


结算部分:
1、路由配置和基础数据渲染
(1)引入静态模板(views/Checkout/index.vue)
(2)配置路由
{
          path: 'checkout',
          component: Checkout
        },
(3)封装接口
export const getCheckInfoAPI = () => {
  return request({
    url: '/member/order/pre'
  })
}
(4)获取数据
import { getCheckInfoAPI } from '@/apis/checkout'
import { onMounted } from 'vue';
import { ref } from 'vue';
const checkInfo = ref({}) // 订单对象
const getCheckInfo = async () => {
  const res = await getCheckInfoAPI()
  checkInfo.value = res.result
}
onMounted(() => getCheckInfo())
(5)渲染默认地址和商品列表以及统计数量
<ul v-else>
                <li><span>收<i />货<i />人:</span>李艳萍</li>
                <li><span>联系方式:</span>1234567</li>
                <li><span>收货地址:</span>甘肃省 武威市 凉州区 666号</li>
              </ul>
2、地址切换
(1)打开弹框
1)在页面的最下面将弹框交互代码的静态结构拿过来:
<el-dialog v-model="showDialog" title="切换收货地址" width="30%" center>
    <div class="addressWrapper">
      <div class="text item" :class="{ active: activeAddress.id === item.id }" @click="switchAddress(item)"
        v-for="item in checkInfo.userAddresses" :key="item.id">
        <ul>
          <li><span>收<i />货<i />人:</span>{{ item.receiver }} </li>
          <li><span>联系方式:</span>{{ item.contact }}</li>
          <li><span>收货地址:</span>{{ item.fullLocation + item.address }}</li>
        </ul>
      </div>
    </div>
    <template #footer>
      <span class="dialog-footer">
        <el-button>取消</el-button>
        <el-button type="primary" @click="confirm">确定</el-button>
      </span>
    </template>
  </el-dialog>
2)为按钮绑定点击事件:
<div class="action">
              <el-button size="large" @click="showDialog = true">切换地址</el-button>
              <el-button size="large">添加地址</el-button>
            </div>
3)声明:默认为false,点击的时候置为true
// 控制弹框打开
const showDialog = ref(false)
(2)地址激活交互
实现原理:

首先,
![]()
1)绑定切换地址事件:
<div class="text item" :class="{ active: activeAddress.id === item.id }" @click="switchAddress(item)"2)声明切换地址的方法:
const activeAddress = ref({})
const switchAddress = (item) => {
activeAddress.value = item
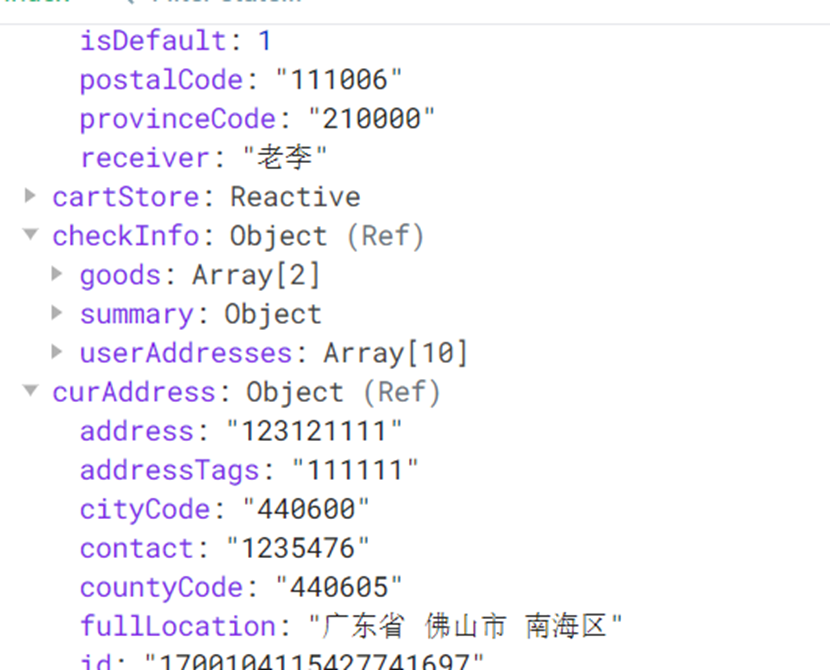
}运行:可以看到这里是空对象

当我们点击切换地址时,刷新,可以看到右边的响应式数据中村下了最新的地址
激活状态显示
采用动态类名控制:查看激活状态的id是否等于当前项id

如果是的话,点击确定:把当前激活项放在左边的地址栏里:用新的地址覆盖默认地址
const curAddress = ref({}) // 默认地址最后,绑定确认事件:
<span class="dialog-footer">
        <el-button>取消</el-button>
        <el-button type="primary" @click="confirm">确定</el-button>
      </span>
声明方法:确认要更换地址,弹框关闭。
const confirm = () => {
  curAddress.value = activeAddress.value
  showDialog.value = false
  // 将当前激活项置为空
  activeAddress.value = {}
}
3、生成订单
(1)先封装接口
export const createOrderAPI = (data) => {
  return request({
    url: '/member/order',
    method: 'POST',
    data
  })
}
(2)声明方法
const createOrder = async () => {
const res = await createOrderAPI({
deliveryTimeType: 1,//配送时间,默认1
payType: 1,// 支付方式,默认1
payChannel: 1,// 支付渠道,默认1
buyerMessage: '',//买家备注留言
//订单内商品集合
// 需要将goods中的skuId和count转换成后台需要的格式
goods: checkInfo.value.goods.map(item => {
return {
// 商品库存量单位id
skuId: item.skuId,
// 商品数量
count: item.count
}
}),
//收货地址
addressId: curAddress.value.id
})
//携带订单id跳转到支付页面
const orderId = res.result.id
router.push({
path: '/pay',
query: {
id: orderId
}
})
// 更新购物车
cartStore.updateNewList()
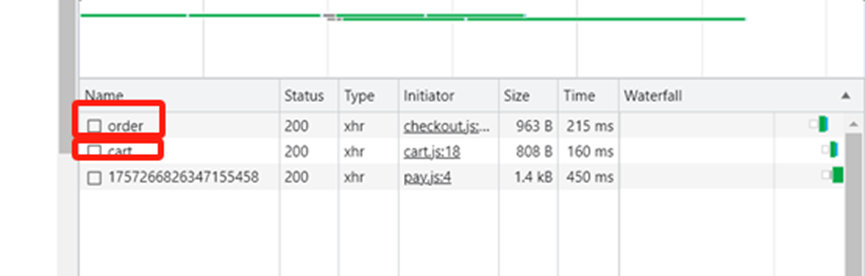
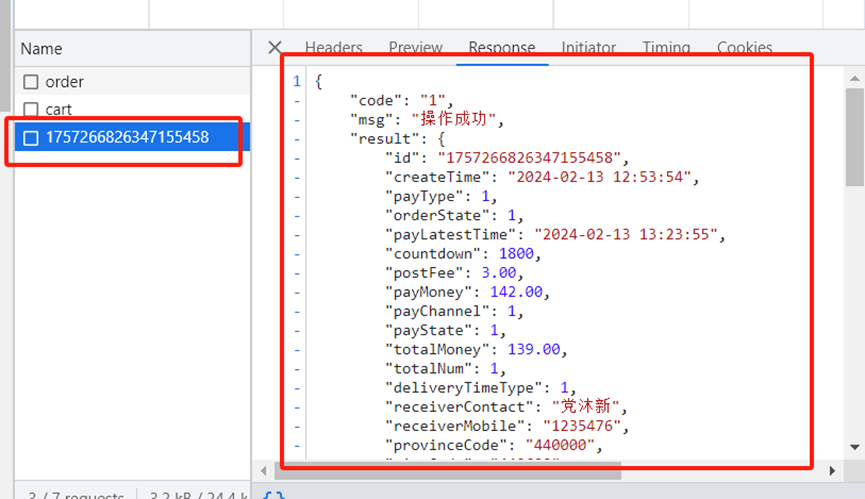
}接口调用情况:点击提交订单的时候,
(3)绑定点击事件
<div class="submit">
          <el-button @click="createOrder" type="primary" size="large">提交订单</el-button>
        </div>
用户点击提交订单后,浏览器携带着对应的id,跳转到支付页面,同时调用更新购物车列表,更新购物车状态
const orderId = res.result.id
  router.push({
    path: '/pay',
    query: {
      id: orderId
    }
  })
支付部分
1、基础数据渲染
(1)引入静态模板
(2)配置路由
(3)封装接口(apis/pay.js)
import request from '@/utils/http'
//获取订单详情以及支付结果
export const getOrderAPI = (id) => {
  return request({
    url: `/member/order/${id}`
  })
}
(4)获取关键数据并渲染
import { getOrderAPI } from '@/apis/pay'
import { onMounted, ref } from 'vue'
import { useRoute } from 'vue-router'
import { useCountDown } from '@/composables/useCountDown'
const { formatTime, start } = useCountDown()
// 获取订单数据
const route = useRoute()
const payInfo = ref({})
const getPayInfo = async () => {
  const res = await getOrderAPI(route.query.id)
  payInfo.value = res.result
  // 初始化倒计时秒数
  start(res.result.countdown)
}
onMounted(() => getPayInfo())
浏览器返回
2、实现支付功能
业务流程:
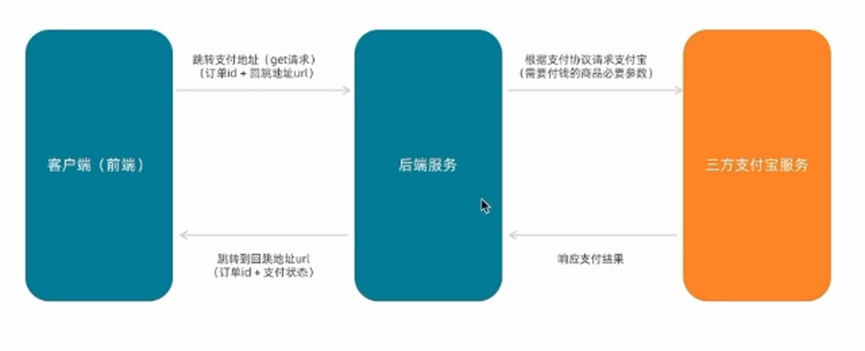
(1)点击支付宝的时候要跳转到支付页面:
const baseURL = 'http://pcapi-xiaotuxian-front-devtest.itheima.net/'
const backURL = 'http://127.0.0.1:5173/paycallback'
//在使用 URL 传参的时候,如果参数中有空格等特殊字符,浏览器可能只会读取到空格面前的内容,导部分致数据丢失。
// 可以使用 encodeURIComponent() 方法,将这些特殊字符进行转义,这样就可以正常读取了。
const redirectUrl = encodeURIComponent(backURL)
const payUrl = `${baseURL}pay/aliPay?orderId=${route.query.id}&redirect=${redirectUrl}`
</script>
(2)绑定要跳转的支付页面:
<div class="item">
          <p>支付平台</p>
          <a class="btn wx" href="https://pay.weixin.qq.com/"></a>
          <a class="btn alipay" :href="payUrl"></a>
        </div>
部分运行结果:

3、封装倒计时函数
需求分析及实现过程


实现步骤:
(1)编写函数框架-确定参数和返回值(src/composables/useCountDown.js)编写核心倒计时逻辑实现基础倒计时
// 封装倒计时逻辑函数
import { computed, onUnmounted, ref } from 'vue'
import dayjs from 'dayjs'
export const useCountDown = () => {
  // 1. 响应式的数据
  let timer = null
  const time = ref(0)
  // 格式化时间 为 xx分xx秒
  const formatTime = computed(() => dayjs.unix(time.value).format('mm分ss秒'))
  // 2. 开启倒计时的函数
  const start = (currentTime) => {
    // 开始倒计时的逻辑
    // 核心逻辑的编写:每隔1s就减一
    time.value = currentTime
    timer = setInterval(() => {
      time.value--
    }, 1000)
  }
  // 组件销毁时清除定时器
  onUnmounted(() => {
    timer && clearInterval(timer)
  })
  return {
    formatTime,
    start
  }
}
(2)实现格式化(插件dayjs,需要先安装)
1)获取订单数据并开启倒计时
const route = useRoute()
const payInfo = ref({})
const getPayInfo = async () => {
  const res = await getOrderAPI(route.query.id)
  payInfo.value = res.result
  // 初始化倒计时秒数
  start(res.result.countdown)
}
onMounted(() => getPayInfo())
2)引入插件
import dayjs from 'dayjs'3)渲染
<div class="tip">
          <p>订单提交成功!请尽快完成支付。</p>
          <p>支付还剩 <span>{{ formatTime }}</span>, 超时后将取消订单</p>
        </div>
好啦,到此为止,本项目的核心业务流程相关代码已经全部梳理完毕,希望对大家的项目开发有所帮助,另外,文中如有不足之处也欢迎各位大佬批评指正!!下期见~


 145
145


 被折叠的 条评论
为什么被折叠?
被折叠的 条评论
为什么被折叠?
 到【灌水乐园】发言


