


目录
一、博客系统简介
现进行登录确认身份,登录成功后进入博客列表页,在博客列表页可以选择查看全文,如果是自己写的博客也可以选择删除。
二、准备工作
创建一个maven项目,在pom.xml中引入Mysql依赖、Servlet依赖以及Jackson依赖。
<dependencies>
        <!-- https://mvnrepository.com/artifact/mysql/mysql-connector-java -->
        <dependency>
            <groupId>mysql</groupId>
            <artifactId>mysql-connector-java</artifactId>
            <version>5.1.47</version>
        </dependency>
        <!-- https://mvnrepository.com/artifact/javax.servlet/javax.servlet-api -->
        <dependency>
            <groupId>javax.servlet</groupId>
            <artifactId>javax.servlet-api</artifactId>
            <version>3.1.0</version>
            <scope>provided</scope>
        </dependency>
        <!-- https://mvnrepository.com/artifact/com.fasterxml.jackson.core/jackson-databind -->
        <dependency>
            <groupId>com.fasterxml.jackson.core</groupId>
            <artifactId>jackson-databind</artifactId>
            <version>2.13.5</version>
        </dependency>
    </dependencies>
创建目录结构,并将前端页面文件添加到目录中。

web.xml文件的内容如下:
<!DOCTYPE web-app PUBLIC
        "-//Sun Microsystems, Inc.//DTD Web Application 2.3//EN"
        "http://java.sun.com/dtd/web-app_2_3.dtd" >

<web-app>
    <display-name>Archetype Created Web Application</display-name>
</web-app>
三、设计实现数据库
创建blog_system数据库。
create database blog_system ;创建blog表,有blogId(博客编号) 、title(博客标题)、content(博客内容)、userId(作者编号)、postTime(发布时间)这些属性。
create table blog
(
    blogId  int primary key auto_increment,
    title varchar(1024),
    content mediumtext,
    userId  int,
    postTime    datetime
);
向blog表中插入一些数据。
insert into blog values(null, '这是第一篇博客', '从今天开始, 我要认真学 Java', 1, now());
insert into blog values(null, '这是第二篇博客', '从昨天开始, 我要认真学 Java', 1, now());
insert into blog values(null, '这是第三篇博客', '从前天开始, 我要认真学 Java', 1, now());
insert into blog values(null, '这是第一篇博客', '从今天开始, 我要认真学 C++', 2, now());
insert into blog values(null, '这是第二篇博客', '从昨天开始, 我要认真学 C++', 2, now());
创建user表,有userId(用户编号)、userName(用户名)、password(密码)这些属性。
create table user(
    userId int primary key auto_increment,
    userName varchar(100) unique ,
    password varchar (100)
);
同样也向user表中插入一些数据。
insert into user values(null,'zhangyi','1234');
insert into user values(null,'zhanger','1234');
insert into user values(null,'zhangsan','1234');
四、封装数据库
创建User类和Blog类
public class Blog {
    private int blogId;
    private String title;
    private String content;
    private int userId;
    private Timestamp postTime;

    public Blog(int blogId, String title, String content, int userId, Timestamp postTime) {
        this.blogId = blogId;
        this.title = title;
        this.content = content;
        this.userId = userId;
        this.postTime = postTime;
    }

    public int getBlogId() {
        return blogId;
    }

    public void setBlogId(int blogId) {
        this.blogId = blogId;
    }

    public String getTitle() {
        return title;
    }

    public void setTitle(String title) {
        this.title = title;
    }

    public String getContent() {
        return content;
    }

    public void setContent(String content) {
        this.content = content;
    }

    public int getUserId() {
        return userId;
    }

    public void setUserId(int userId) {
        this.userId = userId;
    }

    public String getPostTime() {
       SimpleDateFormat simpleDateFormat = new SimpleDateFormat("yyyy-MM-dd HH:mm:ss");
       return simpleDateFormat.format(postTime);
    }

    public void setPostTime(Timestamp postTime) {
        this.postTime = postTime;
    }
}
public class User {
    private int userId;
    private String userName;
    private String password;

    public User(int userId, String userName, String password) {
        this.userId = userId;
        this.userName = userName;
        this.password = password;
    }

    public int getUserId() {
        return userId;
    }

    public void setUserId(int userId) {
        this.userId = userId;
    }

    public String getUserName() {
        return userName;
    }

    public void setUserName(String userName) {
        this.userName = userName;
    }

    public String getPassword() {
        return password;
    }

    public void setPassword(String password) {
        this.password = password;
    }
}
使用JDBC连接数据库
创建DBUtil连接数据库以及相关资源的关闭。
public class DBUtil {
    private static final String url = "jdbc:mysql://127.0.0.1:3306/blog_system?characterEncoding=utf8&useSSL=false";
    private static final String user = "root";
    private static final String password = "1234";
    private static volatile DataSource dataSource;
    private static  DataSource getDataSource(){
         if(dataSource == null){
             synchronized (DBUtil.class){
                 if (dataSource == null){
                     dataSource = new MysqlDataSource();
                     ((MysqlDataSource)dataSource).setURL(url);
                     ((MysqlDataSource)dataSource).setUser(user);
                     ((MysqlDataSource)dataSource).setPassword(password);
                 }
             }
         }
         return dataSource;
    }
    public static Connection getConnection() throws SQLException {
        return (Connection) getDataSource().getConnection();
    }
    public static void closeResource(Connection connection, PreparedStatement statement, ResultSet resultSet)  {
        if(connection != null){
            try {
                connection.close();
            } catch (SQLException e) {
                e.printStackTrace();
            }
        }
        if(statement != null){
            try {
                statement.close();
            } catch (SQLException e) {
                e.printStackTrace();
            }
        }
        if(resultSet != null){
            try {
                resultSet.close();
            } catch (SQLException e) {
                e.printStackTrace();
            }
        }
    }
}
创建BlogDAO类操作数据库中的Blog表
public class BlogDAO {
    //获取博客表中的所有博客信息
    public List<Blog> getAllBlogs()  {
        List<Blog> list = new LinkedList<>();
        Connection connection = null;
        PreparedStatement statement = null;
        ResultSet resultSet = null;
        try {
            connection = DBUtil.getConnection();
            String sql = "select * from blog order by postTime desc";
            statement = connection.prepareStatement(sql);
            resultSet = statement.executeQuery();
            while(resultSet.next()){
                Blog blog = new Blog();
                blog.setBlogId(resultSet.getInt("blogId"));
                String content = resultSet.getString("content");
                if(content.length() > 50){
                    content = content.substring(0,50);
                }
                blog.setContent(content);
                blog.setTitle(resultSet.getString("title"));
                blog.setUserId(resultSet.getInt("userId"));
                blog.setPostTime(resultSet.getTimestamp("postTime"));
                list.add(blog);
            }
        } catch (SQLException e) {
            e.printStackTrace();
        }finally {
            DBUtil.closeResource(connection,statement,resultSet);
        }
        return list;
    }
    //获取指定id的博客
    public Blog getBlog(int blogId)  {
        Connection connection = null;
        PreparedStatement statement = null;
        ResultSet resultSet = null;
        try {
            connection = DBUtil.getConnection();
            String sql = "select * from blog where userId = ?";
            statement = connection.prepareStatement(sql);
            statement.setInt(1,blogId);
            resultSet = statement.executeQuery();
            Blog blog = new Blog();
            if(resultSet.next()) {
                blog.setBlogId(resultSet.getInt("blogId"));
                blog.setContent(resultSet.getString("content"));
                blog.setTitle(resultSet.getString("title"));
                blog.setUserId(resultSet.getInt("userId"));
                blog.setPostTime(resultSet.getTimestamp("postTime"));
                return blog;
            }
        } catch (SQLException e) {
            e.printStackTrace();
        } finally {
            DBUtil.closeResource(connection,statement,resultSet);
        }
        return null;
    }
    //插入一篇博客
    public void addBlog(Blog blog) throws SQLException {
        Connection connection = null;
        PreparedStatement statement = null;
        try {
            connection = DBUtil.getConnection();
            String sql = "insert into blog values(null,?,?,?,now())";
            statement = connection.prepareStatement(sql);
            statement.setString(1,blog.getTitle());
            statement.setString(2, blog.getContent());
            statement.setInt(3,blog.getUserId());
            statement.executeUpdate();
        } catch (SQLException e) {
            e.printStackTrace();
        } finally {
            DBUtil.closeResource(connection,statement,null);
        }

    }
    //删除一篇博客
    public void deleteBlog(int blogId) throws SQLException {
        Connection connection = null;
        PreparedStatement statement = null;
        try {
            connection = DBUtil.getConnection();
            String sql = "delete from blog where userId = ?";
            statement = connection.prepareStatement(sql);
            statement.setInt(1,blogId);
            statement.executeUpdate();
        } catch (SQLException e) {
            e.printStackTrace();
        } finally {
            DBUtil.closeResource(connection,statement,null);
        }
    }
}
创建UserDAO类操作数据库中的user表
public class UserDAO {
    //通过用户名查询用户信息
    public User getUserByName(String name){
        Connection connection = null;
        PreparedStatement statement = null;
        ResultSet resultSet = null;
        try {
            connection = DBUtil.getConnection();
            String sql = "select * from user where userName = ?";
            statement = connection.prepareStatement(sql);
            statement.setString(1,name);
            resultSet = statement.executeQuery();
            if(resultSet.next()){
                User user = new User();
                user.setUserId(resultSet.getInt("userId"));
                user.setUserName(resultSet.getString("userName"));
                user.setPassword(resultSet.getString("password"));
                return user;
            }
        } catch (SQLException e) {
            e.printStackTrace();
        } finally {
            DBUtil.closeResource(connection,statement,resultSet);
        }
        return null;
    }
    //通过id查询用户信息
    public User getUserById(int userId){
        Connection connection = null;
        PreparedStatement statement = null;
        ResultSet resultSet = null;
        try {
            connection = DBUtil.getConnection();
            String sql = "select * from user where userId = ?";
            statement = connection.prepareStatement(sql);
            statement.setInt(1,userId);
            resultSet = statement.executeQuery();
            if(resultSet.next()){
                User user = new User();
                user.setUserId(resultSet.getInt("userId"));
                user.setUserName(resultSet.getString("userName"));
                user.setPassword(resultSet.getString("password"));
                return user;
            }
        } catch (SQLException e) {
            e.printStackTrace();
        } finally {
            DBUtil.closeResource(connection,statement,resultSet);
        }
        return null;
    }
    //删除用户
    public void deleteUser(int userId) throws SQLException {
        Connection connection = null;
        PreparedStatement statement = null;
        try {
            connection = DBUtil.getConnection();
            String sql = "delete from user where userId = ?";
            statement = connection.prepareStatement(sql);
            statement.setInt(1,userId);
            statement.executeUpdate();
        } catch (SQLException e) {
            e.printStackTrace();
        } finally {
            DBUtil.closeResource(connection,statement,null);
        }
    }
}
五、实现具体功能
1、实现博客列表页
约定前后端交互接口
//请求
GET/blog
//响应
{
    {
        blogId:xx;
        title:xxx;
        content:xxxx;
        userId:xx;
        postTime:xxx;
    },
    {
        blogId:xx;
        title:xxx;
        content:xxxx;
        userId:xx;
        postTime:xxx;
    },
    ……
}
服务器端
重写doGet方法来获取数据库中的博客列表,设置响应格式为Json,字符集为utf8,先定义一个Json对象objectMapper,然后利用blogDAO对象从数据库中获取到所有的博客,并将其存到List中,然后利用Json对象将其转换成字符串,并写进响应中。
//获取数据库中的博客列表
    @Override
    protected void doGet(HttpServletRequest req, HttpServletResponse resp) throws ServletException, IOException {
        ObjectMapper objectMapper = new ObjectMapper();
        //设置响应格式
        resp.setContentType("application/json;charset=utf8");
        BlogDAO blogDAO = new BlogDAO();
        List<Blog> blogs = blogDAO.getAllBlogs();
        //将blogs对象装成Json格式的字符串
        String respJson = objectMapper.writeValueAsString(blogs);
        resp.getWriter().write(respJson);
    }
客户端
页面加载的时候利用ajax访问服务器,获取到数据库中的博客列表,因为博客列表的数目不确定,就需要构造div,对body进行遍历,向div中添加各种元素。
<!DOCTYPE html>
<html lang="en">
<head>
<meta charset="UTF-8">
<title>blog-list</title>
<link rel="stylesheet" href="common.css">
<link rel="stylesheet" href="container.css">
</head>
<body>
<div class="nav">
<img src="logo.jpg">
<span class="name">博客系统</span>
<span class="blank"></span>
<a href="#">主页</a>
<a href="#">写博客</a>
<a href="#">注销</a>
</div>
<div class="container">
<div class="left">
<div class="card">
<img class="avatar" src="x.jpg" >
<h3>小郭同学</h3>
<a class="gitee" href="#"> gitee地址</a>
<div class="counter">
<span>文章</span>
<span>专栏</span>
</div>
<div class="counter">
<span>6</span>
<span>2</span>
</div>
</div>
</div>
<div class="right">
<!--<div class="blog">
<div class="title"><!–第一篇博客–></div>
<div class="time"><!–2022-6-09–></div>
<div class="desc"><!– Lorem ipsum dolor sit amet, consectetur adipisicing elit. Accusantium error esse impedit magni placeat possimus repellendus veniam, veritatis voluptas? Cum deserunt explicabo neque non placeat quaerat quam? At, blanditiis, non!–></div>
<a class="a" href="#">查看全文</a>
</div>-->
</div>
</div>
<script src="https://libs.baidu.com/jquery/2.0.0/jquery.min.js"></script>
<script>
//在页面加载的时候,利用ajax向服务器发送请求,获取到博客列表信息后,在页面进行显示
function getBlogList(){
$.ajax({
type:'get',
url:'blog',
success:function(body){
//获取到的body是JS对象的数组,因为数组大小每次可能都不一样,就需要构造div
let rightDiv = document.querySelector('.right');
for(let blog of body){
let blogDiv = document.createElement('div');
blogDiv.className = 'blog';
let titleDiv = document.createElement('div');
titleDiv.className = 'title';
titleDiv.innerHTML = blog.title;
blogDiv.appendChild(titleDiv);
let postTimeDiv = document.createElement('div');
postTimeDiv.className = 'postTime';
postTimeDiv.innerHTML = blog.postTime;
blogDiv.appendChild(postTimeDiv);
let descDiv = document.createElement('div');
descDiv.className = 'desc';
descDiv.innerHTML = blog.content;
blogDiv.appendChild(descDiv);
let a = document.createElement('a');
a.innerHTML = '查看全文';
a.href = 'blog-detail.html?blogId='+blog.blogId;
blogDiv.appendChild(a);
rightDiv.appendChild(blogDiv);
}
},
error:function(){
alert('获取博客列表失败')
}
})
};
getBlogList();
</script>
</body>
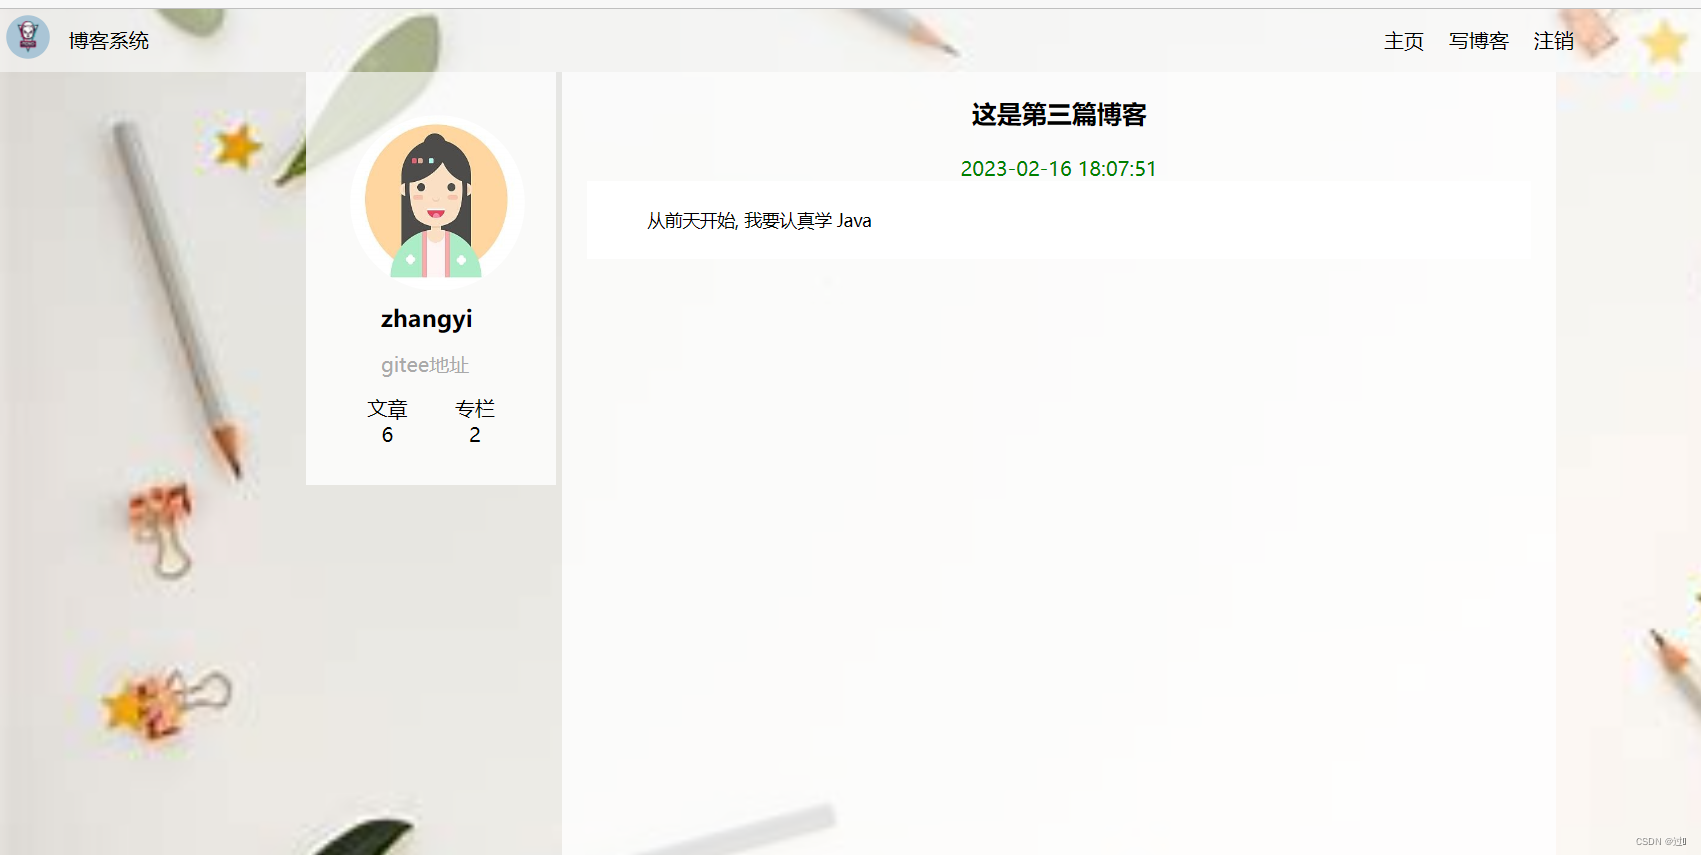
</html>2、实现博客详情页
约定前后端交互接口
//请求
GET/blog?blogId=1
//响应
HTTP/1.1 200 OK
Content-Type:application/json
 {
        blogId:xx;
        title:xxx;
        content:xxxx;
        userId:xx;
        postTime:xxx;
  }
服务器端
可以在实现博客列表详情页列表的服务器端代码进行扩充,首先查看请求参数中是否有blogId,若有则表示是指定一篇博客,就利用BlogDAO对象获取到指定的博客,然后写到响应中。
@WebServlet("/blog")
public class BlogServlet extends HttpServlet {
    //获取数据库中的博客列表
    @Override
    protected void doGet(HttpServletRequest req, HttpServletResponse resp) throws ServletException, IOException {
        ObjectMapper objectMapper = new ObjectMapper();
        //设置响应格式
        resp.setContentType("application/json;charset=utf8");
        BlogDAO blogDAO = new BlogDAO();
        String result = req.getParameter("blogId");
        if(result == null){
            List<Blog> blogs = blogDAO.getAllBlogs();
            //将blogs对象装成Json格式的字符串
            String respJson = objectMapper.writeValueAsString(blogs);
            resp.getWriter().write(respJson);
        }else{
            Blog blog = blogDAO.getBlog(Integer.parseInt(result));
            String respJson = objectMapper.writeValueAsString(blog);
            resp.getWriter().write(respJson);
        }
    }
}
客户端
查看全文时就会跳转到博客详情页,利用ajax来处理响应,对于content由于在编辑博客时用的markdown字符串进行编辑的,但是展示时需要渲染后的结果,就需要利用引入editor依赖来完成。
<!DOCTYPE html>
<html lang="en">
<head>
    <meta charset="UTF-8">
    <title>Blog-detail</title>
    <link rel="stylesheet" href="common.css">
    <link rel="stylesheet" href="container.css">
    <!-- 引入 editor.md 的依赖 -->
    <link rel="stylesheet" href="editor.md/css/editormd.min.css" >
    <script src="js/jquery.min.js"></script>
    <script src="editor.md/lib/marked.min.js"></script>
    <script src="editor.md/lib/prettify.min.js"></script>
    <script src="editor.md/editormd.js"></script>
</head>
<body>
<div class="nav">
    <img src="logo.jpg">
    <span class="name">博客系统</span>
    <span class="blank"></span>
    <a href="#">主页</a>
    <a href="#">写博客</a>
    <a href="#">注销</a>
</div>
<div class="container">
    <div class="left">
        <div class="card">
            <img class="avatar" src="x.jpg" >
            <h3>小郭同学</h3>
            <a class="gitee" href="#"> gitee地址</a>
            <div class="counter">
                <span>文章</span>
                <span>专栏</span>
            </div>
            <div class="counter">
                <span>6</span>
                <span>2</span>
            </div>
        </div>
    </div>
    <div class="right">
        <div class="blog">
            <h3 class="title"></h3>
            <div class="postTime"></div>
            <div id="desc">
            </div>
<script src="http://libs.baidu.com/jquery/2.0.0/jquery.min.js"></script>
<script>
    function getBlog(){
        //在页面加载的时候,利用ajax向服务器发送请求,获取到博客列表信息后,在页面进行显示
       $.ajax({
           type:'get',
           //表示blog=blogId
           url:'blog'+location.search,
           success:function(body){
                let h3 = document.querySelector(".blog>h3");
                h3.innerHTML = body.title;
                let postTime = document.querySelector(".postTime");
                postTime.innerHTML = body.postTime;
                //由于在编辑博客时用的markdown字符串进行编辑的,但是展示时需要渲染后的结果
               // let content = document.querySelector('.desc');
               // content.innerHTML = body.content;
               editormd.markdownToHTML('desc', {
                   markdown: body.content
               });
           },
           error:function(){
               alert("查看全文失败!");
           }
       });

    }
    getBlog();
</script>

</body>
</html>
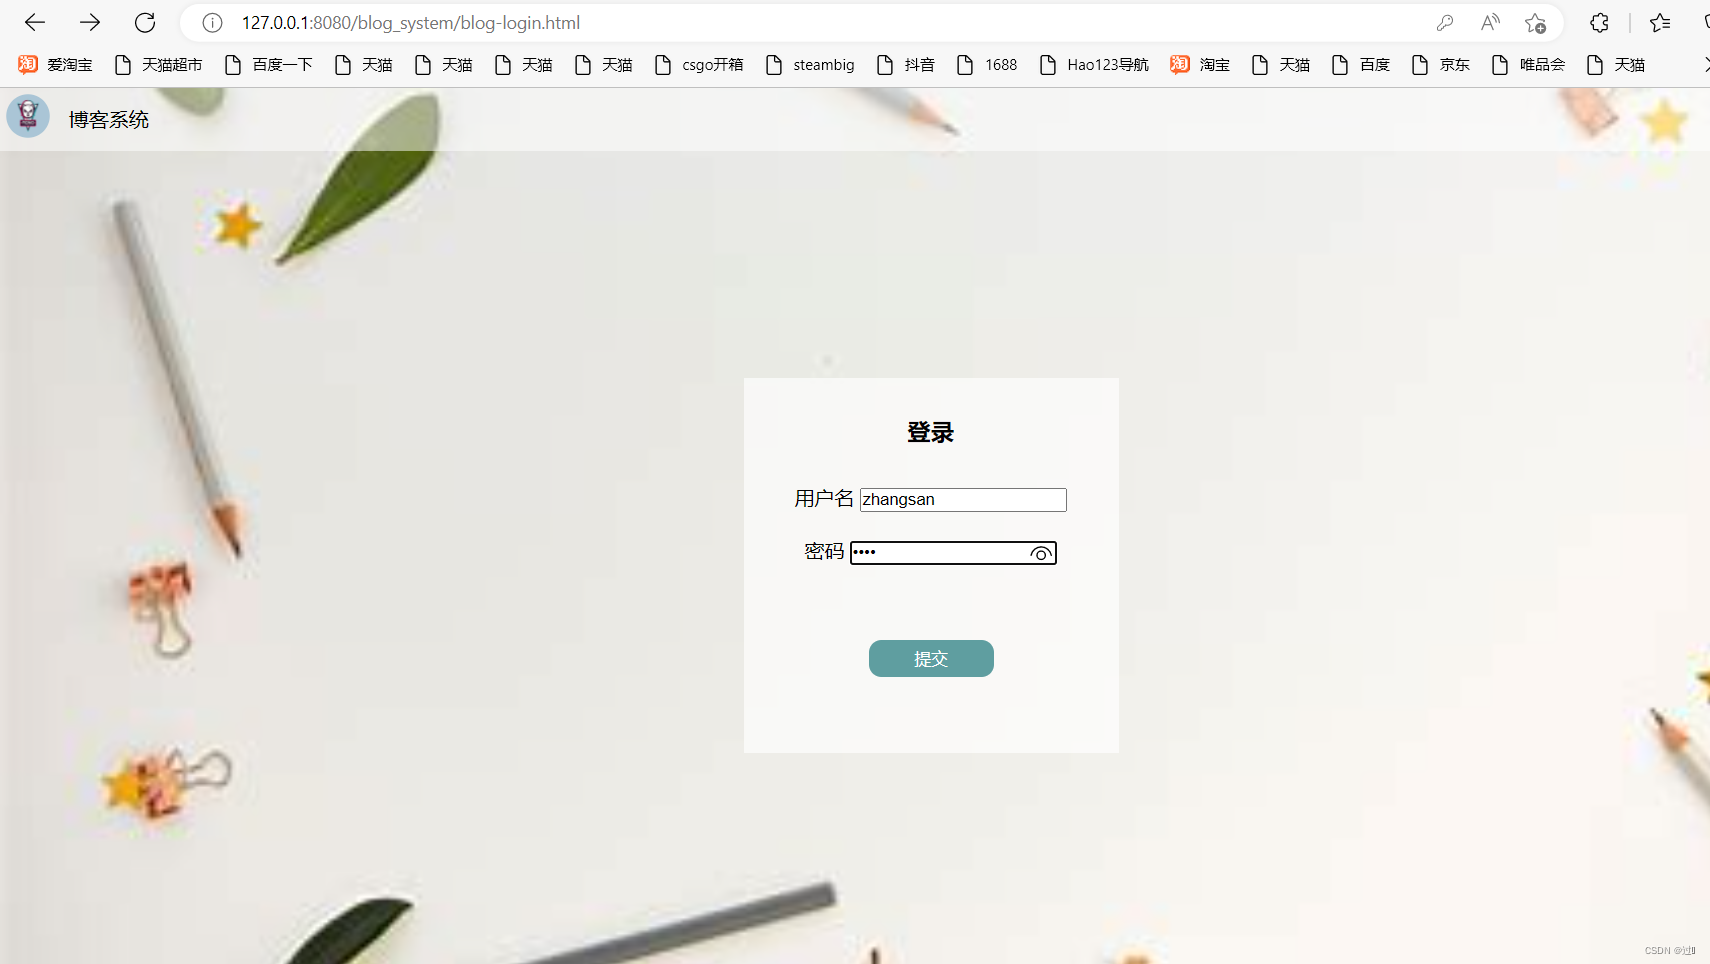
3、实现登录页
约定前后端交互接口
使用form表单来进行提交
//请求
POST/login
Content-Type:application/x-www-form-urlencoded
username=?&password=?
//响应
HTTP/1.1 302
Location:blog_list.html
服务器端
先将请求和响应都按照utf8进行解析避免出现乱码,然后获取到请求中的userName和password判断是否与数据库匹配,若匹配就创建会话跳转到博客列表页。
@WebServlet("/login")
public class LoginServlet extends HttpServlet {
    @Override
    protected void doPost(HttpServletRequest req, HttpServletResponse resp) throws ServletException, IOException {
        req.setCharacterEncoding("utf8");
        resp.setCharacterEncoding("utf8");
        resp.setContentType("text/html;charset=utf8");
        String userName = req.getParameter("userName");
        String password = req.getParameter("password");
        if(userName == null || "".equals(userName) || password == null || "".equals(password)){
            resp.getWriter().write("用户名或密码不能为空");
            return;
        }
        UserDAO userDAO = new UserDAO();
        User user = userDAO.getUserByName(userName);
        if(user != null && user.getPassword().equals(password)){
            //创建会话
            HttpSession session = req.getSession(true);
            //将信息存储到绘画中
            session.setAttribute("user",user);
            //返回重定向报文,跳转到详情页
            resp.sendRedirect("blog-list.html");
        }else{
            resp.getWriter().write("用户名或密码错误");
        }
    }
}
客户端
利用form表单进行提交。
<form action="login" method="post">
    <div class="row">
        <span>用户名</span>
        <span><input  class="input" type="text" name="userName"></span>
    </div>
    <div class="row">
        <span>密码</span>
        <span><input  class="input" type="password" name="password"></span>
    </div>
    <div class="submit">
        <input type="submit" id="submit" value="提交">
    </div>
</form>
4、实现强制要求登陆
对于博客列表页和博客详情页等都需要在登录成功的基础上来进行后序的操作。
约定前后端交互接口
登录状态就返回当前用户的信息,未登录就返回userId为0的对象。
//请求
GET/login
//响应
HTTP/1.1 200 OK
Content-Type:application/json
{
    userId:xx,
    userName
}
服务器端
先判断是否创建会话,再判断会话中是否存在user对象,两种情况等都满足表示已经登录,否则就是未登录状态。
//获取当前的登录状态
    @Override
    protected void doGet(HttpServletRequest req, HttpServletResponse resp) throws ServletException, IOException {
        ObjectMapper objectMapper = new ObjectMapper();
        resp.setContentType("application/json;charset=utf8");
        HttpSession session = req.getSession(false);
        User user = new User();
        if(session == null){
            //未创建会话,表示未登录
            resp.getWriter().write(objectMapper.writeValueAsString(user));
            return;
        }
        user = (User)session.getAttribute("user");
        if(user == null){
            //会话中没有user对象
            user = new User();
            resp.getWriter().write(objectMapper.writeValueAsString(user));
            return;
        }
        //将密码信息不返回给前端
        user.setPassword("");
        resp.getWriter().write(objectMapper.writeValueAsString(user));
    }
客户端
在博客列表页和详情页等加入该方法来判断是否登录,若未登录就跳转到登录页面进行登录。
//获取当前登录状态
        function getUserInfo(pageName){
            $.ajax({
                type:'get',
                url:'login',
                success:function(body){
                    //判定body中的user对象是否有效
                    if(body.userId && body.userId > 0){
                        //表示登录成功,暂时不做处理
                    }else{
                        alert("您当前尚未登录");
                        //跳转到登录页
                        location.assign('blog-login.html');
                    }
                },
                error:function(){
                    alert("您当前尚未登录");
                    //跳转到登录页
                    location.assign('blog-login.html');
                }
            });
        }
5、实现显示用户信息
在登录之后,博客详情页能显示当前作者的个人信息。
进入博客详情页之后能显示作者的个人信息。
约定前后端交互接口
//请求
GET/user
//响应
{
    userId:xx,
    userName:xxx

}
//请求
GET/user?userId=xx
//响应
{
    userId:xx,
    userName:xxx

}
服务器端
在数据库中先得到当前博客的id,再获取到其作者信息。
@WebServlet("/authorInfo")
public class AuthorServlet extends HttpServlet {
    @Override
    protected void doGet(HttpServletRequest req, HttpServletResponse resp) throws ServletException, IOException {
        resp.setContentType("application/json;charset=utf8");
        //获取到指定博客的作者信息
        String param = req.getParameter("blogId");
        if (param == null || "".equals(param)) {
            resp.getWriter().write("{\"ok\":false,\"reason:\":\"参数缺失!\"}");
            return;
        }
        BlogDAO blogDAO = new BlogDAO();
        Blog blog = blogDAO.getBlog(Integer.parseInt(param));
        if(blog == null){
            resp.getWriter().write("{\"ok\":false,\"reason:\":\"要查询的博客不存在!\"}");
            return;
        }
        UserDAO userDAO = new UserDAO();
        User author = userDAO.getUserById(blog.getUserId());
        if(author == null){
            resp.getWriter().write("{\"ok\":false,\"reason:\":\"要查询的用户不存在!\"}");
            return;
        }
        ObjectMapper objectMapper = new ObjectMapper();
        author.setPassword("");
        resp.getWriter().write(objectMapper.writeValueAsString(author));
    }
}
客户端
只需要在登录成功时将用户名改成当前登录的用户名。
function changeUserName(userName){
        let h3 = document.querySelector('.card>h3');
        h3.innerHTML = userName;
    }
在进入博客列表详情页时显示作者名。
function getAuthorInfo(user){
$.ajax({
type:'get',
url:'authorInfo'+location.search,
success:function(body){
if(body.userName){
changeUserName(body.userName);
}else{
alert("获取作者信息失败")
}
},
error:function(){
alert("获取作者信息失败")
}
});
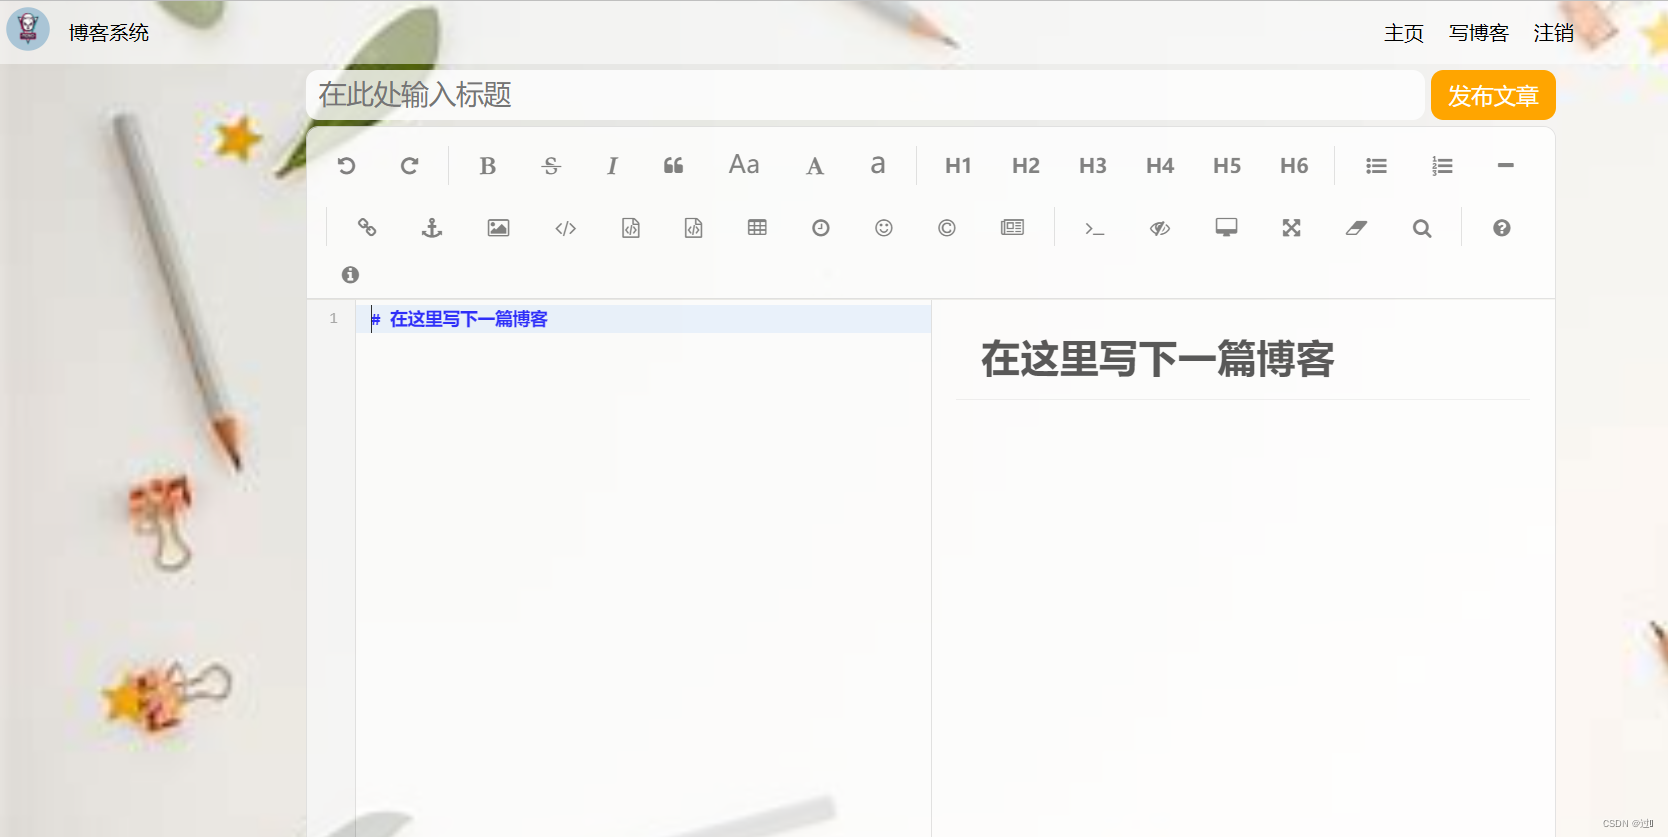
}6、实现发布博客
实现前后端交互接口
//请求
POST/blog
Content-Type:application/x-www-form-urlencoded
//响应
HTTP/1.1 302
Location:blog_list.html
服务器端
先确保用户是登录状态,然后再确认发表的博客标题和内容都不能为空,然后将发表的博客插入到数据库中,页面跳转到博客列表页。
//发表博客
    @Override
    protected void doPost(HttpServletRequest req, HttpServletResponse resp) throws ServletException, IOException {
        req.setCharacterEncoding("utf8");
        resp.setCharacterEncoding("utf8");
        resp.setContentType("text/html;charset=utf8");
        ObjectMapper objectMapper = new ObjectMapper();
        HttpSession session = req.getSession(false);
        if(session == null){
            resp.getWriter().write("用户未登录");
            return;
        }
        User user = (User)session.getAttribute("user");
        if(user == null){
            resp.getWriter().write("用户未登录");
            return;
        }
        String title = req.getParameter("title");
        String content = req.getParameter("content");
        if(title == null || "".equals(title) || content == null || "".equals(title)){
            resp.getWriter().write("提交博客失败,缺少博客标题或内容");
            return;
        }
        Blog blog = new Blog();
        blog.setUserId(user.getUserId());
        blog.setTitle(title);
        blog.setContent(content);
        BlogDAO blogDAO = new BlogDAO();
        try {
            blogDAO.addBlog(blog);
        } catch (SQLException e) {
            e.printStackTrace();
        }
        resp.sendRedirect("blog-list.html");
    }
客户端
利用form表单将内容进行提交。
<form action="blog" method="post" style="height:100%">
            <div class="title">
                <input type="text" placeholder="在此处输入标题" name="title" id="title">
                <!-- <button>发布文章</button> -->
                <input type="submit" value="发布文章" id="submit">
            </div>
            <!-- 放置 md 编辑器 -->
            <div id="editor">
                <!-- 为了进行 form 的提交, 此处搞一个 textarea 多行编辑框, 借助这个编辑框来实现表单的提交 -->
                <!-- 可以设置 editor.md, 让编辑器把 markdown 内容也同步的保存到这个隐藏的 textarea 中, 从而可以进行 form 提交 -->
                <textarea name="content" style="display:none"></textarea>
            </div>
</form>
7、删除博客
约定前后端交互接口
//请求
GET/user?blogId=x
//响应
{
userId:xx;
userName:xxx;
isYourBlog: 1,  // 1 表示当前博客就是登陆者的博客. 0 表示当前博客不是登陆者的博客.
}
服务器端
先判断当是否为登录状态,然后判断当前作者与登录用户是否一致,若相同则在数据库中删除该博客,然后将页面跳转到博客列表页。
@WebServlet("/blogDelete")
public class DeleteBlogServlet extends HttpServlet {
    @Override
    protected void doGet(HttpServletRequest req, HttpServletResponse resp) throws ServletException, IOException {
        resp.setContentType("application/json;charset=utf8");
        HttpSession session = req.getSession(false);
        if(session == null){
            resp.getWriter().write("用户未登录");
            return;
        }
        User user = (User)session.getAttribute("user");
        if (user == null) {
            resp.getWriter().write("用户未登录");
            return;
        }
        String blogId = req.getParameter("blogId");
        if(blogId == null || "".equals(blogId)){
            resp.getWriter().write("博客编号有误");
            return;
        }
        BlogDAO blogDAO = new BlogDAO();
        Blog blog = blogDAO.getBlog(Integer.parseInt(blogId));
        if(blog == null || "".equals(blog)){
            resp.getWriter().write("待删除的博客不存在");
            return;
        }
        if(user.getUserId() != blog.getUserId()){
            resp.getWriter().write("不是本博客的作者,无法删除");
            return;
        }
        try {
            blogDAO.deleteBlog(Integer.parseInt(blogId));
        } catch (SQLException e) {
            e.printStackTrace();
        }
        resp.sendRedirect("blog-list.html");
    }
}
客户端
在列表详情页如果判断当前的作者是正在登录的用户,就新增一个删除超链接,可以进行删除。
function getAuthorInfo(user){
        $.ajax({
            type:'get',
            url:'authorInfo'+location.search,
            success:function(body){
                if(body.userName){
                    changeUserName(body.userName);
                    if(body.userName == user.userName){
                        let navDiv = document.querySelector('.nav');
                        let a = document.createElement('a');
                        a.innerHTML='删除';
                        a.href = 'blogDelete' +location.search;
                        navDiv.appendChild(a);
                    }
                }else{
                    alert("获取作者信息失败")
                }
            },
            error:function(){
                alert("获取作者信息失败")
            }
        });
    }
8、实现注销功能
约定前后端交互接口
//请求
GET/logout
//响应
HTTP/1.1 302
Location:login.html
服务器端
先确认是否创建会话以确保登录状态,然后删除会话信息,并将登录的用户从数据库中删除,注销后跳转到登录页面。
@WebServlet("/logout")
public class LogoutServlet extends HttpServlet {
    @Override
    protected void doGet(HttpServletRequest req, HttpServletResponse resp) throws ServletException, IOException {
        resp.setContentType("application/json;charset=utf8");
        HttpSession session = req.getSession(false);
        if(session == null){
            resp.getWriter().write("用户未登录");
            return;
        }
        User user = (User)session.getAttribute("user");
        //删除会话信息
        session.removeAttribute("user");
        UserDAO userDAO = new UserDAO();
        try {
            userDAO.deleteUser(user.getUserId());
            System.out.println(user.getUserId());
        } catch (SQLException e) {
            e.printStackTrace();
        }
        resp.sendRedirect("blog-login.html");
    }
}
客户端
将注销超链接的href修改为logout。
<a href="logout">注销</a>六、效果展示


 4万+
4万+


 被折叠的 条评论
为什么被折叠?
被折叠的 条评论
为什么被折叠?
 到【灌水乐园】发言


