


React-Native开发鸿蒙NEXT-本地与沙盒加载bundle
来晚了来晚了,不是想偷懒,实在是一个图片问题没搞定导致效果出不来,今天刚靠工具查出了原因。
RN的加载无非本地加载与沙盒加载两种方式。之所以用RN开发,想节省一点原生的开发人力是一方面,另一方面肯定绕不过希望借助bundle天生的可下载优势,来搞个远程更新。通过下载bundle到沙盒环境再加载,达到近似于热更新的效果。对于加载了n个bundle的应用来说这点尤为重要,毕竟不能因为某个bundle的更新就让用户去频繁更新app。
应用之前的加载方式是本地加载,bundle和图片资源都放在了代码的资源文件下。先来看看如何通过沙盒加载。artTS中,加载沙盒bundle和加载本地bundle可以分别调用不同api来实现。
沙盒,利用FileJSBundleProvider加载
provider = new FileJSBundleProvider(bundle.bundlePath);
本地,利用ResourceJSBundleProvider加载
provider = new ResourceJSBundleProvider(rnohCoreContext.uiAbilityContext.resourceManager, bundle.bundlePath);
下一步来看看如何把资源从远程服务器下载到沙盒。在RN中,可以使用react-native-fs+eact-native-zip-archive来实现下载与解压缩。两个依赖的安装可以参考官方文档简单给个示例,只是展示下载与解压缩,实际应用还得考虑断点续传等细节。
// 下载并解压缩
const download = async (downloadUrl = '远程下载地址.zip', unzipPath = '') =>{
    try {
        // 下载
        const zipPath = `${RNFS.DocumentDirectoryPath}/harmony.zip`;
        console.log('zipPath' + zipPath);
        const downloadResult = await RNFS.downloadFile({
          fromUrl: downloadUrl,
          toFile: zipPath,
          progress: (res) => {
            console.log(`下载进度: ${Math.floor((res.bytesWritten / res.contentLength) * 100)}%`);
          }
        }).promise;

        if (downloadResult.statusCode !== 200) {
            console.log('下载失败');
          throw new Error('下载失败');
        }

        // 解压缩
        const targetDir = `${RNFS.DocumentDirectoryPath}/metro`;
        await unzip(zipPath, targetDir);
        console.log('解压完成,路径:', targetDir);

        return targetDir;
      } catch (error) {
        console.error('流程失败:', error.message);
        return null;
      }
}
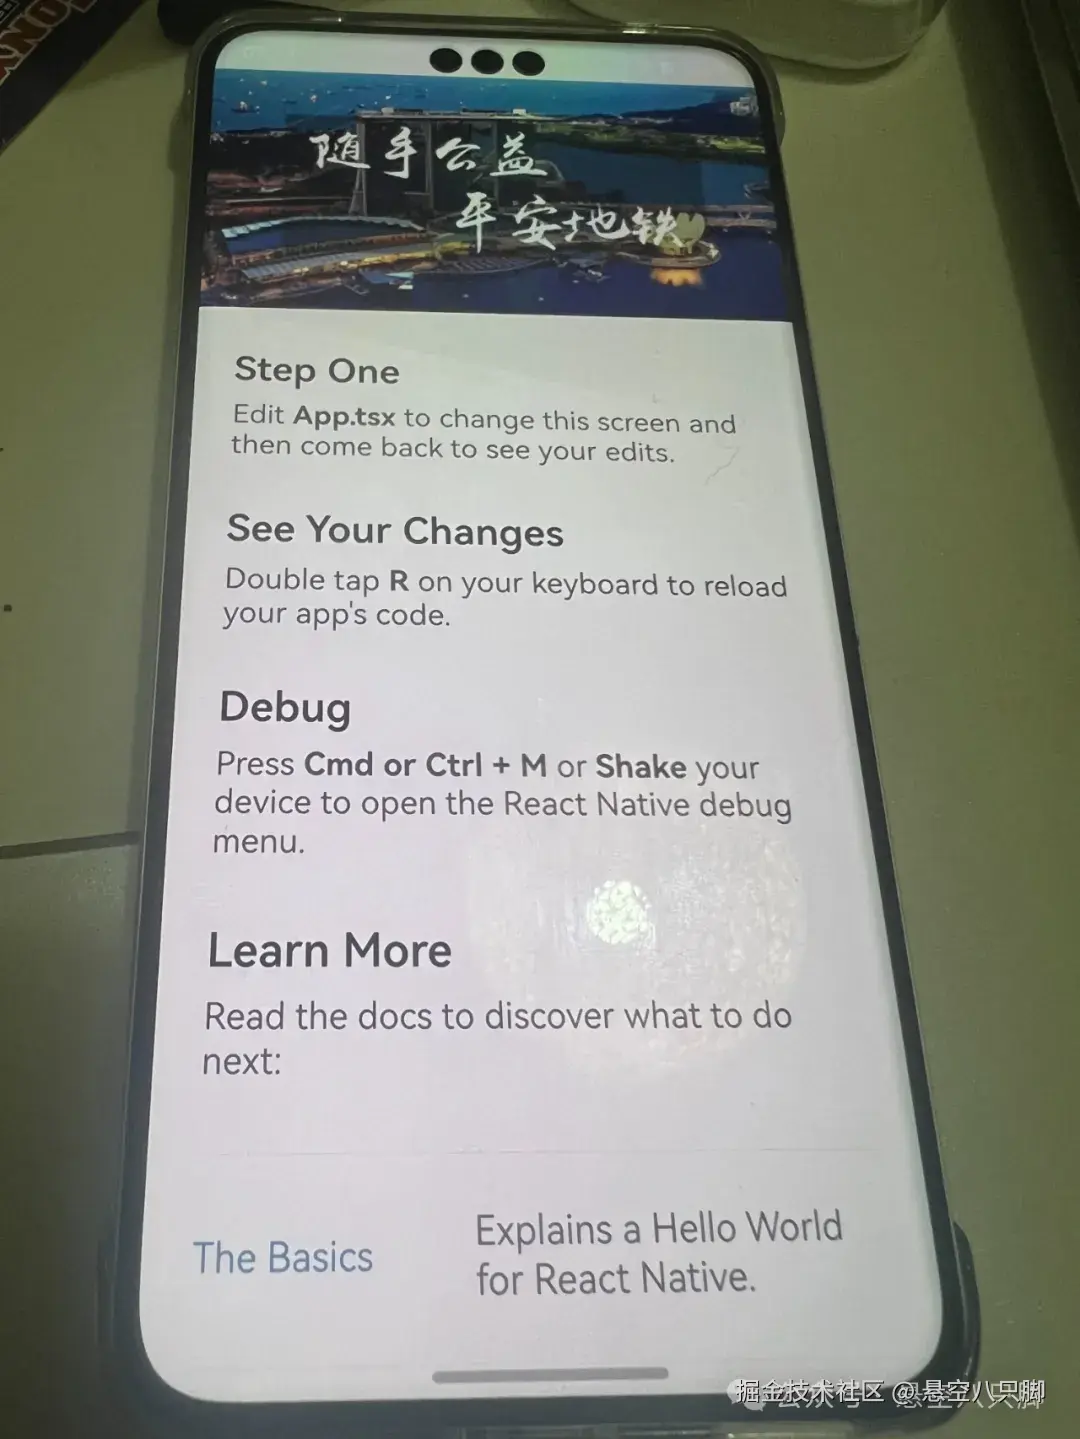
加载的bundle,是一个简单的demo页面,仅仅把demo的header组件改成了一张自定义的图片。
/**
 * Sample React Native App
 * https://github.com/facebook/react-native
 *
 * @format
 */
import React, {useEffect} from 'react';
import type {PropsWithChildren} from 'react';
import SplashScreen from 'react-native-splash-screen';
import versionUtil from './versionUtil';
import {
  SafeAreaView,
  ScrollView,
  StatusBar,
  StyleSheet,
  Text,
  useColorScheme,
  View,
  Image,
} from 'react-native';
import {
  Colors,
  DebugInstructions,
  Header,
  LearnMoreLinks,
  ReloadInstructions,
} from 'react-native/Libraries/NewAppScreen';
import {createBottomTabNavigator} from '@react-navigation/bottom-tabs';
import {createStackNavigator} from '@react-navigation/stack';
const Tab = createBottomTabNavigator();
type SectionProps = PropsWithChildren<{
  title: string;
}>;
function Section({children, title}: SectionProps): JSX.Element {
  const isDarkMode = useColorScheme() === 'dark';
  /**
   * 模拟componentDidMount,即只运行一次该函数
   */
  useEffect(() => {
    SplashScreen.hide();
    versionUtil
      .download()
      .then(result => {
        console.log('下载成功,路径:', result);
      })
      .catch(error => {});
    return () => {};
  }, []);
  return (
    <View style={styles.sectionContainer}>
      <Text
        style={[
          styles.sectionTitle,
          {
            color: isDarkMode ? Colors.white : Colors.black,
          },
        ]}>
        {title}
      </Text>
      <Text
        style={[
          styles.sectionDescription,
          {
            color: isDarkMode ? Colors.light : Colors.dark,
          },
        ]}>
        {children}
      </Text>
    </View>
  );
}
function App(): JSX.Element {
  const isDarkMode = useColorScheme() === 'dark';
  const backgroundStyle = {
    backgroundColor: isDarkMode ? Colors.darker : Colors.lighter,
  };
  return (
    <SafeAreaView style={backgroundStyle}>
      <StatusBar
        barStyle={isDarkMode ? 'light-content' : 'dark-content'}
        backgroundColor={backgroundStyle.backgroundColor}
      />
      <ScrollView
        contentInsetAdjustmentBehavior="automatic"
        style={backgroundStyle}>
        {/* <Header /> */}
        {/* 换成一张自定义图片 */}
        <Image style={{width: '100%', height: 200}} source={require('./assets/banner.png')}/>
        <View
          style={{
            backgroundColor: isDarkMode ? Colors.black : Colors.white,
          }}>
          <Section title="Step One">
            Edit <Text style={styles.highlight}>App.tsx</Text> to change this
            screen and then come back to see your edits.
          </Section>
          <Section title="See Your Changes">
            <ReloadInstructions />
          </Section>
          <Section title="Debug">
            <DebugInstructions />
          </Section>
          <Section title="Learn More">
            Read the docs to discover what to do next:
          </Section>
          <LearnMoreLinks />
        </View>
      </ScrollView>
    </SafeAreaView>
  );
}
const styles = StyleSheet.create({
  sectionContainer: {
    marginTop: 32,
    paddingHorizontal: 24,
  },
  sectionTitle: {
    fontSize: 24,
    fontWeight: '600',
  },
  sectionDescription: {
    marginTop: 8,
    fontSize: 18,
    fontWeight: '400',
  },
  highlight: {
    fontWeight: '700',
  },
});
export default App;
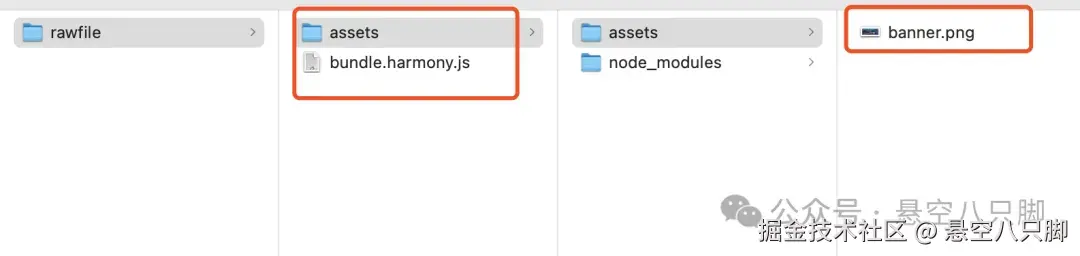
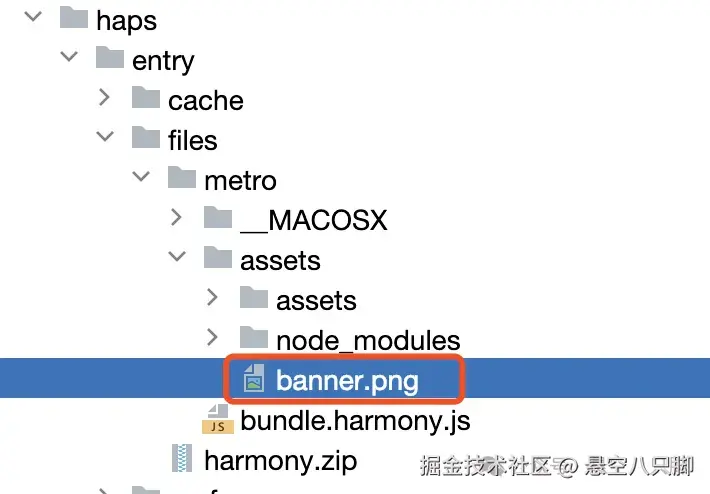
打包后的文件结构,可以看到图片已经被打包到了资源文件中
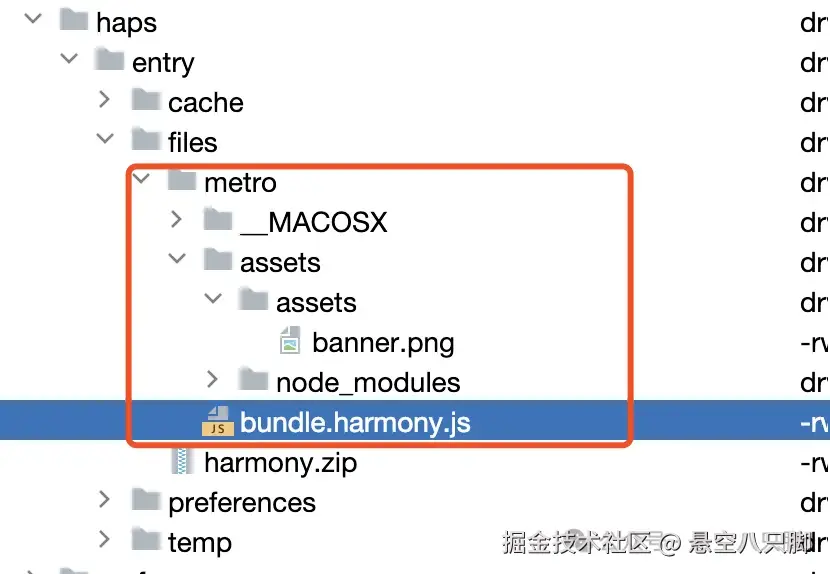
assets与bundle文件压缩,得到压缩文件。手动拖到服务器上,让RN完成下载放入手机的沙盒。利用DevEco-Studio的Device File Browser功能,可以很方便地查看应用沙盒中的文件。可以看到此时文件已经正常下载并解压缩了,文件夹结构也和压缩前一样。
重新启动应用,添加一旦判断沙盒文件是否存在的逻辑让它走沙盒加载,结果不出所料,页面加载出来了但图片是空的。
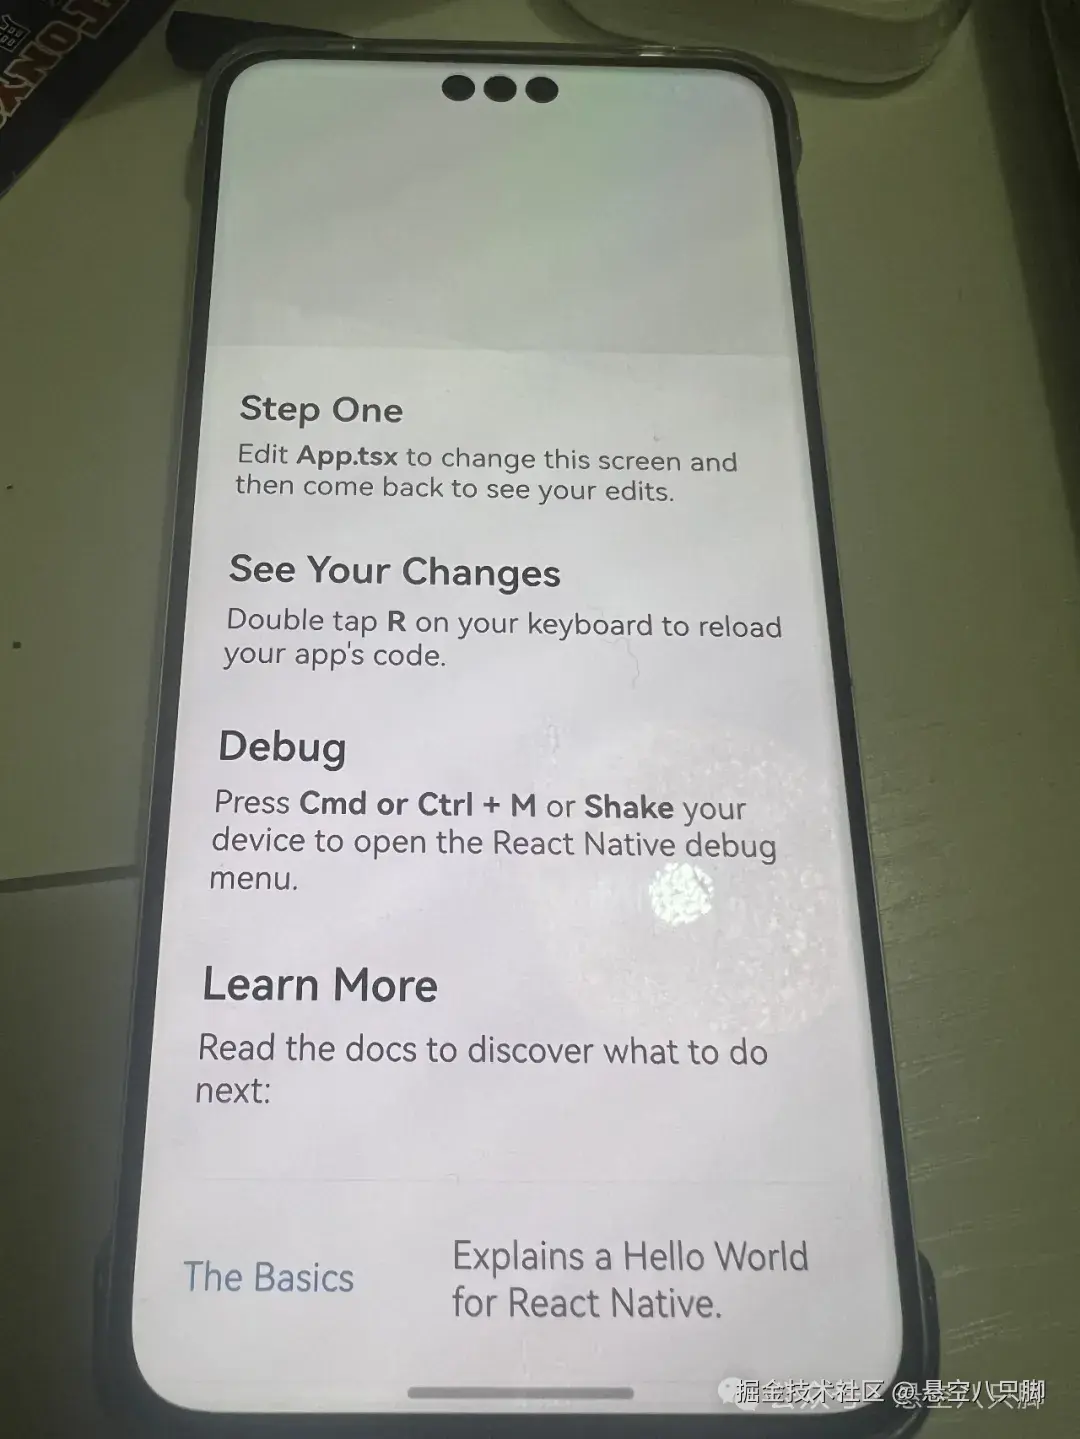
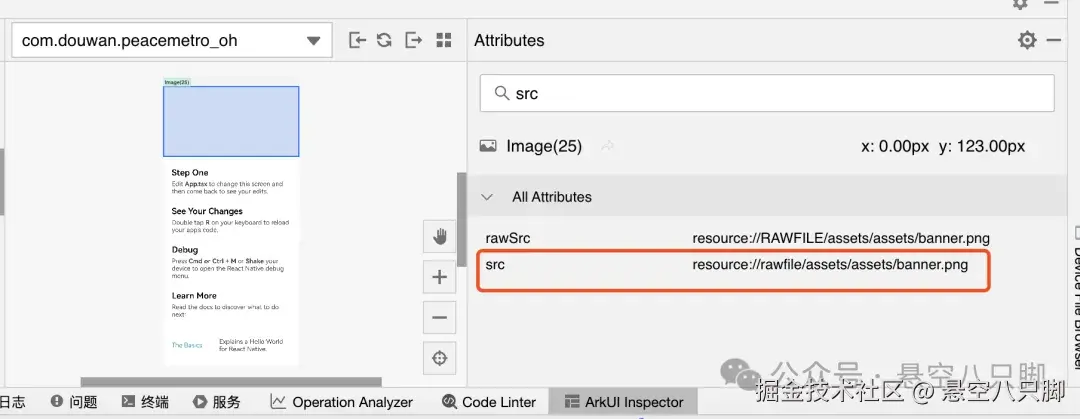
不显示自然是路径不对,在rnohCoreContext.createAndRegisterRNInstance的属性assetsDest里调整了半天也没猜对,一时间有些没头绪。
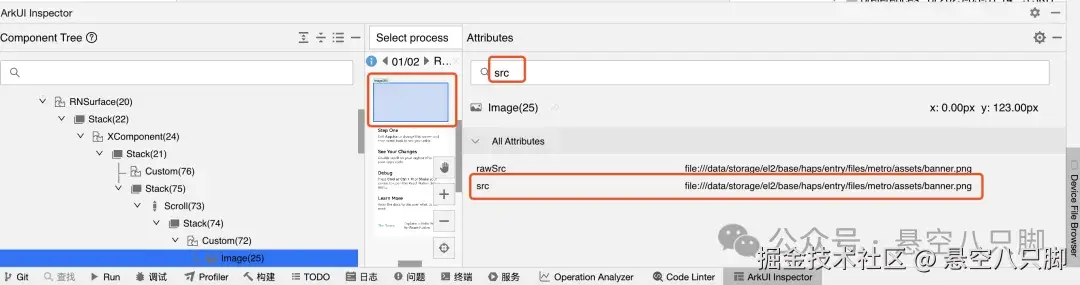
网上查了下发现发现还可以在DevEco的ArkUI Inspector里直接查看页面,哪怕是RN的页面?!那就直接看起来。一看什么鬼?怎么路径和打包的不一样啊?丢了一层assets?
对比下打包的文件夹结构

先直接利用Device File Browser,向外层的assets文件夹下拖了一个图片进去。
直接可以显示了。
为什么打包的资源路径和最终加载的路径会出现不一致?目前还没查明。
趁热打铁看看如果本地加载bundle,它读取的资源最终是在哪个路径?
有点惊讶这个诡异的路径了,本地加载的时候又是两层assets文件夹了。。。。。。
原因可以后面去排查,已经知道了是路径问题,也知道了实际的路径,这些已经可以继续推进下去了。更重要的是知道了如何查看沙盒文件与查看运行时UI页面,比起之前纯纯的一边ai一边猜,效率提高了不止一点半点。
到头来,还得靠工具。
总算是解决了这个React-Native开发鸿蒙NEXT系列自打出生就困扰的一个大问题。看似不大的问题,却有轻舟已过万重山的感觉。
在三月的最后一天,终于小小地开心了一下。

不经常在线,有问题可在微信公众号或者掘金社区私信留言
更多内容可关注
我的公众号悬空八只脚
作者:悬空八只脚
来源:稀土掘金
著作权归作者所有。商业转载请联系作者获得授权,非商业转载请注明出处。


 890
890

 被折叠的 条评论
为什么被折叠?
被折叠的 条评论
为什么被折叠?
 到【灌水乐园】发言


