六、嘀嗒定时器
目标:
使用嘀嗒定时器代替延时函数,实现LED间隔500ms闪烁
(定时器延时比延时函数精确,为下一节的超声波测距做准备)
知识点:

步骤:
1、创建文件
在工程目录下边创建systick.c和systick.h两个文件,并将其添加到工程中
2、编写代码
systick.c
#include "systick.h"
#include "stm32f10x.h"

//毫秒级延时
void ms_delay(uint32_t ms)
{
	while(ms--){
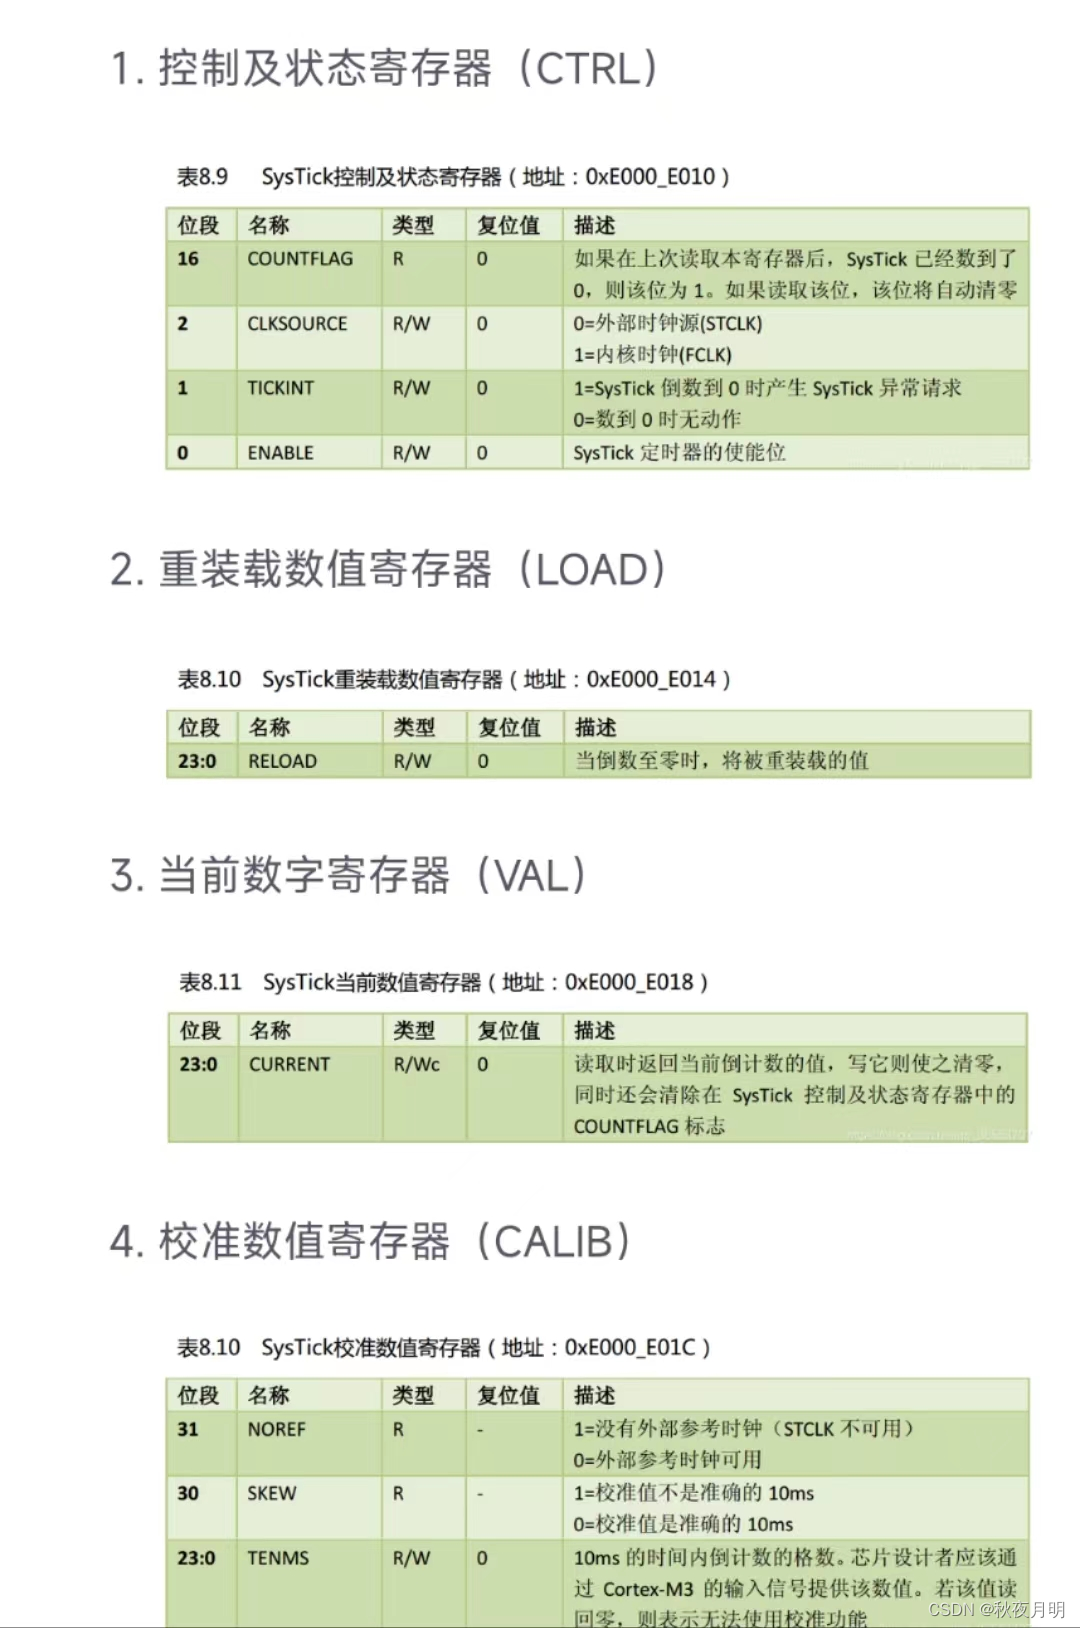
		SysTick_Config(72000);   //72MHZ,72000次表示计时1ms
		while(!(SysTick ->CTRL& (1<<16)));  //没数到0的时候一直等待
		//当72000一直减到零的时候,SysTick ->CTRL= 1 xxxx xxxx xxxx xxxx
		//							1<<16        = 1 0000 0000 0000 0000
	}
	SysTick ->CTRL &=~ SysTick_CTRL_ENABLE_Msk;	  //关闭嘀嗒定时器

}

//微妙级延时
void us_delay(uint32_t ms)
{
	while(ms--){
		SysTick_Config(72);   //72MHZ,72次表示计时1us
		while(!(SysTick ->CTRL& (1<<16)));
	}
	SysTick ->CTRL &=~ SysTick_CTRL_ENABLE_Msk;
}
systick.h
#include "stm32f10x.h"

void ms_delay(uint32_t ms);
void us_delay(uint32_t ms);
main.c
#include "stm32f10x.h"  //引入库函数
#include "main.h"
#include "led.h"     //引入LED相关的文件
#include "exti.h"	//加入刚写的外部中断相关文件
#include "usart.h"  //加入串口相关文件
#include "tim.h"
#include "pwm.h"
#include "systick.h"

#define LED_ON GPIO_ResetBits(GPIOC,GPIO_Pin_13)
#define LED_OFF GPIO_SetBits(GPIOC,GPIO_Pin_13)

int  main()
{
	LED_Init();     //初始化LED(PC13引脚)
	//tim_config();
	//pwm_config();
	//Exti_Init();	//初始化外部中断1
	//usart_init();   //初始化串口usart1


	LED_OFF;   //让LED上电的时候熄灭


	//空循环,等待中断
	while(1)
	{
		LED_ON;
		ms_delay(500);
		LED_OFF;
		ms_delay(500);
	}
}
3、编译烧录
略。


 被折叠的 条评论
为什么被折叠?


