


- 🍨 本文为🔗365天深度学习训练营 中的学习记录博客
- 🍦 参考文章:365天深度学习训练营-第8周:猫狗识别(训练营内部成员可读)
- 🍖 原作者:K同学啊|接辅导、项目定制
🍺 要求:
学会在代码中使用数据增强手段来提高acc
请探索更多的数据增强手段并记录
在本教程中,你将学会如何进行数据增强,并通过数据增强用少量数据达到非常非常棒的识别准确率。
我将展示两种数据增强方式,以及如何自定义数据增强方式并将其放到我们代码当中,两种数据增强方式如下:
● 将数据增强模块嵌入model中
● 在Dataset数据集中进行数据增强
🏡 运行环境:
电脑系统:Windows 10
语言环境:python 3.10
编译器:Pycharm 2022.1.1
深度学习环境:Pytorch
目录
一、准备工作
1.设置GPU
import matplotlib.pyplot as plt
import numpy as np
#隐藏警告
import warnings
warnings.filterwarnings( 'ignore' )
from tensorflow.keras import layers
import tensorflow as tf
gpus = tf.config.list_physical_devices("GPU")
if gpus:
   tf.config.experimental.set_memory_growth(gpus[0],True) #设 置GPU显存用量按需使用
   tf.config.set_visible_devices([gpus[0]], "GPU")
#打印显卡信息,确认GPU可用
print(gpus)
2.加载数据
data_dir = r"D:\empire\365-7-data"
img_height = 224
img_width = 224
batch_size = 32

train_ds = tf.keras.preprocessing.image_dataset_from_directory(
data_dir,
validation_split=0.3,
subset="training",
seed=12,
image_size=(img_height,img_width),
batch_size=batch_size)
val_ds = tf.keras.preprocessing.image_dataset_from_directory(
data_dir,
validation_split=0.3,
subset="training",
seed=12,
image_size=(img_height,img_width),
batch_size=batch_size)
Found 360 files belonging to 2 classes. Using 252 files for training. Found 360 files belonging to 2 classes. Using 252 files for training.
由于原始数据集不包含测试集,因此需要创建一个。 使用tf.data. experimental.cardinality确定验证集中有多少批次的数据,然后将其中的20%移至测试集。
val_batches=tf.data.experimental.cardinality(val_ds)
test_ds=val_ds.take(val_batches // 5)
val_ds=val_ds.skip(val_batches // 5)
print('Number of validation batches: %d' % tf.data.experimental.cardinality(val_ds))
print('Number of test batches: %d' % tf.data.experimental.cardinality(test_ds))

class_names =train_ds.class_names
print(class_names )
Number of validation batches: 7 Number of test batches: 1['cat', 'dog']
AUTOTUNE = tf.data.AUTOTUNE
def preprocess_image(image,label):

    return ( image/255.0,label)
#归一化处理
train_ds = train_ds.map( preprocess_image,num_parallel_calls=AUTOTUNE)
val_ds= val_ds.map( preprocess_image,num_parallel_calls=AUTOTUNE)
test_ds = test_ds.map(preprocess_image,num_parallel_calls=AUTOTUNE)
train_ds = train_ds.cache( ).prefetch(buffer_size=AUTOTUNE)
val_ds = val_ds.cache().prefetch(buffer_size=AUTOTUNE )


plt.figure(figsize=(15,10)) # 图形的宽为15高为10
for images,labels in train_ds.take(1):


    for i in range(8):
        ax = plt.subplot(5,8,i+1)
        plt.imshow(images[i])
        plt.title(class_names[labels[i]])
        plt.axis("off")
二、数据增强
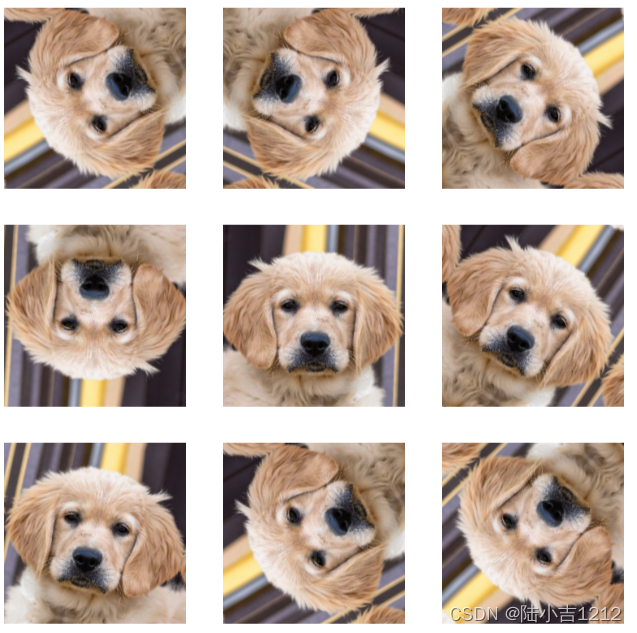
我们可以使用 tf.keras.layers.experimental.preprocessing.RandomFlip 与 tf.keras.layers.experimental.preprocessing.RandomRotation 进行数据增强:
🍦tf.keras.layers.experimental.preprocessing.RandomFlip:水平和垂直随机翻转每个图像。
🍦tf.keras.layers.experimental.preprocessing.RandomRotation:随机旋转每个图像
data_augmentation = tf.keras.Sequential([

   tf.keras.layers.experimental.preprocessing.RandomFlip("horizontal_and_vertical"),
   tf.keras.layers.experimental.preprocessing.RandomRotation(0.2),
])#第一个层表示进行随机的水平和垂直翻转,而第二个层表示按照 0.2的弧度值进行随机旋转。


# Add the image to a batch.
image = tf.expand_dims(images[i], 0)

plt.figure(figsize=(8,8))
for i in range(9):

    augmented_image = data_augmentation(image)
    ax = plt.subplot(3,3, i + 1)
    plt.imshow(augmented_image[0])
    plt.axis("off")
三、增强方式
方法一:将其嵌入model中
model=tf.keras.sequential([
    data_augmentation,
    layers.Conv2D(16,3,padding='same',activation='relu'),
    layers.Maxpooling2D(),
])
这样做的好处是:
数据增强这块的工作可以得到GPU的加速(如果你使用了GPU训练的话)
注意:只有在模型训练时(Model.fit) 才会进行增强,在模型评估(Model.evaluate)以及预测
(Model.predict)时并不会进行增强操作。
方法二:在Dataset数据集中进行数据增强
batch_size=32
AUTOTUNE=tf.data.AUTOTUNE
def prepare(ds):
    ds=ds.map(lambda x,y:(data_augmentation(x,training=Ture),y),num_parallel_calls=AUTOTUNE)
    return ds

train_ds=prepare(train_ds)
四、训练模型
model
= tf. keras . Sequential([
layers .Conv2D(16, 3, padding= ' same', activation=' relu'),
layers . MaxPooling2D(),
layers. . Conv2D(32, 3, padding= ' same', activation='relu'),
layers .MaxPooling2D(),
layers .Conv2D(64, 3, padding= ' same', activation=' relu'),
layers .MaxPooling2D(),
layers.Flatten(),
layers . Dense(128,activation= ' relu'),
layers . Dense(len(class_ names))
])
在准备对模型进行训练之前,还需要再对其进行些设置。 以下内容是在模型的编译步骤中添加的:
损失函数(loss) :用于衡量模型在训练期间的准确率。
优化器(optimizer) :决定模型如何根据其看到的数据和自身的损失函数进行更新。
评价函数(metrics) :用于监控训练和测试步骤。
model.compile(optimizer='adam',
             loss=tf.keras.losses.SparseCategoricalCrossentropy(from_logits=True),
              metrics=['accuracy'])

epochs=20
history = model.fit(

   train_ds,
   validation_data=val_ds,
   epochs=epochs
)
Epoch 1/20 8/8 [==============================] - 9s 850ms/step - loss: 1.2430 - accuracy: 0.5238 - val_loss: 0.6924 - val_accuracy: 0.5045 Epoch 2/20 8/8 [==============================] - 6s 780ms/step - loss: 0.6943 - accuracy: 0.5238 - val_loss: 0.6767 - val_accuracy: 0.6091 Epoch 3/20 8/8 [==============================] - 6s 785ms/step - loss: 0.6824 - accuracy: 0.5357 - val_loss: 0.6680 - val_accuracy: 0.6000 Epoch 4/20 8/8 [==============================] - 7s 796ms/step - loss: 0.6582 - accuracy: 0.6627 - val_loss: 0.6449 - val_accuracy: 0.6409 Epoch 5/20 8/8 [==============================] - 6s 771ms/step - loss: 0.6218 - accuracy: 0.6944 - val_loss: 0.6112 - val_accuracy: 0.6318 Epoch 6/20 8/8 [==============================] - 6s 786ms/step - loss: 0.5748 - accuracy: 0.7540 - val_loss: 0.6060 - val_accuracy: 0.6182 Epoch 7/20 8/8 [==============================] - 6s 786ms/step - loss: 0.5432 - accuracy: 0.7341 - val_loss: 0.5501 - val_accuracy: 0.6864 Epoch 8/20 8/8 [==============================] - 7s 804ms/step - loss: 0.4876 - accuracy: 0.7817 - val_loss: 0.5175 - val_accuracy: 0.7273 Epoch 9/20 8/8 [==============================] - 7s 896ms/step - loss: 0.4556 - accuracy: 0.7937 - val_loss: 0.5021 - val_accuracy: 0.7364 Epoch 10/20 8/8 [==============================] - 7s 877ms/step - loss: 0.4182 - accuracy: 0.8016 - val_loss: 0.4946 - val_accuracy: 0.7455 Epoch 11/20 8/8 [==============================] - 7s 865ms/step - loss: 0.4001 - accuracy: 0.8333 - val_loss: 0.4209 - val_accuracy: 0.8045 Epoch 12/20 8/8 [==============================] - 8s 915ms/step - loss: 0.3303 - accuracy: 0.8810 - val_loss: 0.4732 - val_accuracy: 0.7591 Epoch 13/20 8/8 [==============================] - 8s 941ms/step - loss: 0.3255 - accuracy: 0.8452 - val_loss: 0.3251 - val_accuracy: 0.8545 Epoch 14/20 8/8 [==============================] - 8s 913ms/step - loss: 0.2834 - accuracy: 0.8849 - val_loss: 0.2953 - val_accuracy: 0.8455 Epoch 15/20 8/8 [==============================] - 8s 933ms/step - loss: 0.2781 - accuracy: 0.8770 - val_loss: 0.2791 - val_accuracy: 0.8727 Epoch 16/20 8/8 [==============================] - 7s 911ms/step - loss: 0.2450 - accuracy: 0.9048 - val_loss: 0.3016 - val_accuracy: 0.8727 Epoch 17/20 8/8 [==============================] - 7s 924ms/step - loss: 0.2184 - accuracy: 0.9286 - val_loss: 0.1941 - val_accuracy: 0.9182 Epoch 18/20 8/8 [==============================] - 8s 921ms/step - loss: 0.1850 - accuracy: 0.9444 - val_loss: 0.1889 - val_accuracy: 0.9182 Epoch 19/20 8/8 [==============================] - 7s 916ms/step - loss: 0.1620 - accuracy: 0.9286 - val_loss: 0.3436 - val_accuracy: 0.8409 Epoch 20/20 8/8 [==============================] - 7s 881ms/step - loss: 0.1481 - accuracy: 0.9365 - val_loss: 0.2079 - val_accuracy: 0.9136
loss,acc = model.evaluate(test_ds)
print(" Accuracy",acc )
1/1 [==============================] - 0s 445ms/step - loss: 0.1809 - accuracy: 0.9375 Accuracy 0.9375
五、自定义增强函数
import random
def aug_img(image):
    seed=(random.randint(1,8),0)
    stateless_random_brightness = tf.image.stateless_random_contrast(image,lower=0.1,upper=1.0,seed=seed)
    return stateless_random_brightness

image = tf.expand_dims(images[3]*255,0)
print("Min and max pixel values:",image.numpy().min(),image.numpy().max())


plt.figure(figsize=(8,8))
for i in range(9):
    augmented_image = aug_img( image)
    ax = plt.subplot(3,3, i + 1)
    plt.imshow(augmented_image[0].numpy().astype("uint8"))

    plt.axis("off")
Min and max pixel values: 0.0 255.0
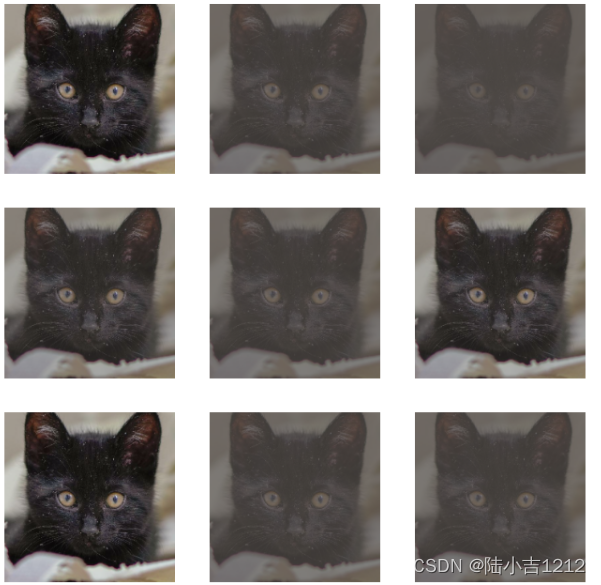
更改图像亮度
#visualize(image, saturated)
image = tf.expand_dims(images[3]*255, 0)
bright = tf.image.adjust_brightness(image, 0.1)
plt.figure(figsize=(8, 8))
for i in range(9):
    augmented_image = aug_img(bright )
    ax = plt.subplot(3, 3, i + 1)
    plt.imshow(augmented_image[0].numpy().astype("uint8"))

plt.axis("off") 
对图像进行裁剪
image = tf.expand_dims(images[3]*255, 0)
cropped = tf.image.central_crop(image, central_fraction=0.5)

plt.figure(figsize=(8, 8))
for i in range(9):
    augmented_image = aug_img(cropped)
    ax = plt.subplot(3, 3, i + 1)
    plt.imshow(augmented_image[0].numpy().astype("uint8"))

    plt.axis("off")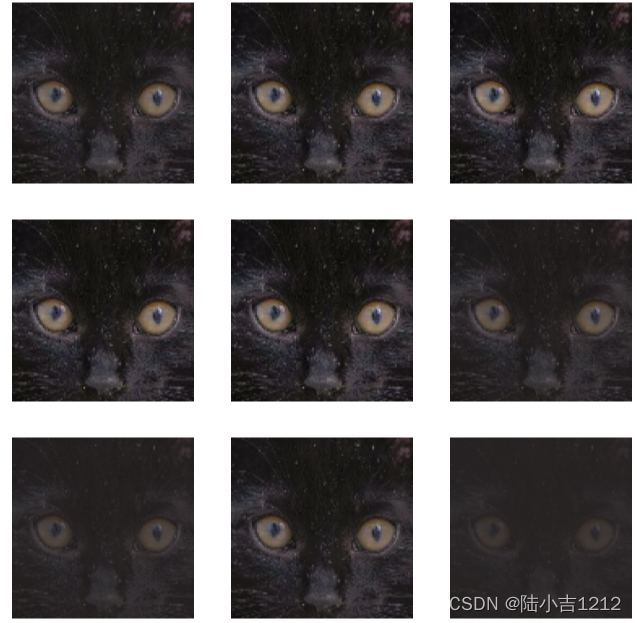
参考博文:https://blog.csdn.net/Jessica2017lj/article/details/127123778


 1131
1131

 被折叠的 条评论
为什么被折叠?
被折叠的 条评论
为什么被折叠?
 到【灌水乐园】发言


