


一、SpringMVC简介
Spring MVC是Spring Framework提供的Web组件,全称是Spring Web MVC,是一种基于Java实现MVC模型的轻量级Web框架,是目前主流的实现MVC设计模式的框架,提供前端路由映射、视图解析等功能。
什么是MVC?
MVC(Model View Controller)是软件工程中的一种软件架构模式,它把软件系统分为模型、视图和控制器三个基本部分。用一种业务逻辑、数据、界面显示分离的方法组织代码,将业务逻辑聚集到一个部件里面,在改进和个性化定制界面及用户交互的同时,不需要重新编写业务逻辑。
M:Model,模型。javaBean
- 完成具体的业务操作,如:查询数据库,封装对象
V:View视图。JSP、HTML等来进行数据展示
C:Controller控制器。Servlet
- 获取View的请求
- 调用模型将数据交给视图进行展示
二、SpringMVC入门案例
1.环境准备
创建一个Maven项目选定web
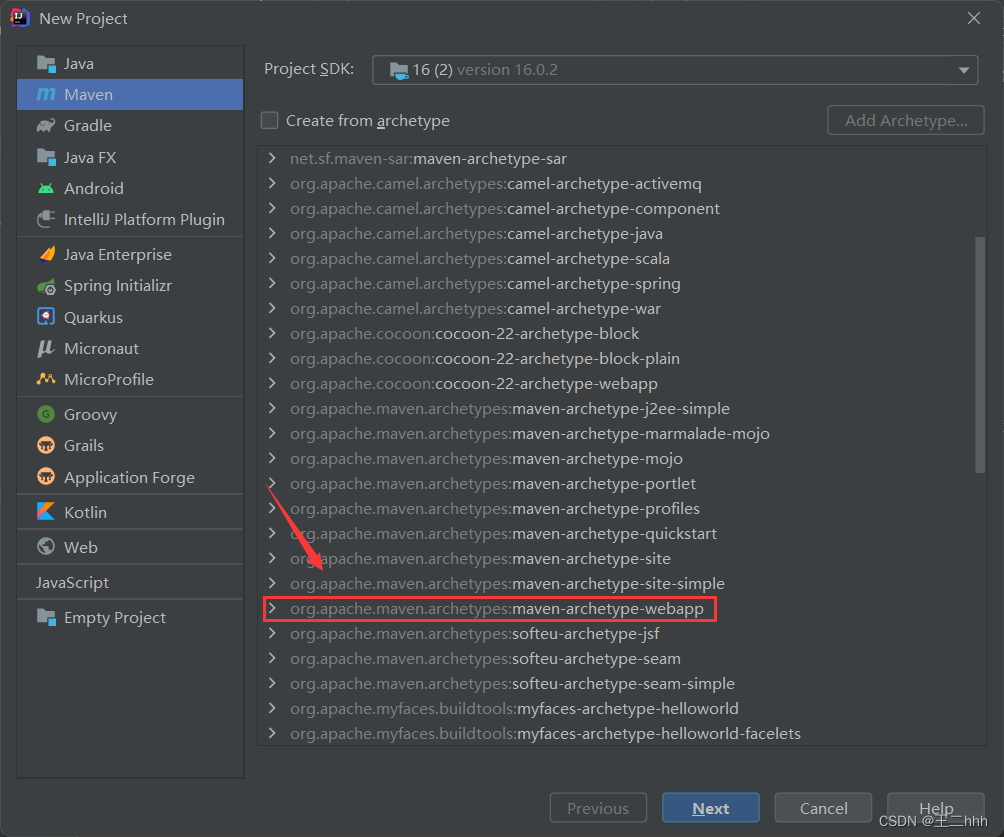
创建成功后补全目录结构

加入java包
2.在pom.xml中导入相关依赖
<?xml version="1.0" encoding="UTF-8"?>

<project xmlns="http://maven.apache.org/POM/4.0.0" xmlns:xsi="http://www.w3.org/2001/XMLSchema-instance"
         xsi:schemaLocation="http://maven.apache.org/POM/4.0.0 http://maven.apache.org/xsd/maven-4.0.0.xsd">
    <modelVersion>4.0.0</modelVersion>

    <groupId>SpringMVC_quickstart_02</groupId>
    <artifactId>SpringMVC_02</artifactId>
    <version>1.0-SNAPSHOT</version>
    <packaging>war</packaging>

    <properties>
        <project.build.sourceEncoding>UTF-8</project.build.sourceEncoding>
        <maven.compiler.source>16</maven.compiler.source>
        <maven.compiler.target>16</maven.compiler.target>
    </properties>

    <dependencies>
        <dependency>
            <groupId>javax.servlet</groupId>
            <artifactId>javax.servlet-api</artifactId>
            <version>3.1.0</version>
            <scope>provided</scope>
        </dependency>

        <dependency>
            <groupId>org.springframework</groupId>
            <artifactId>spring-webmvc</artifactId>
            <version>5.3.0</version>
        </dependency>
    </dependencies>

    <build>
        <plugins>
            <plugin>
                <groupId>org.apache.tomcat.maven</groupId>
                <artifactId>tomcat7-maven-plugin</artifactId>
                <version>2.1</version>
                <configuration>
                    <port>80</port>
                    <path>/</path>
                </configuration>
            </plugin>
        </plugins>
    </build>
</project>servlet坐标添加<scope>provided</scope> 是因为会和tomcat中的servlet-api包发生冲突,导致报错。provided代表的是该包只在编译和测试的时候用,运行的时候无效直接使用tomcat中的,避免冲突
SpringMVC 是基于 Spring 的,在 pom.xml 只导入了 spring - webmvc jar 包的原因是它会自动依赖Spring相关坐标
3.创建Controller类
@Controller
public class UserController {
    @RequestMapping("/save")
    @ResponseBody
    public String save(){
        System.out.println("user save ...");
        return "{'info':'springmvc'}";
    }
}
- @Controller:设置SpringMVC的核心控制器bean
- @RequestMapping:设置当前控制器方法请求访问路径
- @ResponseBody:设置当前控制器方法响应内容为当前返回值,无需解析
4.创建配置类
@Configuration
@ComponentScan("com.controller")
public class SpringMVCConfig {
}
5.使用配置类替换web.xml
将web.xml删除,换成在config包中创建的ServletContainersInitConfig类
public class ServletContainersInitConfig extends AbstractDispatcherServletInitializer {
//加载springmvc配置类
protected WebApplicationContext createServletApplicationContext() {
//初始化webApplicationContext对象
AnnotationConfigWebApplicationContext ctx = new AnnotationConfigWebApplicationContext();
//加载指定配置类
ctx.register(SpringMVCConfig.class);
return ctx;
}
//设置由springmvc控制器处理的请求映射路径
protected String[] getServletMappings() {
return new String[]{"/"};
}
//加载spring配置类
protected WebApplicationContext createRootApplicationContext() {
return null;
}
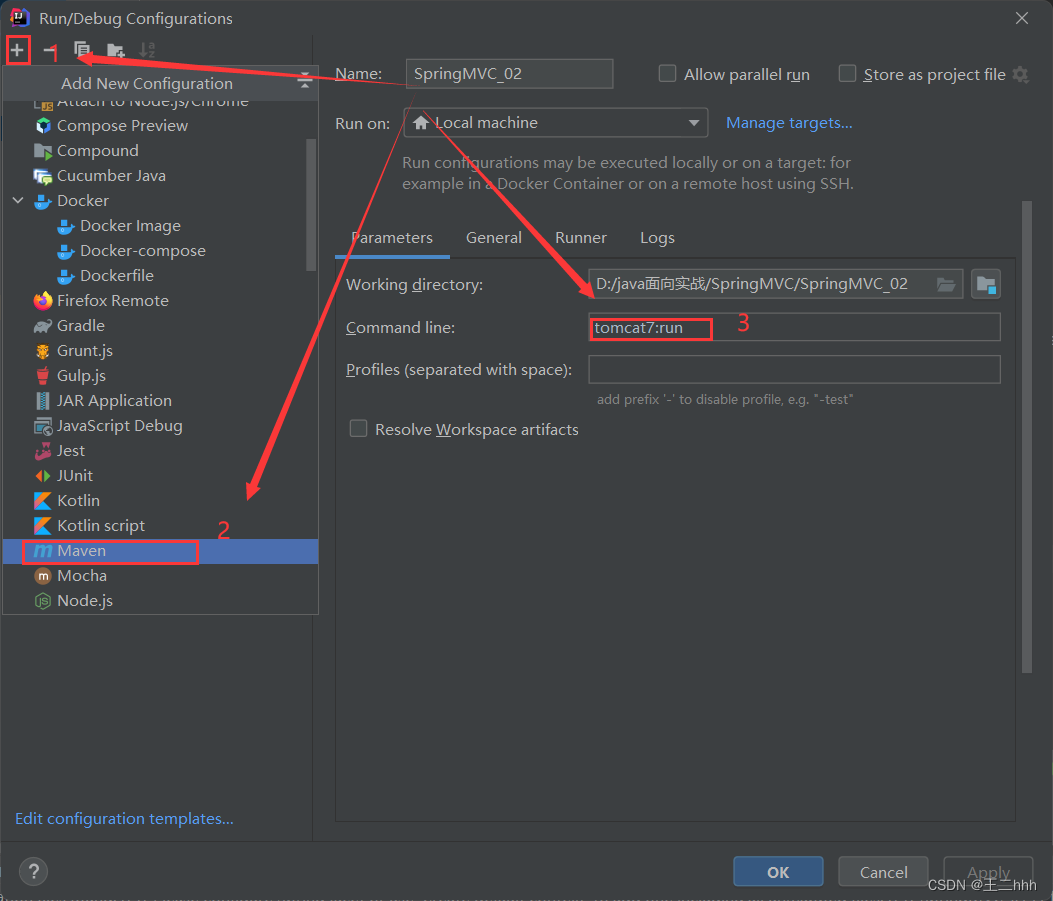
}6.配置Tomcat环境
点击此处

7.启动项目
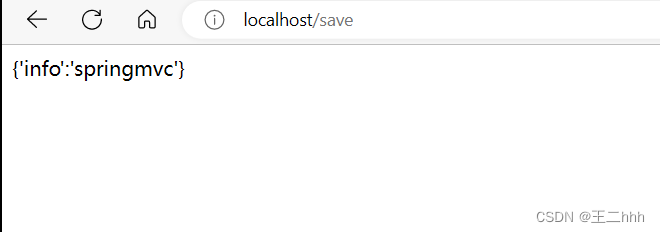
浏览器输入http://localhost/save
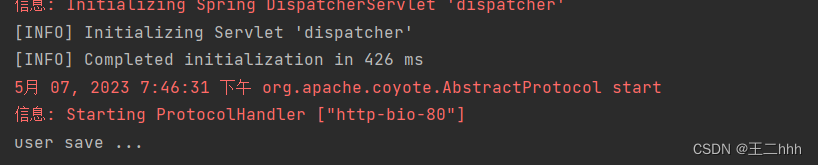
控制台输出
在SpringMVC中,只有定义处理请求的控制器类和控制器方法,并配置映射路径(@RequestMapping)与返回json数据(@ResponseBody)需要多次编写,其余工作均为一次性工作
三、SpringMVC工作流程
SpringMVC的工作流程分为两个阶段,分别是启动服务器初始化过程和单次请求过程
1.启动服务器初始化过程
(1)、服务器启动,执行ServletContainersInitConfig类,初始化web容器
功能类似于web.xml
(2)、执行createServletApplicationContext方法,创建了WebApplicationContext对象
该方法加载SpringMVC的配置类SpringMVCConfig来初始化SpringMVC容器
(3)、加载SpringMVCConfig配置类
@Configuration
@ComponentScan("com.controller")
public class SpringMVCConfig {
}
(4)、执行@ComponentScan加载对应的bean
扫描指定包及其子包下所有类上的注解,如Controller类上的@Controller注解
(5)、加载UserController,每个@RequestMapping的名称对应一个具体的方法
@Controller
public class UserController {

    @RequestMapping("/save")
    @ResponseBody
    public String save(){
        System.out.println("user save ...");
        return "{'info':'springmvc'}";
    }
}
此时就建立了/save和save方法的对应关系
(6)、执行getServletMappings方法,设定SpringMVC拦截请求的路径规则
    protected String[] getServletMappings() {
        return new String[]{"/"};
}/代表所拦截请求的路径规则,只有被拦截后才能交给SpringMVC来处理请求
2.单次请求过程
(1)、发送请求http://localhost/save
(2)、web容器发现该请求满足SpringMVC拦截规则,将请求交给SpringMVC处理
(3)、解析请求路径/save
(4)、由/save匹配执行对应的方法save()
(5)、执行save()
(6)、检测到有@ResponseBody直接将save()方法的返回值作为响应体返回给请求方
四、bean控制加载
SpringConfig和SpringMVCConfig都是Spring框架中的配置类,负责加载其所管理的bean。但是SpringMVC加载其相关bean(表现层bean),也就是controller包下的类,而Spring加载业务bean(Service)和功能bean(DataSource,SqlSessionFactoryBean,MapperScannerConfigurer等),如何让两个配置类分别加载到其所对应的bean同时又避免错误加载到不该加载的bean呢?
对于SpringMVC的配置类SpringMVCConfig中使用注解@ComponentScan,我们只需要将其扫描范围设置到controller即可
@Configuration
@ComponentScan("com.controller")
public class SpringMVCConfig {
}
对于Spring的配置类SpringConfig中使用注解@ComponentScan,我们扫描时也包含了controller
@Configuration
@ComponentScan("com")
public class SpringConfig {
}
对于如何解决Spring错误加载到SpringMVC的bean,我们有两种解决方案
1.修改Spring配置类,设定扫描范围为精准范围
@Configuration
@ComponentScan({"com.service","com.dao"})
public class SpringConfig {
}
2.修改Spring配置类,设定扫描范围为com,排除掉controller包中的bean
@Configuration
@ComponentScan(value = "com",
        excludeFilters = @ComponentScan.Filter(
                type = FilterType.ANNOTATION,
                classes = Controller.class
        )
)
public class SpringConfig {
}
- excludeFilters属性:设置扫描加载bean时,排除的过滤规则
- type属性:设置排除规则,当前使用按照bean定义时的注解类型进行排除
ANNOTATION:按照注解排除ASSIGNABLE_TYPE:按照指定的类型过滤ASPECTJ:按照 Aspectj 表达式排除,基本上不会用REGEX:按照正则表达式排除CUSTOM:按照自定义规则排除
- classes属性:设置排除的具体注解类,当前设置排除@Controller定义的bean
当我们使用这种方法扫描时,SpringMVC的配置类SpringMVCConfig上的@Configuration注解也会被扫描进来,同时被排除的Controller类又会被SpringMVCConfig加载进来。
要解决这个问题,只需要把SpringMVC的配置类移出Spring的扫描范围即可
五、tomcat服务器启动加载Spring配置类及其简化
当我们有了Spring配置类,需要在tomcat服务器启动时将其加载,我们便需要修改ServletContainersInitConfig类
public class ServletContainersInitConfig extends AbstractDispatcherServletInitializer {
    //加载springmvc配置类
    protected WebApplicationContext createServletApplicationContext() {
        //初始化webApplicationContext对象
        AnnotationConfigWebApplicationContext ctx = new AnnotationConfigWebApplicationContext();
        //加载指定配置类
        ctx.register(SpringMVCConfig.class);

        return ctx;
    }

    //设置由springmvc控制器处理的请求映射路径
    protected String[] getServletMappings() {
        return new String[]{"/"};
    }

    //加载spring配置类
    protected WebApplicationContext createRootApplicationContext() {
        //初始化webApplicationContext对象
        AnnotationConfigWebApplicationContext ctx = new AnnotationConfigWebApplicationContext();
        //加载指定配置类
        ctx.register(SpringConfig.class);

        return ctx;
    }
}
只是将上面SpringMVC加载配置文件中的SpringMVCConfig改为了SpringConfig
对于上述的配置方式,Spring还提供了一种更简单的配置方式,可以不用再去创建AnnotationConfigWebApplicationContext对象,不用手动register对应的配置类
public class ServletContainersInitConfig extends AbstractAnnotationConfigDispatcherServletInitializer {

    //加载spring配置类
    protected Class<?>[] getRootConfigClasses() {
        return new Class[]{SpringConfig.class};
    }

    //加载springmvc配置类
    protected Class<?>[] getServletConfigClasses() {
        return new Class[]{SpringMVCConfig.class};
    }

    //设置由springmvc控制器处理的请求映射路径
    protected String[] getServletMappings() {
        return new String[]{"/"};
    }
}


 239
239


 被折叠的 条评论
为什么被折叠?
被折叠的 条评论
为什么被折叠?
 到【灌水乐园】发言


