


config:
info: “config info for dev(dev)”
config-test.yml:
config:
info: “config info for test(dev)”
config-prod.yml:
config:
info: “config info for prod(dev)”
这里我们创建一个config-server模块来演示Spring Cloud Config 作为配置中心的功能。
在pom.xml中添加相关依赖
org.springframework.cloud
spring-cloud-config-server
org.springframework.cloud
spring-cloud-starter-netflix-eureka-client
在application.yml中进行配置
server:
port: 8901
spring:
application:
name: config-server
cloud:
config:
server:
git:
配置存储配置信息的Git仓库
uri: https://gitee.com/JourWon/springcloud-config.git
username: JourWon
password: 123456
开启启动时直接从git获取配置
clone-on-start: true
获取子目录下的配置
search-paths: ‘{application}’
eureka:
client:
register-with-eureka: true
fetch-registry: true
service-url:
defaultZone: http://localhost:8001/eureka/
在启动类上添加@EnableConfigServer注解来启用配置中心功能
@EnableConfigServer
@EnableDiscoveryClient
@SpringBootApplication
public class ConfigServerApplication {
public static void main(String[] args) {
SpringApplication.run(ConfigServerApplication.class, args);
}
}
通过config-server获取配置信息
这里我们通过config-server来演示下如何获取配置信息。
获取配置文件信息的访问格式
获取配置信息
/{label}/{application}-{profile}
获取配置文件信息
/{label}/{application}-{profile}.yml
占位符相关解释
-
application:代表应用名称,默认为配置文件中的spring.application.name,如果配置了spring.cloud.config.name,则为该名称;
-
label:代表分支名称,对应配置文件中的spring.cloud.config.label;
-
profile:代表环境名称,对应配置文件中的spring.cloud.config.profile。
获取配置信息演示
启动eureka-server、config-server服务;
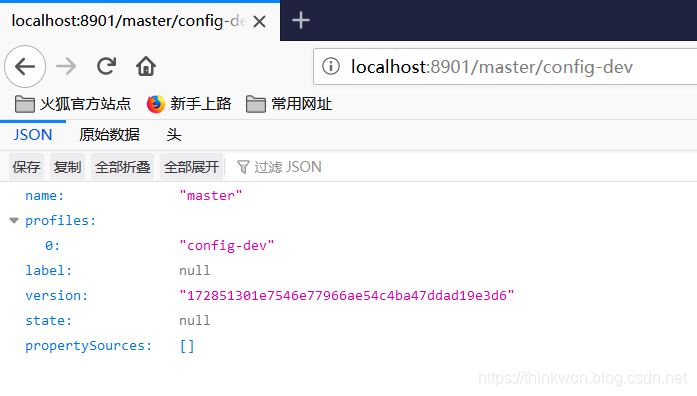
访问http://localhost:8901/master/config-dev来获取master分支上dev环境的配置信息;
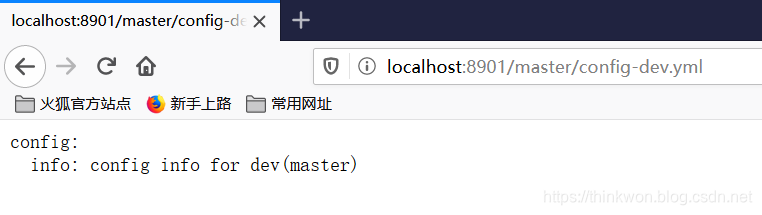
访问http://localhost:8901/master/config-dev.yml来获取master分支上dev环境的配置文件信息,对比上面信息,可以看出配置信息和配置文件信息并不是同一个概念;
访问http://localhost:8901/master/config-test.yml来获取master分支上test环境的配置文件信息:

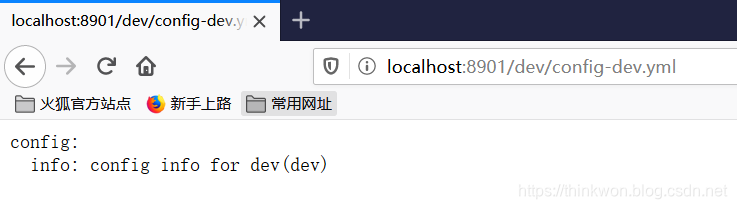
访问http://localhost:8901/dev/config-dev.yml来获取dev分支上dev环境的配置文件信息:
我们创建一个config-client模块来从config-server获取配置。
在pom.xml中添加相关依赖
org.springframework.cloud
spring-cloud-starter-config
org.springframework.cloud
spring-cloud-starter-netflix-eureka-client
org.springframework.boot
spring-boot-starter-web
在bootstrap.yml中进行配置
server:
port: 9001
spring:
application:
name: config-client
cloud:
config客户端配置
config:
分支名称
label: master
启用配置后缀名称
profile: dev
配置文件名称
name: config
配置中心地址
uri: http://localhost:8901
eureka:
client:
register-with-eureka: true
fetch-registry: true
service-url:
defaultZone: http://localhost:8001/eureka/
添加ConfigClientController类用于获取配置
@RestController
public class ConfigClientController {
@Value("${config.info}")
private String configInfo;
@GetMapping("/configInfo")
public String getConfigInfo() {
return configInfo;
}
}
演示从配置中心获取配置
启动eureka-server、config-server、config-client服务
访问http://localhost:9001/configInfo,可以获取到dev分支下dev环境的配置;
config info for dev(master)
获取子目录下的配置
我们不仅可以把每个项目的配置放在不同的Git仓库存储,也可以在一个Git仓库中存储多个项目的配置,此时就会用到在子目录中搜索配置信息的配置。
首先我们需要在config-server中添加相关配置,用于搜索子目录中的配置,这里我们用到了application占位符,表示对于不同的应用,我们从对应应用名称的子目录中搜索配置,比如config子目录中的配置对应config应用;
spring:
cloud:
config:
server:
git:
search-paths: ‘{application}’
访问http://localhost:9001/configInfo进行测试,可以发现获取的是config子目录下的配置信息。
config info for config dir dev(master)
刷新配置
当Git仓库中的配置信息更改后,我们可以通过SpringBoot Actuator的refresh端点来刷新客户端配置信息,以下更改都需要在config-client中进行。
在pom.xml中添加Actuator的依赖:
org.springframework.boot
spring-boot-starter-actuator
在bootstrap.y
《一线大厂Java面试题解析+后端开发学习笔记+最新架构讲解视频+实战项目源码讲义》
【docs.qq.com/doc/DSmxTbFJ1cmN1R2dB】 完整内容开源分享
ml中开启refresh端点:
management:
endpoints:
web:
exposure:
include: ‘refresh’
在ConfigClientController类添加@RefreshScope注解用于刷新配置:
@RefreshScope
@RestController
public class ConfigClientController {
@Value("${config.info}")
private String configInfo;
@GetMapping("/configInfo")
public String getConfigInfo() {
return configInfo;
}
}
重新启动config-client后,调用refresh端点进行配置刷新:
使用post请求http://localhost:9001/actuator/refresh
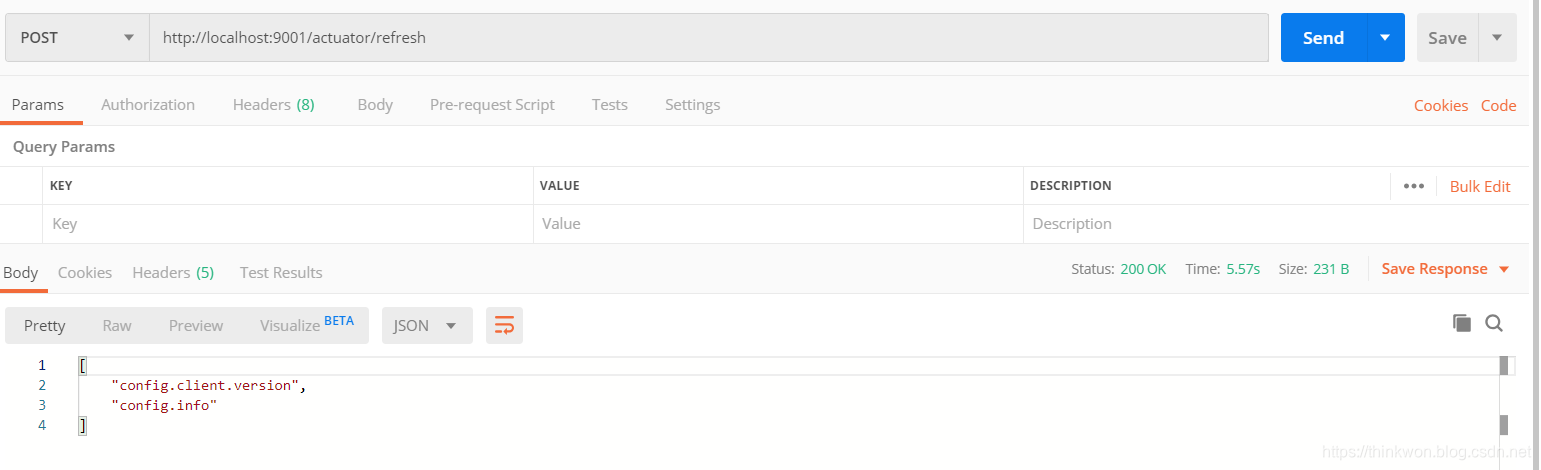
访问http://localhost:9001/configInfo进行测试,可以发现配置信息已经刷新。
update config info for config dir dev(master)
我们可以通过整合SpringSecurity来为配置中心添加安全认证。
创建config-security-server模块
在pom.xml中添加相关依赖:
org.springframework.cloud
spring-cloud-config-server
org.springframework.boot
spring-boot-starter-security
在application.yml中进行配置:
server:
port: 8905
spring:
application:
name: config-security-server
cloud:
config:
server:
git:
uri: https://gitee.com/JourWon/springcloud-config.git
username: JourWon
password: 123456
clone-on-start: true
security:
user:
配置用户名和密码
name: root
password: 123456
启动config-security-server服务。
修改config-client的配置
添加bootstrap-security.yml配置文件,主要是配置了配置中心的用户名和密码:
server:
port: 9002
spring:
application:
name: config-client
cloud:
config客户端配置
config:
分支名称
label: master
启用配置后缀名称
profile: dev
配置文件名称
name: config
配置中心地址
uri: http://localhost:8905
username: root
password: 123456
eureka:
client:
register-with-eureka: true
fetch-registry: true
service-url:
defaultZone: http://localhost:8001/eureka/
使用bootstrap-security.yml启动config-client服务;
访问http://localhost:9002/configInfo进行测试,发现可以获取到配置信息。
config info for dev(master)
在微服务架构中,所有服务都从配置中心获取配置,配置中心一旦宕机,会发生很严重的问题,下面我们搭建一个双节点的配置中心集群来解决该问题。


 580
580


 被折叠的 条评论
为什么被折叠?
被折叠的 条评论
为什么被折叠?
 到【灌水乐园】发言


