


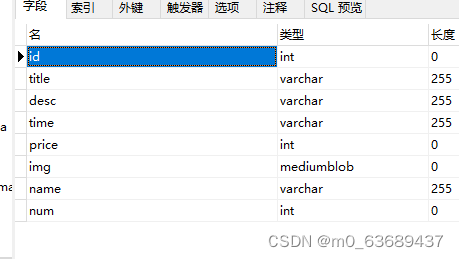
前期准备
确定好MySQL图片类型的定义,图片要选择mediumblob
之后前端上传图片到后端过去
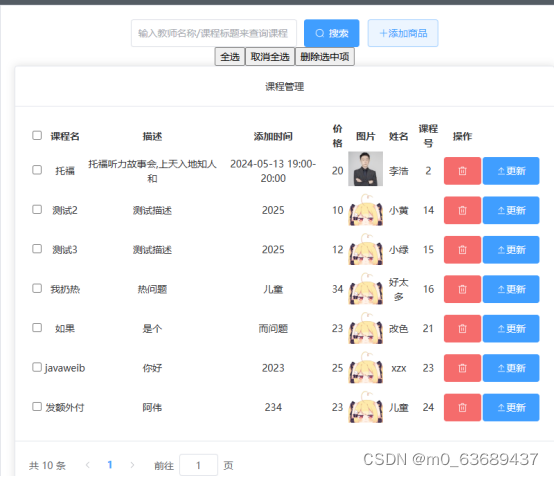

前端页面设计可以参考Overview 组件总览 | Element Plus (element-plus.org)
前端
上传图片
<!-- 上传图片 on-change是用来监视是否有上传文件 有变化就调用相关的方法 -->
                <el-upload limit=1 action="#" :on-change="handleFileChange" list-type="picture-card" :auto-upload="false">

                  <el-icon><Plus /></el-icon>

                  <template #file="{ file }">
                    <div>
                      <img class="el-upload-list__item-thumbnail" :src="file.url" alt="" />
                      <!-- <span class="el-upload-list__item-actions">
                        <span
                        class="el-upload-list__item-preview"
                        @click="handlePictureCardPreview(file)"
                      >
                        <el-icon><zoom-in /></el-icon>
                        </span>
                        <span
                        v-if="!disabled"
                        class="el-upload-list__item-delete"
                        @click="handleDownload(file)"
                      >
                          <el-icon><Download /></el-icon>
                        </span>
                        <span
                        v-if="!disabled"
                        class="el-upload-list__item-delete"
                        @click="handleRemove(file)"
                      >
                    <el-icon><Delete /></el-icon>
                        </span>
                      </span> -->
                    </div>
                  </template>
                </el-upload>
当上传图片过后调用的方法
//用于将图片格式转为base64格式编码,用于存储到数据库当中
const handleFileChange = (file) => {
      const reader = new FileReader();
      reader.readAsDataURL(file.raw);
      reader.onload = () => {
        // 只取Base64部分 在转的过程中会有MIME类型的格式一起存进来 会有违规字符 所以要去掉
        const base64Data = reader.result.split(',')[1];
        updateform.value.img = base64Data;
        form.value.img = base64Data;
      };
      console.log(updateform.value.img);
    };
之后是调用方法,这里将添加按钮绑定confirm方法
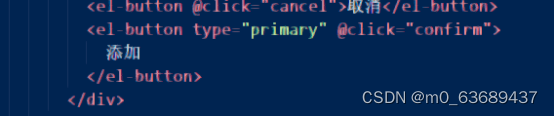
confirm方法
// 提交时增加课程
const confirm = async () => {
      try {
        console.log(form.value);
        //request封装起来了,这里就不提供代码了
        //它的作用就是前后端联调 可以使用axios接口的post方法 实现效果是一样的
        const addcourse = await request.post('/admin/addGood', form.value);
        console.log(addcourse.data);
        successMessage.value = '商品添加成功';
        ElMessage.success(successMessage.value);
        errorMessage.value = '';
        dialogFormVisible.value = false;//关闭对话款
        fetchCourses();//刷新课程列表
        // form.value = null;
      } catch (error) {
        errorMessage.value = error.response.data.message || '添加商品失败,请重试';
        ElMessage.error(errorMessage.value);
        successMessage.value = '';
      }
    };
定义form对象
const form = ref({
  title:'',
  desc:'',
  time:'',
  price:null,
  img:null,
  name:'',
})
后端实现过程
映射方法定义
//增加课程
@PostMapping("/addGood")//HTTP请求中的Post请求用于将数据提交到指定资源进行处理。
public Result addGood(@RequestBody Good good){
    List<Good> existingGood = adminMapper.selectGood(good.getName(),good.getTitle()); //查询新加课程是否已经存在
    int size = existingGood.size();//数组的大小
    if (size != 0){
        //  size为0则存在相同课程,返回课程已存在
        System.out.println(2);
        return Result.error("课程已存在");
    }else{  //不存在就添加入数据库
        System.out.println(1);
        int newgood = adminMapper.addGood(good);
        return Result.success(newgood);
    }
}
在前端你使用的是post方法,“const addcourse = await request.post('/admin/addGood', form.value);” 那么后端需要使用关联的映射PostMapping
SQL语句实现增加课程功能
//增加课程
@Insert("insert into `home_good`(title,`desc`,time,price,img,name,num) " +
        "values (#{title},#{desc},#{time},#{price},#{img},#{name},#{num})")
int addGood(Good good);
你的点赞加关注是我更新的动力哦(⊙o⊙)


 2938
2938


 被折叠的 条评论
为什么被折叠?
被折叠的 条评论
为什么被折叠?
 到【灌水乐园】发言


