


在Spring Boot中,事件监听是一种机制,通过该机制,你可以定义和触发自定义的事件,以及在应用程序中注册监听器来响应这些事件,提供了一种解耦的方式来处理应用程序中的事件。
文末有源码gitee地址!拉取可进行测试。
事件监听的主要组件包括:
-
事件(Event):
- 事件是一个普通的Java对象,用于封装与应用程序中发生的某个动作或状态变化相关的信息。
-
事件发布器(Event Publisher):
- 事件发布器是一个负责将事件发布给注册的监听器的组件。在Spring中,
ApplicationEventPublisher接口定义了事件发布器的标准。
- 事件发布器是一个负责将事件发布给注册的监听器的组件。在Spring中,
-
事件监听器(Event Listener):
- 事件监听器是用于监听和响应特定事件的组件。在Spring中,通过
ApplicationListener接口或使用@EventListener注解来定义事件监听器。
- 事件监听器是用于监听和响应特定事件的组件。在Spring中,通过
在Spring Boot中实现事件监听的步骤如下:
-
定义事件类:
- 创建一个普通的Java类,用于表示特定的事件。该类通常继承自
ApplicationEvent或其子类。
- 创建一个普通的Java类,用于表示特定的事件。该类通常继承自
-
定义事件发布器(可选):
- 可以在需要的地方注入
ApplicationEventPublisher并使用它来发布事件,或者直接通过Spring容器(ApplicationContext)发布事件。
- 可以在需要的地方注入
-
定义事件监听器:
- 创建一个实现
ApplicationListener接口或使用@EventListener注解的类,用于监听特定的事件,并在事件发生时执行相应的逻辑。
- 创建一个实现
-
注册监听器:
- 将事件监听器注册到Spring容器中,可以通过注解、Java配置或XML配置来完成。
以下是一个简单的示例,演示了如何在Spring Boot中实现事件监听(主要代码展示):
代码层级结构:
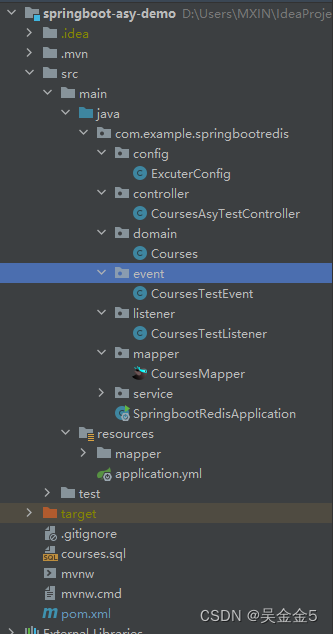
1.自定义事件类 CoursesTestEvent继承ApplicationEvent:
package com.example.springbootredis.event;

import lombok.Getter;
import lombok.Setter;
import org.springframework.context.ApplicationEvent;

/**
 * 课程事件类,继承自 ApplicationEvent,表示课程相关的事件。
 */
@Setter
@Getter
public class CoursesTestEvent extends ApplicationEvent {

    private Integer id;
    /**
     * 课程标题
     */
    private String title;
    /**
     * 课程封面
     */
    private String thumb;
    /**
     * 课程价格(分)
     */
    private Integer charge;
    /**
     * 随便传递几个参数
     * */
    public CoursesTestEvent(Object source, String title, String thumb) {
        super(source);
        this.title = title;
        this.thumb = thumb;
    }

}
2.创建一个事件监听器类 CoursesTestListener:
package com.example.springbootredis.listener;

import com.example.springbootredis.event.CoursesTestEvent;
import com.example.springbootredis.service.CoursesService;
import lombok.extern.slf4j.Slf4j;
import org.springframework.beans.factory.annotation.Autowired;
import org.springframework.context.event.EventListener;
import org.springframework.scheduling.annotation.Async;
import org.springframework.stereotype.Component;

/**
 * 用于测试监听事务,异步执行方法
 * 课程事件监听器类,用于异步更新课程信息。
 */
@Component
@Slf4j
public class CoursesTestListener {

    //根据实际的需求进行注入
    @Autowired
    private CoursesService coursesService;

    /**
     * 异步事件监听方法,用于监听CoursesTestEvent进行更新课程相关信息。
     * @param event 触发的课程的事件。
     */
//    @Async("myTaskExecutor") // 异步执行的注解,线程池
//    @Async() // 异步执行的注解
    @EventListener  // 事件监听器的注解
    public void updateLoginInfo(CoursesTestEvent event)  {
        //检查是否能够获取到CoursesTestEvent
        System.out.println("title:"+event.getTitle());
        System.out.println("thumb:"+event.getThumb());
        System.out.println(3);
        // 打印当前线程的信息
        System.out.println("执行当前线程的名称3: " + Thread.currentThread().getName());
    }
}
3.在业务逻辑中进行测试事件监听:
package com.example.springbootredis.service.impl;
import com.example.springbootredis.domain.Courses;
import com.example.springbootredis.event.CoursesTestEvent;
import com.example.springbootredis.mapper.CoursesMapper;
import com.example.springbootredis.service.CoursesService;
import lombok.extern.slf4j.Slf4j;
import org.springframework.beans.factory.annotation.Autowired;
import org.springframework.context.ApplicationContext;
import org.springframework.stereotype.Service;
import java.util.List;
@Service
@Slf4j
public class CoursesServiceImpl implements CoursesService {
@Autowired
private CoursesMapper coursesMapper;
//用于管理和维护Bean以及处理Bean之间依赖关系的核心容器。
@Autowired
private ApplicationContext applicationContext;
//进行异步测试
@Override
public List<Courses> asyTest() {
List<Courses> courses = coursesMapper.findAll();
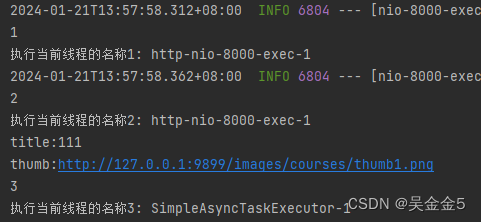
System.out.println(1);
// 打印当前线程的信息
System.out.println("执行当前线程的名称1: " + Thread.currentThread().getName());
// 发布自定义的课程测试事件
applicationContext.publishEvent(new CoursesTestEvent(this,courses.get(0).getTitle(),courses.get(0).getThumb()));
System.out.println(2);
System.out.println("执行当前线程的名称2: " + Thread.currentThread().getName());
return courses;
}
}
4.代码执行结果(没有使用异步):

测试达到了监听的效果了,但是都是同一个线程执行,按照顺序进行执行,没有达到异步的效果。为了增加响应的效率,对监听事件进行异步的执行。
Spring Boot的异步任务通常使用以下几个核心注解:
@EnableAsync:
在Spring Boot应用程序的配置类上添加@EnableAsync注解,以启用异步任务支持。这样Spring会为异步方法创建一个代理,允许它们在单独的线程中执行。
package com.example.springbootredis;


import org.mybatis.spring.annotation.MapperScan;
import org.springframework.boot.SpringApplication;
import org.springframework.boot.autoconfigure.SpringBootApplication;
import org.springframework.scheduling.annotation.EnableAsync;

@SpringBootApplication
@MapperScan("com.example.springbootredis.mapper")
@EnableAsync //开启异步任务支持(主要)
public class SpringbootRedisApplication {

    public static void main(String[] args) {
        SpringApplication.run(SpringbootRedisApplication.class, args);
    }

}
@Async:
在需要异步执行的方法上添加@Async注解。这告诉Spring框架将这个方法的调用包装在一个新的线程中执行。
package com.example.springbootredis.listener;

import com.example.springbootredis.event.CoursesTestEvent;
import com.example.springbootredis.service.CoursesService;
import lombok.extern.slf4j.Slf4j;
import org.springframework.beans.factory.annotation.Autowired;
import org.springframework.context.event.EventListener;
import org.springframework.scheduling.annotation.Async;
import org.springframework.stereotype.Component;

/**
 * 用于测试监听事务,异步执行方法
 * 课程事件监听器类,用于异步更新课程信息。
 */
@Component
@Slf4j
public class CoursesTestListener {

    //根据实际的需求进行注入
    @Autowired
    private CoursesService coursesService;

    /**
     * 异步事件监听方法,用于监听CoursesTestEvent进行更新课程相关信息。
     * @param event 触发的课程的事件。
     */
//    @Async("myTaskExecutor") // 异步执行的注解,线程池
    @Async() // 异步执行的注解
    @EventListener  // 事件监听器的注解
    public void updateLoginInfo(CoursesTestEvent event)  {
        //检查是否能够获取到CoursesTestEvent
        System.out.println("title:"+event.getTitle());
        System.out.println("thumb:"+event.getThumb());
        System.out.println(3);
        // 打印当前线程的信息
        System.out.println("执行当前线程的名称3: " + Thread.currentThread().getName());
    }
}
再进行测试(异步):
这样就达到异步的效果了,对监听事件进行异步执行。如果想直接进行测试,下面是gitee地址:创建一个数据库将courses.sql文件进行执行,启动即可测试:https://gitee.com/sophisticatedxin/springboot-asy-demo.git


 2587
2587

 被折叠的 条评论
为什么被折叠?
被折叠的 条评论
为什么被折叠?
 到【灌水乐园】发言


