


最近在写项目的时候,遇到了一个困难,不知道如何在自己的项目中集成高德地图,这里我将为你们一一讲述。
一、高德开放平台的使用
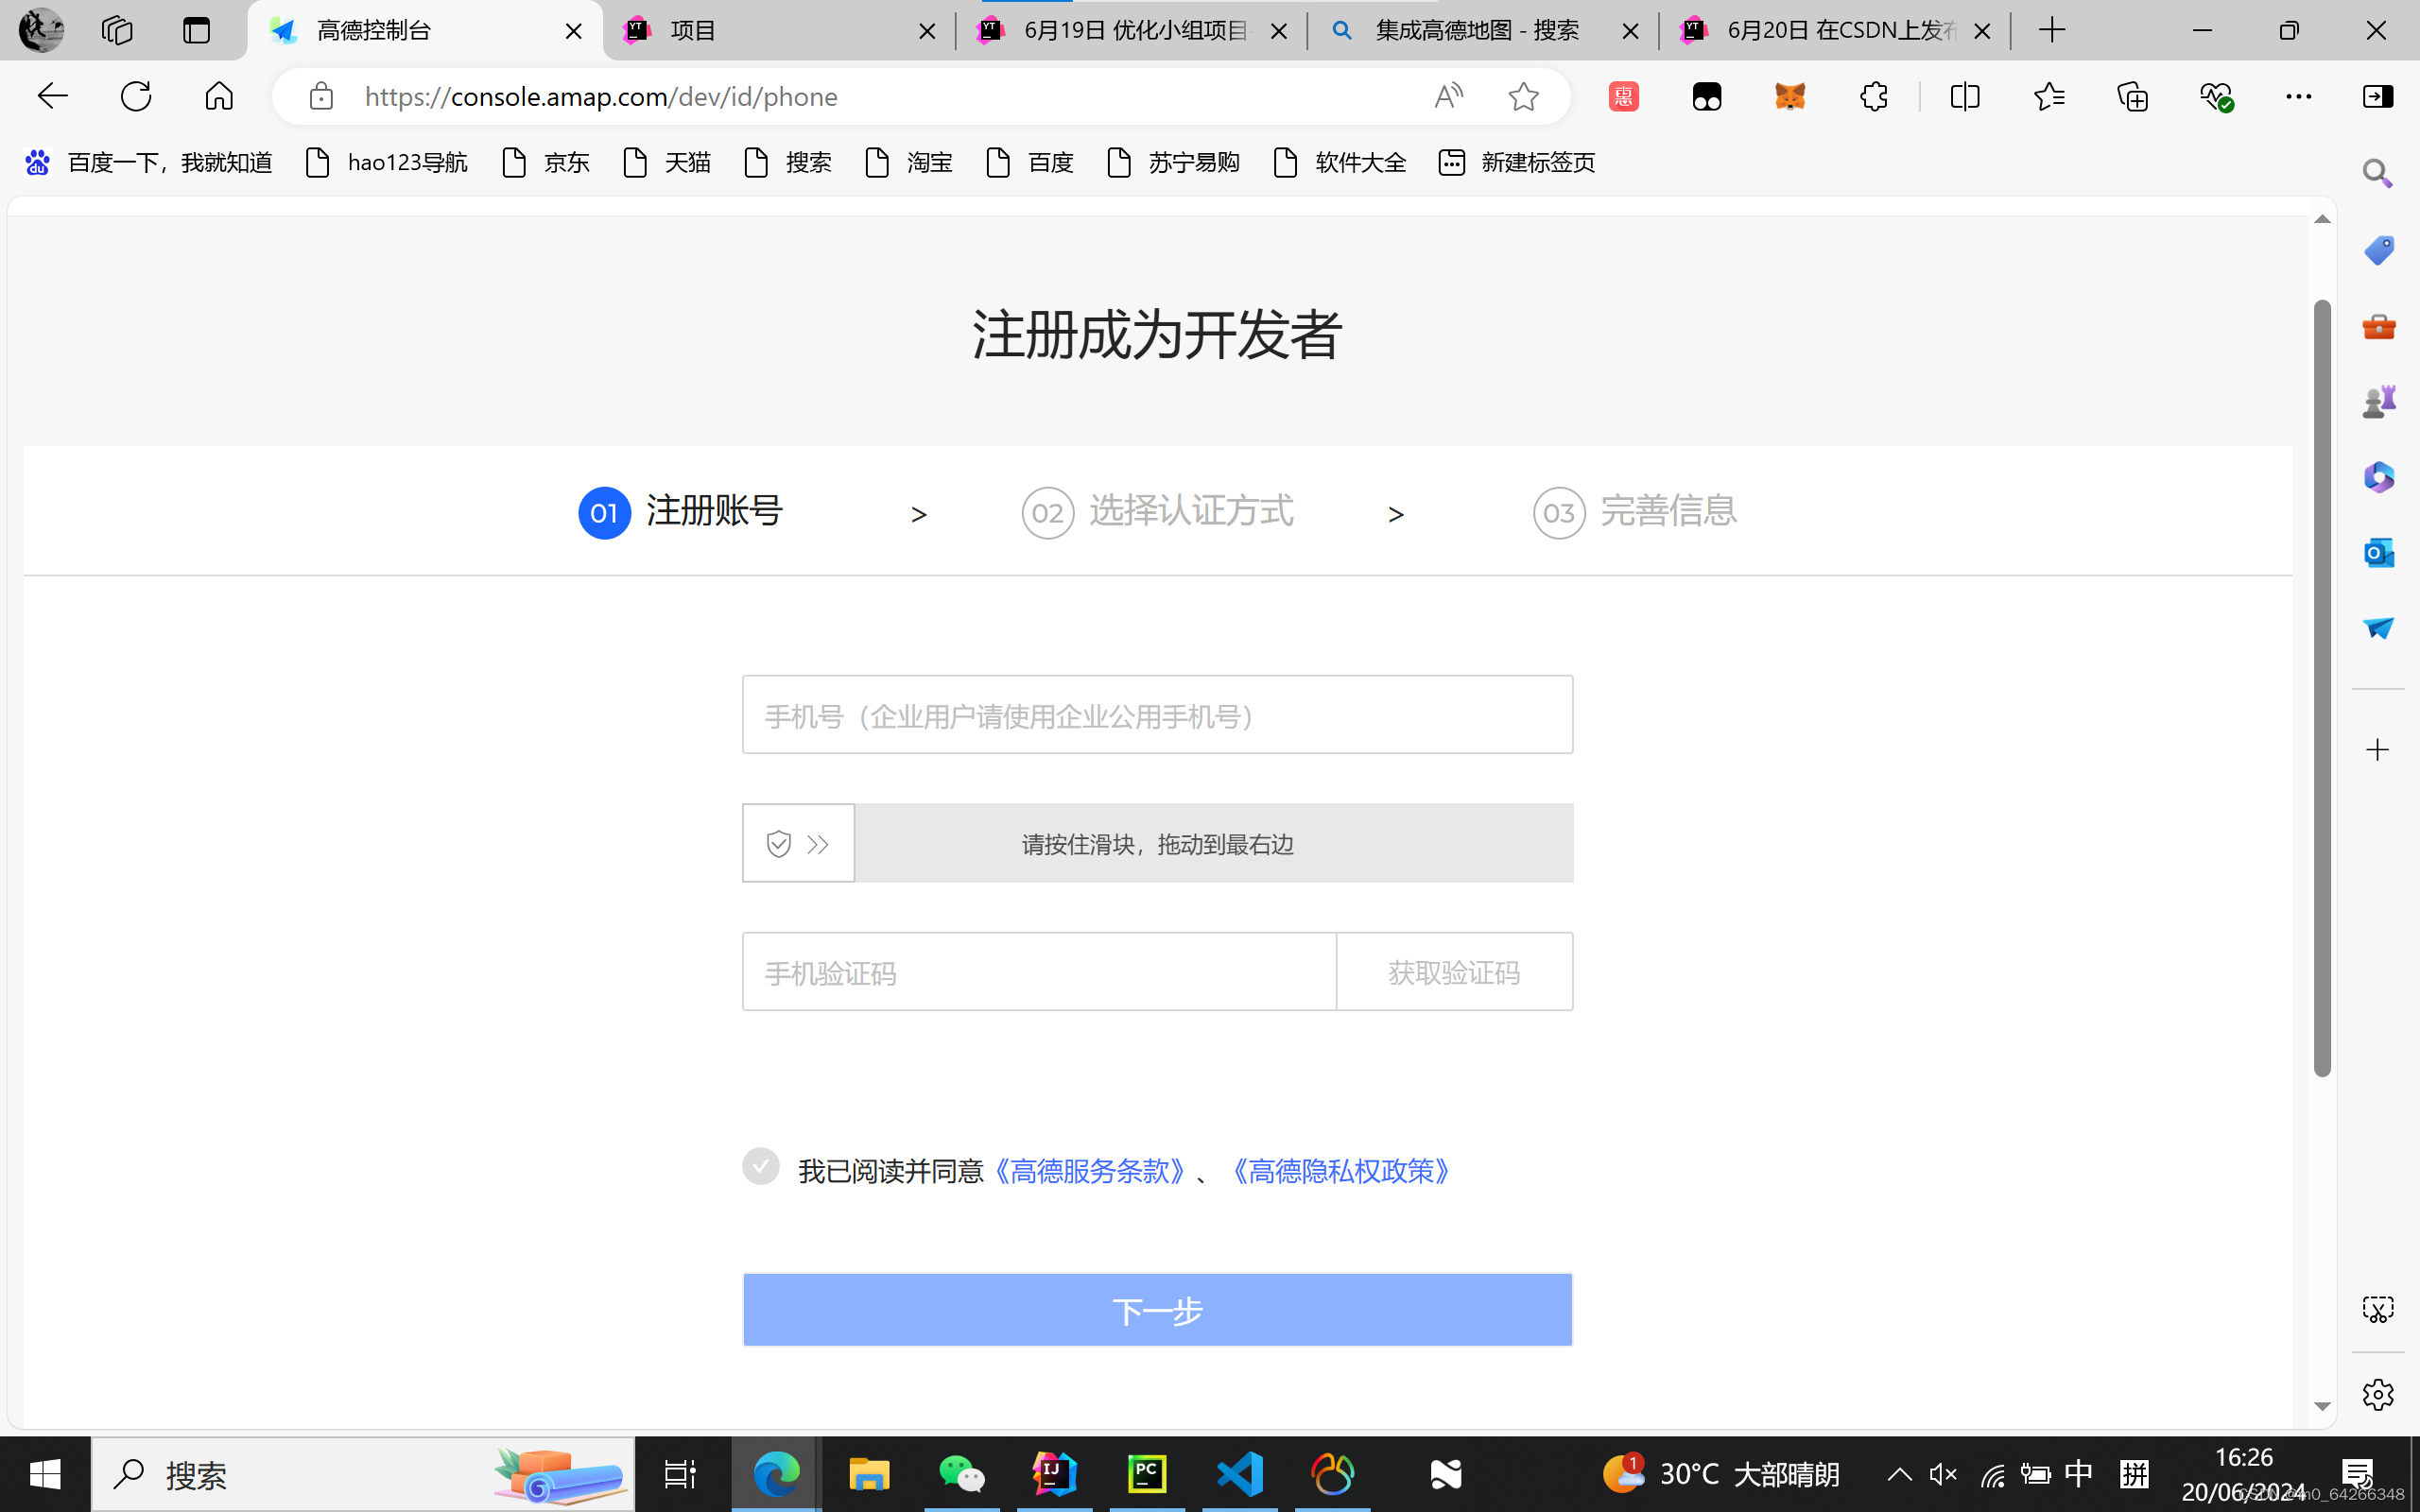
1.首先先登录,这种有很多登录方式,我选择的是支付宝扫码登录。
 2.扫完支付宝完善一下个人信息:
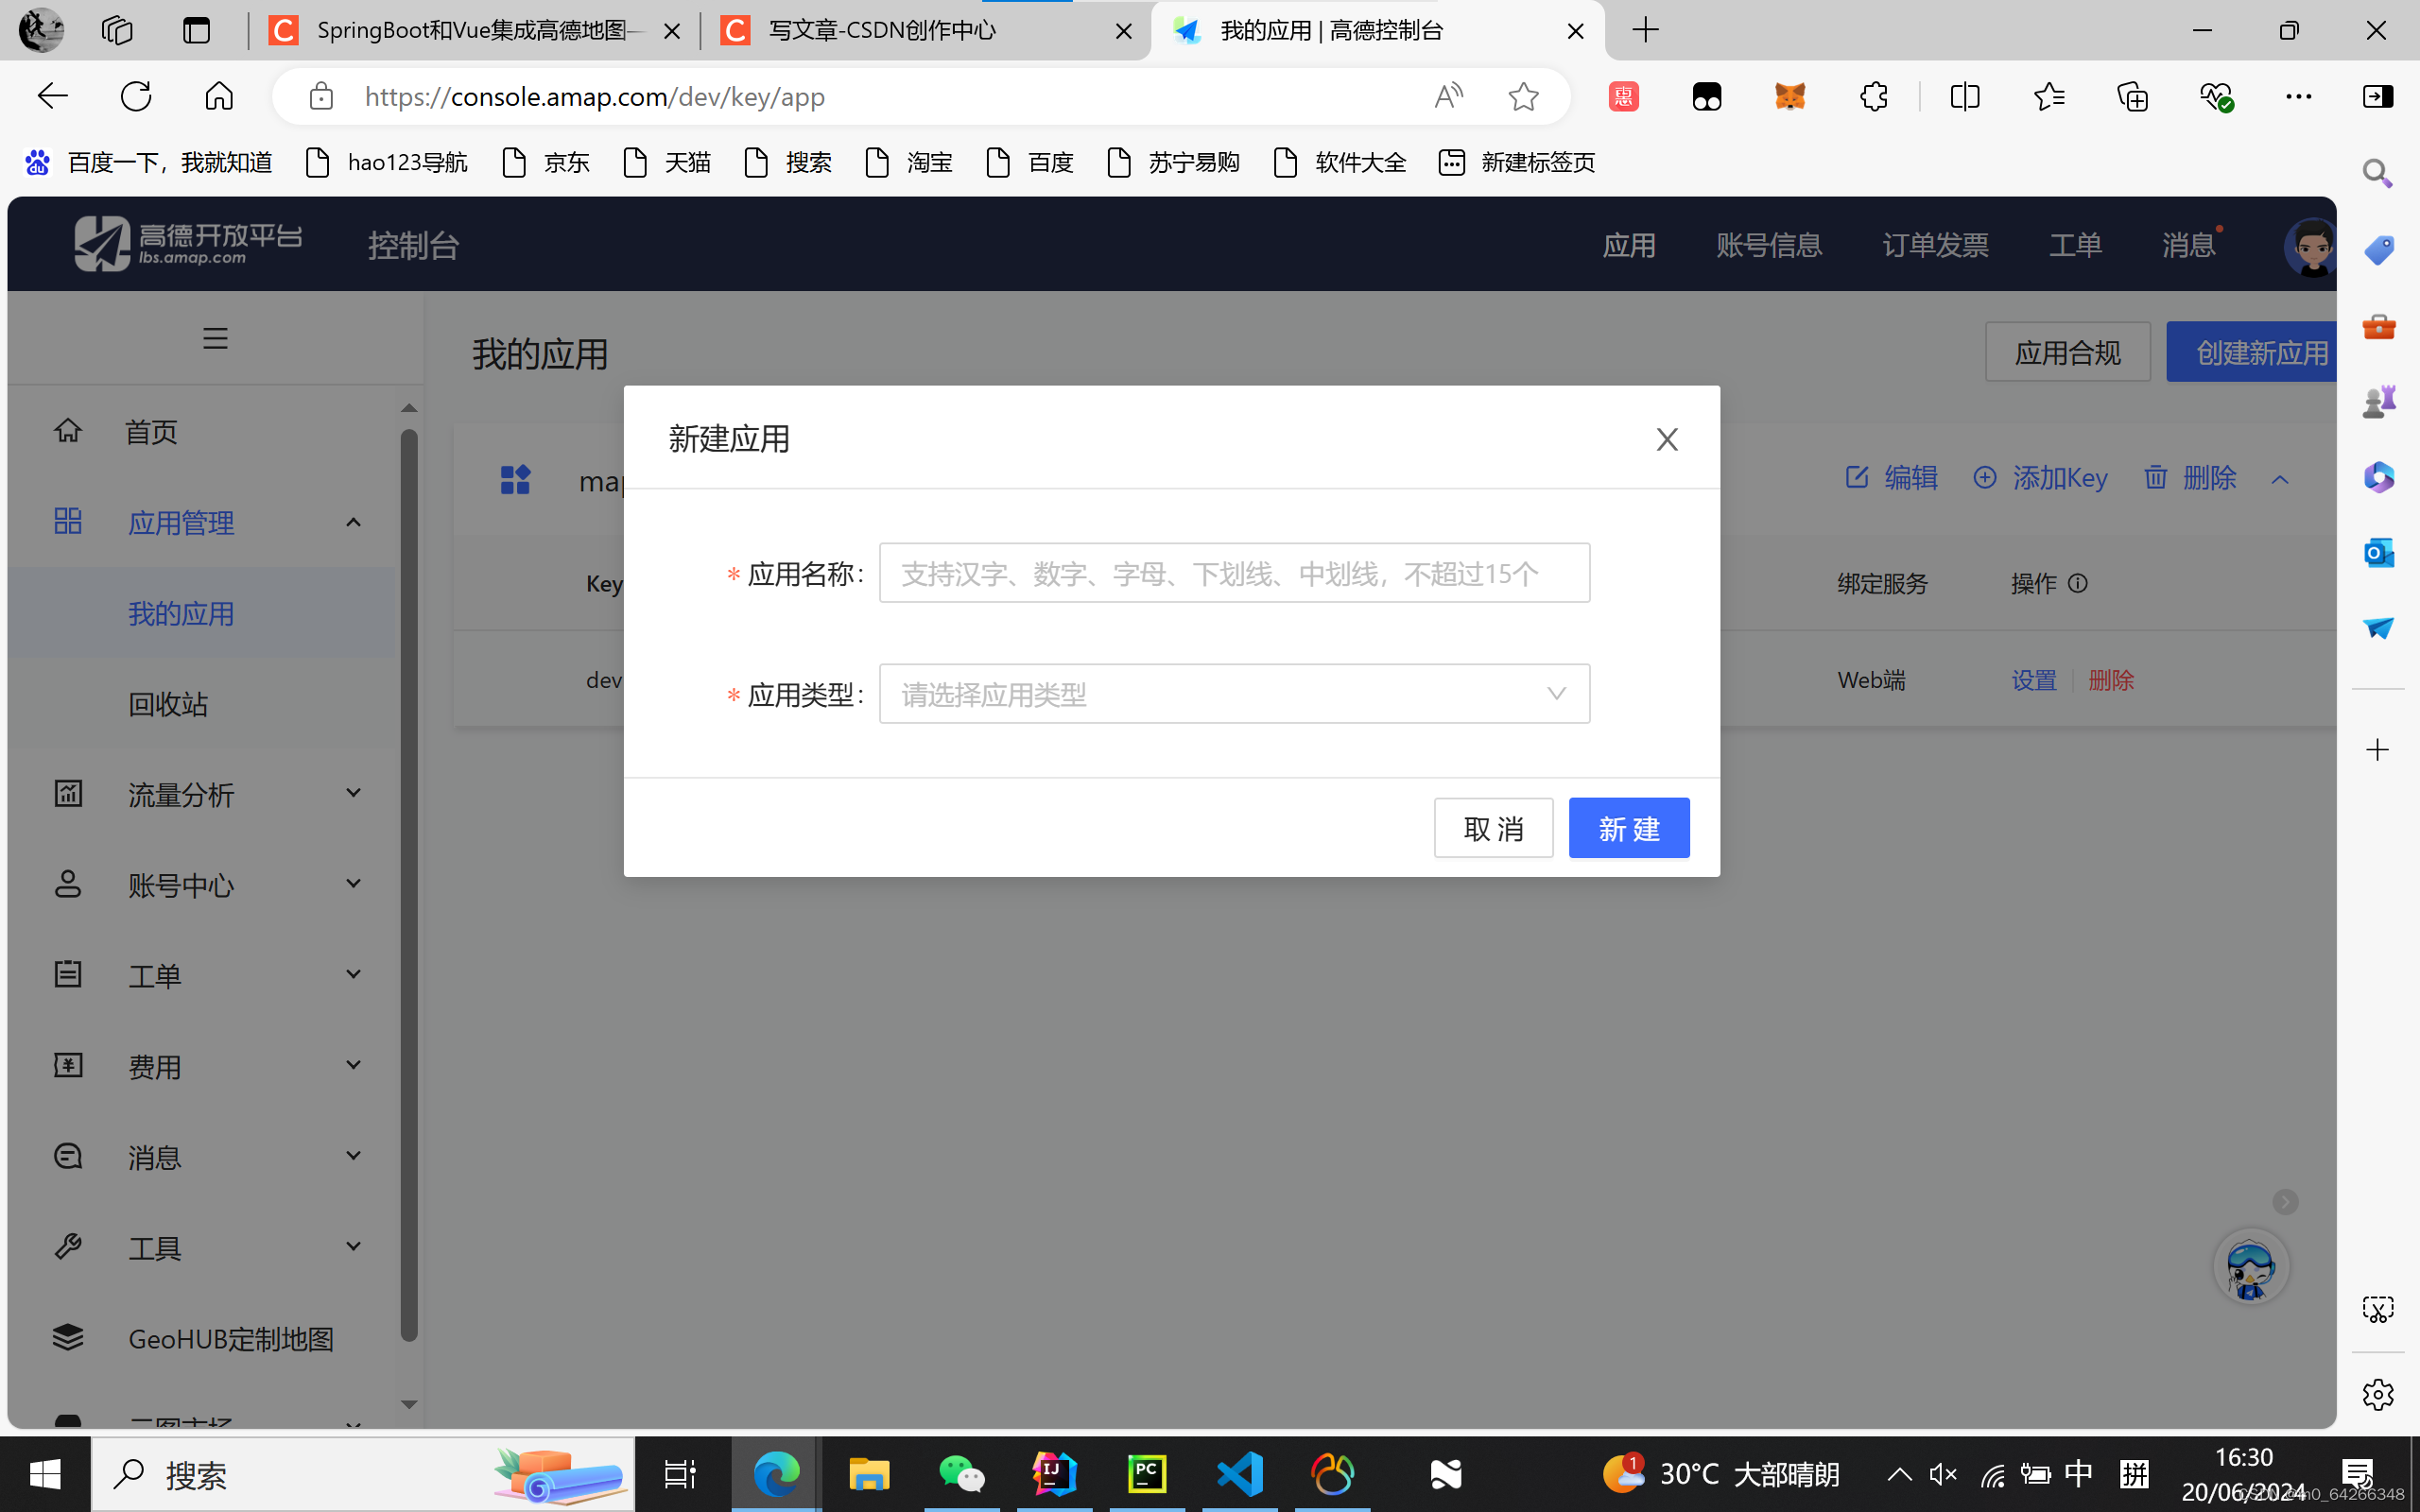
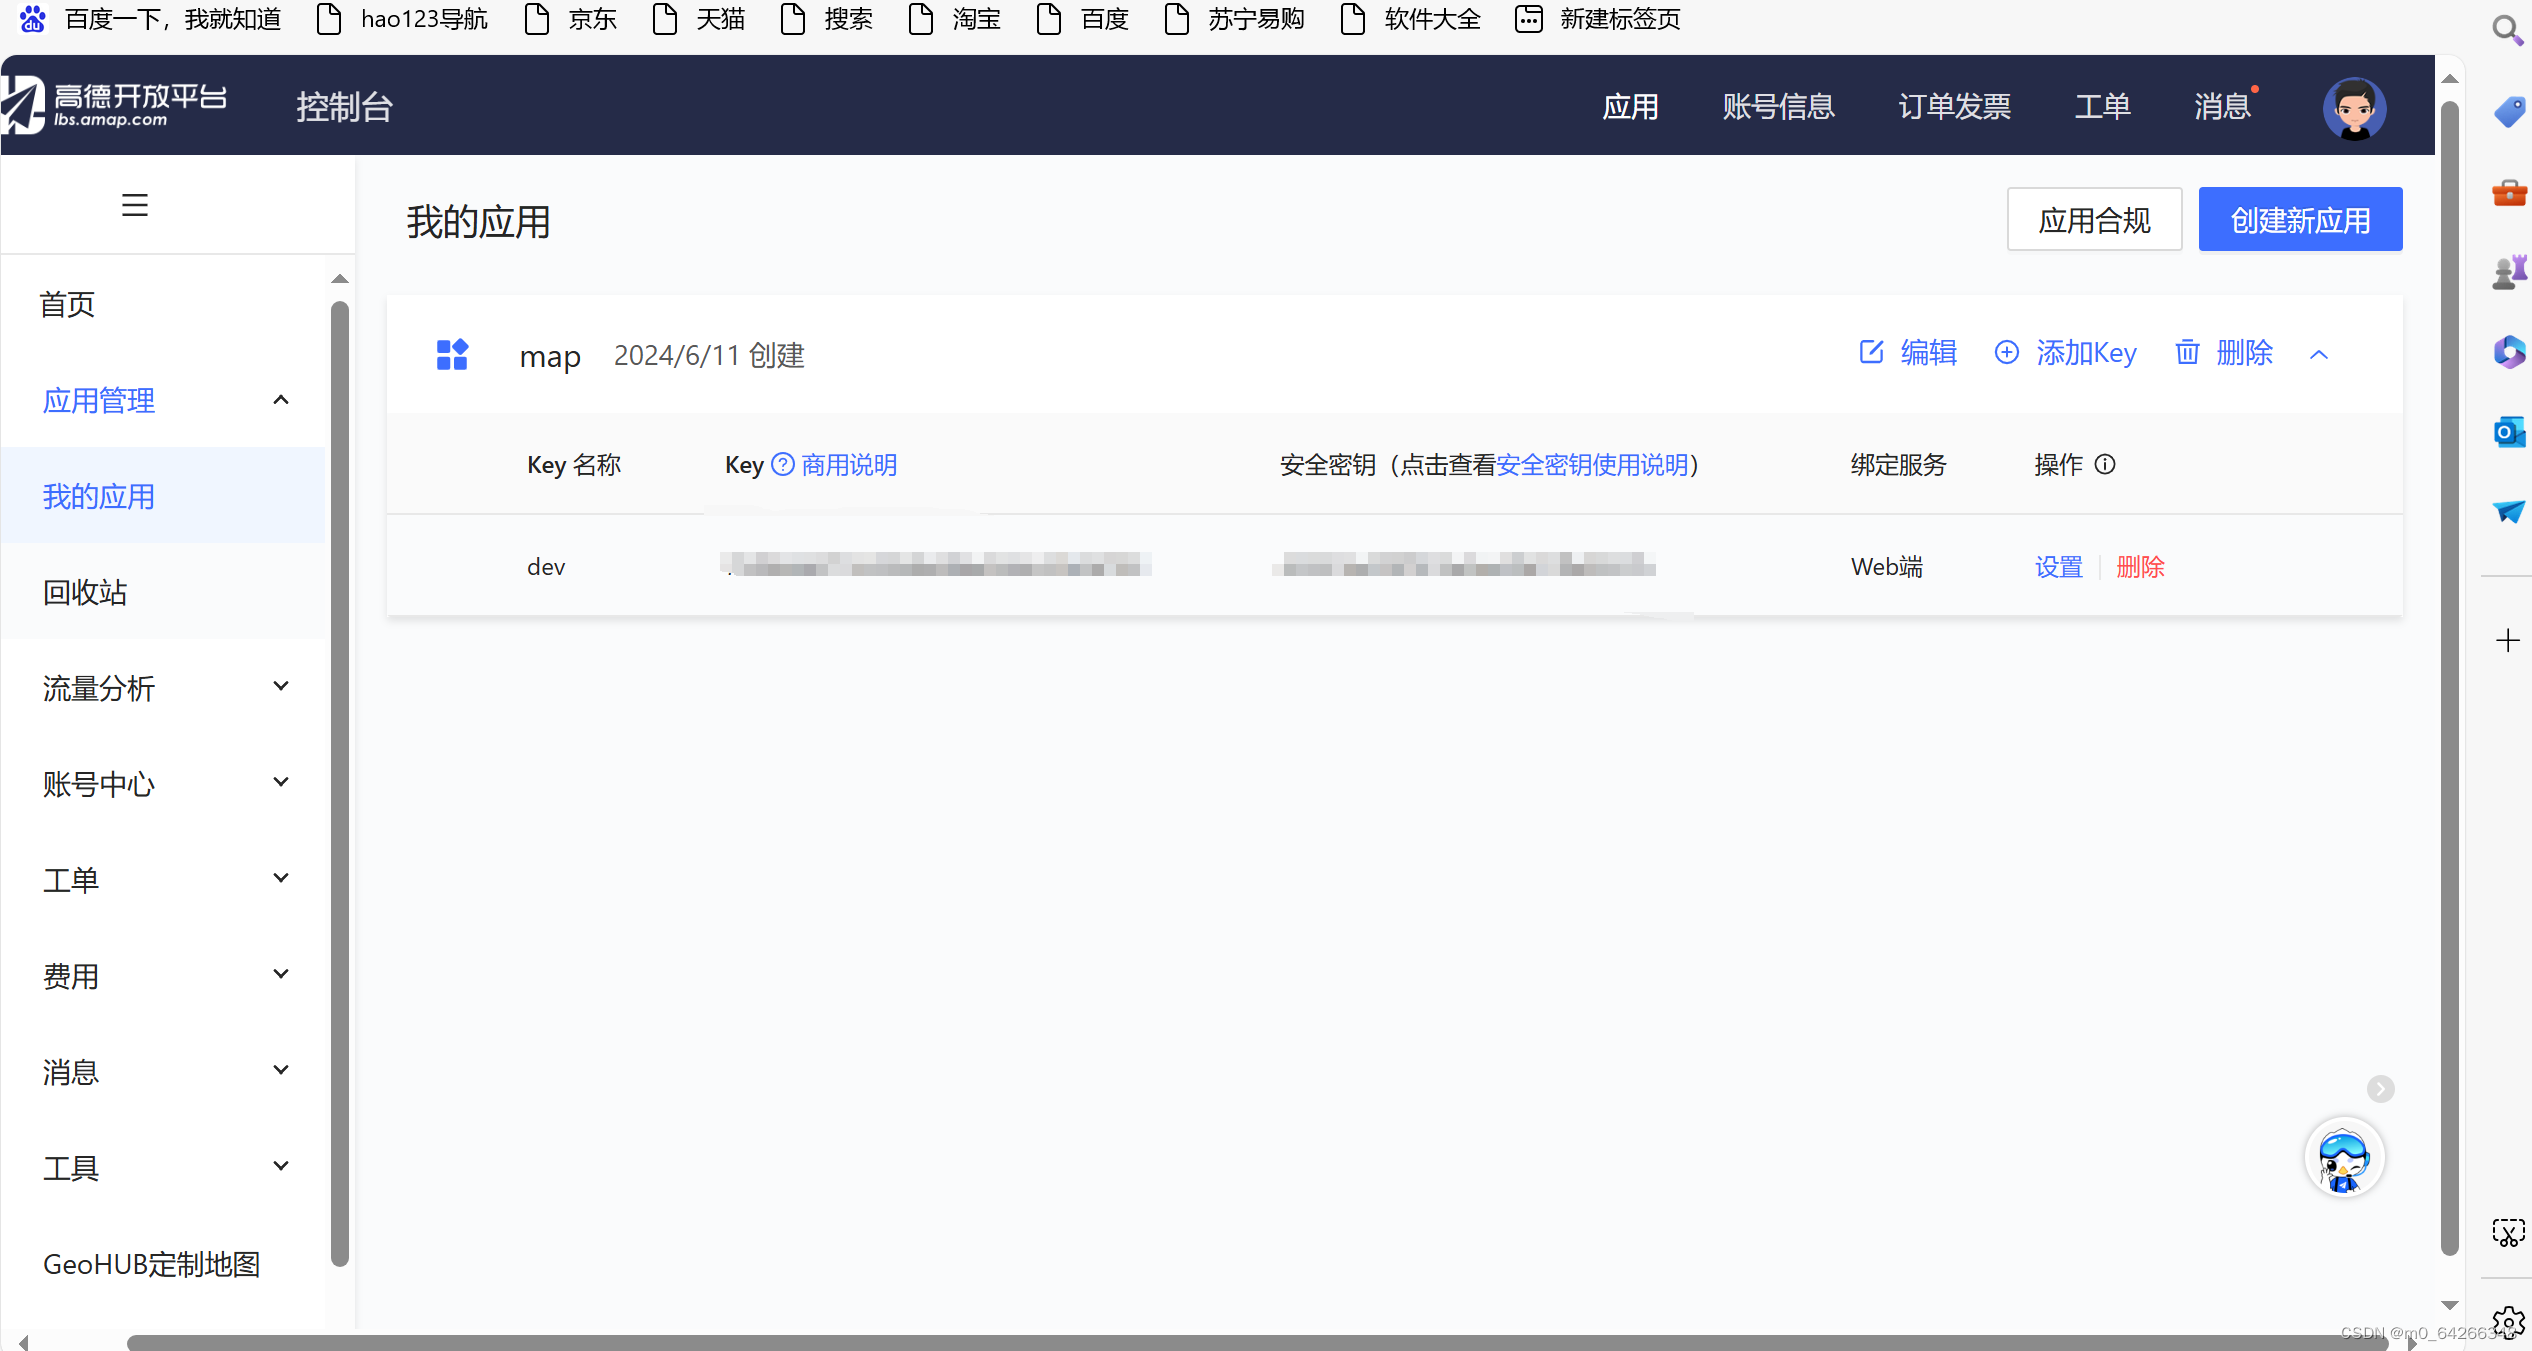
3.完善信息后,进入到控制台,新建应用、key名称
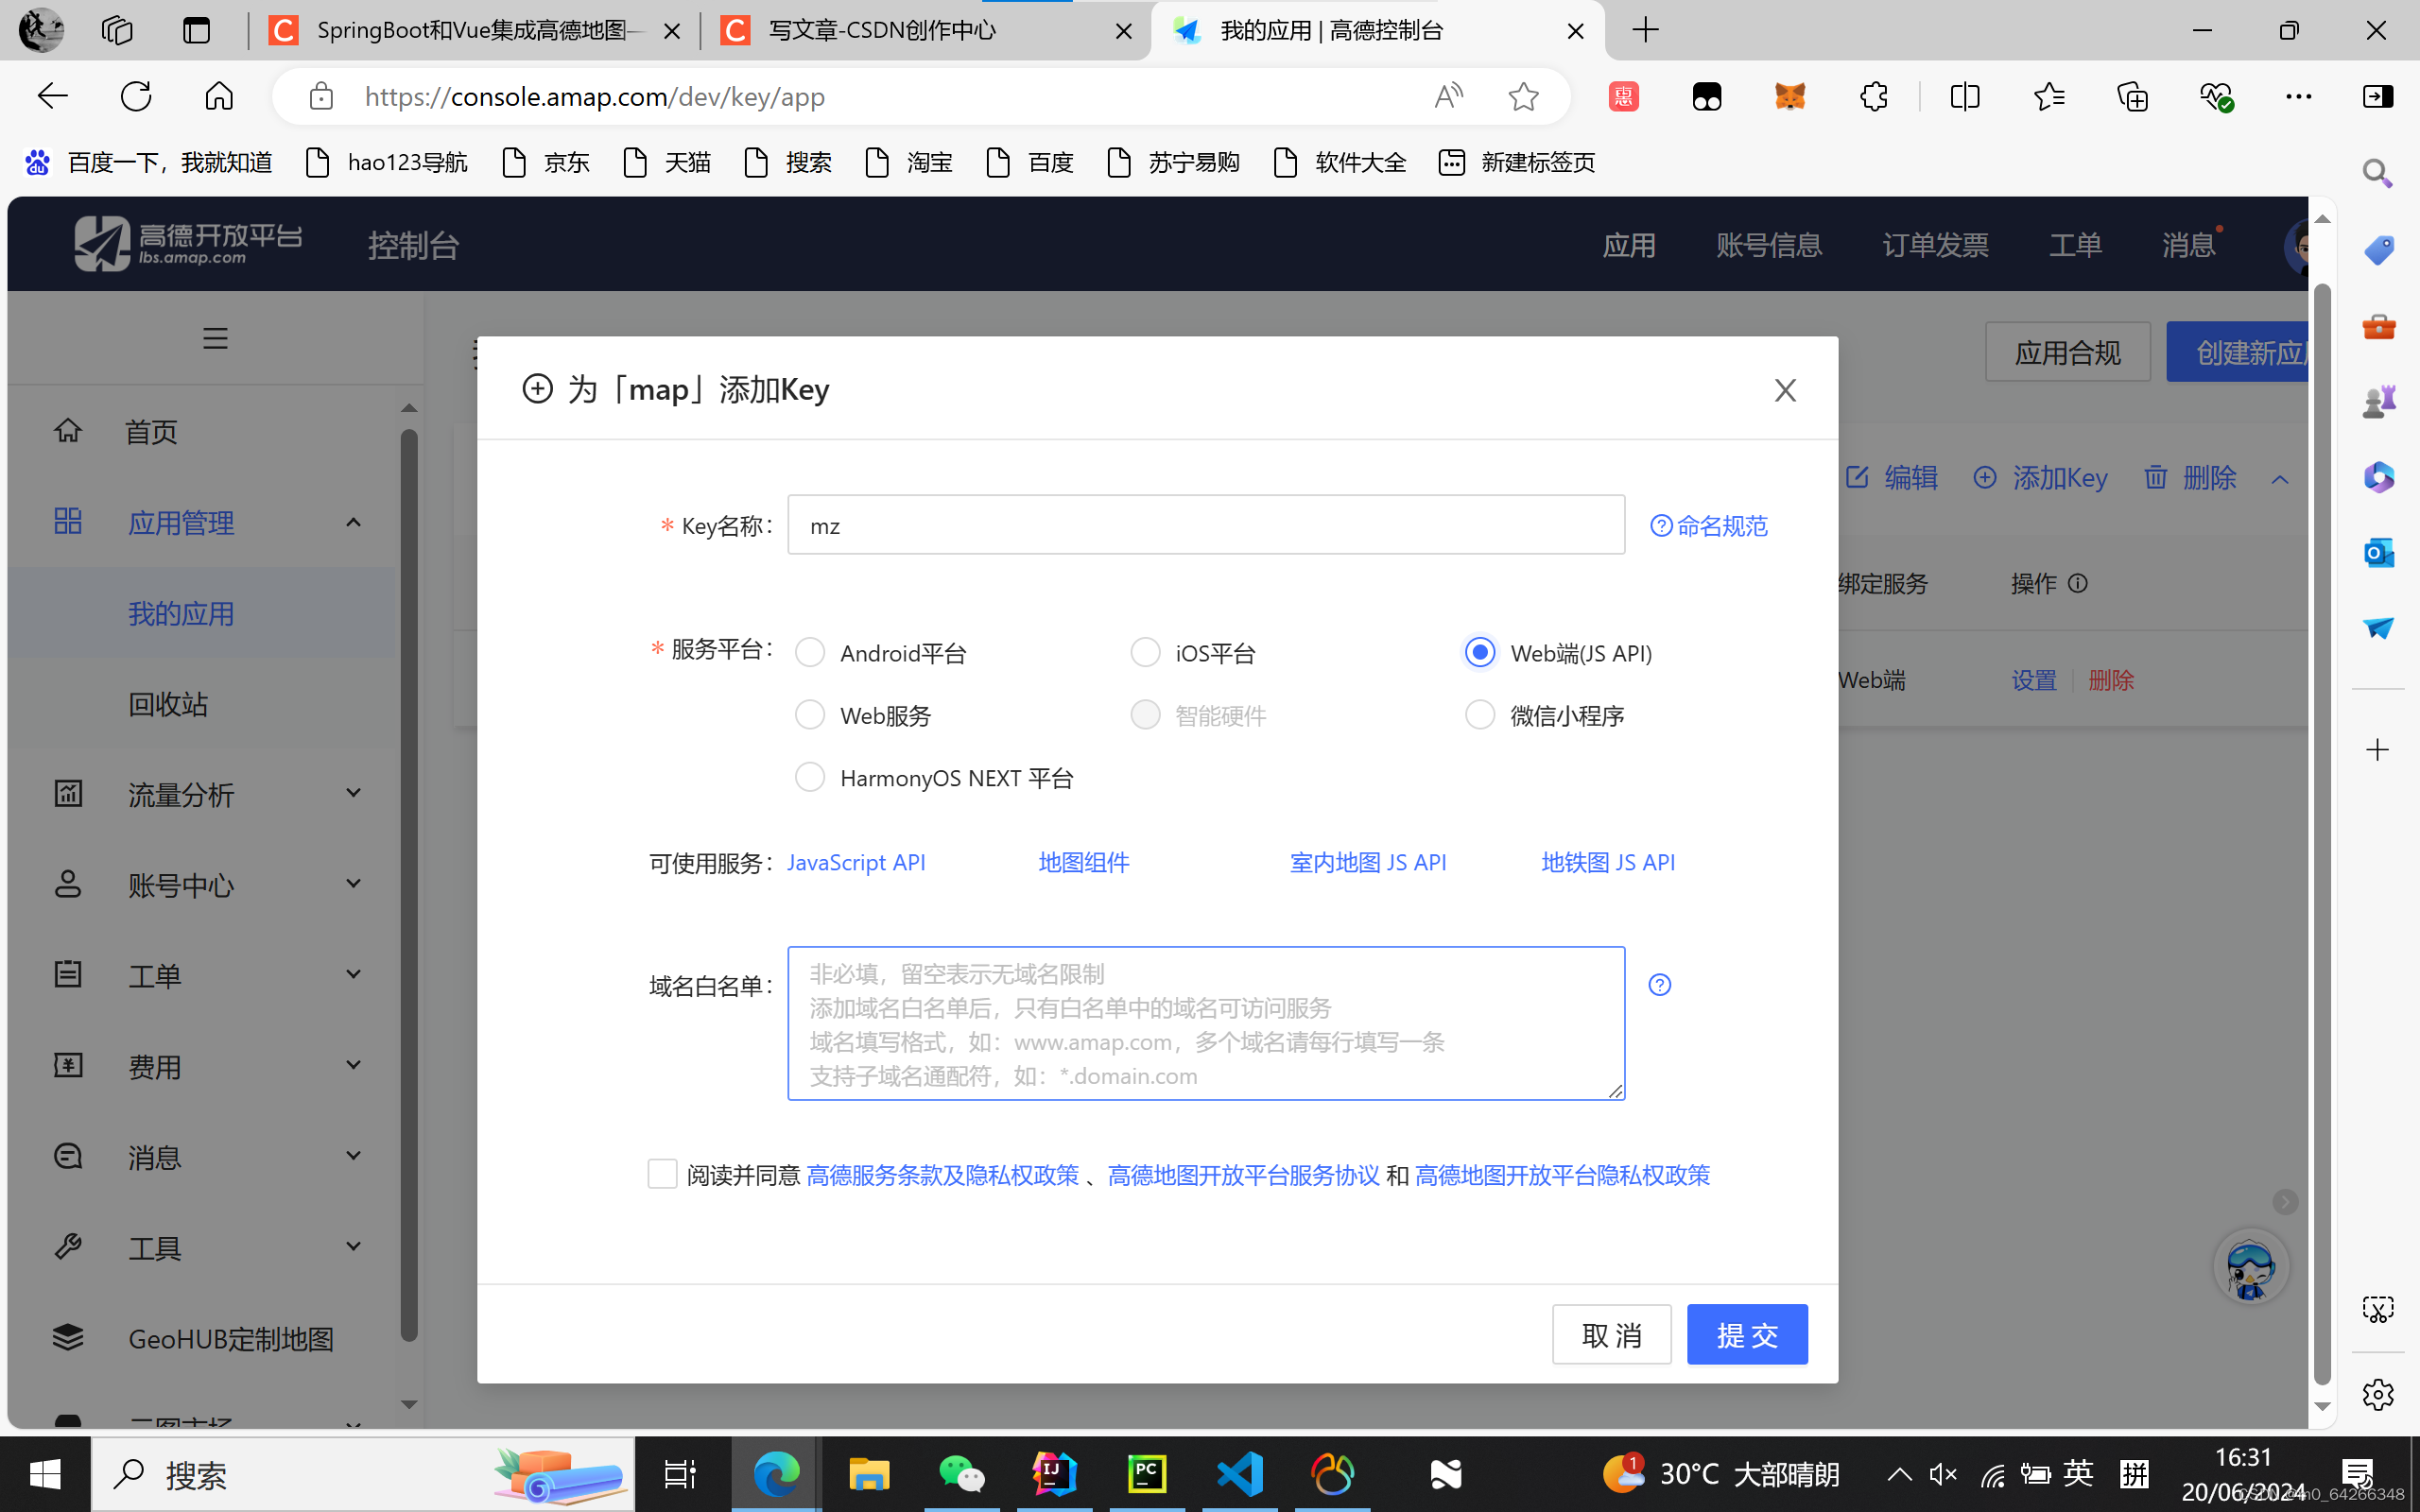
4.创建成功后会生成key和密钥
二、springboot写地图接口
以我最近在写的超市商品管理系统举个例子,在用户端用户如果想要购买商品,要填写收货地址时,这里就可以用到地图定位,这里我将给出后端的详细代码:
MapService接口
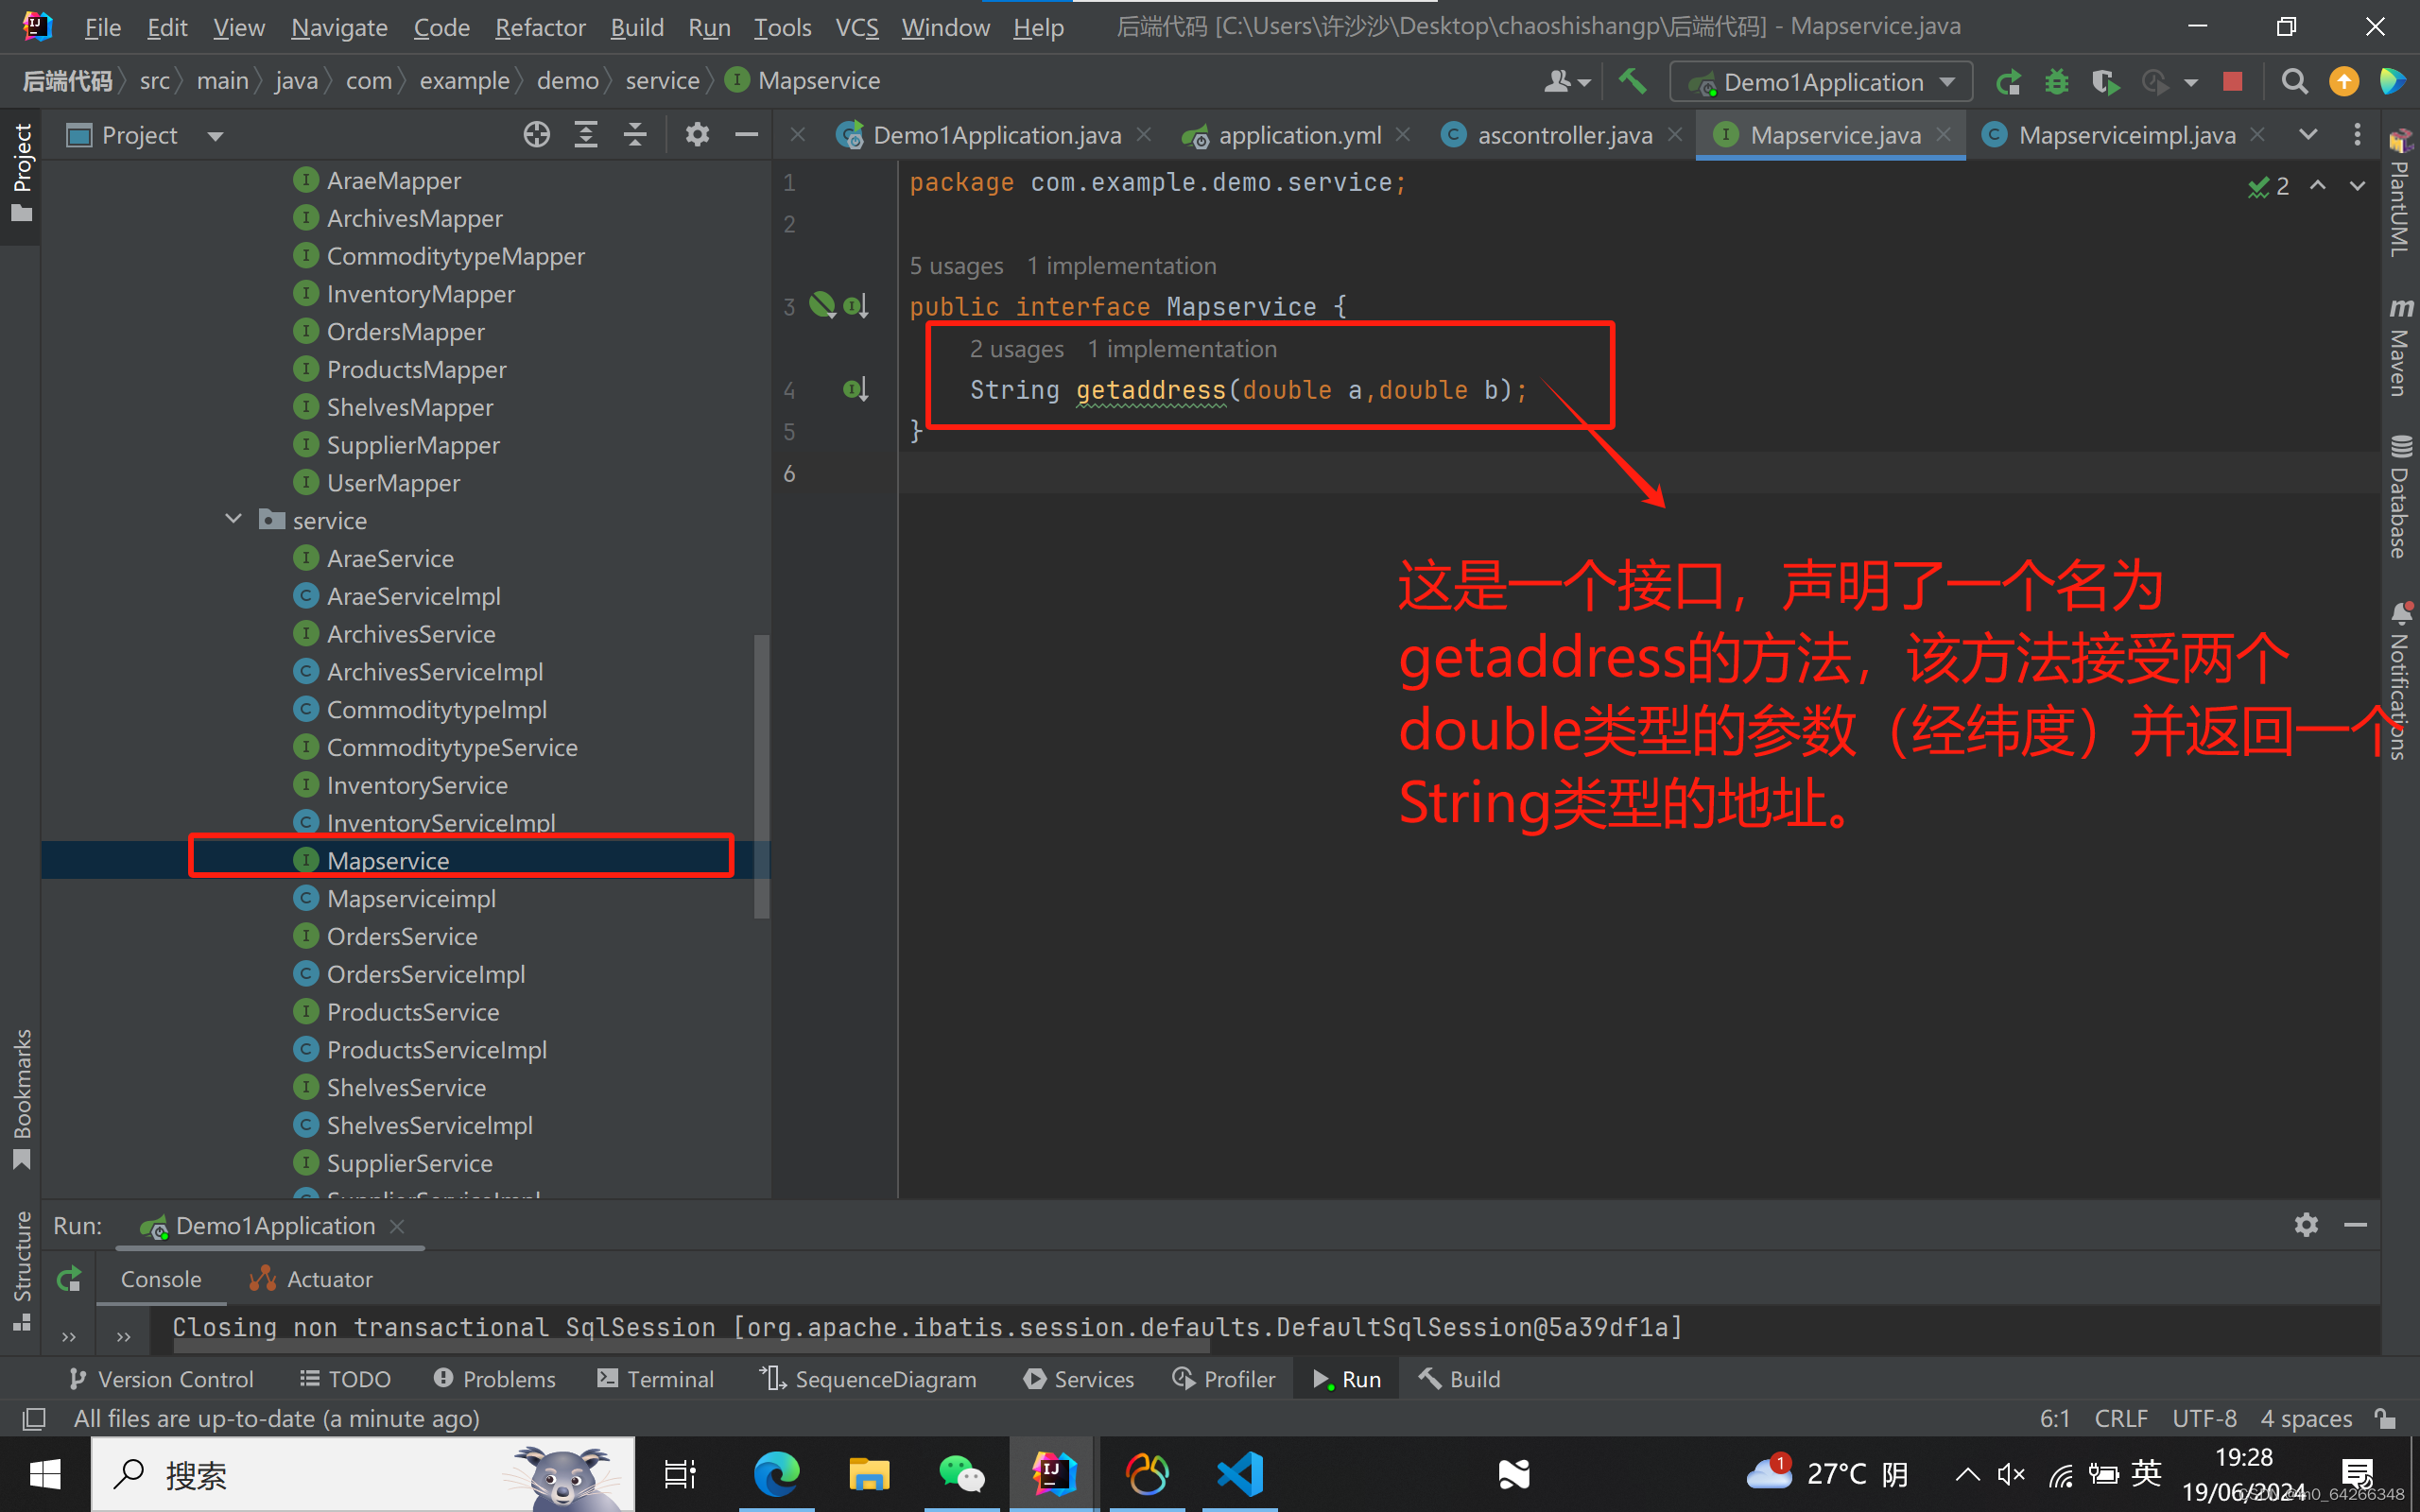
package com.example.demo.service;

public interface Mapservice {
    String getaddress(double a,double b);
}
Mapserviceimpl 类

 编辑
编辑
package com.example.demo.service;
import cn.hutool.json.JSONObject;
import org.springframework.stereotype.Service;

import java.io.BufferedReader;
import java.io.InputStreamReader;
import java.net.HttpURLConnection;
import java.net.URL;

@Service
public class Mapserviceimpl implements Mapservice {
        private static final String API_KEY = "34d78dea5ef31f53cf88ac0c17514c9f"; // 替换为你的高德API密钥
         @Override
         public String getaddress(double latitude, double longitude) {
             try { String urlString = "https://restapi.amap.com/v3/geocode/regeo?key=" + API_KEY + "&location=" + longitude + "," + latitude;
                 URL url = new URL(urlString);
                 HttpURLConnection connection = (HttpURLConnection) url.openConnection();
                 connection.setRequestMethod("GET");
                 connection.setRequestProperty("Content-Type", "application/json");
                 BufferedReader reader = new BufferedReader(new InputStreamReader(connection.getInputStream()));
                 StringBuilder response = new StringBuilder();
                 String line;
                 while ((line = reader.readLine()) != null) { response.append(line); }
                 reader.close();
//                 String result=response.toString();
//                 String address=result.
                // return result;
                 JSONObject jsonResponse = new JSONObject(response.toString());
                JSONObject regeocode = jsonResponse.getJSONObject("regeocode");
//                     System.out.println(regeocode);
                     return regeocode.getStr("formatted_address");
         //        } else { return "未找到地址信息"; }
             } catch (Exception e) { e.printStackTrace(); return "逆地理编码转化错误"; } } }
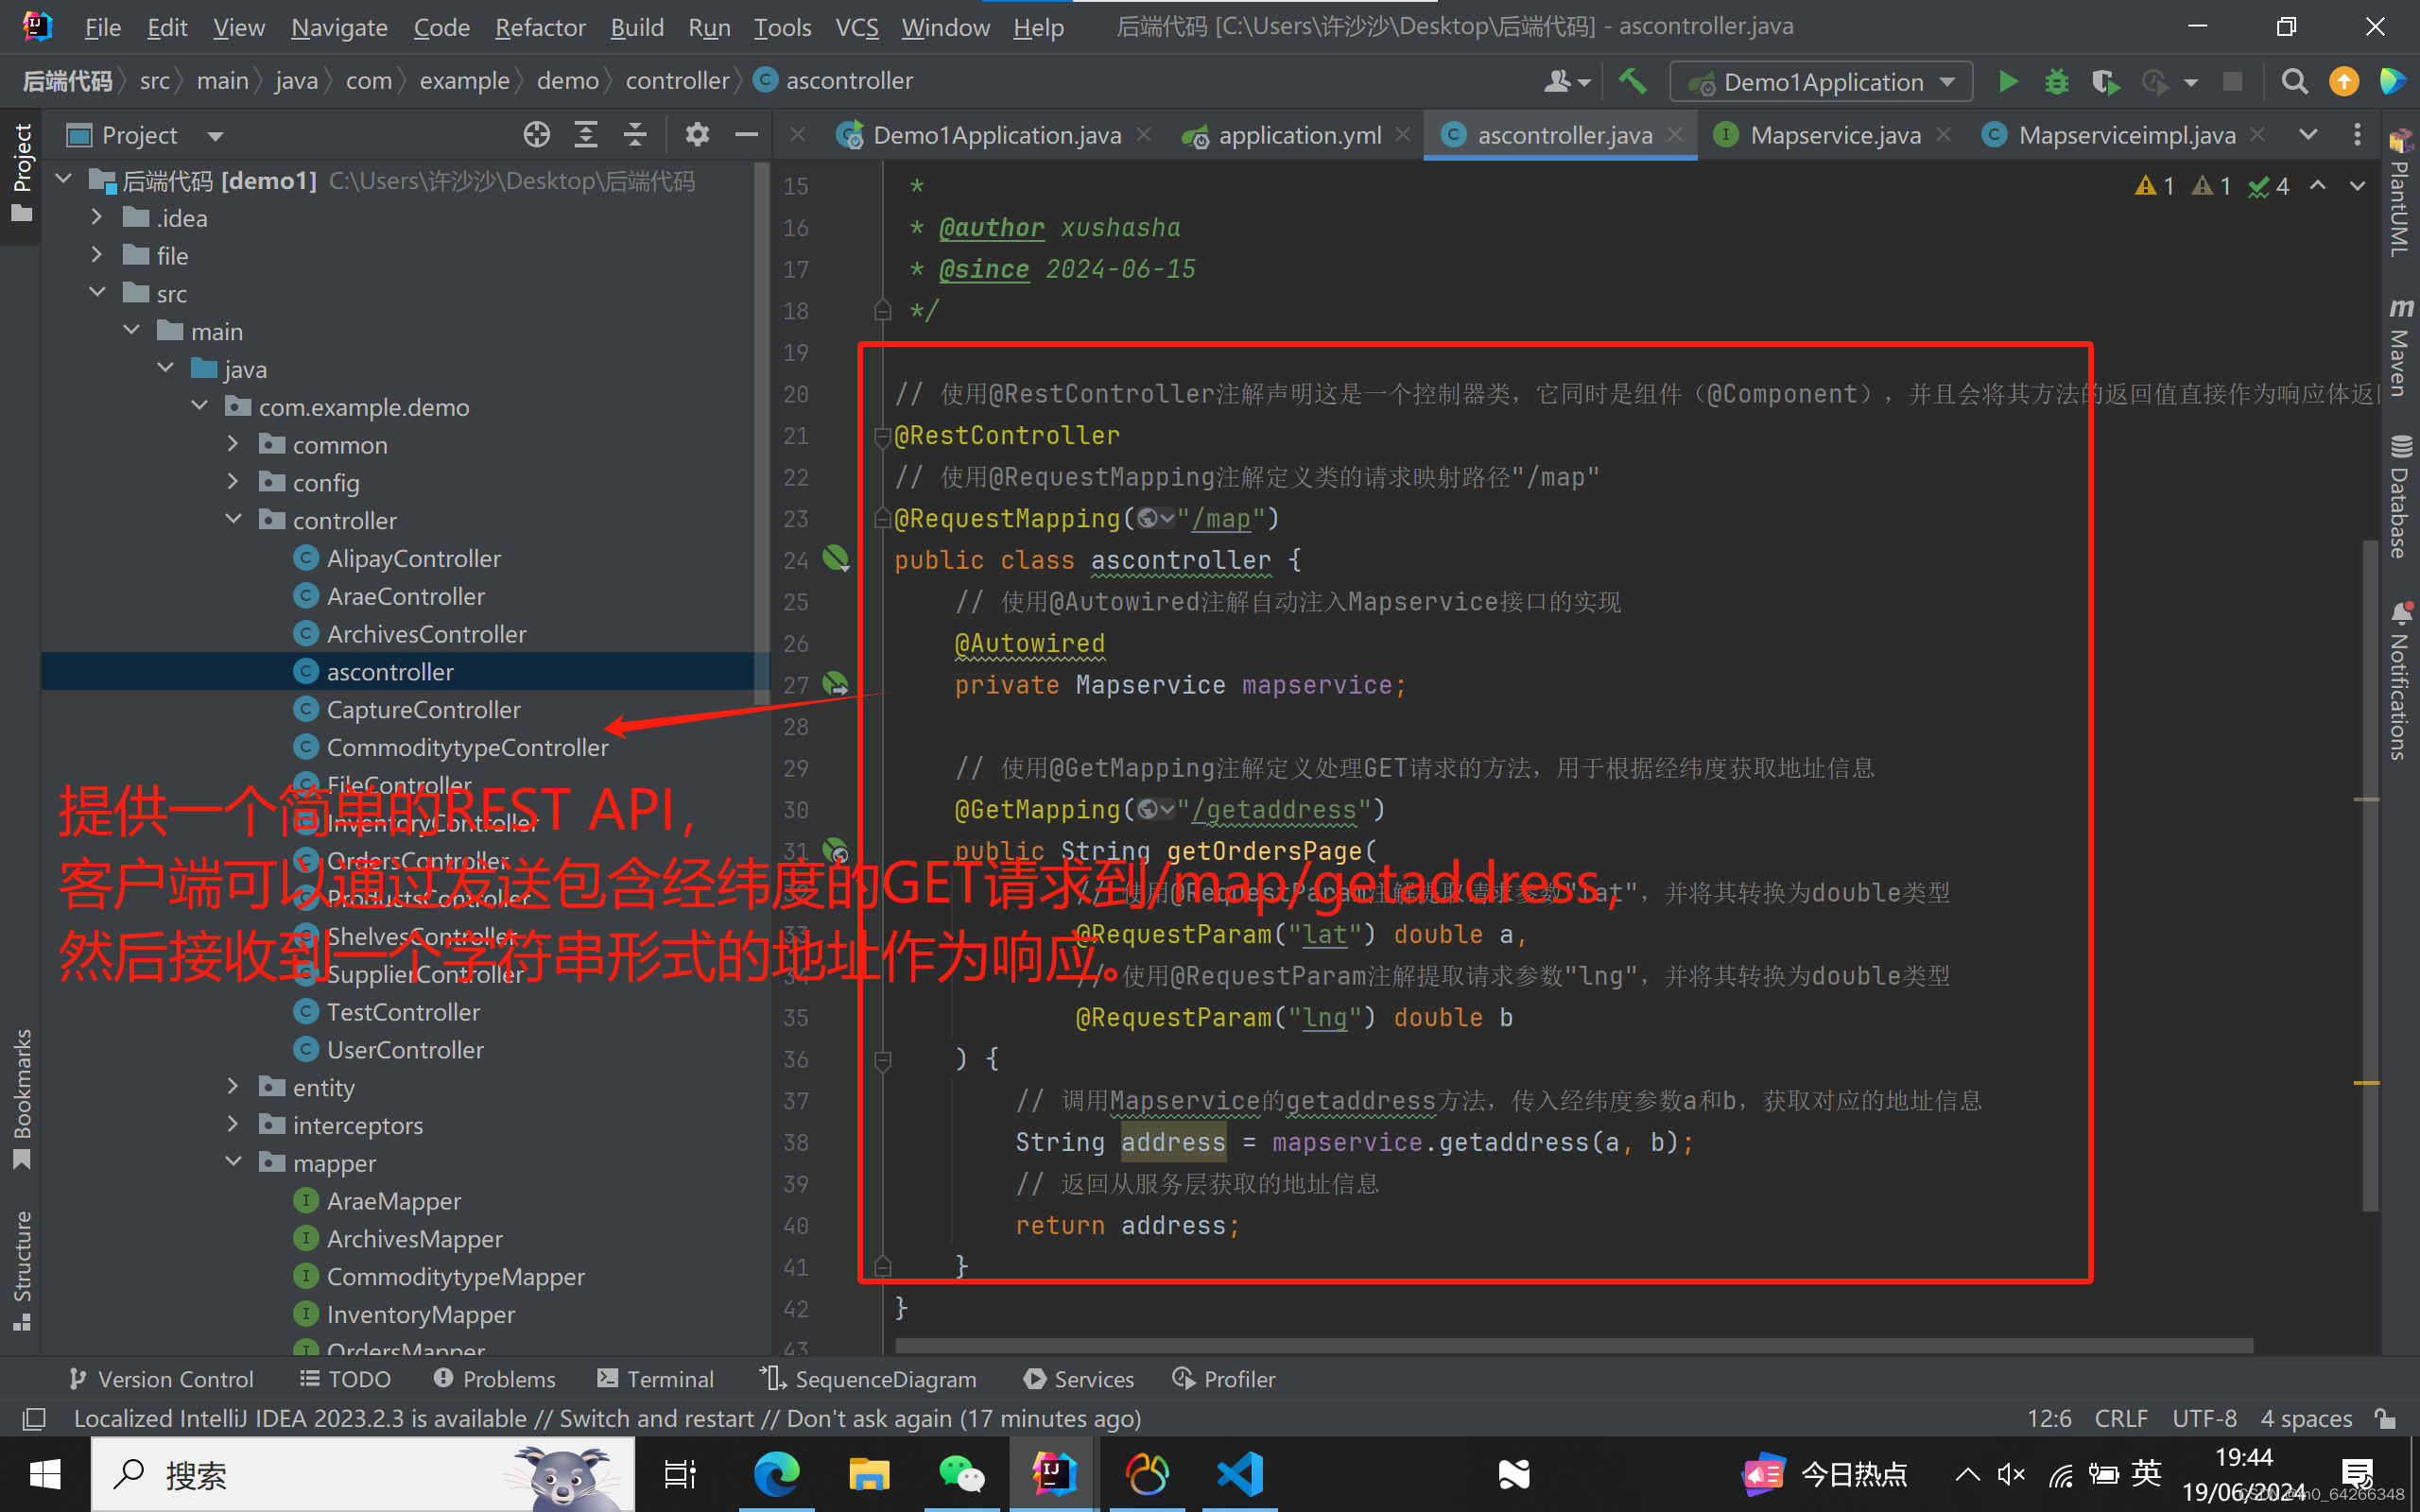
控制器
package com.example.demo.controller;

import com.example.demo.service.Mapservice;
import org.springframework.beans.factory.annotation.Autowired;
import org.springframework.web.bind.annotation.GetMapping;
import org.springframework.web.bind.annotation.RequestMapping;
import org.springframework.web.bind.annotation.RequestParam;
import org.springframework.web.bind.annotation.RestController;

@RestController
@RequestMapping("/map")
public class ascontroller {
    @Autowired
    private Mapservice mapservice;
    @GetMapping("/getaddress")
    public String getOrdersPage(
            @RequestParam("lat") double a,
            @RequestParam("lng") double b

    ) {
        String address=mapservice.getaddress(a,b);
        return address;
    }

}
三、前端
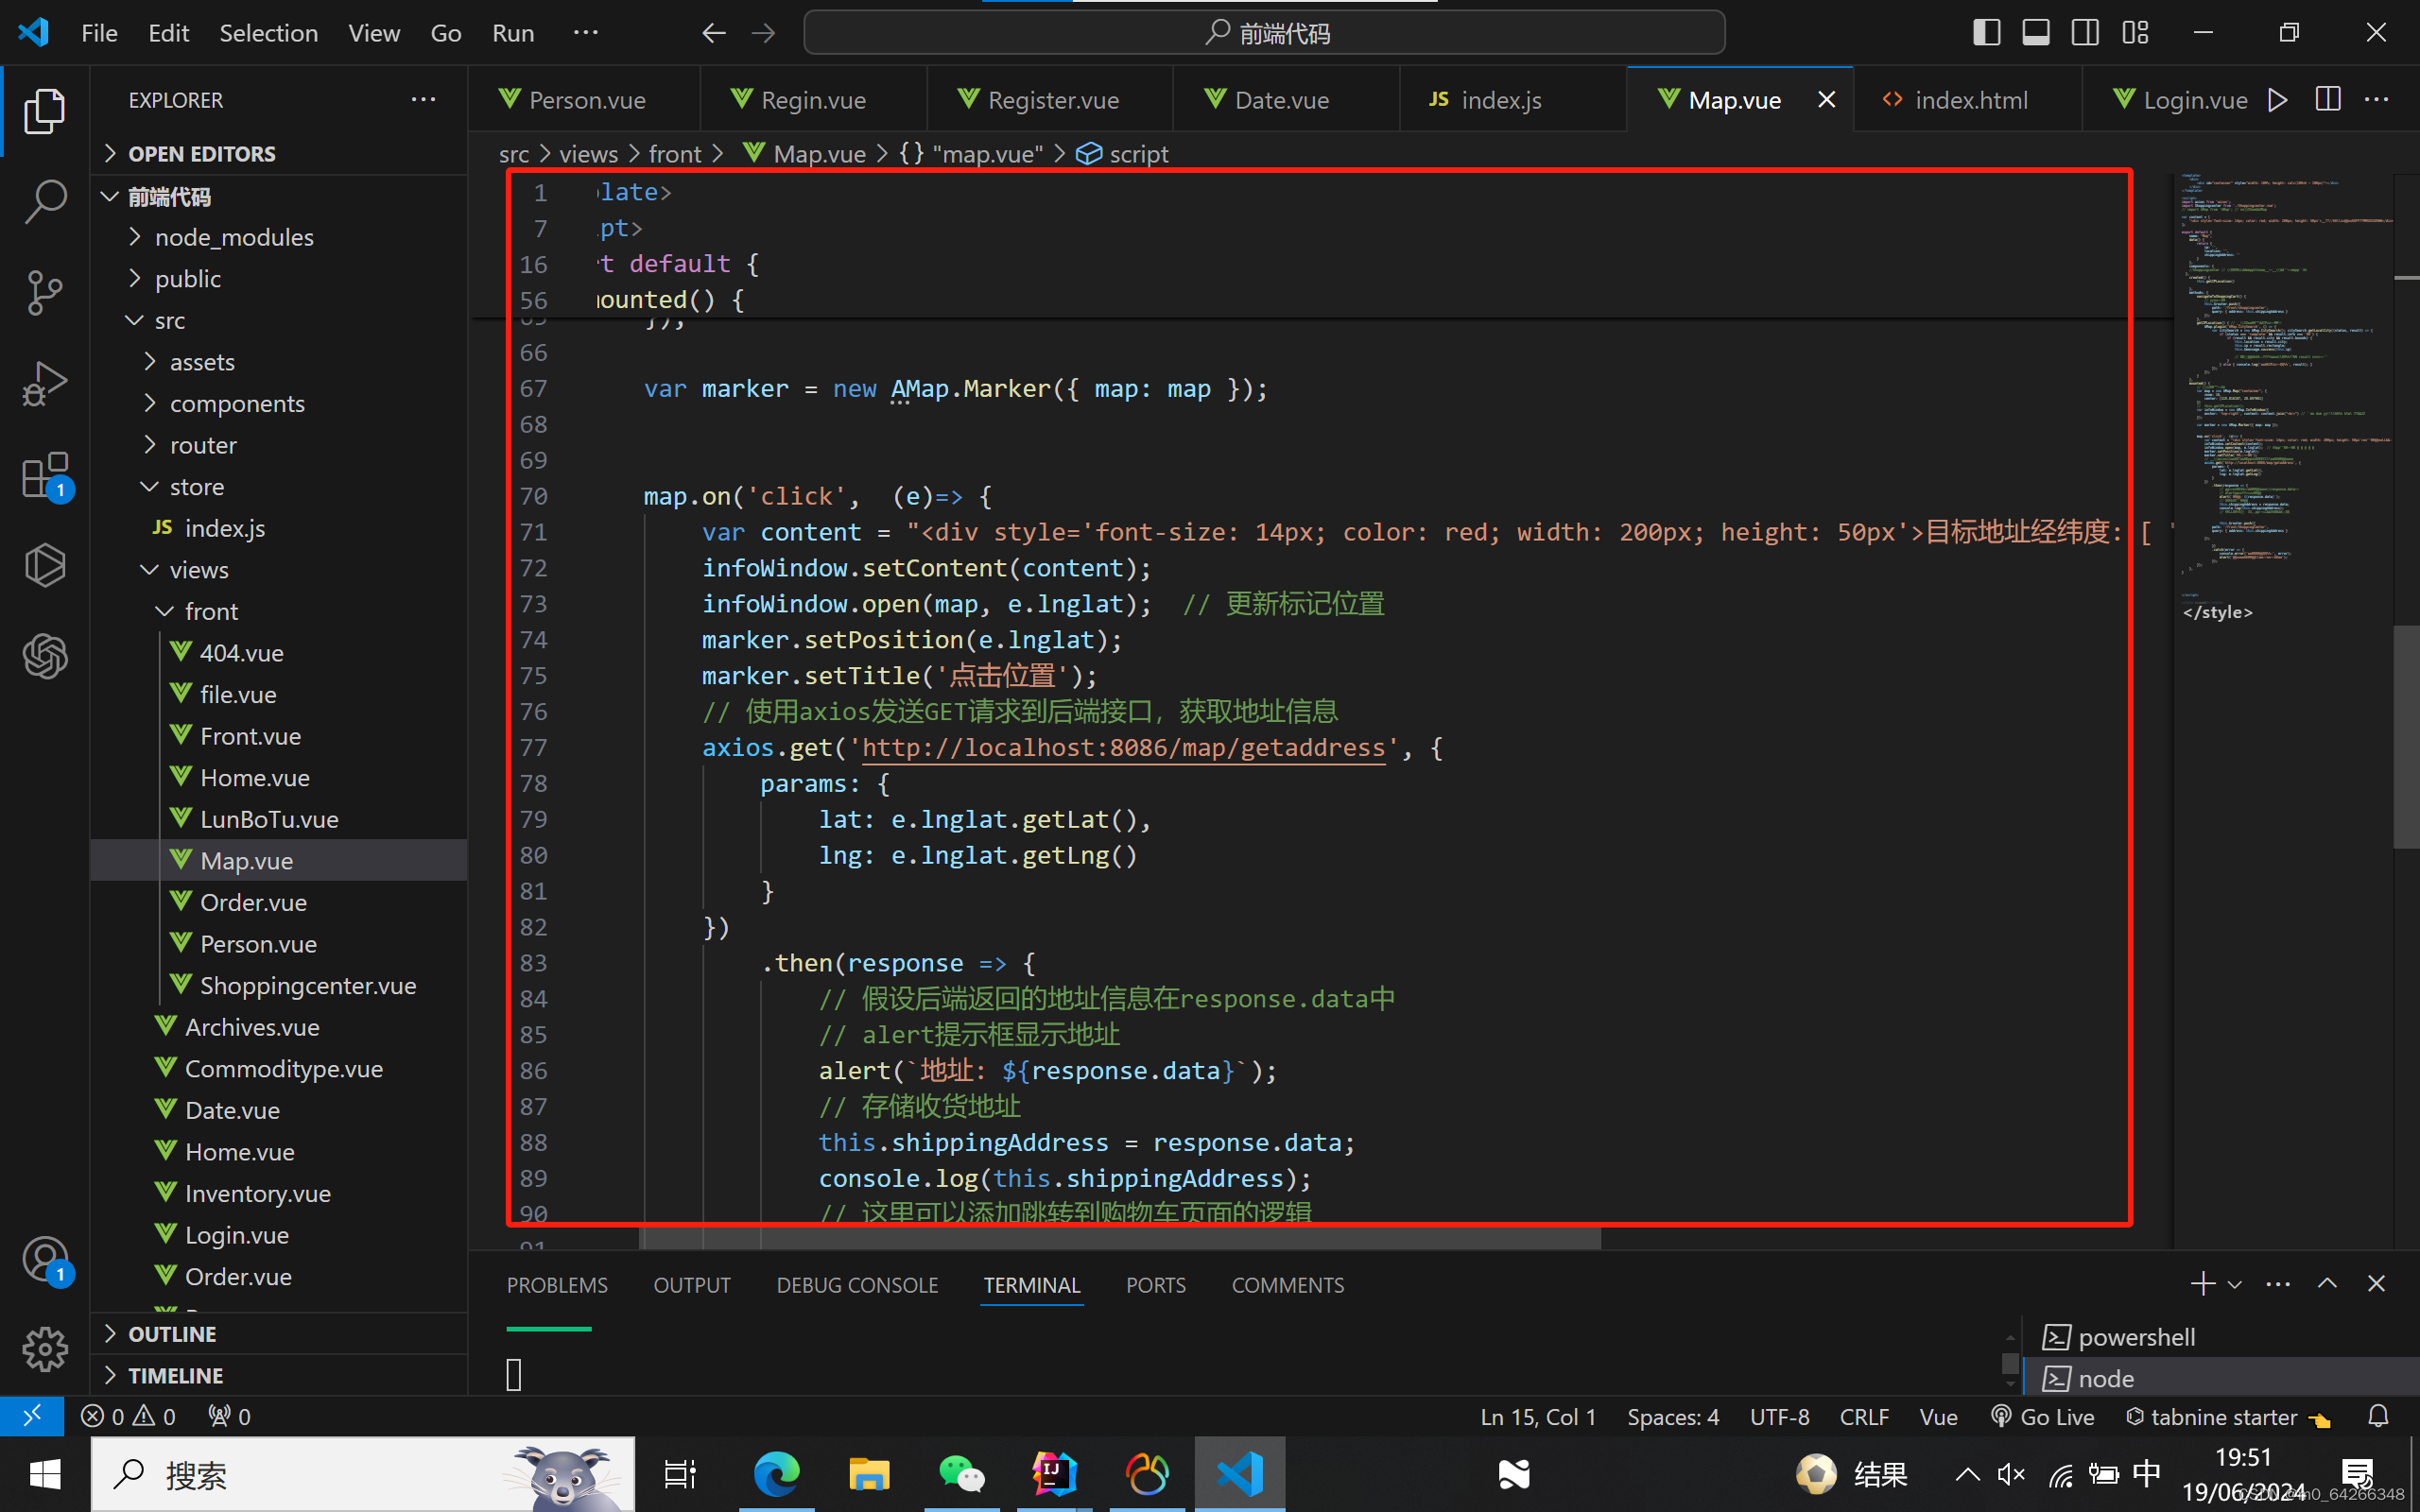
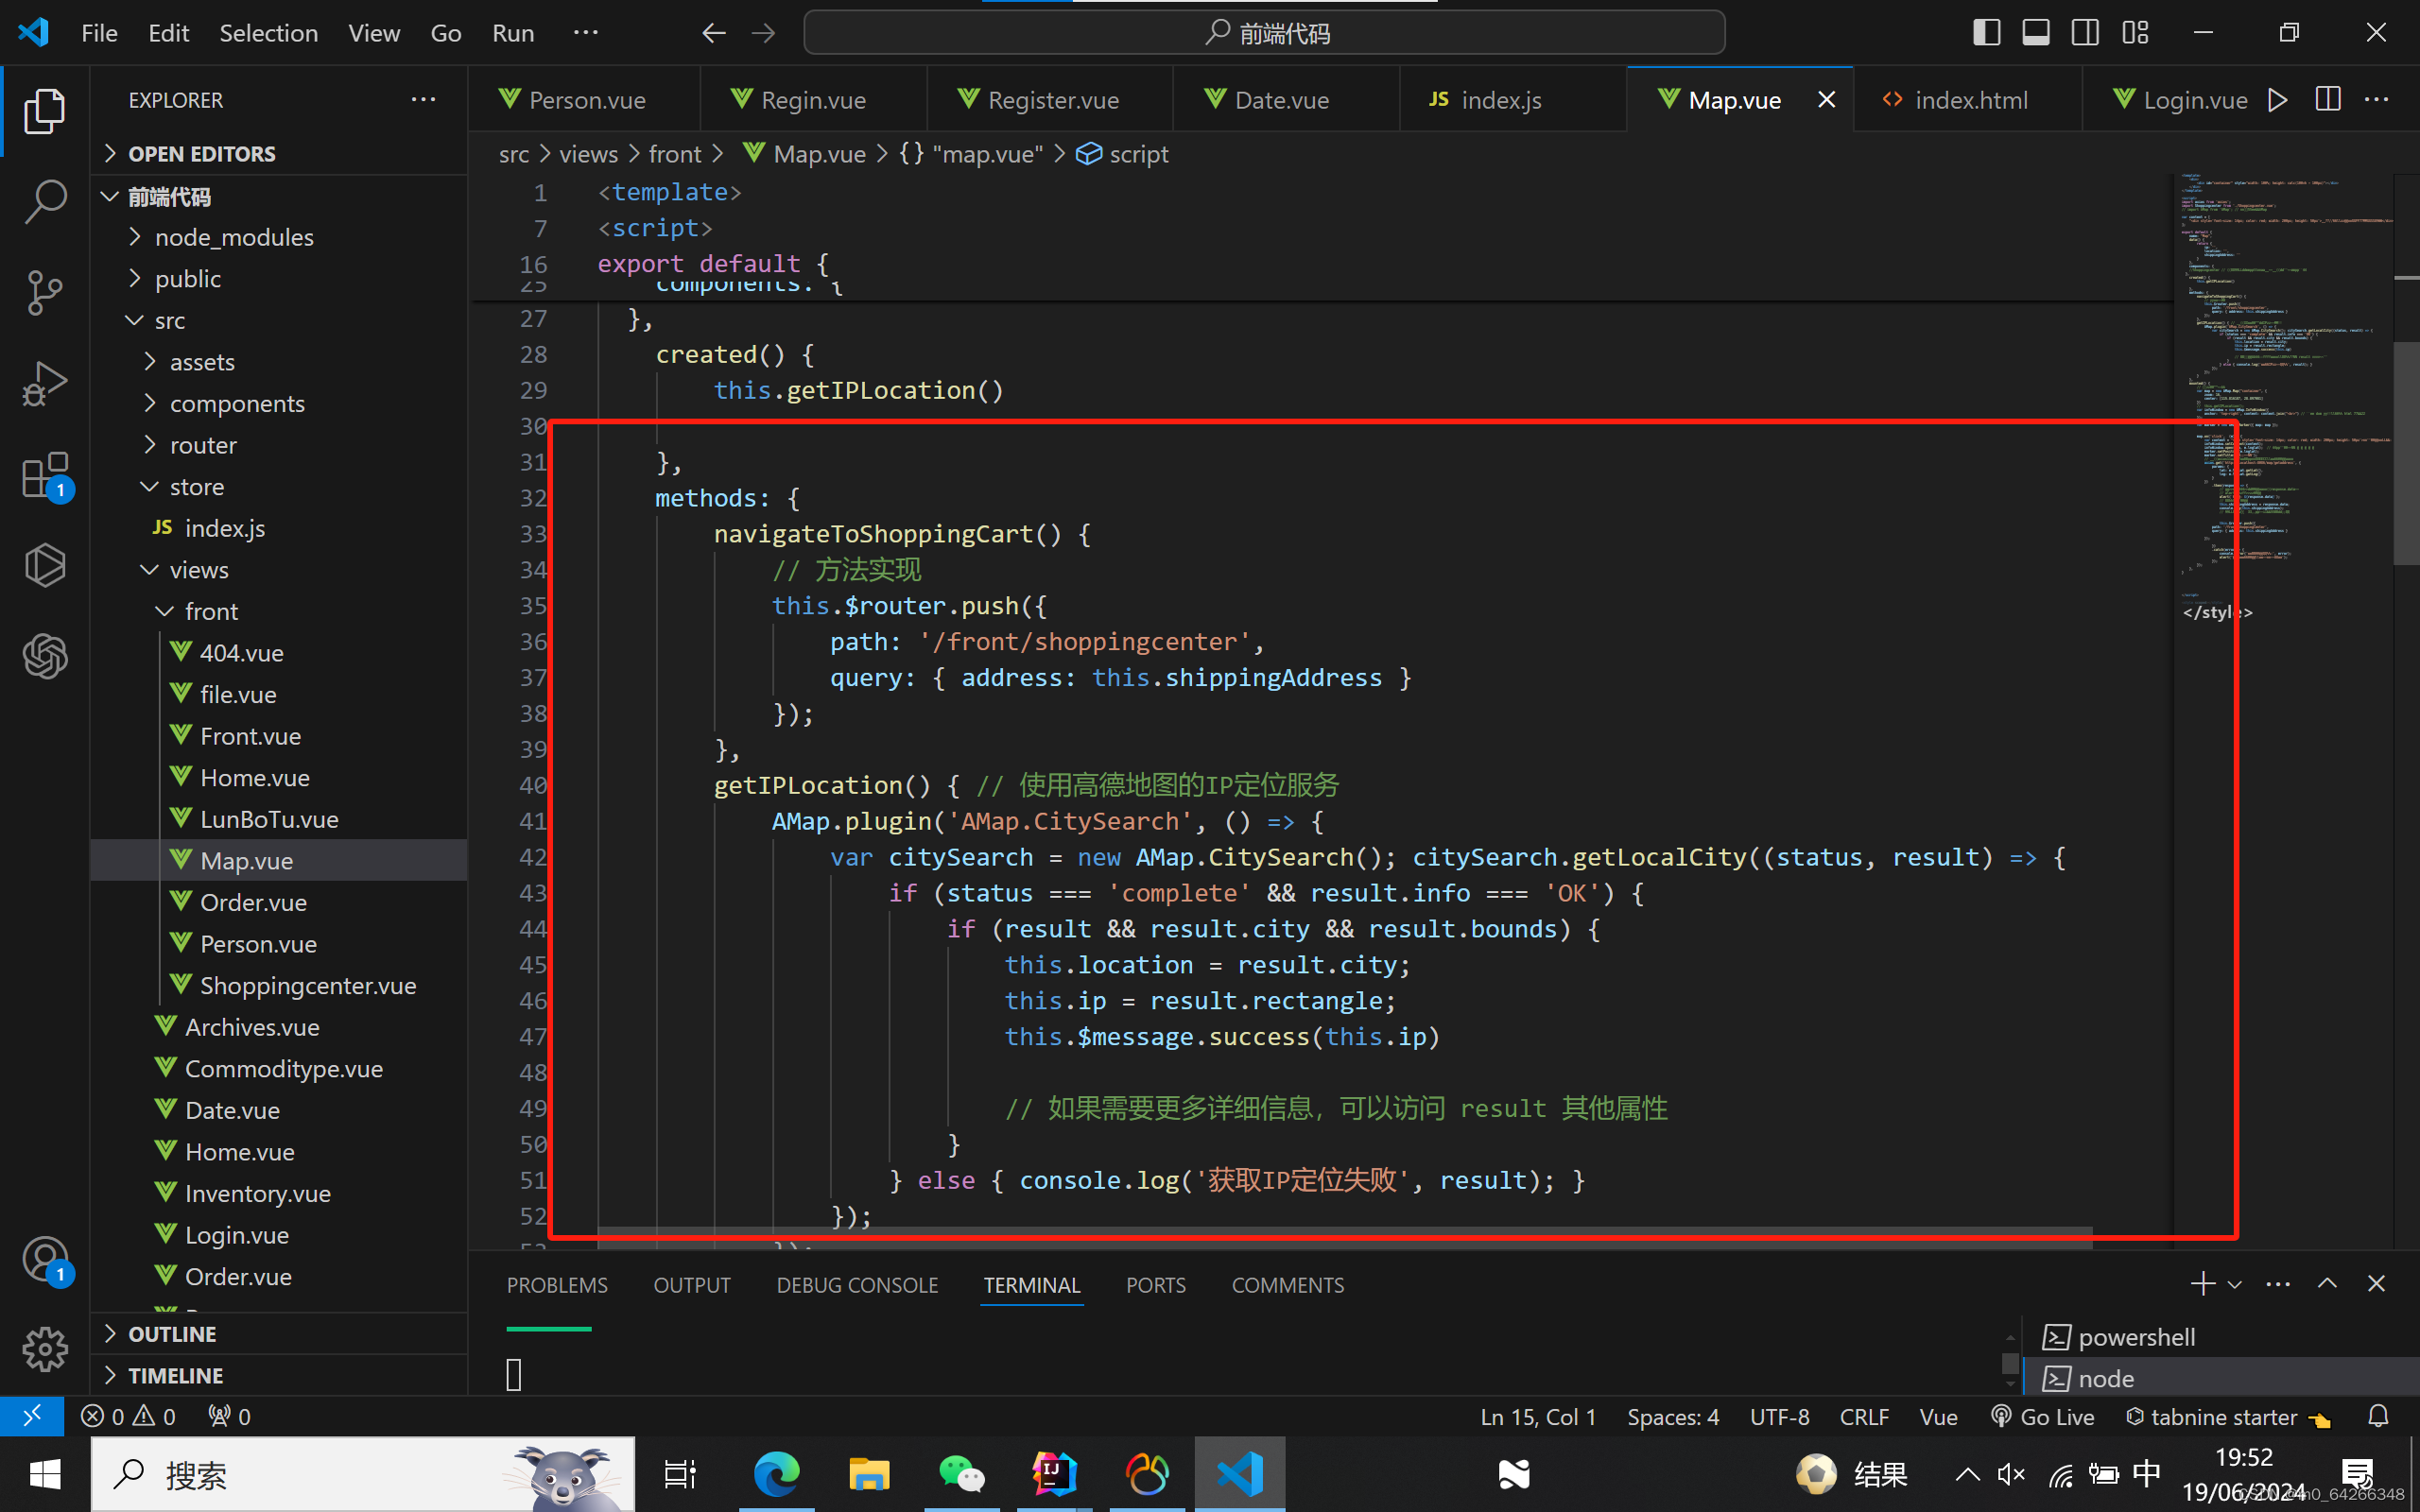
结合了高德地图API和axios库,提供了一个地图显示和交互界面,允许用户点击地图来获取特定位置的详细地址信息,并将这个地址用于后续操作,例如导航到购物车页面。同时,组件还尝试在创建时获取用户的地理位置信息。
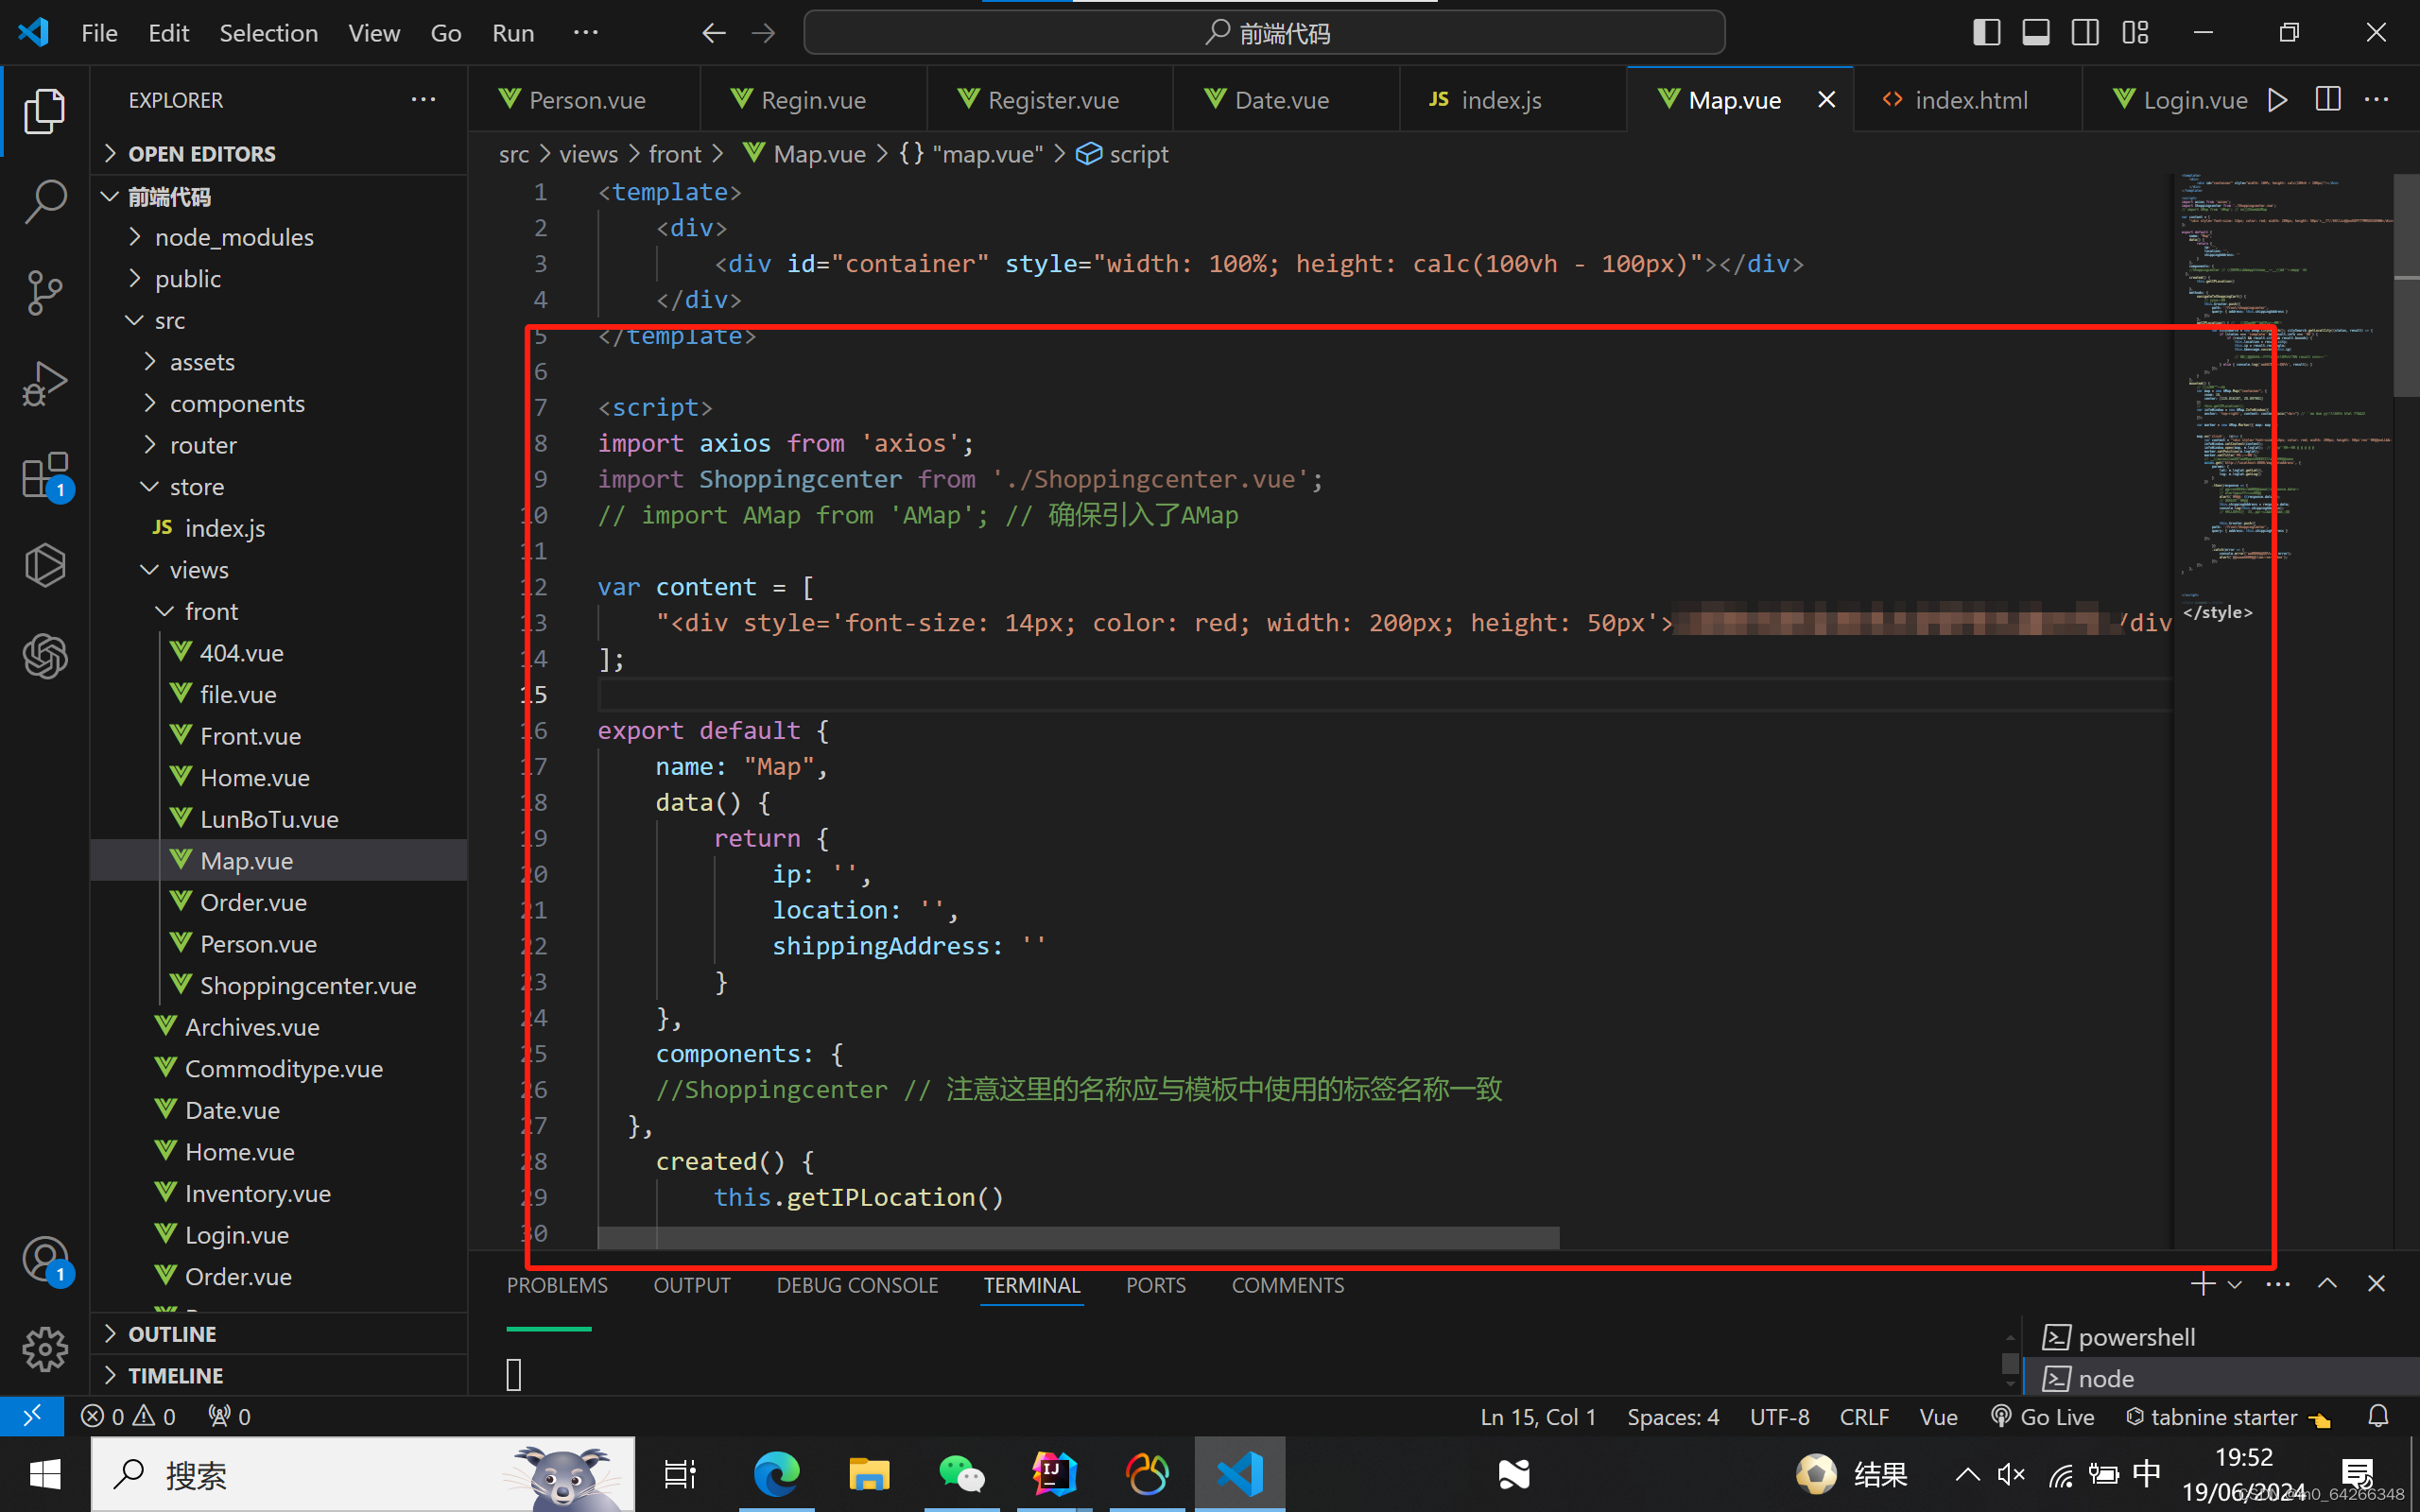
<template>
    <div>
        <div id="container" style="width: 100%; height: calc(100vh - 100px)"></div>
    </div>
</template>

<script>
import axios from 'axios';
import Shoppingcenter from './Shoppingcenter.vue';
// import AMap from 'AMap'; // 确保引入了AMap

var content = [
    "<div style='font-size: 14px; color: red; width: 200px; height: 50px'>你当前的位置</div>"
];

export default {
    name: "Map",
    data() {
        return {
            ip: '',
            location: '',
            shippingAddress: ''
        }
    },
    components: {
    //Shoppingcenter // 注意这里的名称应与模板中使用的标签名称一致
  },
    created() {
        this.getIPLocation()

    },
    methods: {
        navigateToShoppingCart() {
            // 方法实现
            this.$router.push({
                path: '/front/shoppingcenter',
                query: { address: this.shippingAddress }
            });
        },
        getIPLocation() { // 使用高德地图的IP定位服务
            AMap.plugin('AMap.CitySearch', () => {
                var citySearch = new AMap.CitySearch(); citySearch.getLocalCity((status, result) => {
                    if (status === 'complete' && result.info === 'OK') {
                        if (result && result.city && result.bounds) {
                            this.location = result.city;
                            this.ip = result.rectangle;
                            this.$message.success(this.ip)

                            // 如果需要更多详细信息,可以访问 result 其他属性
                        }
                    } else { console.log('获取IP定位失败', result); }
                });
            });
        }
    },
    mounted() {
        // 创建地图实例
        var map = new AMap.Map("container", {
            zoom: 16,
            center: [115.816187, 28.897081]
        })
        //  this.getIPLocation();
        var infoWindow = new AMap.InfoWindow({
            anchor: 'top-right', content: content.join("<br>") // 传入 dom 对象,或者 html 字符串
        });

        var marker = new AMap.Marker({ map: map });


        map.on('click',  (e)=> {
            var content = "<div style='font-size: 14px; color: red; width: 200px; height: 50px'>目标地址经纬度: [ " + e.lnglat.getLng() + ", " + e.lnglat.getLat() + " ]</div>";
            infoWindow.setContent(content);
            infoWindow.open(map, e.lnglat);  // 更新标记位置
            marker.setPosition(e.lnglat);
            marker.setTitle('点击位置');
            // 使用axios发送GET请求到后端接口,获取地址信息
            axios.get('http://localhost:8086/map/getaddress', {
                params: {
                    lat: e.lnglat.getLat(),
                    lng: e.lnglat.getLng()
                }
            })
                .then(response => {
                    // 假设后端返回的地址信息在response.data中
                    // alert提示框显示地址
                    alert(`地址: ${response.data}`);
                    // 存储收货地址
                    this.shippingAddress = response.data;
                    console.log(this.shippingAddress);
                    // 这里可以添加跳转到购物车页面的逻辑


                    this.$router.push({
                path: '/front/ShoppingCenter',
                query: { address: this.shippingAddress }

            });

                })
                .catch(error => {
                    console.error('请求地址失败:', error);
                    alert('无法获取地址,请稍后再试!');
                });
        });
    },
}


</script>

<style scoped></style>
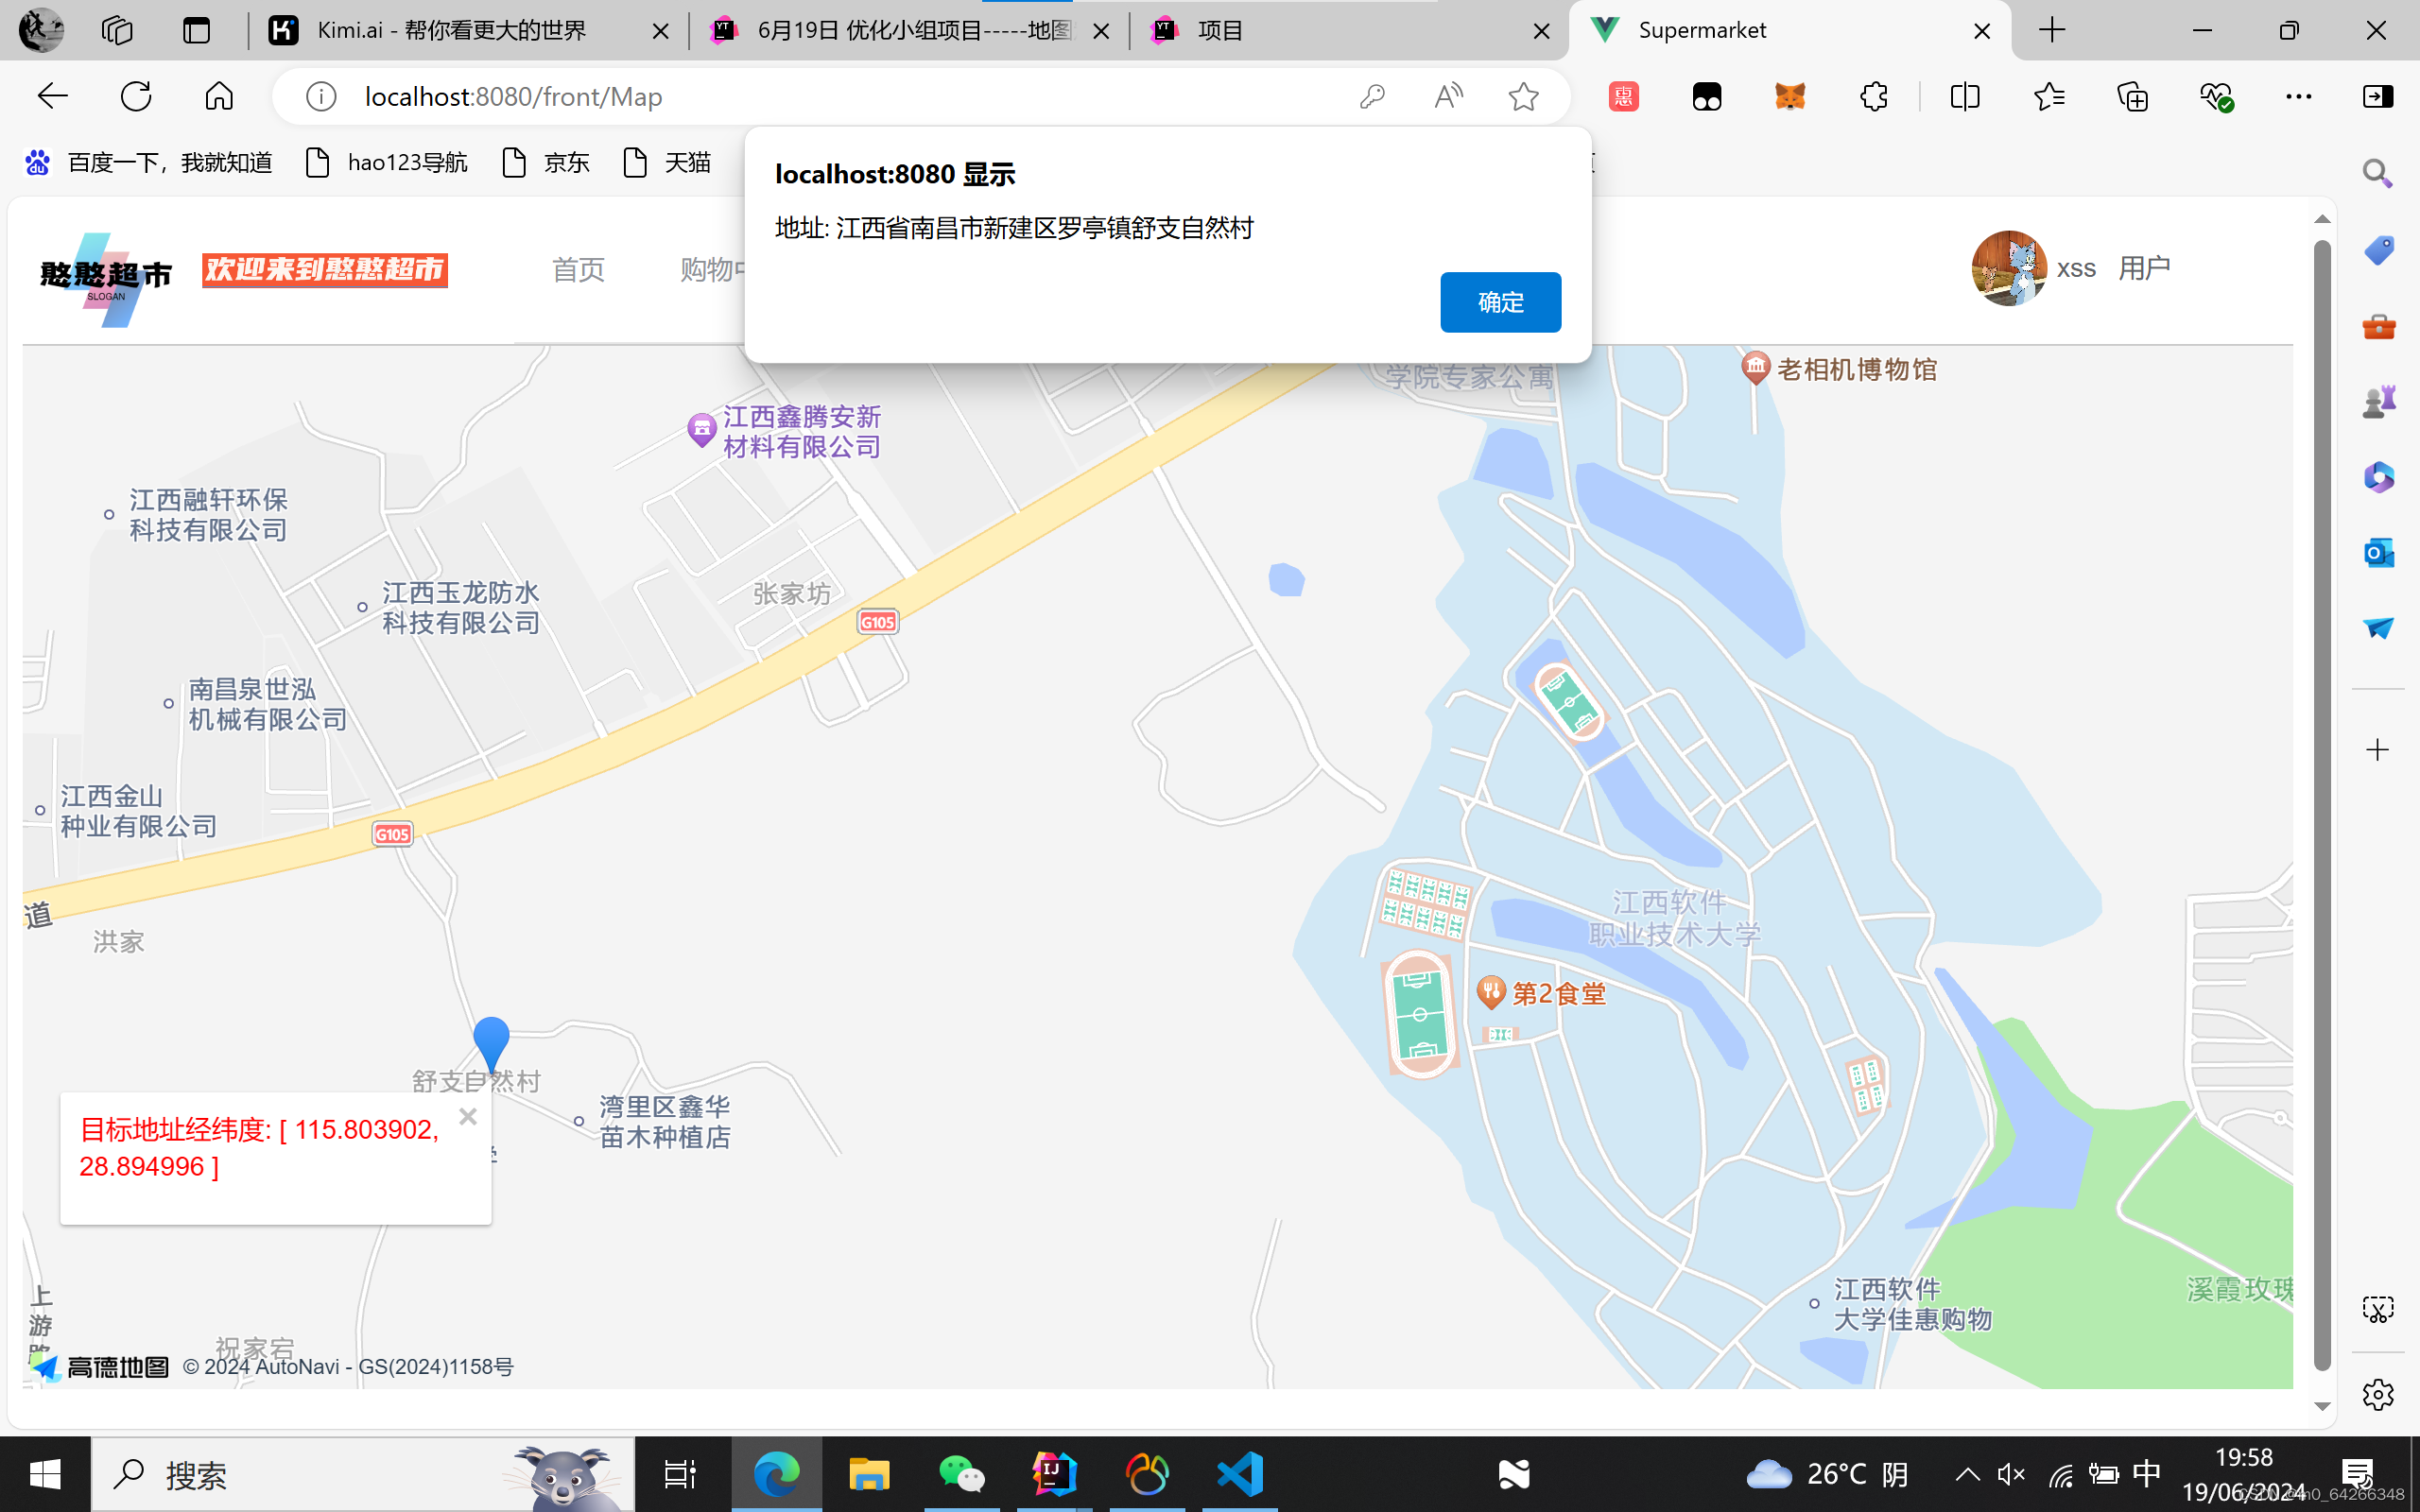
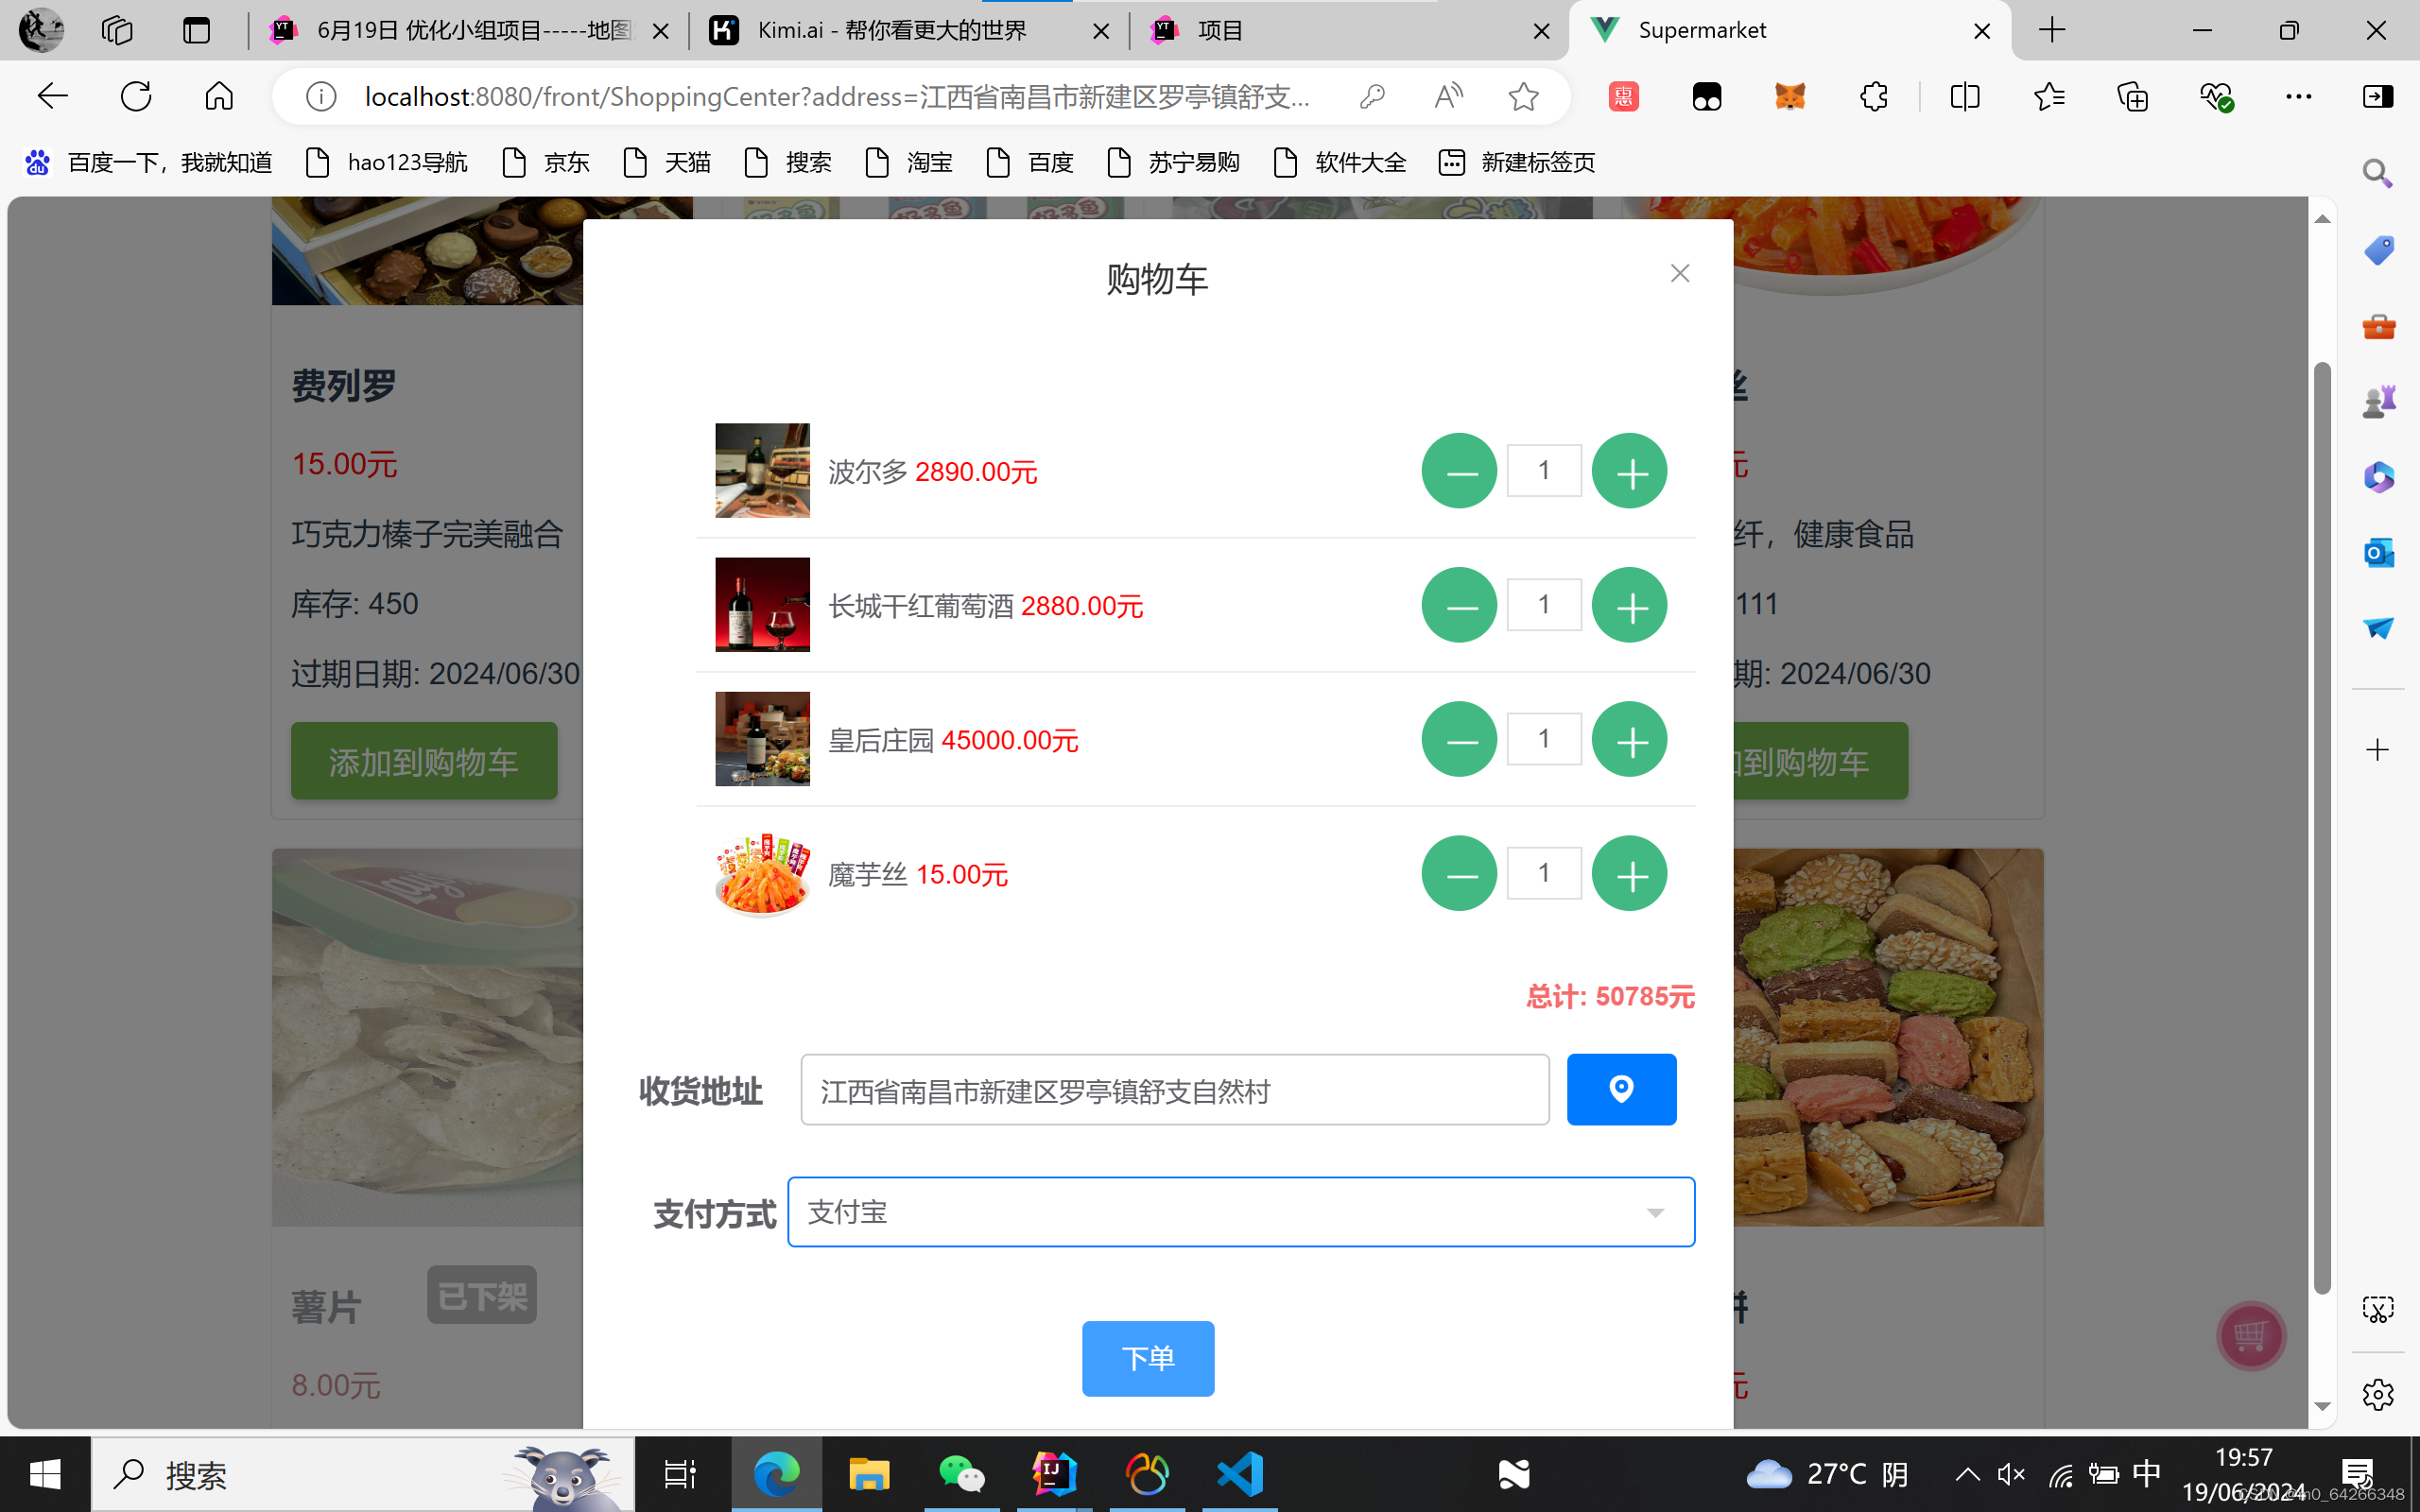
四、页面展示
五、总结
就到这啦,希望对各位友友们有所帮助,我们下期再见!


 2472
2472

 被折叠的 条评论
为什么被折叠?
被折叠的 条评论
为什么被折叠?
 到【灌水乐园】发言


