


1、配置域名,方便后续测试服务注册中心能否顺利运行
第一步:
打开hosts文件

第二步:
在hosts文件里加入本地ip和域名
![]()
2、测试该域名是否能访问
第一步:
按住Win+R唤出运行框
第二步:
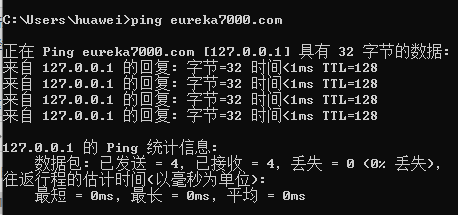
输入cmd命令进入命令提示符
第三步:
ping我们配置好的域名,看是否能联通
结果:ping成功
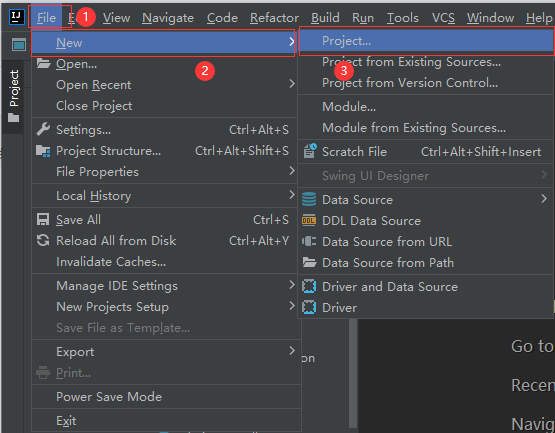
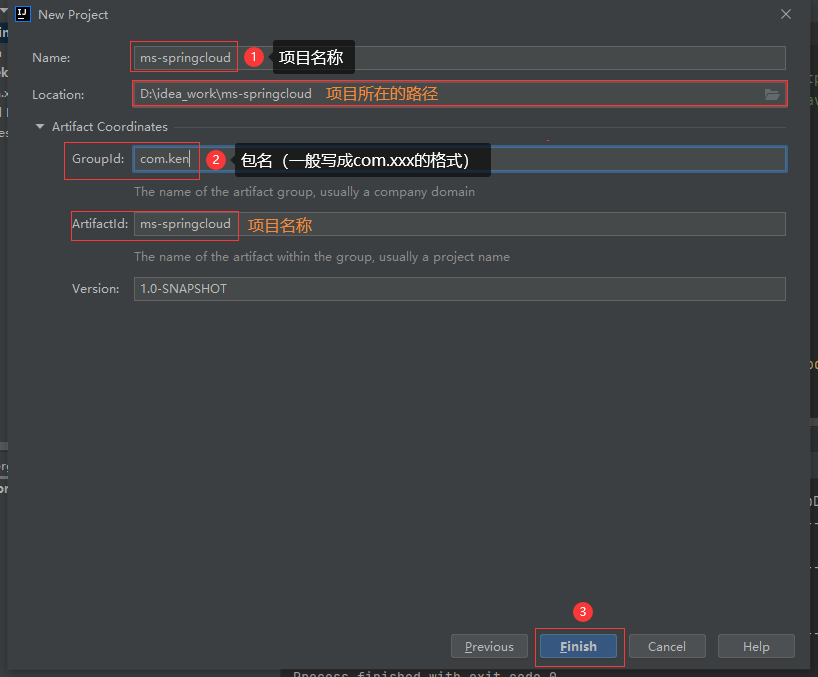
3、新建Maven项目
第一步:
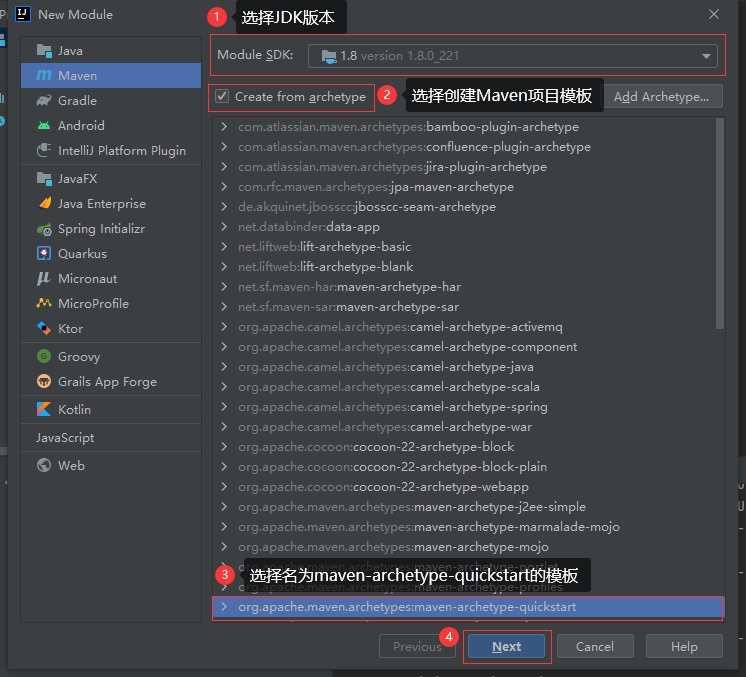
第二步:
选择模板
第三步:
设置Maven项目的相关参数
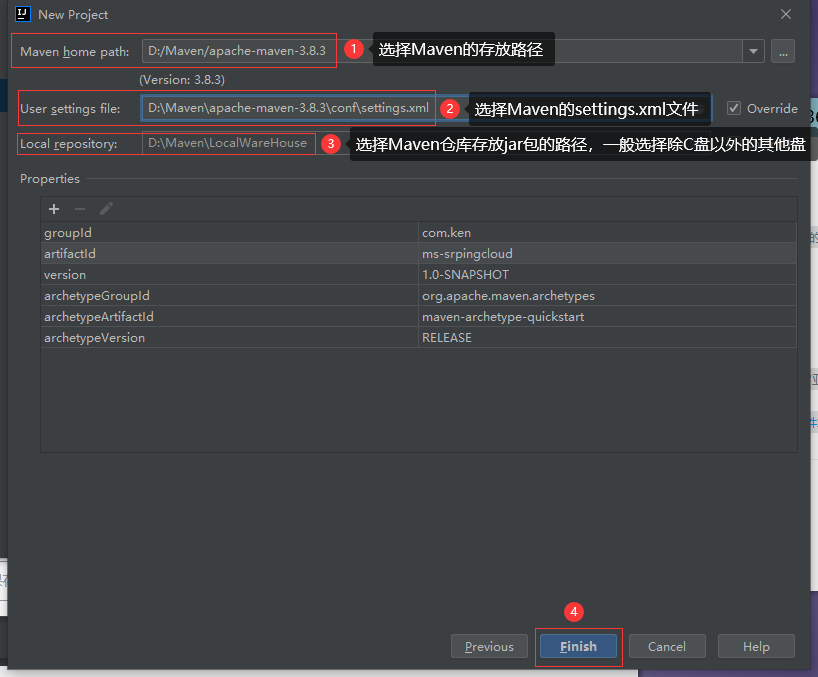
第四步:
配置Maven
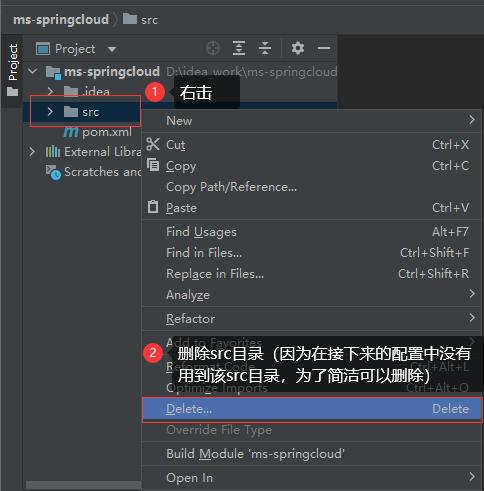
第五步:
删除src目录
第六步:
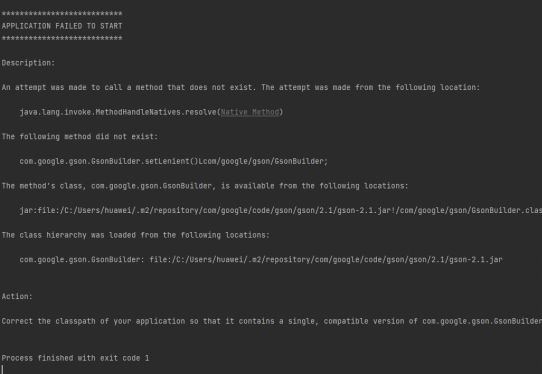
导入gson依赖(写在父目录,子目录就不用重复写了)

    <!-- https://mvnrepository.com/artifact/com.google.code.gson/gson -->
    <dependency>
      <groupId>com.google.code.gson</groupId>
      <artifactId>gson</artifactId>
      <version>2.8.9</version>
    </dependency>
不导入在后面运行项目时会报以下错误
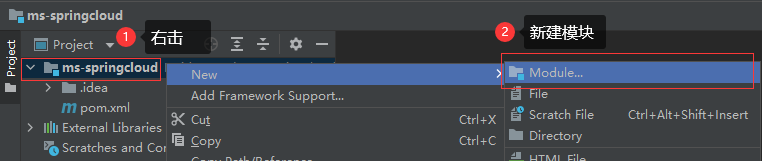
4、在ms-springcloud项目下新建Maven模块,该模块用于构建服务注册中心
第一步:
新建Maven模块
第二步:
选择模板
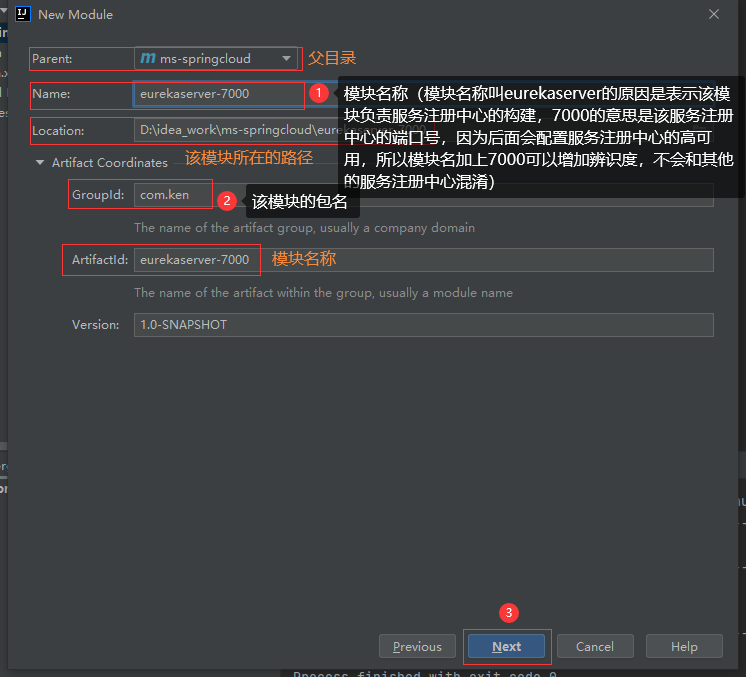
第三步:
设置Maven模块的相关参数
第四步:
配置Maven
第五步:
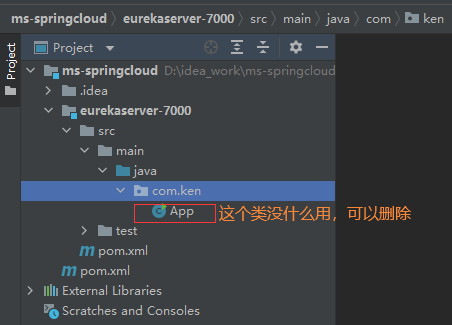
查看项目目录
5、构建服务注册中心
第一步:
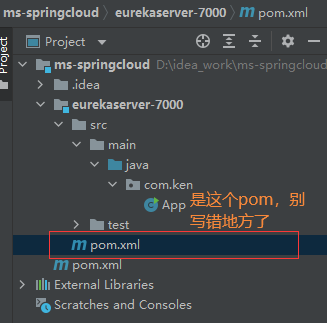
在eurekaserver-7000模块下配置pom.xml文件
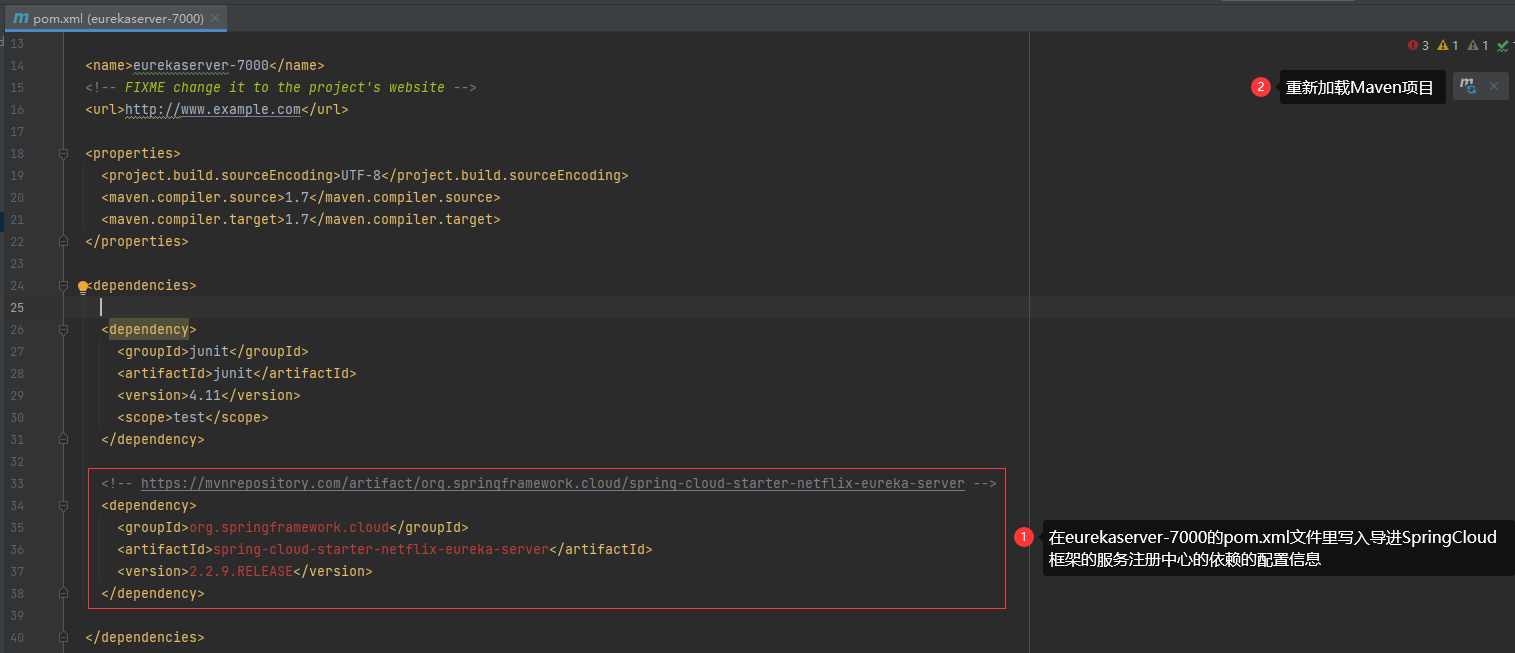
    <!-- https://mvnrepository.com/artifact/org.springframework.cloud/spring-cloud-starter-netflix-eureka-server -->
    <dependency>
      <groupId>org.springframework.cloud</groupId>
      <artifactId>spring-cloud-starter-netflix-eureka-server</artifactId>
      <version>2.2.9.RELEASE</version>
    </dependency>
第二步:
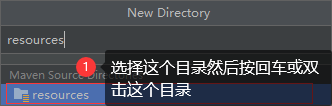
在eurekaserver-7000模块下的resources构建application.properties配置文件
第一步:
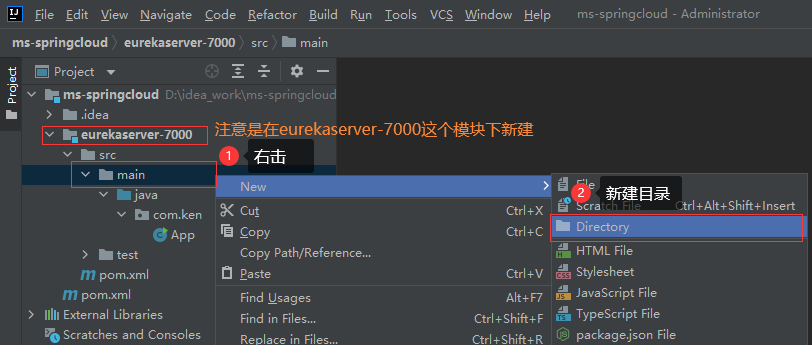
第二步:
第三步:
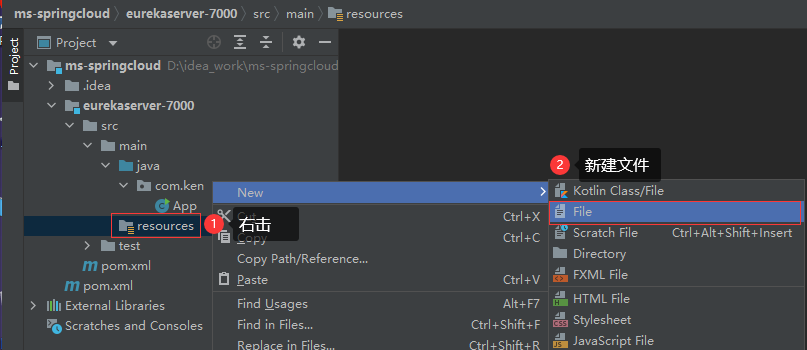
第四步:

application.properties第五步:;
在application.properties配置与服务注册中心相关的信息
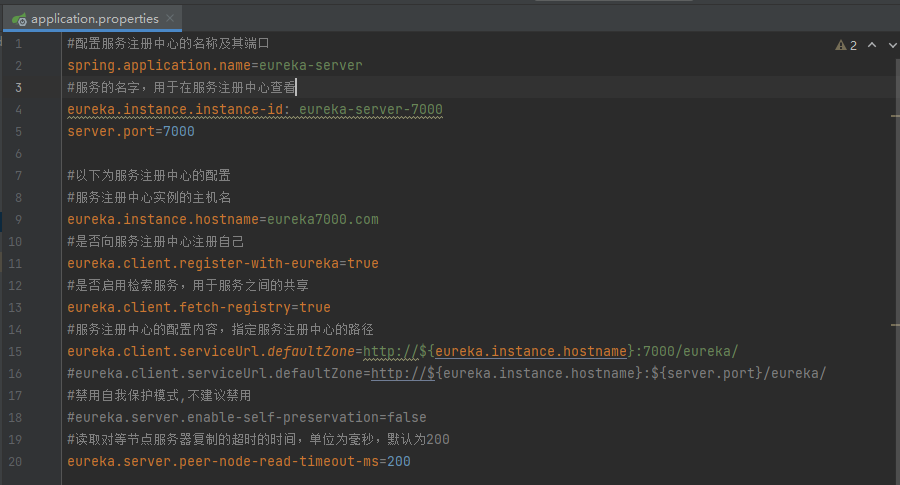
#配置服务注册中心的名称及其端口
spring.application.name=eureka-server
#服务的名字,用于在服务注册中心查看
eureka.instance.instance-id: eureka-server-7000
server.port=7000

#以下为服务注册中心的配置
#服务注册中心实例的主机名
eureka.instance.hostname=eureka7000.com
#是否向服务注册中心注册自己
eureka.client.register-with-eureka=true
#是否启用检索服务,用于服务之间的共享
eureka.client.fetch-registry=true
#服务注册中心的配置内容,指定服务注册中心的路径
eureka.client.serviceUrl.defaultZone=http://${eureka.instance.hostname}:7000/eureka/
#eureka.client.serviceUrl.defaultZone=http://${eureka.instance.hostname}:${server.port}/eureka/
#禁用自我保护模式,不建议禁用
#eureka.server.enable-self-preservation=false
#读取对等节点服务器复制的超时的时间,单位为毫秒,默认为200
eureka.server.peer-node-re
第六步:
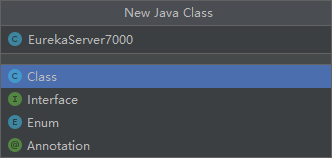
新建名为EurekaServer7000的类
第七步:
构建EurekaServer7000类
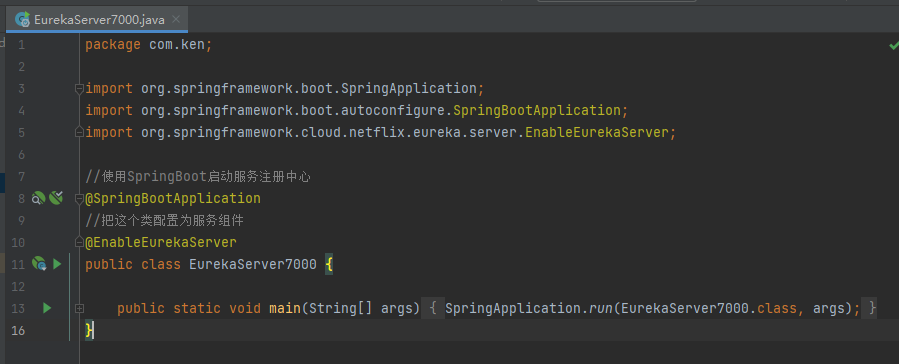
import org.springframework.boot.SpringApplication;
import org.springframework.boot.autoconfigure.SpringBootApplication;
import org.springframework.cloud.netflix.eureka.server.EnableEurekaServer;

//使用SpringBoot启动服务注册中心
@SpringBootApplication
//把这个类配置为服务组件
@EnableEurekaServer
public class EurekaServer7000 {

    public static void main(String[] args) {
        SpringApplication.run(EurekaServer7000.class, args);
    }
}
第八步:
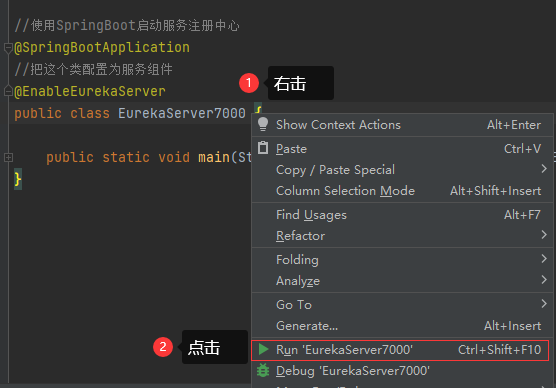
启动 EurekaServer7000类
第九步:
在浏览器输入http://localhost:7000/进入服务注册中心查看我们开发的服务是否能顺利运行


 2184
2184


 被折叠的 条评论
为什么被折叠?
被折叠的 条评论
为什么被折叠?
 到【灌水乐园】发言


