


kvm虚拟化
虚拟化介绍
虚拟化是云计算的基础。简单的说,虚拟化使得在一台物理的服务器上可以跑多台虚拟机,虚拟机共享物理机的 CPU、内存、IO 硬件资源,但逻辑上虚拟机之间是相互隔离的。
物理机我们一般称为宿主机(Host),宿主机上面的虚拟机称为客户机(Guest)。
那么 Host 是如何将自己的硬件资源虚拟化,并提供给 Guest 使用的呢?
这个主要是通过一个叫做 Hypervisor 的程序实现的。
根据 Hypervisor 的实现方式和所处的位置,虚拟化又分为两种:
- 全虚拟化
- 半虚拟化
全虚拟化:
Hypervisor 直接安装在物理机上,多个虚拟机在 Hypervisor 上运行。Hypervisor 实现方式一般是一个特殊定制的 Linux 系统。Xen 和 VMWare 的 ESXi 都属于这个类型

半虚拟化:

理论上讲:
全虚拟化一般对硬件虚拟化功能进行了特别优化,性能上比半虚拟化要高;
半虚拟化因为基于普通的操作系统,会比较灵活,比如支持虚拟机嵌套。嵌套意味着可以在KVM虚拟机中再运行KVM。
kvm介绍
kVM 全称是 Kernel-Based Virtual Machine。也就是说 KVM 是基于 Linux 内核实现的。KVM有一个内核模块叫 kvm.ko,只用于管理虚拟 CPU 和内存。
那 IO 的虚拟化,比如存储和网络设备则是由 Linux 内核与Qemu来实现。
作为一个 Hypervisor,KVM 本身只关注虚拟机调度和内存管理这两个方面。IO 外设的任务交给 Linux 内核和 Qemu。
大家在网上看 KVM 相关文章的时候肯定经常会看到 Libvirt 这个东西。
Libvirt 就是 KVM 的管理工具。
其实,Libvirt 除了能管理 KVM 这种 Hypervisor,还能管理 Xen,VirtualBox 等。
Libvirt 包含 3 个东西:后台 daemon 程序 libvirtd、API 库和命令行工具 virsh
- libvirtd是服务程序,接收和处理 API 请求;
- API 库使得其他人可以开发基于 Libvirt 的高级工具,比如 virt-manager,这是个图形化的 KVM 管理工具;
- virsh 是我们经常要用的 KVM 命令行工具
部署kvm
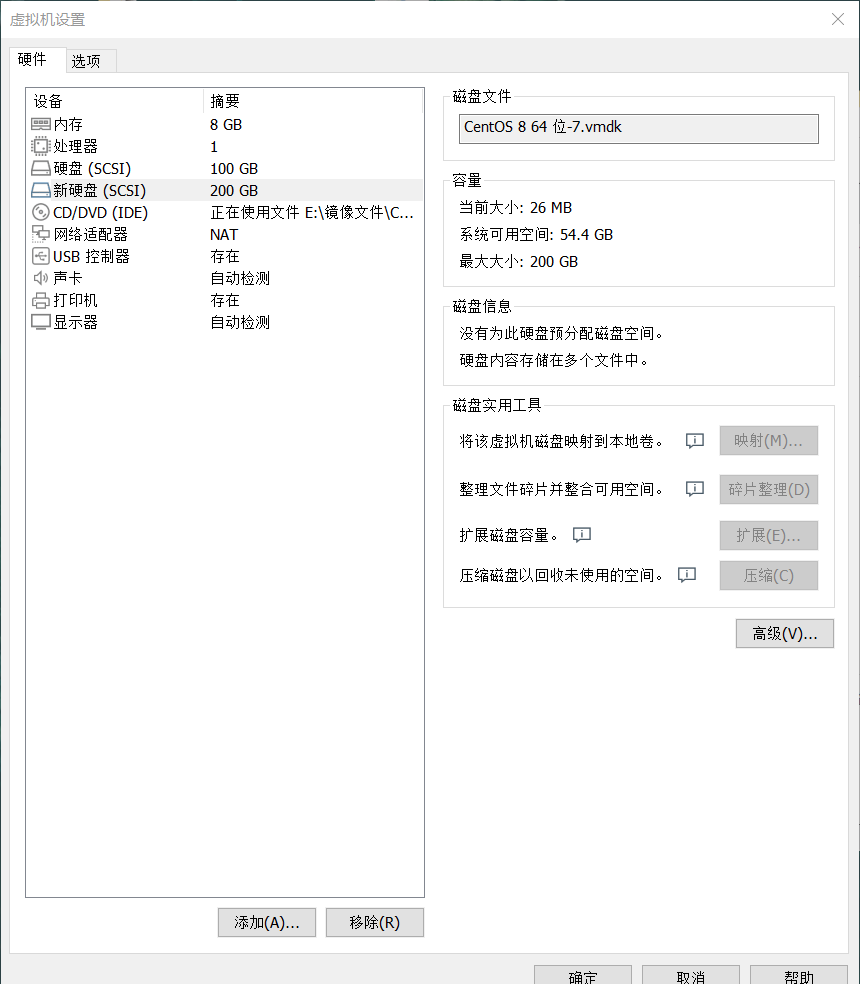
首先虚拟机要打开虚拟化功能,虚拟机内存加一块200G的硬盘
#新建分区,将硬盘所有大小都给这个分区
[root@kvm ~]# parted /dev/sdb
GNU Parted 3.2
Using /dev/sdb
Welcome to GNU Parted! Type 'help' to view a list of commands.
(parted)
align-check  help         mktable      quit         resizepart   set          version
disk_set     mklabel      name         rescue       rm           toggle
disk_toggle  mkpart       print        resize       select       unit

(parted) mklabel
New disk label type?
aix    amiga  atari  bsd    dvh    gpt    loop   mac    msdos  pc98   sun

#新的磁盘标签类型
New disk label type? msdos
(parted) unit
Unit?  [compact]?
%        GB       MB       TB       chs      cyl      kiB
B        GiB      MiB      TiB      compact  kB       s
Unit?  [compact]? MiB
(parted) p
Model: VMware, VMware Virtual S (scsi)
Disk /dev/sdb: 204800MiB
Sector size (logical/physical): 512B/512B
Partition Table: msdos
Disk Flags:

Number  Start  End  Size  Type  File system  Flags


#分区类型
(parted) mkpart
Partition type?  primary/extended? primary

#文件系统类型
File system type?  [ext2]? xfs
#起始点
Start? 10MiB                                                 #结束点
End? 204790MiB
(parted) p
Model: VMware, VMware Virtual S (scsi)
Disk /dev/sdb: 204800MiB
Sector size (logical/physical): 512B/512B
Partition Table: msdos
Disk Flags:

Number  Start    End        Size       Type     File system  Flags
 1      10.0MiB  204790MiB  204780MiB  primary  xfs          lba

(parted) q
Information: You may need to update /etc/fstab.

#同步
[root@kvm ~]# udevadm settle

#格式化
[root@kvm ~]# mkfs.xfs /dev/sdb1
meta-data=/dev/sdb1              isize=512    agcount=4, agsize=13105920 blks
         =                       sectsz=512   attr=2, projid32bit=1
         =                       crc=1        finobt=1, sparse=1, rmapbt=0
         =                       reflink=1    bigtime=0 inobtcount=0
data     =                       bsize=4096   blocks=52423680, imaxpct=25
         =                       sunit=0      swidth=0 blks
naming   =version 2              bsize=4096   ascii-ci=0, ftype=1
log      =internal log           bsize=4096   blocks=25597, version=2
         =                       sectsz=512   sunit=0 blks, lazy-count=1
realtime =none                   extsz=4096   blocks=0, rtextents=0
[root@kvm ~]# blkid /dev/sdb1
/dev/sdb1: UUID="68c66d06-5881-4f2b-9870-8717277b53e8" BLOCK_SIZE="512" TYPE="xfs" PARTUUID="080f99e4-01"


#挂载
[root@kvm ~]# mkdir /kvmdata
[root@kvm ~]# vim /etc/fstab
UUID="68c66d06-5881-4f2b-9870-8717277b53e8"  /kvmdata xfs defaults 0 0

[root@kvm ~]# mount -a
[root@kvm ~]# df -Th
Filesystem          Type      Size  Used Avail Use% Mounted on
devtmpfs            devtmpfs  3.8G     0  3.8G   0% /dev
tmpfs               tmpfs     3.8G     0  3.8G   0% /dev/shm
tmpfs               tmpfs     3.8G  9.0M  3.8G   1% /run
tmpfs               tmpfs     3.8G     0  3.8G   0% /sys/fs/cgroup
/dev/mapper/cs-root xfs        66G  5.5G   60G   9% /
/dev/sda1           xfs      1014M  209M  806M  21% /boot
/dev/mapper/cs-home xfs        32G  260M   32G   1% /home
tmpfs               tmpfs     774M     0  774M   0% /run/user/0
/dev/sdb1           xfs       200G  1.5G  199G   1% /kvmdata

#关闭防火墙和selinux
[root@kvm ~]# systemctl status firewalld.service
● firewalld.service - firewalld - dynamic firewall daemon
   Loaded: loaded (/usr/lib/systemd/system/firewalld.service; disabled; vendor preset: enabled)
   Active: inactive (dead)
     Docs: man:firewalld(1)
[root@kvm ~]# setenforce 0
setenforce: SELinux is disabled


#部署yum源
[root@kvm yum.repos.d]# curl -o /etc/yum.repos.d/CentOS-Base.repo https://mirrors.aliyun.com/repo/Centos-vault-8.5.2111.repo
  % Total    % Received % Xferd  Average Speed   Time    Time     Time  Current
                                 Dload  Upload   Total   Spent    Left  Speed
100  2495  100  2495    0     0   4070      0 --:--:-- --:--:-- --:--:--  4070
[root@kvm yum.repos.d]# ls
CentOS-Base.repo
[root@kvm yum.repos.d]# yum makecache
Failed to set locale, defaulting to C.UTF-8
CentOS-8.5.2111 - Base - mirrors.aliyun.com                       12 kB/s | 3.9 kB     00:00
CentOS-8.5.2111 - Extras - mirrors.aliyun.com                    7.6 kB/s | 1.5 kB     00:00
CentOS-8.5.2111 - AppStream - mirrors.aliyun.com                  16 kB/s | 4.3 kB     00:00
Metadata cache created.
[root@kvm yum.repos.d]# sed -i -e '/mirrors.cloud.aliyuncs.com/d' -e '/mirrors.aliyuncs.com/d' /etc/yum.repos.d/CentOS-Base.repo


#安装所需软件包
[root@kvm yum.repos.d]# yum -y install epel-release vim wget net-tools unzip zip gcc gcc-c++


#验证cpu是否支持kvm,vmx是intel的  svm是AMD的
[root@kvm yum.repos.d]# egrep -o 'vmx|svm' /proc/cpuinfo
vmx


#安装kvm
[root@kvm yum.repos.d]# yum -y install qemu-kvm \
 qemu-kvm-tools \
 qemu-img \
 virt-manager \
 libvirt \
 libvirt-python \
 libvirt-client \
 virt-install \
 virt-viewer \
 bridge-utils \
 libguestfs-tools

#配置网络,因为虚拟机中的网络,我们一般是都和公司服务器处在同一网段的,所以我们需要把kvm的网卡配置成桥接模式
[root@kvm yum.repos.d]# cd /etc/sysconfig/network-scripts/
[root@kvm network-scripts]# ls
ifcfg-ens33
[root@kvm network-scripts]# cp  ifcfg-ens33 ifcfg-br0
[root@kvm network-scripts]# vim  ifcfg-br0
TYPE=Bridge
BOOTPROTO=none
NAME=br0
DEVICE=br0
ONBOOT=yes
IPADDR=192.168.17.133
PREFIX=24
GATEWAY=192.168.17.2
DNS1=8.8.8.8
DNS2=114.114.114.114


[root@kvm network-scripts]# vim ifcfg-ens33
TYPE=Ethernet
BOOTPROTO=none
NAME=ens33
DEVICE=ens33
ONBOOT=yes
BRIDGE=br0

#重启网卡服务
[root@kvm network-scripts]# systemctl restart network
[root@kvm network-scripts]# systemctl restart NetworkManager
[root@kvm network-scripts]# ip a
2: ens33: <BROADCAST,MULTICAST,UP,LOWER_UP> mtu 1500 qdisc fq_codel master br0 state UP group default qlen 1000
    link/ether 00:0c:29:ab:fe:16 brd ff:ff:ff:ff:ff:ff
3: br0: <BROADCAST,MULTICAST,UP,LOWER_UP> mtu 1500 qdisc noqueue state UP group default qlen 1000
    link/ether 00:0c:29:ab:fe:16 brd ff:ff:ff:ff:ff:ff
    inet 192.168.17.137/24 brd 192.168.17.255 scope global noprefixroute br0
       valid_lft forever preferred_lft forever
    inet 192.168.17.133/24 brd 192.168.17.255 scope global secondary noprefixroute br0
       valid_lft forever preferred_lft forever
    inet6 fe80::20c:29ff:feab:fe16/64 scope link
       valid_lft forever preferred_lft forever


#重启libvirtd服务,并设置下次启动生效
[root@kvm network-scripts]# systemctl restart libvirtd
[root@kvm network-scripts]# systemctl enable libvirtd


#查看kvm模块是否加载
[root@kvm yum.repos.d]#  lsmod|grep kvm
kvm_intel             323584  0
kvm                   905216  1 kvm_intel
irqbypass              16384  1 kvm

#验证安装结果
[root@kvm network-scripts]# virsh -c qemu:///system list
setlocale: No such file or directory
 Id   Name   State
--------------------

[root@kvm network-scripts]# virsh --version
setlocale: No such file or directory
6.0.0
[root@kvm network-scripts]# virt-install --version
2.2.1


#将qemu-kvm这个命令做一个软链接到/usr/bin/qemu-kvm
[root@kvm ~]# ln -s /usr/libexec/qemu-kvm /usr/bin/qemu-kvm
[root@kvm ~]# ll /usr/bin/qemu-kvm
lrwxrwxrwx 1 root root 21 Oct  2 16:04 /usr/bin/qemu-kvm -> /usr/libexec/qemu-kvm

的

#查看网桥信息
[root@kvm ~]# brctl show
bridge name     bridge id               STP enabled     interfaces
br0             8000.000c29abfe16       no              ens33
docker0         8000.0242d262f1c6       no
virbr0          8000.525400e26dbb       yes             virbr0-nic
使用WebVirtMgr的WEB界面管理
#安装依赖包
[root@kvm ~]# yum -y install git python3-pip python3-libvirt python3-libxml2 python3-websocket-client supervisor nginx python36-devel


#从github上下载webvirtmgr代码
[root@kvm ~]# cd /usr/local/src/
[root@kvm src]# git clone http://github.com/retspen/webvirtmgr.git
Cloning into 'webvirtmgr'...
warning: redirecting to https://github.com/retspen/webvirtmgr.git/
remote: Enumerating objects: 5614, done.
remote: Total 5614 (delta 0), reused 0 (delta 0), pack-reused 5614
Receiving objects: 100% (5614/5614), 2.97 MiB | 2.08 MiB/s, done.
Resolving deltas: 100% (3606/3606), done.

#安装webvirtmgr
[root@kvm src]# cd webvirtmgr/
[root@kvm webvirtmgr]# ls
MANIFEST.in  console               hostdetail  locale            secrets    storages
README.rst   create                images      manage.py         serverlog  templates
Vagrantfile  deploy                instance    networks          servers    vrtManager
conf         dev-requirements.txt  interfaces  requirements.txt  setup.py   webvirtmgr
[root@kvm webvirtmgr]# pip3 install -r requirements.txt
WARNING: Running pip install with root privileges is generally not a good idea. Try `pip3 install --user` instead.
Collecting django==1.5.5 (from -r requirements.txt (line 1))
  Downloading https://files.pythonhosted.org/packages/38/49/93511c5d3367b6b21fc2995a0e53399721afc15e4cd6eb57be879ae13ad4/Django-1.5.5.tar.gz (8.1MB)
    100% |████████████████████████████████| 8.1MB 19kB/s
Collecting gunicorn==19.5.0 (from -r requirements.txt (line 2))
  Downloading https://files.pythonhosted.org/packages/f9/4e/f4076a1a57fc1e75edc0828db365cfa9005f9f6b4a51b489ae39a91eb4be/gunicorn-19.5.0-py2.py3-none-any.whl (113kB)
    100% |████████████████████████████████| 122kB 97kB/s
Collecting lockfile>=0.9 (from -r requirements.txt (line 5))
  Downloading https://files.pythonhosted.org/packages/c8/22/9460e311f340cb62d26a38c419b1381b8593b0bb6b5d1f056938b086d362/lockfile-0.12.2-py2.py3-none-any.whl
Installing collected packages: django, gunicorn, lockfile
  Running setup.py install for django ... done
Successfully installed django-1.5.5 gunicorn-19.5.0 lockfile-0.12.2


#检查sqlite3是否安装
[root@kvm webvirtmgr]# python3
Python 3.6.8 (default, Sep 10 2021, 09:13:53)
[GCC 8.5.0 20210514 (Red Hat 8.5.0-3)] on linux
Type "help", "copyright", "credits" or "license" for more information.
>>> import sqlite3
>>> exit
Use exit() or Ctrl-D (i.e. EOF) to exit
>>> exit()


#初始化账号信息
[root@kvm webvirtmgr]# python3 manage.py syncdb
WARNING:root:No local_settings file found.
Creating tables ...
Creating table auth_permission
Creating table auth_group_permissions
Creating table auth_group
Creating table auth_user_groups
Creating table auth_user_user_permissions
Creating table auth_user
Creating table django_content_type
Creating table django_session
Creating table django_site
Creating table servers_compute
Creating table instance_instance
Creating table create_flavor

You just installed Django's auth system, which means you don't have any superusers defined.
Would you like to create one now? (yes/no): yes
Username (leave blank to use 'root'):
Email address: 1494696995@qq.com
Password:
Password (again):
Superuser created successfully.
Installing custom SQL ...
Installing indexes ...
Installed 6 object(s) from 1 fixture(s)


#拷贝web网页到指定目录
[root@kvm webvirtmgr]# mkdir /var/www
[root@kvm webvirtmgr]# cp -r /usr/local/src/webvirtmgr/ /var/www/
[root@kvm webvirtmgr]# chown -R nginx.nginx /var/www/webvirtmgr/


#生成一对公钥与私钥,由于这里webvirtmgr和kvm服务部署在同一台主机中,所以这里本地信任。如果kvm部署在其他机器上的时候,那么就需要把公钥发送到kvm主机中
[root@kvm webvirtmgr]# ssh-keygen
Generating public/private rsa key pair.
Enter file in which to save the key (/root/.ssh/id_rsa):
Created directory '/root/.ssh'.
Enter passphrase (empty for no passphrase):
Enter same passphrase again:
Your identification has been saved in /root/.ssh/id_rsa.
Your public key has been saved in /root/.ssh/id_rsa.pub.
The key fingerprint is:
SHA256:xLz9h9Cj6heNUrnAS6mqMaU4RYKjJW7SPh69DMO4u5g root@kvm
The key's randomart image is:
+---[RSA 2048]----+
|                 |
|.      o         |
|= o    .+. .     |
|oB     .=oo.     |
|ooo .  oS+o+o    |
|o* +  . o ++.o   |
|+ @ ..   ...o .  |
|.= O..   ..  .   |
|Eoo.o  .o.       |
+----[SHA256]-----+
[root@kvm webvirtmgr]# ssh-copy-id -i ~/.ssh/id_rsa.pub root@192.168.17.133
/usr/bin/ssh-copy-id: INFO: Source of key(s) to be installed: "/root/.ssh/id_rsa.pub"
The authenticity of host '192.168.17.133 (192.168.17.133)' can't be established.
ECDSA key fingerprint is SHA256:OkVIWDqbwnfMHO9xeIP8qeYdc2tN5cW0ItmQxHpdgbg.
ECDSA key fingerprint is MD5:e0:f4:08:75:ee:a8:8b:eb:73:47:2f:79:e0:e4:d3:8a.
Are you sure you want to continue connecting (yes/no)? yes
/usr/bin/ssh-copy-id: INFO: attempting to log in with the new key(s), to filter out any that are already installed
/usr/bin/ssh-copy-id: INFO: 1 key(s) remain to be installed -- if you are prompted now it is to install the new keys
root@192.168.17.133's password:

Number of key(s) added: 1

Now try logging into the machine, with:   "ssh 'root@192.168.17.133'"
and check to make sure that only the key(s) you wanted were added.


#配置端口转发
[root@kvm webvirtmgr]# ssh 192.168.17.133 -L localhost:8000:localhost:8000 -L localhost:6080:localhost:60
Last login: Sun Oct  2 21:56:47 2022 from 192.168.17.1
[root@kvm ~]# ss -antl
State       Recv-Q Send-Q   Local Address:Port                  Peer Address:Port
LISTEN      0      128          127.0.0.1:6080                             *:*
LISTEN      0      128          127.0.0.1:8000                             *:*
LISTEN      0      128                  *:111                              *:*
LISTEN      0      5        192.168.122.1:53                               *:*
LISTEN      0      128                  *:22                               *:*
LISTEN      0      100          127.0.0.1:25                               *:*
LISTEN      0      128                ::1:6080                            :::*
LISTEN      0      128                ::1:8000                            :::*
LISTEN      0      128                 :::111                             :::*
LISTEN      0      128                 :::22                              :::*
LISTEN      0      100                ::1:25                              :::*
[root@kvm ~]#


#配置nginx
[root@kvm ~]# cp /etc/nginx/nginx.conf /etc/nginx/nginx.conf.bak
[root@kvm ~]# vim /etc/nginx/nginx.conf
删除listen       [::]:80;行
参数server_name行改成server_name  localhost;
删除root         /usr/share/nginx/html;行
在include /etc/nginx/default.d/*.conf;行下添加
location/ {
                root    html;
                index   index.html index.htm;
}


#配置nginx虚拟主机
[root@kvm ~]# vim /etc/nginx/conf.d/webvirtmgr.conf
server {
    listen 80 default_server;

    server_name $hostname;
    #access_log /var/log/nginx/webvirtmgr_access_log;

    location /static/ {
        root /var/www/webvirtmgr/webvirtmgr;
        expires max;
    }

    location / {
        proxy_pass http://127.0.0.1:8000;
        proxy_set_header X-Real-IP $remote_addr;
        proxy_set_header X-Forwarded-for $proxy_add_x_forwarded_for;
        proxy_set_header Host $host:$server_port;
        proxy_set_header X-Forwarded-Proto $remote_addr;
        proxy_connect_timeout 600;
        proxy_read_timeout 600;
        proxy_send_timeout 600;
        client_max_body_size 1024M;
    }
}


#确保bind绑定本机的8000端口
[root@kvm ~]# vim /var/www/webvirtmgr/conf/gunicorn.conf.py
bind = '127.0.0.1:8000'  //确保此处绑定的是本机的8000端口,这个在nginx配置中定义了,被代理的端口
backlog = 2048


#重启nginx服务,查看端口是否开启
[root@kvm ~]# systemctl restart nginx

[root@kvm ~]# ss -antl
State       Recv-Q Send-Q   Local Address:Port                  Peer Address:Port
LISTEN      0      128          127.0.0.1:6080                             *:*
LISTEN      0      128          127.0.0.1:8000                             *:*
LISTEN      0      128                  *:111                              *:*
LISTEN      0      128                  *:80                               *:*
LISTEN      0      5        192.168.122.1:53                               *:*
LISTEN      0      128                  *:22                               *:*
LISTEN      0      100          127.0.0.1:25


#设置supervisor
[root@kvm ~]# vim /etc/supervisord.conf
//在文件最后添加如下信息
[program:webvirtmgr]
#这里command是一行
command=/usr/bin/python2 /var/www/webvirtmgr/manage.py run_gunicorn -c /var/www/webvirtmgr/conf/gunicorn.conf.py
directory=/var/www/webvirtmgr
autostart=true
autorestart=true
logfile=/var/log/supervisor/webvirtmgr.log
log_stderr=true
user=nginx

[program:webvirtmgr-console]
command=/usr/bin/python2 /var/www/webvirtmgr/console/webvirtmgr-console
directory=/var/www/webvirtmgr
autostart=true
autorestart=true
stdout_logfile=/var/log/supervisor/webvirtmgr-console.log
redirect_stderr=true
user=nginx


#启动supervisor并设置开机自启
[root@kvm ~]# systemctl restart supervisord.service
[root@kvm ~]# systemctl enable supervisord.service
Created symlink from /etc/systemd/system/multi-user.target.wants/supervisord.service to /usr/lib/systemd/system/supervisord.service.


#配置nginx用户
[root@kvm ~]# su - nginx -s /bin/bash
-bash-4.2$ ssh-keygen
Generating public/private rsa key pair.
Enter file in which to save the key (/var/lib/nginx/.ssh/id_rsa):
Created directory '/var/lib/nginx/.ssh'.
Enter passphrase (empty for no passphrase):
Enter same passphrase again:
Your identification has been saved in /var/lib/nginx/.ssh/id_rsa.
Your public key has been saved in /var/lib/nginx/.ssh/id_rsa.pub.
The key fingerprint is:
SHA256:XwNgL5hj476FPEdqrJ+LDtTbNmsZQENVz4AKL/2sRUU nginx@kvm
The key's randomart image is:
+---[RSA 2048]----+
|   ....+E        |
|  . o .+.*       |
|   = o*.. =      |
|  ..=o.o . .     |
|  ...=. S   o    |
| .   *=+ . . .   |
|  . .o%oo .      |
|   ..=oO         |
|   .+o*.         |
+----[SHA256]-----+
-bash-4.2$  touch ~/.ssh/config
-bash-4.2$ echo -e "StrictHostKeyChecking=no\nUserKnownHostsFile=/dev/null" >> ~/.ssh/config
-bash-4.2$ chmod 0600 ~/.ssh/config
-bash-4.2$ ssh-copy-id -i ~/.ssh/id_rsa.pub root@192.168.17.133
/bin/ssh-copy-id: INFO: Source of key(s) to be installed: "/var/lib/nginx/.ssh/id_rsa.pub"
/bin/ssh-copy-id: INFO: attempting to log in with the new key(s), to filter out any that are already installed
/bin/ssh-copy-id: INFO: 1 key(s) remain to be installed -- if you are prompted now it is to install the new keys
Warning: Permanently added '192.168.17.133' (ECDSA) to the list of known hosts.
root@192.168.17.133's password:

Number of key(s) added: 1

Now try logging into the machine, with:   "ssh 'root@192.168.17.133'"
and check to make sure that only the key(s) you wanted were added.


#验证基于密钥认证是否成功
-bash-4.2$ ssh root@192.168.17.133
Warning: Permanently added '192.168.17.133' (ECDSA) to the list of known hosts.
Last login: Sun Oct  2 22:16:17 2022 from kvm
[root@kvm ~]#


[root@kvm ~]# vim /etc/polkit-1/localauthority/50-local.d/50-libvirt-remote-access.pkla
[Remote libvirt SSH access]
Identity=unix-user:root
Action=org.libvirt.unix.manage
ResultAny=yes
ResultInactive=yes
ResultActive=yes

[root@kvm ~]# chown -R root.root /etc/polkit-1/localauthority/50-local.d/50-libvirt-remote-access.pkla
[root@kvm ~]# systemctl restart nginx.service
[root@kvm ~]# systemctl restart libvirtd


#修改nginx配置文件
[root@kvm ~]# vim /etc/nginx/nginx.conf
user nginx;
worker_processes auto;
error_log /var/log/nginx/error.log;
pid /run/nginx.pid;
worker_rlimit_nofile 655350;   //添加此行


#对系统参数进行设置
[root@kvm ~]# vim /etc/security/limits.conf
//在文件最末尾写入
* soft nofile 655350
* hard nofile 655350

#重启服务,重读文件
[root@kvm ~]# sysctl -p
[root@kvm ~]# systemctl restart nginx.service


#安装novnc,并通过novnc_server启动一个vnc
[root@kvm ~]# yum -y install novnc
[root@kvm ~]# chmod +x /etc/rc.d/rc.local
[root@kvm ~]# vim /etc/rc.d/rc.local
//在最末尾加入如下行
nohup novnc_server 192.168.17.133:5920 &
[root@kvm ~]# . /etc/rc.d/rc.local
[root@kvm ~]# nohup: 忽略输入并把输出追加到"nohup.out"
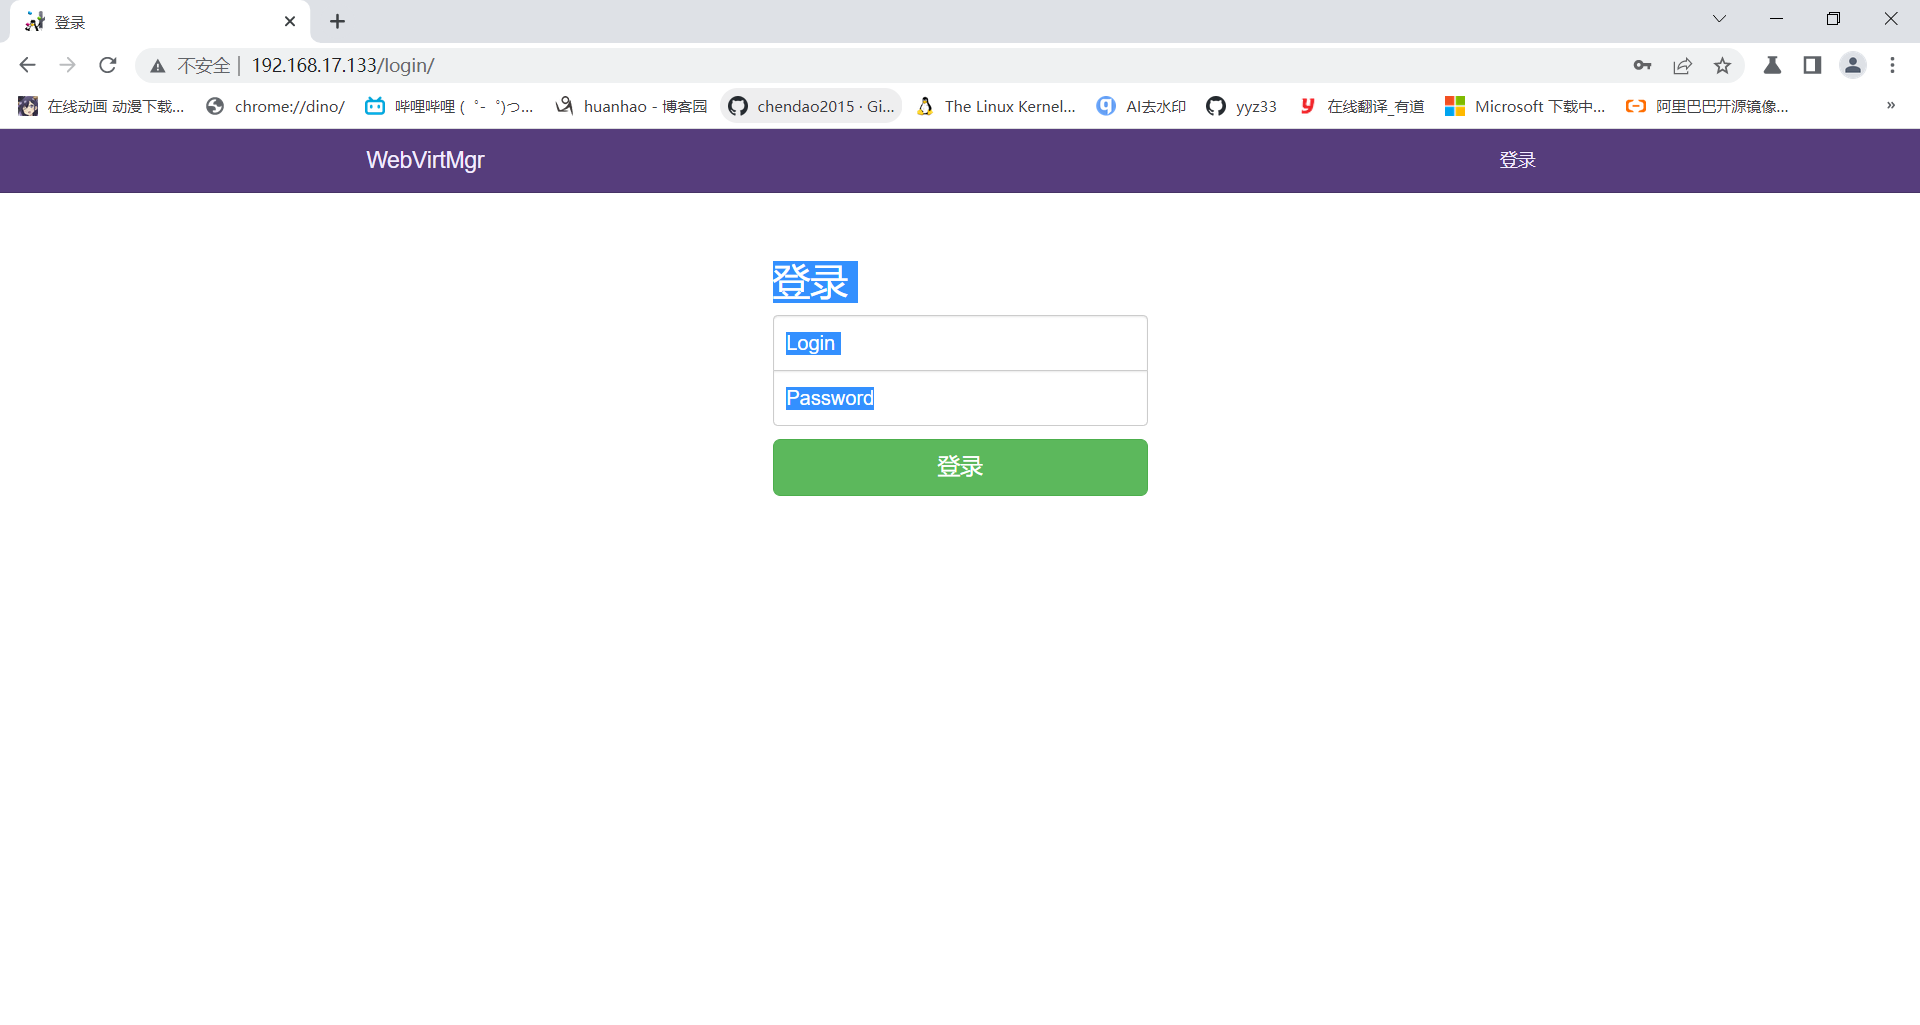
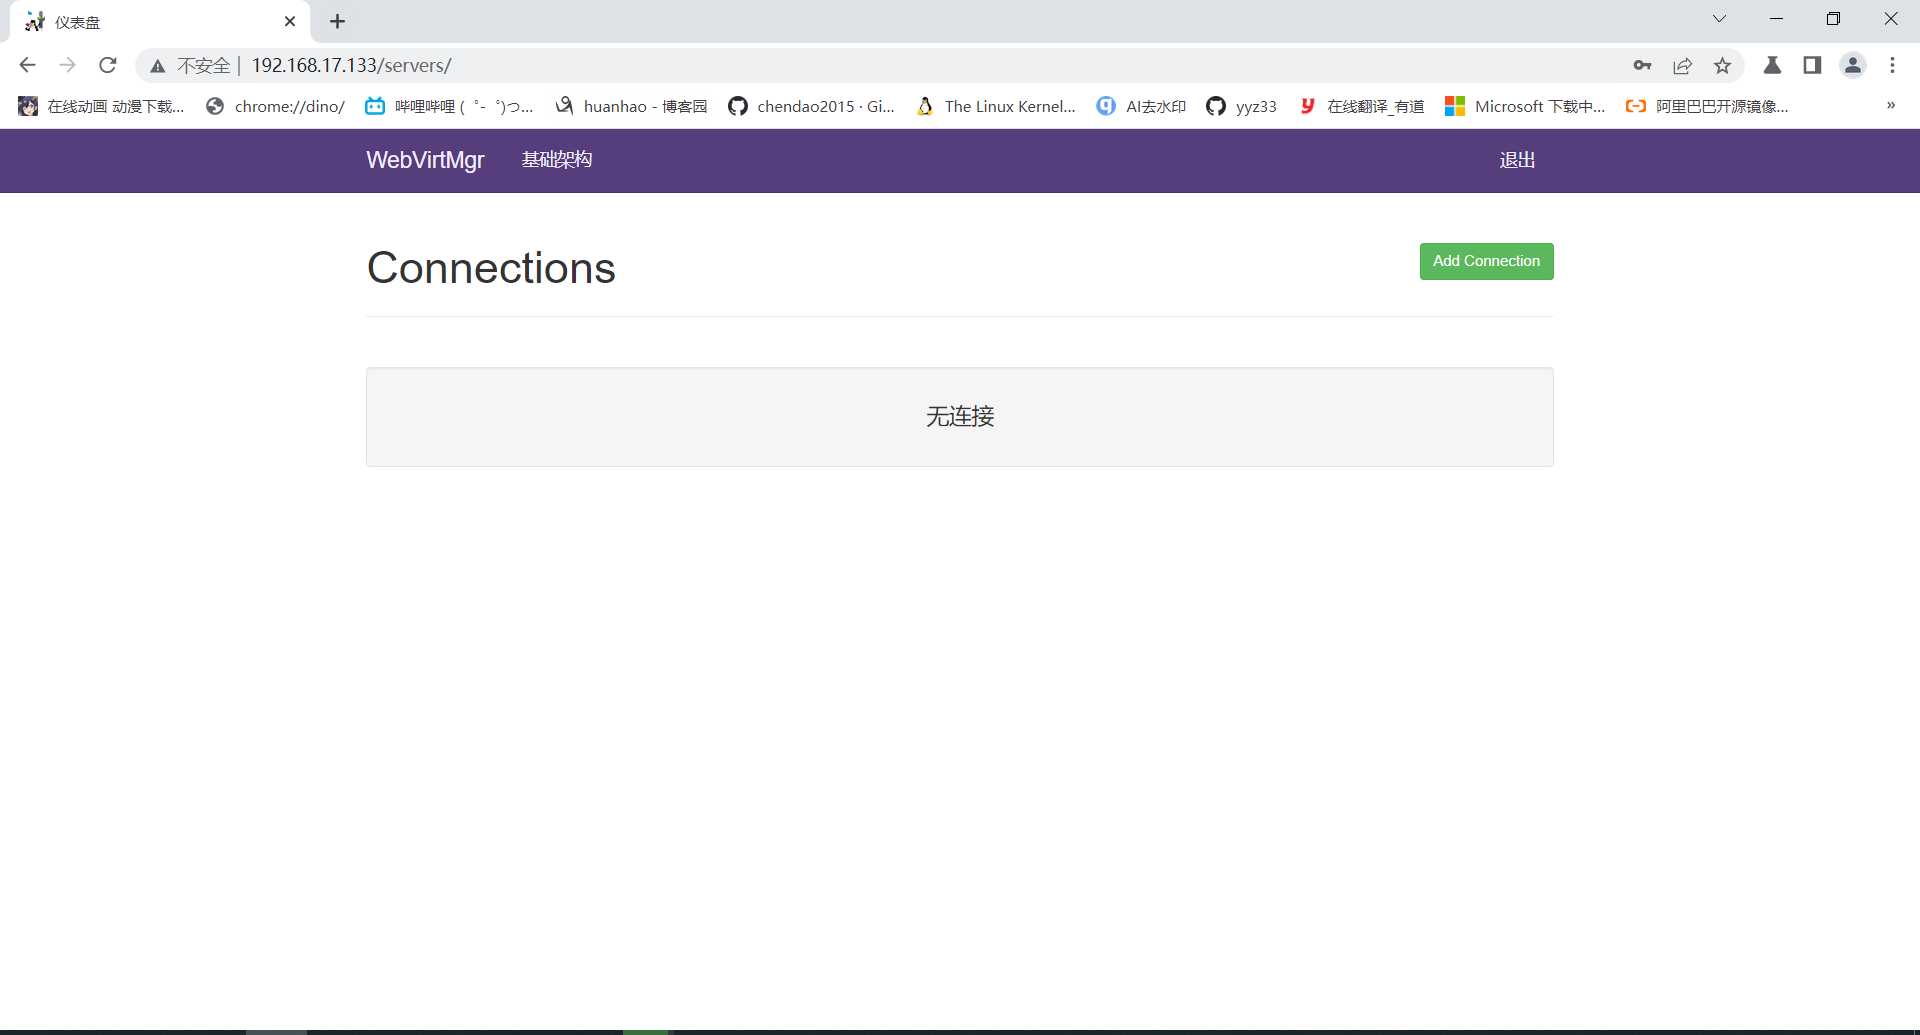
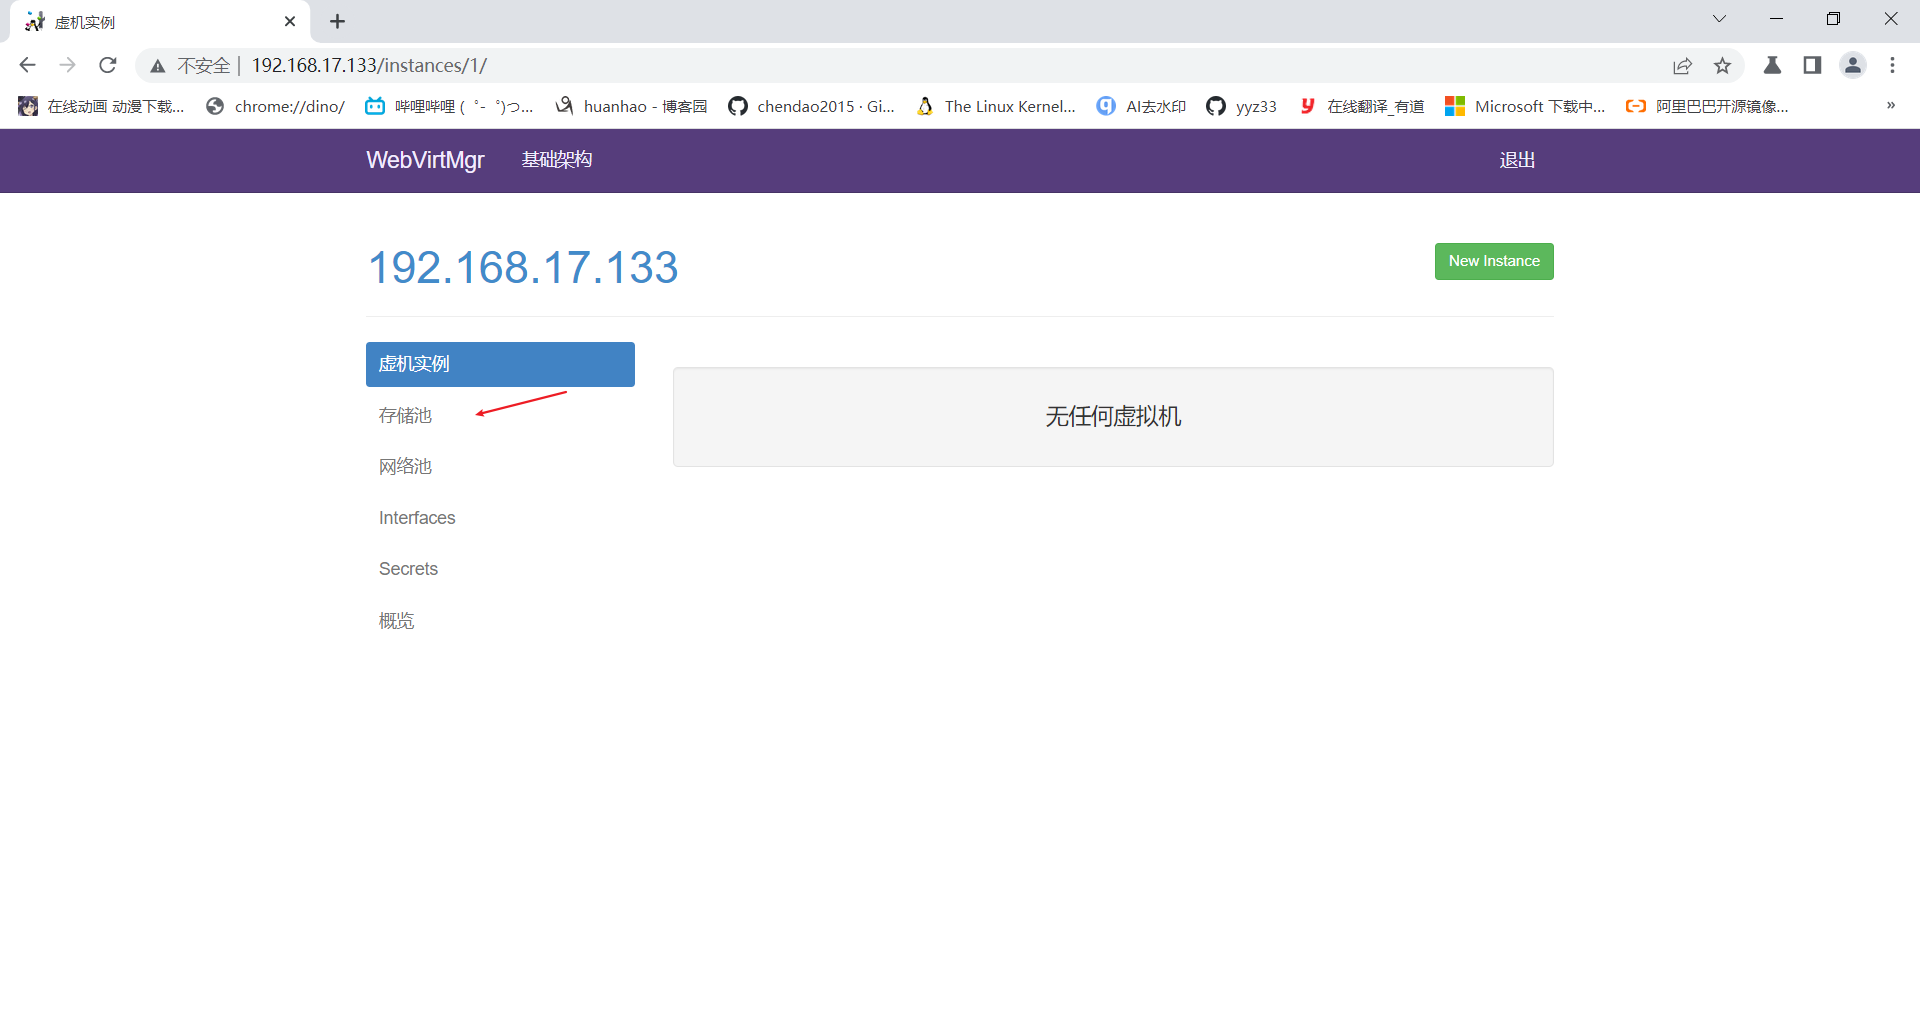
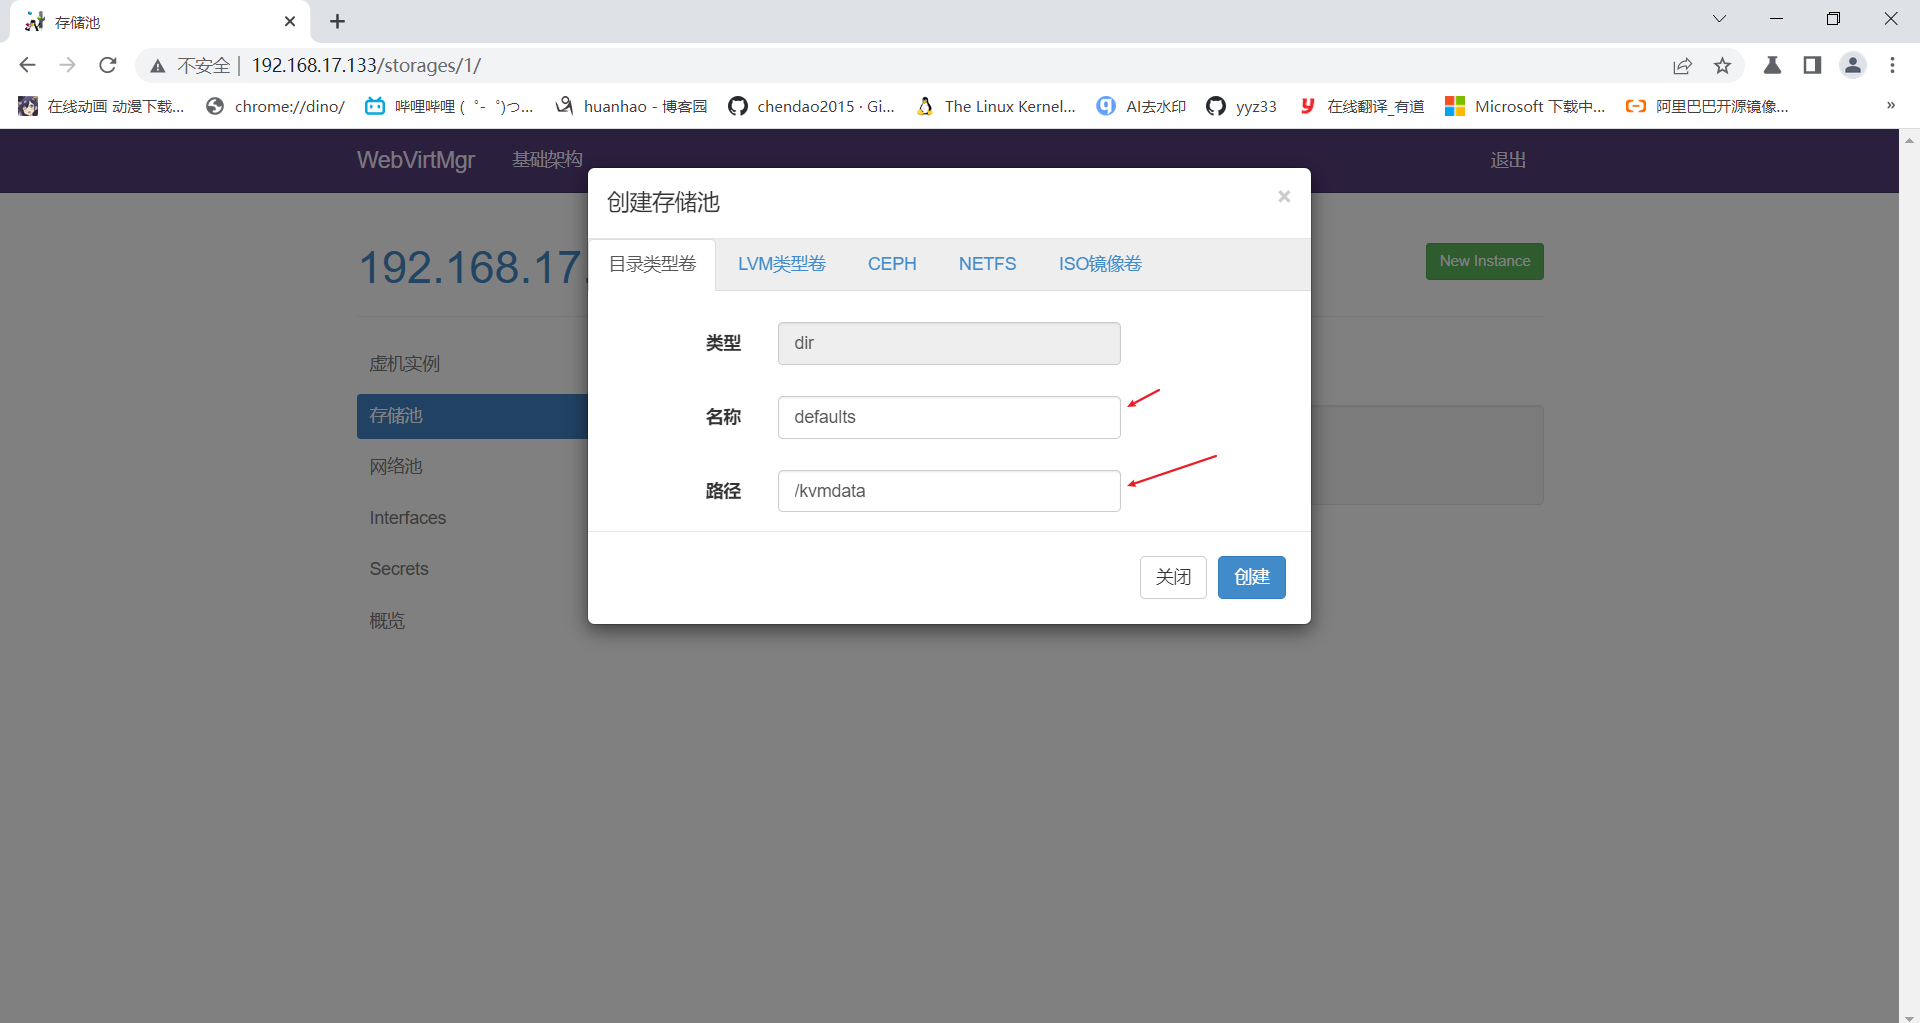
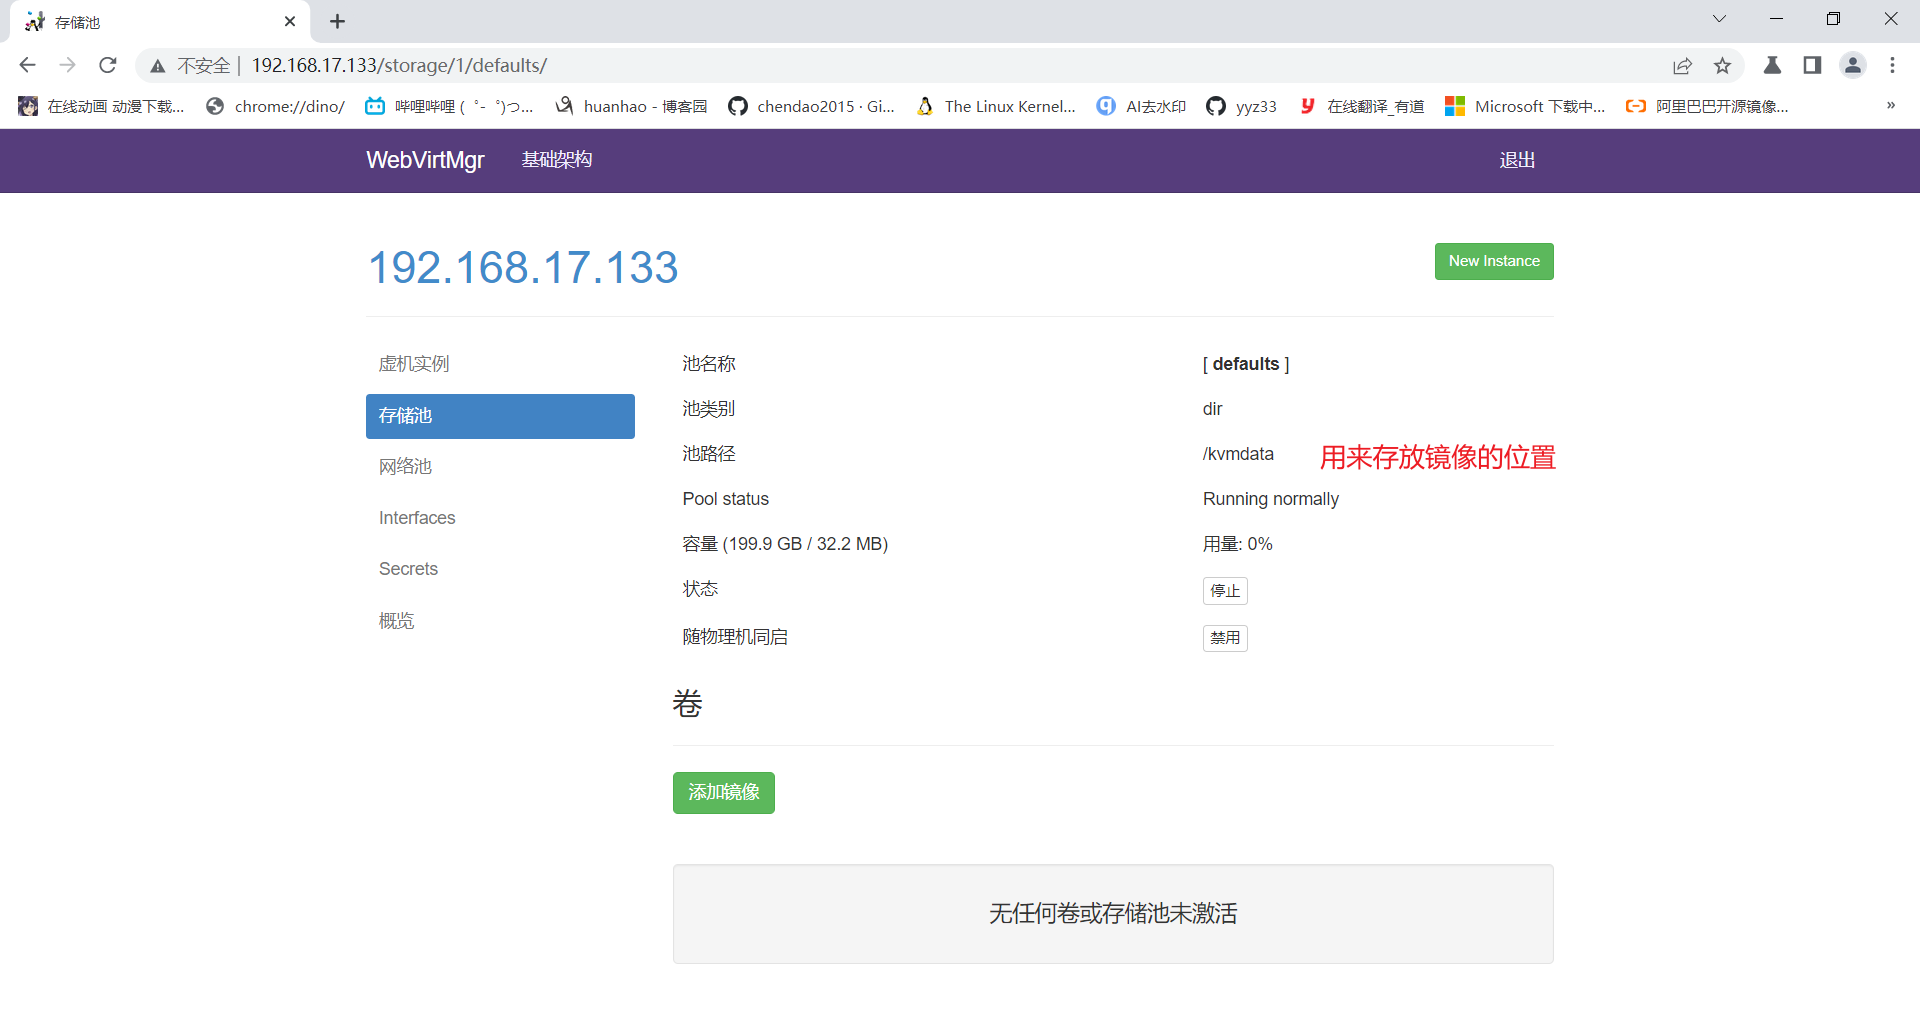
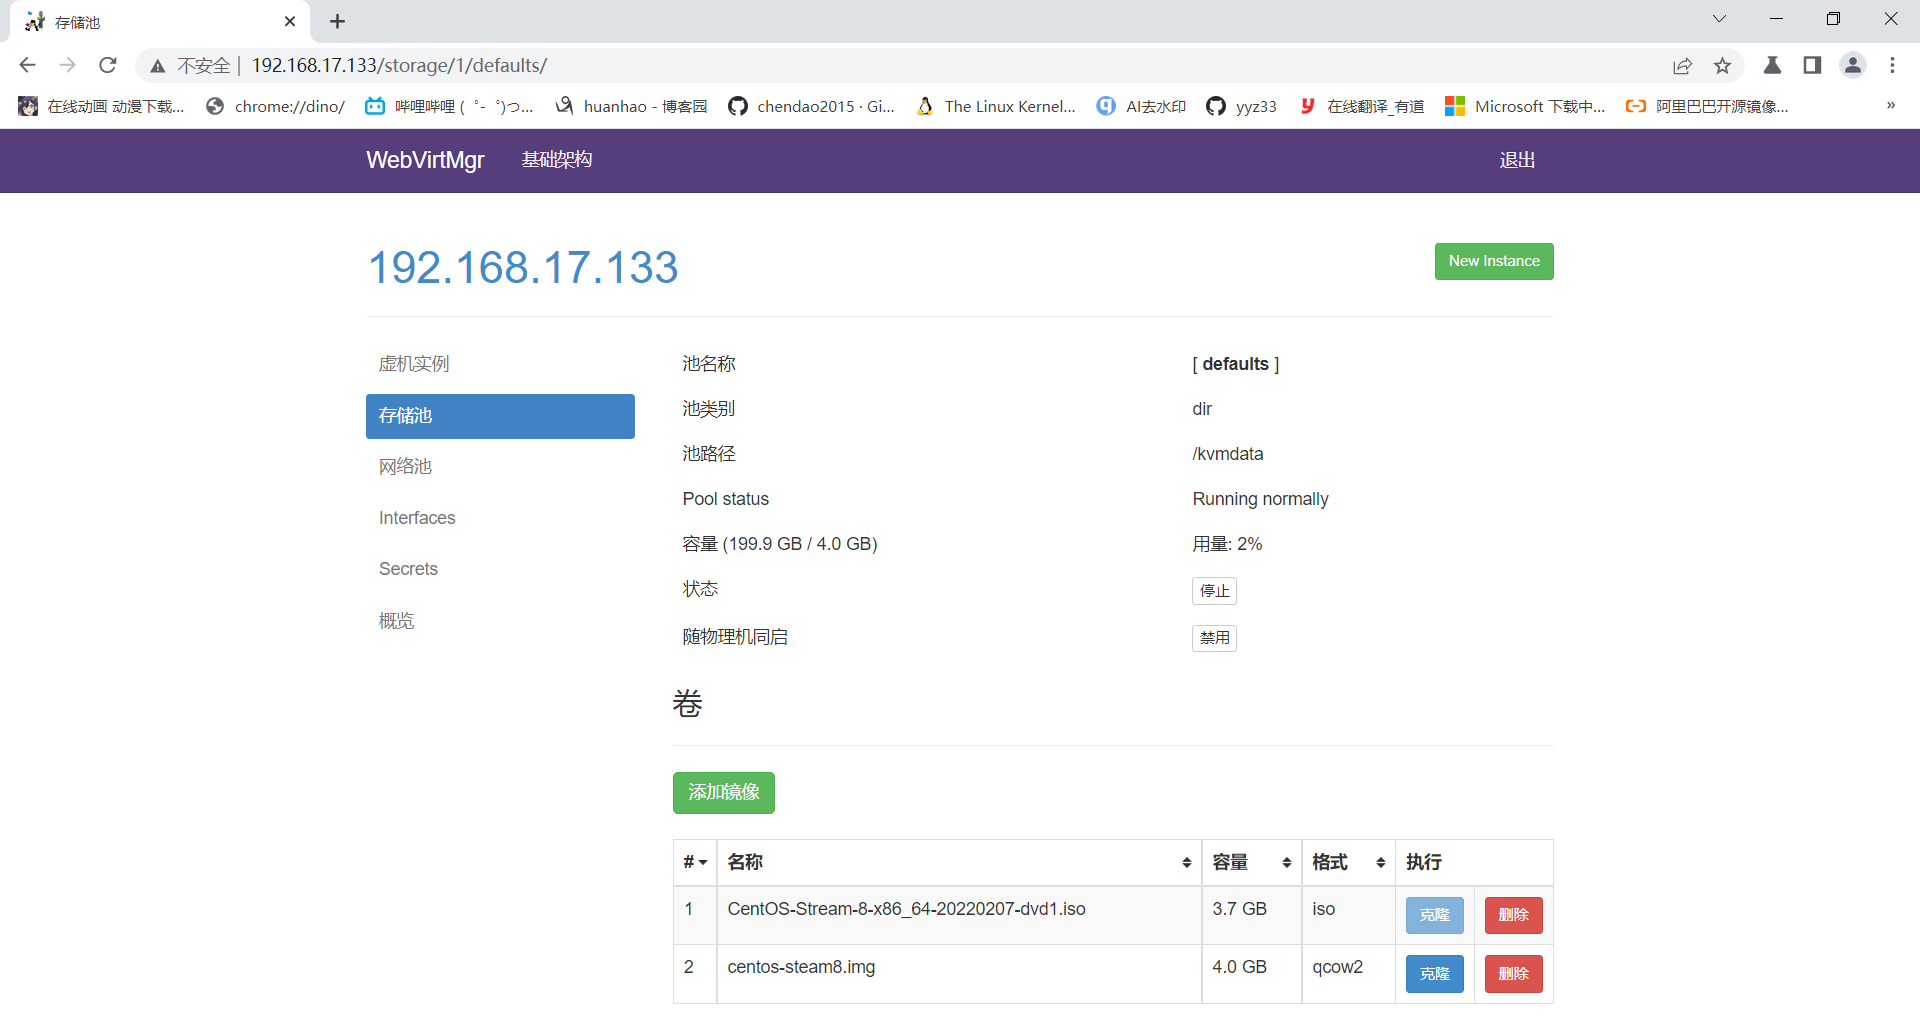
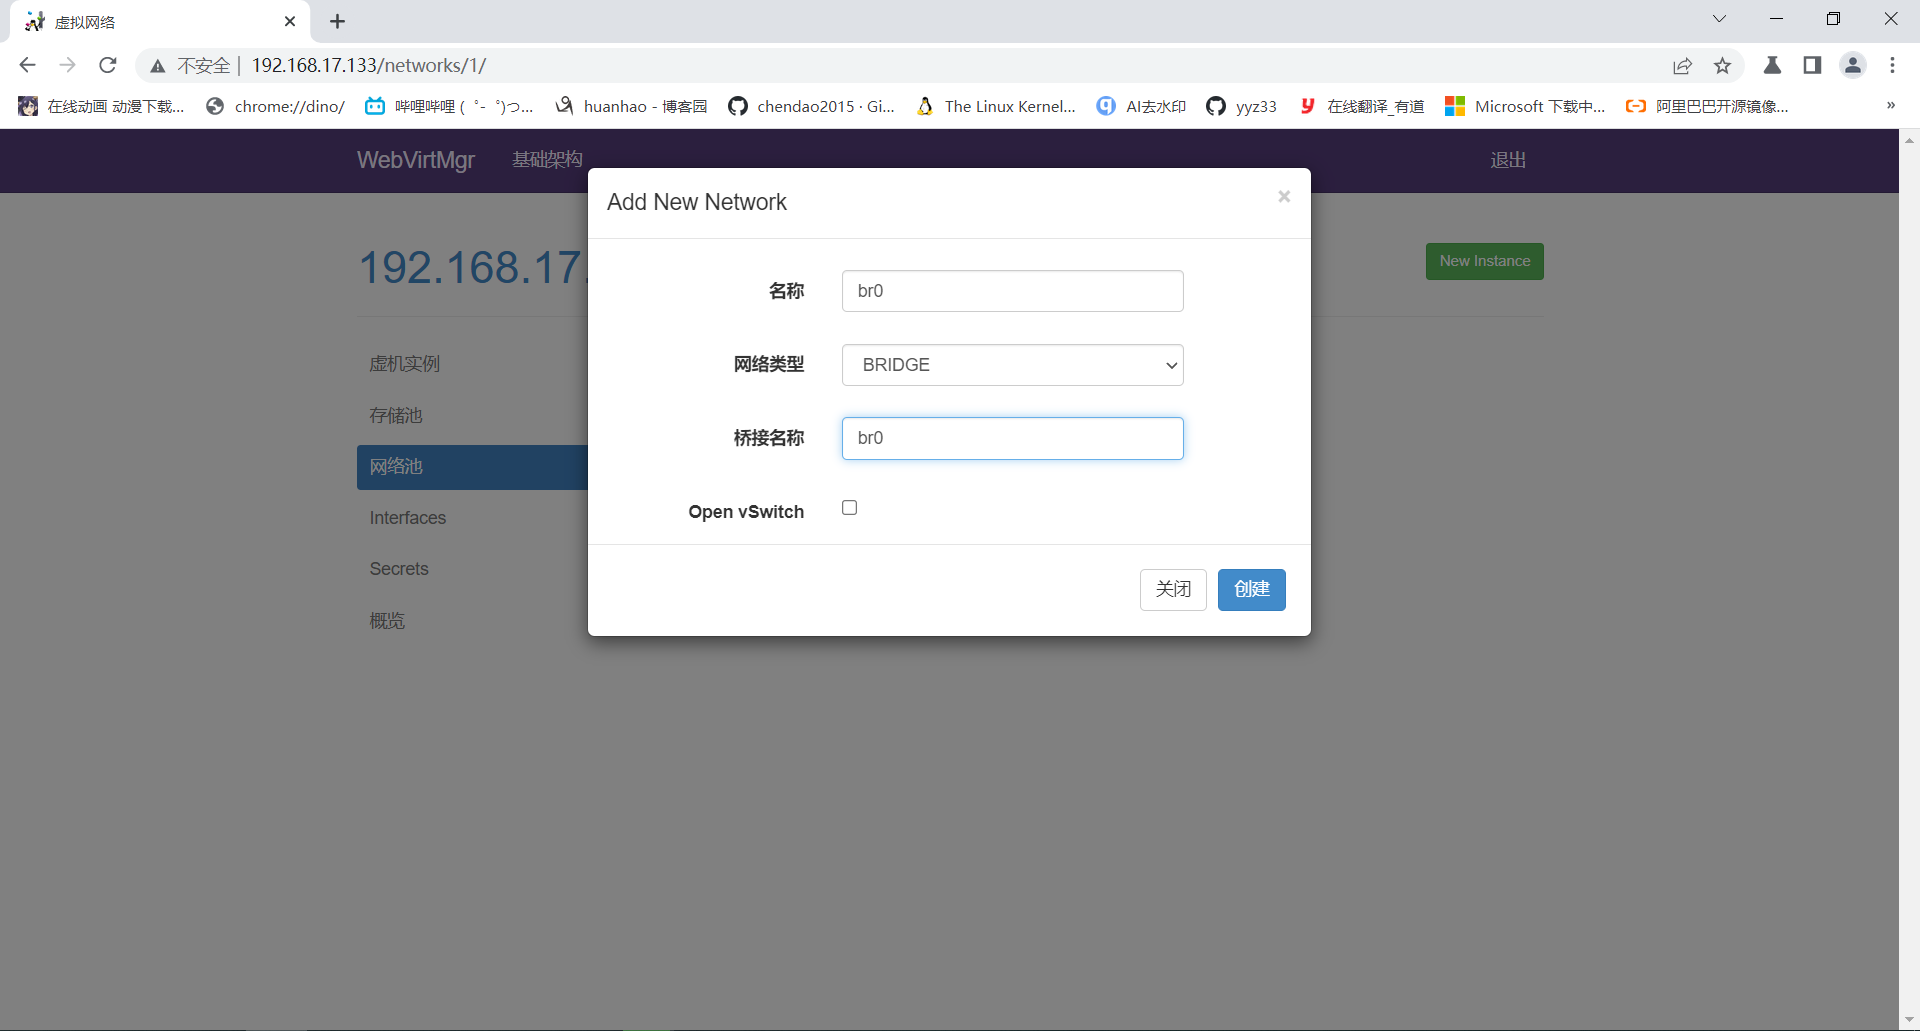
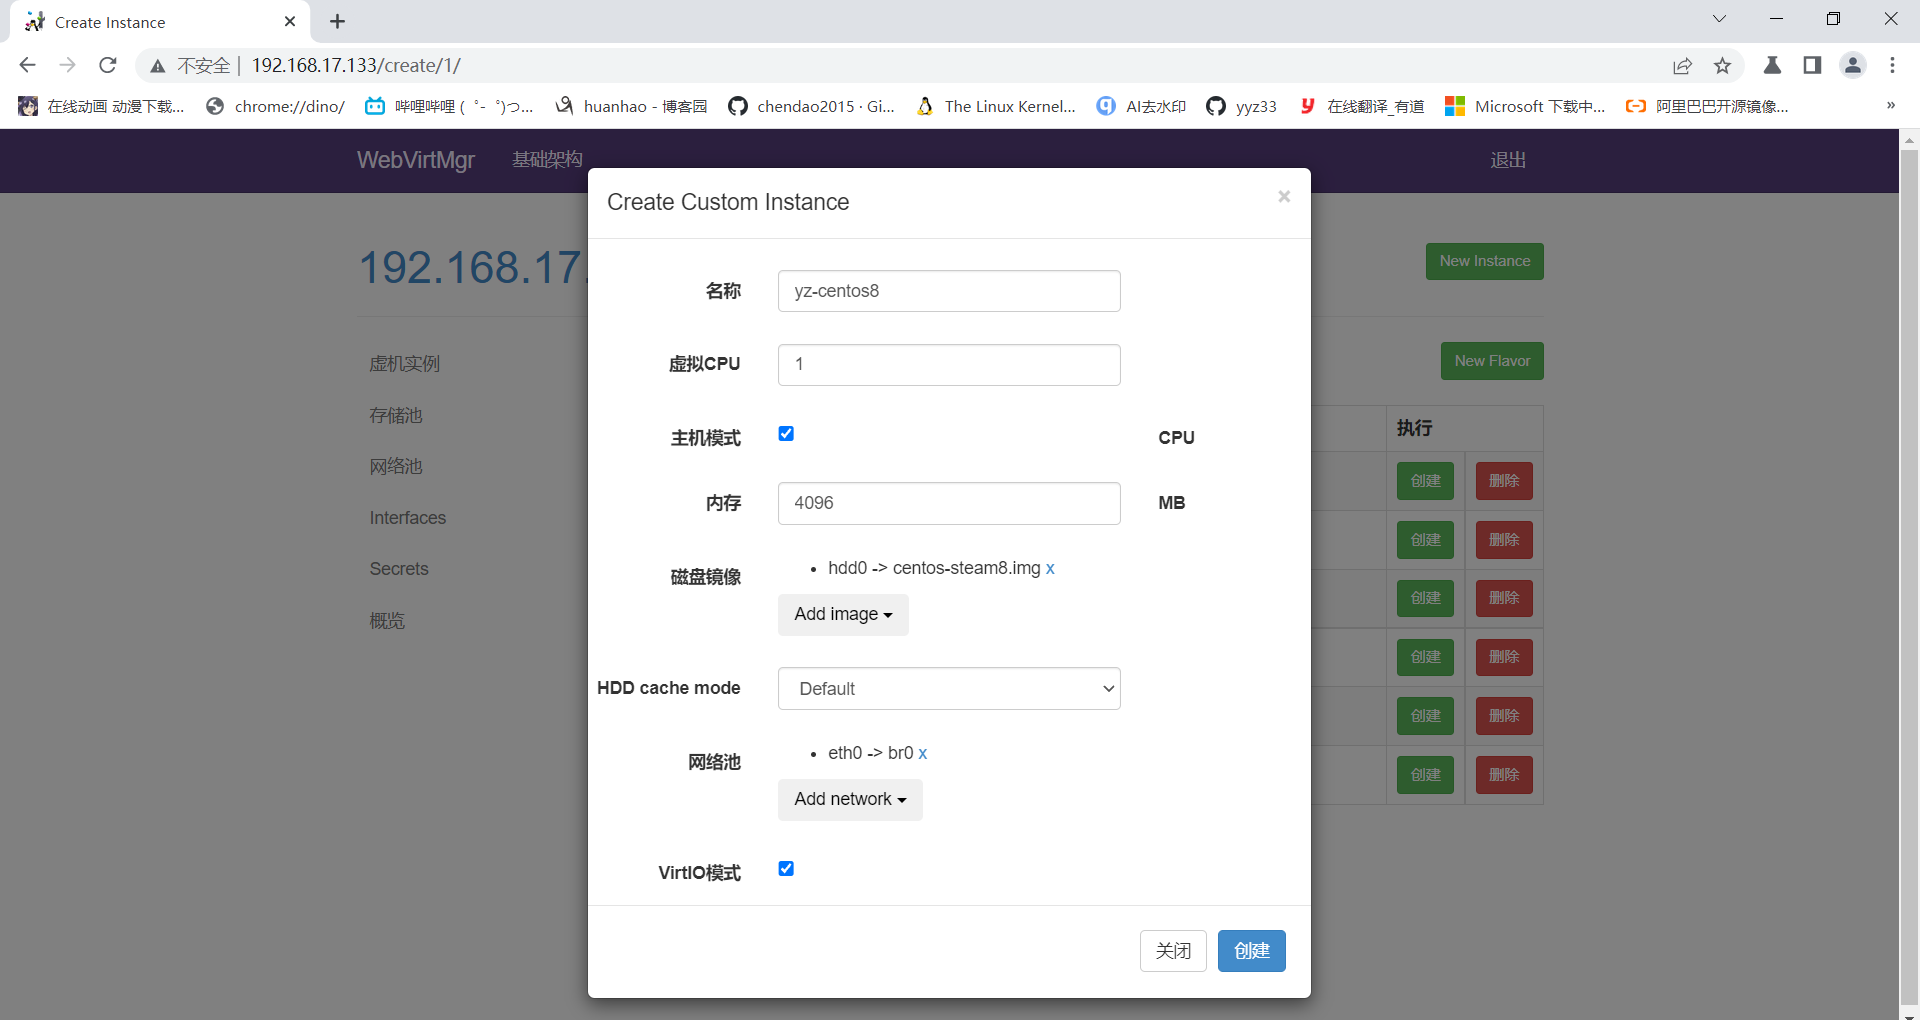
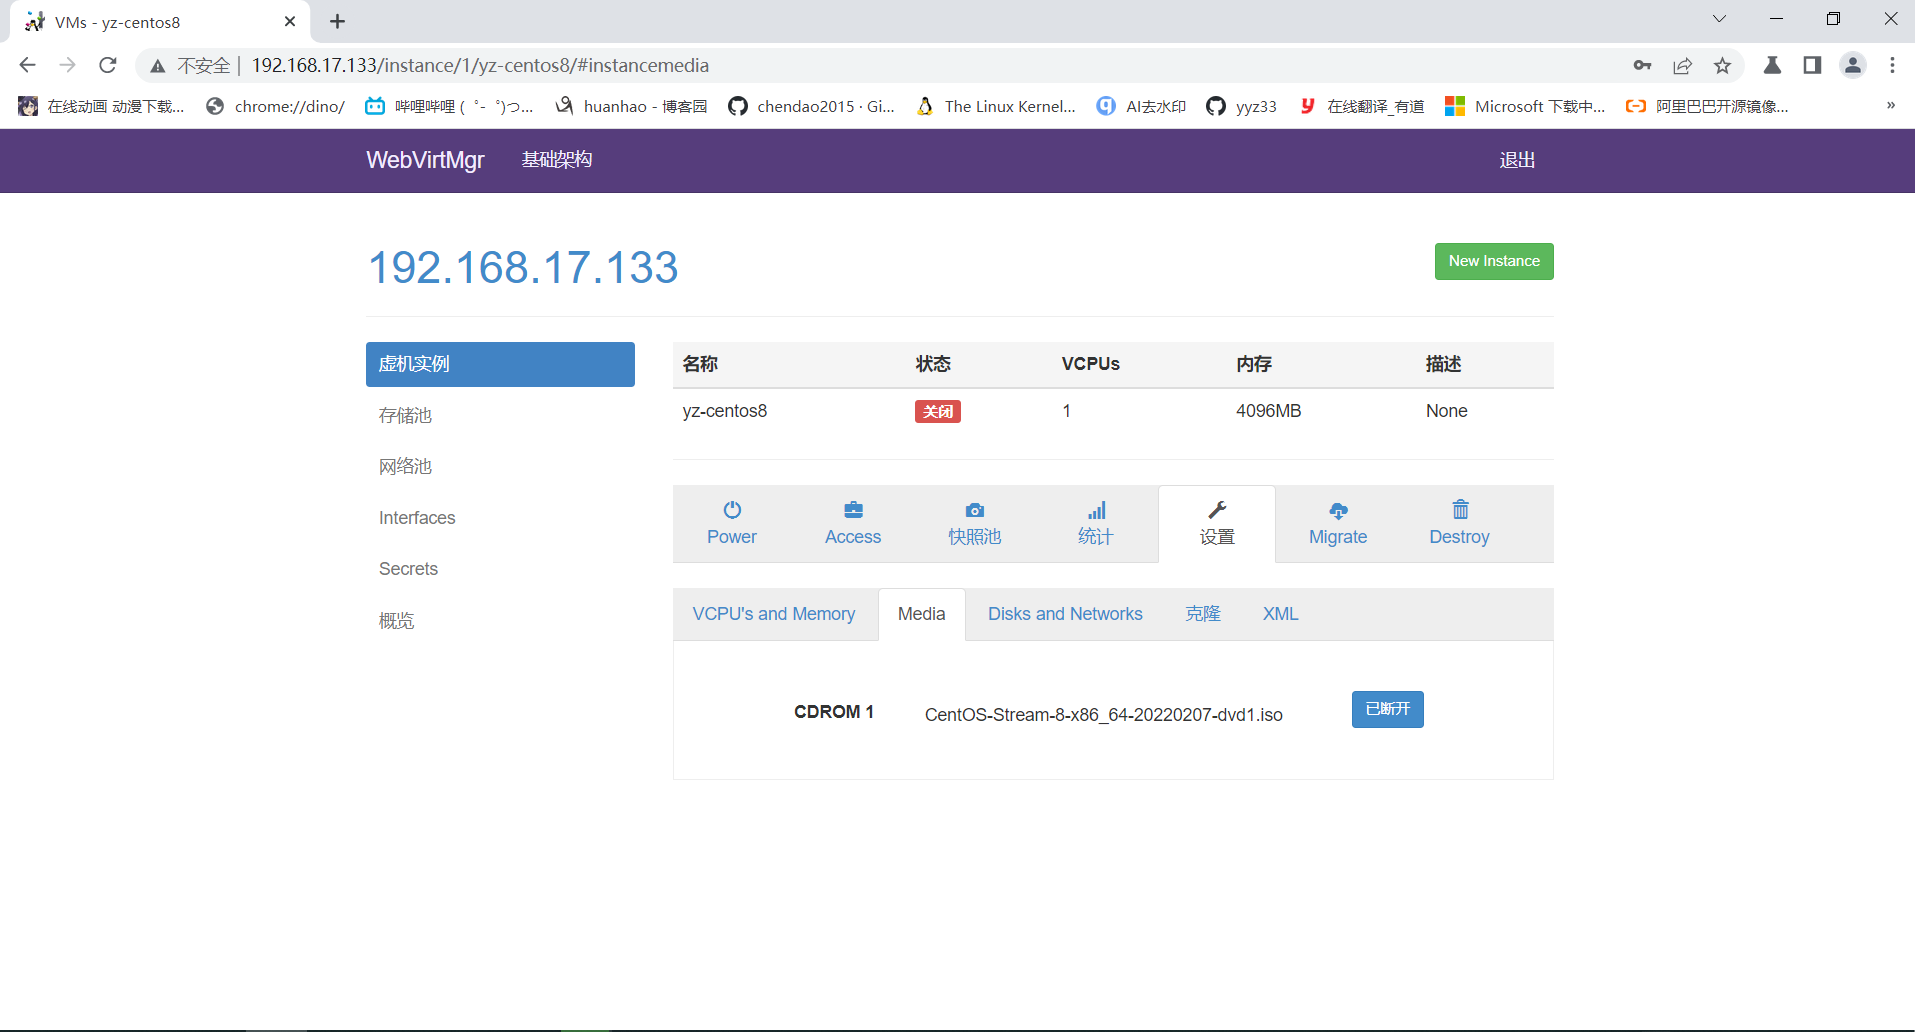
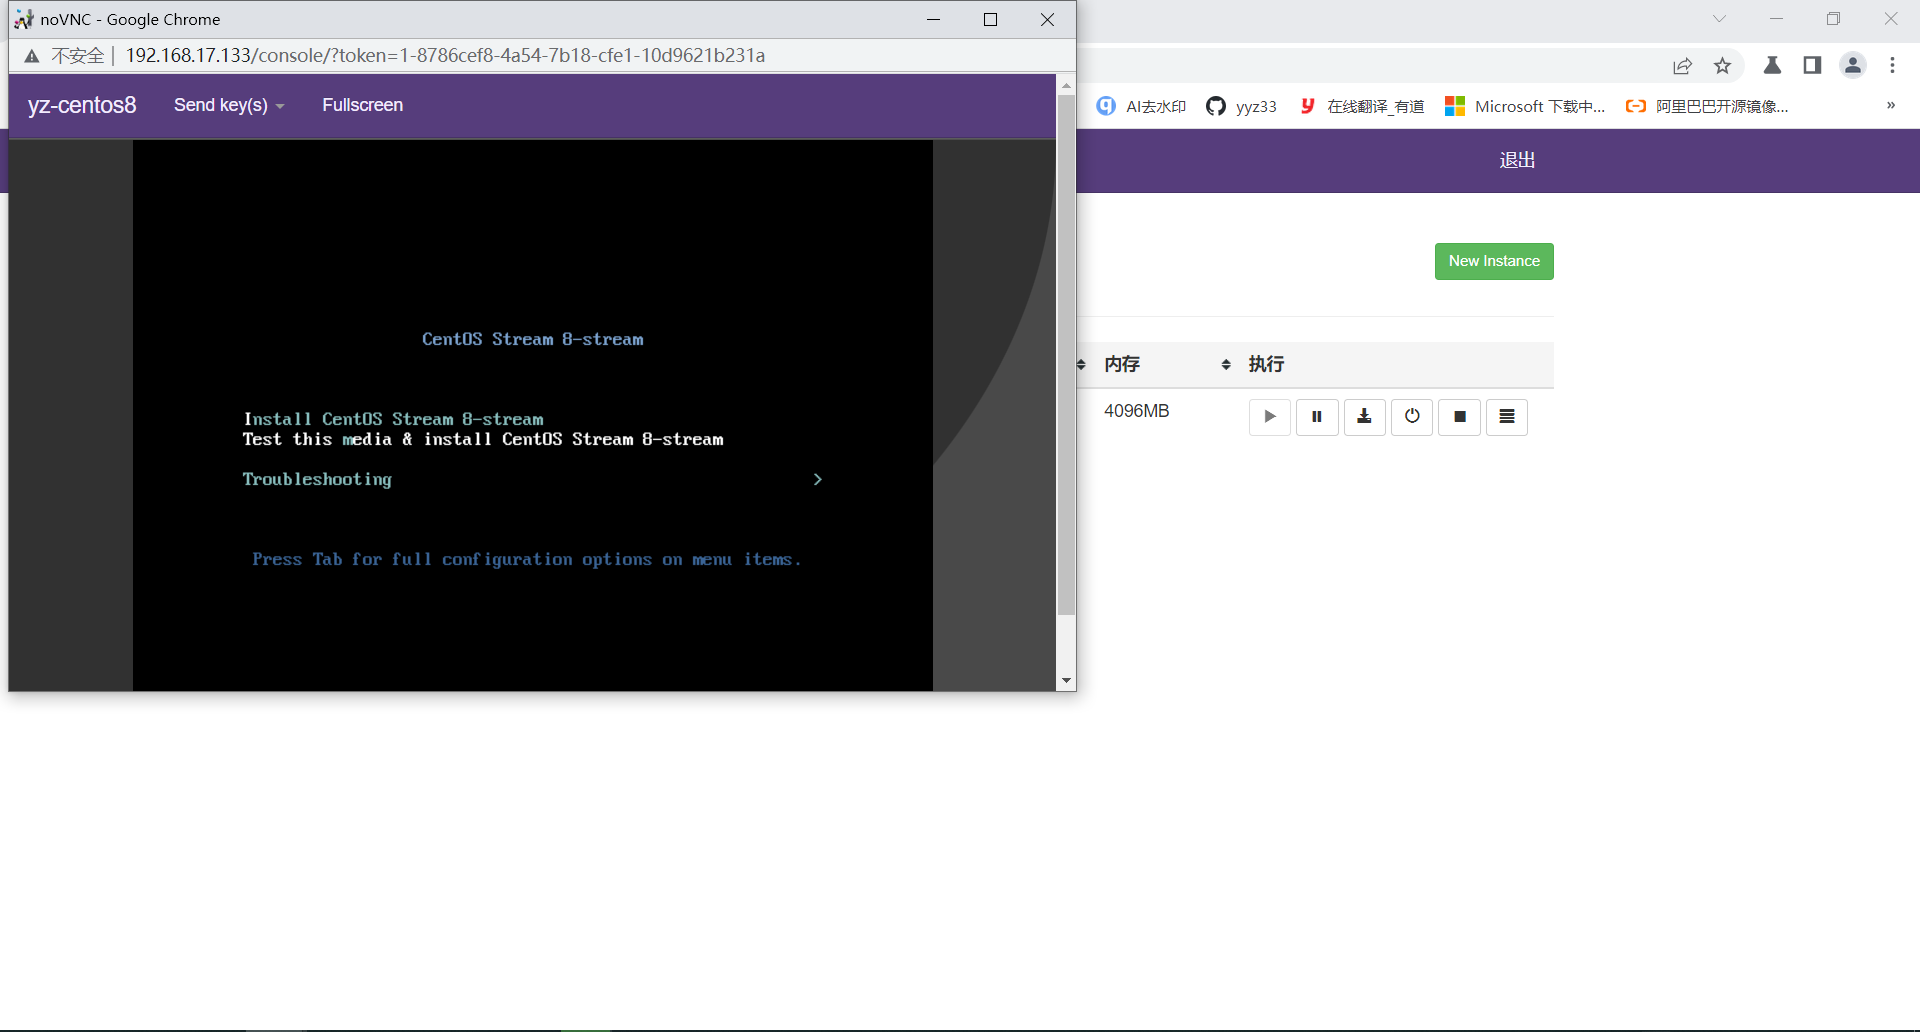
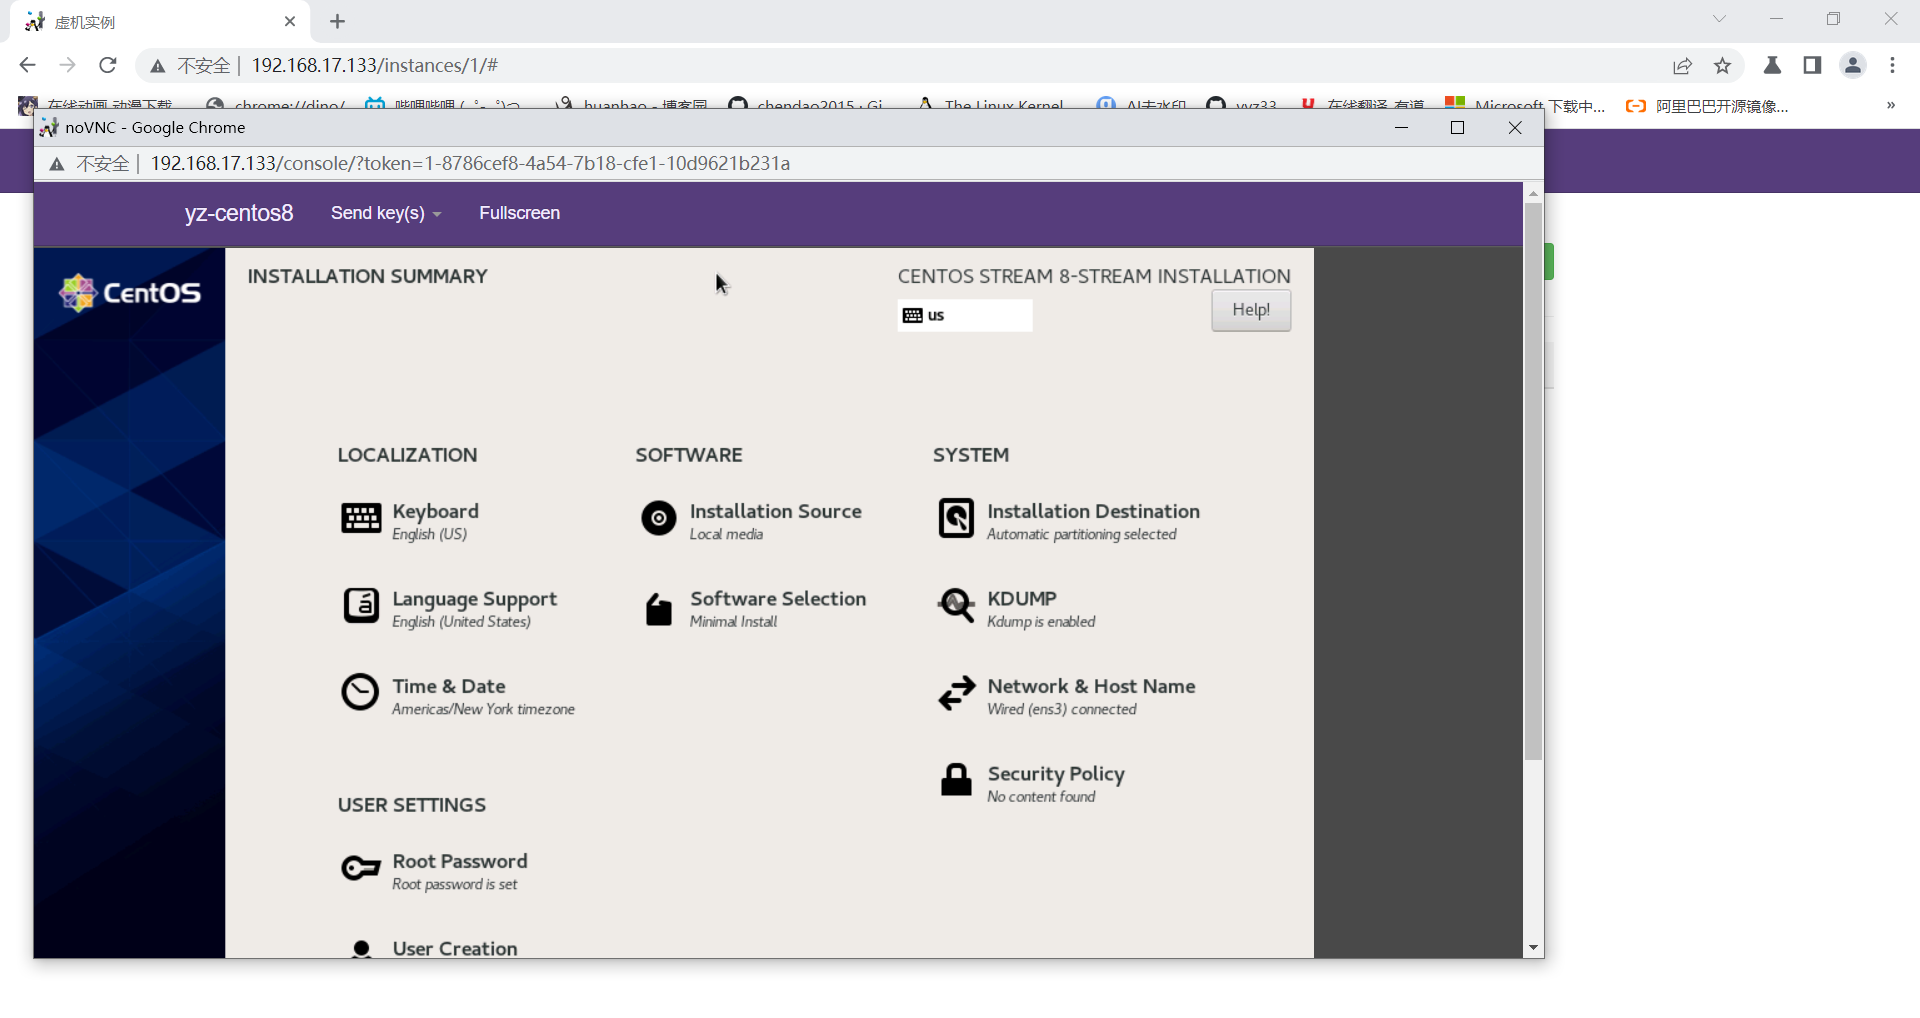
访问界面
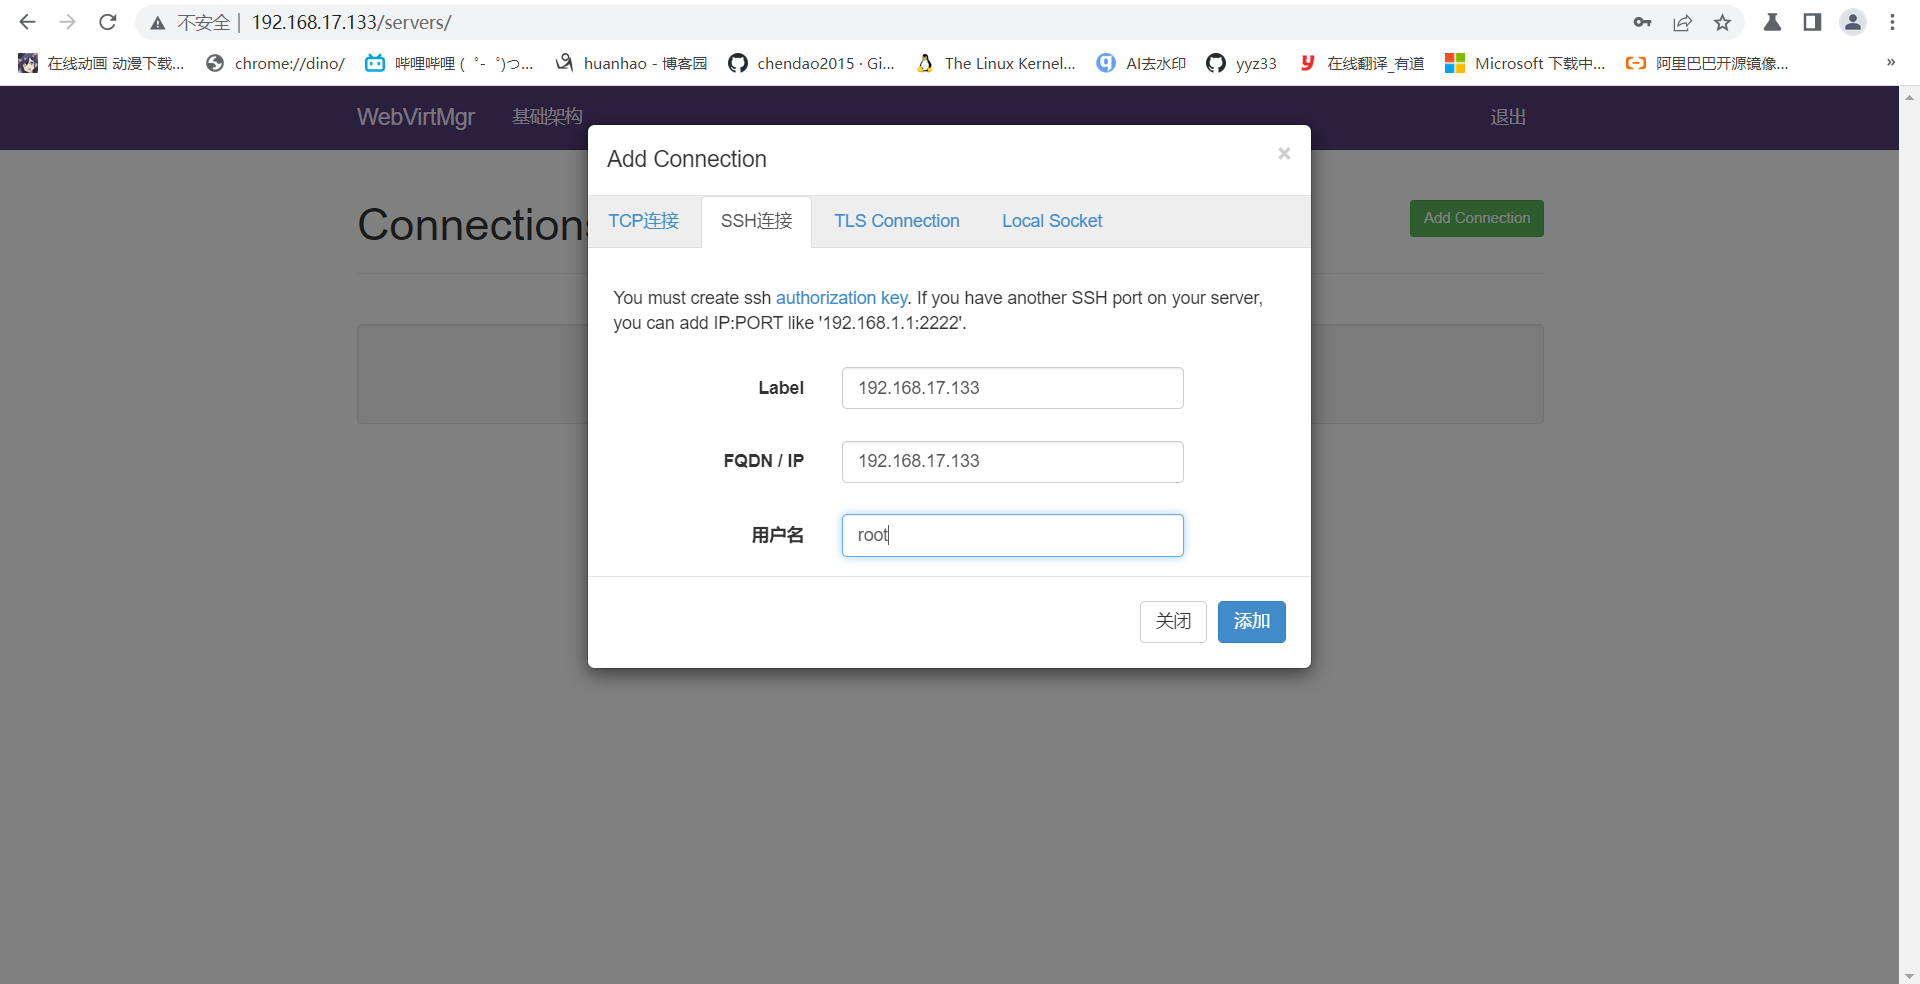
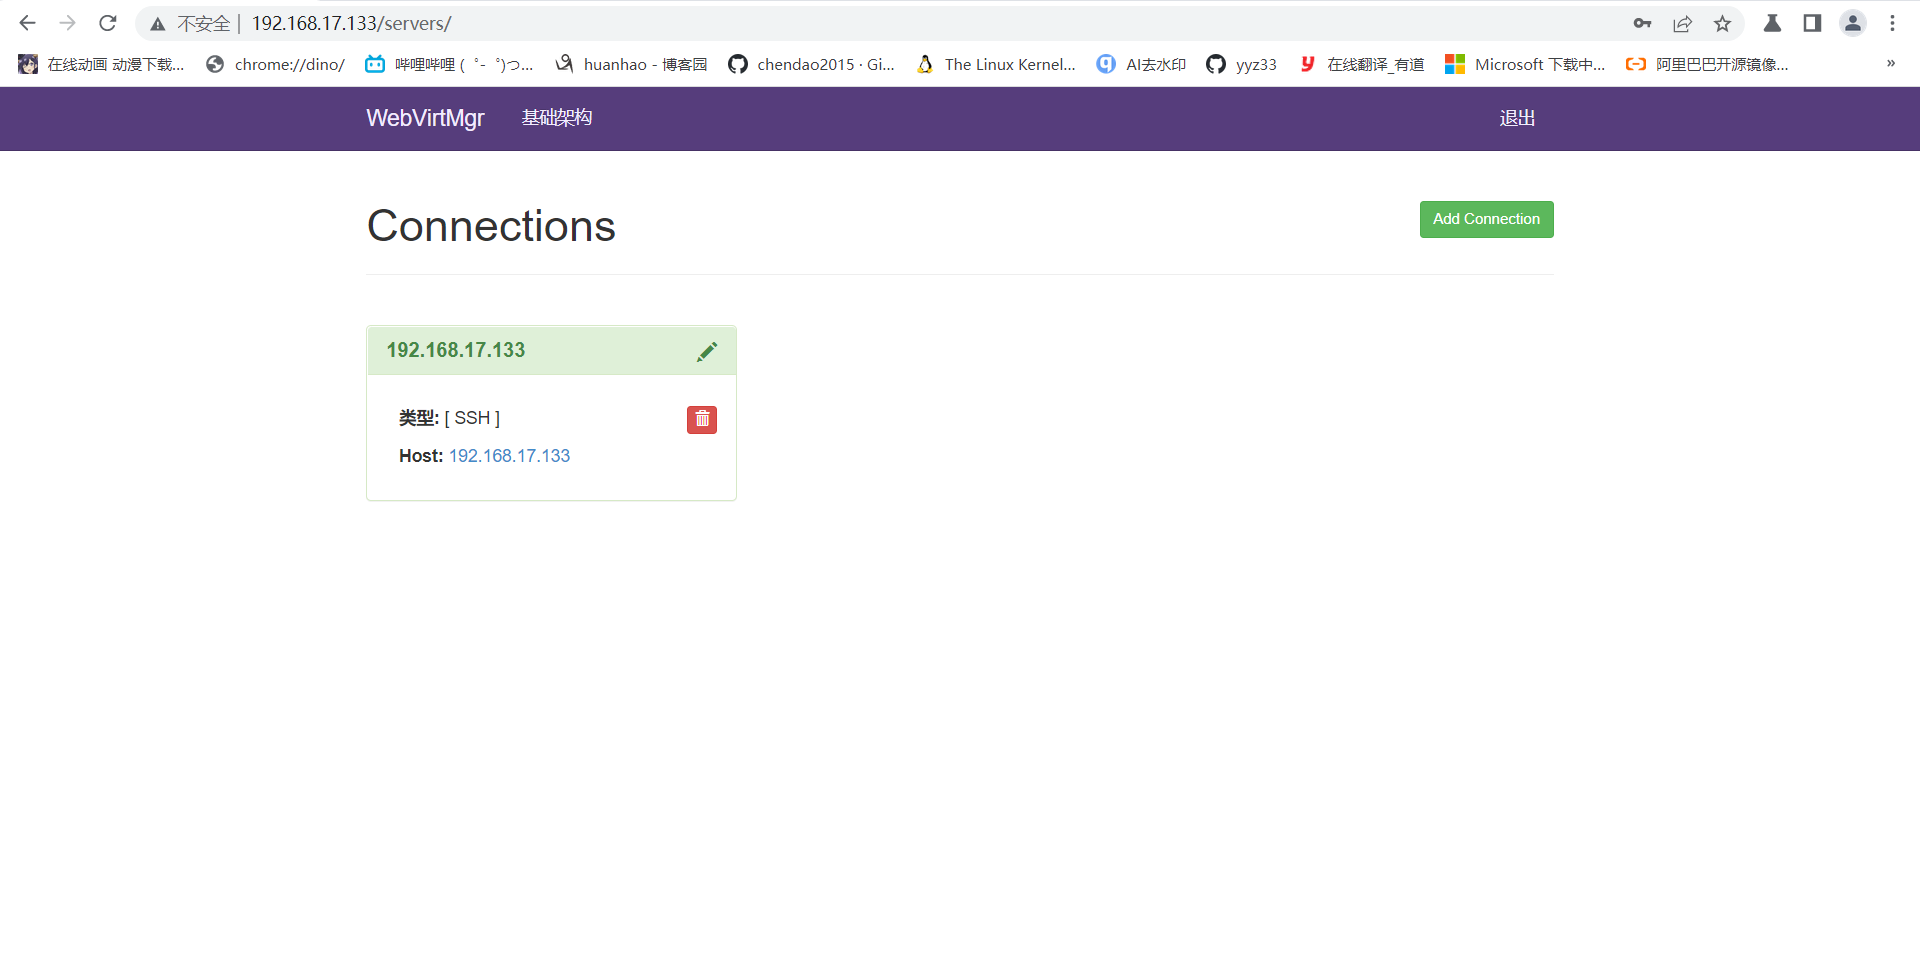
在该WEB页面安装一台linux操作系统


 233
233


 被折叠的 条评论
为什么被折叠?
被折叠的 条评论
为什么被折叠?
 到【灌水乐园】发言


