


前言
当我们的python项目使用了torch等第三方库之后,其体积将变得巨大(超过1个g),此时使用nuitka或者pyinstaller打包,都将面临打包成功率低,耗时长,打包后体积巨大的问题。本文旨在使用嵌入式打包来解决这个问题。
解决思路是打包只分发解释器与自己的核心代码,第三方依赖由用户第一次使用程序时现场安装。
示例代码
如果不明白什么是嵌入式打包的朋友,可以先看这篇文章,本文的示例代码也使用这篇文章的代码。
python嵌入式打包,打包新姿势!打包速度比pyinstaller还快哦_csdn python嵌入式打包-CSDN博客
示例代码的项目构造
|-- main.py
|-- app 放置自己代码的文件夹
|   -- start_main.py 项目文件
main.py
from app.start_main import start
if __name__ == '__main__':
    start()
start_main.py
import sys
import numpy as np
import pandas as pd
from PyQt5.QtWidgets import QApplication, QMainWindow, QVBoxLayout, QWidget, QLabel
from matplotlib.backends.backend_qt5agg import FigureCanvasQTAgg as FigureCanvas
from matplotlib.figure import Figure
class MplCanvas(FigureCanvas):
"""Ultimately, this is a QWidget (as well as a FigureCanvasAgg, etc.)."""
def __init__(self, parent=None, width=5, height=4, dpi=100):
fig = Figure(figsize=(width, height), dpi=dpi)
self.axes = fig.add_subplot()
# 初始化父类
super(MplCanvas, self).__init__(fig)
class MainWindow(QMainWindow):
def __init__(self):
super(MainWindow, self).__init__()
# 创建MplCanvas实例作为窗口中的中央部件
self.canvas = MplCanvas(self, width=5, height=4, dpi=100)
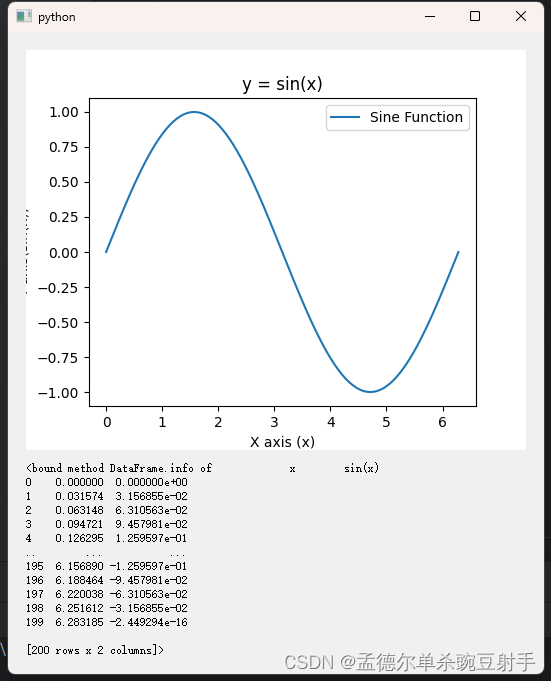
# 生成数据并绘制
x_values = np.linspace(0, 2 * np.pi, num=200)
y_values = np.sin(x_values)
df = pd.DataFrame({'x': x_values, 'sin(x)': y_values})
self.canvas.axes.plot(x_values, y_values, label='Sine Function')
# 设置图表标题、坐标轴标签等
self.canvas.axes.set_xlabel('X axis (x)')
self.canvas.axes.set_ylabel('Y axis(sin(x))')
self.canvas.axes.set_title('y = sin(x)')
self.canvas.axes.legend()
# 布局管理
layout = QVBoxLayout()
layout.addWidget(self.canvas)
self.text = QLabel(str(df.info))
layout.addWidget(self.text)
container = QWidget()
container.setLayout(layout)
self.setCentralWidget(container)
def start():
app = QApplication(sys.argv)
main_win = MainWindow()
main_win.show()
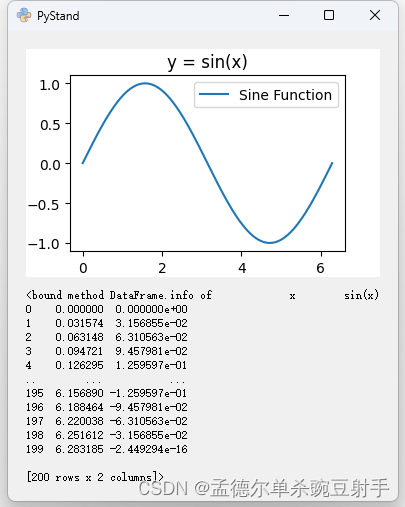
sys.exit(app.exec_())运行效果
打包准备
准备项目依赖requirements.txt,激活自己的项目环境,使用下面的命令导出依赖文件.
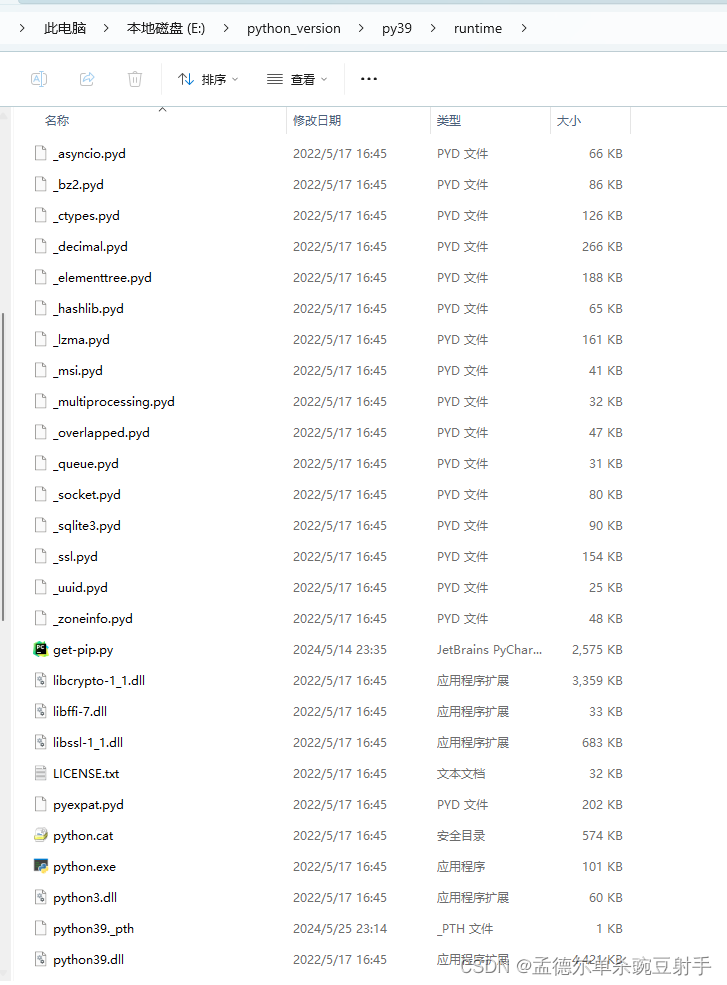
python -m pip freeze >requirements.txt准备嵌入式解释器,从官网下载;
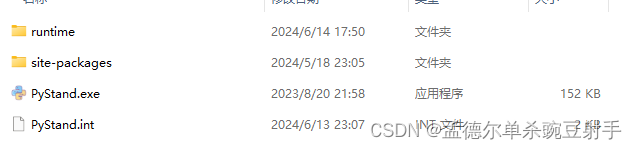
准备pystand壳,从github下载
准备get-pip.py,用于下载pip工具,从下面获取,获取后放置在runtime文件夹中
准备就绪后,文件夹长这样,注意:pystand同级目录的sitepackages中是没有任何东西的
开始打包
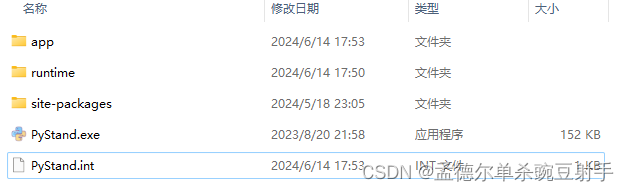
1,将自己的代码复制过来,app文件夹放在pystand同级目录,main.py里面的代码内容全文复制,覆盖掉pystand.int文件里面的内容
完事后目录是这样
2,新建download.py文件,放在runtime文件夹内,
download.py脚本做以下几件事:
①,提示用户第一次使用需要联网安装依赖;
②,调用runtime文件夹里面的python解释器运行get-pip脚本安装pip工具;
③,调用安装的pip工具,按照给定的依赖文件,安装环境依赖;
④,安装完毕后,提醒用户重启程序。
内容如下:
import os
import sys
from pathlib import Path

print("第一次启动,缺少环境依赖,开始安装依赖,请保持网络畅通")
python_path = Path(sys.exec_prefix).joinpath("python.exe")
get_pip_script = Path(sys.exec_prefix).joinpath("get-pip.py")
command = f"{python_path} {get_pip_script}"  # 安装pip工具
os.system(command)
requirements_path = Path(sys.exec_prefix).joinpath("requirements.txt")  # 安装其他依赖
# 安装依赖,这是阿里源
command = str(
    python_path) + " -m pip install --no-warn-script-location -i https://mirrors.aliyun.com/pypi/simple/ -r" + f"{requirements_path}"
status_code = os.system(command)
# 然后退出程序,提醒用户重启
if status_code != 0:
    input("依赖安装失败")
else:
    input("依赖安装完成,请重新打开程序,按回车键退出")
sys.exit()
3,修改pystand.int文件内容,捕获程序正常运行的ModuleNotFoundError错误,调用runtime文件夹中的python解释器运行download.py脚本。
修改为如下:
import os
import sys

try:
    from app.start_main import start
except ModuleNotFoundError:
    from pathlib import Path

    python_path = Path(sys.exec_prefix).joinpath("python.exe")
    download_script = Path(sys.exec_prefix).joinpath("download.py")
    command = f"{python_path} {download_script}"
    os.system(command)
    sys.exit()

if __name__ == '__main__':
    start()
4,将上面打包准备的requirements.txt文件放置在runtime文件夹里。
5,修改runtime文件夹中的._pth文件,取消import site前面的注释。
6,删除pystand同级目录的sitepackage文件夹(不需要它了)。
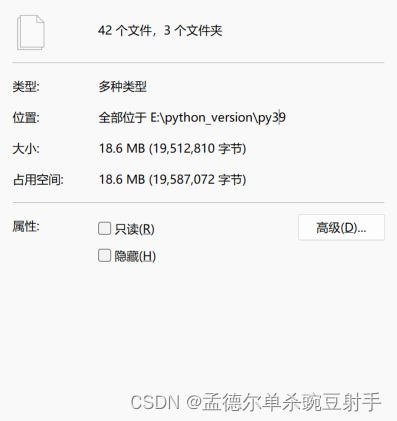
打包到此完成。整个文件夹体积为18.6M,使用7z压缩后为8.5M
测试
1,双击pystand,程序会提示缺少依赖,开始执行下载脚本。

2,安装完成后,会提示用户重启程序。

3,重新双击pystand,第一次启动会比较慢(包含了第三方库py转pyc的过程)。
额外讲解
这种打包方式利用pip工具,让用户在线安装依赖,程序分发体积仅8M,避免了python程序打包体积过大的问题,同时也避免了传统打包方式漏包体积大的缺点。非常适合一些使用了torch,yolov,ocr库等的项目。
不需要用户的电脑上是否有安装python环境。
第三方库是被安装在runtime\Lib\site-packages文件夹下的,所以一定要修改._pth文件,取消注释。
这种打包方式一次成功后,可以多次复用。
对于不同的项目,删除runtime文件夹里面的文件夹,替换requirement.txt,替换自己的代码,就ok了。
至于什么代码加密这些,请看前面的文章。
tips:为了方便演示,我仅仅用了一些小型库作为示例代码,实际上本文是为了torch这种大型库准备的。
如果项目依赖了torch库gpu版,需要将自己的项目依赖文件(requirement.txt)拆成两份,包含包含torch,torchaudio,torchvision三个库的一份,包含其他依赖库的一份。download.py脚本像下面这样写,先安装torch。
import os
import sys
from pathlib import Path

print("第一次启动,缺少环境依赖,开始安装依赖,请保持网络畅通")
python_path = Path(sys.exec_prefix).joinpath("python.exe")
get_pip_script = Path(sys.exec_prefix).joinpath("get-pip.py")
command = f"{python_path} {get_pip_script}"  # 安装pip工具
os.system(command)
torch_requirements_path = Path(sys.exec_prefix).joinpath("torch_requirements.txt")
other_requirements_path = Path(sys.exec_prefix).joinpath("other_requirements.txt")
# 你自己看到办,你的torch下载链接是哪个,下面这个是cuda118版本的
command = str(
    python_path) + " -m pip install -f https://download.pytorch.org/whl/torch_stable.html -r " + f"{torch_requirements_path}"
os.system(command)
# 安装其他依赖,这是阿里源
command = str(
    python_path) + " -m pip install -i https://mirrors.aliyun.com/pypi/simple -r" + f"{other_requirements_path}"
os.system(command)
# 然后退出程序,提醒用户重启
input("依赖安装完成,请重新打开程序,按回车键退出")
sys.exit()
示例打包下载
这里我弄了一个本文示例代码的打包
链接: https://pan.baidu.com/s/1ZzLX6Q6vbov1RchjjpvKkg?pwd=4chg 提取码: 4chg 复制这段内容后打开百度网盘手机App,操作更方便哦
改天有空录个视频讲解一下


 2452
2452

 被折叠的 条评论
为什么被折叠?
被折叠的 条评论
为什么被折叠?
 到【灌水乐园】发言


