


1.启动与关闭
systemctl start/stop mysqld.service![]()
2.登录与退出
开始登录
mysql -u用户 -p密码 -hIP地址 -D数据库名 -P端口
注意:-p密码 不能有空格,密码有特殊字符,需要用单引号括起来。8.0禁止将密码写在命令行
[root@localhost ~]# mysql -uroot -p
不知晓密码的情况下我们可以使用临时密码
[root@localhost ~]# grep password /var/log/mysqld.log ![]()
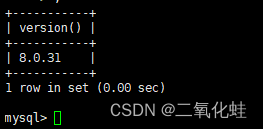
进入mysql
mysql> select version();或
mysql> select database();注意:
1.注意命令最后有';'
2.例如若出现这种情况,一般是命令输入不完整,如:
![]()
命令输入完成后会出现两种情况:
1.此时若使用临时密码将出现以下提示。如果提示使用临时密码请修改密码(使用初始密码将给出以下提示,我们可以忽略提示或者 修改root的密码:密码要复合复杂性要求。)
ERROR 1820 (HY000): You must reset your password using ALTER USER statement before executing this statement.2.若密码已经修改,我们会直接进入为这个界面。
查看当前选择数据库
mysql> show database;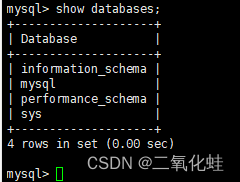
3.修改root密码
方法1:mysqladmin
[root@localhost ~]# mysqladmin -uroot -p password '#OPENlab123'
[root@localhost ~]# mysqladmin -uroot -p password 
最好不要把密码显示在命令行。系统会进行提示警告危险。所以我们最好使用第二个命令同样达到修改密码的目的。

方法2:alter user
mysql> alter user root@localhost identified by '#OPENlab123';
Query OK, 0 rows affected (0.00 sec)
方法3:set password for
mysql> set password for 'root'@'localhost' = '#openLAB123';
Query OK, 0 rows affected (0.01 sec)
方法4:update 表
mysql> update user set authentication_string='' where user='root';
mysql> flush privileges;刷新权限表
mysql> update user set authentication_string='' where user='root';
ERROR 1046 (3D000): No database selected(若出现此问题,解决方式在其后)
mysql> update mysql.user set authentication_string='' where user='root';
Query OK, 1 row affected (0.01 sec)
Rows matched: 1 Changed: 1 Warnings: 0然后刷新权限表,此时该数据库可以不使用密码登录。(此方法不安全)
出现的问题:
mysql> update user set authentication_string='' where user='root';
ERROR 1046 (3D000): No database selected解决方法:
mysql> select database(); ### 查看当前选择的数据库
+------------+
| database() |
+------------+
| NULL |
+------------+
1 row in set (0.00 sec)
mysql> use mysql; ### 选择指定的数据库
Reading table information for completion of table and column names
You can turn off this feature to get a quicker startup with -A
Database changedmysql客户端是支持命令命令历史的
4.root重置密码
方法1
停止服务:
[root@mysql ~]# systemctl stop mysqld启动时跳过权限表:
[root@mysql ~]# mysqld --user=mysql --skip-grant-tables输入该命令后,页面将一直保持静止的状态,无法进行操作。我们双击窗口栏新添加一个窗口进行后续操作。相当于我们已经跳过权限直接进入mysql。
![]()
刷新权限表:
mysql> flush privileges;修改密码:
可以使用上述方法2
mysql> alter user root@localhost identified by '#openLAB123';也可以上述方法4
mysql> update user set authentication_string='' where user='root';此时密码已经修改完成
恢复进程:
我们先查看进程进度
[root@localhost ~]# ps -ef | grep mysql
阻止进程:
[root@localhost ~]# kill -9 3227
![]()
此时我们查看前端口发现已经恢复
方法2
创建一个文件并输入内容
[root@mysql ~]# vim /tmp/mysql-init 在文件中输入
alter user 'root'@'localhost' identified by '#OPENlab123';查找日志
[root@mysql ~]# tail -f /var/log/mysqld.logmysql处于一个等待连接的状态。我们切换到另一个窗口
查看mysql状态
[root@localhost ~]# ps -ef | grep mysql关闭mysql
[root@localhost ~]# systemctl stop mysqld启动
[root@mysql ~]# mysqld --init-file=/tmp/mysql-init --user=mysql &查看mysql状态
[root@localhost ~]# ps -ef | grep mysql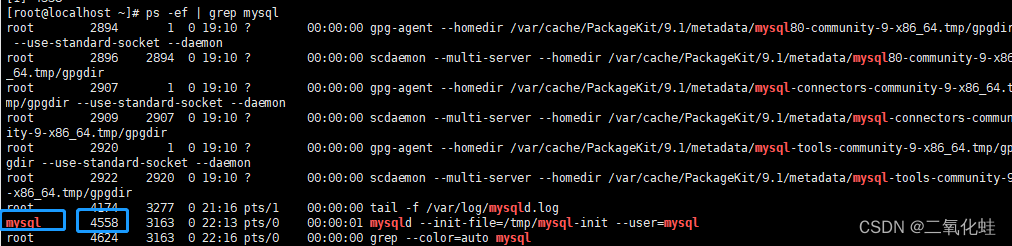
停止数据库
[root@localhost ~]# kill -9 4558
![]()
5.用户名&主机名
User Value Host Value Permissible Connections
'fred' 'h1.example.net' fred, connecting from h1.example.net
' ' 'h1.example.net' Any user, connecting from h1.example.net
'fred' '%' fred, connecting from any host
' ' '%' Any user, connecting from any host
'fred' '%.example.net' fred, connecting from any host in the example.net domain
'fred' 'x.example.%' fred, connecting from x.example.net, x.example.com, x.example.edu, and so on; this is probably not useful
'fred' '198.51.100.177' fred, connecting from the host with IP address 198.51.100.177 '
fred' '198.51.100.%' fred, connecting from any host in the 198.51.100 class C subnet 'fred' '198.51.100.0/255.255.255.0' Same as previous example
6.查询命令
6.1 查询当前用户
mysql> select current_user();6.2 查询数据库
mysql> select database();6.3 切换数据库并查询数据库
mysql> use mysql;
mysql> select database();
7.配置root远程登陆
配置root密码
alter user root@localhost identified by '#OPENlab123';更新为所有主机
update user set host='%' where user='root';遇到问题,命令不成功:
![]()
解决办法:重新选择mysql

刷新权限表
mysql> flush privileges;查看防火墙
[root@localhost ~]# systemctl status firewall添加防火墙
[root@localhost ~]# firewall-cmd --permanent --add-service=mysql
[root@localhost ~]# firewall-cmd --reload
8、Mysql客户端工具的使用
图形化管理工具
    https://www.navicat.com.cn/            1

    https://dev.mysql.com/downloads/workbench/          2

    https://dbeaver.io/download/                    3

    https://webyog.com/product/sqlyog/
连接时一般需要:
1、 会话名称 2、 主机地址 ip/主机名 3、 端口 4、 数据库服务器的用户名 5、 数据库服务器的密码


 1万+
1万+


 被折叠的 条评论
为什么被折叠?
被折叠的 条评论
为什么被折叠?
 到【灌水乐园】发言


