


爬图片的流程
1.向目标网站发送请求
2.获取数据(网页源码)
3.解析数据
4.向详情页发送请求
5.获取数据
确定网址,发起请求
导入请求库,然后发起请求
import requests

headers = {
    'User-Agent': 'sadasdsafdgdsd'
}
url = 'https://www.xxxxx.com/104212.html'
response = requests.get(url=url,headers=headers)
print(response.text)
接着导入解析库
import parsel对数据进行解析
import requests
import parsel

headers = {
    'User-Agent': 'sadasdsafdgdsd'
}
url = 'https://www.jdlingyu.com/104212.html'
response = requests.get(url=url,headers=headers)
html = response.text
select = parsel.Selector(html)
print(select)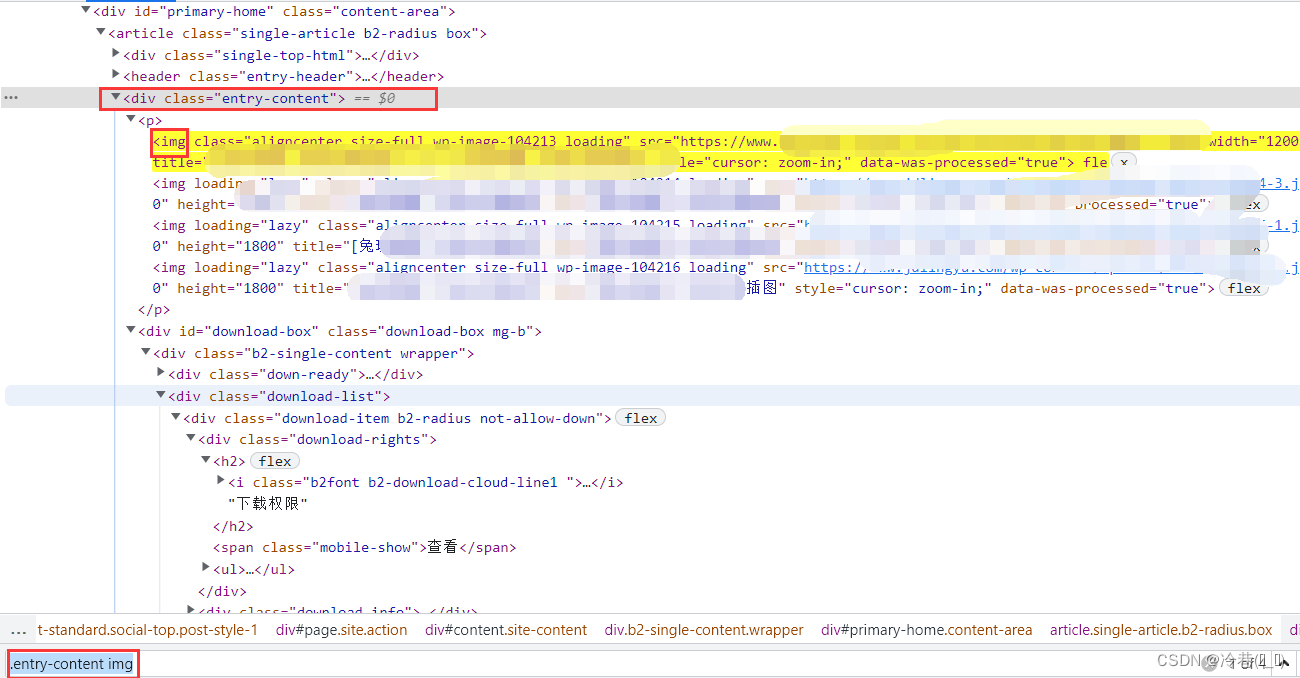
利用css来进行定位,
img_all = select.css('.entry-content img::attr(src)').getall()::attr(src)是提取这元素中的src对应的地址。
但是提取出来并不好看,可以用for来进行再次提取
for img in img_all:
    print(img)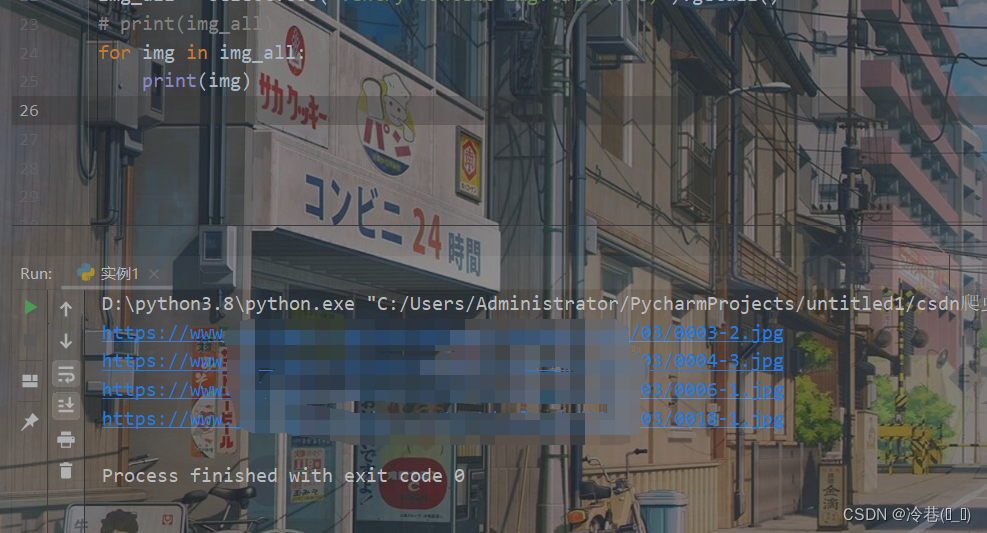
既然拿到了图片的地址,那么就对这个地址发起请求
img_data = requests.get(img,headers=headers).content然后取这个地址的反斜杠最后一段,用来做图片的名称
img_name = img.split('/')[-1]接着创建一个名为img的文件夹用来存图片
    with open(f'img/{img_name}',mode='wb') as f:
        f.write(img_data)
可以了,但是就这四张太少了,来整多点!!
那么重新来一遍,对整体进行请求
import requests
import parsel

headers = {
    'User-Agent': 'sadasdsafdgdsd'
}
url = 'https://www.xxxx.com/tuji'
response = requests.get(url=url,headers=headers)
html = response.text
select = parsel.Selector(html)
print(select)
这里有一堆
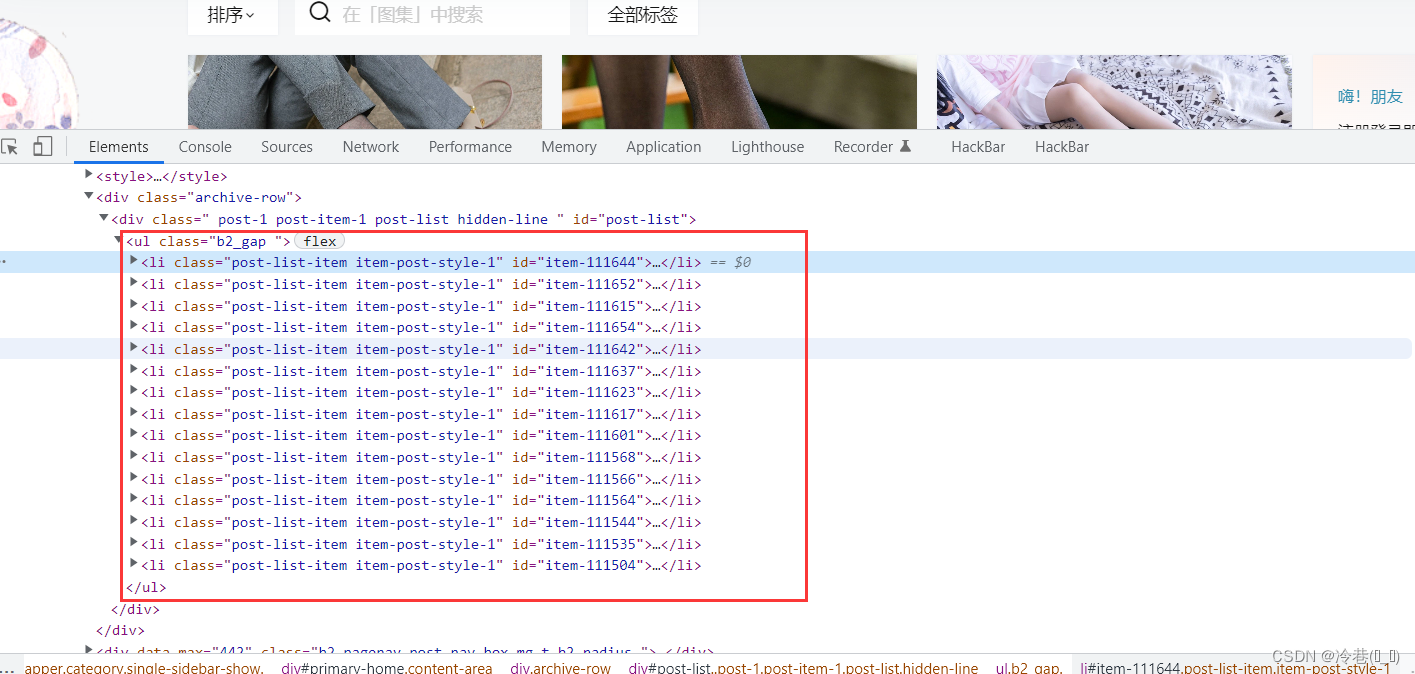
再次用css来进行定位
因为它的地址和名称都在这,所以
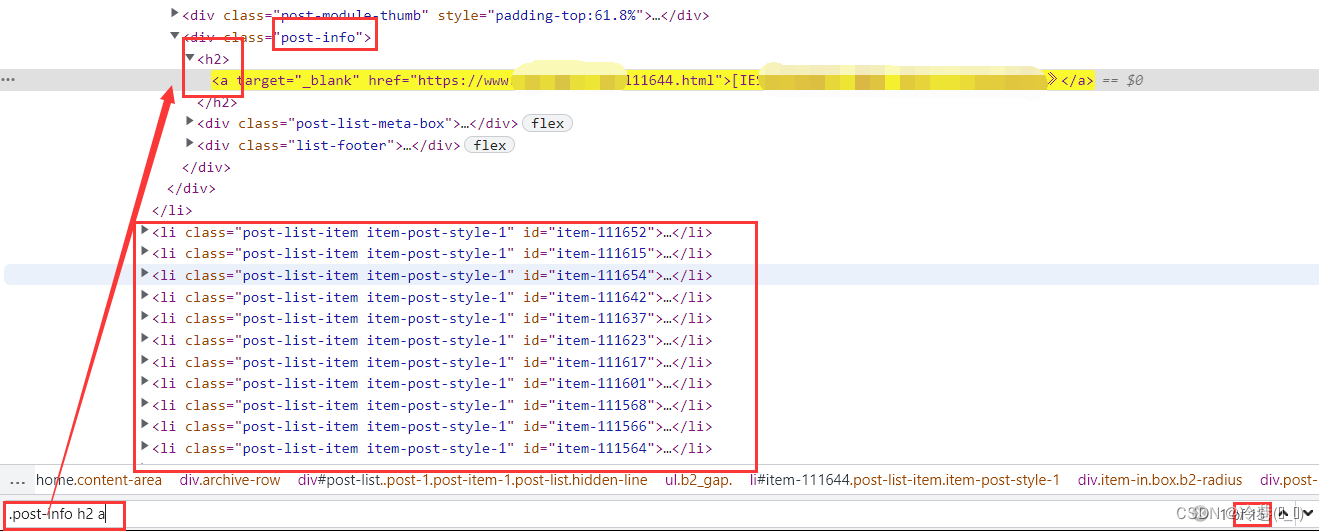
title_list = select.css('.post-info h2 a::text').getall()
link_list = select.css('.post-info h2 a::attr(href)').getall()
然后
for title,link in zip(title_list,link_list):把它们提取出来。
接着导入os模块,来创建文件夹
    if not os.path.exists(f'img/{title}'):
        os.mkdir(f'img/{title}')
然后运行就完事了
完整代码如下:
#!/usr/bin/env python
# -*- coding: UTF-8 -*-
"""
@Project :untitled1
@File    :实例1.py
@IDE     :PyCharm
@Author  :冷巷(✘_✘)
@Date    :2022/7/15 14:28
"""

import requests
import parsel
import os

headers = {
    'User-Agent': 'sadasdsafdgdsd'
}
url = 'https://www.jdlingyu.com/tuji'
response = requests.get(url=url,headers=headers).text
select = parsel.Selector(response)
title_list = select.css('.post-info h2 a::text').getall()
link_list = select.css('.post-info h2 a::attr(href)').getall()
for title,link in zip(title_list,link_list):
    if not os.path.exists(f'img/{title}'):
        os.mkdir(f'img/{title}')
    response_1 = requests.get(link,headers=headers)
    html_data = response_1.text
    select = parsel.Selector(html_data)
    img_all = select.css('.entry-content img::attr(src)').getall()
    for img in img_all:
        img_data = requests.get(img,headers=headers).content
        img_name = img.split('/')[-1]
        with open(f'img/{img_name}',mode='wb') as f:
            f.write(img_data)


 9678
9678

 被折叠的 条评论
为什么被折叠?
被折叠的 条评论
为什么被折叠?
 到【灌水乐园】发言


