


通俗易懂:创建一个SpringMVC框架
1、开发环境
IDE:idea 2023.2
构建工具:maven3.9.0
服务器:tomcat10
Spring版本:6.0.0
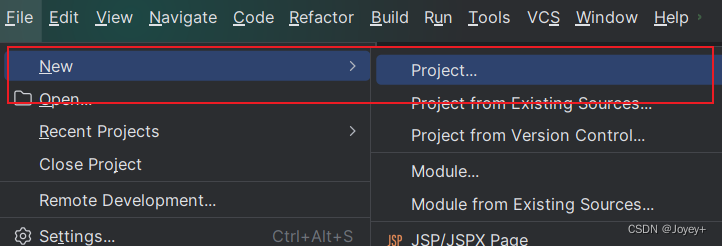
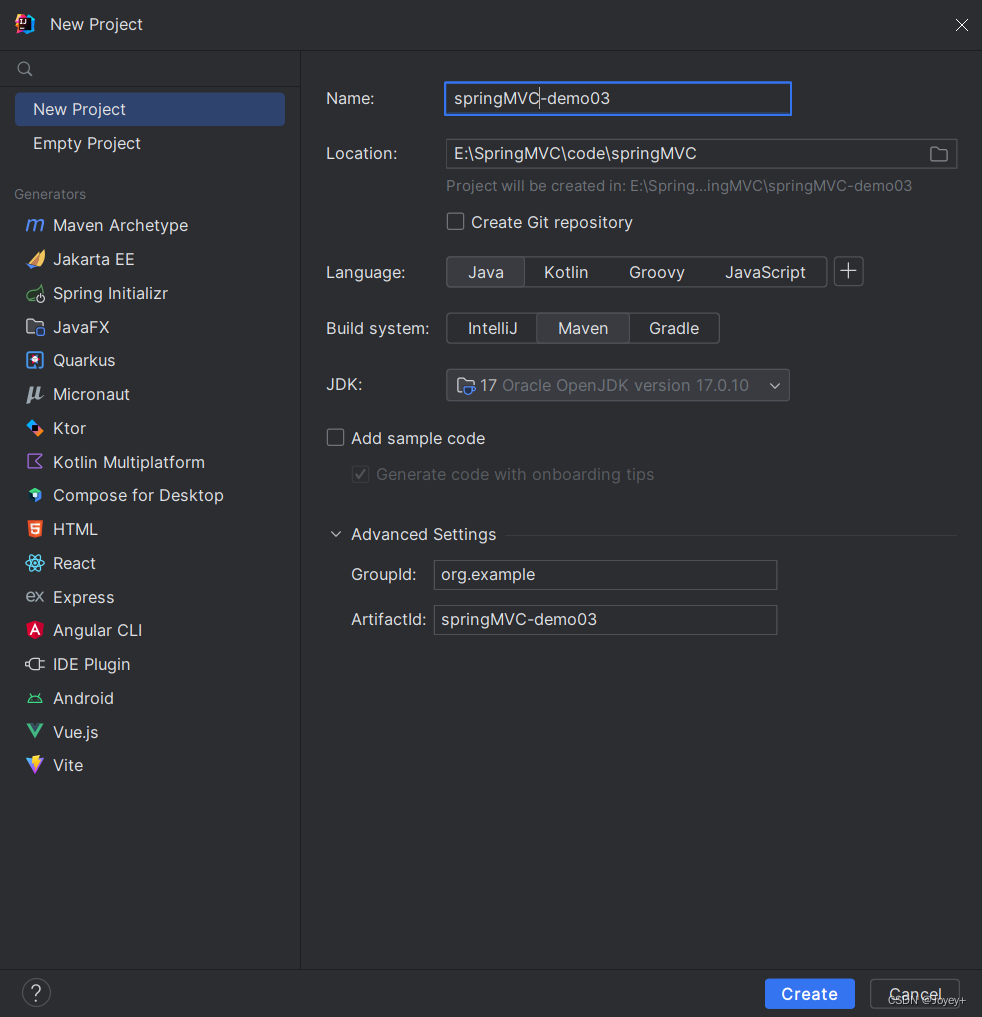
2.创建过程
添加依赖
pom.xml
<?xml version="1.0" encoding="UTF-8"?>
<project xmlns="http://maven.apache.org/POM/4.0.0"
         xmlns:xsi="http://www.w3.org/2001/XMLSchema-instance"
         xsi:schemaLocation="http://maven.apache.org/POM/4.0.0 http://maven.apache.org/xsd/maven-4.0.0.xsd">
    <modelVersion>4.0.0</modelVersion>

    <groupId>org.example</groupId>
    <artifactId>springMVC-demo02</artifactId>
    <version>1.0-SNAPSHOT</version>
    <packaging>war</packaging>

    <properties>
        <maven.compiler.source>17</maven.compiler.source>
        <maven.compiler.target>17</maven.compiler.target>
        <project.build.sourceEncoding>UTF-8</project.build.sourceEncoding>
    </properties>

    <dependencies>
        <!-- SpringMVC -->
        <dependency>
            <groupId>org.springframework</groupId>
            <artifactId>spring-webmvc</artifactId>
            <version>6.0.10</version>
        </dependency>

        <!-- 日志 -->
        <dependency>
            <groupId>ch.qos.logback</groupId>
            <artifactId>logback-classic</artifactId>
            <version>1.2.11</version>
        </dependency>

        <!-- ServletAPI -->
        <dependency>
            <groupId>jakarta.servlet</groupId>
            <artifactId>jakarta.servlet-api</artifactId>
            <version>6.0.0</version>
            <!-- 表示这个jar包不会在lib目录下 -->
            <scope>provided</scope>
        </dependency>

        <dependency>
            <groupId>javax.servlet</groupId>
            <artifactId>javax.servlet-api</artifactId>
            <version>4.0.1</version>
            <scope>provided</scope>
        </dependency>

        <!-- Spring6和Thymeleaf整合包 -->
        <dependency>
            <groupId>org.thymeleaf</groupId>
            <artifactId>thymeleaf-spring6</artifactId>
            <version>3.1.0.RELEASE</version>
        </dependency>
    </dependencies>
</project>
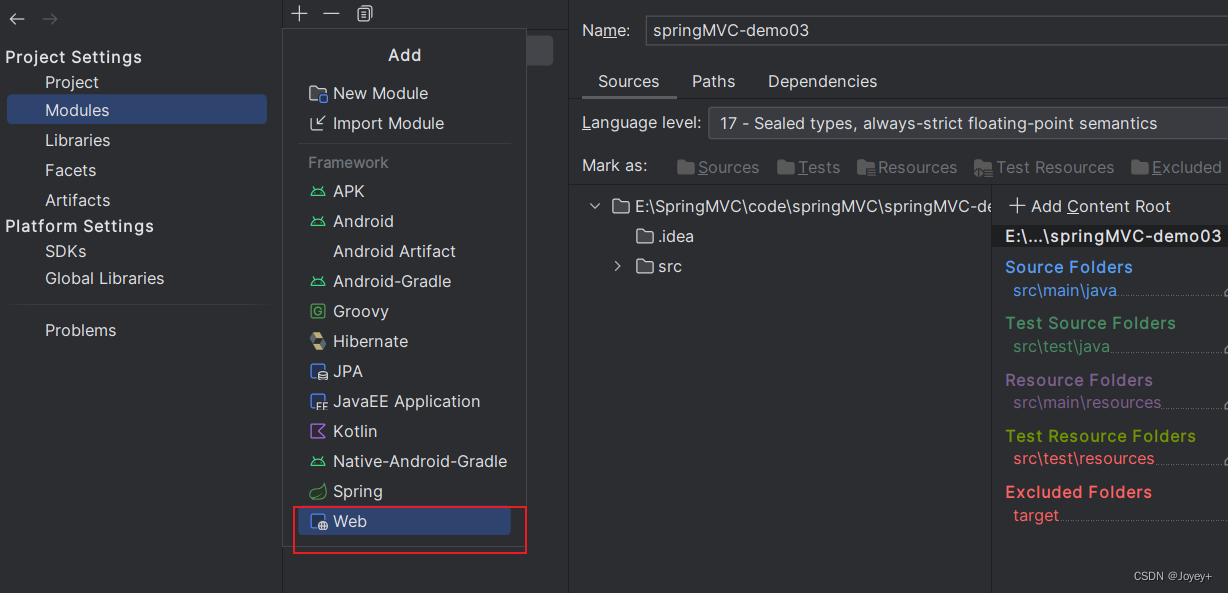
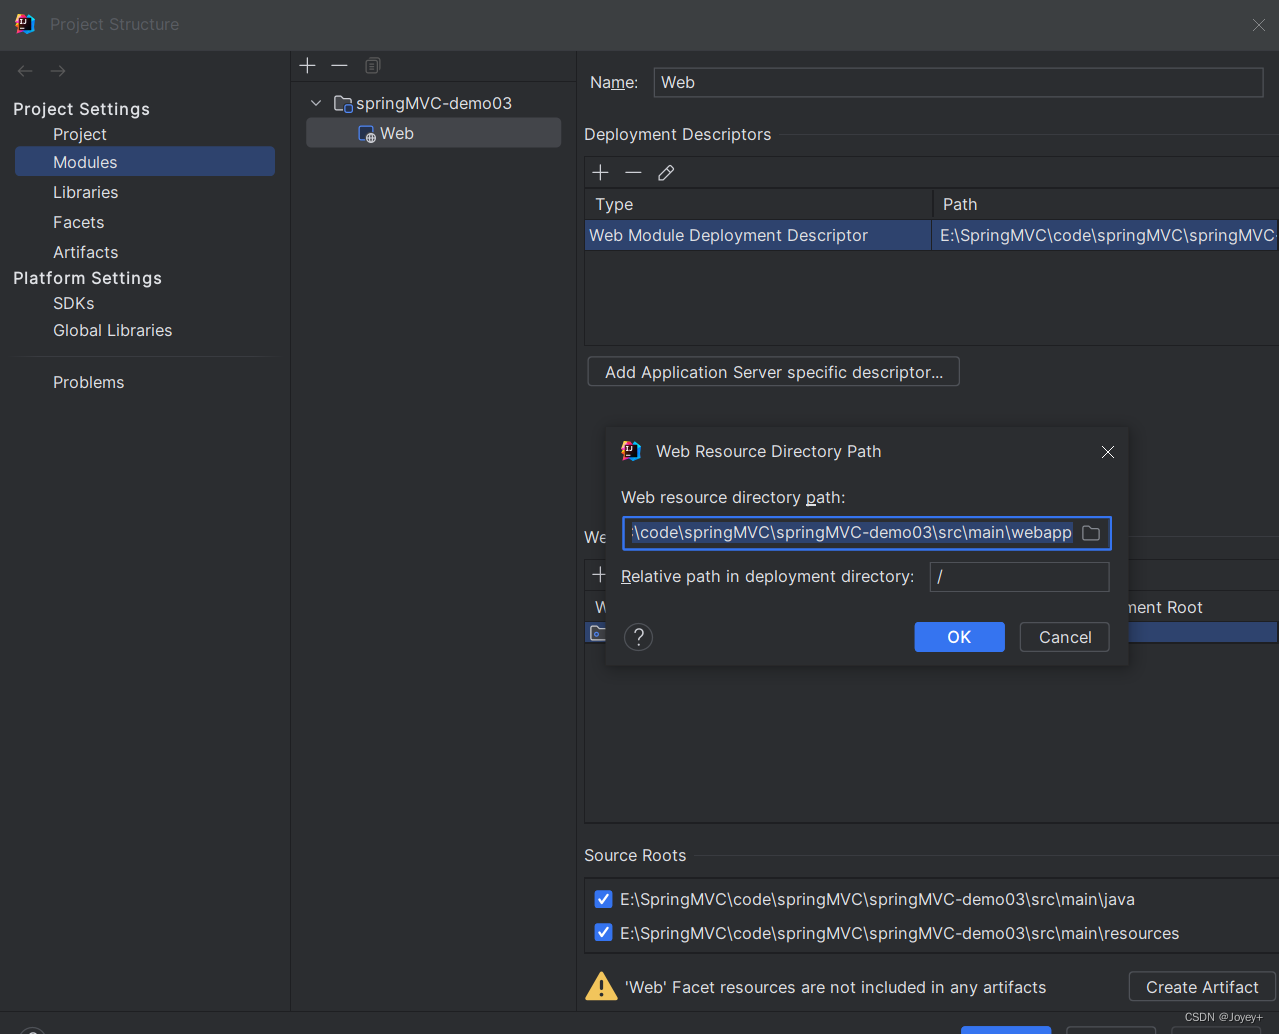
更改项目结构,选中要更改的模块,添加web文件
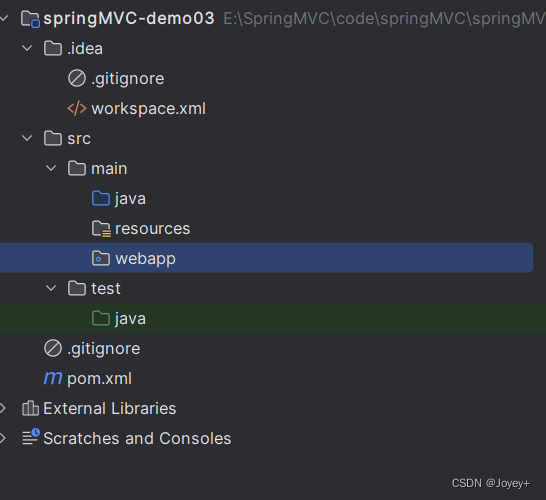
新建webapp目录,注意前面有个空心蓝圈
创建testController类
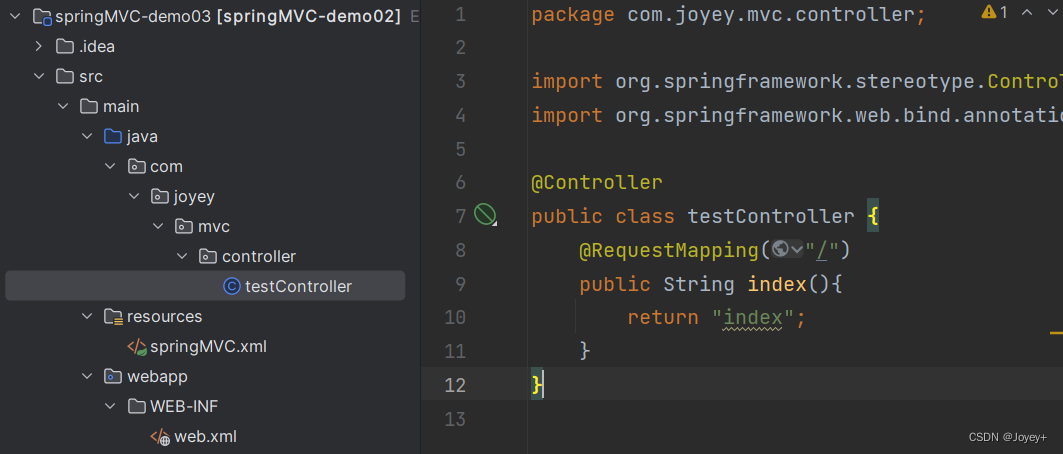
package com.joyey.mvc.controller;

import org.springframework.stereotype.Controller;
import org.springframework.web.bind.annotation.RequestMapping;

@Controller
public class testController {
    @RequestMapping("/")
    public String index(){
        return "index";
    }
}
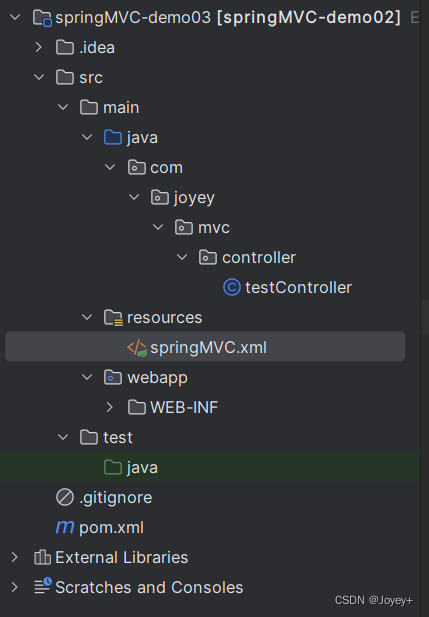
创建springMVC.xml配置文件
<?xml version="1.0" encoding="UTF-8"?>
<beans xmlns="http://www.springframework.org/schema/beans"
       xmlns:xsi="http://www.w3.org/2001/XMLSchema-instance"
       xmlns:context="http://www.springframework.org/schema/context"
       xsi:schemaLocation="http://www.springframework.org/schema/beans http://www.springframework.org/schema/beans/spring-beans.xsd http://www.springframework.org/schema/context https://www.springframework.org/schema/context/spring-context.xsd">

    <!--    扫描组件    -->
    <context:component-scan base-package="com.joyey.mvc.controller"></context:component-scan>

    <!-- 配置thymeleaf的视图解析器  -->
    <bean id="springResourceTemplateResolver" class="org.thymeleaf.spring6.templateresolver.SpringResourceTemplateResolver">
        <property name="prefix" value="/WEB-INF/templates/"/>
        <property name="suffix" value=".html"/>
        <property name="templateMode" value="HTML"/>
        <property name="characterEncoding" value="UTF-8"/>
    </bean>

    <bean id="templateEngine" class="org.thymeleaf.spring6.SpringTemplateEngine">
        <property name="templateResolver" ref="springResourceTemplateResolver"/>
    </bean>
    <bean id="viewResolver" class="org.thymeleaf.spring6.view.ThymeleafViewResolver">
        <property name="order" value="1"/>
        <property name="characterEncoding" value="UTF-8"/>
        <property name="templateEngine" ref="templateEngine"/>
    </bean>
</beans>
配置web.xml文件
<?xml version="1.0" encoding="UTF-8"?>
<web-app xmlns="http://xmlns.jcp.org/xml/ns/javaee"
         xmlns:xsi="http://www.w3.org/2001/XMLSchema-instance"
         xsi:schemaLocation="http://xmlns.jcp.org/xml/ns/javaee http://xmlns.jcp.org/xml/ns/javaee/web-app_4_0.xsd"
         version="4.0">

    <servlet>
        <servlet-name>DispatcherServlet</servlet-name>
        <servlet-class>org.springframework.web.servlet.DispatcherServlet</servlet-class>
        <init-param>
            <param-name>contextConfigLocation</param-name>
            <param-value>classpath:springMVC.xml</param-value>
        </init-param>
        <!--  将前端控制器初始化提前 -->
        <load-on-startup>1</load-on-startup>
    </servlet>
    <servlet-mapping>
        <servlet-name>DispatcherServlet</servlet-name>
        <url-pattern>/</url-pattern>
    </servlet-mapping>
</web-app>
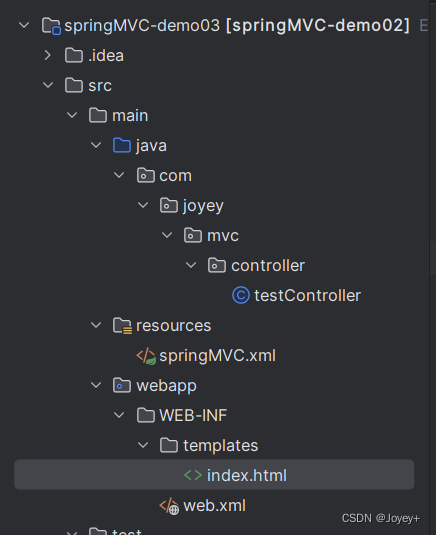
创建index.html
<!DOCTYPE html>
<html lang="en" xmlns:th="http://www.thymeleaf.org">
<head>
    <meta charset="UTF-8">
    <title>Title</title>
</head>
<body>
<h1>你好</h1>
</body>
</html>
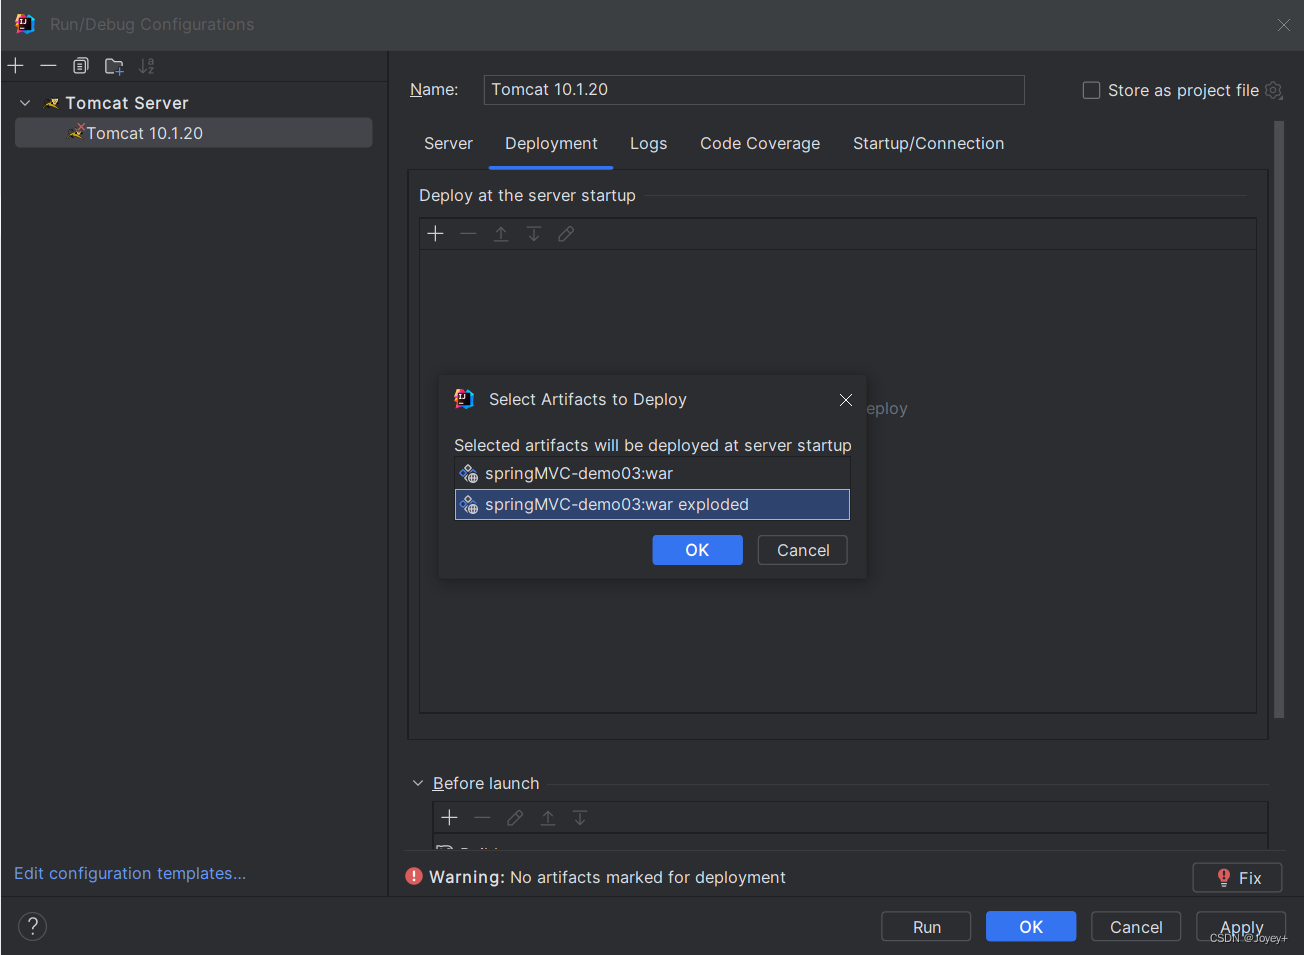
配置运行选项
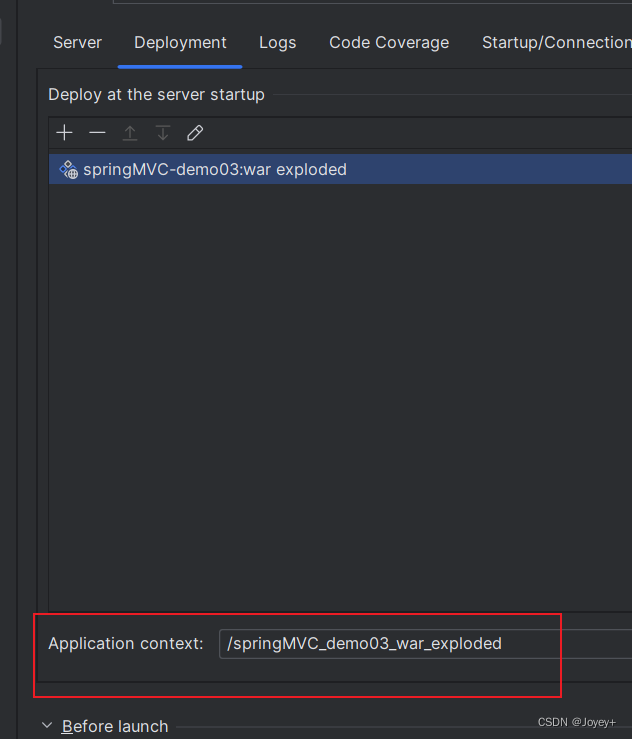
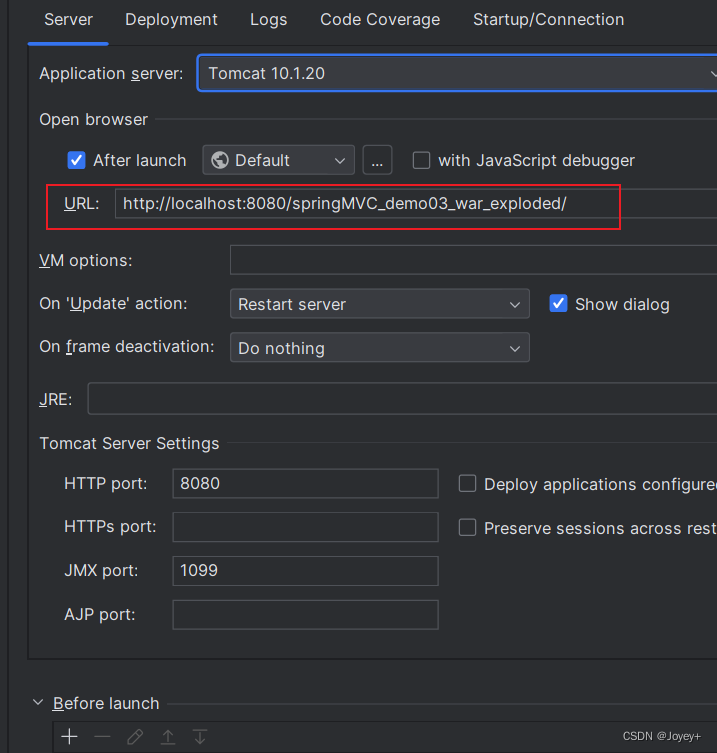
注意红框圈起来的两部分部分要一致
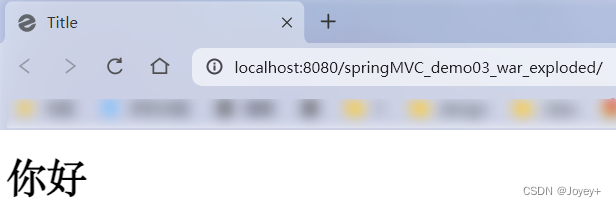
出现以下界面,就证明你springMVC框架搭建成功啦!


 282
282


 被折叠的 条评论
为什么被折叠?
被折叠的 条评论
为什么被折叠?
 到【灌水乐园】发言


