


Web集群部署
1. 云网站架构

2. 购买云主机
| 名称 | 主机IP | 配置 |
| nfs | 192.168.1.10 | 1CPU,1G内存 |
| web-0001 | 192.168.1.11 | 2CPU,4G内存 |
| web-0002 | 192.168.1.12 | 2CPU,4G内存 |
| web-0003 | 192.168.1.13 | 2CPU,4G内存 |
3. 部署网站页面

网站页面文件website.tar.gz需要事先准备
4. 部署NFS服务
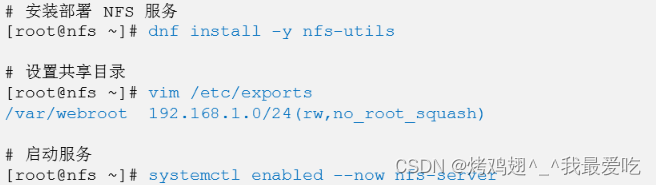
5. 部署Web集群

在跳板机ecs-proxy上创建ansible配置目录,编写playbook自动化部署
![]()


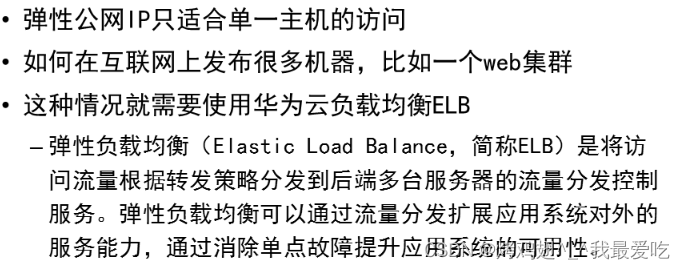
负载均衡ELB
1. 负载均衡概述
2. ELB架构概述

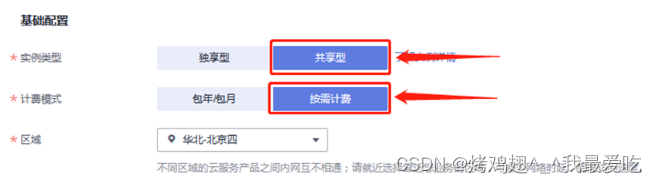
3. 购买负载均衡ELB

4. 配置监听器

5. 配置负载均衡算法

添加服务主机

6. 验证ELB服务

7. 配置负载均衡
弹性负载均衡-->更多-->绑定弹性公网IP
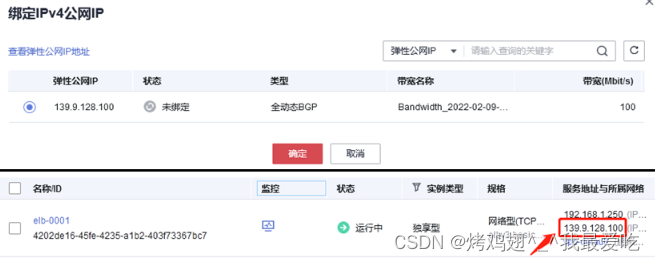
浏览器访问http://http://139.9.62.233/,IP地址为ecs-proxy跳板机的公网IP

Elasticsearch部署(ELK)
1. 项目架构

2. ELK概述

3. Elasticsearch概述
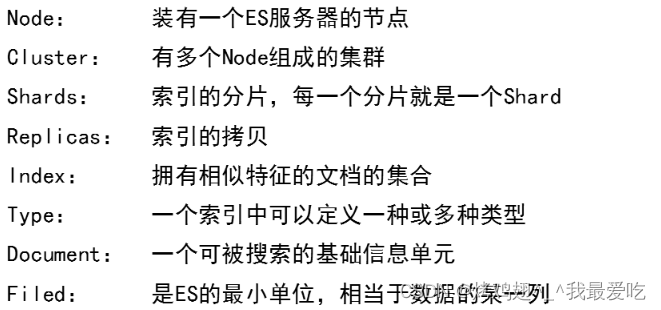
| Elasticsearch与关系型数据库对比 | |
| Relation Database | Elasticsearch |
| Database | Index |
| Table | Type |
| Row | Document |
| Column | Filed |
| Insert | PUT http:// |
| Delete | DELETE http:// |
| Update | POST http:// |
| Selete | GET http:// |
4. 购买云主机
| 名称 | 主机IP | 配置 |
| es-0001 | 192.168.1.21 | 最低2CPU,4G内存 |
| es-0002 | 192.168.1.22 | 最低2CPU,4G内存 |
| es-0003 | 192.168.1.23 | 最低2CPU,4G内存 |
| es-0004 | 192.168.1.24 | 最低2CPU,4G内存 |
| es-0005 | 192.168.1.25 | 最低2CPU,4G内存 |
5. 添加ELK软件包到自定义Yum仓库

6. 部署Elasticsearch集群


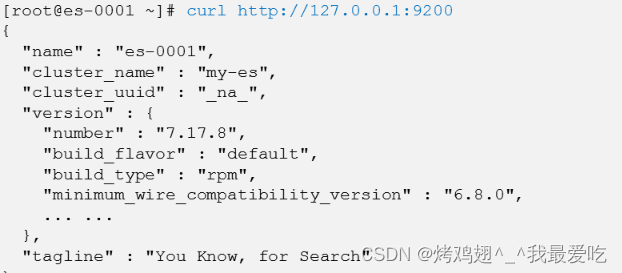
服务启动成功

验证集群失败,因为选票没有超过半数
需要在es-0002上一样的操作,安装Elasticsearch、配置、起服务

7. 集群扩容
-- 在ecs-proxy跳板机使用ansible批量部署

-- 创建配置文件模板

-- 编写playbook
![]()
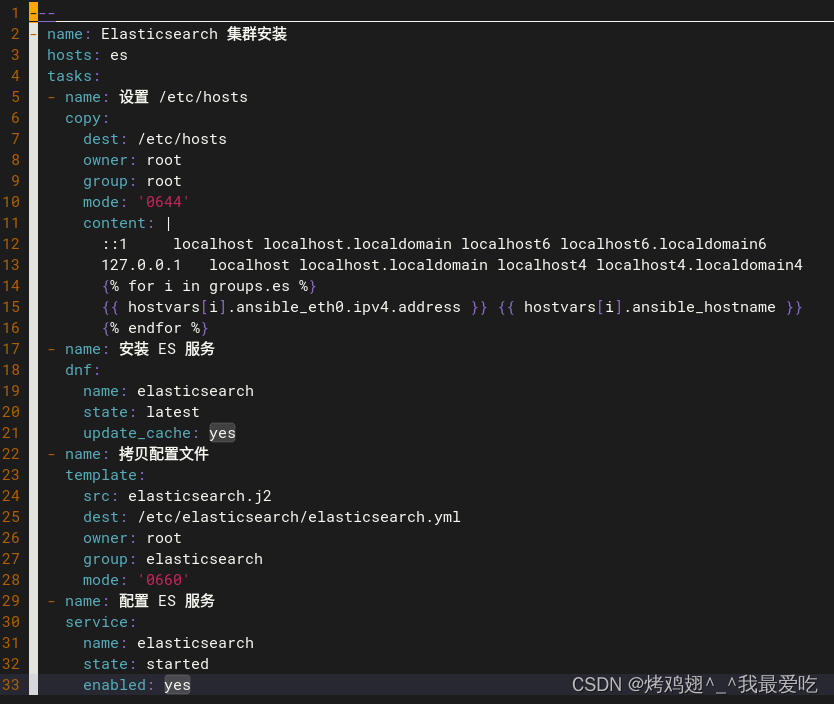
执行剧本安装部署,*表示为master服务器

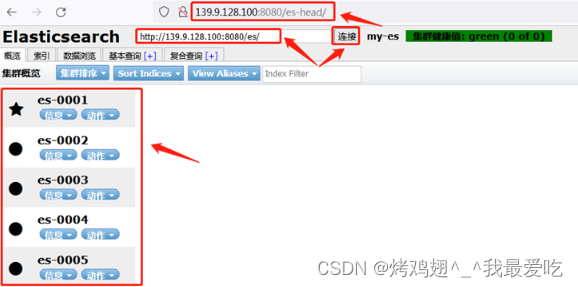
8. Head插件管理
-- 架构
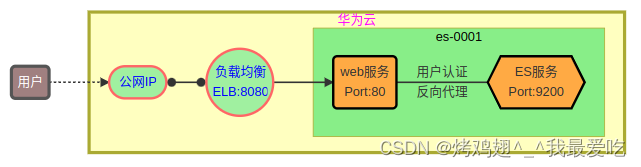

-- 配置认证和代理

-- 使用插件连接集群(公网IP)
补充:API原语管理

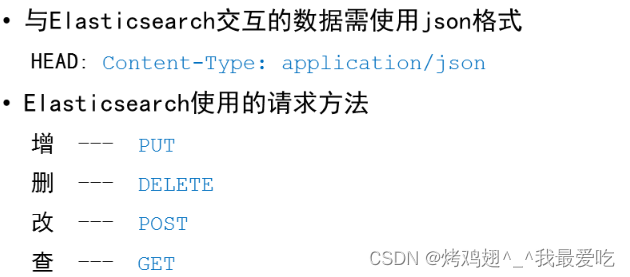
-- 使用格式:
-- 创建索引:
[root@es-0001 ~]# curl -XPUT http://127.0.0.1:9200/student?pretty
{
  "acknowledged" : true,
  "shards_acknowledged" : true,
  "index" : "student"
}
-- 增加数据:
[root@es-0001 ~]# curl -XPUT -H "Content-Type: application/json" \
http://127.0.0.1:9200/student/mydata/1?pretty -d '{
"职业": "诗人","名字": "李白","称号": "诗仙","年代": "唐"
}'
-- 查询数据:
[root@es-0001 ~]# curl -XGET http://127.0.0.1:9200/student/mydata/_search?pretty
[root@es-0001 ~]# curl -XGET http://127.0.0.1:9200/student/mydata/_search?pretty
-- 修改数据:
[root@es-0001 ~]# curl -XPOST -H "Content-Type: application/json" \
http://127.0.0.1:9200/student/mydata/1/_update -d '{
"doc": {"年代":"公元701"}
}'
-- 删除数据:
删除一条:[root@es-0001 ~]# curl -XDELETE http://127.0.0.1:9200/student/mydata/1
删除索引:[root@es-0001 ~]# curl -XDELETE http://127.0.0.1:9200/student


 1730
1730


 被折叠的 条评论
为什么被折叠?
被折叠的 条评论
为什么被折叠?
 到【灌水乐园】发言


