


(一)异步任务
1、同步
(1)创建service包,编写AsyncService类
@Service
public class AsyncService {

   public void hello(){
       try {
           Thread.sleep(3000);//睡眠三秒
      } catch (InterruptedException e) {
           e.printStackTrace();
      }
       System.out.println("业务进行中....");
  }
}
(2)创建controller包,编写AsyncController类
@RestController
public class AsyncController {

   @Autowired
   AsyncService asyncService;

   @GetMapping("/hello")
   public String hello(){
       asyncService.hello();
       return "success";
  }
}
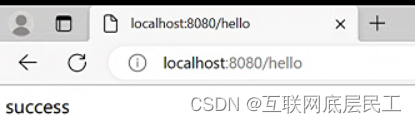
(3)测试
访问http://localhost:8080/hello进行测试,三秒后出现success。这是同步等待。
2、异步
如果我们想要用户直接得到消息,不需要等待。就需要在后台使用多线程的方式进行处理。
(1)给hello方法添加@Async注解
添加该注解后,Springboot会开一个线程池,进行调用。
//告诉Spring这是一个异步方法
@Async
public void hello(){
   try {
       Thread.sleep(3000);
  } catch (InterruptedException e) {
       e.printStackTrace();
  }
   System.out.println("业务进行中....");
}
(2)在主线程上添加注解
@EnableAsync //开启异步注解功能
@SpringBootApplication
public class SpringbootTaskApplication {
   public static void main(String[] args) {
       SpringApplication.run(SpringbootTaskApplication.class, args);
  }
}
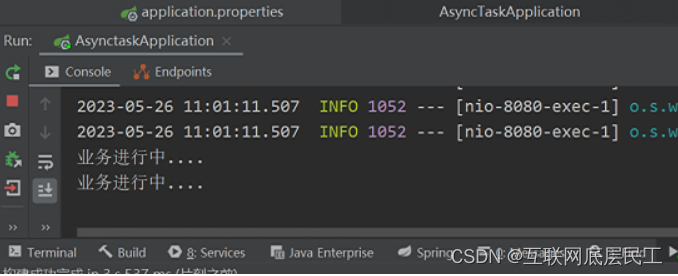
(3)测试
重新启动,访问http://localhost:8080/hello。网页瞬间响应,后台代码依旧执行。
(二)邮件任务
1、引入依赖
<dependency>
   <groupId>org.springframework.boot</groupId>
   <artifactId>spring-boot-starter-mail</artifactId>
</dependency>
查看它引入的依赖,可以看见jakarta.mail
<dependency>
   <groupId>com.sun.mail</groupId>
   <artifactId>jakarta.mail</artifactId>
   <version>1.6.4</version>
   <scope>compile</scope>
</dependency>
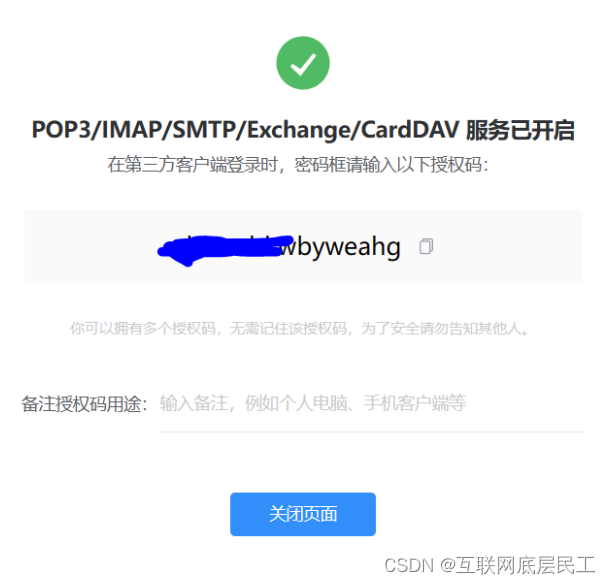
2、邮件配置
在设置->账号中启动POP3/SMTP服务和IMAP/SMTP服务
获取授权码,用于在第三方客户端登录邮箱
(1)登录邮箱->设置->账户->POP3/SMTP

(2)点击开启服务
3、配置文件
spring.mail.username=2592814145@qq.com
spring.mail.password=你的qq授权码
#邮件发送器  QQ的是smtp.qq.com  网易邮箱为smtp.163.com
spring.mail.host=smtp.qq.com
# qq需要配置ssl
spring.mail.properties.mail.smtp.ssl.enable=true
获取授权码:在QQ邮箱中的设置->账户->开启pop3和smtp服务
4、Spring单元测试
@Autowired
JavaMailSenderImpl mailSender;

@Test
public void contextLoads() {
   //邮件设置1:一个简单的邮件
   SimpleMailMessage message = new SimpleMailMessage();
   message.setSubject("通知-明天来狂神这听课");
   message.setText("今晚7:30开会");

   message.setTo("24736743@qq.com");
   message.setFrom("24736743@qq.com");
   mailSender.send(message);
}

@Test
public void contextLoads2() throws MessagingException {
   //邮件设置2:一个复杂的邮件
   MimeMessage mimeMessage = mailSender.createMimeMessage();
   MimeMessageHelper helper = new MimeMessageHelper(mimeMessage, true);

   helper.setSubject("通知-明天来狂神这听课");
   helper.setText("<b style='color:red'>今天 7:30来开会</b>",true);

   //发送附件
   helper.addAttachment("1.jpg",new File(""));
   helper.addAttachment("2.jpg",new File(""));

   helper.setTo("24736743@qq.com");
   helper.setFrom("24736743@qq.com");

   mailSender.send(mimeMessage);
}
(三)定时任务
1、静态:基于注解
基于注解@Scheduled默认为单线程,开启多给任务时,任务的执行时机会受上一个任务执行时间的影响;
(1)创建定时器
1、创建一个ScheduledService
@Service
public class ScheduledService {
//秒 分 时 日 月 周几
//注意cron表达式的用法;
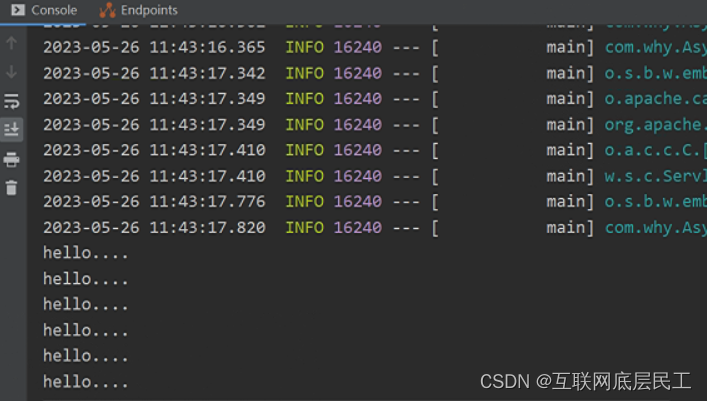
@Scheduled(cron = "0/2 * * * * ?)//每两秒打印一次hello
public void hello(){
System.out.println("hello.....")/;
}
}
2、写完定时任务后,在主程序上增加注解开启定时任务功能
@EnableAsync //开启异步注解功能
@EnableScheduling //开启基于注解的定时任务
@SpringBootApplication
public class SpringbootTaskApplication {

   public static void main(String[] args) {
       SpringApplication.run(SpringbootTaskApplication.class, args);
  }

    //定时任务也可以写在主程序中
     /* @Scheduled(cron = "0/2 * * * * ?)//每两秒打印一次hello
   public void hello(){
       System.out.println("hello.....")/;
  }*/

}
3、运行
(2)了解cron表达式
结构:
cron表达式是一个字符串,分为6或7个域,每两个域之间用空格分隔。
取值范围:
| 域名 | 可取值 | 可取符号 |
|---|---|---|
| 秒域 | 0~59的整数 | * - , / |
| 分域 | 0~59的整数 | * - , / |
| 时雨 | 0~23的整数 | * - , / |
| 日域 | 1~31的整数 | * - , / ?L |
| 周域 | 112的整数或JANDEC | * - , / |
| 月域 | 17的整数或SUNSAT | * - , / ? L # |
| 年域 | 1970~2099的整数 | * - , / |
常用表达式:
| 表达式 | 意义 |
|---|---|
| 0/5 * * * * ? | 表示每两秒执行一次任务 |
| 0 0/2 * * * ? | 表示每两分钟执行任务 |
| 0 0 2 1 * ? | 表示在每月的一号的凌晨2点调整任务 |
| 0 15 10 ?* MON-FRI | 表示周一到周五每天上午10:15执行作业 |
| 0 15 10 ?6L 2002-2006 | 表示2002-2006年的每个月的最后一个星期五上午10:15执行作 |
| 0 0/5 14 * * ? | 在每天下午2点到下午2:55期间的每5分钟触发 |
| 0 10,44 14 ? 3 WED | 每年三月的星期三的下午2:10和2:44触发 |
2、动态:基于接口
用于实现从数据库获取指定时间来动态执行定时任务;
使用@Scheduled 注解很方便,但缺点是当我们调整了执行周期的时候,需要重启应用才能生效。为了达到实时生效的效果,可以使用接口来完成定时任务,统一将定时器信息存放在数据库中。
(1)添加数据库
DROP DATABASE IF EXISTS `task`;
CREATE DATABASE `task`;
USE `TASK`;
DROP TABLE IF EXISTS `cron`;
CREATE TABLE `cron`  (
  `cron_id` varchar(30) NOT NULL PRIMARY KEY,
  `cron_name` varchar(30) NULL,
  `cron` varchar(30) NOT NULL
);
INSERT INTO `cron` VALUES ('1', '0/5 * * * * ?');
(2)添加数据源
spring:
  datasource:
    url: jdbc:mysql://localhost:3306/task
    username: root
    password: root
(3)创建定时器
@Configuration      //1.主要用于标记配置类,兼备Component的效果。
@EnableScheduling   // 2.开启定时任务
public class DynamicScheduleTask implements SchedulingConfigurer {

    @Mapper
    public interface CronMapper {
        @Select("select cron from cron limit 1")
        public String getCron();
    }

    @Autowired      //注入mapper
    @SuppressWarnings("all")
    CronMapper cronMapper;

    /**
     * 执行定时任务.
     */
    @Override
    public void configureTasks(ScheduledTaskRegistrar taskRegistrar) {

        taskRegistrar.addTriggerTask(
                //1.添加任务内容(Runnable)
                () -> System.out.println("执行动态定时任务: " + LocalDateTime.now().toLocalTime()),
                //2.设置执行周期(Trigger)
                triggerContext -> {
                    //2.1 从数据库获取执行周期
                    String cron = cronMapper.getCron();
                    //2.2 合法性校验.
                    if (StringUtils.isEmpty(cron)) {
                        // Omitted Code ..
                    }
                    //2.3 返回执行周期(Date)
                    return new CronTrigger(cron).nextExecutionTime(triggerContext);
                }
        );
    }

}
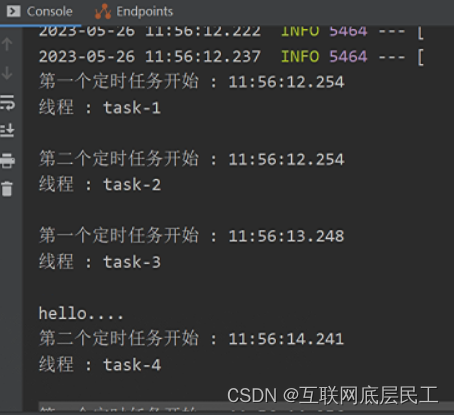
3、多线程定时任务
基于注解设定多线程定时任务;
@Scheduled执行周期任务会受到上次一个任务的执行时间影响。那么可以开启多线程执行周期任务
//@Component注解用于对那些比较中立的类进行注释;
//相对与在持久层、业务层和控制层分别采用 @Repository、@Service 和 @Controller 对分层中的类进行注释
@Component
@EnableScheduling   // 1.开启定时任务
@EnableAsync        // 2.开启多线程
public class MultithreadScheduleTask {

        @Async
        @Scheduled(fixedDelay = 1000)  //间隔1秒
        public void first() throws InterruptedException {
            System.out.println("第一个定时任务开始 : " + LocalDateTime.now().toLocalTime() + "\r\n线程 : " + Thread.currentThread().getName());
            System.out.println();
            Thread.sleep(1000 * 10);
        }

        @Async
        @Scheduled(fixedDelay = 2000)
        public void second() {
            System.out.println("第二个定时任务开始 : " + LocalDateTime.now().toLocalTime() + "\r\n线程 : " + Thread.currentThread().getName());
            System.out.println();
        }
    }
运行:


 10万+
10万+


 被折叠的 条评论
为什么被折叠?
被折叠的 条评论
为什么被折叠?
 到【灌水乐园】发言


