


config(配置中心):把所有配置文件集中管理(把yml文件配置在码云上);
bus(消息总线):可以实现在线配置修改,不用重启端口(在线热部署);
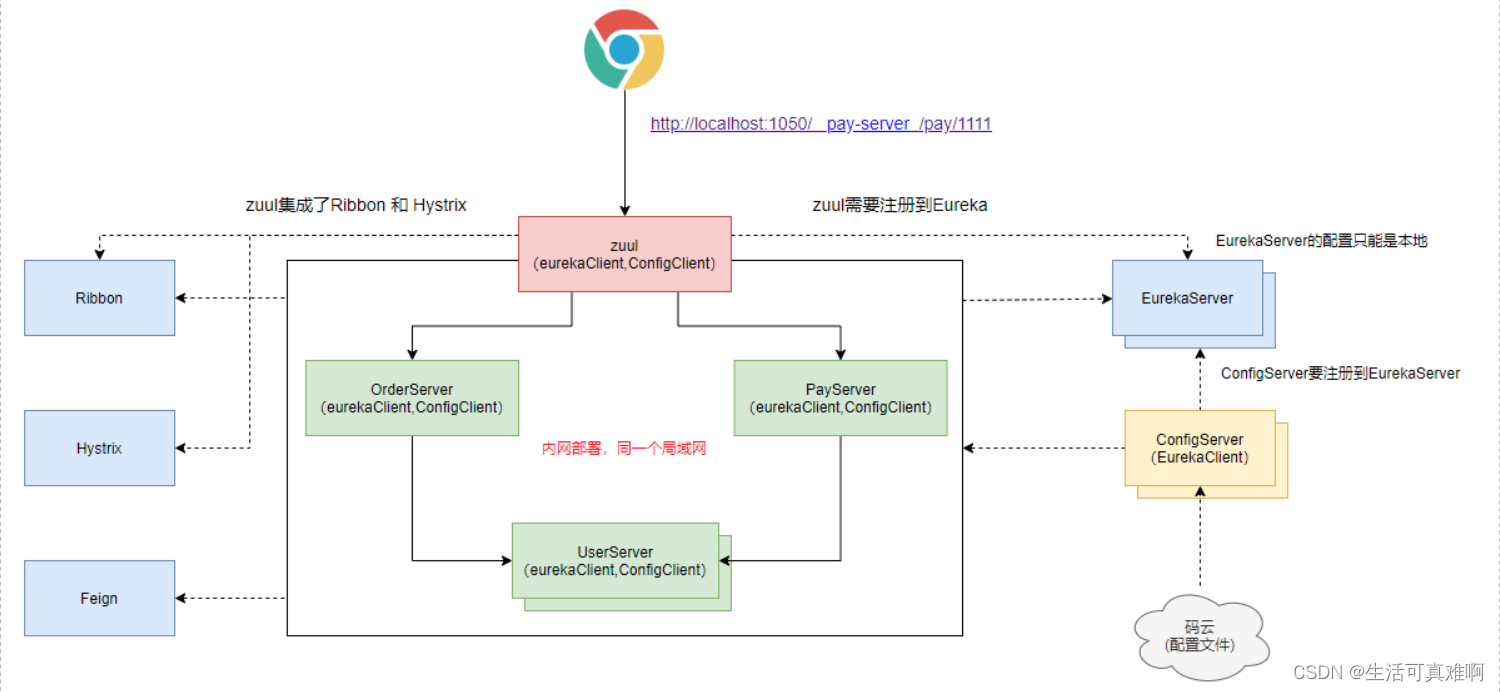
config工作流程图
config:优点:可以实时在云端实现端口修改;
缺点:修改配置需要重启 端口;(bus完美的解决了这个问题);
使用config步骤:
1.导入依赖;
2.添加注解;
3.配置yml;
4.再到客户端集成config组件;
4.1客户端导入依赖
4.2客服端创建bootstrap.yml文件,删除application.yml
1.导入依赖;
<dependency>
    <groupId>org.springframework.cloud</groupId>
    <artifactId>spring-cloud-starter-netflix-eureka-client</artifactId>
</dependency>
<dependency>
    <groupId>org.springframework.boot</groupId>
    <artifactId>spring-boot-starter-web</artifactId>
</dependency>
<dependency>
    <groupId>org.springframework.cloud</groupId>
    <artifactId>spring-cloud-config-server</artifactId>
</dependency>
2.添加注解;
@EnableConfigServer
3.配置yml;
eureka:
  client:
    serviceUrl:
      defaultZone: http://localhost:1010/eureka/
  instance:
    prefer-ip-address: true
    instance-id: config-server1070
spring:
  rabbitmq: #集成RabbitMQ如果配置是默认,可以省略
    host: localhost #mq连接地址
    port: 5672 #mq端口
    username: guest
    password: guest

  application:
    name: config-server
  cloud:
    config:
      server:
        git:
          #配置远程仓库地址,去仓库中复制
          uri: https://gitee.com/liu_-liang/springcloud-config-server-1070.git
          username: 15271148123    #仓库是私有的需要账号
          password: ll15271148123...
          #search-paths: 路径 #如果配置文件不再仓库的根目录,需要配置查找路径
  profiles:
    active: config1
#actuator配置
management:
  endpoint:
    health:
      show-details: always #打印日志
  endpoints:
    web:
      exposure:
        include: "*" #向外暴露的接口,这里*则表示所有的actuator接口都可以被访问
    enabled-by-default: true  #开启actuator监控
---
spring:
  profiles: config1
eureka:
  instance:
    prefer-ip-address: true #使用ip地址注册
    instance-id: config-server:1071  #指定服务的id
server:
  port: 1071
---
spring:
  profiles: config2
eureka:
  instance:
    prefer-ip-address: true #使用ip地址注册
    instance-id: config-server:1072  #指定服务的id
server:
  port: 1072
4.再到客户端集成config组件;
4.1客户端导入依赖
<dependency>
    <groupId>org.springframework.cloud</groupId>
    <artifactId>spring-cloud-starter-bus-amqp</artifactId>
</dependency>
<dependency>
    <groupId>org.springframework.boot</groupId>
    <artifactId>spring-boot-starter-actuator</artifactId>
</dependency>
4.2客服端创建bootstrap.yml文件,删除application.yml
#配置中心的地址
spring:
  cloud:
    config:
      #uri: http://localhost:1070 #指向配置中心服务端地址
      name: application-zuul #指定拉取配置文件的名称
      profile: dev #指定环境
      label: master #指定分支
      discovery:
        service-id: config-server #配置中心服务名
        enabled: true #使用服务名访问配置中心
    bus: #这行代码很重要,根据官方定义的标准来的 ,就是为了产生一个bus.id
      id: ${spring.application.name}:${spring.cloud.config.profile}:${random.value}
  rabbitmq: #集成RabbitMQ如果配置是默认,可以省略
    host: localhost #mq连接地址
    port: 5672 #mq端口
    username: guest
    password: guest

#注册到EurekaServer
eureka:
  client:
    serviceUrl:
      defaultZone: http://localhost:1010/eureka/
此时把配置文件写在码云上,启动端口,端口与配置在码云上的端口一致即算配置成功;
此时config的缺点就暴露出来了,修改配置文件之后需要重启端口才会生效,此时bus就出现了
bus使用步骤:
1.在配置中心导入依赖
2.配置yml
3.客户端集成
3.1导依赖
3.2配置yml
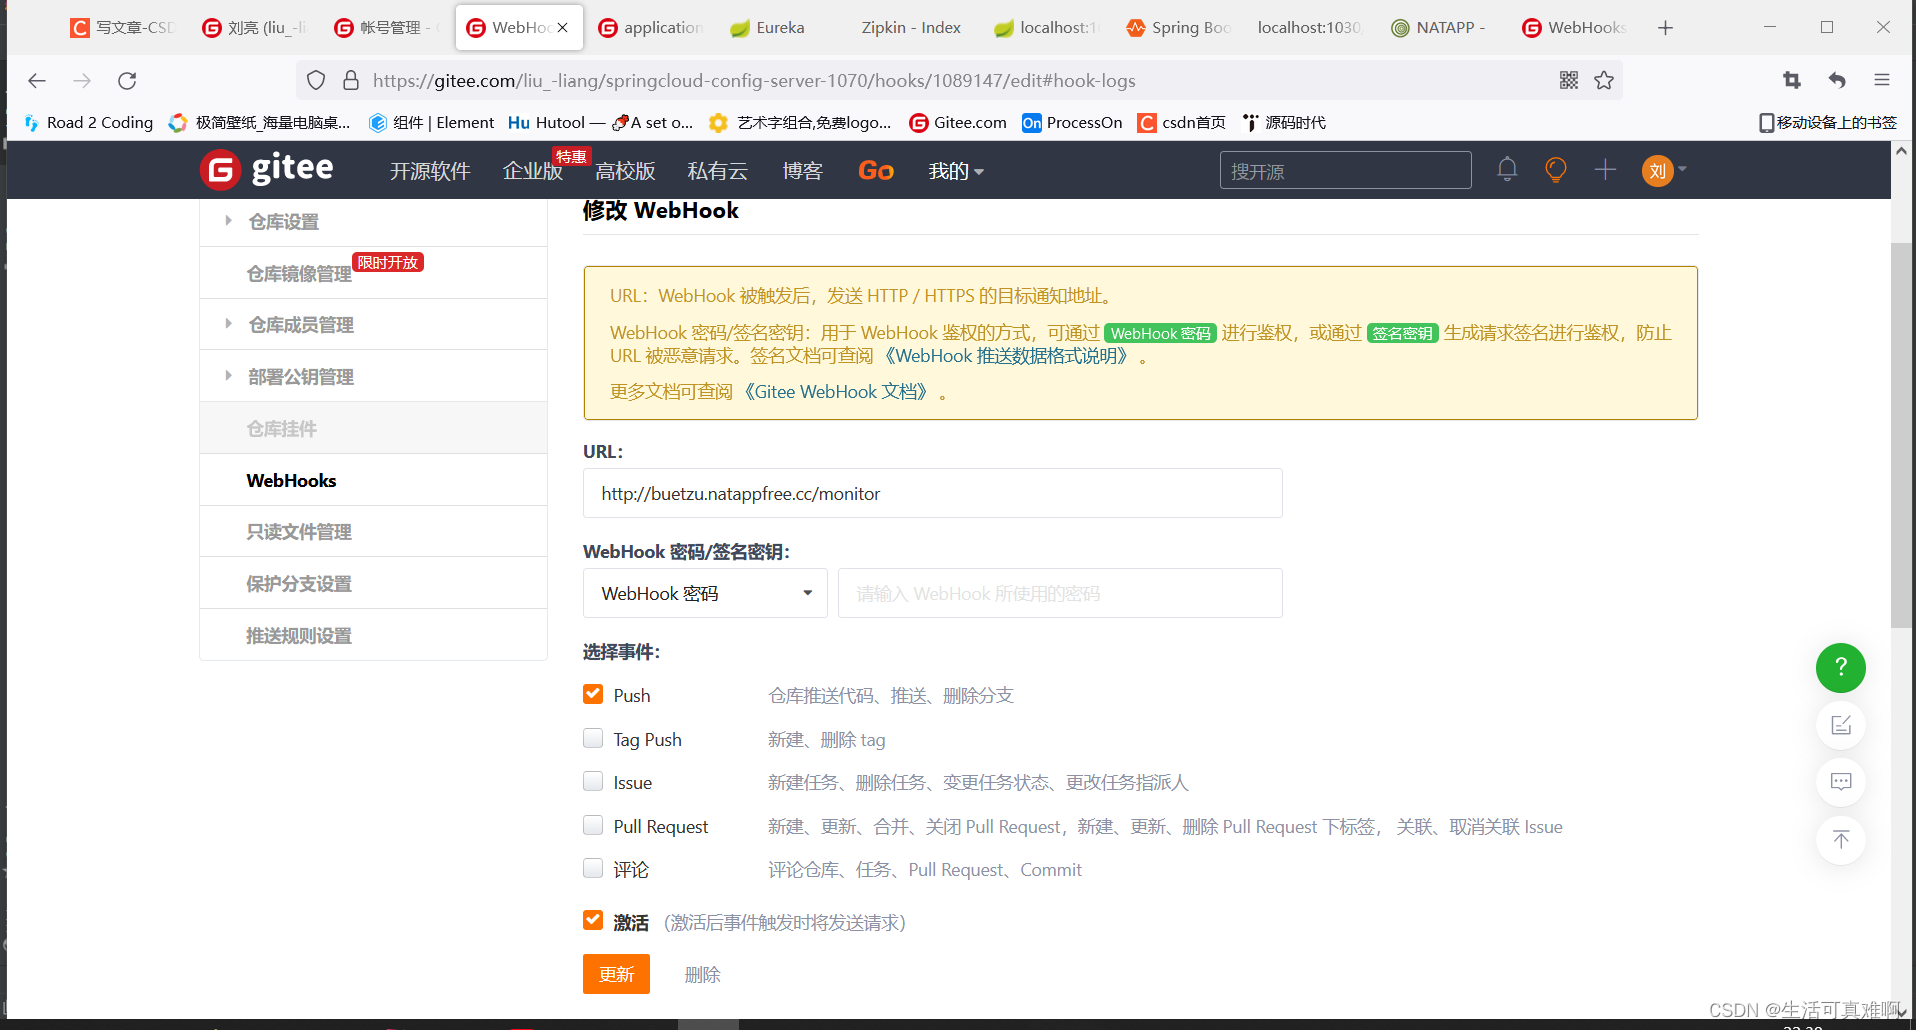
4.在git上配置Webhooks(钩子方法);使得一配置后就像哦欸之中心发送请求;
5.设置内网穿透;因为本地的局域网git访问不到;
1.在配置中心导入依赖
<dependency>
<groupId>org.springframework.cloud</groupId>
<artifactId>spring-cloud-starter-bus-amqp</artifactId>
</dependency>
<dependency>
<groupId>org.springframework.cloud</groupId>
<artifactId>spring-cloud-config-monitor</artifactId>
</dependency>
<dependency>
<groupId>org.springframework.boot</groupId>
<artifactId>spring-boot-starter-actuator</artifactId>
</dependency>
2.配置yml
上面 config已经说明过;
3.客户端集成
3.1导依赖
3.2配置yml
3.1导依赖
<dependency>
<groupId>org.springframework.cloud</groupId>
<artifactId>spring-cloud-starter-bus-amqp</artifactId>
</dependency><dependency>
<groupId>org.springframework.boot</groupId>
<artifactId>spring-boot-starter-actuator</artifactId>
</dependency>
3.2配置yml
上面config已经说明
4.在git上配置Webhooks(钩子方法);使得一配置后就像哦欸之中心发送请求;
(路径填内网穿透的名字+/monitor)
5.设置内网穿透;因为本地的局域网git访问不到;
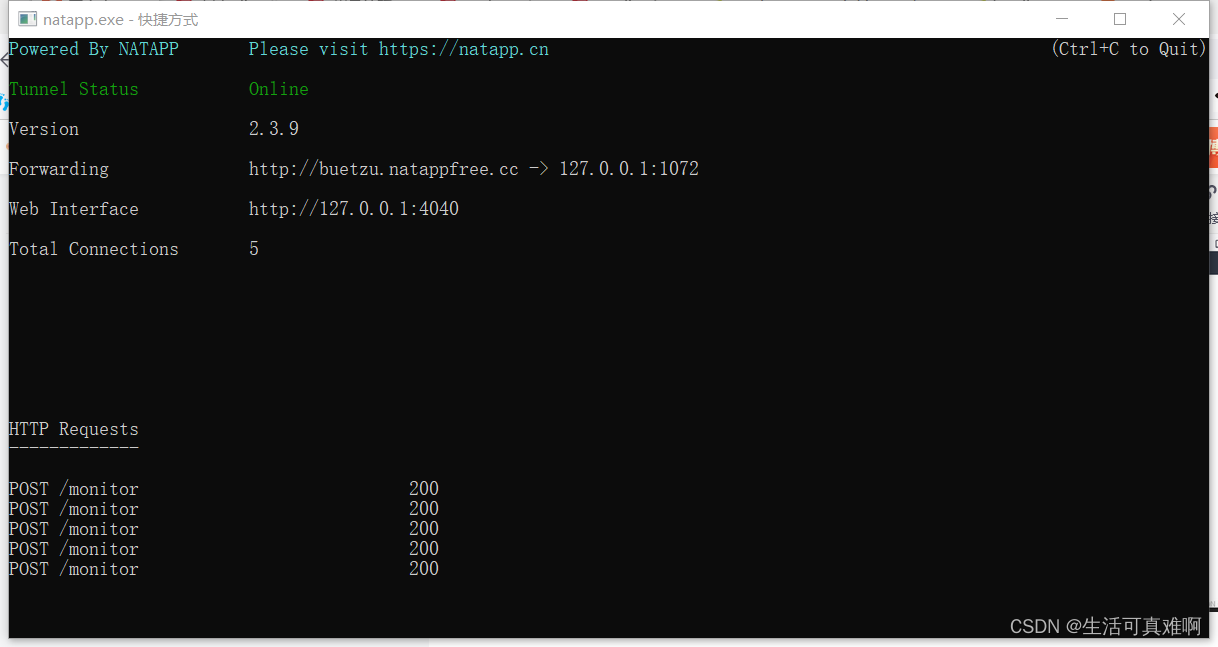
设置完就可以直接测试了,使用bus后可以在线实现配置且不用重启端口,非常优雅;
springcloud其他组件:
SpringBoot Admin(服务监控):用来服务和监控,内存,垃圾回收,日志等参数;
ELK(ElasticSearch , Logstash, Kibana):用来做海量数据的日志处理;


 988
988


 被折叠的 条评论
为什么被折叠?
被折叠的 条评论
为什么被折叠?
 到【灌水乐园】发言


