


前言
在使用uni-app开发app或者是微信小程序时,使用原生的导航栏有时无法满足我们的一些特殊需要,我们可以封装一个导航栏用于复用。
一、创建导航栏组件
在项目的根目录创建components文件夹,在components文件夹下创建customNavbar目录,并创建与目录同名的customNavbar.vue文件。
二、customNavbar.vue 文件原码
<template>
	<view class="customNavbar" :style="{'background':bgColor}">
		<!-- 系统导航栏 -->
		<view class="system" :style="{'height':`${statusBar * 2}rpx`}"></view>
		<view class="navbar" :style="{'height':`${(customBar - statusBar) * 2}rpx`}">
			<view class="left">
				<!-- 通过具名插槽来自定义导航栏左侧内通 -->
				<slot name="left">
					<!-- 这里我就直接用文本代替了,返回图标大家自行替换哈 -->
					<!-- #ifdef APP-PLUS -->
					<view @click="back()">返回</view>
					<!-- #endif -->
					<!-- 这里考虑到微信小程序分享的页面,在页面中不存在上一页面时,直接返回首页。-->
					<!-- #ifdef MP-WEIXIN -->
					<view @click="back()" v-if="isPageUp">返回</view>
					<view @click="homePage()" v-else>首页</view>
					<!-- #endif -->
				</slot>
			</view>
			<!-- 通过具名插槽来自定义导航栏中间内通 -->
			<view class="content">
				<slot name="content">{{ title }}</slot>
			</view>
			<!-- 通过具名插槽来自定义导航栏右侧内通 -->
			<view class="right">
				<slot name="right">
				</slot>
			</view>
		</view>
	</view>
</template>
<script>
	export default {
		data() {
			return {
				statusBar: 0, // 状态栏
				customBar: 0, // 状态栏 + 导航栏高度
				platform: "", // 平台
				isPageUp: true, // 是否返回上一页(微信小程序)
			}
		},
		props: {
			// 自定义左侧文字
			leftText: {
				type: String,
				default: ""
			},
			// 标题名称
			title: {
				type: String,
				default: ""
			},
			// 自定义右侧文字
			rightText: {
				type: String,
				default: ""
			},
			// 背景颜色
			bgColor: {
				type: String,
				default: "#fff"
			},
		},
		mounted() {
			/*
				这里通过 uni.getSystemInfo 获取系统信息
				用来计算系统导航栏高度和导航栏高度
			*/
			uni.getSystemInfo({
				success: (res) => {
					this.platform = res.platform
					// #ifdef MP-WEIXIN
					this.statusBar = res.statusBarHeight
					const custom = wx.getMenuButtonBoundingClientRect()
					this.customBar = custom.bottom + custom.top - res.statusBarHeight
					// #endif
					// #ifdef APP-PLUS
					this.statusBar = res.statusBarHeight
					this.customBar = res.statusBarHeight + 45
					// 这里是在安卓手机上加上 3 像素(当时好像是在安卓水滴屏上,系统导航栏高度较低才加上去的,大家可以真机自己调试一下)
					if (res.platform == "android") {
						this.statusBar += 3
						this.customBar += 3
					}
					// #endif
				}
			})
			// getCurrentPages 官方解释用于获取当前页面的实例  官方地址:https://uniapp.dcloud.net.cn/uni-app-x/api/get-current-pages.html#getcurrentpages
			let pages = getCurrentPages()
			if (pages[pages.length - 2]) {
				this.isPageUp = true
			} else {
				this.isPageUp = false
			}
		},
		methods: {
			// 返回上一页面
			back() {
				console.log("返回上一页!")
				uni.navigateBack()
			},
			// 微信小程序返回首页
			homePage() {
				console.log("返回首页!")
				uni.switchTab({
					url: '/pages/index/index'
				})
			}
		}
	}
</script>
<style lang="scss" scoped>
	.customNavbar {
		.system {
			width: 100vw;
			background: transparent;
		}

		.navbar {
			width: 100vw;
			display: flex;
			align-items: center;
			justify-content: space-between;
			box-sizing: border-box;
			position: relative;
			padding: 0 30rpx;
		}

		.left,
		.right {
			width: 88rpx;
		}

		.left {
			text-align: left;
		}

		.content {
			text-align: center;
		}

		.right {
			text-align: right;
		}
	}
</style>
三、组件的使用
<template>
	<view class="content">
		<customNavbar title="首页"></customNavbar>
	</view>
</template>
<script>
	// 注册 customNavbar 组件
	import customNavbar from '@/components/customNavbar/customNavbar.vue'
	export default {
		components: {
			customNavbar
		},
		data() {
			return {

			}
		},
		mounted() {

		},
		methods: {

		}
	}
</script>
<style lang="scss" scoped></style>
四、全局组件的注册
在pages.json文件中添加以下代码
	"easycom": {
		"autoscan": true // 自动扫描组件
	},
五、效果图展示
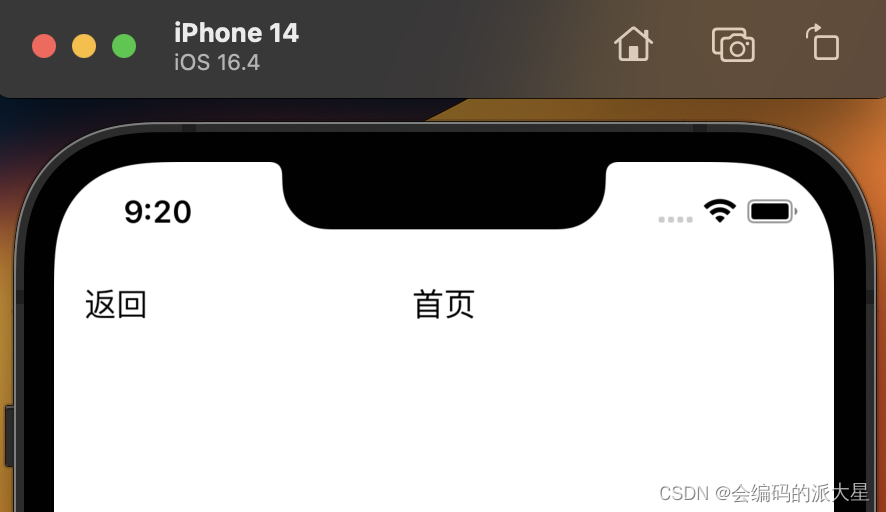
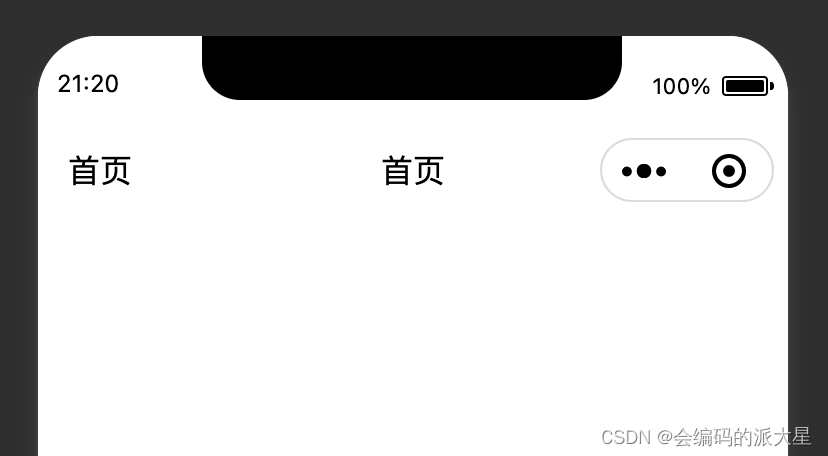
封装的不是很完善,后期会慢慢优化。


 805
805


 被折叠的 条评论
为什么被折叠?
被折叠的 条评论
为什么被折叠?
 到【灌水乐园】发言


