


目录
一、ZeST简介
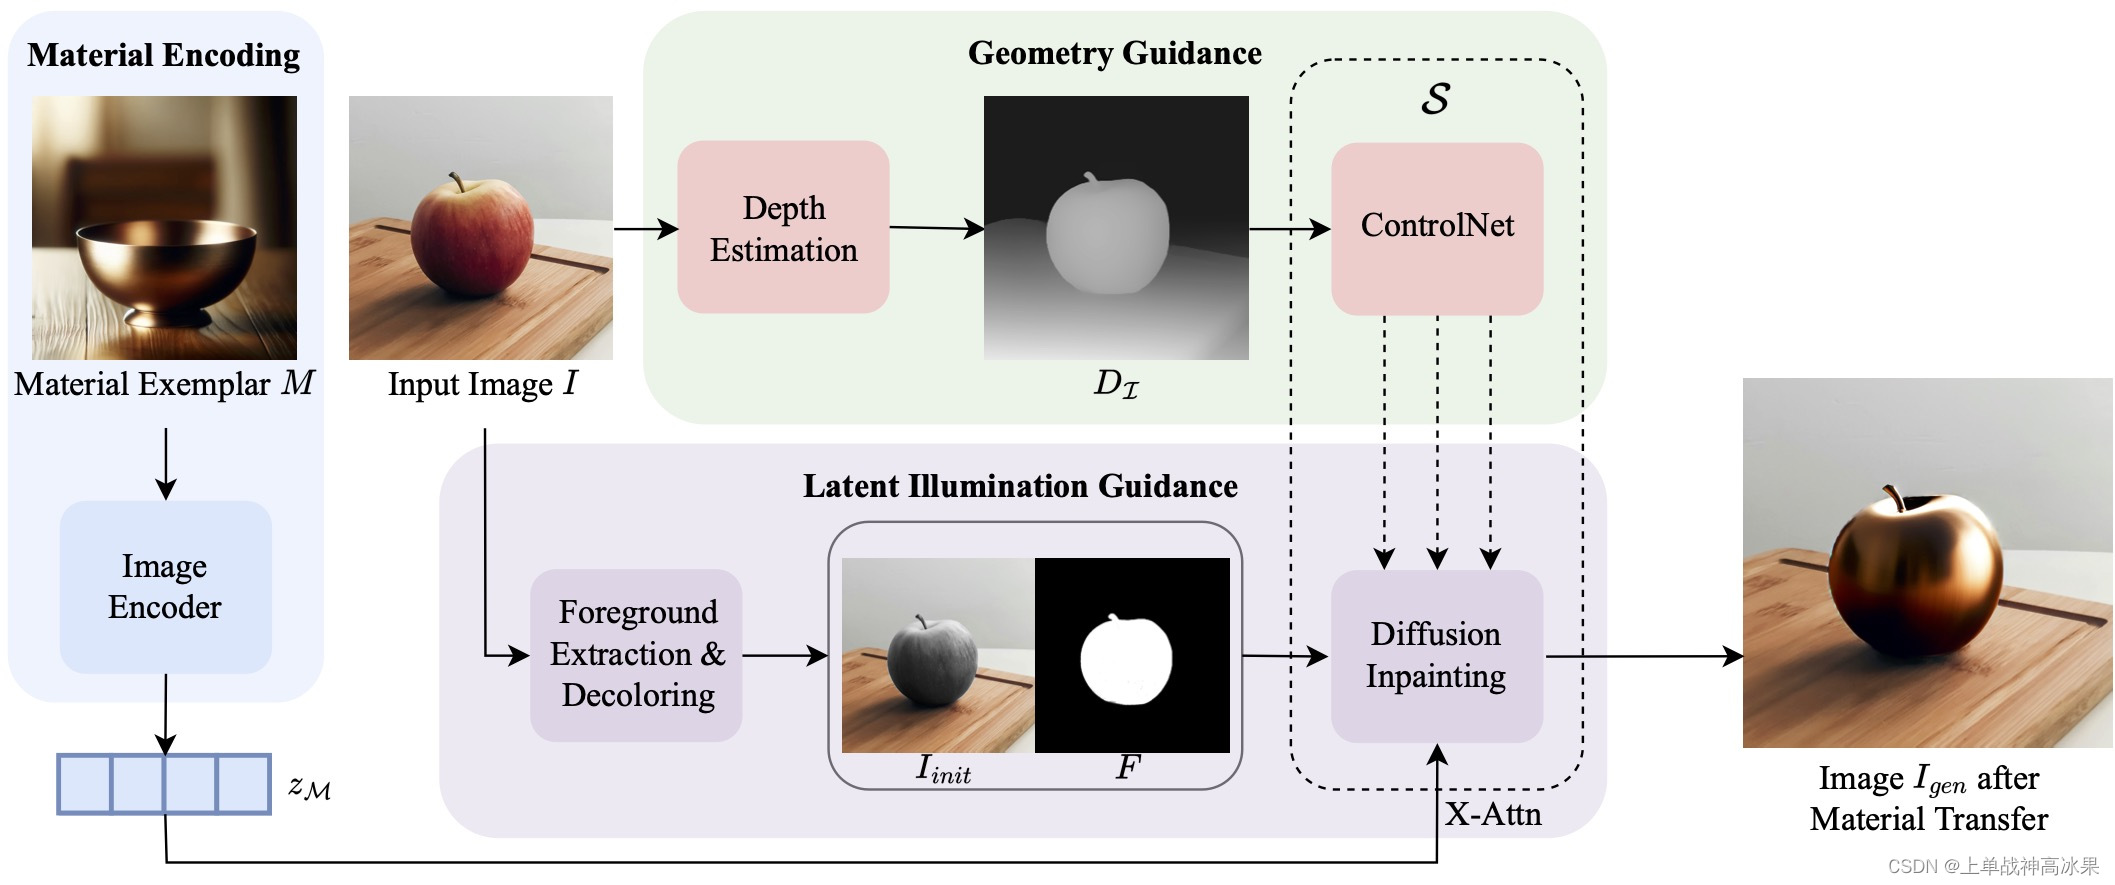
项目全名:ZeST: Zero-Shot Material Transfer from a Single Image
论文链接:https://arxiv.org/abs/2404.06425
Github链接:https://github.com/ttchengab/zest_code
用途:
ZeST可以实现从单张图像进行材料转移,把参考图的材质迁移到需要的图像上
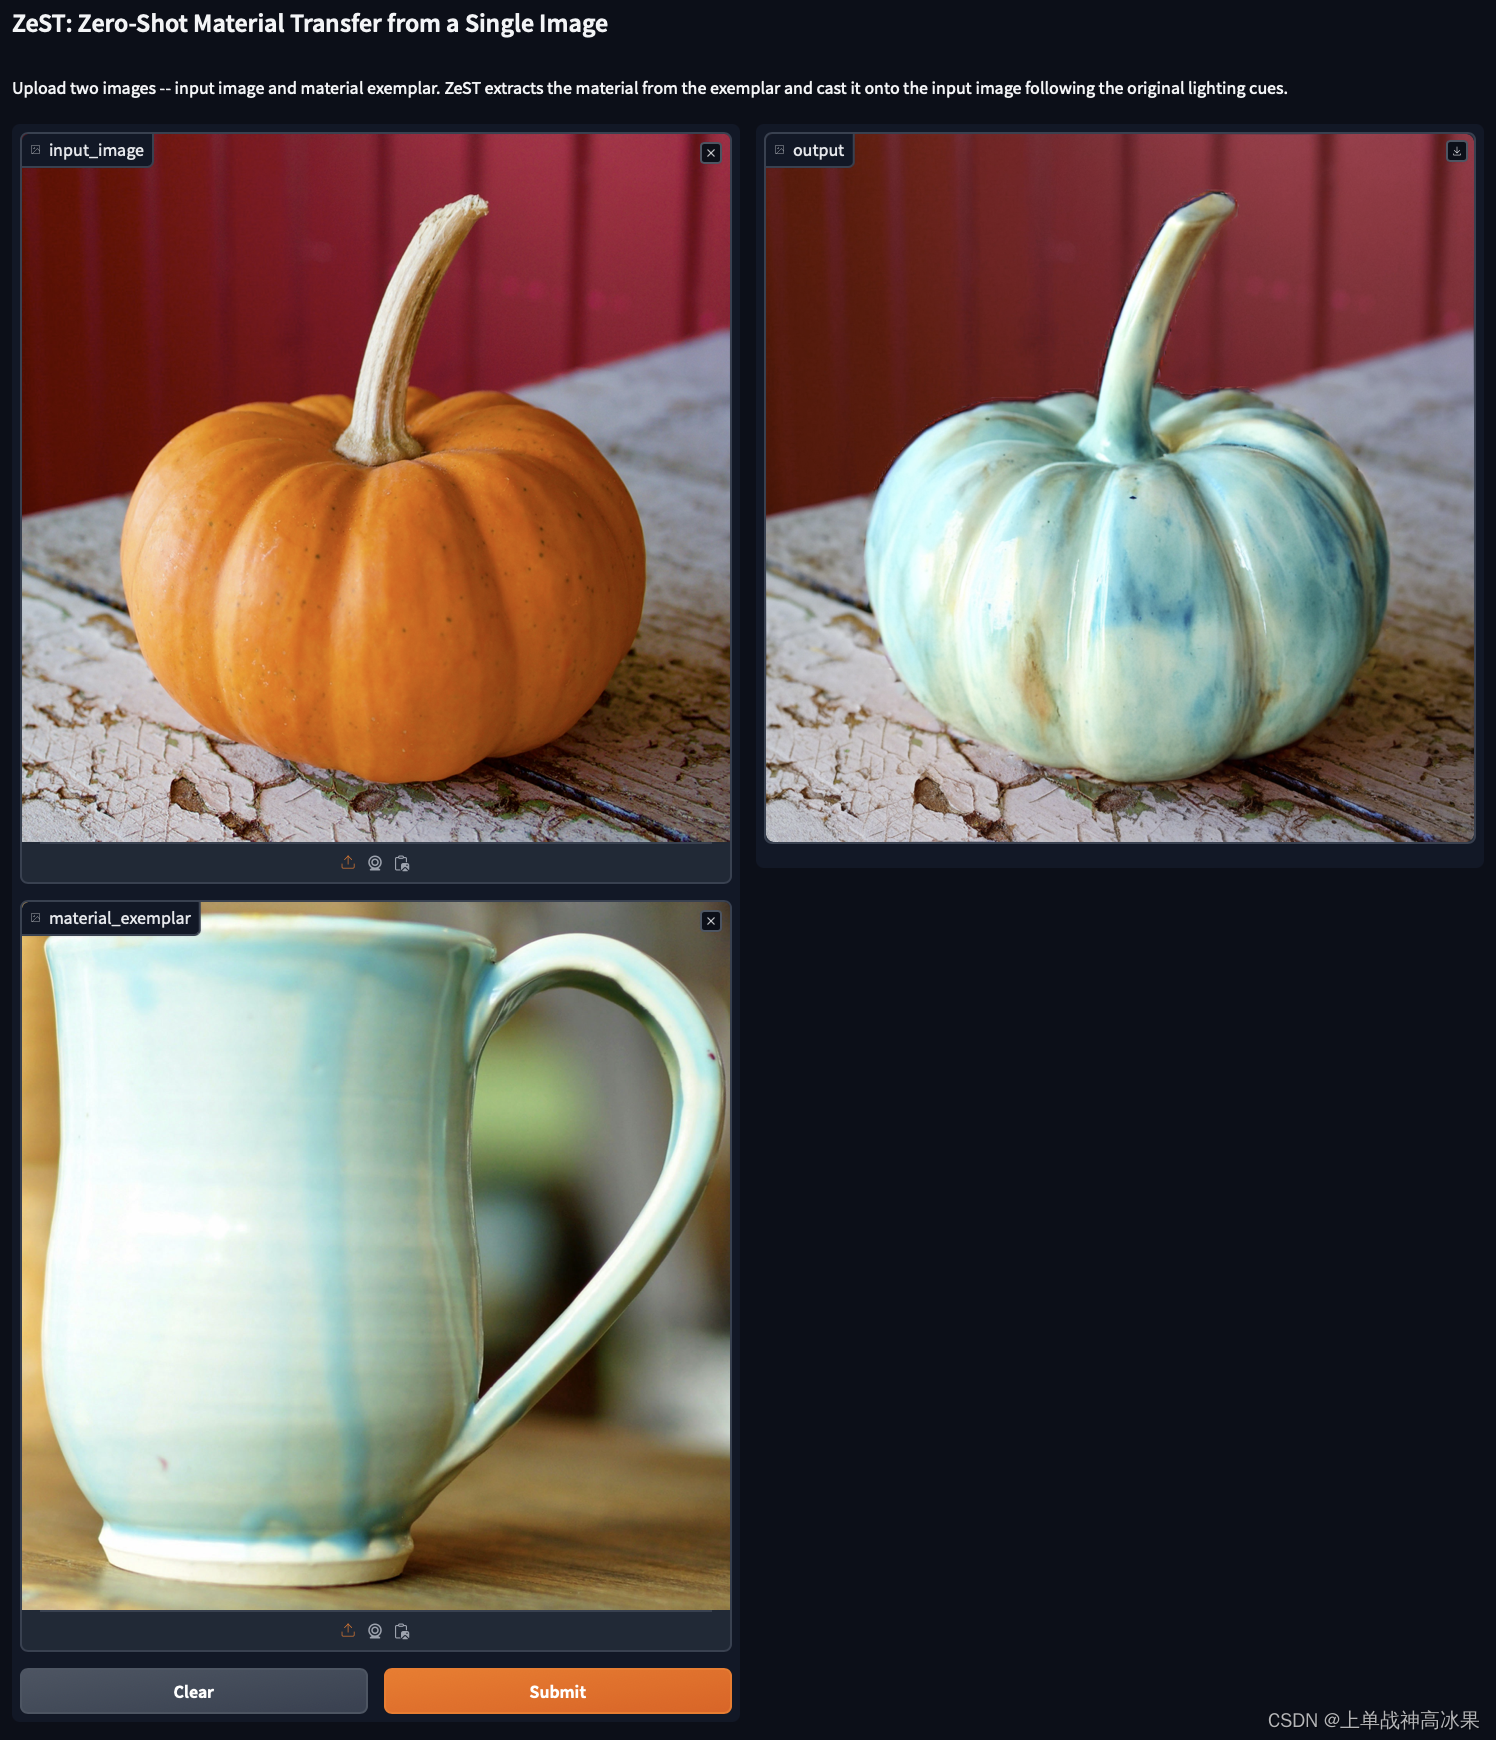
官方示例
二、安装与使用(Linux)
安装
参考github页面,打开安装文件夹,右键打开控制台:
# 克隆该项目
https://github.com/ttchengab/zest_code.git

# 进入zest_code文件夹
cd zest_code

# 安装依赖
pip install -r requirements.txt

# 安装IP-Adapter
git clone https://github.com/tencent-ailab/IP-Adapter.git
mv IP-Adapter/ip_adapter ip_adapter
rm -r IP-Adapter/
下载预训练模型
链接:https://huggingface.co/h94/IP-Adapter/tree/main
放在项目根目录下,下载后使用以下命令
mv IP-Adapter/models models
mv IP-Adapter/sdxl_models sdxl_models
安装DPT用于制作深度图
git clone https://github.com/isl-org/DPT.git下载权重文件放在“DPT/weights”文件夹中
链接:https://github.com/intel-isl/DPT/releases/download/1_0/dpt_hybrid-midas-501f0c75.pt
使用
使用官方提供的gradio界面
python demo_gradio.py制作自己数据的深度图
需要将图像放在“DPT/input/”文件夹中,结果会输出在“DPT/output/”文件夹里,使用以下命令
python DPT/run_monodepth.py将制作出来的深度图放置在“demo_assets/depths”文件夹中即可。
三、效果测试
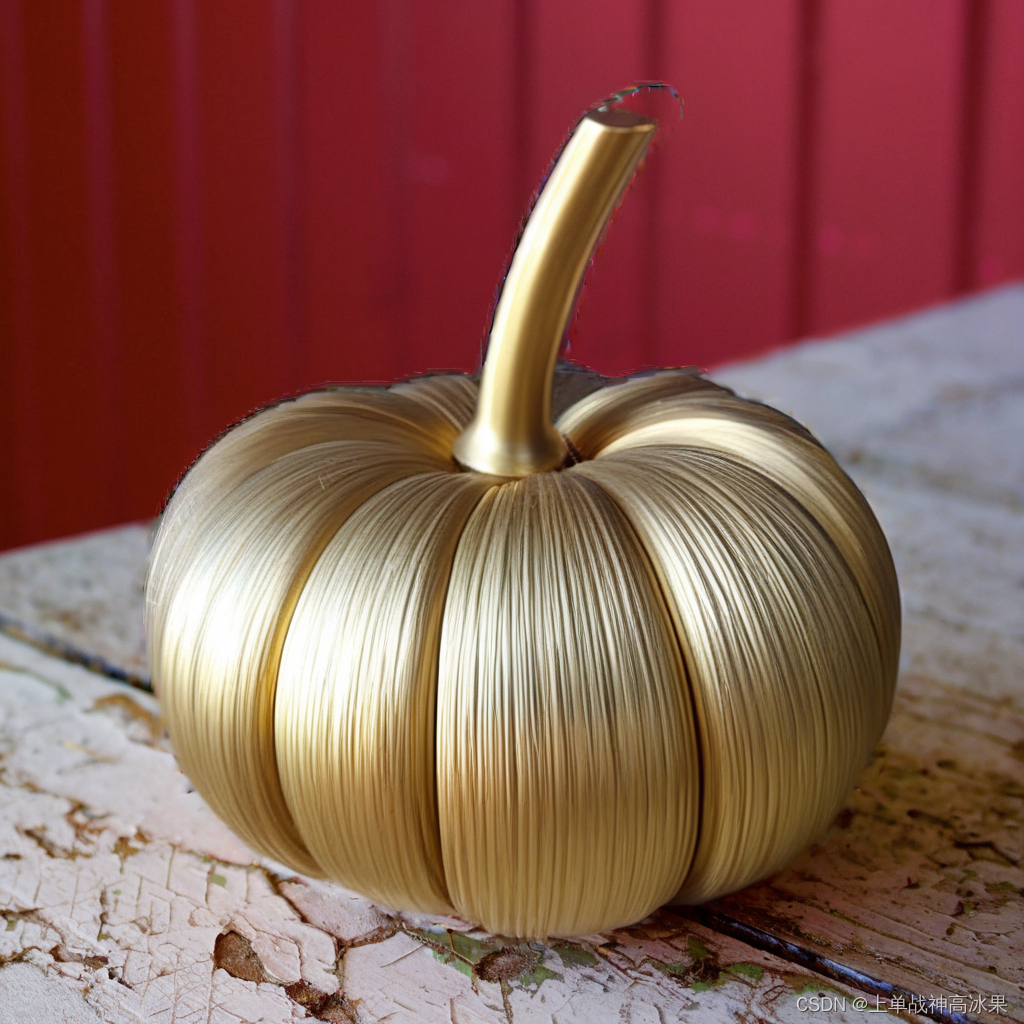
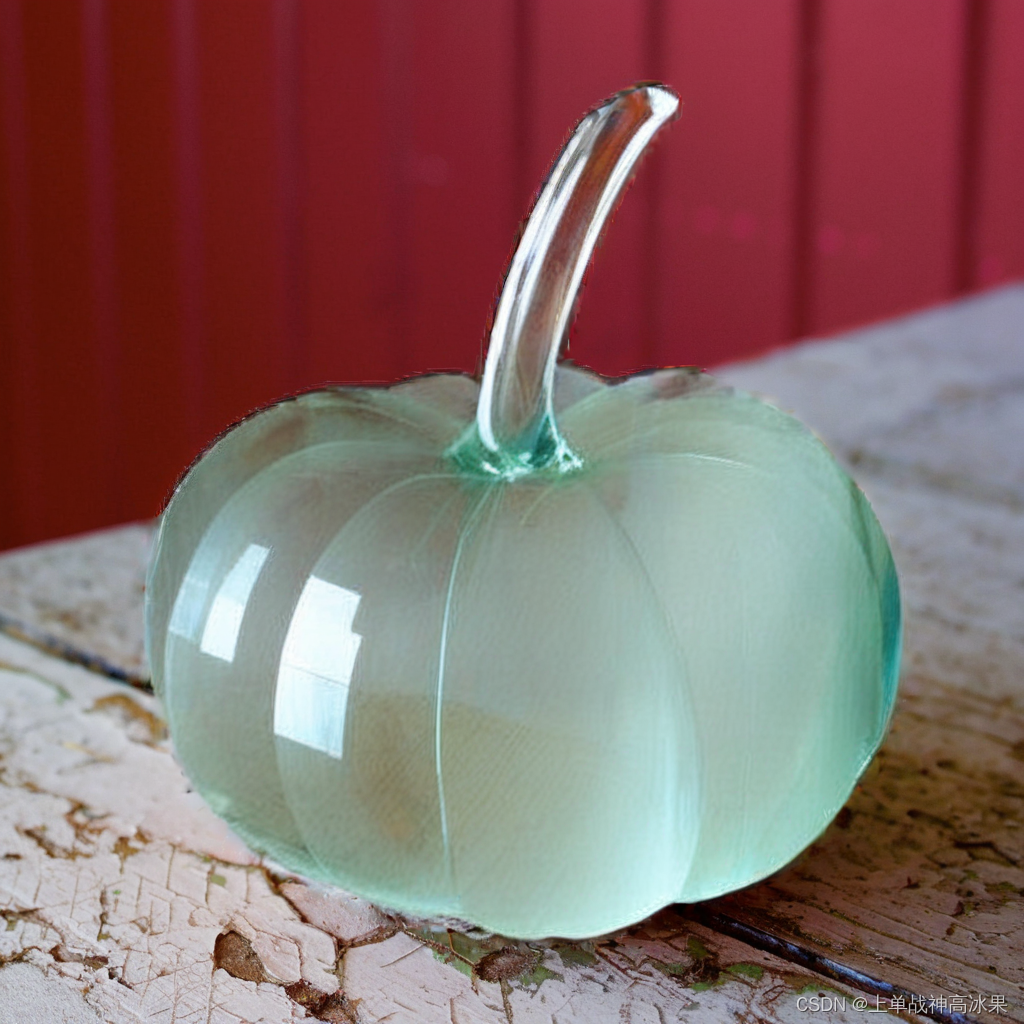
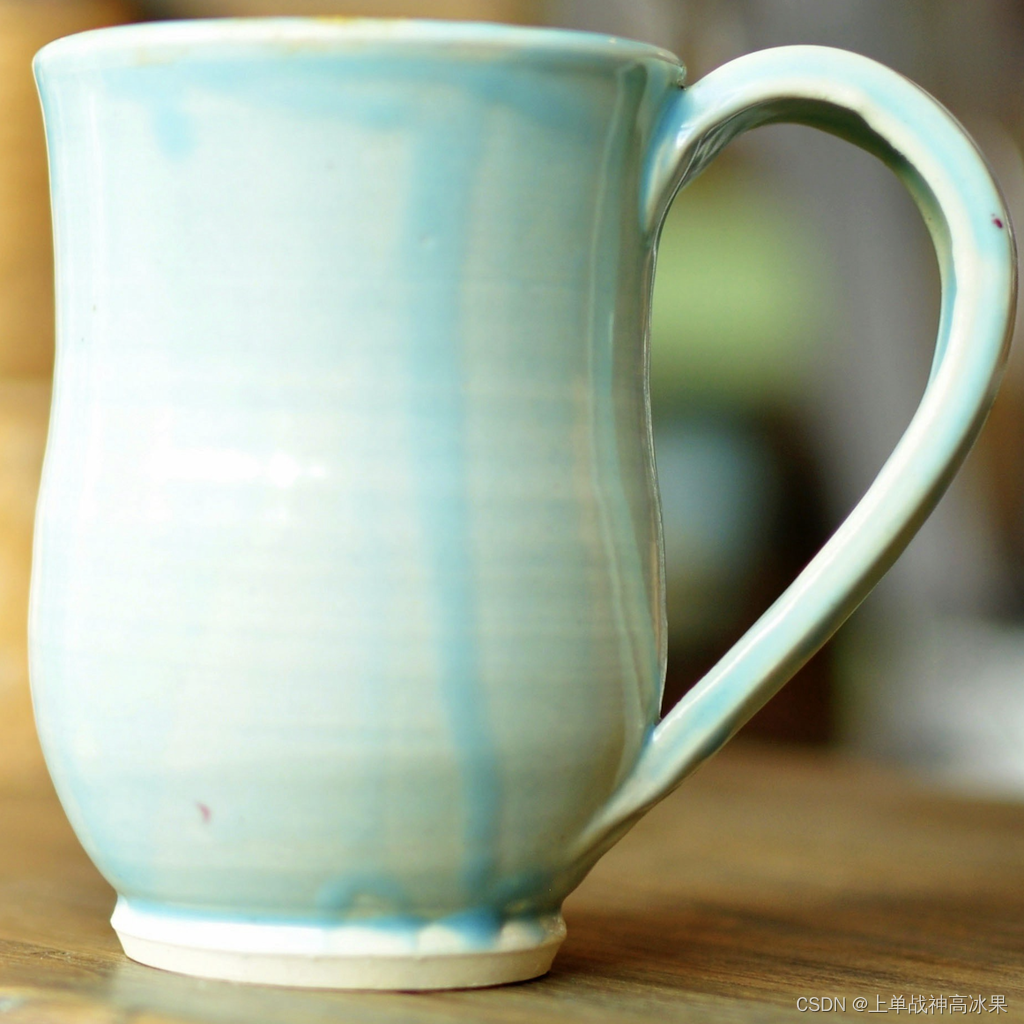
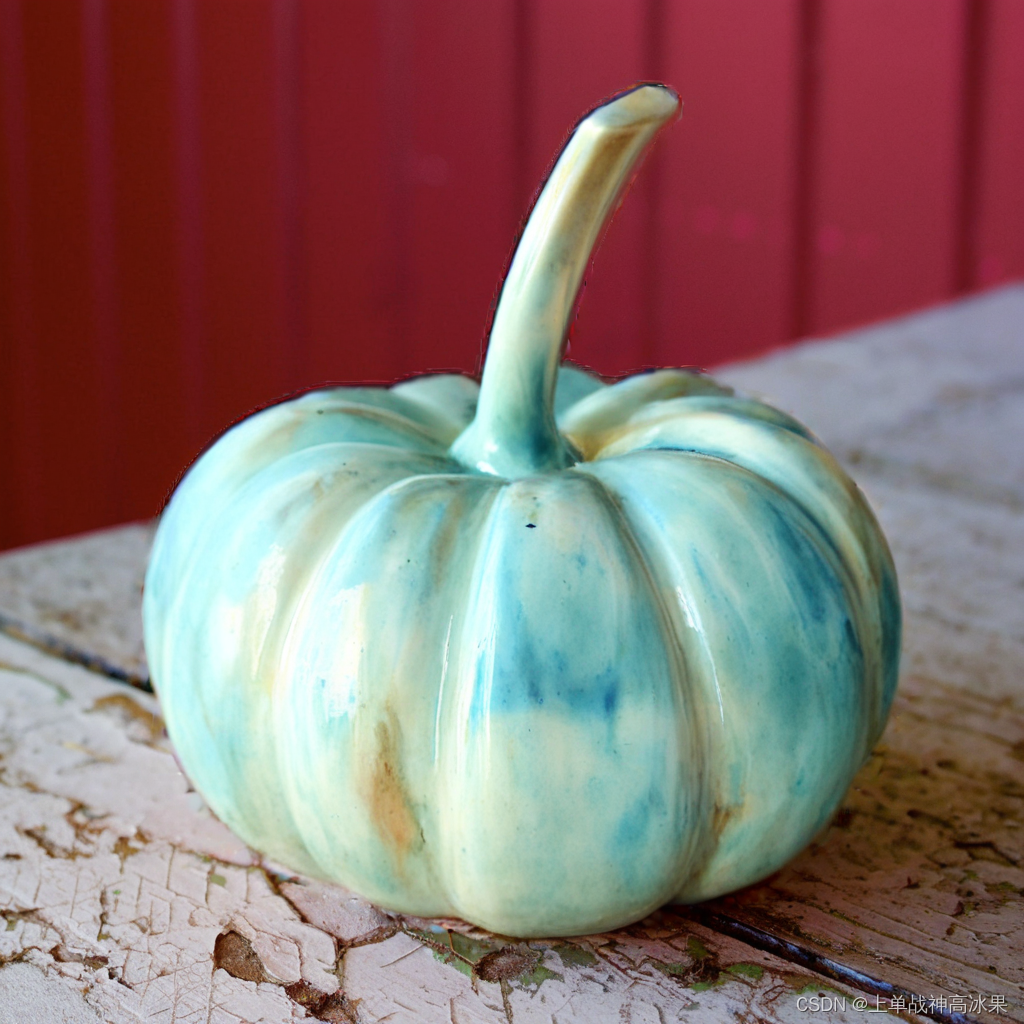
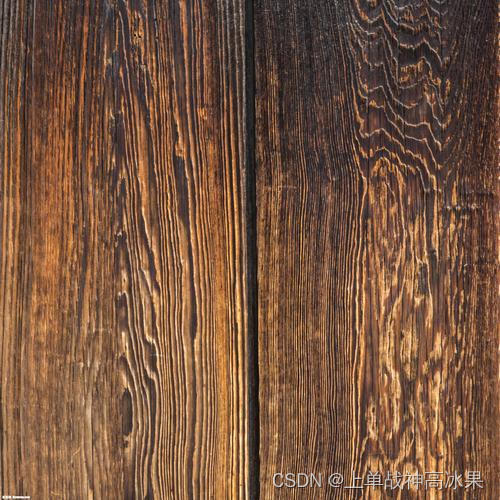
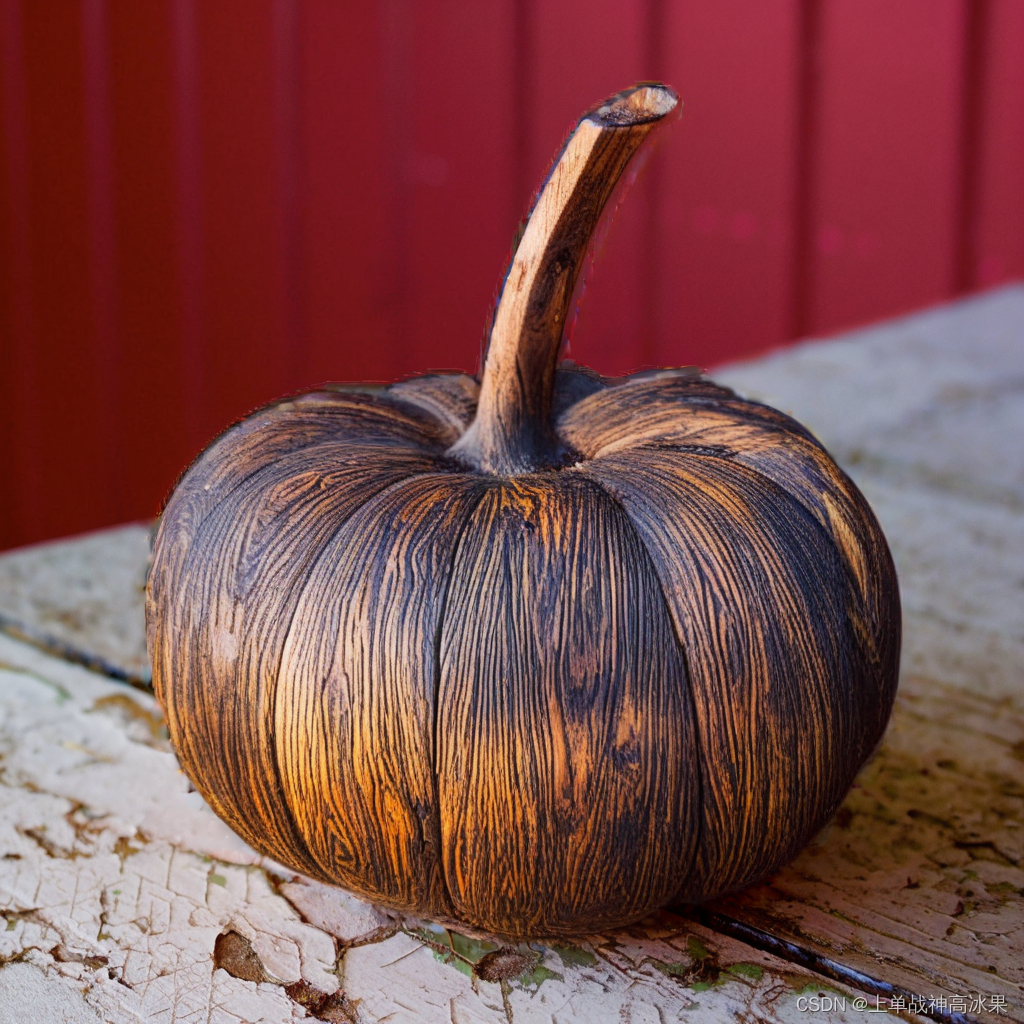
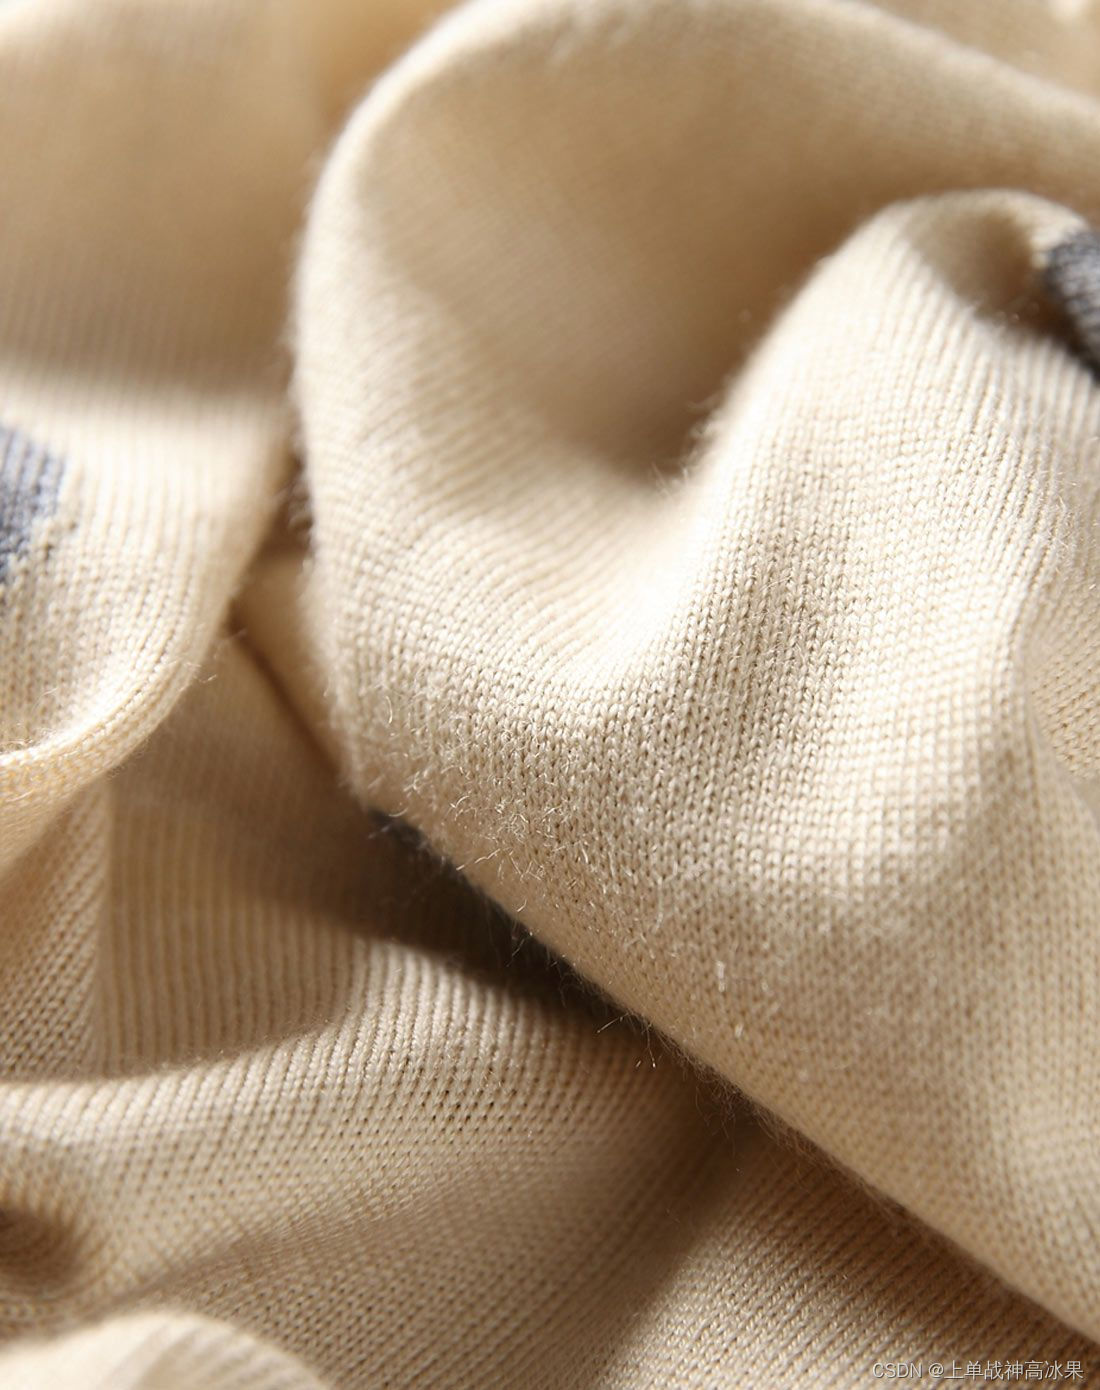
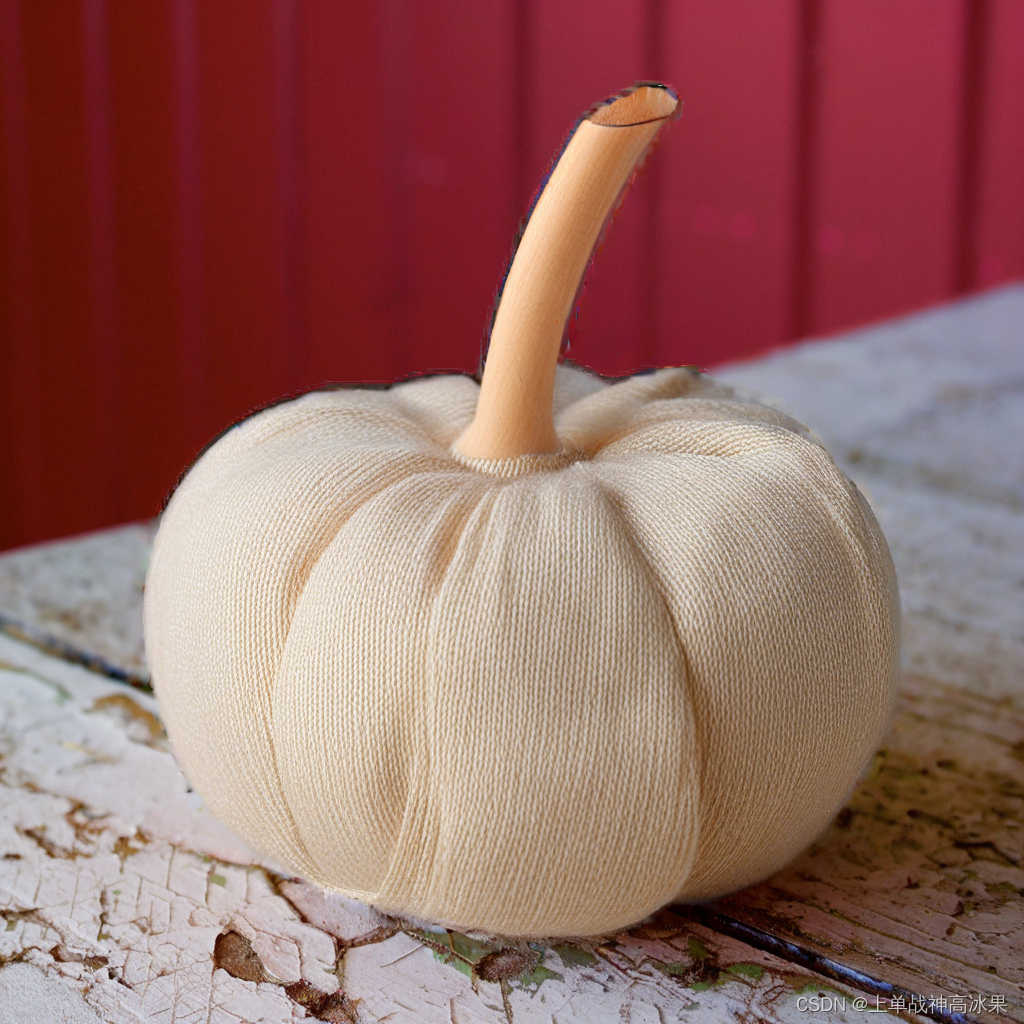
官方示例
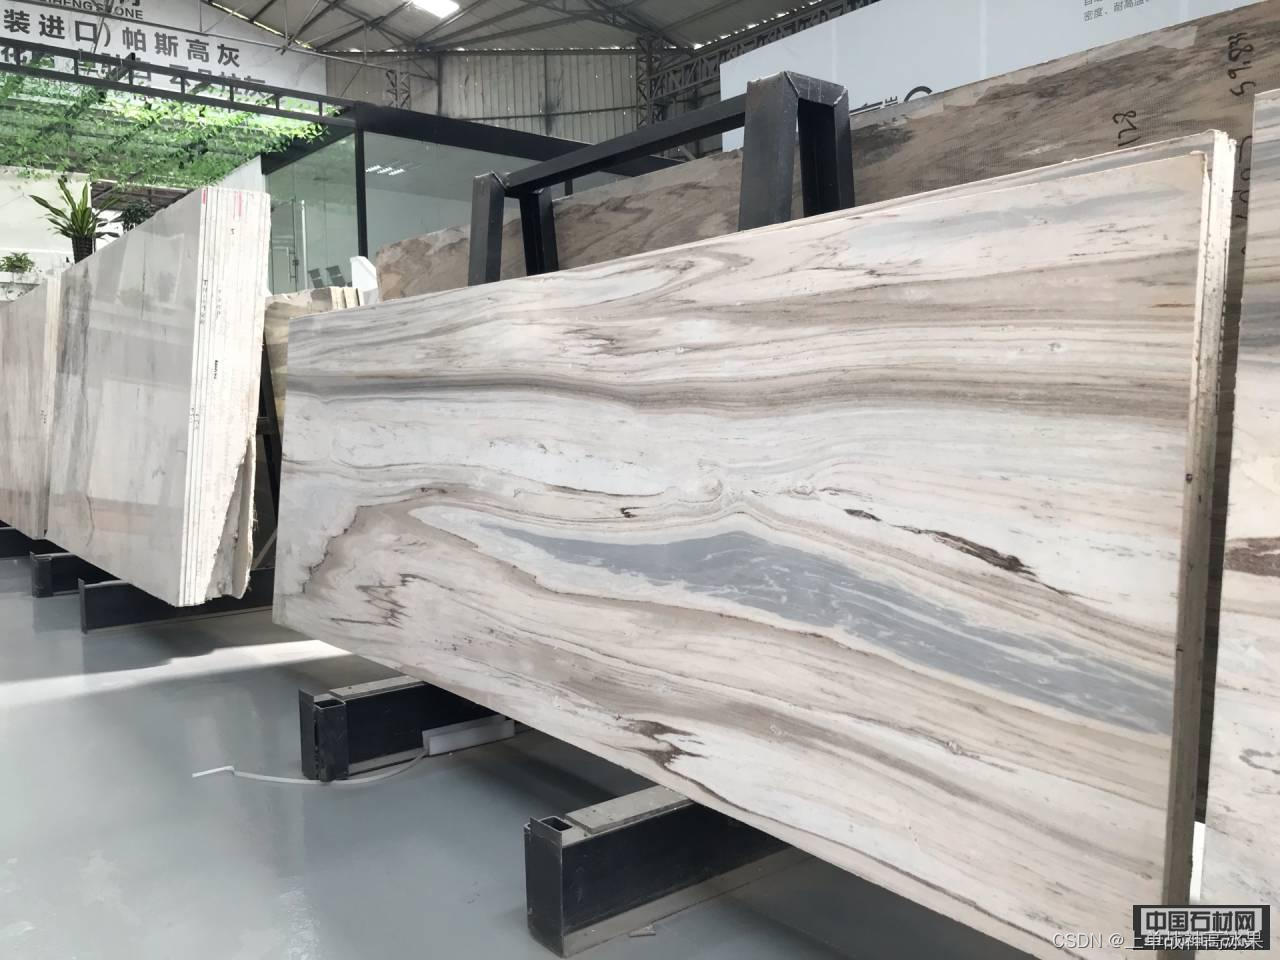
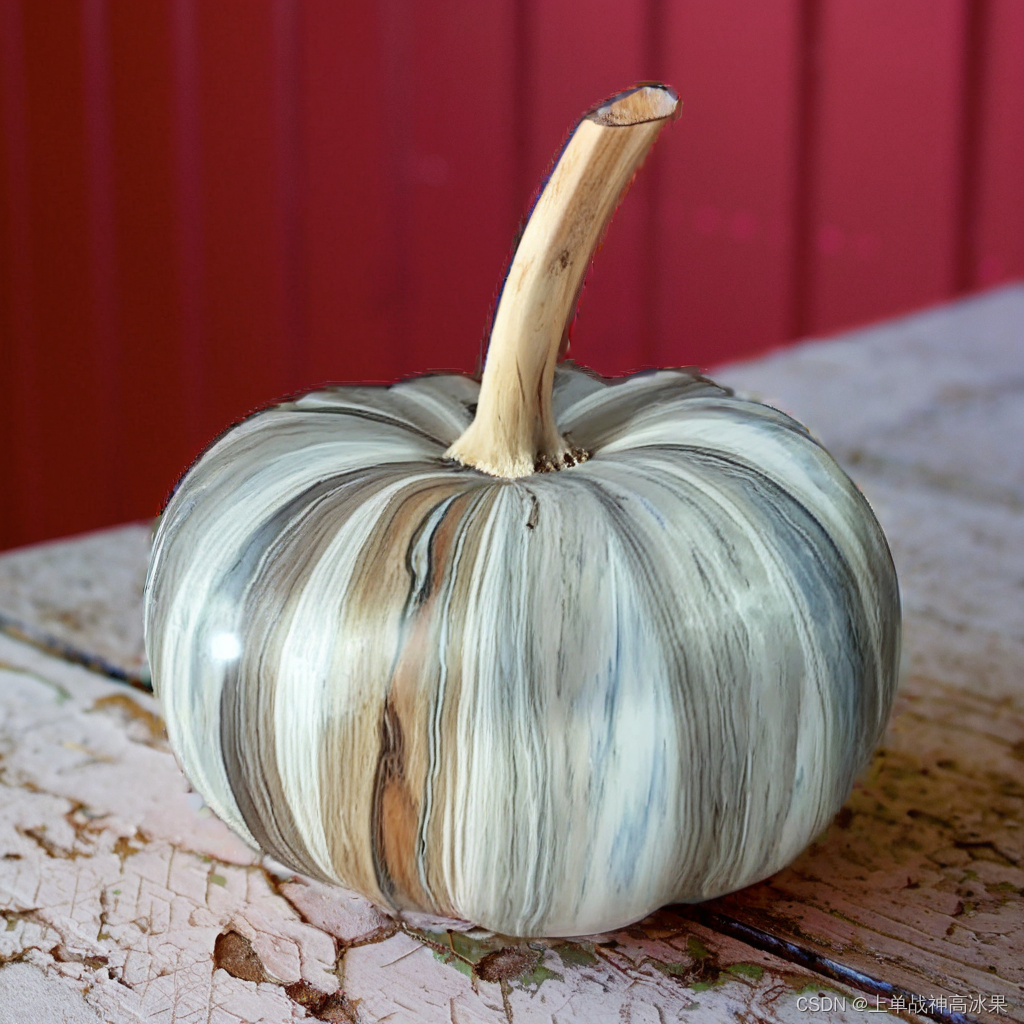
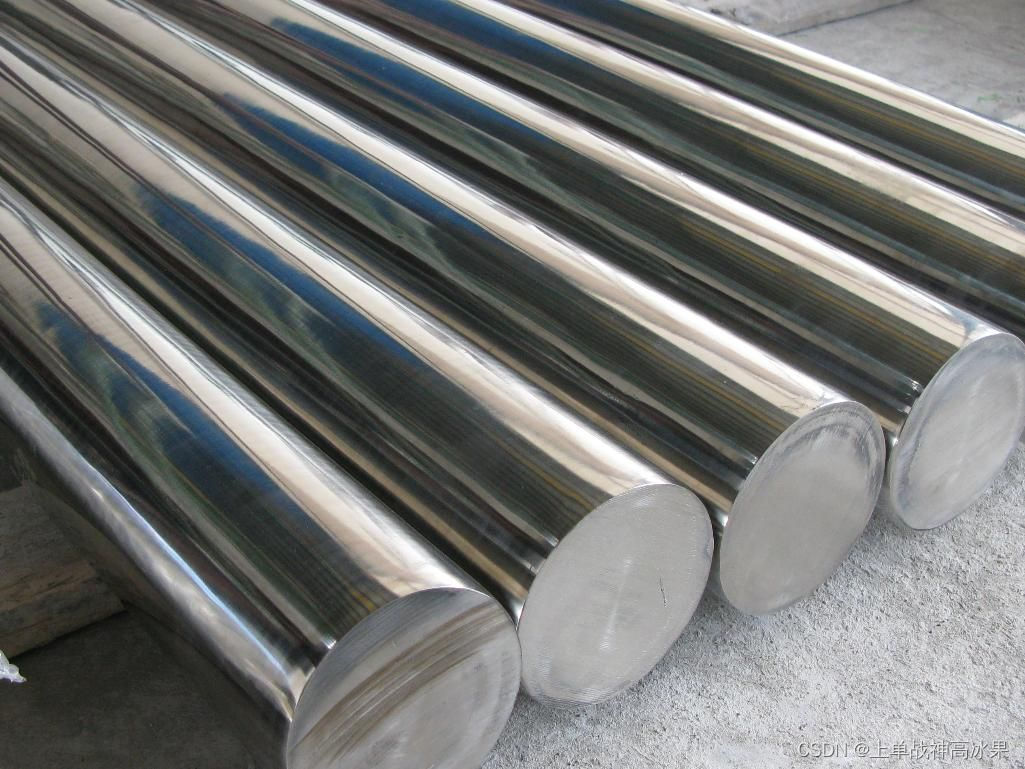
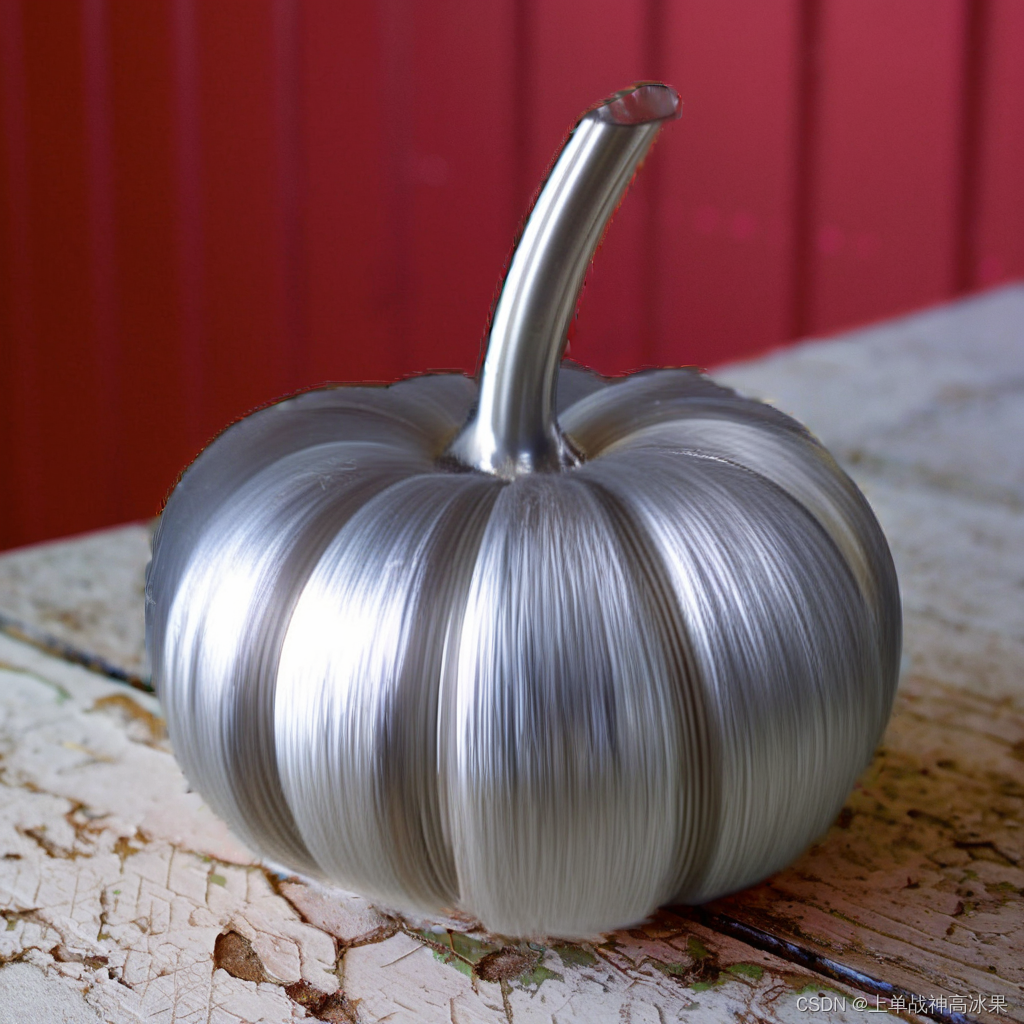
南瓜图片和瓷器杯子是官方提供的,其他参考图是自己找的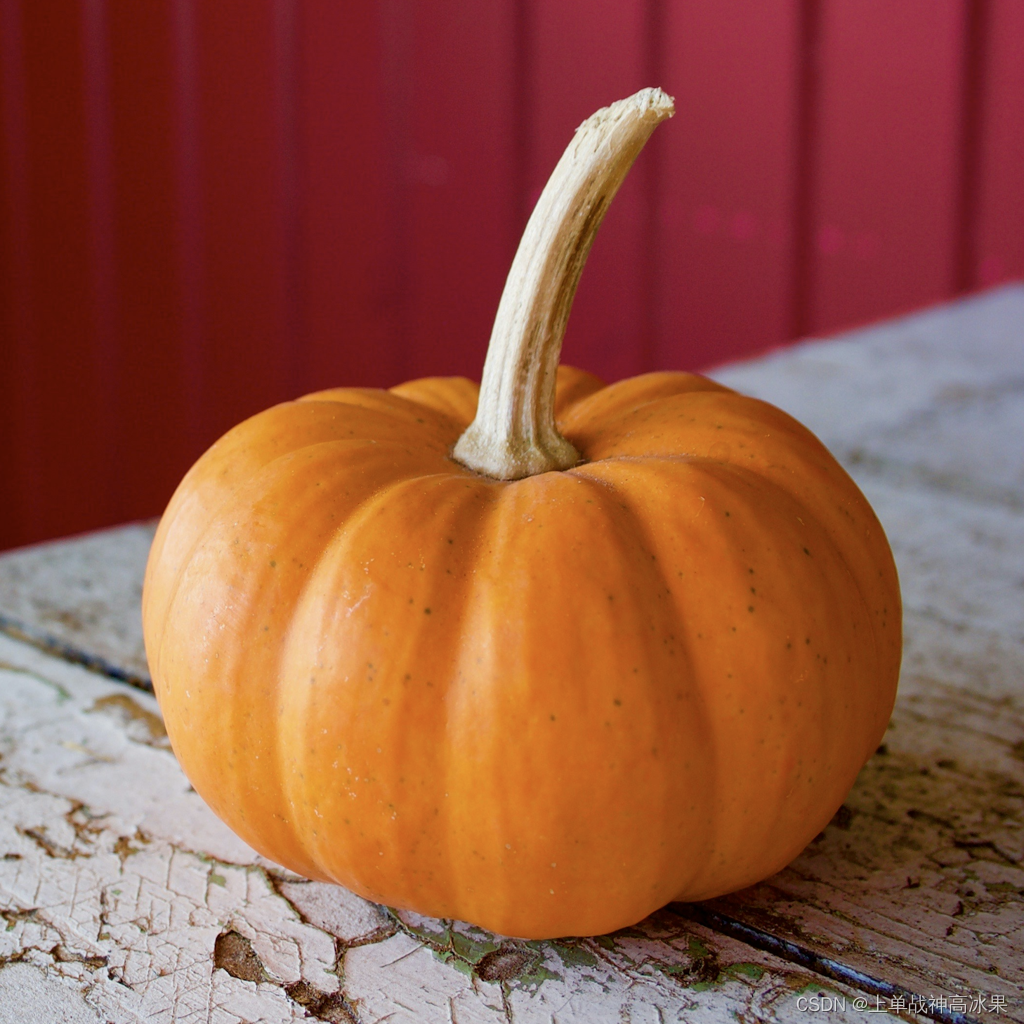
| reference | result |
|
|  |
 |  |
 |  |
 |  |
 |  |
 |  |
 |  |
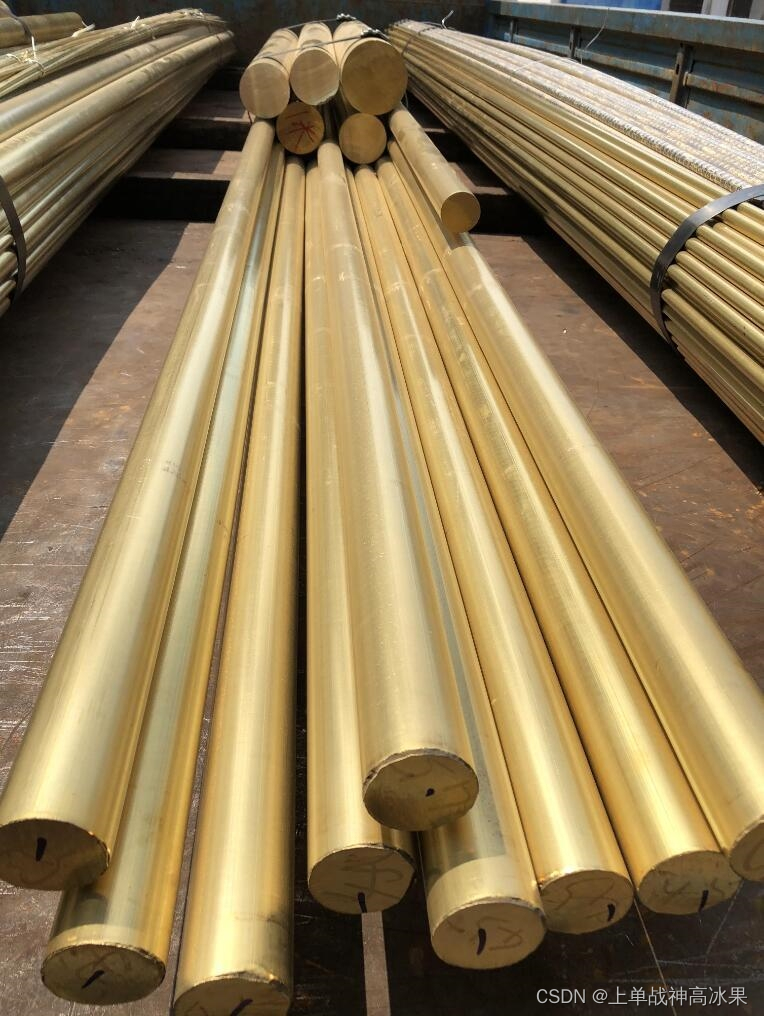
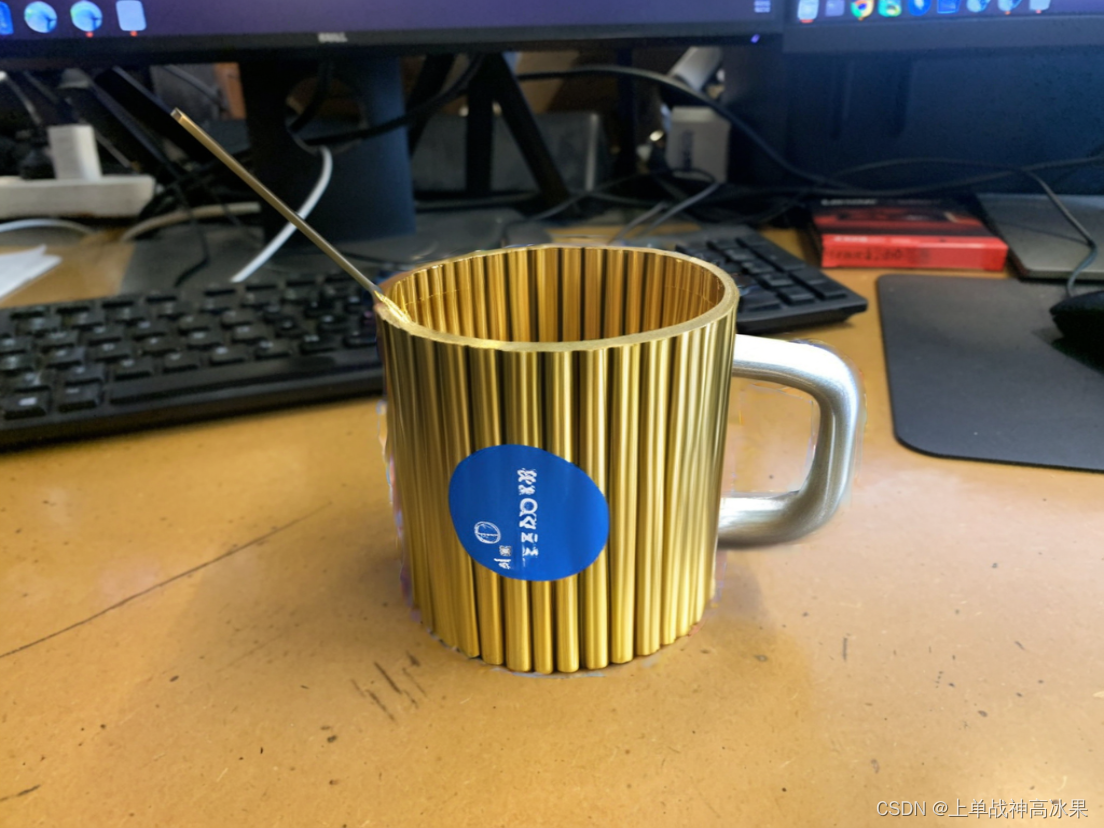
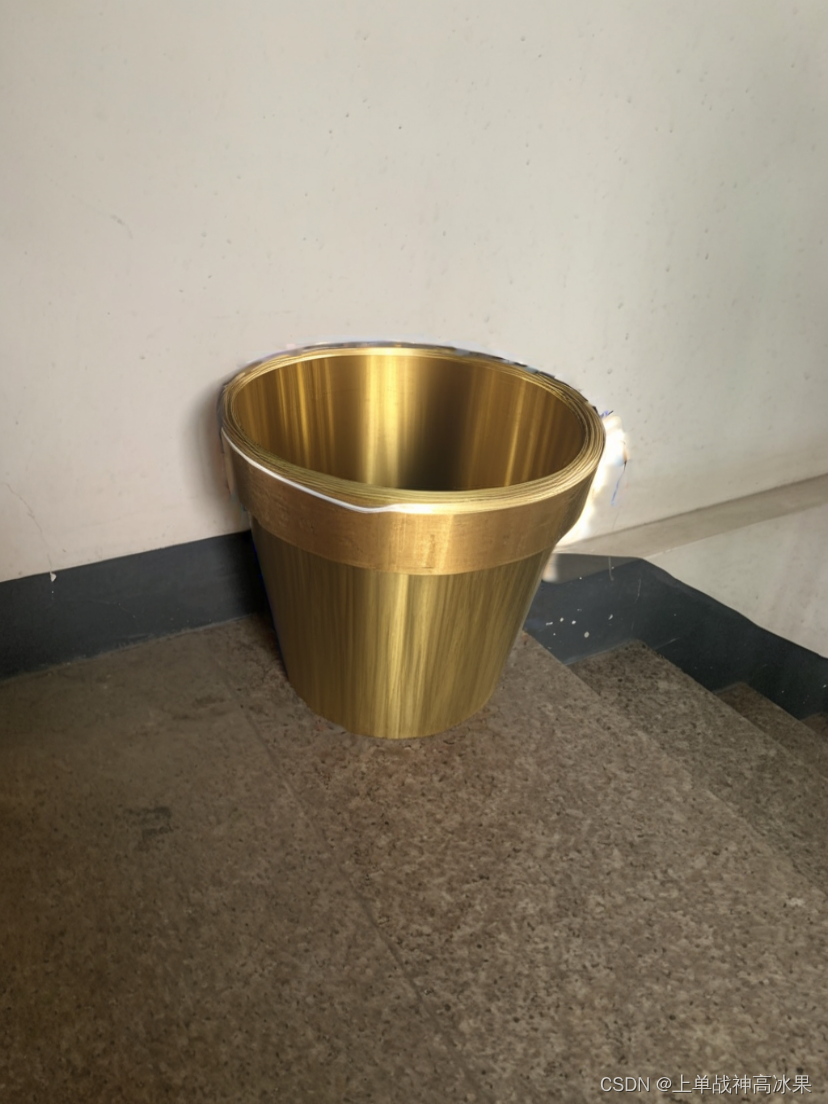
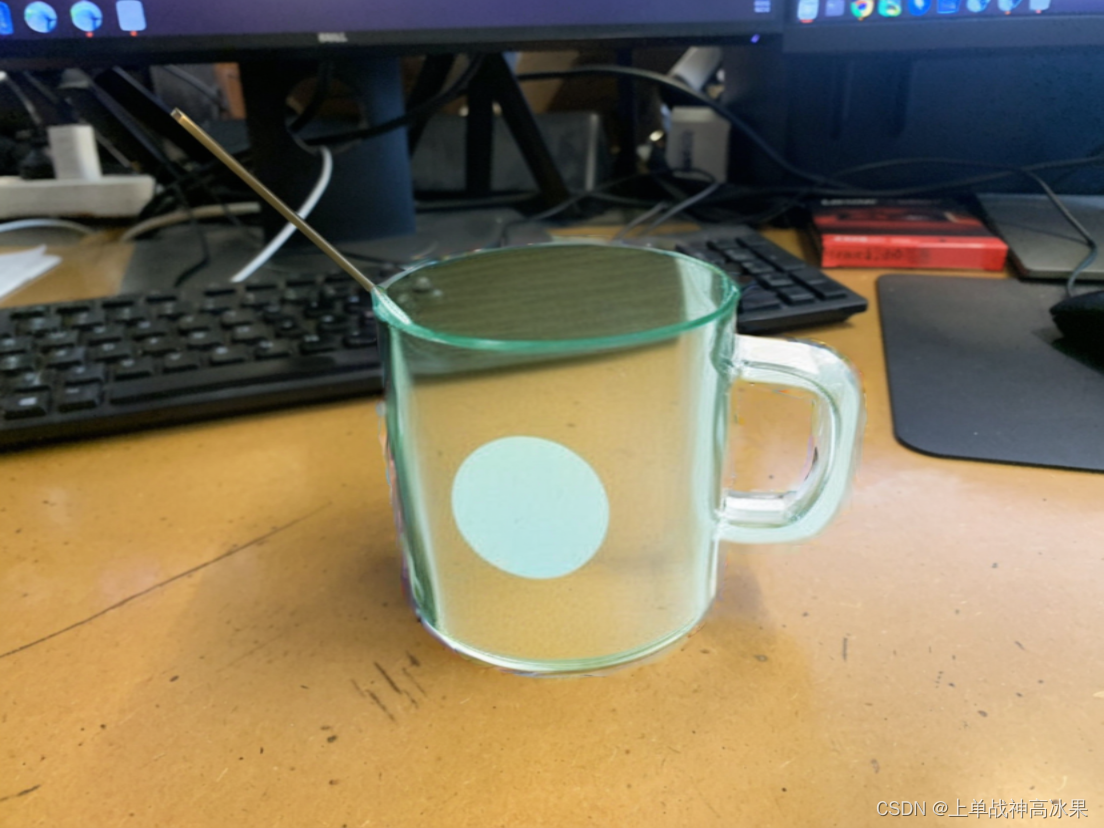
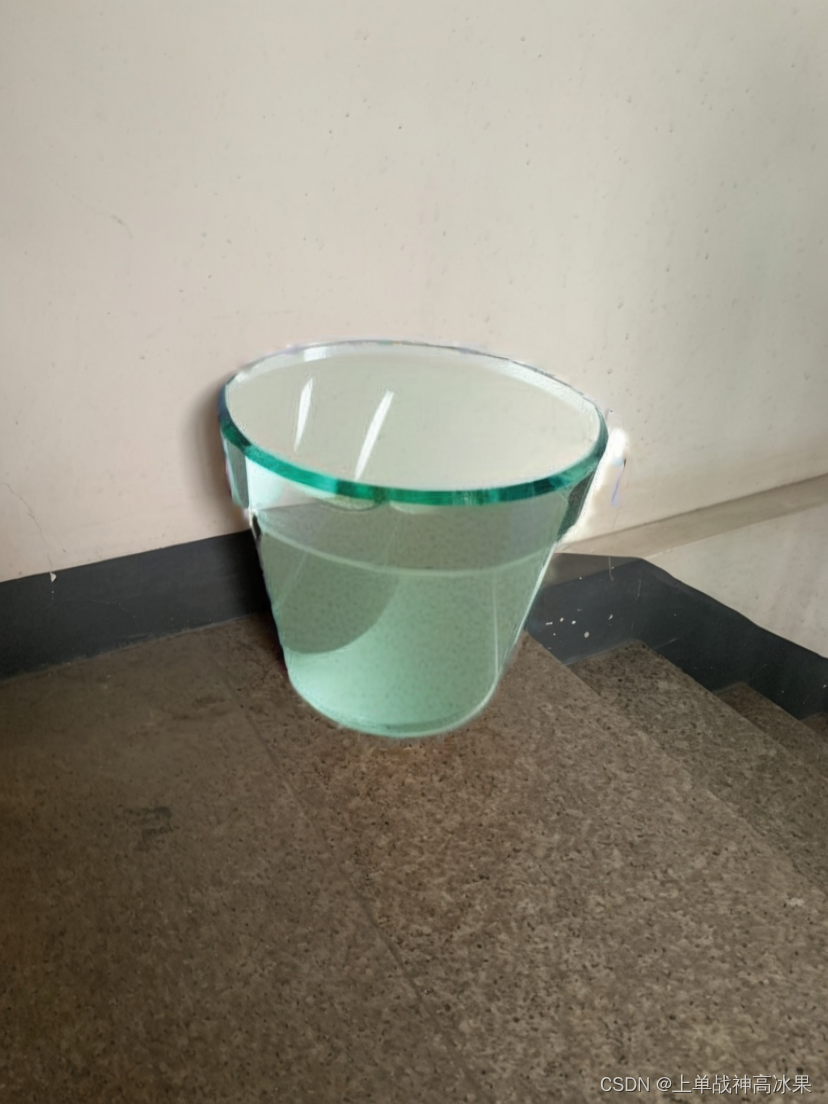
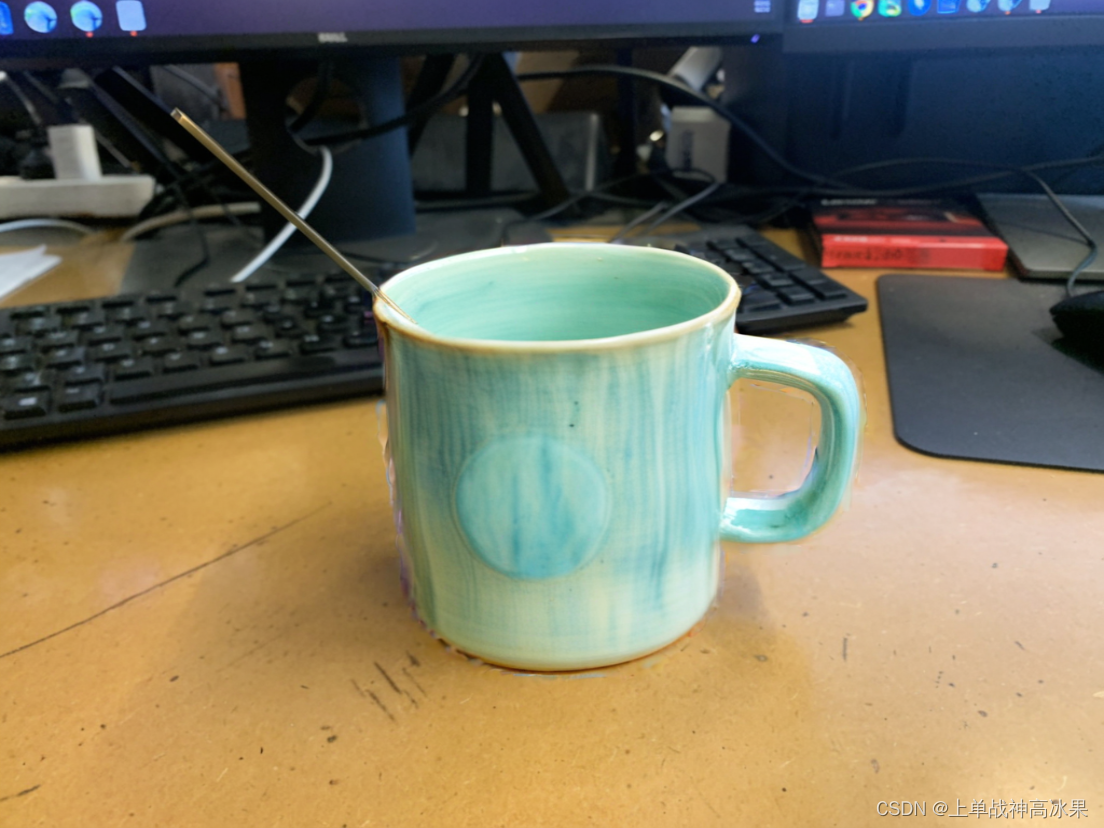
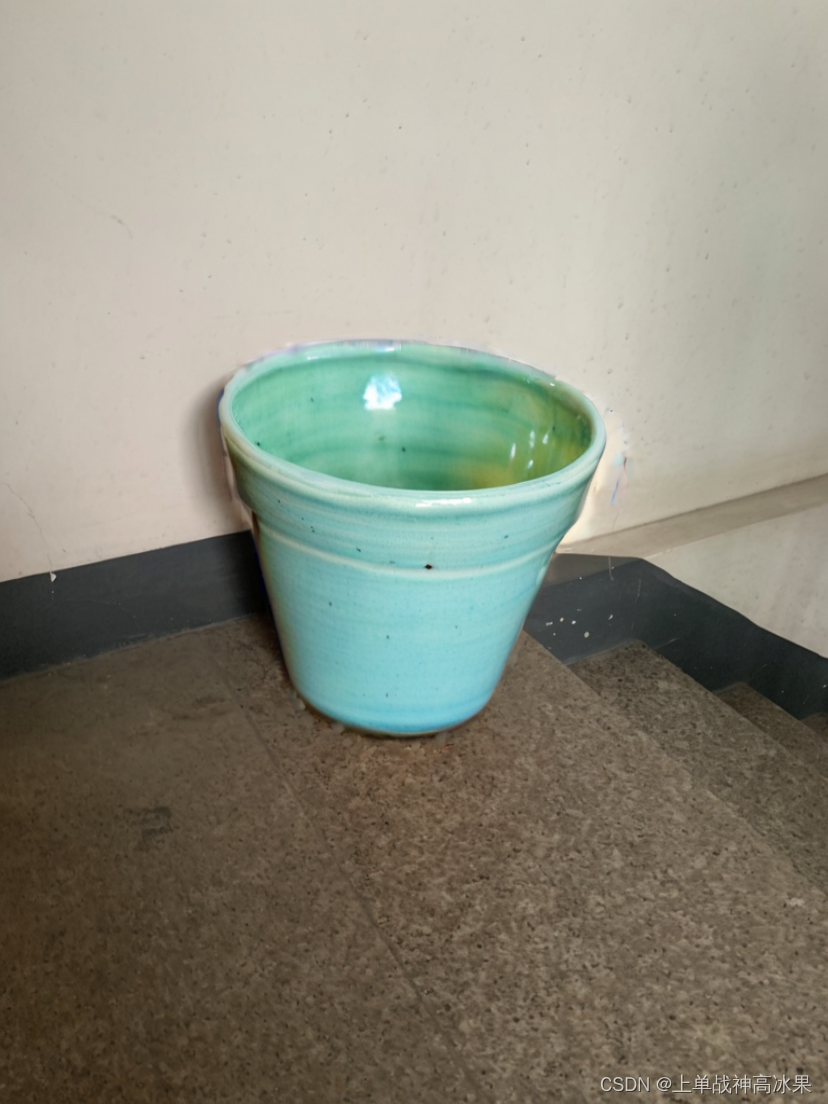
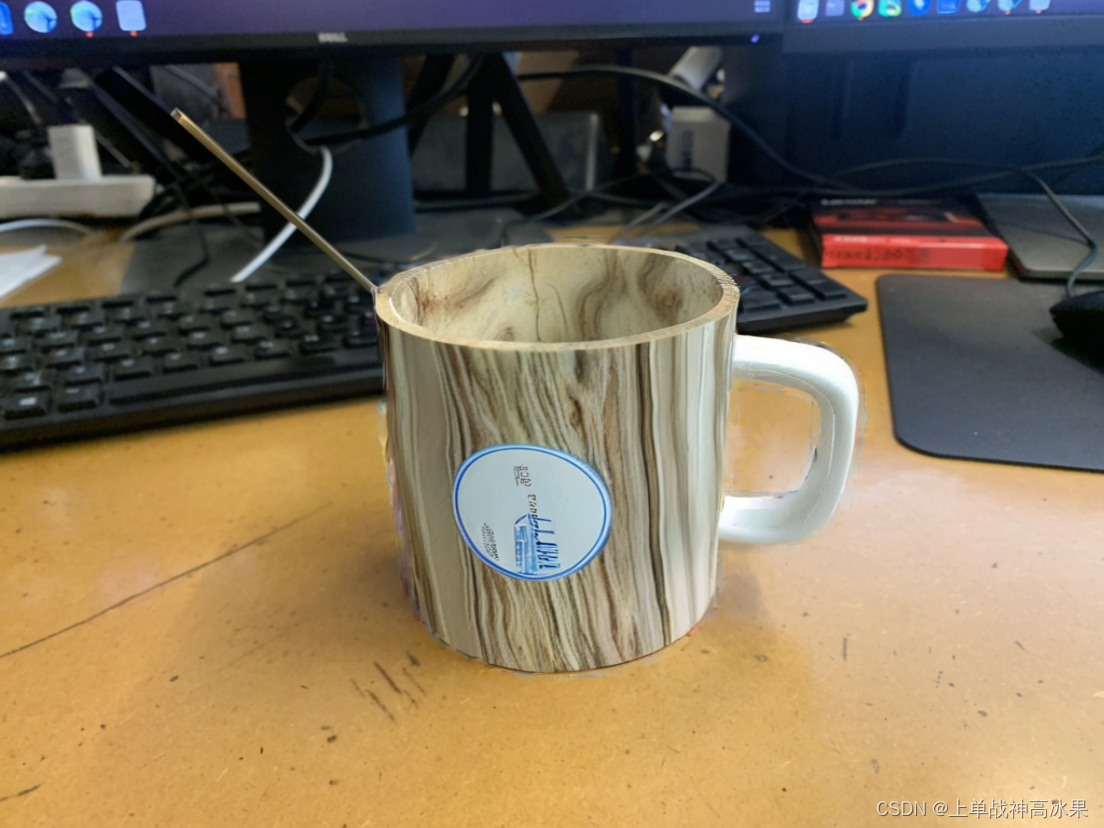
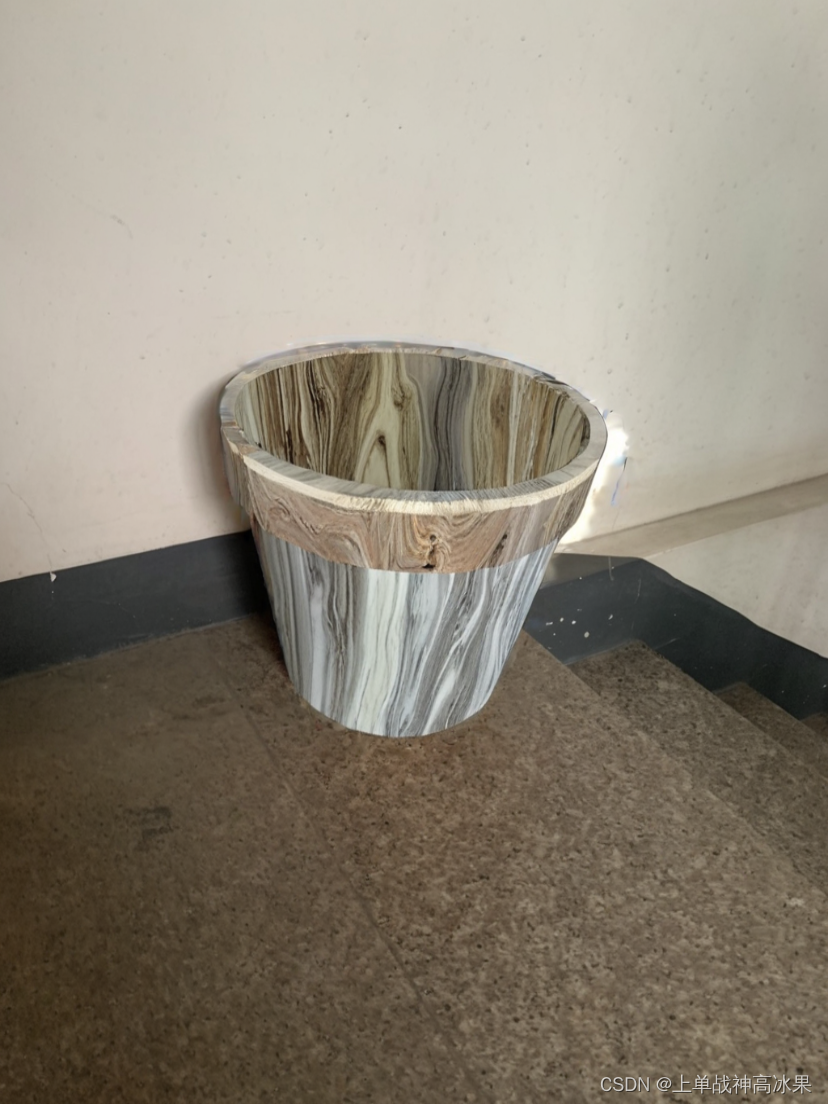
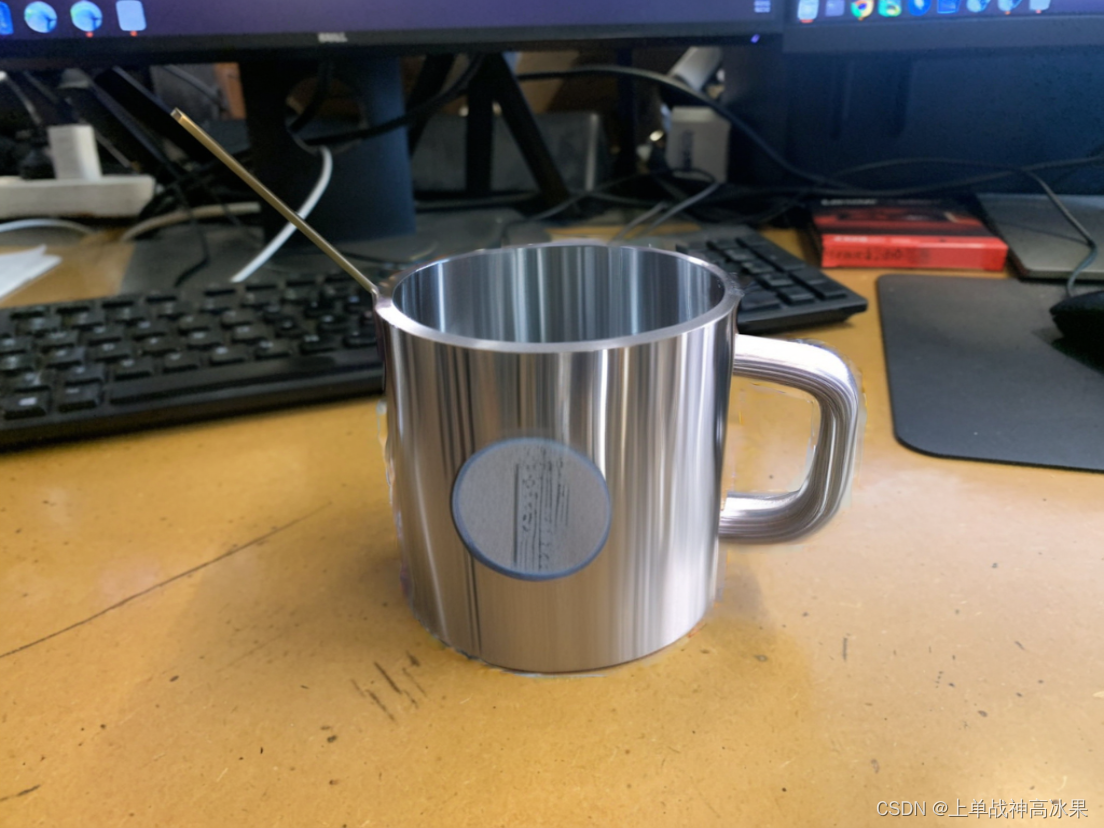
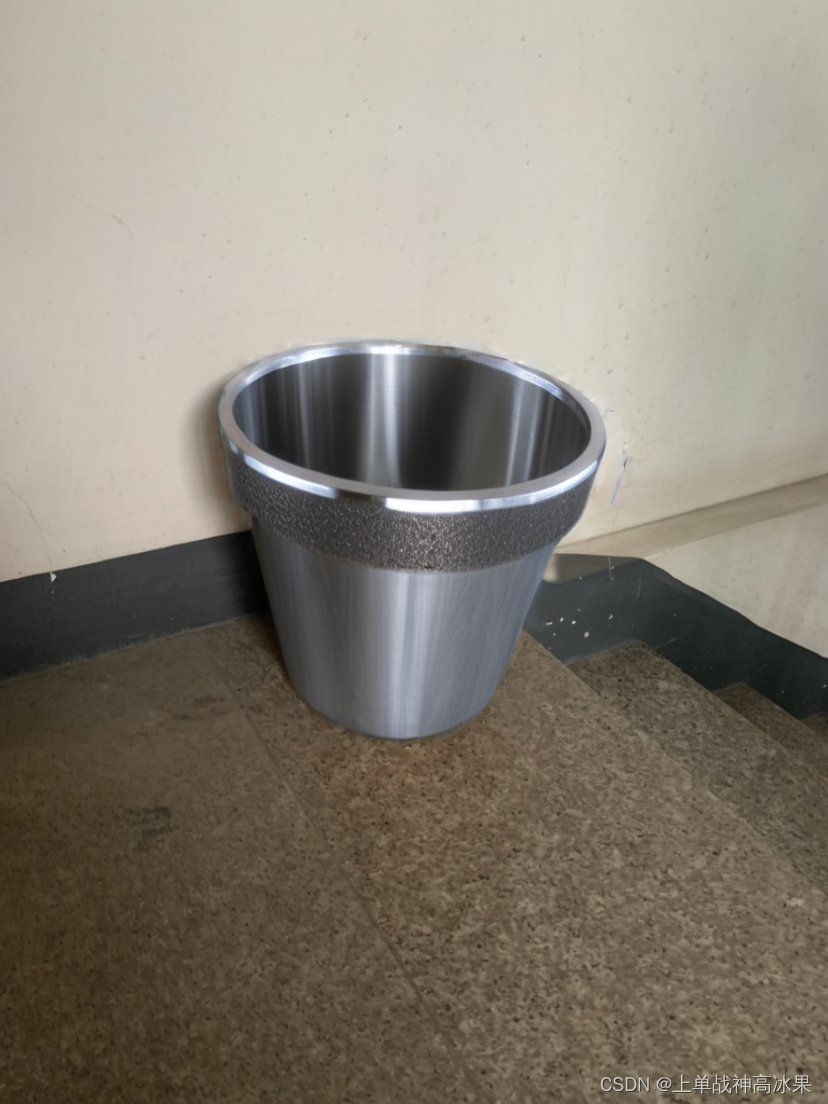
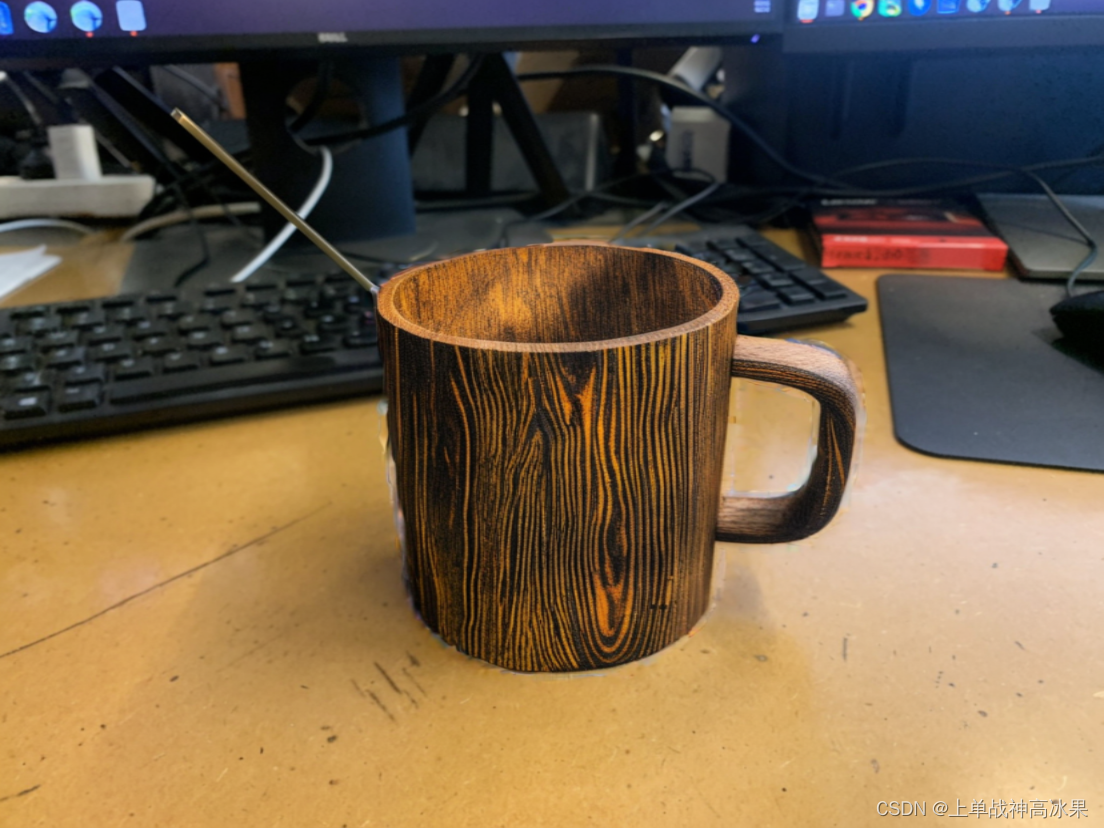
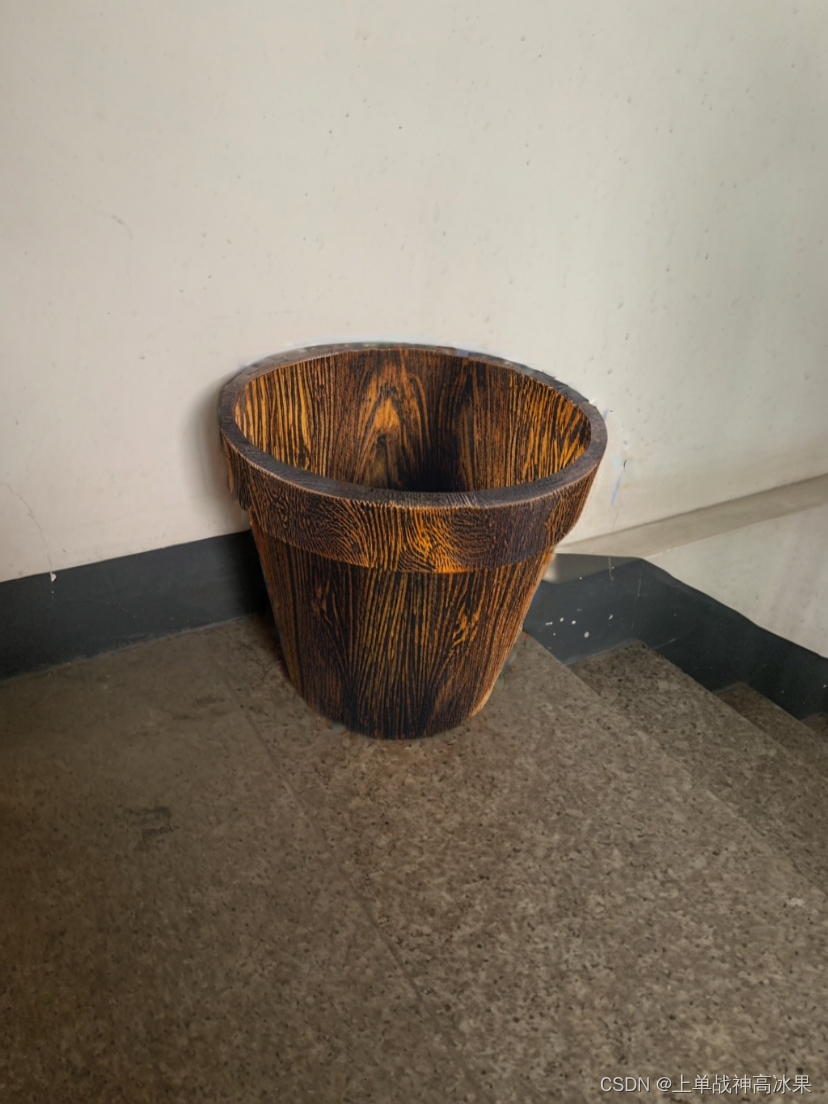
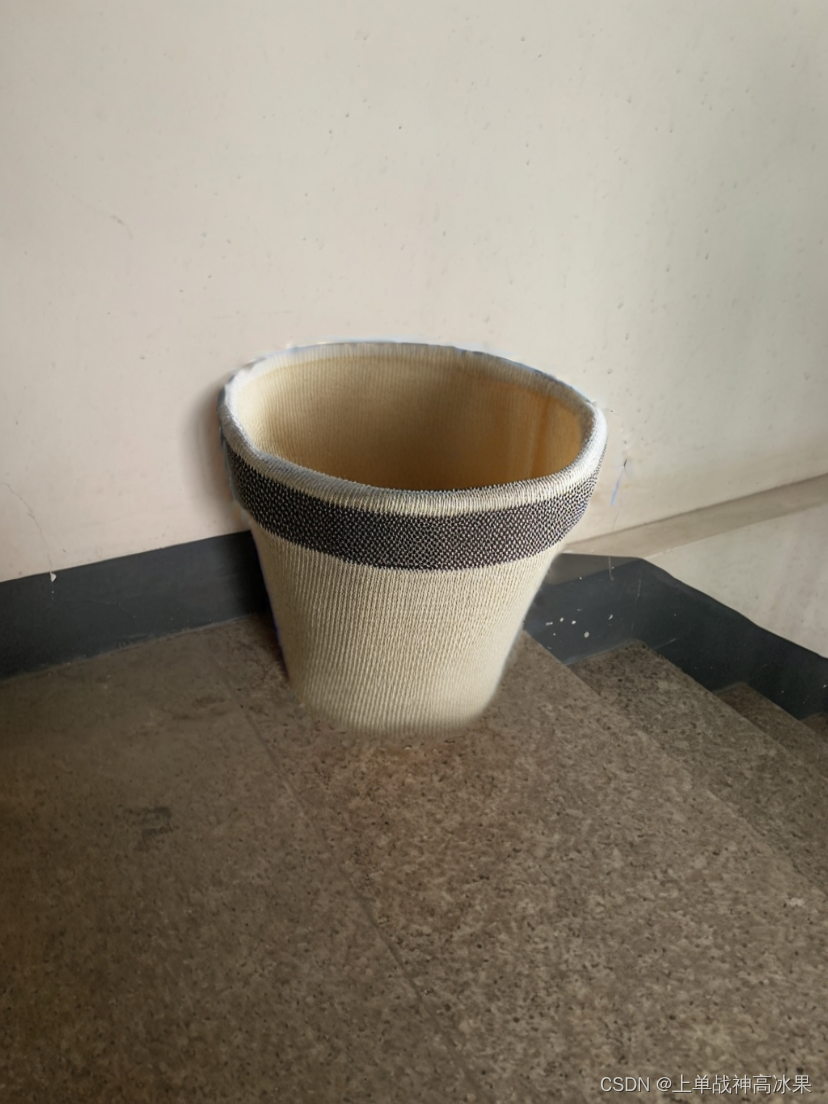
自寻数据
test1/2
| cup | pot | |
| input | 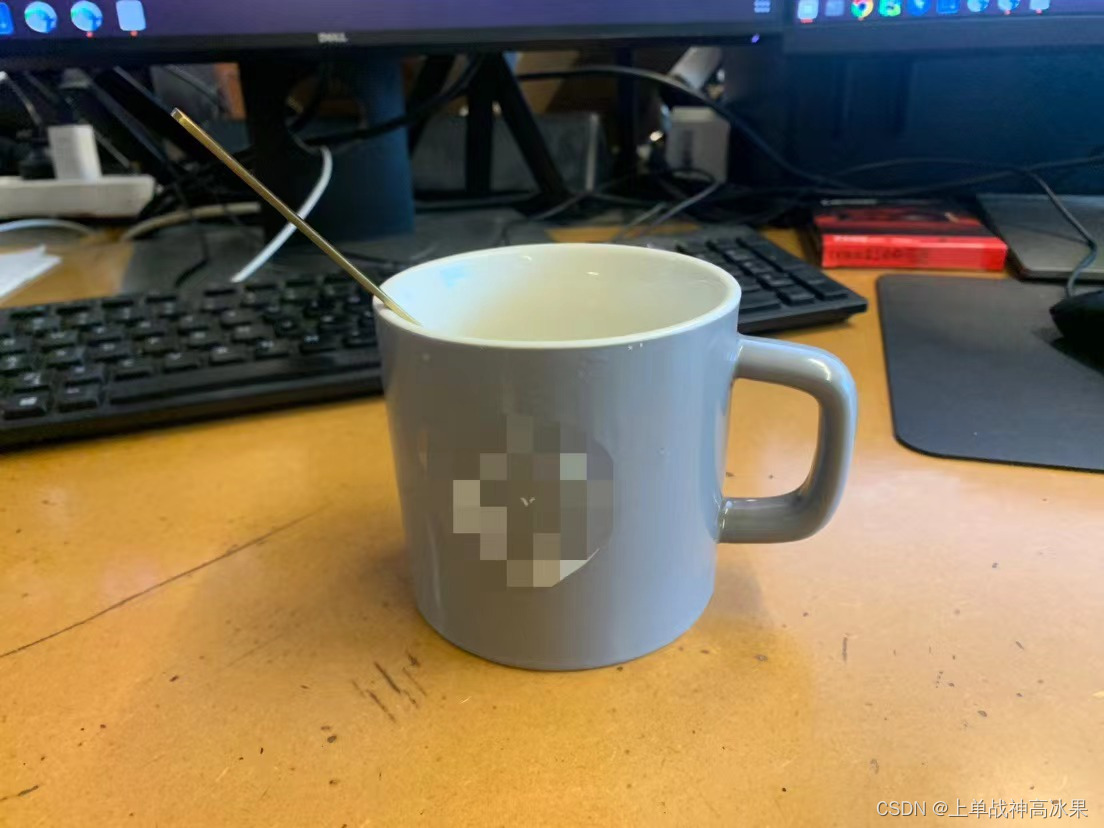 | 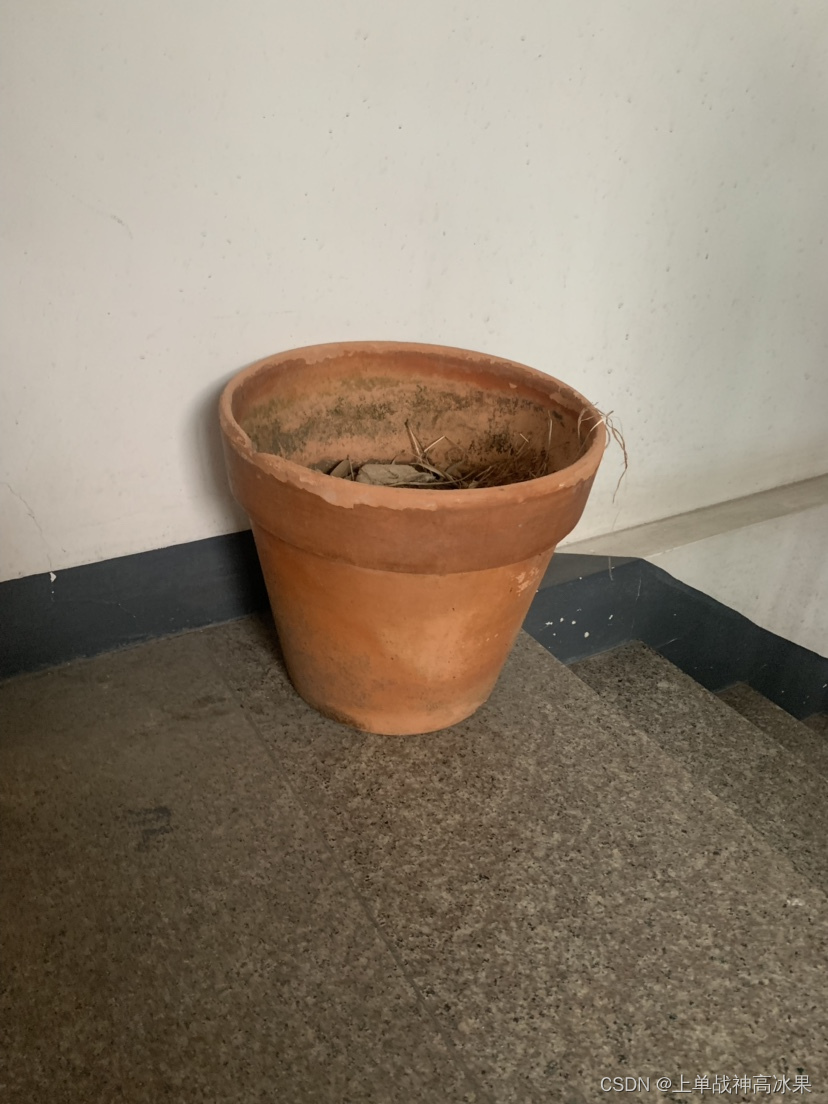 |
|
|  |  |
|
|  |  |
|  |  |
|  |  |
|  |  |
|  |  |
|  |  |
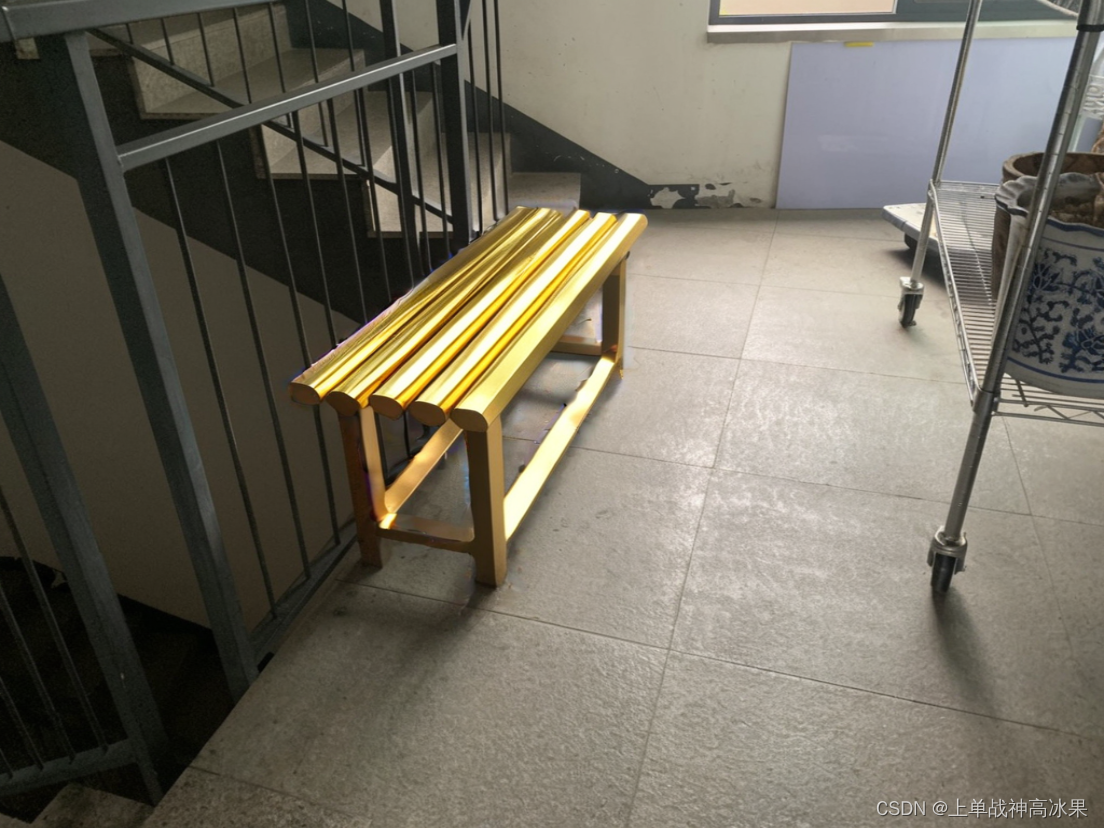
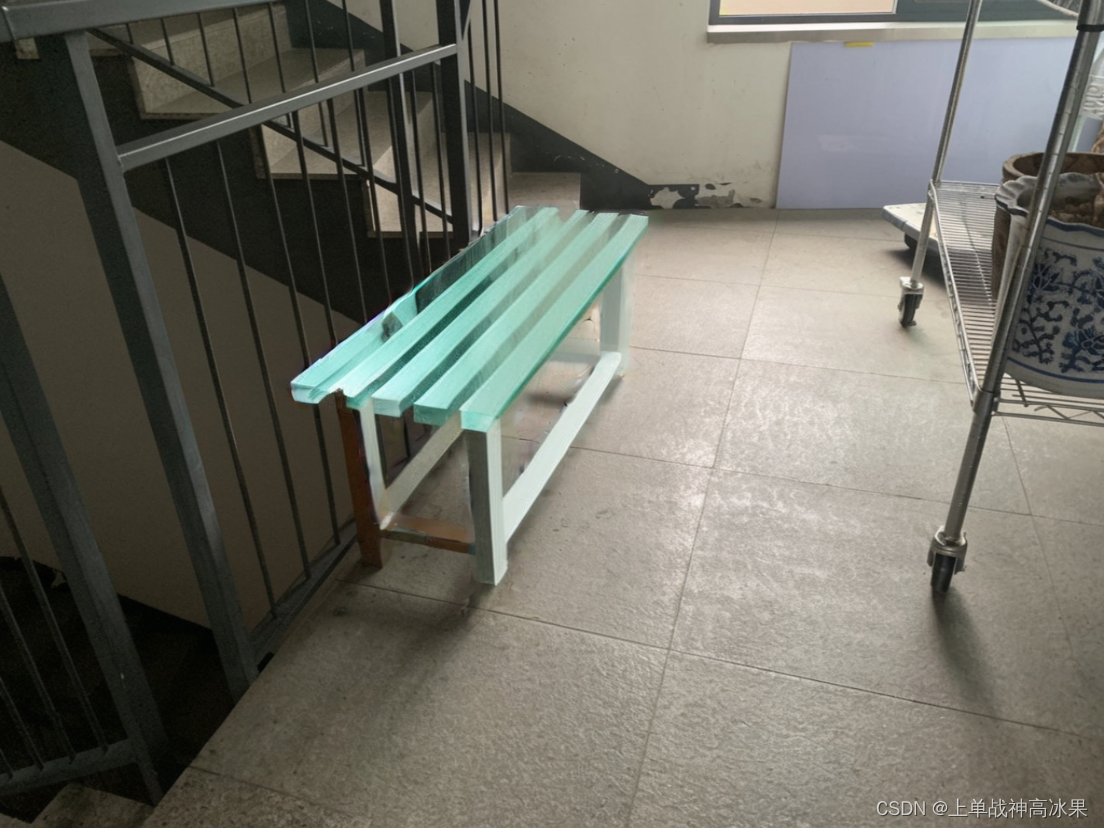
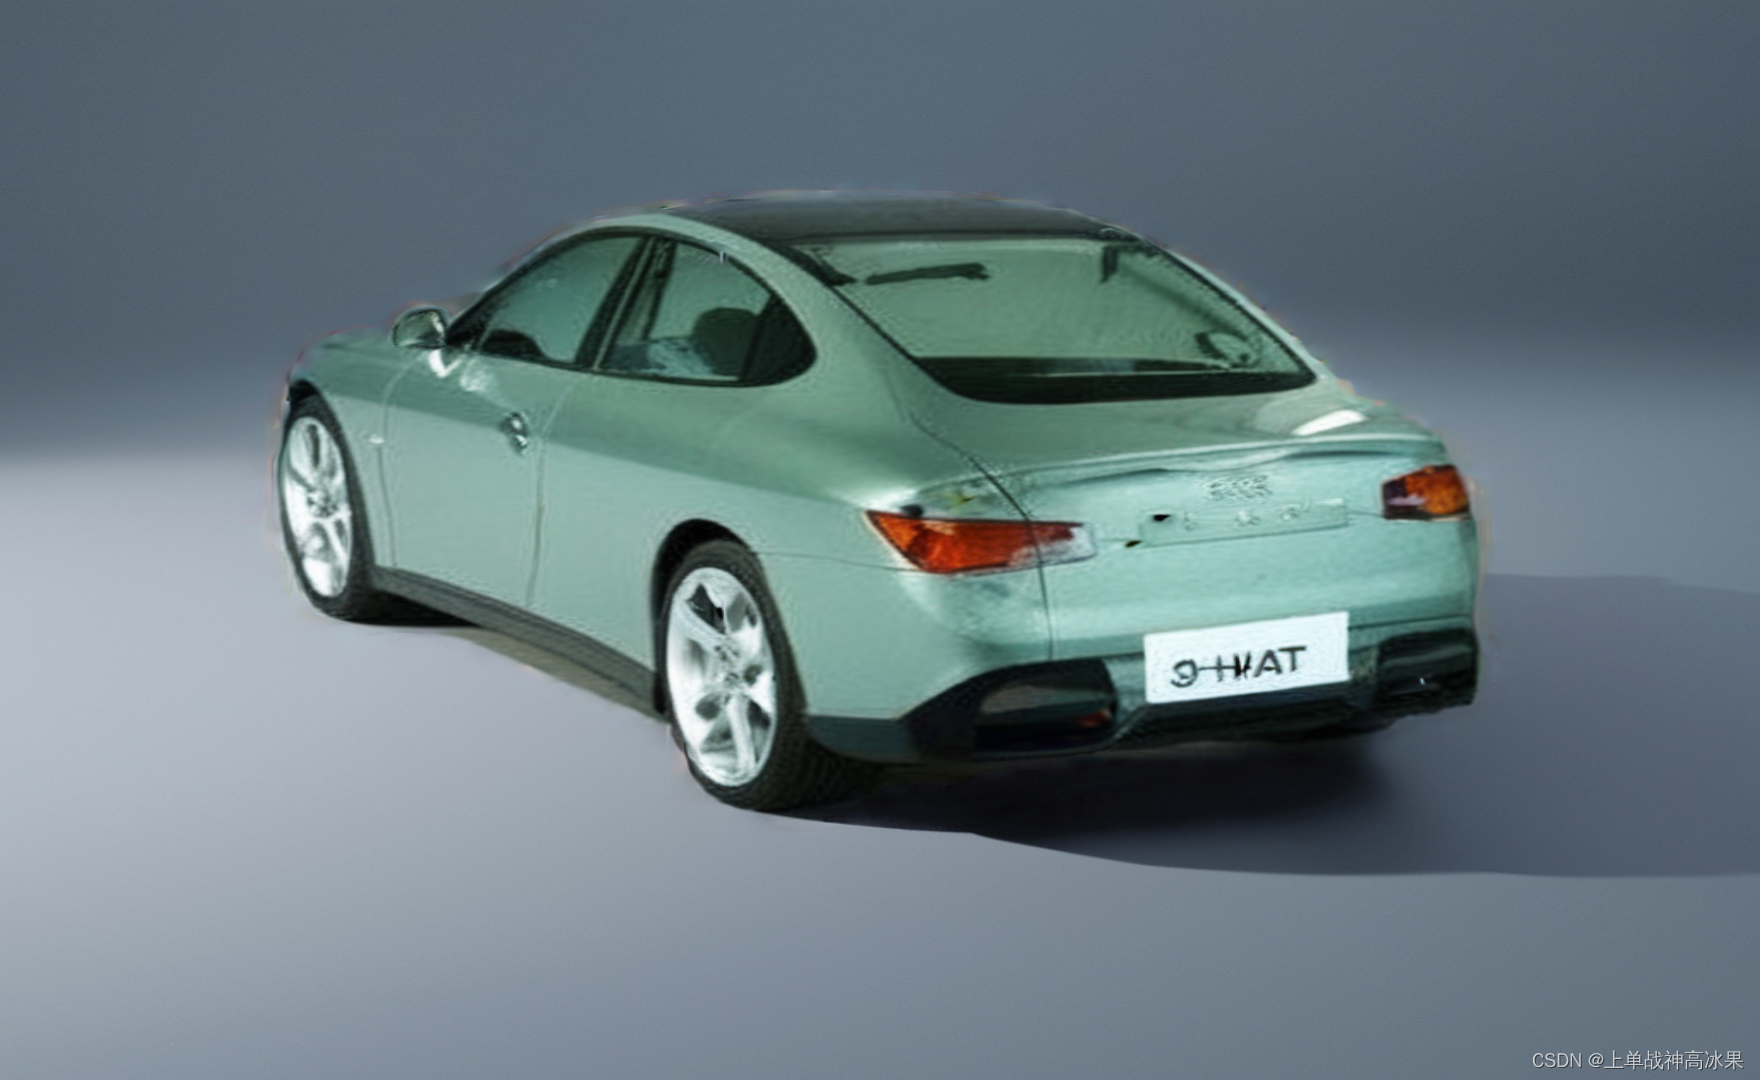
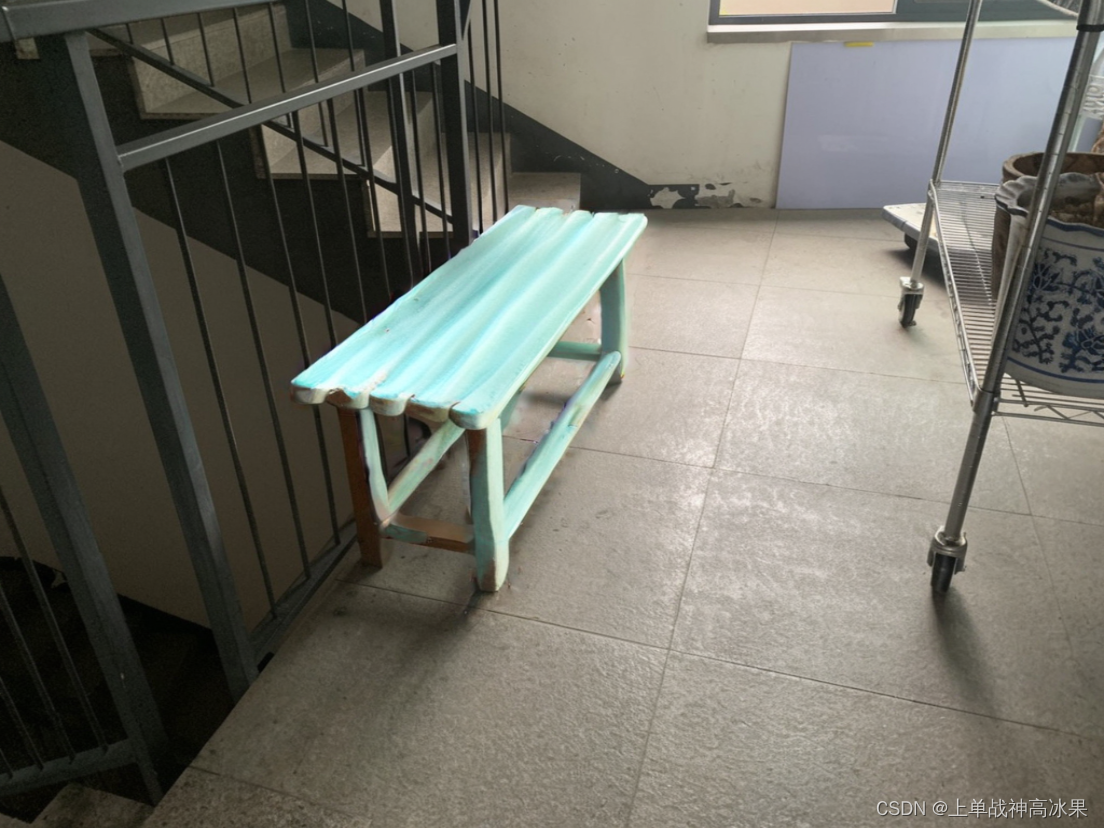
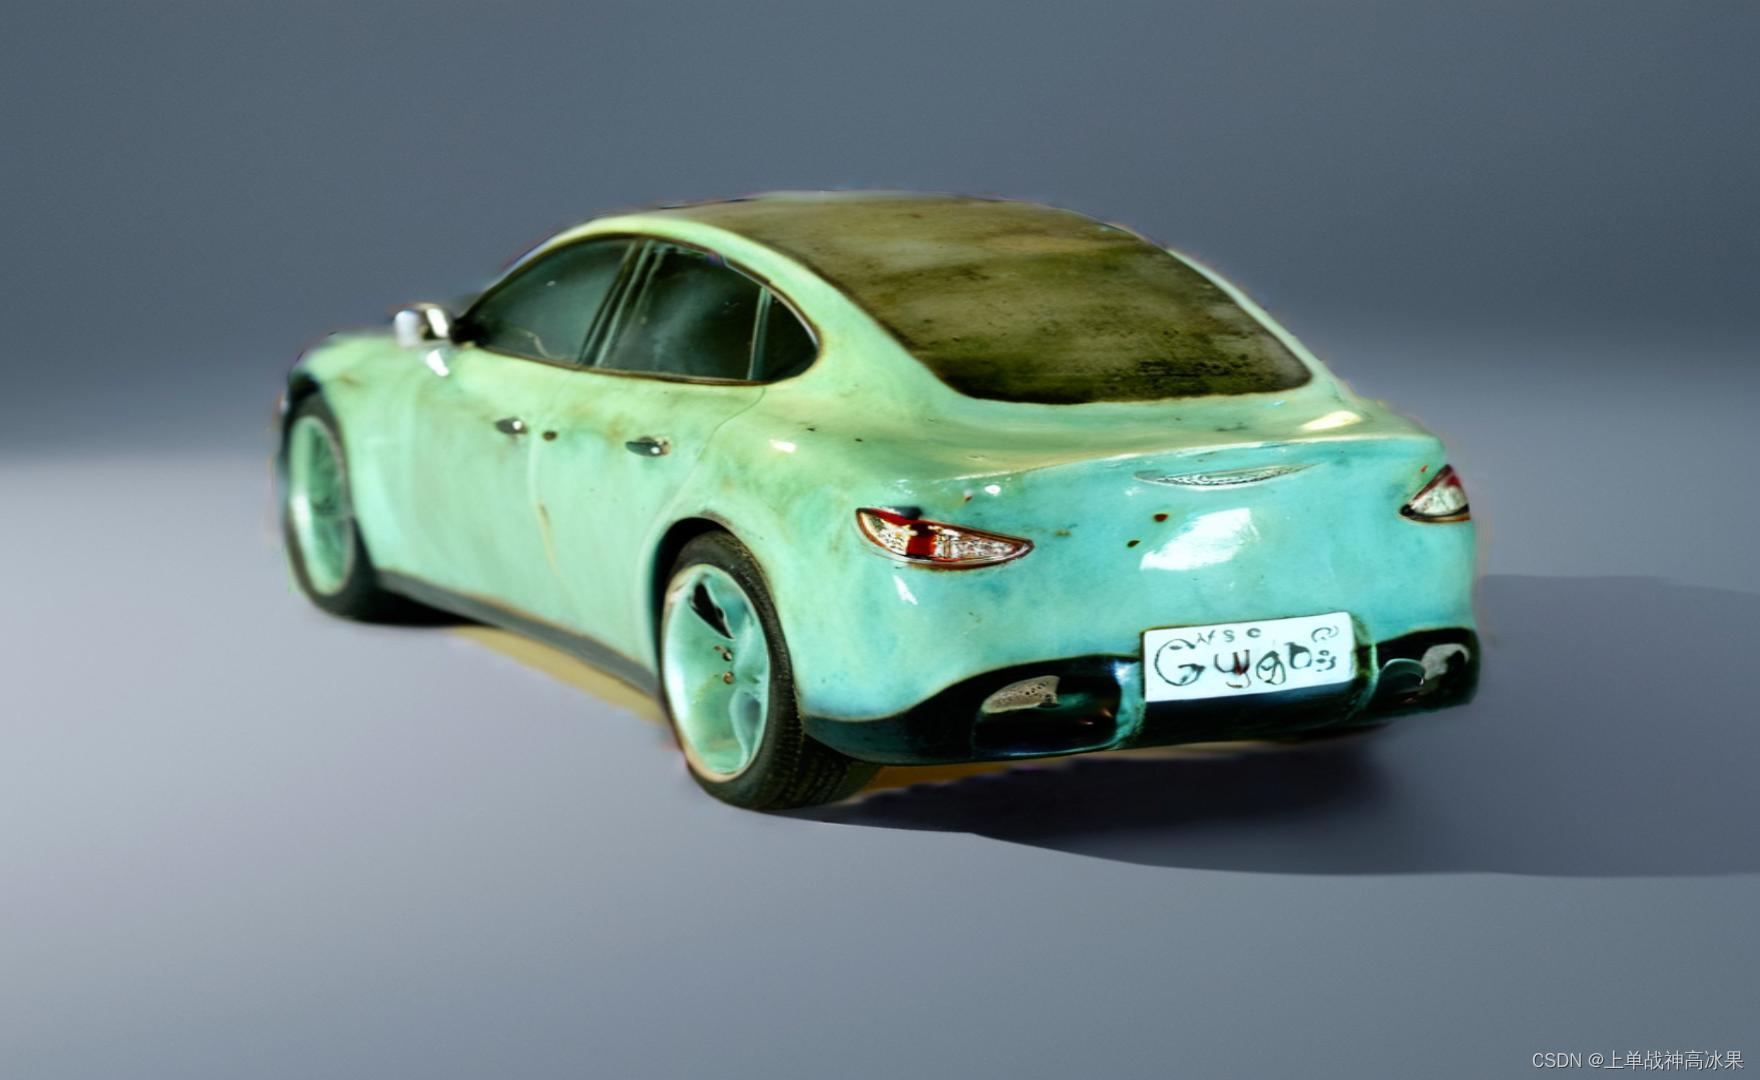
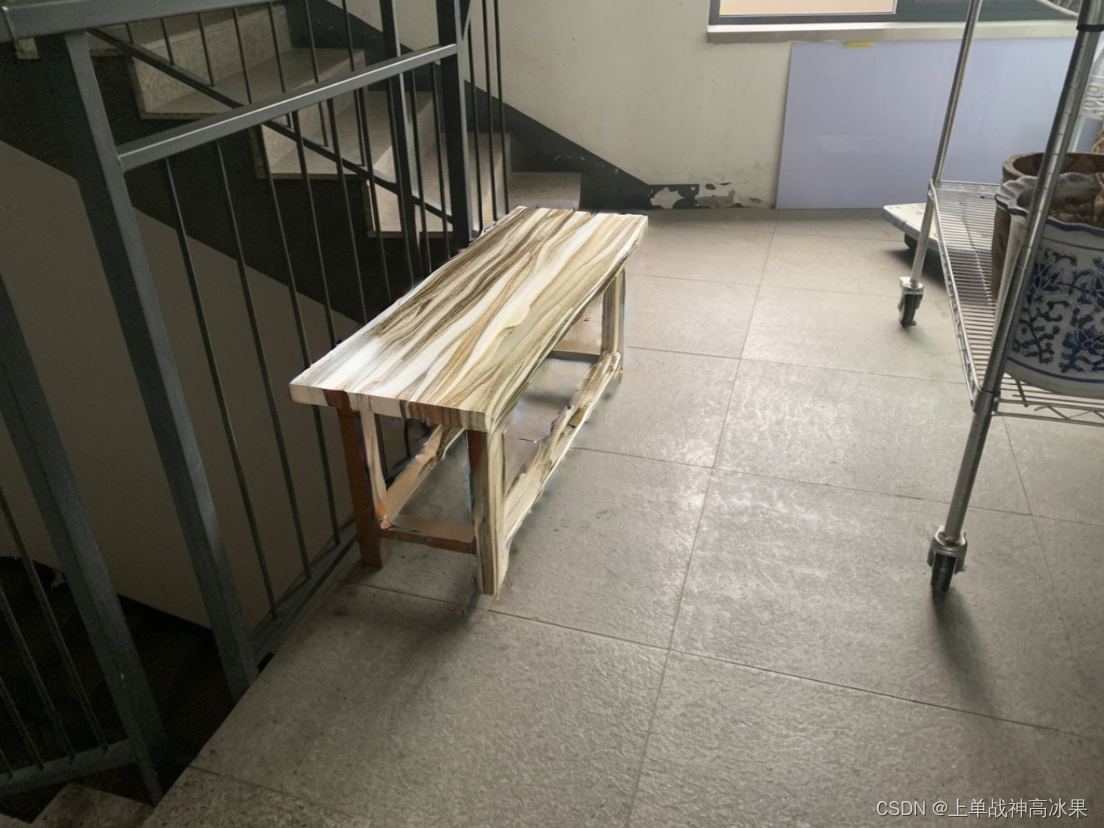
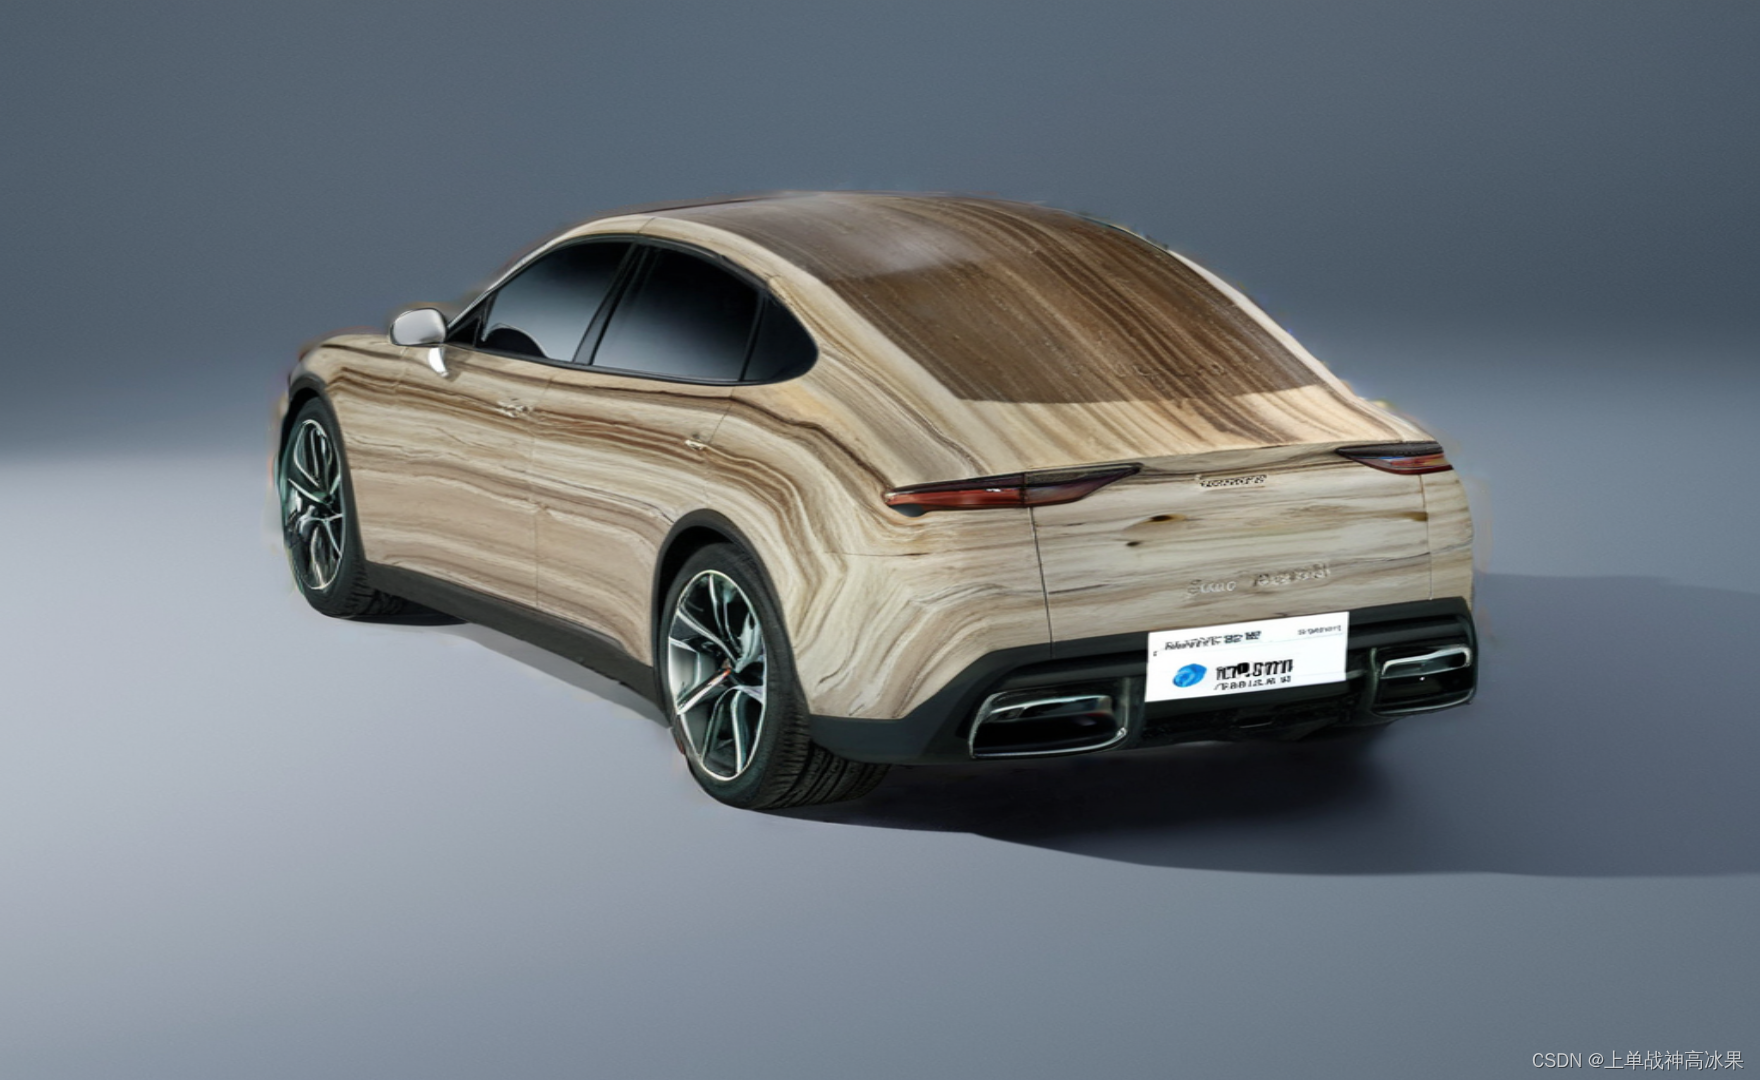
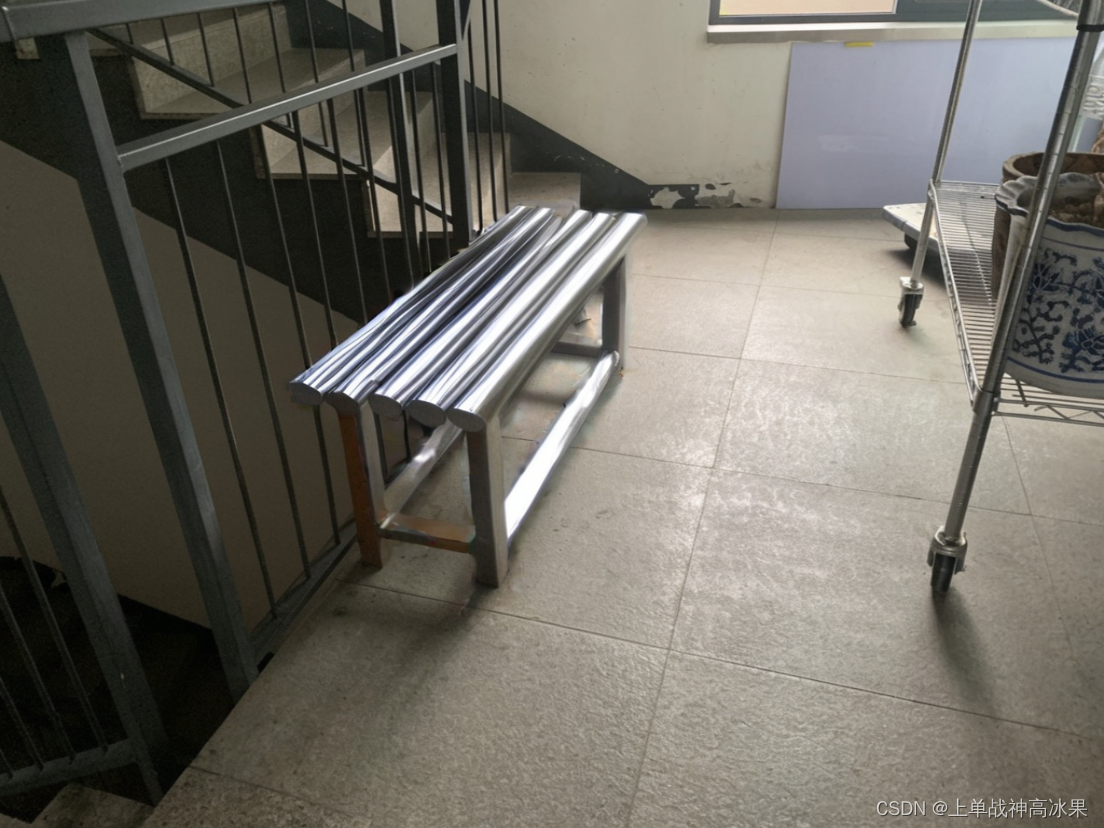
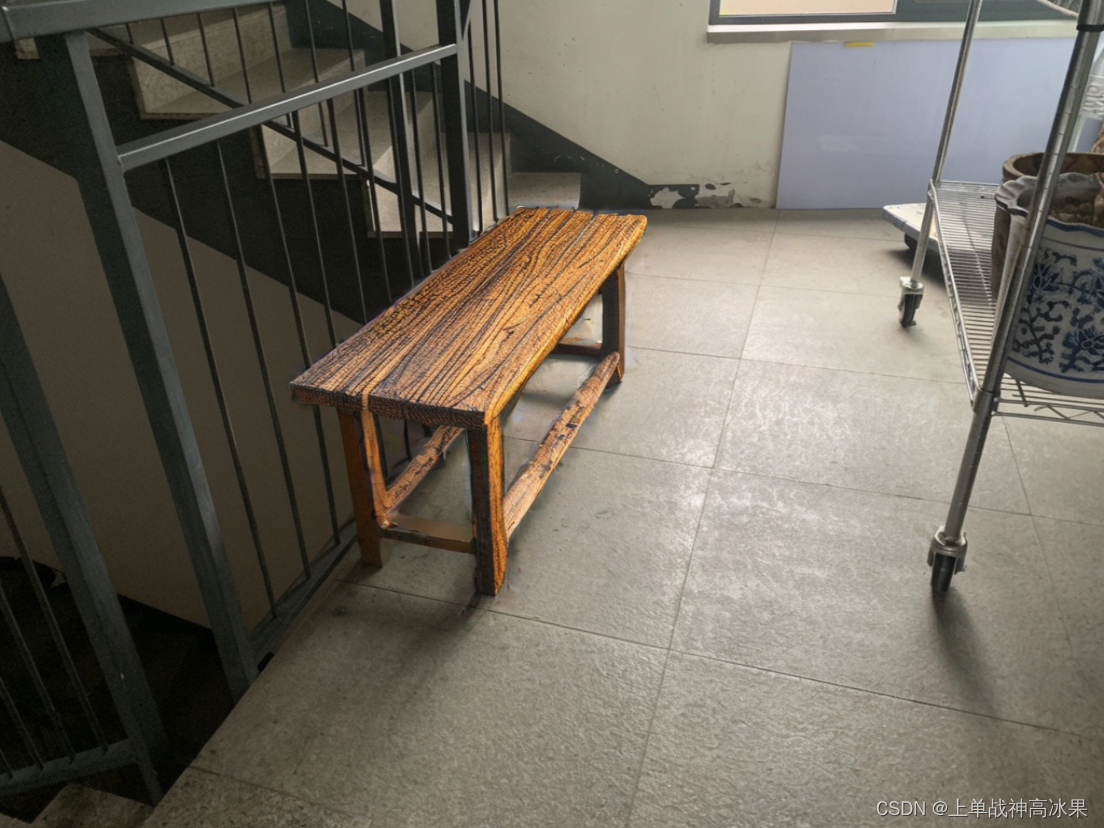
test3/4
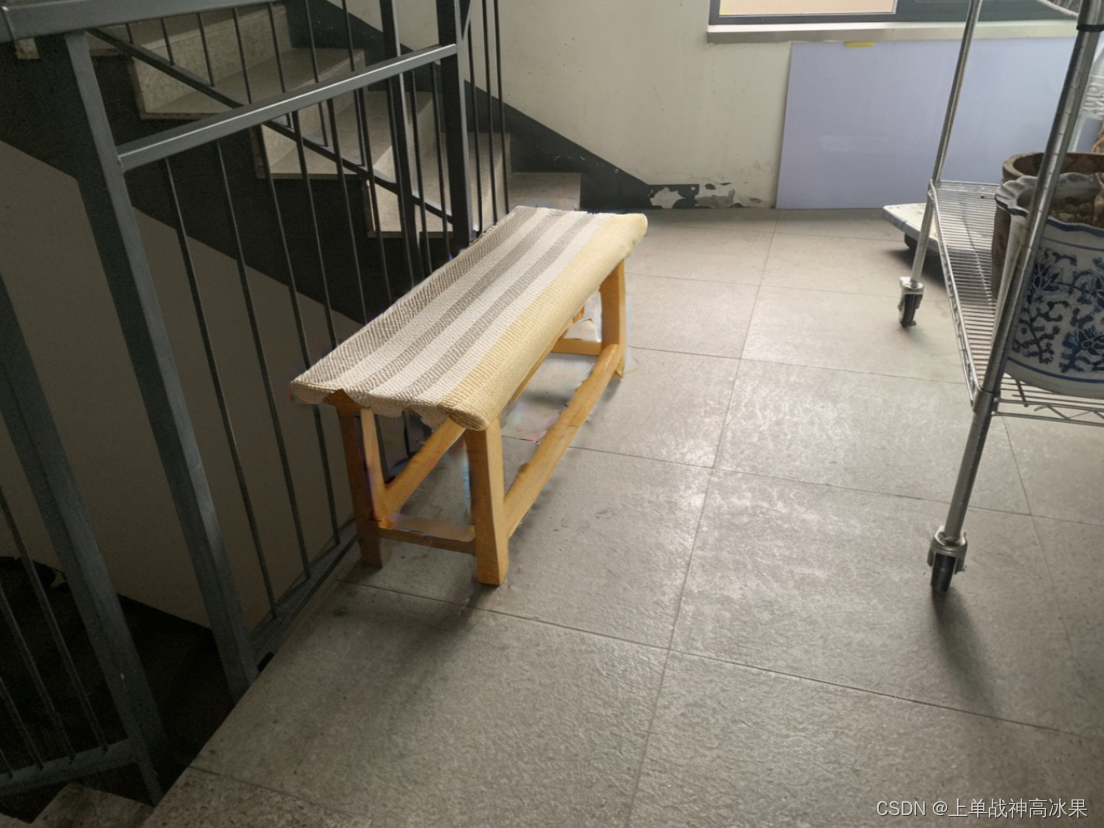
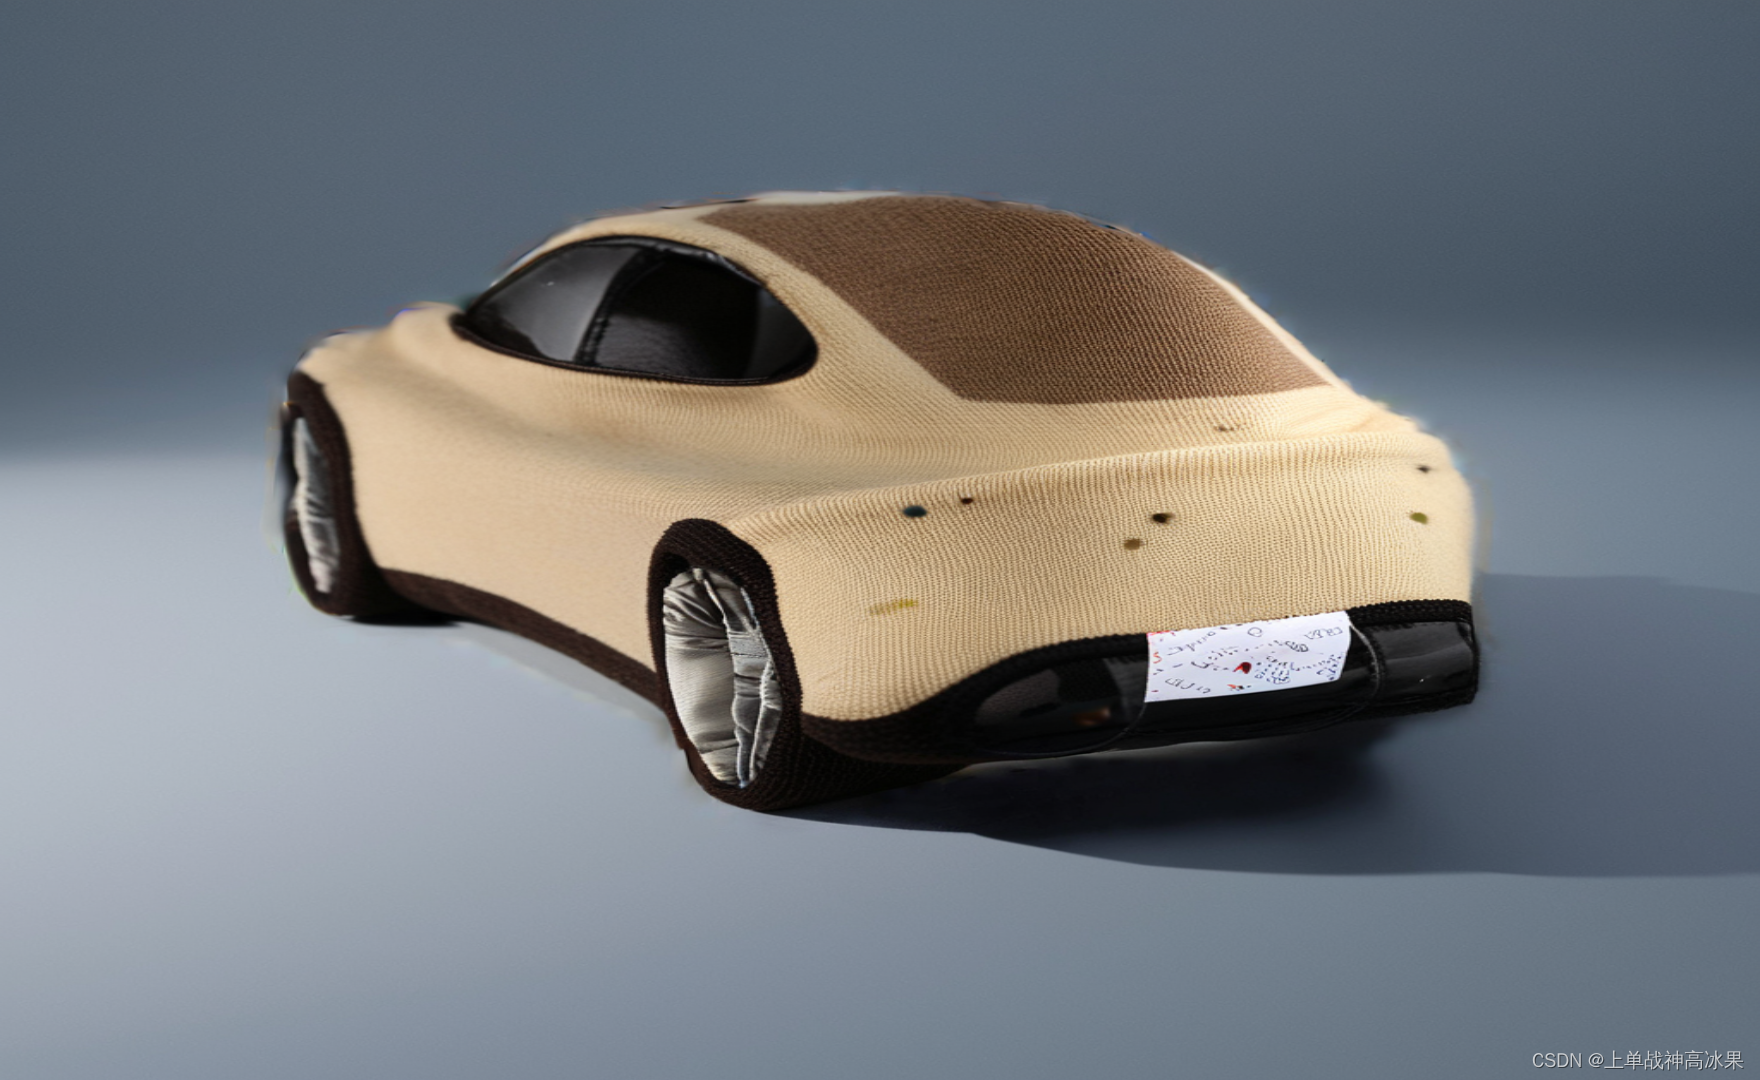
| bench | mi | |
| input | 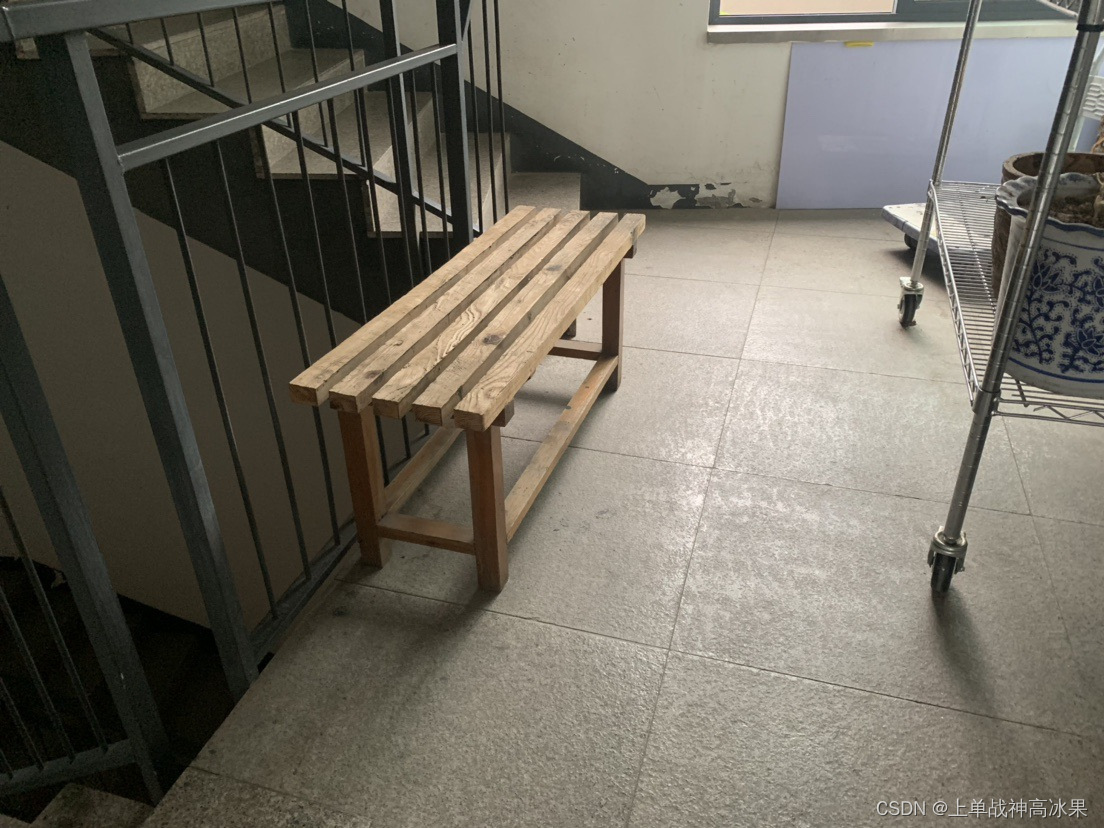 | 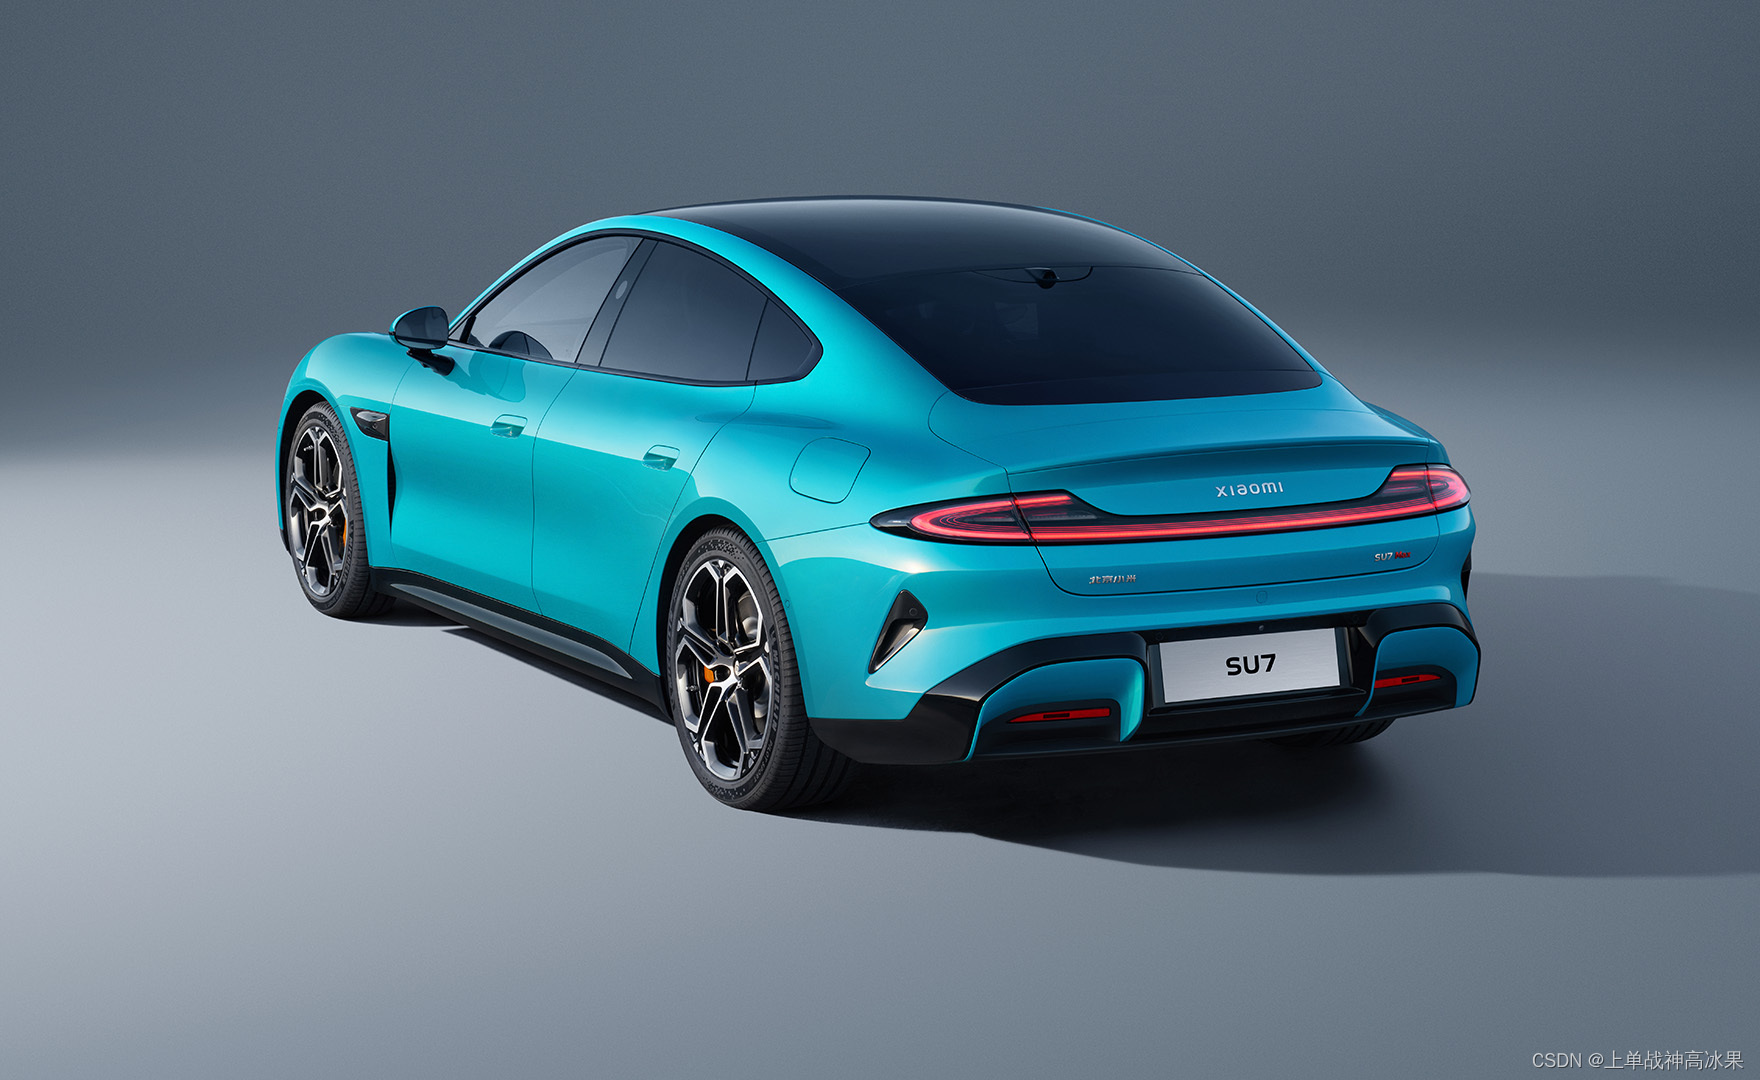 |
|
|  |  |
|
|  |  |
|  |  |
|  |  |
|  |  |
|  |  |
|  |  |
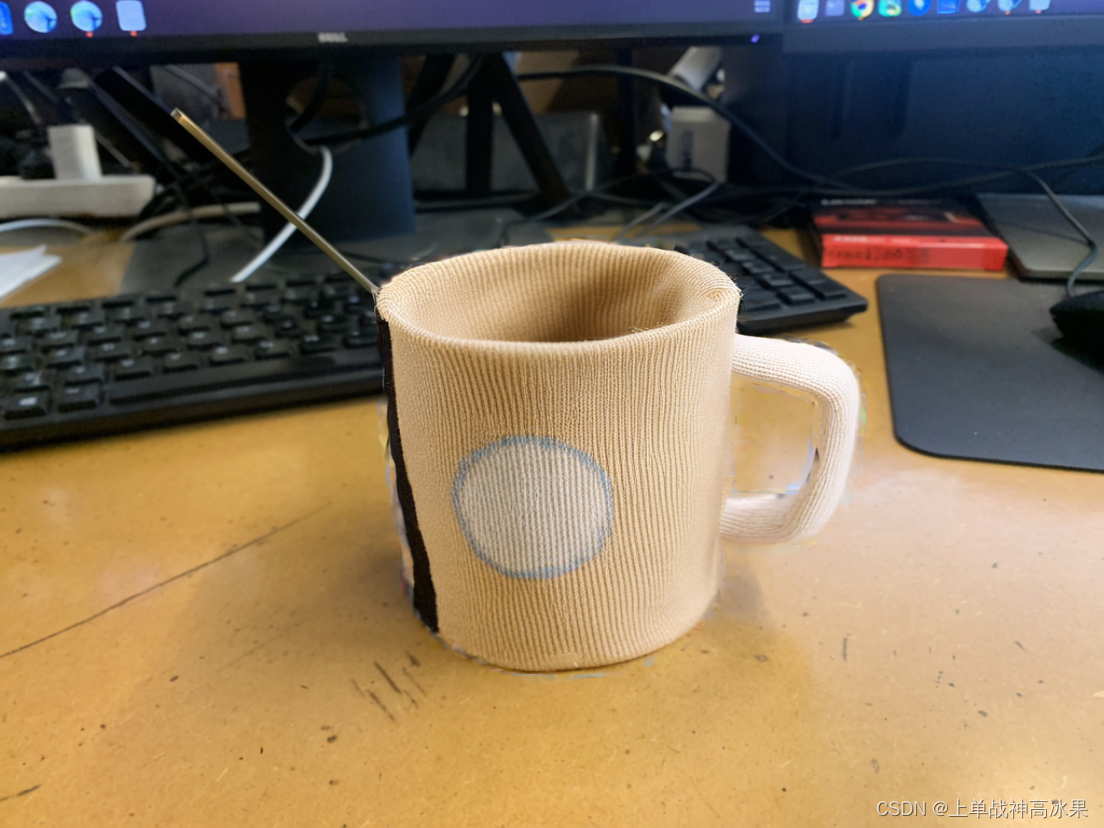
一点体会
-
总的来说,一方面效果跟深度图的好坏有比较大关联,深度图好效果比较好。
-
另一方面参考材质的图像也比较重要,参考图像除了材质,形状也可能会混进结果当中,要选择合适的参考材质图。
-
还有,特别怪异的组合效果不太好,如果选择一个现实中不存在的物体和材质的组合,效果会不好。比如毛线制的杯子、汽车等。


 1699
1699

 被折叠的 条评论
为什么被折叠?
被折叠的 条评论
为什么被折叠?
 到【灌水乐园】发言


