


目录
6.2选择配置 - 主机 - 选择zabbix-server节点 - 右上角创建监控项
一、Zabbix简介
Zabbix 是一个基于 WEB 界面的提供分布式系统监视以及网络监视功能的企业级的开源解决方案。
它能监视各种网络参数,保证服务器系统的安全运营;并提供灵活的通知机制以让系统管理员快速定位/解决存在的各种问题。
二、Zabbix功能特点及架构图
Zabbix 是一个企业级分布式开源监控解决方案,一个的软件包中包含了多种功能。
1.数据采集:
可用性和性能检查;
支持 SNMP(包括主动轮询和被动捕获)、IPMI、JMX、VMware 监控;
自定义检查;
按照自定义的时间间隔采集需要的数据;
通过 Server/Proxy 和 Agents 来执行数据采集。
2.灵活的阈值定义
可以参考后端数据库定义非常灵活的告警阈值,即触发器
3.高度可配置化的告警
 可以根据递增计划、接收者、媒介类型自定义发送告警通知;

 使用宏变量可以使告警通知变得更加高效有用;

 自动操作包含远程执行命令。
4.实时图形
使用内置图形功能可以将监控项实时绘制成图形。
5.实时图形
Zabbix可以追踪模拟鼠标在 Web 网站上的点击操作,来检查 Web 网站的功能和响应时间
6.丰富的可视化选项
可以组合多个监控项到单个视图中,创建自定义图表;
网络拓扑图;
以仪表盘样式展示自定义聚合图形和幻灯片演示;
报表;
监控资源的更高层次展示视图(业务视图)。
7.历史数据存储
存储在数据库中的数据;
历史配置;
内置数据管理机制(housekeeping)。
8.历史数据存储
将被监控设备添加为主机;
主机一旦添加到数据库中,就会采集数据用于监控;
将模板用于监控设备。
9.历史数据存储
自动发现网络设备;
Zabbix Agent 发现设备后自动注册;
自动发现文件系统、网络接口和 SNMP OIDs 值。
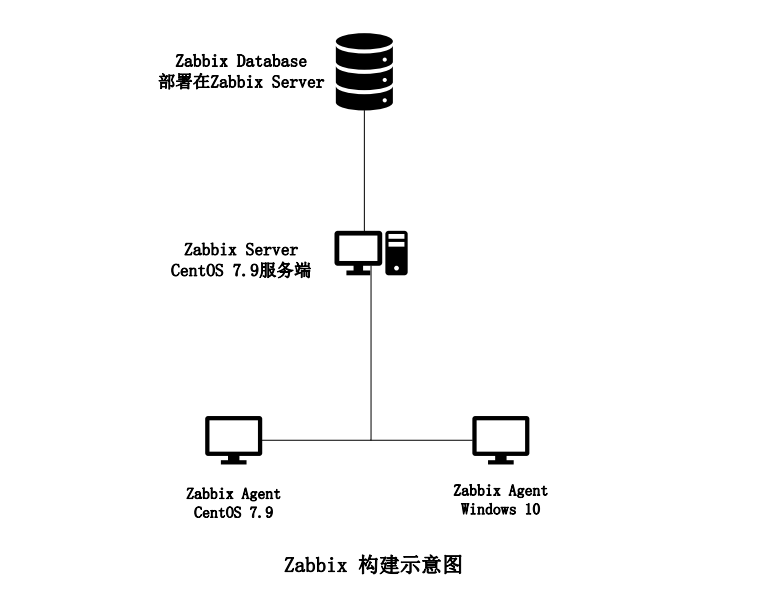
三、Zabbix节点规划
zabbix-server     192.168.83.11        服务端             server
zabbix-agent1     192.168.83.12        被监控端1          agent1
zabbix-agent1     192.168.83.12        被监控端2          agent2
四、Zabbix安装步骤、
1.server端配置更新YUM源
[root@zabbix-1 ~]# rm -rf /etc/yum.repos.d/*
[root@zabbix-1 ~]# curl -o /etc/yum.repos.d/CentOS-Base.repo https://mirrors.aliyun.com/repo/Centos-7.repo
\  % Total    % Received % Xferd  Average Speed   Time    Time     Time  Current
                                 Dload  Upload   Total   Spent    Left  Speed
100  2523  100  2523    0     0   7901      0 --:--:-- --:--:-- --:--:--  7909
[root@zabbix-1 ~]# yum clean all && yum repolist
2.安装Zabbix镜像源
[root@zabbix-1 ~]# rpm -Uvh https://mirrors.aliyun.com/zabbix/zabbix/5.0/rhel/7/x86_64/zabbix-release-5.0-1.el7.noarch.rpm
Retrieving https://mirrors.aliyun.com/zabbix/zabbix/5.0/rhel/7/x86_64/zabbix-release-5.0-1.el7.noarch.rpm
warning: /var/tmp/rpm-tmp.MokUly: Header V4 RSA/SHA512 Signature, key ID a14fe591: NOKEY
Preparing...                          ################################# [100%]
Updating / installing...
   1:zabbix-release-5.0-1.el7         ################################# [100%]
[root@zabbix-1 ~]# sed -i 's#http://repo.zabbix.com#https://mirrors.aliyun.com/zabbix#' /etc/yum.repos.d/zabbix.repo
3、安装 Zabbix 服务器
[root@zabbix-1 ~]# yum install zabbix-server-mysql -y
[root@zabbix-1 ~]# rpm -qa | grep zabbix
zabbix-release-5.0-1.el7.noarch
zabbix-server-mysql-5.0.33-1.el7.x86_64
4、安装 SCL 存储库
概述
从Zabbix 5.0版本开始,Zabbix前端需要PHP 7.2版或更高版本。 非常不幸的是, RHEL/CentOS 7 缺省只提供PHP 5.4版本. 本章节介绍在RHEL/CentOS 7上安装Zabbix前端的建议方法。
从官方提供的安装包repo.zabbix.com完成了Zabbix 5.0的干净的安装, 使用yum搜索Zabbix时,可能会缺少前端包。
这是因为前端包被移动到了一个专用的前端子目录 frontend .然而, Zabbix前端是可以被安装的,前提是PHP 7.2依赖条件已经提供
为了方便起见,已经从主zabbix-web包中删除了对PHP的任何直接依赖。这为解决PHP7.2依赖关系的方法提供了更大的灵活性。
建议使用Red Hat软件集合中的PHP包,以下是方法
在CentOS环境下:
yum install  -y centos-release-scl
此时,执行
[root@zabbix-1 ~]#  yum list rh-php7\*
rh-php70.x86_64                                             2.3-1.el7                              centos-sclo-rh
rh-php70-build.x86_64                                       2.3-1.el7                              centos-sclo-rh
rh-php70-php.x86_64                                         7.0.27-2.el7                           centos-sclo-rh
rh-php70-php-bcmath.x86_64                                  7.0.27-2.el7                           centos-sclo-rh
rh-php70-php-cli.x86_64                                     7.0.27-2.el7                           centos-sclo-rh
rh-php70-php-common.x86_64                                  7.0.27-2.el7                           centos-sclo-rh
会返回显示新的rh-php7*列表.
然后, 编辑 /etc/yum.repos.d/zabbix.repo 文件 把 enabled=0 替代成 enabled=1.
[zabbix-frontend]
       ...
       enabled=1
       ...

在此阶段,通yum搜索Zabbix将返回zabbix-web包和四个新包。 这四个包是:

zabbix-nginx-conf-scl.noarch : Nginx的Zabbix前端配置 (scl 版本)
zabbix-web-deps-scl.noarch : 用于从redhat软件集合安装zabbix-web包所需PHP依赖项的便利包
zabbix-web-mysql-scl.noarch : 用于MySQL数据库的Zabbix web前端包 (scl 版本)
zabbix-web-pgsql-scl.noarch : 用于PostgreSQL数据库的Zabbix web前端包(scl 版本)
5、安装zabbix 前端包
[root@zabbix-1 ~]#  yum install -y zabbix-web-mysql-scl zabbix-apache-conf-scl zabbix-nginx-conf-scl zabbix-agent.x86_64
[root@zabbix-1 ~]#  rpm -qa | grep zabbix
zabbix-web-5.0.33-1.el7.noarch
zabbix-web-mysql-scl-5.0.33-1.el7.noarch
zabbix-nginx-conf-scl-5.0.33-1.el7.noarch
zabbix-server-mysql-5.0.33-1.el7.x86_64
zabbix-web-deps-scl-5.0.33-1.el7.noarch
zabbix-apache-conf-scl-5.0.33-1.el7.noarch
zabbix-release-5.0-1.el7.noarch
6、安装并配置数据库📙
[root@zabbix-1 ~]# yum install  -y mariadb-server
启动数据库并设置开机自启动
[root@zabbix-1 ~]# systemctl start mariadb && systemctl enable mariadb && systemctl status mariadb
初始化数据库并设置数据库登录密码
[root@zabbix-1 ~]# mysql_secure_installation

NOTE: RUNNING ALL PARTS OF THIS SCRIPT IS RECOMMENDED FOR ALL MariaDB
      SERVERS IN PRODUCTION USE!  PLEASE READ EACH STEP CAREFULLY!

In order to log into MariaDB to secure it, we'll need the current
password for the root user.  If you've just installed MariaDB, and
you haven't set the root password yet, the password will be blank,
so you should just press enter here.

Enter current password for root (enter for none):
OK, successfully used password, moving on...

Setting the root password ensures that nobody can log into the MariaDB
root user without the proper authorisation.

Set root password? [Y/n] y
New password:
Re-enter new password:
Password updated successfully!
Reloading privilege tables..
 ... Success!


By default, a MariaDB installation has an anonymous user, allowing anyone
to log into MariaDB without having to have a user account created for
them.  This is intended only for testing, and to make the installation
go a bit smoother.  You should remove them before moving into a
production environment.

Remove anonymous users? [Y/n] y
 ... Success!

Normally, root should only be allowed to connect from 'localhost'.  This
ensures that someone cannot guess at the root password from the network.

Disallow root login remotely? [Y/n] n
 ... skipping.

By default, MariaDB comes with a database named 'test' that anyone can
access.  This is also intended only for testing, and should be removed
before moving into a production environment.

Remove test database and access to it? [Y/n] y
 - Dropping test database...
 ... Success!
 - Removing privileges on test database...
 ... Success!

Reloading the privilege tables will ensure that all changes made so far
will take effect immediately.

Reload privilege tables now? [Y/n] y
 ... Success!

Cleaning up...

All done!  If you've completed all of the above steps, your MariaDB
installation should now be secure.

Thanks for using MariaDB!
[root@zabbix-1 ~]# mysql -uroot -p
Enter password:
Welcome to the MariaDB monitor.  Commands end with ; or \g.
Your MariaDB connection id is 9
Server version: 5.5.68-MariaDB MariaDB Server

Copyright (c) 2000, 2018, Oracle, MariaDB Corporation Ab and others.

Type 'help;' or '\h' for help. Type '\c' to clear the current input statement.

MariaDB [(none)]> create database zabbix character set utf8 collate utf8_bin;
Query OK, 1 row affected (0.00 sec)

MariaDB [(none)]> create user zabbix@localhost identified by '000000';
Query OK, 0 rows affected (0.00 sec)

MariaDB [(none)]> grant all privileges on zabbix.*to zabbix@localhost;
Query OK, 0 rows affected (0.01 sec)

MariaDB [(none)]> flush privileges;
Query OK, 0 rows affected (0.00 sec)

MariaDB [(none)]>  quit;
Bye
7.导入初始架构和数据,系统将提示您输入新创建的密码
[root@zabbix-1 ~]# zcat /usr/share/doc/zabbix-server-mysql*/create.sql.gz | mysql -uzabbix -p zabbix
Enter password:
8.修改zabbix_server.conf配置文件📚
为Zabbix server配置数据库
修改配置文件 /etc/zabbix/zabbix_server.conf,修改数据库密码。
[root@zabbix-1 ~]# vim /etc/zabbix/zabbix_server.conf
修改内容
DBPassword=password(数据库的密码)
保存退出
9.修改 zabbix 的 php 配置文件
[root@zabbix-1 ~]#  vim /etc/opt/rh/rh-php72/php-fpm.d/zabbix.conf
修改内容
#将注释;去掉,并修改为
php_value[date.timezone] = Asia/Shanghai
按:wq保存退出
10.启动Zabbix server和agent进程📒
[root@zabbix-1 ~]# systemctl start zabbix-server zabbix-agent httpd rh-php72-php-fpm
[root@zabbix-1 ~]# syst enable zabbix-server zabbix-agent httpd rh-php72-php-fpm
[root@zabbix-1 ~]# systemctl status zabbix-server zabbix-agent httpd rh-php72-php-fpm
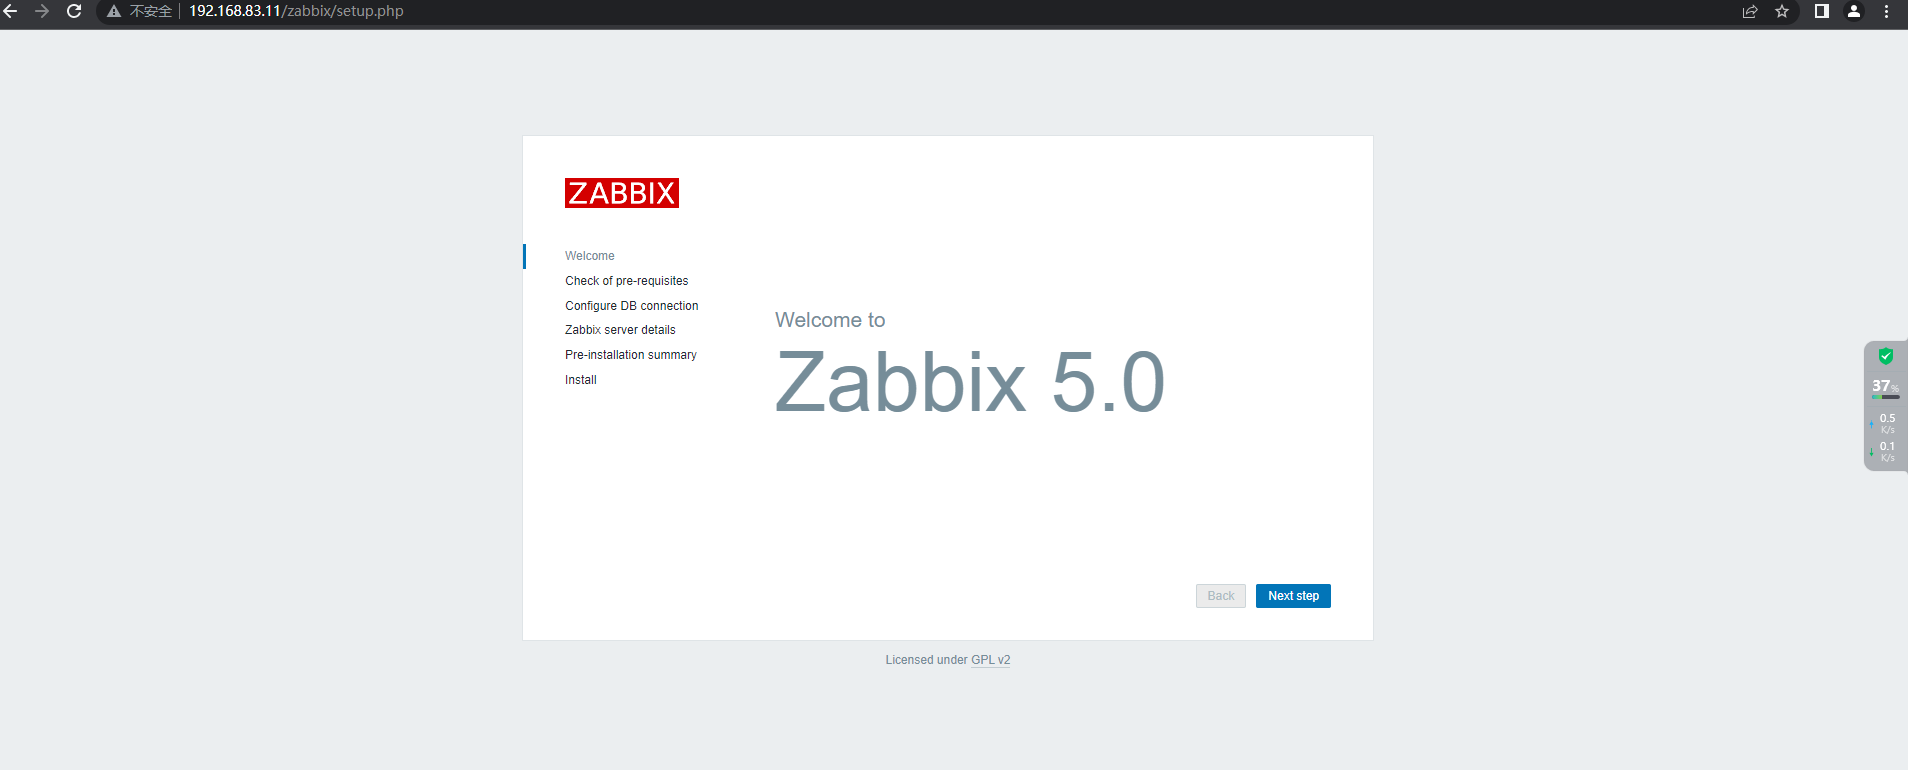
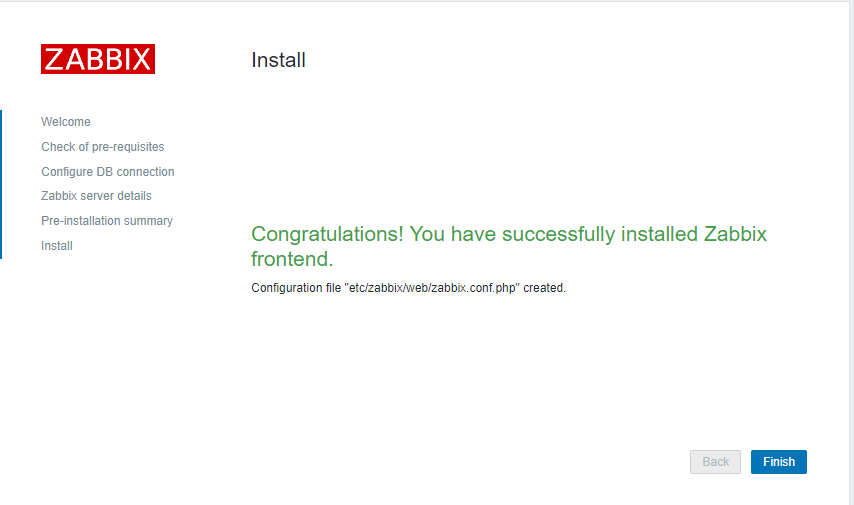
11.配置Zabbix前端-WEB界面安装
连接到新安装的Zabbix前端:http://IP/zabbix
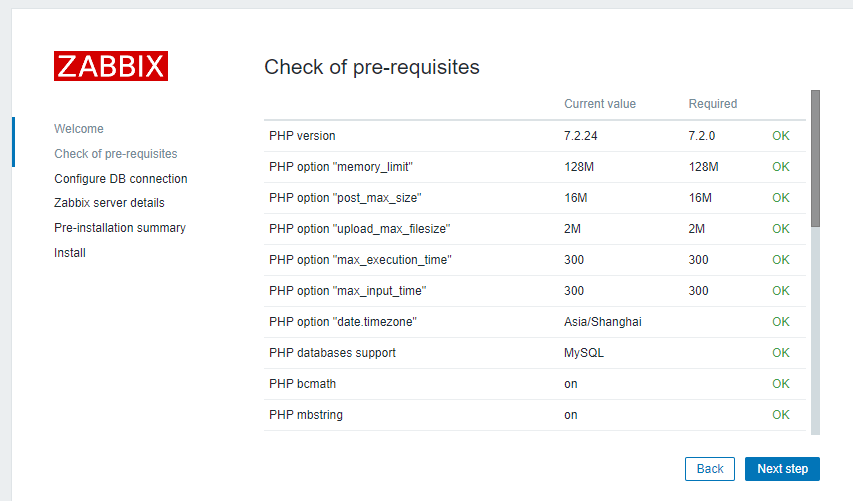
检查先决条件

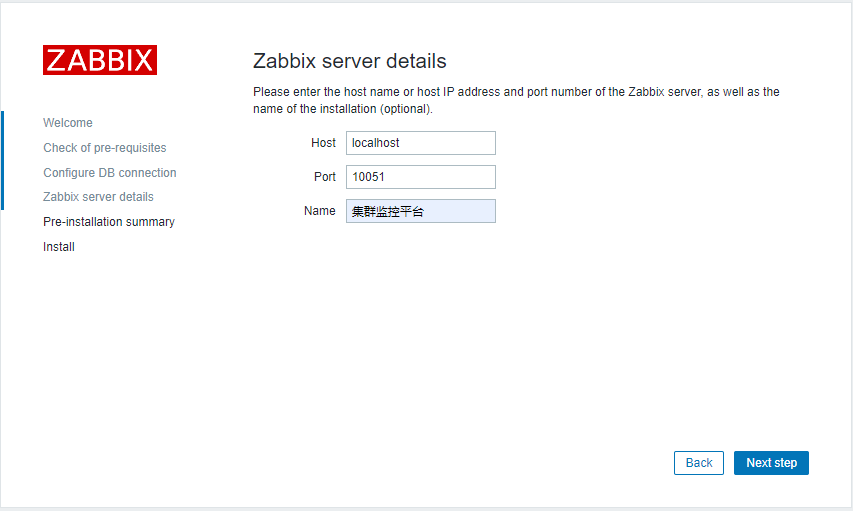
安装前确认信息

安装完成
12.登录Zabbix集群控制面板
输入系统默认的用户名和密码Admin/zabbix
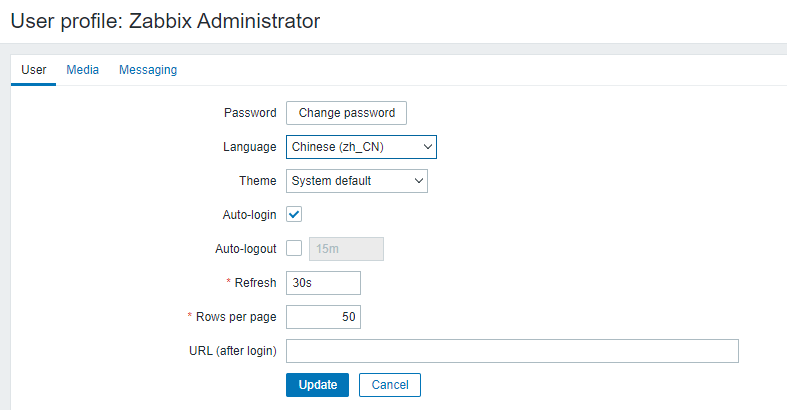
13.设置成中文界面(左下user setting)
五、添加另外两台监控主机
5.1安装zabbix-agent
scp server yum源 给agent
[root@zabbix-2 ~]# yum install -y zabbix-agent.x86_64
5.2配置zabbix-agent
修改内容如下
# zabbix 服务端地址
Server=192.168.83.11
# zabbix活动服务器地址
ServerActive=192.168.83.11
# 主机名,在web页面添加主机时需设置相同
Hostname=zabbix2
按:wq保存退出。
5.3启动服务
[root@zabbix2 ~]# systemctl start zabbix-agent && systemctl enable zabbix-agent && systemctl status zabbix-agent
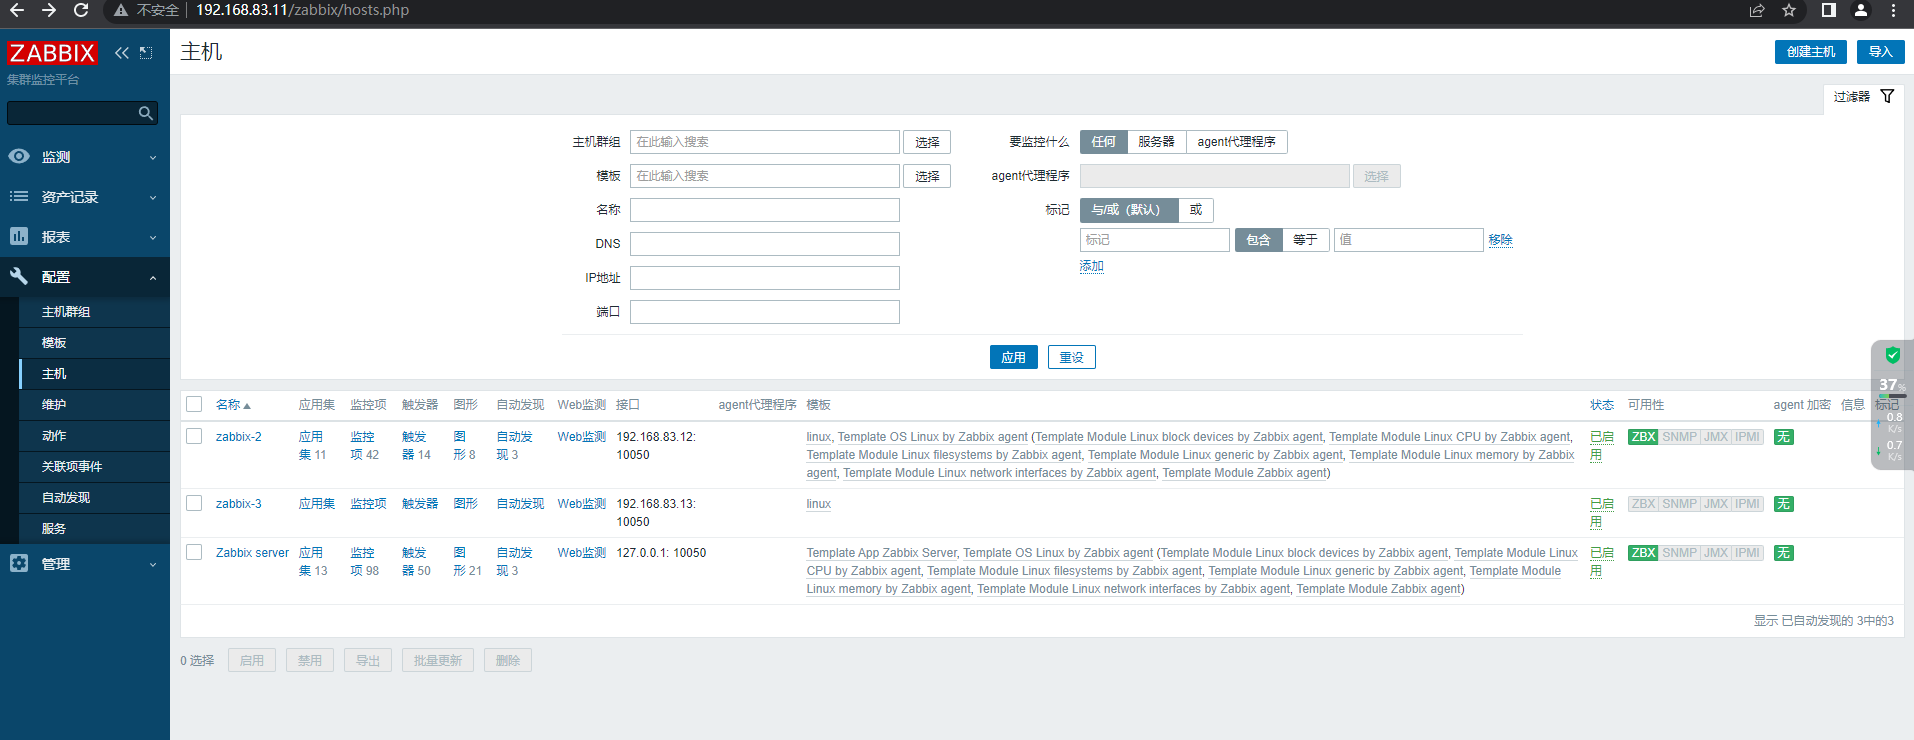
5.4创建主机(配置==》主机==》右上创建主机==》)

六、案例监控端口
6.1首先在服务器上启动一个测试端口 8080
[root@zabbix3 ~]# systemctl start httpd
[root@zabbix3 ~]# systemctl status httpd
● httpd.service - The Apache HTTP Server
   Loaded: loaded (/usr/lib/systemd/system/httpd.service; disabled; vendor preset: disabled)
   Active: active (running) since Sat 2023-04-15 08:16:36 EDT; 8s ago
[root@zabbix3 ~]# netstat -lntp
Active Internet connections (only servers)
Proto Recv-Q Send-Q Local Address           Foreign Address         State       PID/Program name
tcp        0      0 0.0.0.0:22              0.0.0.0:*               LISTEN      1005/sshd
tcp        0      0 127.0.0.1:25            0.0.0.0:*               LISTEN      1218/master
tcp        0      0 0.0.0.0:10050           0.0.0.0:*               LISTEN      1791/zabbix_agentd
tcp6       0      0 :::8080                 :::*                    LISTEN      1825/httpd
tcp6       0      0 :::22                   :::*                    LISTEN      1005/sshd
tcp6       0      0 ::1:25                  :::*                    LISTEN      1218/master
tcp6       0      0 :::10050                :::*                    LISTEN      1791/zabbix_agentd
6.2选择配置 - 主机 - 选择zabbix-server节点 - 右上角创建监控项
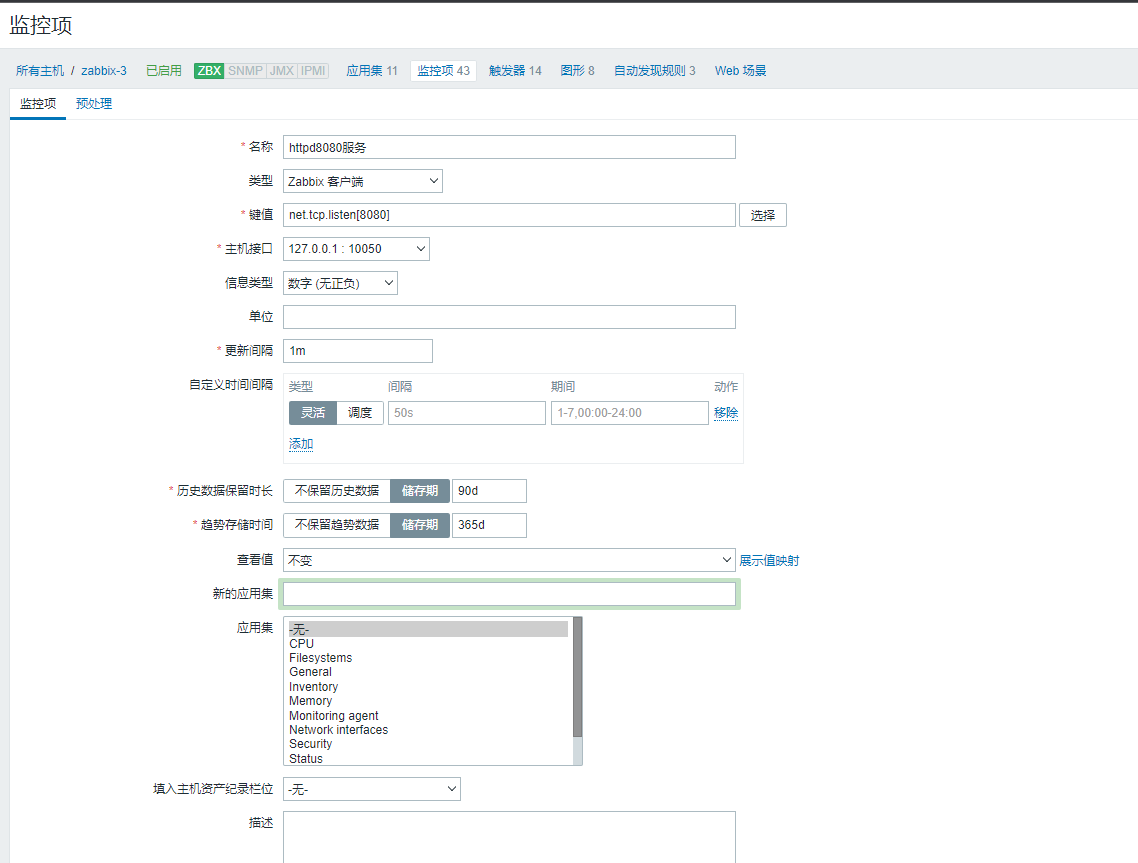
键值 : net.tcp.listen[port] 检查 TCP 端口 是否处于侦听状态。返回 0 - 未侦听;1 - 正在侦听 把port换成实际需要监控的端口 添加
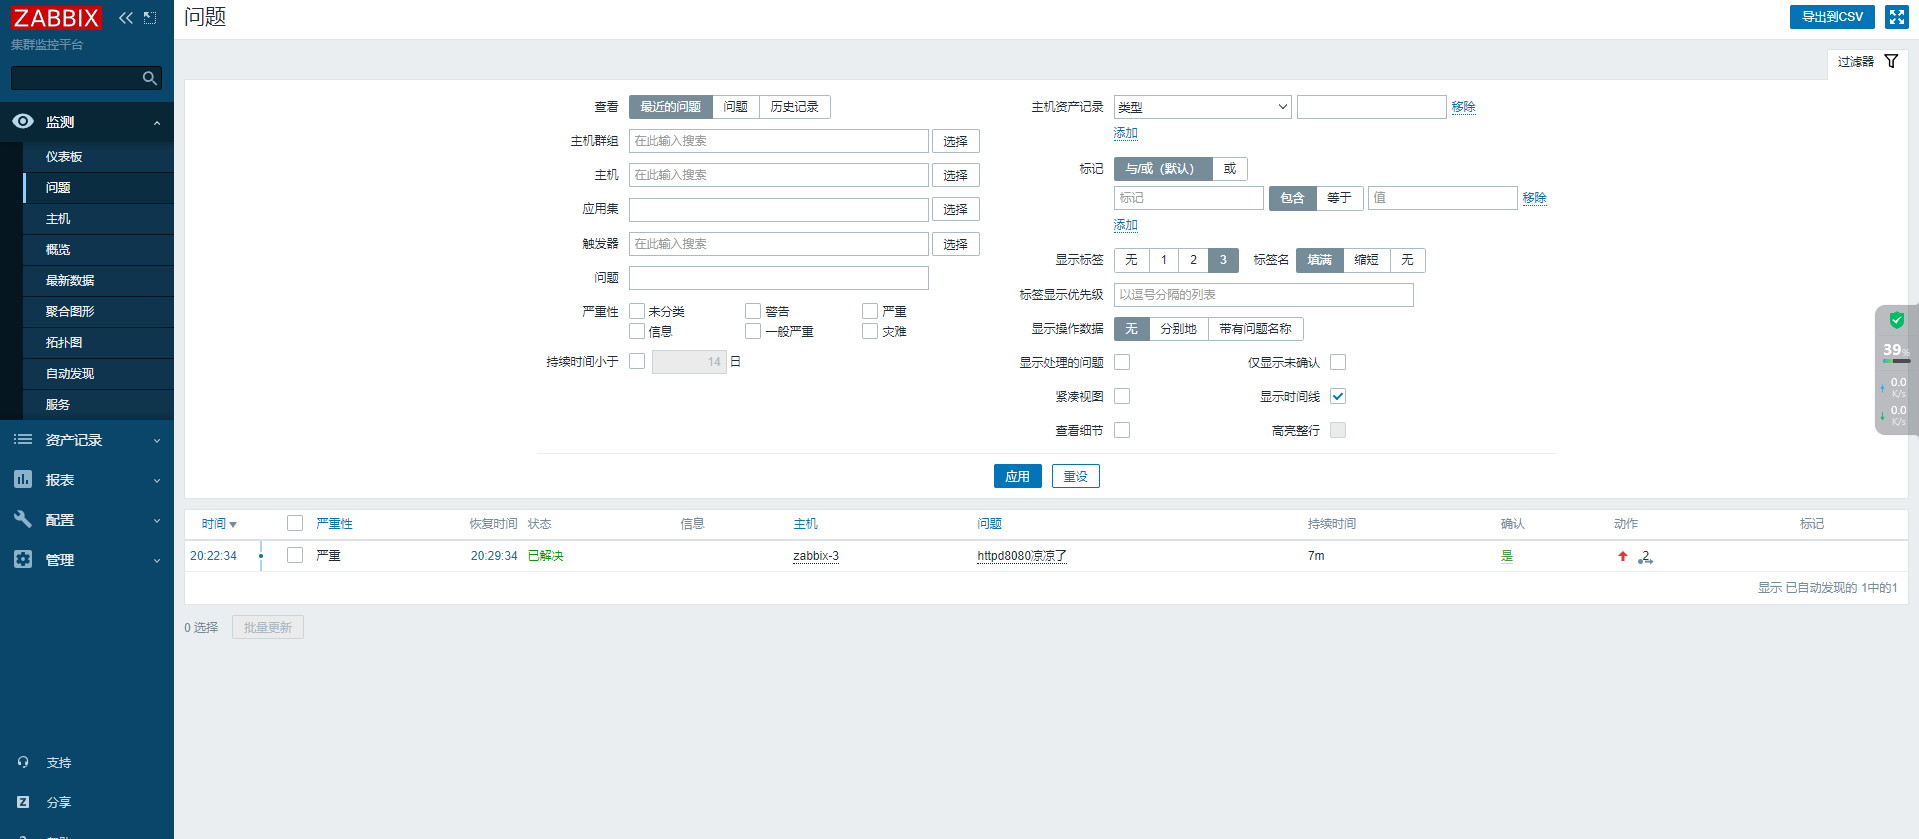
有了监控项也就具备了持续监控状态,还需要一个状态变化触发告警的配置:触发器
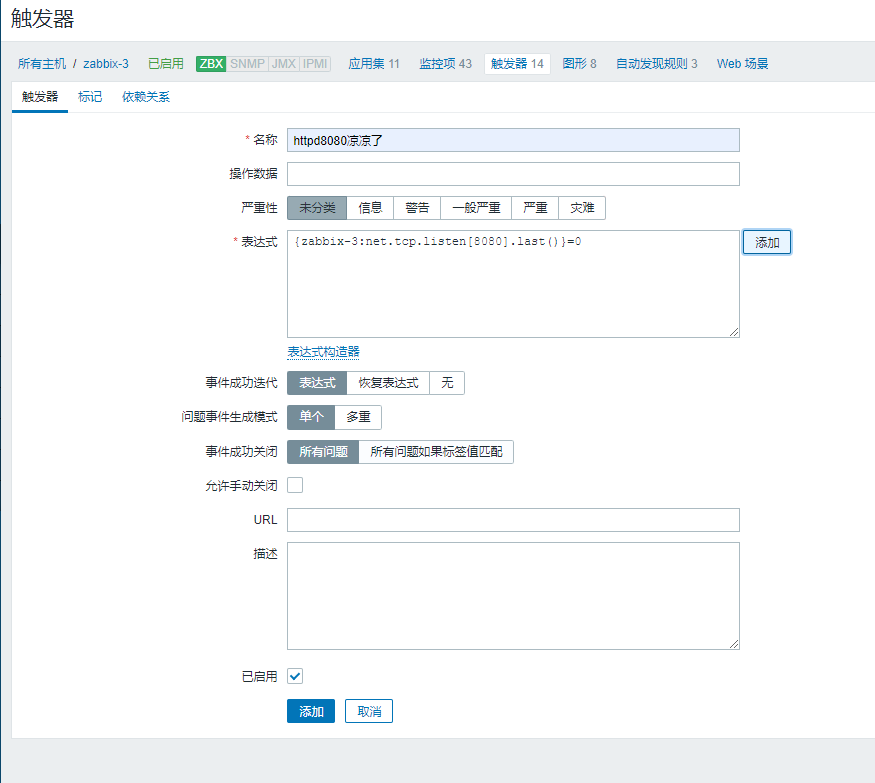
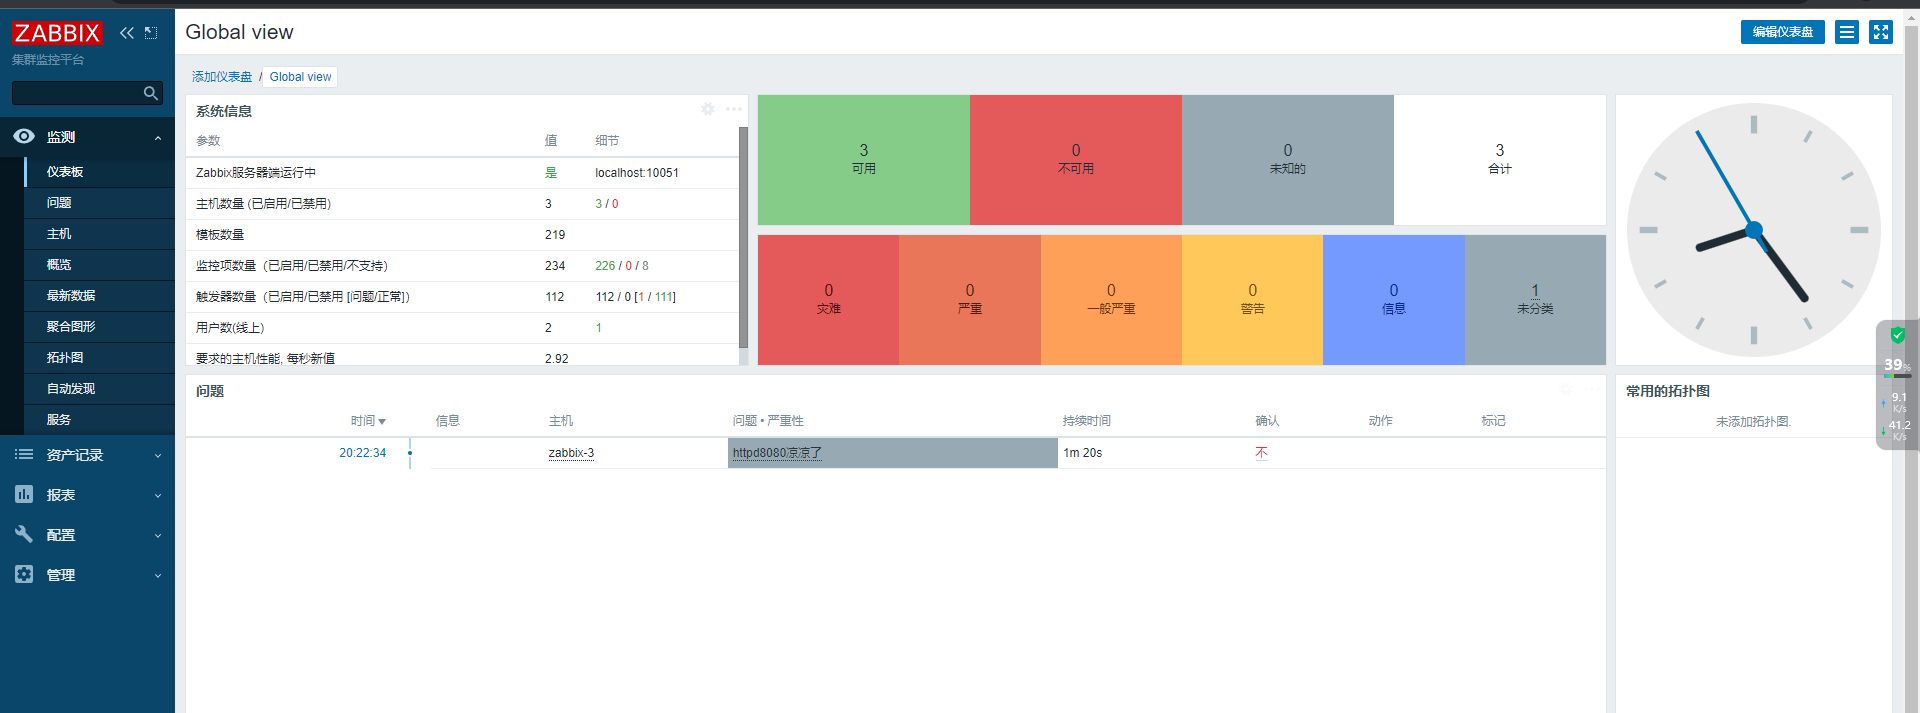
现在把httpd服务禁用,出现问题警告
[root@zabbix3 ~]# systemctl stop httpd
[root@zabbix3 ~]# netstat -lntp
Active Internet connections (only servers)
Proto Recv-Q Send-Q Local Address           Foreign Address         State       PID/Program name
tcp        0      0 0.0.0.0:22              0.0.0.0:*               LISTEN      1005/sshd
tcp        0      0 127.0.0.1:25            0.0.0.0:*               LISTEN      1218/master
tcp        0      0 0.0.0.0:10050           0.0.0.0:*               LISTEN      1791/zabbix_agentd
tcp6       0      0 :::22                   :::*                    LISTEN      1005/sshd
tcp6       0      0 ::1:25                  :::*                    LISTEN      1218/master
tcp6       0      0 :::10050                :::*                    LISTEN      1791/zabbix_agentd
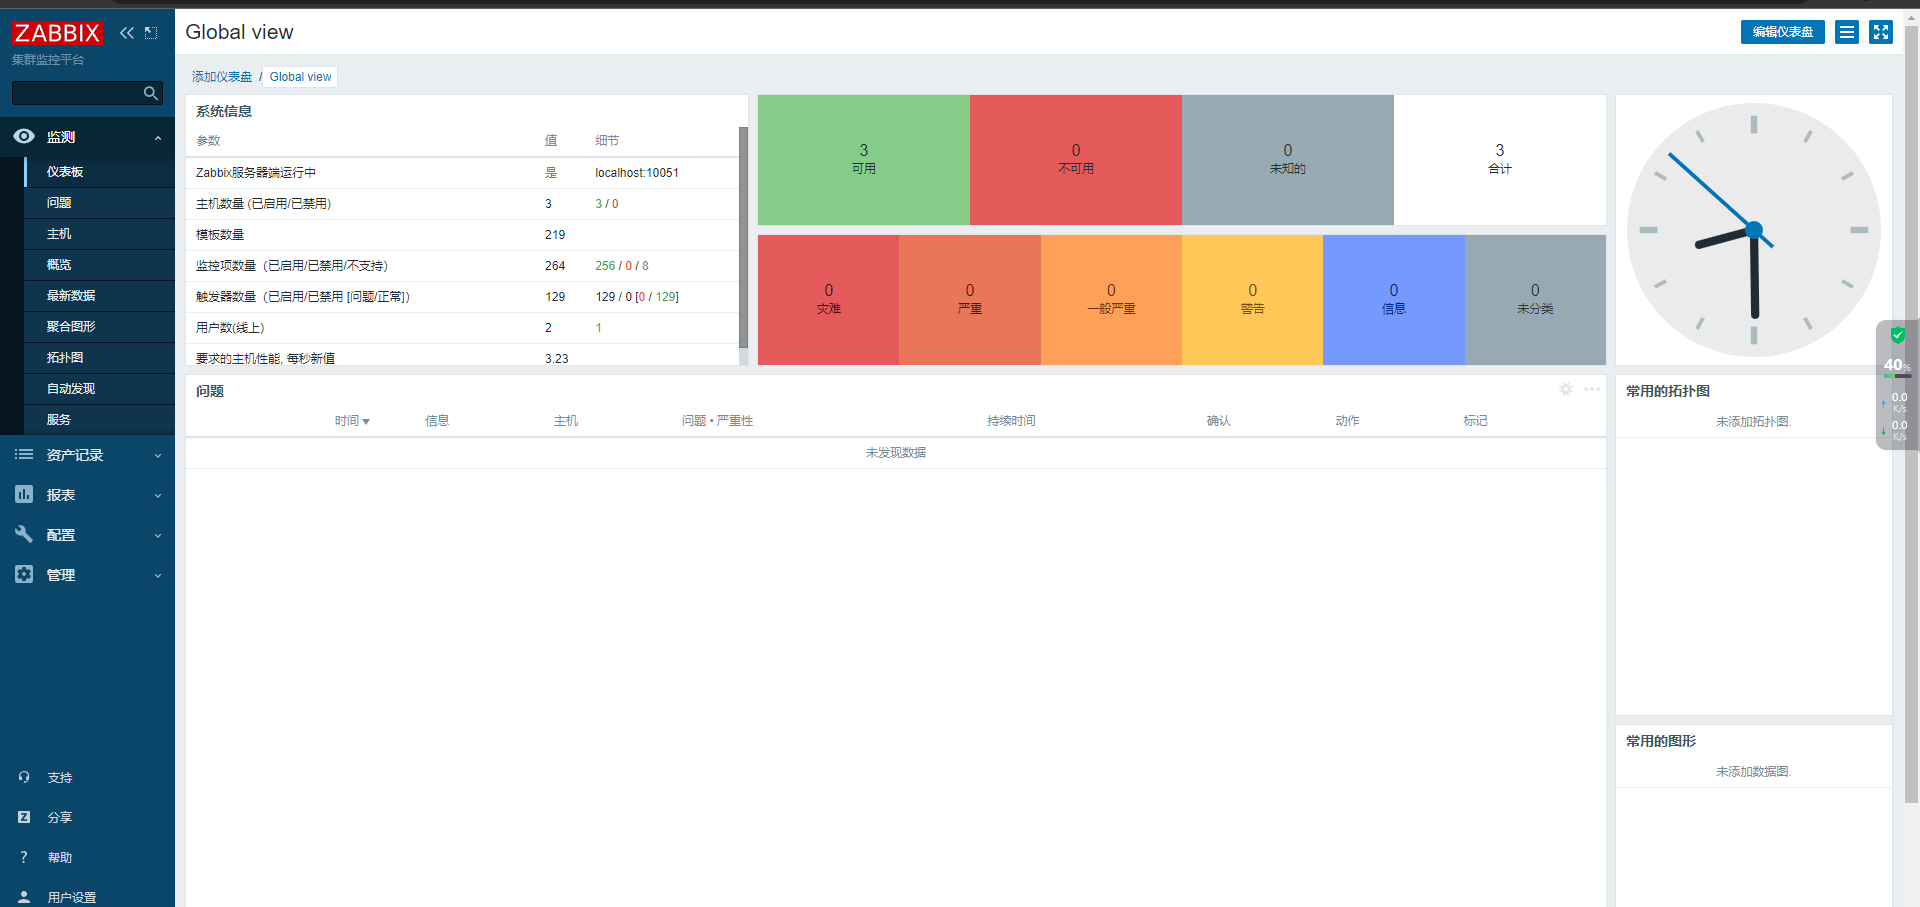
在打开httpd,问题消失
[root@zabbix3 ~]# systemctl start httpd
[root@zabbix3 ~]# netstat -lntp
Active Internet connections (only servers)
Proto Recv-Q Send-Q Local Address           Foreign Address         State       PID/Program name
tcp        0      0 0.0.0.0:22              0.0.0.0:*               LISTEN      1005/sshd
tcp        0      0 127.0.0.1:25            0.0.0.0:*               LISTEN      1218/master
tcp        0      0 0.0.0.0:10050           0.0.0.0:*               LISTEN      1791/zabbix_agentd
tcp6       0      0 :::8080                 :::*                    LISTEN      1853/httpd
tcp6       0      0 :::22                   :::*                    LISTEN      1005/sshd
tcp6       0      0 ::1:25                  :::*                    LISTEN      1218/master
tcp6       0      0 :::10050                :::*                    LISTEN      1791/zabbix_agentd


 9316
9316


 被折叠的 条评论
为什么被折叠?
被折叠的 条评论
为什么被折叠?
 到【灌水乐园】发言


