


2.第二次作业:
-
1.配置ntp时间服务器,确保客户端主机能和服务主机同步时间
第一步定位server端:
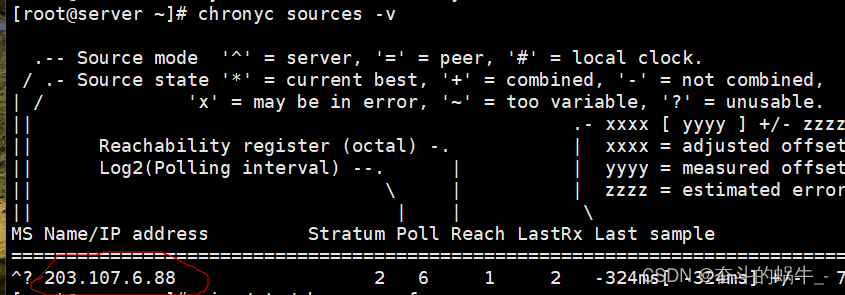
[root@server ~]# vim /etc/chrony.conf #编辑配置文件将第三行修改为阿里云的时间同步服务器地址 server ntp.aliyun.com iburst #将26行的地址改为node1的地址 allow 192.168.100.134/24 [root@server ~]# systemctl restart chronyd #重启服务 [root@server ~]# chronyc sources -v [root@server ~]# timedatectl status


第二步定位node1端:
[root@node1 ~]# vim /etc/chrony.conf
#定位第三行改为server端的地址
server 192.168.100.133 iburst
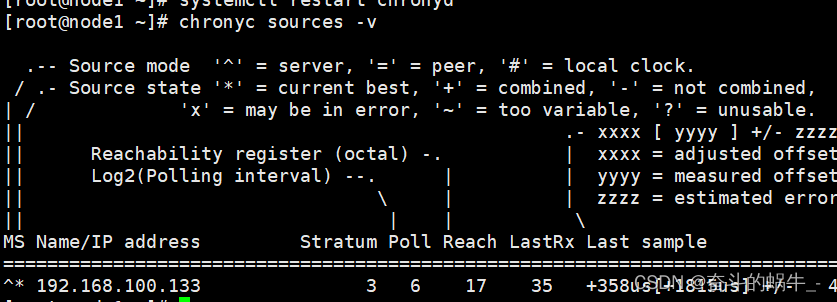
[root@node1 ~]# systemctl restart chronyd #重启服务
[root@node1 ~]# chronyc sources -v #查看时间服务器的IP是否为server端的IP192.168.100.133
[root@node1 ~]# timedatectl status
Local time: 一 2023-07-17 16:28:38 CST
Universal time: 一 2023-07-17 08:28:38 UTC
RTC time: 一 2023-07-17 08:28:38
Time zone: Asia/Shanghai (CST, +0800)
System clock synchronized: yes #注意
NTP service: active
RTC in local TZ: no

2.配置ssh免密登陆,能够实现客户端主机通过服务器端的redhat账户进行基于公钥验证方式的远程连接
第一步定位server端
[root@server ~]# useradd redhat
[root@server ~]# passwd redhat
第二步定位node1端
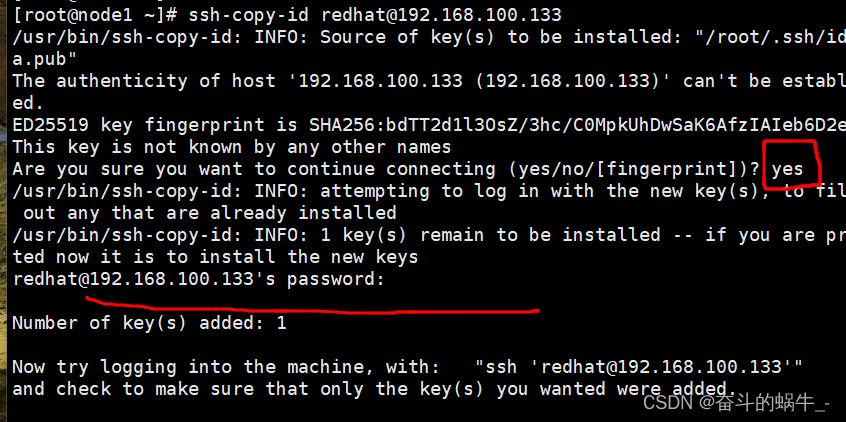
[root@node1 ~]# ssh-keygen -t rsa #制作公私钥对,一路回车
[root@node1 ~]# ssh-copy-id redhat@192.168.100.133  #上传公钥,注意第一次需要输入yes和密码

 第三步定位node1端测试
[root@node1 ~]# ssh redhat@192.168.100.133


 347
347


 被折叠的 条评论
为什么被折叠?
被折叠的 条评论
为什么被折叠?
 到【灌水乐园】发言


