


写在前面
利用Spring IOC和Spring DI的思想开发一个打印机模拟程序,使其满足以下条件。
1、可以灵活地配置彩色墨盒或灰色墨盒。
2、可以灵活地配置打印页面的大小。
一、项目搭建
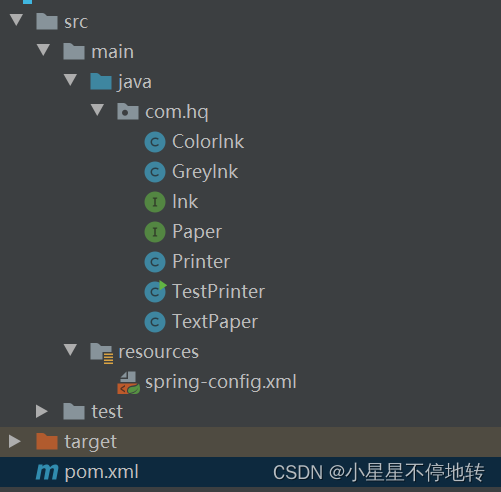
新建一个maven项目,项目结构图如下:
二、详细代码
1、pom.xml
这里我们利用5.3.25版本的Spring,当然你也可以使用别的版本的依赖,但是版本太高了可能会报错,也许是与idea版本不兼容的原因,作者使用的IDEA版本为2020版。
	<dependencies>
        <dependency>
            <groupId>org.springframework</groupId>
            <artifactId>spring-aop</artifactId>
            <version>5.3.25</version>
        </dependency>

        <dependency>
            <groupId>org.springframework</groupId>
            <artifactId>spring-core</artifactId>
            <version>5.3.25</version>
        </dependency>

        <dependency>
            <groupId>org.springframework</groupId>
            <artifactId>spring-beans</artifactId>
            <version>5.3.25</version>
        </dependency>

        <dependency>
            <groupId>org.springframework</groupId>
            <artifactId>spring-context</artifactId>
            <version>5.3.25</version>
        </dependency>

        <!-- lombok -->
        <dependency>
            <groupId>org.projectlombok</groupId>
            <artifactId>lombok</artifactId>
            <version>1.18.26</version>
        </dependency>
    </dependencies>
2、创建接口Ink和Paper
创建两个接口类,包含得到颜色和获得内容的方法。
public interface Ink {
    public String getColor();
}

public interface Paper {
    public String getContent();
    public void putInChars(String content);
}
3、创建不同的接口实现类
创建ColorInk、GreyInk实现Ink接口,此处将三原色直接赋值了,也可以不赋值,在配置文件中加入属性的赋值。TextPaper原理相同。
public class ColorInk implements Ink {
    private int red = 10;
    private int green = 20;
    private int blue = 30;

    @Override
    public String getColor() {
        Color color = new Color(this.red,this.green,this.blue);
        return "#"+Integer.toHexString(color.getRGB()).substring(2);
    }
}

public class GreyInk implements Ink {
    private int red = 20;
    private int green = 30;
    private int blue = 40;

    @Override
    public String getColor() {
        int c = (this.red+this.green+this.blue)/3;
        Color color = new Color(c,c,c);
        return "#"+Integer.toHexString(color.getRGB()).substring(2);
    }
}

public class TextPaper implements Paper {
    private int charPerLine = 10;
    private int linePerLine = 8;
    private String content;

    @Override
    public String getContent() {
        String out = "每行字符数"+ this.charPerLine +"\n";
        out += "每页行数" + this.linePerLine + "\n";
        out += this.content;
        return out;
    }

    @Override
    public void putInChars(String content) {
        this.content = content;
    }
}
4、Printer类
加入@Data注解,提供setter()和getter()方法,也可以不加注解,直接给出其方法。
@Data
@NoArgsConstructor
public class Printer {
    private Ink ink;
    private Paper paper;

    public void print(String str) {
        System.out.println("使用"+ink.getColor()+"颜色打印");
        paper.putInChars(str);
        System.out.println(paper.getContent());
    }
}
5、配置文件spring-config.xml
编写配置文件,利用Spring容器实现控制反转和依赖注入。
<?xml version="1.0" encoding="UTF-8"?>
<beans xmlns="http://www.springframework.org/schema/beans"
       xmlns:xsi="http://www.w3.org/2001/XMLSchema-instance"
       xsi:schemaLocation="http://www.springframework.org/schema/beans http://www.springframework.org/schema/beans/spring-beans.xsd">
	<!--定义bean-->
    <bean id="greyInk" class="com.hq.GreyInk" />
    <bean id="colorInk" class="com.hq.ColorInk" />

    <bean id="textPaper" class="com.hq.TextPaper" />
	<!--在printer中注入ink和paper,ink使用greyInk,paper使用textPaper,此处利用面向接口编程的思想-->
    <bean id="printer" class="com.hq.Printer">
        <property name="ink" ref="greyInk" />
        <property name="paper" ref="textPaper" />
    </bean>
</beans>
6、编写测试类
public class TestPrinter {
    public static void main(String[] args) {
    	// 通过配置文件启动容器
        ApplicationContext context = new ClassPathXmlApplicationContext("spring-config.xml");
        // printer即为定义的bean,此时注入的是greyInk
        Printer printer = (Printer) context.getBean("printer");
        printer.print("hello world!");
    }
}
三、运行结果

如果修改配置文件中printer的bean定义,如下所示:
<bean id="printer" class="com.hq.Printer">
   <property name="ink" ref="colorInk" />
   <property name="paper" ref="textPaper" />
</bean>
此时,运行结果为:

四、额外扩展
如果不在类中定义属性时即赋值,那么配置文件可以进行如下配置:
通过< property>子元素实现:
Spring调用Bean的默认构造方法来实例化Bean对象,然后通过反射的方式调用setter方法来注入属性值,为对象赋值。要求Bean类必须提供一个默认的无参数构造方法, Bean类为需要注入的属性提供对应的setter方法。
通过构造注入:
使用此元素传入构造方法的参数进行实例化,type属性指定构造参数类型,参数值可通过ref属性或value属性直接指定,也可以通过ref或value子元素指定。
	<bean id="ColorInk" class="com.hq.ColorInk">
		<!--使用<property>标签进行定义,name属性为指定类中的属性,value属性为其赋值。-->
        <property name="red" value="10" />
        <property name="green" value="20" />
        <property name="blue" value="30" />
    </bean>

    <bean id="greyInk" class="com.hq.GreyInk">
        <property name="red" value="20" />
        <property name="green" value="30" />
        <property name="blue" value="40" />
    </bean>

    <bean id="textPaper" class="com.hq.TextPaper">
    	<!--通过构造函数注入-->
        <constructor-arg value="10" />
        <constructor-arg value="8" />
    </bean>

    <bean id="printer" class="com.hq.Printer">
        <constructor-arg ref="greyInk" />
        <constructor-arg ref="textPaper" />
    </bean>
大家可以尝试一下使用这种方式进行配置,熟悉各种标签的作用。好了,今天就先到这里。


 1万+
1万+


 被折叠的 条评论
为什么被折叠?
被折叠的 条评论
为什么被折叠?
 到【灌水乐园】发言


