


1. 整合MyBatis-Plus
1.1 基本配置
1.2 代码生成器(旧)
<!-- mp -->
<dependency>
<groupId>com.baomidou</groupId>
<artifactId>mybatis-plus-boot-starter</artifactId>
<version>3.4.1</version>
</dependency>
<!-- 代码生成工具 -->
<dependency>
<groupId>com.baomidou</groupId>
<artifactId>mybatis-plus-generator</artifactId>
<version>3.4.1</version>
</dependency>
<!-- 代码生成模板 -->
<dependency>
<groupId>org.apache.velocity</groupId>
<artifactId>velocity-engine-core</artifactId>
<version>2.2</version>
</dependency>package com.xja;
import com.baomidou.mybatisplus.annotation.DbType;
import com.baomidou.mybatisplus.annotation.IdType;
import com.baomidou.mybatisplus.core.exceptions.MybatisPlusException;
import com.baomidou.mybatisplus.generator.AutoGenerator;
import com.baomidou.mybatisplus.generator.config.DataSourceConfig;
import com.baomidou.mybatisplus.generator.config.GlobalConfig;
import com.baomidou.mybatisplus.generator.config.PackageConfig;
import com.baomidou.mybatisplus.generator.config.StrategyConfig;
import com.baomidou.mybatisplus.generator.config.rules.DateType;
import com.baomidou.mybatisplus.generator.config.rules.NamingStrategy;
import java.util.Scanner;
public class CodeGenerator {
//数据源
private static final String JdbcUrl = "jdbc:mysql:///boot?
useUnicode=true&characterEncoding=UTF-8&serverTimezone=GMT%2B8";
private static final String DriverName = "com.mysql.cj.jdbc.Driver";
private static final String username = "root";
private static final String password = "";
//忽略的表前缀
private static final String tablePrefix = "tb_";
//private static final String tablePrefix = "";
//父包名
private static final String parent = "com.xja";
private static String scanner(String tip) {
Scanner scanner = new Scanner(System.in);
System.out.println("请输入" + tip + ":");
if (scanner.hasNext()) {
String ipt = scanner.next();
if (ipt!=null) {
return ipt;
}
}
throw new MybatisPlusException("请输入正确的" + tip + "!");
}
public static void main(String[] args) {
// 创建代码生成器对象
AutoGenerator mpg = new AutoGenerator();
// 全局配置
GlobalConfig gc = new GlobalConfig();
gc.setOutputDir(scanner("你的项目路径(本项目的路径
如:D:\\Java_practice\\demo)") + "/src/main/java");
gc.setAuthor("sunwz");
//生成之后是否打开资源管理器
gc.setOpen(false);
//重新生成时是否覆盖文件
gc.setFileOverride(false);
//%s 为占位符
//mp生成service层代码,默认接口名称第一个字母是有I
gc.setServiceName("%sService");
//gc.setServiceName("service");
//设置主键生成策略 自动增长
gc.setIdType(IdType.AUTO);
//设置Date的类型 只使用 java.util.date 代替
gc.setDateType(DateType.ONLY_DATE);
//开启实体属性 Swagger2 注解
//gc.setSwagger2(true);
mpg.setGlobalConfig(gc);
// 数据源配置
DataSourceConfig dsc = new DataSourceConfig();
dsc.setUrl(JdbcUrl);
dsc.setDriverName(DriverName);
dsc.setUsername(username);
dsc.setPassword(password);
//使用mysql数据库
dsc.setDbType(DbType.MYSQL);
mpg.setDataSource(dsc);
// 包配置
PackageConfig pc = new PackageConfig();
//pc.setModuleName(scanner("请输入模块名(存放的包名称 如system)"));
pc.setParent(parent);
pc.setController("controller");
pc.setService("service");
pc.setServiceImpl("service.impl");
pc.setMapper("mapper");
pc.setEntity("pojo");
pc.setXml("mapper");
mpg.setPackageInfo(pc);
// 策略配置
StrategyConfig strategy = new StrategyConfig();
//设置哪些表需要自动生成
strategy.setInclude(scanner("表名,多个英文逗号分割").split(","));
//实体类名称驼峰命名
strategy.setNaming(NamingStrategy.underline_to_camel);
//列名名称驼峰命名
strategy.setColumnNaming(NamingStrategy.underline_to_camel);
strategy.setEntityLombokModel(true);
//设置controller的api风格 使用RestController
strategy.setRestControllerStyle(true);
//驼峰转连字符
strategy.setControllerMappingHyphenStyle(true);
//忽略表前缀
strategy.setTablePrefix(tablePrefix);
mpg.setStrategy(strategy);
mpg.execute();
}
}1.3 代码生成器(新)
<!-- https://mvnrepository.com/artifact/com.baomidou/mybatis-plus-boot-starter -->
<dependency>
<groupId>com.baomidou</groupId>
<artifactId>mybatis-plus-boot-starter</artifactId>
<version>3.5.3.1</version>
</dependency>
<dependency>
<groupId>com.baomidou</groupId>
<artifactId>mybatis-plus-generator</artifactId>
<version>3.5.2</version>
</dependency>
<dependency>
<groupId>org.apache.velocity</groupId>
<artifactId>velocity-engine-core</artifactId>
<version>2.2</version>
</dependency>package edu.xja.springbootmp;
import com.baomidou.mybatisplus.annotation.IdType;
import com.baomidou.mybatisplus.generator.AutoGenerator;
import com.baomidou.mybatisplus.generator.config.*;
import com.baomidou.mybatisplus.generator.config.querys.MySqlQuery;
import com.baomidou.mybatisplus.generator.config.rules.DateType;
import com.baomidou.mybatisplus.generator.config.rules.NamingStrategy;
import java.util.Arrays;
import java.util.Collections;
import java.util.List;
import java.util.Scanner;
public class CodeGeneration {
public static void main(String[] args) {
/**
* 先配置数据源
*/
MySqlQuery mySqlQuery = new MySqlQuery() {
@Override
public String[] fieldCustom() {
return new String[]{"Default"};
}
};
DataSourceConfig dsc = new
DataSourceConfig.Builder("jdbc:mysql://localhost:3306/security?
&useUnicode=true&characterEncoding=utf-
8&serverTimezone=Asia/Shanghai","root","123456")
.dbQuery(mySqlQuery).build();
//通过datasourceConfig创建AutoGenerator
AutoGenerator generator = new AutoGenerator(dsc);
Scanner scanner = new Scanner(System.in);
System.out.println("代码生成的绝对路径(右键项目->copy path):");
String projectPath = scanner.next();
System.out.println("请输入表名,多个英文逗号分隔,所有输入 all");
String s = scanner.next();
/**
* 全局配置
*/
//String projectPath = System.getProperty("user.dir"); //获取项目路径
String filePath = projectPath + "/src/main/java"; //java下的文件路径
GlobalConfig global = new GlobalConfig.Builder()
.outputDir(filePath)//生成的输出路径
.author("sunwz")//生成的作者名字
//.enableSwagger()开启swagger,需要添加swagger依赖并配置
.dateType(DateType.TIME_PACK)//时间策略
.commentDate("yyyy年MM月dd日")//格式化时间格式
.disableOpenDir()//禁止打开输出目录,默认false
.fileOverride()//覆盖生成文件
.build();
/**
* 包配置
*/
PackageConfig packages = new PackageConfig.Builder()
.entity("pojo")//实体类包名
.parent("edu.xja")//父包名。如果为空,将下面子包名必须写全部, 否则就只需写子
包名
.controller("controller")//控制层包名
.mapper("mapper")//mapper层包名
.xml("mapper.xml")//数据访问层xml包名
.service("service")//service层包名
.serviceImpl("service.impl")//service实现类包名
//.other("output")//输出自定义文件时的包名
.pathInfo(Collections.singletonMap(OutputFile.xml, projectPath +
"/src/main/resources/mapper")) //路径配置信息,就是配置各个文件模板的路径信息,这里以
mapper.xml为例
.build();
/**
* 模板配置
*/
// 如果模板引擎是 freemarker
// String templatePath = "/templates/mapper.xml.ftl";
// 如果模板引擎是 velocity
// String templatePath = "/templates/mapper.xml.vm";
TemplateConfig template = new TemplateConfig.Builder()
// .disable()//禁用所有模板
//.disable(TemplateType.ENTITY)禁用指定模板
// .service(filePath + "/service.java")//service模板路径
// .serviceImpl(filePath + "/service/impl/serviceImpl.java")//实现类模
板路径
// .mapper(filePath + "/mapper.java")//mapper模板路径
// .mapperXml("/templates/mapper.xml")//xml文件模板路路径
// .controller(filePath + "/controller")//controller层模板路径
.build();
/**
* 注入配置,自定义配置一个Map对象
*/
// Map<String,Object> map = new HashMap<>();
// map.put("name","young");
// map.put("age","22");
// map.put("sex","男");
// map.put("description","深情不及黎治跃");
//
// InjectionConfig injectionConfig = new InjectionConfig.Builder()
// .customMap(map)
// .build();
/**
* 策略配置开始
*/
StrategyConfig strategyConfig = new StrategyConfig.Builder()
.enableCapitalMode()//开启全局大写命名
//.likeTable()模糊表匹配
.addInclude(getTables(s))//添加表匹配,指定要生成的数据表名,不写默认选定数据
库所有表
.addTablePrefix("tb_", "sys_") //设置忽略表前缀
//.disableSqlFilter()禁用sql过滤:默认(不使用该方法)true
//.enableSchema()启用schema:默认false
.entityBuilder() //实体策略配置
//.disableSerialVersionUID()禁用生成SerialVersionUID:默认true
.enableChainModel()//开启链式模型
.enableLombok()//开启lombok
.enableRemoveIsPrefix()//开启 Boolean 类型字段移除 is 前缀
.enableTableFieldAnnotation()//开启生成实体时生成字段注解
//.addTableFills()添加表字段填充
.naming(NamingStrategy.underline_to_camel)//数据表映射实体命名策略:默认
下划线转驼峰underline_to_camel
.columnNaming(NamingStrategy.underline_to_camel)//表字段映射实体属性命名
规则:默认null,不指定按照naming执行
.idType(IdType.AUTO)//添加全局主键类型
.formatFileName("%s")//格式化实体名称,%s取消首字母I
.build()
.mapperBuilder()//mapper文件策略
.enableMapperAnnotation()//开启mapper注解
.enableBaseResultMap()//启用xml文件中的BaseResultMap 生成
.enableBaseColumnList()//启用xml文件中的BaseColumnList
//.cache(缓存类.class)设置缓存实现类
.formatMapperFileName("%sMapper")//格式化Dao类名称
.formatXmlFileName("%sMapper")//格式化xml文件名称
.build()
.serviceBuilder()//service文件策略
.formatServiceFileName("%sService")//格式化 service 接口文件名称
.formatServiceImplFileName("%sServiceImpl")//格式化 service 接口文件名
称
.build()
.controllerBuilder()//控制层策略
//.enableHyphenStyle()开启驼峰转连字符,默认:false
.enableRestStyle()//开启生成@RestController
.formatFileName("%sController")//格式化文件名称
.build();
/*至此,策略配置才算基本完成!*/
/**
* 将所有配置项整合到AutoGenerator中进行执行
*/
generator.global(global)
.template(template)
// .injection(injectionConfig)
.packageInfo(packages)
.strategy(strategyConfig)
.execute();
}
// 处理 all 情况
protected static List<String> getTables(String tables) {
return "all".equals(tables) ? Collections.emptyList() :
Arrays.asList(tables.split(","));
}
}1.4 配置文件

1.5 Rest测试MP应用
package edu.xja.controller;
import edu.xja.pojo.User;
import edu.xja.service.UserService;
import org.springframework.beans.factory.annotation.Autowired;
import org.springframework.stereotype.Controller;
import org.springframework.web.bind.annotation.*;
import java.util.List;
/**
* <p>
* 用户表 前端控制器
* </p>
*
* @author sunwz
* @since 2023年04月06日
*/
@RestController // restFul + @RestController = @Controller + @ResponseBody
/*@Controller
@ResponseBody*/
@RequestMapping("/user")
public class UserController {
@Autowired
private UserService userService;
//一旦使用@RestController表示当前项目是一个前后端分离的项目,这里没有作用域返回数据全是json
/**
* 查询全部 @GetMapping
* id查询 @GetMapping
* 增加 @PostMapping
* 修改 @PutMapping
* 删除 @DeleteMapping
*/
@GetMapping
public List<User> list(){
return userService.list();
}
@GetMapping("/{id}")
public User byId(@PathVariable("id") Long id){
return userService.getById(id);
}
@PostMapping
public boolean save(@RequestBody User user){
return userService.save(user);
}
@PutMapping
public boolean update(@RequestBody User user){
return userService.updateById(user);
}
@DeleteMapping("/{id}")
public boolean delete(@PathVariable Long id){
return userService.removeById(id);
}
}
1.6 关于时间处理
/**
* 注册时间
*/
@DateTimeFormat(pattern = "yyyy-MM-dd HH:mm:ss")
@JsonFormat(pattern = "yyyy-MM-dd HH:mm:ss")
private Date registerTime;@TableField("create_time")
private LocalDateTime createTime;@Configuration
public class LocalDateTimeConfig {
/*
* 序列化内容
* LocalDateTime -> String
* 服务端返回给客户端内容
* */
@Bean
public LocalDateTimeSerializer localDateTimeSerializer() {
return new LocalDateTimeSerializer(DateTimeFormatter.ofPattern("yyyy-MM-dd
HH:mm:ss"));
}
/*
* 反序列化内容
* String -> LocalDateTime
* 客户端传入服务端数据
* */
@Bean
public LocalDateTimeDeserializer localDateTimeDeserializer() {
return new LocalDateTimeDeserializer(DateTimeFormatter.ofPattern("yyyy-MM-dd
HH:mm:ss"));
}
// 配置
@Bean
public Jackson2ObjectMapperBuilderCustomizer
jackson2ObjectMapperBuilderCustomizer() {
return builder -> {
1.7 案例
2. SpringBoot自动配置原理
SpringBoot 虽然干掉了 XML 但未做到 零配置,它体现出了一种 约定优于配置,也称作按约定编程,是一种
软件设计范式,旨在减少软件开发人员需做决定的数量,获得简单的好处,而又不失灵活性。 一般情况下默
认的配置足够满足日常开发所需,但在特殊的情况下,我们往往需要用到自定义属性配置、自定义文件配
置、多环境配置、外部命令引导等一系列功能。不用担心,这些 SpringBoot 都替我们考虑好了,我们只需
要遵循它的规则配置即可
2.1 Spring Boot的配置文件
初识Spring Boot时我们就知道,Spring Boot有一个全局配置文件:application.properties或
application.yml。
我们的各种属性都可以在这个文件中进行配置,最常配置的比如:server.port、logging.level.* 等等,然而
我们实际用到的往往只是很少的一部分,那么这些属性是否有据可依呢?答案当然是肯定的,这些属性都可
以在官方文档中查找到,但是开发这是比较喜欢记忆一些常用的配置,或者使用idea提供功能进行一些相关
的配置
那么问题来了:这些配置是如何在Spring Boot项目中生效的呢? 那么接下来,就需要聚焦本篇博客的主
题:自动配置工作原理或者叫实现方式。
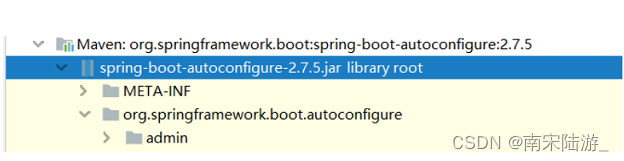
2.2 工作原理剖析
Spring Boot关于自动配置的源码在spring-boot-autoconfigure-x.x.x.x.jar中:
builder.serializerByType(LocalDateTime.class,
localDateTimeSerializer());
builder.deserializerByType(LocalDateTime.class,
localDateTimeDeserializer());
};
}
}2. SpringBoot自动配置原理
2.1 Spring Boot的配置文件

2.2 工作原理剖析

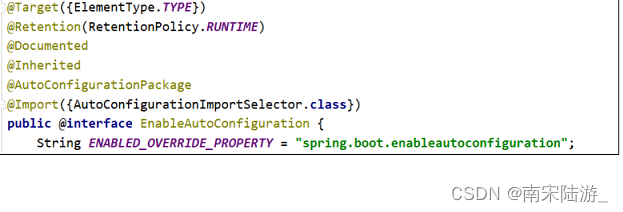
@SpringBootApplication 是一个复合注解或派生注解,在 @SpringBootApplication 中有一个注解
@EnableAutoConfiguration ,翻译成人话就是开启自动配置,其定义如下: 
2.3 自动配置生效原理


https://cloud.tencent.com/developer/article/2120900
https://blog.csdn.net/weixin_45934981/article/details/129877810
3. SpringBoot上传
3.1 导入依赖
<dependencies>
<dependency>
<groupId>org.springframework.boot</groupId>
<artifactId>spring-boot-starter-web</artifactId>
</dependency>
<dependency>
<groupId>org.springframework.boot</groupId>
<artifactId>spring-boot-starter-thymeleaf</artifactId>
</dependency>
<dependency>
<groupId>org.springframework.boot</groupId>
<artifactId>spring-boot-starter-test</artifactId>
<scope>test</scope>
</dependency>
</dependencies>
3.2 配置文件
# 禁用 thymeleaf 缓存
spring.thymeleaf.cache=false
# 是否支持批量上传 (默认值 true)
spring.servlet.multipart.enabled=true
# 上传文件的临时目录 (一般情况下不用特意修改)
spring.servlet.multipart.location=
# 上传文件最大为 1M (默认值 1M 根据自身业务自行控制即可)
spring.servlet.multipart.max-file-size=1048576
# 上传请求最大为 10M(默认值10M 根据自身业务自行控制即可)
spring.servlet.multipart.max-request-size=10485760
# 文件大小阈值,当大于这个阈值时将写入到磁盘,否则存在内存中,(默认值0 一般情况下不用特意修改)
spring.servlet.multipart.file-size-threshold=0
# 判断是否要延迟解析文件(相当于懒加载,一般情况下不用特意修改)
spring.servlet.multipart.resolve-lazily=false
3.3 上传页面
<!DOCTYPE html>
<html lang="en" xmlns:th="http://www.thymeleaf.org">
<head>
<meta charset="UTF-8">
<title>评论详情</title>
<!--<link rel="stylesheet" href="../static/css/bootstrap.min.css">
<script src="../static/js/bootstrap.min.js"></script>
<script src="../static/js/jquery-3.6.0.js"></script>
<script src="../static/js/My97DatePicker/WdatePicker.js"></script>-->
<link rel="stylesheet" th:href="@{/css/bootstrap.min.css}">
<script type="text/javascript" th:src="@{/js/jquery-3.6.0.js}"></script>
<script type="text/javascript" th:src="@{/js/bootstrap.min.js}"></script>
<script type="text/javascript" th:src="@{/js/My97DatePicker/WdatePicker.js}">
</script>
<style>
.files span{
cursor: pointer;
}
</style>
<script>
$(function () {
/* 这种方式能够默认提供新生内容事件 */
$(document).on("click" ,".add", function () {
$("#files").append("<div><input type=\"file\" name=\"file\"
style=\"margin-top: 3px;display: inline\"> <span class=\"add\"> 增加 </span><span
class=\"del\"> 删除 </span></div>");
})
$(document).on("click" ,".del", function () {
$(this).parent().remove();
})
})
</script>
</head>
<body>
<div class="container">
<form style="margin-top: 20px" action="/comment/saveComment"
enctype="multipart/form-data" method="post">
<div class="form-group">
<label for="userId">用户</label>
<select class="form-control" id="userId" name="userId" style="width:
200px">
<option></option>
<option th:each="user:${list}" th:value="${user.id}"
th:text="${user.username}"></option>
</select>
</div>
<div class="form-group">
<label for="content">评论信息</label>
<textarea class="form-control" rows="3" id="content" name="content"
style="width: 600px"></textarea>
</div>
<div class="form-group">
<label for="score">评分</label>
<input type="text" class="form-control" id="score" name="score"
style="width: 100px" >
</div>
<div class="form-group files" id="files">
<label >上传图片</label>
<div><input type="file" name="file" style="margin-top: 3px;display:
inline"> <span class="add"> 增加 </span><span class="del"> 删除 </span></div>
</div>
<div class="form-group">
<label for="publicDate">上传时间</label>
<input type="text" class="form-control Wdate" id="publicDate"
name="publicDate" style="width: 200px" onclick="WdatePicker({el:this,dateFmt:'yyyyMM-dd HH:mm:ss'})">
</div>
<button type="submit" class="btn btn-success">提交评论</button>
</form>
</div>
</body>
</html>
3.4 控制层
@Controller
@RequestMapping("/uploads")
public class FileUploadController {
private static final Logger log =
LoggerFactory.getLogger(FileUploadController.class);
@GetMapping
public String index() {
return "index";
}
@PostMapping("/upload1")
@ResponseBody
public Map<String, String> upload1(@RequestParam("file") MultipartFile file)
throws IOException {
3.5 配置tomcat虚拟目录
log.info("[文件类型] - [{}]", file.getContentType());
log.info("[文件名称] - [{}]", file.getOriginalFilename());
log.info("[文件大小] - [{}]", file.getSize());
// TODO 将文件写入到指定目录(具体开发中有可能是将文件写入到云存储/或者指定目录通过 Nginx
进行 gzip 压缩和反向代理,此处只是为了演示故将地址写成本地电脑指定目录)
file.transferTo(new File("F:\\app\\chapter16\\" +
file.getOriginalFilename()));
Map<String, String> result = new HashMap<>(16);
result.put("contentType", file.getContentType());
result.put("fileName", file.getOriginalFilename());
result.put("fileSize", file.getSize() + "");
return result;
}
@PostMapping("/upload2")
@ResponseBody
public List<Map<String, String>> upload2(@RequestParam("file") MultipartFile[]
files) throws IOException {
if (files == null || files.length == 0) {
return null;
}
List<Map<String, String>> results = new ArrayList<>();
for (MultipartFile file : files) {
// TODO Spring Mvc 提供的写入方式
file.transferTo(new File("F:\\app\\chapter16\\" +
file.getOriginalFilename()));
Map<String, String> map = new HashMap<>(16);
map.put("contentType", file.getContentType());
map.put("fileName", file.getOriginalFilename());
map.put("fileSize", file.getSize() + "");
results.add(map);
}
return results;
}
}
3.5 配置tomcat虚拟目录
package com.xja.config;
import org.springframework.context.annotation.Configuration;
import org.springframework.stereotype.Component;
import org.springframework.web.context.WebApplicationContext;
import org.springframework.web.servlet.config.annotation.ResourceHandlerRegistry;
import org.springframework.web.servlet.config.annotation.WebMvcConfigurer;
/**
* 配置tomcat下的虚拟目录:核心思想就将本地的文件夹当成项目资源用tomcat的形式提供访问
*/
@Configuration
//@Component
public class TomcatDocResource implements WebMvcConfigurer {
4. SpringBoot常用接口
4.1 ApplicationListener
ApplicationListener可以监听某个事件event,通过实现这个接口,传入一个泛型事件,在run方法中就可以
监听这个事件,从而做出一定的逻辑,比如在等所有bean加载完之后执行某些操作. Spring典型的观察者设
计模式。
同时这个事件还可以直接读取到IOC容器中所有被实例化的对象
@Override
public void addResourceHandlers(ResourceHandlerRegistry registry) {
//addResourceHandler 配置访问路径
//addResourceLocations 配置资源的具体地址
//虽然能使用但是影响项目原有的请求
//registry.addResourceHandler("/**").addResourceLocations("file:D:\\comment_image\\
");
registry.addResourceHandler("/ims/**").addResourceLocations("file:D:\\comment_image
\\");
}
}//欢迎页
@Override
public void addViewControllers(ViewControllerRegistry registry) {
//直接跳转
//registry.addViewController("/").setViewName("ww.html");
//需要向后台查询之后在进页面
registry.addViewController("/").setViewName("redirect:/user/toWelcome");
}4. SpringBoot常用接口
4.1 ApplicationListener
@Component
public class SystemListener implements ApplicationListener<ContextRefreshedEvent> {
@Override
public void onApplicationEvent(ContextRefreshedEvent event) {
if (event.getApplicationContext().getParent() == null) {
System.out.println("do something");
// 打印容器中出事Bean的数量
System.out.println("监听器获得容器中初始化Bean数量:" +
event.getApplicationContext().getBeanDefinitionCount());
}
}
}4.2 ApplicationContextAware
@Component
public class PayService2 implements ApplicationContextAware {
@Override
public void setApplicationContext(ApplicationContext applicationContext) throws
BeansException {
// 初始化applicationContext对象
this.applicationContext = applicationContext;
}
}
4.3 InitializingBean
4.4 HandlerInterceptor
@Log4j2
@Component
public class LoginHandlerInterceptor implements HandlerInterceptor {
@Override
public boolean preHandle(HttpServletRequest request, HttpServletResponse
response, Object handler) throws Exception {
log.warn("我已经成功进入到拦截器。。。。。");
return true;
}
}@Component
public class MyHandle implements WebMvcConfigurer {
@Autowired
private LoginHandlerInterceptor loginHandlerInterceptor;
@Override
public void addInterceptors(InterceptorRegistry registry) {
registry.addInterceptor(loginHandlerInterceptor)
.addPathPatterns("/**")
.excludePathPatterns("/user/login");
}
}4.5 WebMvcConfigurer
/* 拦截器配置 */
void addInterceptors(InterceptorRegistry var1);
/* 视图跳转控制器 */
void addViewControllers(ViewControllerRegistry registry);
/** *静态资源处理**/
void addResourceHandlers(ResourceHandlerRegistry registry);
/* 默认静态资源处理器 */
void configureDefaultServletHandling(DefaultServletHandlerConfigurer configurer);
/* 这里配置视图解析器 */
void configureViewResolvers(ViewResolverRegistry registry);
/* 配置内容裁决的一些选项*/
void configureContentNegotiation(ContentNegotiationConfigurer configurer);
/** 解决跨域问题 **/
public void addCorsMappings(CorsRegistry registry) ;
4.5.1 addInterceptors
@Override
public void addInterceptors(InterceptorRegistry registry) {
super.addInterceptors(registry);
registry.addInterceptor(new
TestInterceptor()).addPathPatterns("/**").excludePathPatterns("/emp/toLogin","/emp/l
ogin","/js/**","/css/**","/images/**");
}
4.5.2 addViewControllers
@Override
public void addViewControllers(ViewControllerRegistry registry) {
//配置一个路径定位到指定的视图上。
registry.addViewController("/toLogin").setViewName("login");
//配置欢迎页面
registry.addViewController("/").setViewName("login.html");
registry.addViewController("/").setViewName("forward:/login/login1");
}4.5.3 addResourceHandlers
@Configuration
public class MyWebMvcConfigurerAdapter implements WebMvcConfigurer {
/**
* 配置静态访问资源
* @param registry
*/
@Override
public void addResourceHandlers(ResourceHandlerRegistry registry) {
//放行静态资源
registry.addResourceHandler("/mycss/**").addResourceLocations("classpath:/mycss/");
//tomcat虚拟目录
registry.addResourceHandler("/images/**").addResourceLocations("file:D://123");
}
}4.5.4 静态资源处理器
@Override
public void configureDefaultServletHandling(DefaultServletHandlerConfigurer
configurer) {
configurer.enable();
configurer.enable("defaultServletName");
}
4.5.5 视图解析器
/**
* 配置请求视图映射
* @return
*/
@Bean
public InternalResourceViewResolver resourceViewResolver()
{
InternalResourceViewResolver internalResourceViewResolver = new
InternalResourceViewResolver();
//请求视图文件的前缀地址
internalResourceViewResolver.setPrefix("/WEB-INF/jsp/");
//请求视图文件的后缀
internalResourceViewResolver.setSuffix(".jsp");
return internalResourceViewResolver;
}
/**
* 视图配置
* @param registry
*/
@Override
public void configureViewResolvers(ViewResolverRegistry registry) {
super.configureViewResolvers(registry);
registry.viewResolver(resourceViewResolver());
}
5. Swagger
5.1 整合swagger
<!--swagger依赖-->
<dependency>
<groupId>io.springfox</groupId>
<artifactId>springfox-swagger2</artifactId>
<version>2.9.2</version>
</dependency>
<dependency>
<groupId>io.springfox</groupId>
<artifactId>springfox-swagger-ui</artifactId>
<version>2.9.2</version>
</dependencypackage com.its.swagger.config;
import org.springframework.context.annotation.Bean;
import org.springframework.context.annotation.Configuration;
import springfox.documentation.builders.ApiInfoBuilder;
import springfox.documentation.builders.PathSelectors;
import springfox.documentation.builders.RequestHandlerSelectors;
import springfox.documentation.service.ApiInfo;
import springfox.documentation.service.Contact;
import springfox.documentation.spi.DocumentationType;
import springfox.documentation.spring.web.plugins.Docket;
import springfox.documentation.swagger2.annotations.EnableSwagger2;
/*
* 用于配置SwaggerApi
* */
//开启Swagger使用(项目注释文档)
@EnableSwagger2
//标明是配置类
@Configuration
public class SwaggerConfig {
@Bean
public Docket createRestApi() {
return new Docket(DocumentationType.SWAGGER_2)
//用于生成API信息
.apiInfo(apiInfo())
//select()函数返回一个ApiSelectorBuilder实例,用来控制接口被swagger做成文档
.select()
//用于指定扫描哪个包下的接口
.apis(RequestHandlerSelectors.basePackage("com.its.controller"))
//选择所有的API,如果你想只为部分API生成文档,可以配置这里
.paths(PathSelectors.any())
.build();
}
/*
*用于定义API主界面的信息,比如可以声明所有的API的总标题、描述、版本
*/
private ApiInfo apiInfo() {
return new ApiInfoBuilder()
//用来自定义API的标题
.title("SpringBoot项目SwaggerAPI")
//用来描述整体的API
.description("SpringBoot项目SwaggerAPI描述测试")
//创建人信息
.contact(new Contact("sunwz","http://localhost:8080/swaggerui.html","xxxxxxxx@163.com"))
//用于定义服务的域名
//.termsOfServiceUrl("")
.version("1.0") //可以用来定义版本
.build();
}
}spring:
mvc:
pathmatch:
matching-strategy: ant_path_matcher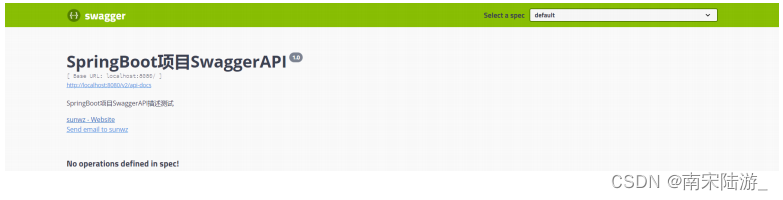
5.2 定义接口组
package com.its.swagger.controller;
import io.swagger.annotations.Api;
import org.springframework.web.bind.annotation.GetMapping;
import org.springframework.web.bind.annotation.RestController;
@Api(tags = "用户管理")
@RestController
public class UserController {
// 注意,对于swagger,不要使用@RequestMapping,
// 因为@RequestMapping支持任意请求方式,swagger会为这个接口生成7种请求方式的接口文档
@GetMapping("/info")
public String info(String id){
return "aaa";
}
}
package com.its.swagger.controller;
import io.swagger.annotations.Api;
import org.springframework.web.bind.annotation.PostMapping;
import org.springframework.web.bind.annotation.RestController;
@Api(tags = "角色管理") // tags:你可以当作是这个组的名字。
@RestController
public class RoleController {
@PostMapping("/ww")
public boolean ww(){
return false;
}
}
视图解析


我们可以使用 @ApiOperation 来描述接口,比如:
@ApiOperation(value = "用户测试",notes = "用户测试notes")
@GetMapping("/test")
public String test(String id){
return "test";
}
5.3 定义接口请求参数
5.3.1 请求参数是实体类
public class Filter {
@ApiModelProperty(allowableValues = "range[1,5]")
Integer order
@ApiModelProperty(allowableValues = "111, 222")
String code;
}package com.its.swagger.pojo;
import io.swagger.annotations.ApiModel;
import io.swagger.annotations.ApiModelProperty;
import lombok.Data;
// 先使用@ApiModel来标注类
@ApiModel(value="用户登录表单对象",description="用户登录表单对象")
@Data //getter,setter,swagger也需要这个
public class LoginForm {
// 使用ApiModelProperty来标注字段属性。
@ApiModelProperty(value = "用户名",required = true,example = "root")
private String username;
@ApiModelProperty(value = "密码",required = true,example = "123456")
private String password;
}@ApiOperation(value = "登录接口",notes = "登录接口的说明")
@PostMapping("/login")
public LoginForm login(@RequestBody LoginForm loginForm){
return loginForm;
}
5.3.2 请求参数是非实体类
5.3.2.1 声明入参是URL参数
// 使用URL query参数
@ApiOperation(value = "登录接口2",notes = "登录接口的说明2")
@ApiImplicitParams({
@ApiImplicitParam(name = "username",//参数名字
value = "用户名",//参数的描述
required = true,//是否必须传入
//paramType定义参数传递类型:有path,query,body,form,header
paramType = "query"
)
,
@ApiImplicitParam(name = "password",//参数名字
value = "密码",//参数的描述
required = true,//是否必须传入
paramType = "query"
)
})
@PostMapping(value = "/login2")
public LoginForm login2(String username,String password){
System.out.println(username+":"+password);
LoginForm loginForm = new LoginForm();
loginForm.setUsername(username);
loginForm.setPassword(password);
return loginForm;
}
5.3.2.2 声明入参是URL路径参数
// 使用路径参数
@PostMapping("/login3/{id1}/{id2}")
@ApiOperation(value = "登录接口3",notes = "登录接口的说明3")
@ApiImplicitParams({
@ApiImplicitParam(name = "id1",//参数名字
value = "用户名",//参数的描述
required = true,//是否必须传入
//paramType定义参数传递类型:有path,query,body,form,header
paramType = "path"
)
,
@ApiImplicitParam(name = "id2",//参数名字
value = "密码",//参数的描述
required = true,//是否必须传入
paramType = "path"
)
})
public String login3(@PathVariable Integer id1,@PathVariable Integer id2){
return id1+":"+id2;
}
5.3.2.3 声明入参是header参数
// 用header传递参数
@PostMapping("/login4")
@ApiOperation(value = "登录接口4",notes = "登录接口的说明4")
@ApiImplicitParams({
@ApiImplicitParam(name = "username",//参数名字
value = "用户名",//参数的描述
required = true,//是否必须传入
//paramType定义参数传递类型:有path,query,body,form,header
paramType = "header"
)
,
@ApiImplicitParam(name = "password",//参数名字
value = "密码",//参数的描述
required = true,//是否必须传入
paramType = "header"
)
})
public String login4( @RequestHeader String username,
@RequestHeader String password){
return username+":"+password;
}
5.3.2.4 声明文件上传参数
// 有文件上传时要用@ApiParam,用法基本与@ApiImplicitParam一样,不过@ApiParam用在参数上
// 或者你也可以不注解,swagger会自动生成说明
@ApiOperation(value = "上传文件",notes = "上传文件")
@PostMapping(value = "/upload")
public String upload(@ApiParam(value = "图片文件", required = true)MultipartFile
uploadFile){
String originalFilename = uploadFile.getOriginalFilename();
return originalFilename;
}
// 多个文件上传时,**swagger只能测试单文件上传**
@ApiOperation(value = "上传多个文件",notes = "上传多个文件")
@PostMapping(value = "/upload2",consumes = "multipart/*", headers = "contenttype=multipart/form-data")
public String upload2(@ApiParam(value = "图片文件", required = true,allowMultiple =
true)MultipartFile[] uploadFile){
StringBuffer sb = new StringBuffer();
for (int i = 0; i < uploadFile.length; i++) {
System.out.println(uploadFile[i].getOriginalFilename());
sb.append(uploadFile[i].getOriginalFilename());
sb.append(",");
}
return sb.toString();
}
// 既有文件,又有参数
@ApiOperation(value = "既有文件,又有参数",notes = "既有文件,又有参数")
@PostMapping(value = "/upload3")
@ApiImplicitParams({
@ApiImplicitParam(name = "name",
value = "图片新名字",
required = true
)
})
public String upload3(@ApiParam(value = "图片文件", required = true)MultipartFile
uploadFile,
String name){
String originalFilename = uploadFile.getOriginalFilename();
return originalFilename+":"+name;
}
5.4 定义接口响应
5.4.1 响应是实体类
// 返回被@ApiModel标注的类对象
@ApiOperation(value = "实体类响应",notes = "返回数据为实体类的接口")
@PostMapping("/role1")
public LoginForm role1(@RequestBody LoginForm loginForm){
return loginForm;
}
5.4.2 响应是非实体类
// 其他类型的,此时不能增加字段注释,所以其实swagger推荐使用实体类
@ApiOperation(value = "非实体类",notes = "非实体类")
@ApiResponses({
@ApiResponse(code=200,message = "调用成功"),
@ApiResponse(code=401,message = "无权限" )
5.5 Swagger UI增强
你可能会觉得现在这个UI不是很好看,现在有一些第三方提供了一些Swagger UI增强,比较流行的是
swagger-bootstrap-ui
在swagger配置类中增加注解 @EnableSwaggerBootstrapUI :
}
)
@PostMapping("/role2")
public String role2(){
return " {\n" +
" name:\"广东\",\n" +
" citys:{\n" +
" city:[\"广州\",\"深圳\",\"珠海\"]\n" +
" }\n" +
" }";
}
5.5 Swagger UI增强
<!-- 引入swagger-bootstrap-ui依赖包-->
<dependency>
<groupId>com.github.xiaoymin</groupId>
<artifactId>swagger-bootstrap-ui</artifactId>
<version>1.9.6</version>
</dependency>@Configuration // 标明是配置类
@EnableSwagger2 //开启swagger功能
@EnableSwaggerBootstrapUI // 开启SwaggerBootstrapUI
public class SwaggerConfig {
// 省略配置内容
}5.6 整合Spring Security注意
.antMatchers("/swagger**/**").permitAll()
.antMatchers("/webjars/**").permitAll()
.antMatchers("/v2/**").permitAll()
.antMatchers("/doc.html").permitAll() // 如果你用了bootstarp的Swagger UI界面,加一个这
个。
6. @Configuration和@Component
package edu.xja.pojo;
import com.baomidou.mybatisplus.annotation.IdType;
import com.baomidou.mybatisplus.annotation.TableField;
import com.baomidou.mybatisplus.annotation.TableId;
import com.baomidou.mybatisplus.annotation.TableName;
import java.io.Serializable;
import java.time.LocalDateTime;
import io.swagger.annotations.ApiModel;
import io.swagger.annotations.ApiModelProperty;
import lombok.Getter;
import lombok.Setter;
import lombok.experimental.Accessors;
/**
* <p>
*
* </p>
*
* @author sunwz
* @since 2023年04月10日
*/
@Getter
@Setter
@Accessors(chain = true)
@TableName("cargo")
@ApiModel(value = "Cargo对象", description = "")
public class Cargo implements Serializable {
private static final long serialVersionUID = 1L;
@TableId(value = "id", type = IdType.AUTO)
private Integer id;
@ApiModelProperty(value = "名字",example = "小猪佩奇玩偶",allowableValues =
"range[3,10]",required = true)
@TableField("name")
private String name;
@TableField("unit")
private String unit;
@TableField("num")
private Integer num;
@TableField("price")
private Double price;
@TableField("manufacturer")
private String manufacturer;
@TableField("classify")
private Integer classify;
@TableField("time")
private LocalDateTime time;
@TableField("operator")
private String operator;
}package edu.xja.pojo;
import lombok.Data;
/**
* <p>
*
* </p>
*
* @author sunwz
* @version 1.0
* @since 2023/4/10 14:11
*/
@Data
public class Student {
private String name = "张三";
private Cargo cargo;
}package edu.xja.ex;
import edu.xja.pojo.Cargo;
import edu.xja.pojo.Student;
import org.springframework.context.annotation.Bean;
import org.springframework.context.annotation.Configuration;
/**
* <p>
*
* </p>
*
* @author sunwz
* @version 1.0
* @since 2023/4/10 13:45
*/
@Configuration
public class ConfigurationTest {
private String id = "10010";
public String getId() {
return id;
}
/*@Bean
public Student student(){
Student student = new Student();
student.setCargo(cargo());
return student;
}
@Bean
public Cargo cargo(){
return new Cargo().setId(1).setName("哈哈");
}*/
}package edu.xja.ex;
import edu.xja.pojo.Cargo;
import edu.xja.pojo.Student;
import org.springframework.beans.factory.annotation.Autowired;
import org.springframework.context.annotation.Bean;
import org.springframework.stereotype.Component;
/**
* <p>
*
* </p>
*
* @author sunwz
* @version 1.0
* @since 2023/4/10 13:45
*/
@Component
public class ComponentTest {
private String id = "10086";
public String getId() {
return id;
}
@Bean
public Cargo cargo(){
return new Cargo().setId(1).setName("哈哈");
}
@Bean
public Student student(){
Student student = new Student();
//此处报错不影响运行,使用@Bean注释的方法被直接调用。请使用依赖项注入。检查信息:报告错误使
用代理方法的警告。
// Spring Framework 5.2引入了@Configuration类处理的优化,
// 可以通过属性@Configuration(proxyBeanMethods = false)来启用。
// 如果你禁用proxyBeanMethods不再创建代理实例,
// 并且调用该方法会再次调用它(每次返回一个新实例)。
// 因此,您无法保证您实际上在上下文中注入了相应的bean。
student.setCargo(cargo());
return student;
}
}package edu.xja;
import edu.xja.ex.ComponentTest;
import edu.xja.ex.ConfigurationTest;
import edu.xja.pojo.Cargo;
import edu.xja.pojo.Student;
import org.springframework.boot.SpringApplication;
import org.springframework.boot.autoconfigure.SpringBootApplication;
import org.springframework.context.ApplicationContext;
import org.springframework.context.ConfigurableApplicationContext;
@SpringBootApplication
public class SwaggerApplication {
public static void main(String[] args) {
ApplicationContext run = SpringApplication.run(SwaggerApplication.class,
args);
ComponentTest test1 = run.getBean(ComponentTest.class);
System.out.println("test1 = " + test1.getId());
ConfigurationTest test2 = run.getBean(ConfigurationTest.class);
System.out.println("test2 = " + test2.getId());
//读取配置类创建对象
Cargo cargo = run.getBean(Cargo.class);
Student student = run.getBean(Student.class);
System.out.println(cargo);
System.out.println(student.getCargo());
}
}(1)
Spring Boot启动的时候类上有一个注解@SpringBootApplication,
程序通过SpringApplication.run()将本类的字节码传递到这个类中,从通过反射机制加载这个注解。
@SpringBootApplication是一个派生注解,点击去发现 @EnableAutoConfiguration这就是开启自动配置的注解,
通过这个注解找到@Improt 导入的注解找到 META-INF/spring.factories配置文件中的所有自动配置类,并对其进行加载
,而这些自动配置类都是以AutoConfiguration结尾来命名的,它实际上就是一个JavaConfig形式的Spring容器配置类,
它能通过以Properties结尾命名的类中取得在全局配置文件中配置的属性如:server.port,
而XxxxProperties类是通过@ConfigurationProperties注解与全局配置文件中对应的属性进行绑定的,这样就完成了一个自动配置功能。
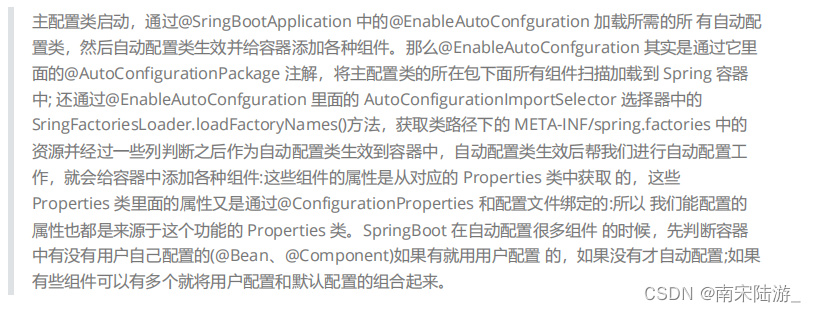
(2)
主配置类启动,通过@SringBootApplication 中的@EnableAutoConfguration 加载所需的所 有自动配置类,
然后自动配置类生效并给容器添加各种组件。那么@EnableAutoConfguration 其实是通过它里面的@AutoConfigurationPackage 注解,
将主配置类的所在包皮下面所有子包 里面的所有组件扫描加载到 Spring 容器中;
还通过@EnableAutoConfguration 里面的 AutoConfigurationImportSelector 选择器中的 SringFactoriesLoader.loadFactoryNames()方法,
获取类路径下的 META-INF/spring.factories 中的 资源并经过一些列判断之后作为自动配置类生效到容器中,自动配置类生效后帮我们进行自 动配置工作,
就会给容器中添加各种组件:这些组件的属性是从对应的 Properties 类中获取 的,
这些 Properties 类里面的属性又是通过@ConfigurationProperties 和配置文件绑定的:所以 我们能配置的属性也都是来源于这个功能的 Properties 类。
SpringBoot 在自动配置很多组件 的时候,先判断容器中有没有用户自己配置的(@Bean、@Component)如果有就用用户配置 的,
如果没有,才自动配置;如果有些组件可以有多个就将用户配置和默认配置的组合起来


 933
933

 被折叠的 条评论
为什么被折叠?
被折叠的 条评论
为什么被折叠?
 到【灌水乐园】发言


