


本篇概览
-
本章我们来一起阅读和分析 SpringMVC 的部分源码,看看收到 POST 请求中的二进制文件后,SpingMVC 框架是如何处理的;
-
使用了 SpringMVC 框架的 web 应用中,接收上传文件时,一般分以下三步完成:
-
在 spring 配置文件中配置一个 bean:
<bean id="multipartResolver"class="org.springframework.web.multipart.commons.CommonsMultipartResolver"><property name="defaultEncoding" value="utf-8" /><property name="maxUploadSize" value="10485760000" /><property name="maxInMemorySize" value="40960" /></bean>
复制代码
-
pom.xml 中添加 apache 的 commons-fileupload 库的依赖:
<dependency><groupId>commons-fileupload</groupId><artifactId>commons-fileupload</artifactId><version>1.3.1</version></dependency>
复制代码
-
开发业务 Controller 的响应方法,以下代码是将 POST 的文件存储到应用所在的电脑上:
@RequestMapping(value="/upload",method= RequestMethod.POST)public void upload(HttpServletRequest request,HttpServletResponse response,@RequestParam("comment") String comment,@RequestParam("file") MultipartFile file) throws Exception {logger.info("start upload, comment [{}]", comment);if(null==file || file.isEmpty()){logger.error("file item is empty!");responseAndClose(response, "文件数据为空");return;}//上传文件路径String savePath = request.getServletContext().getRealPath("/WEB-INF/upload");//上传文件名String fileName = file.getOriginalFilename();logger.info("base save path [{}], original file name [{}]", savePath, fileName);//得到文件保存的名称fileName = mkFileName(fileName);//得到文件保存的路径String savePathStr = mkFilePath(savePath, fileName);logger.info("real save path [{}], real file name [{}]", savePathStr, fileName);File filepath = new File(savePathStr, fileName);//确保路径存在if(!filepath.getParentFile().exists()){logger.info("real save path is not exists, create now");filepath.getParentFile().mkdirs();}String fullSavePath = savePathStr + File.separator + fileName;//存本地file.transferTo(new File(fullSavePath));logger.info("save file success [{}]", fullSavePath);responseAndClose(response, "Spring MVC环境下,上传文件成功");}
复制代码
-
如上所示,方法入参中的 MultipartFile 就是 POST 的文件对应的对象,调用 file.transferTo 方法即可将上传的文件创建到业务所需的位置;
三个疑问
-
虽然业务代码简单,以上几步即可完成对上传文件的接收和处理,但是有几个疑问想要弄清楚:
-
为什么要配置名为 multipartResolver 的 bean;
-
为什么要依赖 apache 的 commons-fileupload 库;
-
从客户端的 POST 到 Controller 中的 file.transferTo 方法调用,具体做了哪些文件相关的操作?
-
接下来我们就一起来看看 SpringMVC 的源码,寻找这几个问题的答案;
Spring 版本
-
本文涉及的 Spring 相关库,例如 spring-core、spring-web、spring-webmvc 等,都是 4.0.2.RELEASE 版本;
SpringMVC 源码
-
先来看下入口类 DispatcherServlet 的源码,在应用初始化的时候会调用 initMultipartResolver 方法:
this.multipartResolver = context.getBean(MULTIPART_RESOLVER_BEAN_NAME, MultipartResolver.class);...
复制代码
-
所以,如果配置了名为 multipartResolver 的 bean,就会 DispatcherServlet 的 multipartResolver 保存下来;
-
再来看一下处理 POST 请求时候的调用链:
FrameworkServlet.doPost->FrameworkServlet.processRequest->DispatcherServlet.doService->DispatcherServlet.doDispatch->DispatcherServlet.checkMultipart->multipartResolver.resolveMultipart(request)
复制代码
-
因此,应用收到上传文件的请求时,最终会调用 multipartResolver.resolveMultipart;
第一个疑问已经解开:SpringMVC 框架在处理 POST 请求时,会使用名为 multipartResolver 的 bean 来处理文件;
-
CommonsMultipartResolver.resolveMultipart 方法中会调用 parseRequest 方法,我们看 parseRequest 方法的源码:
String encoding = this.determineEncoding(request);FileUpload fileUpload = this.prepareFileUpload(encoding);try {List<FileItem> fileItems = ((ServletFileUpload)fileUpload).parseRequest(request);return this.parseFileItems(fileItems, encoding);} catch (SizeLimitExceededException var5) {throw new MaxUploadSizeExceededException(fileUpload.getSizeMax(), var5);} catch (FileUploadException var6) {throw new MultipartException("Could not parse multipart servlet request", var6);}
复制代码
-
从以上代码可以发现,在调用 prepareFileUpload 方法的时候,相关的 fileItemFactory 和 fileUpload 对象都已经是 commons-fileupload 库中定义的类型了,并且最终还是调用由 commons-fileupload 库中的 ServletFileUpload.parseRequest 方法负责解析工作,构建 FileItem 对象; 第二个疑问已经解开:SpringMVC 框架在处理 POST 请求时,本质是调用 commons-fileupload 库中的 API 来处理的;
-
继续关注 CommonsMultipartResolver.parseRequest 方法,里面调用了 ServletFileUpload.parseRequest 方法,最终由 FileUploadBase.parseRequest 方法来处理:
public List<FileItem> parseRequest(RequestContext ctx)throws FileUploadException {List<FileItem> items = new ArrayList<FileItem>();boolean successful = false;try {FileItemIterator iter = getItemIterator(ctx);FileItemFactory fac = getFileItemFactory();if (fac == null) {throw new NullPointerException("No FileItemFactory has been set.");}while (iter.hasNext()) {final FileItemStream item = iter.next();// Don't use getName() here to prevent an InvalidFileNameException.final String fileName = ((FileItemIteratorImpl.FileItemStreamImpl) item).name;FileItem fileItem = fac.createItem(item.getFieldName(), item.getContentType(),item.isFormField(), fileName);items.add(fileItem);try {Streams.copy(item.openStream(), fileItem.getOutputStream(), true);} catch (FileUploadIOException e) {throw (FileUploadException) e.getCause();} catch (IOException e) {throw new IOFileUploadException(format("Processing of %s request failed. %s",MULTIPART_FORM_DATA, e.getMessage()), e);}final FileItemHeaders fih = item.getHeaders();fileItem.setHeaders(fih);}successful = true;return items;} catch (FileUploadIOException e) {throw (FileUploadException) e.getCause();} catch (IOException e) {throw new FileUploadException(e.getMessage(), e);} finally {if (!successful) {for (FileItem fileItem : items) {try {fileItem.delete();} catch (Throwable e) {// ignore it}}}}}
复制代码
-
重点关注这一段: Streams.copy(item.openStream(), fileItem.getOutputStream(), true); ,这是一次流的拷贝,将提交文件的 inputstrem 写入到一个 outputstream,我们再看看 getOutputStream 方法的源码:
public OutputStream getOutputStream()throws IOException {if (dfos == null) {File outputFile = getTempFile();dfos = new DeferredFileOutputStream(sizeThreshold, outputFile);}return dfos;}
复制代码
-
原来如此,会准备一个临时文件,上传的文件通过流拷贝写入到临时文件中了; 等一下,事情没那么简单!!!
-
上面的代码中并没有直接返回文件对象 outputFile,而是创建了一个 DeferredFileOutputStream 对象,这是个什么东西?另外 sizeThreshold 这个参数是干啥用的?
-
为了搞清楚上面两个问题,我们从 Streams.copy 方法开始看吧:a. Streams.copy 方法的关键代码如下:
for (;;) {int res = in.read(buffer);if (res == -1) {break;}if (res > 0) {total += res;if (out != null) {out.write(buffer, 0, res);}}}
复制代码
-
上述代码表明,steam 的 copy 过程中会调用 OutputStream 的 write 方法;
b. DeferredFileOutputStream 类没有 write 方法,去看它的父类 DeferredFileOutputStream 的 write 方法:
public void write(byte b[]) throws IOException{checkThreshold(b.length);getStream().write(b);written += b.length;}
复制代码
-
先调用 checkThreshold 方法,检查 已写入长度 加上 即将写入的长度 是否达到 threshold 值,如果达到就会将 thresholdExceeded 设置为 true,并调用 thresholdReached 方法;
c. thresholdReached 方法源码如下:
protected void thresholdReached() throws IOException{if (prefix != null) {outputFile = File.createTempFile(prefix, suffix, directory);}FileOutputStream fos = new FileOutputStream(outputFile);memoryOutputStream.writeTo(fos);currentOutputStream = fos;memoryOutputStream = null;}
复制代码
-
真相大白:threshold 是一个阈值,如果文件比 threshold 小,就将文件存入内存,如果文件比 threshold 大就写入到磁盘中去,这显然是个处理文件时的优化手段;
-
注意这一行代码: currentOutputStream = fos; ,原本 currentOutputStream 是基于内存的 ByteArrayOutputStream,如果超过了 threshold,就改为基于文件的 FileOutputStream 对象,后续再执行 getStream().write(b)的时候,就不再写入到内存,而是写入到文件了;
-
我们再回到主线:CommonsMultipartResolver,这里 FileItem 对象在 parseFileItems 方法中经过处理,被放入了 CommonsMultipartFile 对象中,再被放入 MultipartParsingResult 对象中,最后被放入 DefaultMultipartHttpServletRequest 对象中,返回到 DispatcherServlet.doDispatch 方法中,然后传递到业务的 controller 中处理;
-
业务 Controller 的响应方法中,调用了 file.transferTo 方法将临时文件写入到业务指定的文件中,transferTo 方法中有一行关键代码: this.fileItem.write(dest); ,我们打开 DiskFileItem 类,看看这个 write 方法的源码:
public void write(File file) throws Exception {if (isInMemory()) {FileOutputStream fout = null;try {fout = new FileOutputStream(file);fout.write(get());} finally {if (fout != null) {fout.close();}}} else {File outputFile = getStoreLocation();if (outputFile != null) {// Save the length of the filesize = outputFile.length();/** The uploaded file is being stored on disk* in a temporary location so move it to the* desired file.*/if (!outputFile.renameTo(file)) {BufferedInputStream in = null;BufferedOutputStream out = null;try {in = new BufferedInputStream(new FileInputStream(outputFile));out = new BufferedOutputStream(new FileOutputStream(file));IOUtils.copy(in, out);} finally {if (in != null) {try {in.close();} catch (IOException e) {// ignore}}if (out != null) {try {out.close();} catch (IOException e) {// ignore}}}}} else {/** For whatever reason we cannot write the* file to disk.*/throw new FileUploadException("Cannot write uploaded file to disk!");}}}
复制代码
-
如上所示,依然是对 DeferredFileOutputStream 对象的操作,如果数据在内存中,就写入到指定文件,否则就尝试将临时文件 rename 为指定文件,如果 rename 失败,就会读取临时文件的二进制流,再写到指定文件上去;
-
另外,DiskFileItem 中出现的 cachedContent 对象,其本身也就是 DeferredFileOutputStream 的内存数据;
-
至此,第三个疑问也解开了:**- 上传的文件如果小于指定的阈值,就会被保存在内存中,否则就存在磁盘上,留给业务代码用,业务代码在使用时通过 CommonsMultipartFile 对象来操作;</fotn>
-
似乎又有一个疑问了:这些临时文件存在内存或者磁盘上,什么时候清理呢,不清理岂不是越来越多?
-
在 DispatcherServlet.doDispatch 方法中,有这么一段:
finally {if (asyncManager.isConcurrentHandlingStarted()) {// Instead of postHandle and afterCompletionmappedHandler.applyAfterConcurrentHandlingStarted(processedRequest, response);return;}// Clean up any resources used by a multipart request.if (multipartRequestParsed) {cleanupMultipart(processedRequest);}}
复制代码
-
关键代码是 cleanupMultipart(processedRequest); ,进去跟踪发现会调用 CommonsFileUploadSupport.cleanupFileItems 方法,最终调用 DiskFileItem.delete 方法,将临时文件清理掉;
-
至此 SpringMVC 源码分析就结束了,接下来列出一些 web 应用的源码,作为可能用到的参考信息;
demo 源码下载
-
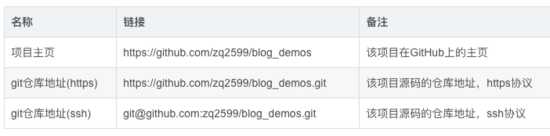
文中提到的 demo 工程,您可以在 GitHub 下载,地址和链接信息如下表所示:
-
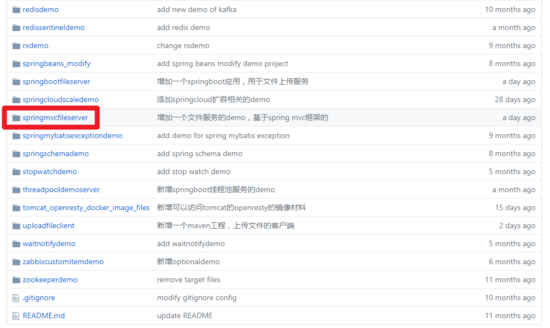
这个 git 项目中有多个目录,本次所需的资源放在 springmvcfileserver,如下图红框所示:
-
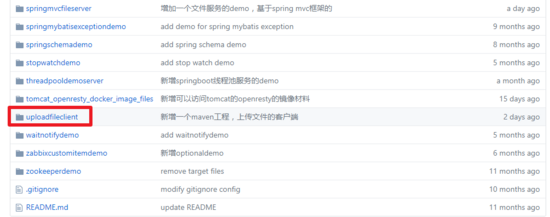
如果您想了解如何 POST 二进制文件到服务端,请下载 uploadfileclient 这个文件夹下的客户端 demo 工程,如下图红框所示:
-
如果您不想让 SpringMVC 处理上传的文件,而是自己去调用 apache 的 commons-fileupload 库来做些更复杂的操作,您可以参考 fileserverdemo 这个文件夹下的 demo 工程,如下图红框所示:

-
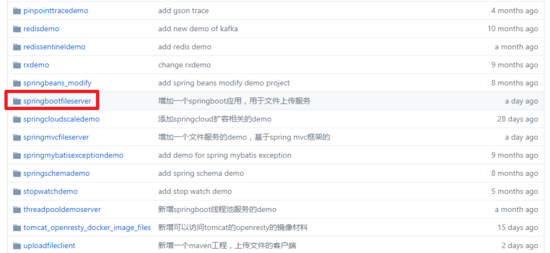
如果您的应用是基于 springboot 的,实现文件服务可以参考 springbootfileserver 这个文件夹下的 demo 工程,如下图红框所示:
-
至此,本次阅读和分析实战已全部完成,在您学习和理解 SpringMVC 框架的过程中,希望本文能对您有所帮助,如果发现文中有错误,也真诚的期待您能留下意见;


 8113
8113


 被折叠的 条评论
为什么被折叠?
被折叠的 条评论
为什么被折叠?
 到【灌水乐园】发言


