


前情提要
之前在分析 Spring XML 配置文件资源在加载的时候,会根据 Spring 提供的约束文件对 XML 文件内容进行校验。通常情况下,解析器会根据 XML 文件中声明的约束文件的 URL 下载约束文件,对 XML 文件进行校验。
但是,有些时候,Spring 会运行在离线环境或者网络受限的环境中,这时不具备下载约束文件的条件。为了解决这个问题,Spring 工程中内置了这些约束文件,使 XML 加载的过程中不需要通过网络下载约束文件。这种情况下,需要有一种方式告诉解析器如何找到正确的约束文件。
这便是 EntityResolver 要解决的问题。
EntityResolver
EntityResolver 是org.xml.sax包中定义的一个接口,在 Spring 框架中,提供了几个 EntityResolver 的实现类,来负责处理 XML 配置文件所需要的约束文件:

这几个实现类,在之前的源码分析过程中已经了解过了,可以参考:Spring 源码阅读 07:加载 BeanDefinition 的过程(资源加载阶段)
我们说回到 EntityResolver 接口,它的接口定义如下:
public interface EntityResolver {

public abstract InputSource resolveEntity (String publicId,
                                               String systemId)
        throws SAXException, IOException;

}
接口中包含了一个方法,就是告诉解析器如何找到约束文件。这个方法的返回值是一个包含了约束文件的 InputSource 对象。在调用时,需要调用方提供publicId和systemId两个参数,可以把它们理解为约束文件的标识符,它们可以从 XML 文件中获取到,下面通过两个 XML 文件,分别介绍一个如何分别在 DTD 约束文件和 XSD 约束文件中找到这两个标识符。
在如下的 XML 文件中:
<?xml version="1.0" encoding="UTF-8"?>
<beans xmlns="http://www.springframework.org/schema/beans"
       xmlns:xsi="http://www.w3.org/2001/XMLSchema-instance"
       xsi:schemaLocation="http://www.springframework.org/schema/beans http://www.springframework.org/schema/beans/spring-beans.xsd">
    <!-- bean 配置 -->
</beans>
publicId是空systemId是http://www.springframework.org/schema/beans/spring-beans.xsd
在如下的 XML 文件中:
<?xml version="1.0" encoding="UTF-8"?>
<!DOCTYPE beans PUBLIC "-//SPRING//DTD BEAN//EN" "http://www.springframework.org/dtd/spring-beans.dtd">
<beans>
    <!-- bean 配置 -->
</beans>
publicId是-//SPRING//DTD BEAN//ENsystemId是http://www.springframework.org/dtd/spring-beans.dtd
也就是说,systemId就是下载约束文件的网址,DTD约束文件还有一个publicId,而 XSD 约束文件没有publicId。
知道了这些,我们就可以分析 Spring 为 XML 查找约束文件的流程。
代理解析器
从之前的源码解析(Spring 源码阅读 07:加载 BeanDefinition 的过程(资源加载阶段)中,可以知道,Spring 提供给解析器的 EntityResolver 是 ResourceEntityResolver 类型,它的resolveEntity方法如下:
@Override
@Nullable
public InputSource resolveEntity(@Nullable String publicId, @Nullable String systemId)
      throws SAXException, IOException {

   InputSource source = super.resolveEntity(publicId, systemId);

   if (source == null && systemId != null) {
      /* 省略部分代码 */
   }

   return source;
}
首先调用了父类的resolveEntity方法,然后针对通过父类方法无法处理的情况,继续尝试使用systemId(也就是约束文件的路径)从查找。
继续查看它的父类 DelegatingEntityResolver 中的resolveEntity方法:
@Override
@Nullable
public InputSource resolveEntity(@Nullable String publicId, @Nullable String systemId)
      throws SAXException, IOException {

   if (systemId != null) {
      if (systemId.endsWith(DTD_SUFFIX)) {
         return this.dtdResolver.resolveEntity(publicId, systemId);
      }
      else if (systemId.endsWith(XSD_SUFFIX)) {
         return this.schemaResolver.resolveEntity(publicId, systemId);
      }
   }

   // Fall back to the parser's default behavior.
   return null;
}
在之前的源码阅读Spring 源码阅读:加载 BeanDefinition 的过程(资源加载阶段中,曾经分析过 ResourceEntityResolver 的创建过程,它会在构造方法中调用父类 DelegatingEntityResolver 的构造方法,其中会初始化dtdResolver和schemaResolver两个成员变量。
而从 DelegatingEntityResolver 的resolveEntity方法的代码中可以看到,这里的逻辑非常简单,就是根据systemId的后缀来判断约束文件的类型,然后委托给相应的解析器去处理。
下面分别看一下两种解析器分别是如何处理的。
XSD约束文件的处理
以下是PluggableSchemaResolver#resolveEntity方法的源码:
@Override
@Nullable
public InputSource resolveEntity(@Nullable String publicId, @Nullable String systemId) throws IOException {
   if (logger.isTraceEnabled()) {
      logger.trace("Trying to resolve XML entity with public id [" + publicId +
            "] and system id [" + systemId + "]");
   }

   if (systemId != null) {
      String resourceLocation = getSchemaMappings().get(systemId);
      if (resourceLocation == null && systemId.startsWith("https:")) {
         // Retrieve canonical http schema mapping even for https declaration
         resourceLocation = getSchemaMappings().get("http:" + systemId.substring(6));
      }
      if (resourceLocation != null) {
         Resource resource = new ClassPathResource(resourceLocation, this.classLoader);
         try {
            InputSource source = new InputSource(resource.getInputStream());
            source.setPublicId(publicId);
            source.setSystemId(systemId);
            if (logger.isTraceEnabled()) {
               logger.trace("Found XML schema [" + systemId + "] in classpath: " + resourceLocation);
            }
            return source;
         }
         catch (FileNotFoundException ex) {
            if (logger.isDebugEnabled()) {
               logger.debug("Could not find XML schema [" + systemId + "]: " + resource, ex);
            }
         }
      }
   }

   // Fall back to the parser's default behavior.
   return null;
}
这段代码的实现中包含了如下逻辑:
- 通过判断确保
systemId是非空的。 - 通过
getSchemaMappings().get(systemId)获取到一个resourceLocation。(通过后面的逻辑可以判断出,这个就是要加载的离线 XSD 文件的路径,后面在分析它是如何被获取到的) - 如果上一步没有获取到路径,并且
systemId是以https:开头的,就把它替换为http:再试一遍。 - 如果至此得到的路径不为空,那么根据路径加载相应的资源并封装成 InputSource 并返回。
下面分析一下resourceLocation这个路径是如何获取到的。找到getSchemaMappings()的源码:
private Map<String, String> getSchemaMappings() {
   Map<String, String> schemaMappings = this.schemaMappings;
   if (schemaMappings == null) {
      synchronized (this) {
         schemaMappings = this.schemaMappings;
         if (schemaMappings == null) {
            if (logger.isTraceEnabled()) {
               logger.trace("Loading schema mappings from [" + this.schemaMappingsLocation + "]");
            }
            try {
               Properties mappings =
                     PropertiesLoaderUtils.loadAllProperties(this.schemaMappingsLocation, this.classLoader);
               if (logger.isTraceEnabled()) {
                  logger.trace("Loaded schema mappings: " + mappings);
               }
               schemaMappings = new ConcurrentHashMap<>(mappings.size());
               CollectionUtils.mergePropertiesIntoMap(mappings, schemaMappings);
               this.schemaMappings = schemaMappings;
            }
            catch (IOException ex) {
               throw new IllegalStateException(
                     "Unable to load schema mappings from location [" + this.schemaMappingsLocation + "]", ex);
            }
         }
      }
   }
   return schemaMappings;
}
首先,schemaMappings这个成员变量在第一次执行这个方法的时候是空的,因此这里需要走到if语句块中的逻辑。在if语句块中,会从schemaMappingsLocation路径加载一个 Properties 对象,然后将加载出来的内容合并到schemaMappings中。这样,下次再调用这个方法的时候,就不需要再重新加载了。
这里可以看出来,schemaMappings是一个Map,再结合之前调用getSchemaMappings().get(systemId)方法的方式可以看出,这个 Map 中以 Key-Value 方式保存着 XSD 文件的systemId和离线文件的存储路径。
在刚才这段代码中,schemaMappings中的内容是从schemaMappingsLocation加载得到的,我们再看一下schemaMappingsLocation的内容具体是什么。
在定义schemaMappingsLocation的时候并没有进行初始化,但是在 PluggableSchemaResolver 的构造方法中,给它赋了值:
public PluggableSchemaResolver(@Nullable ClassLoader classLoader) {
   this.classLoader = classLoader;
   this.schemaMappingsLocation = DEFAULT_SCHEMA_MAPPINGS_LOCATION;
}
再找到赋给它的值:
public static final String DEFAULT_SCHEMA_MAPPINGS_LOCATION = "META-INF/spring.schemas";
之后,在找到META-INF/spring.schemas文件:
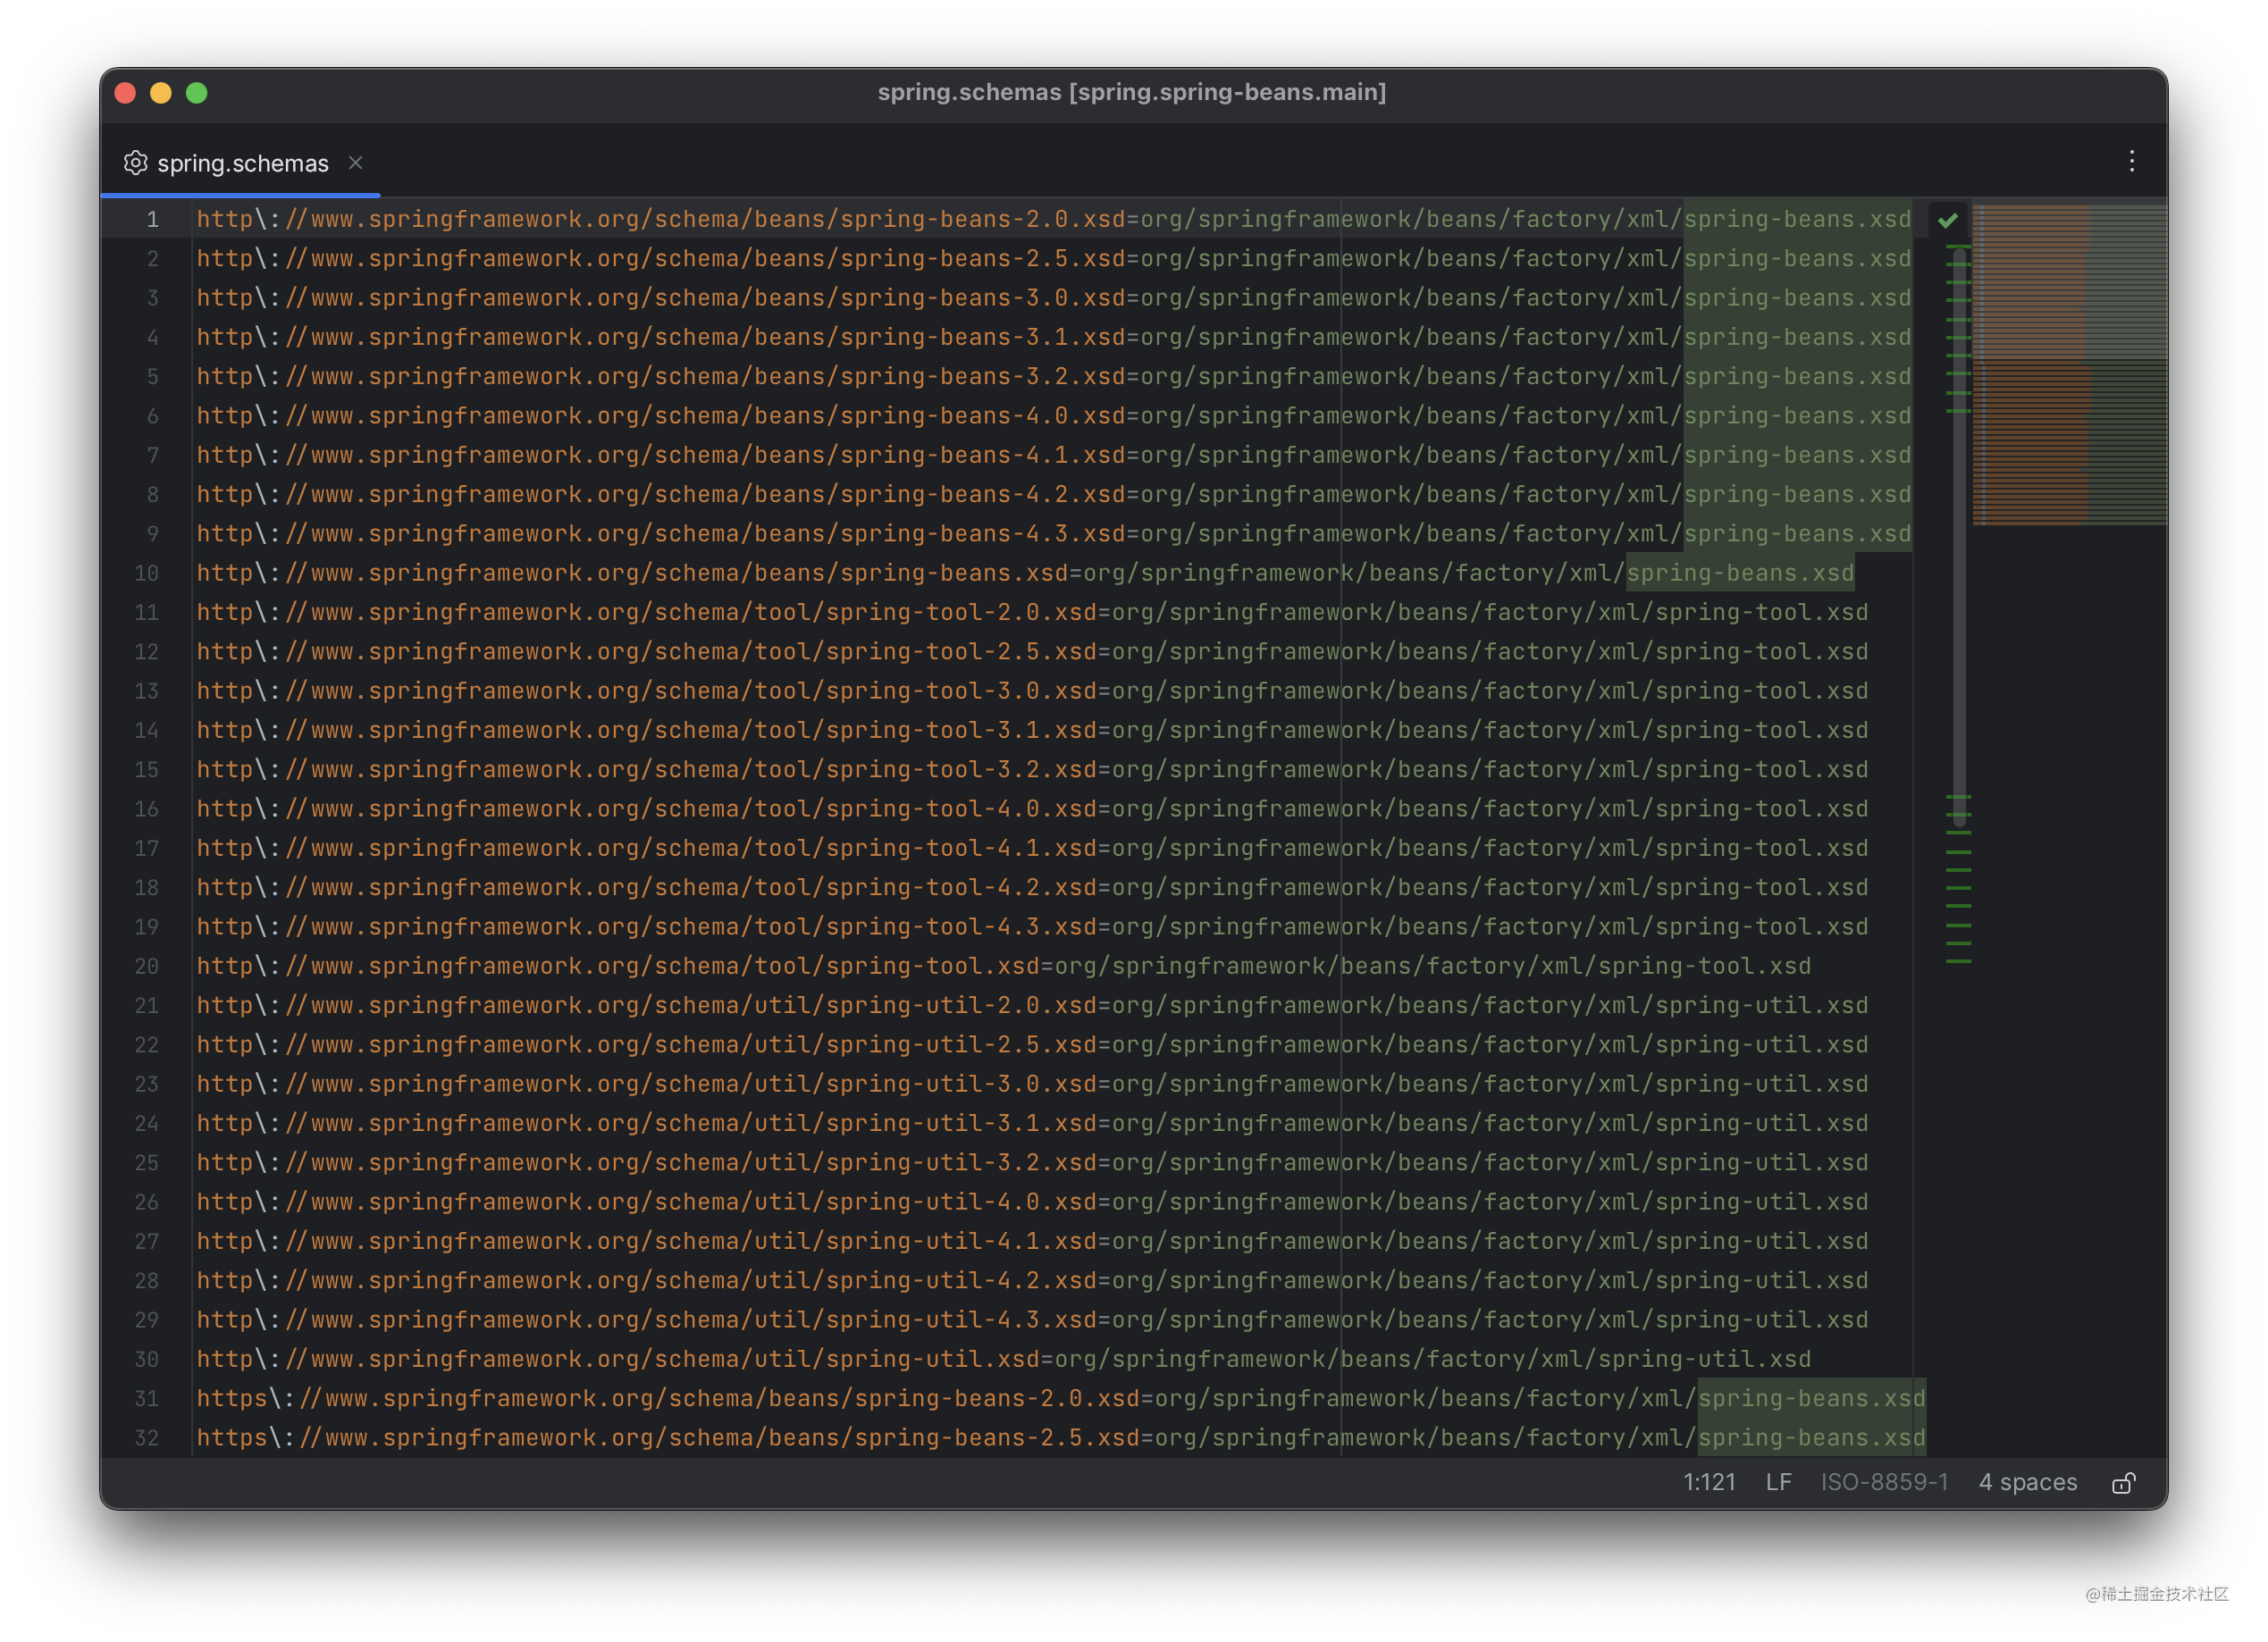
这个文件中的内容正是用 Key-Value 形式保存的systemId和离线文件的存储路径,根据这些路径,也都能找到 Spring 中内置的离线文件。
至此,我们搞清楚了,XSD 文件的解析器先从META-INF/spring.schemas文件中加载 Spring 中所有的 XSD 文件的systemId和离线文件的存储路径,保存在一个 Map 中,在根据提供的systemId从 Map 中找到离线的 XSD 文件的路径,并加载相应的文件资源。
DTD约束文件的处理
以下是BeansDtdResolver#resolveEntity方法的源码:
@Override
@Nullable
public InputSource resolveEntity(@Nullable String publicId, @Nullable String systemId) throws IOException {
   if (logger.isTraceEnabled()) {
      logger.trace("Trying to resolve XML entity with public ID [" + publicId +
            "] and system ID [" + systemId + "]");
   }

   if (systemId != null && systemId.endsWith(DTD_EXTENSION)) {
      int lastPathSeparator = systemId.lastIndexOf('/');
      int dtdNameStart = systemId.indexOf(DTD_NAME, lastPathSeparator);
      if (dtdNameStart != -1) {
         String dtdFile = DTD_NAME + DTD_EXTENSION;
         if (logger.isTraceEnabled()) {
            logger.trace("Trying to locate [" + dtdFile + "] in Spring jar on classpath");
         }
         try {
            Resource resource = new ClassPathResource(dtdFile, getClass());
            InputSource source = new InputSource(resource.getInputStream());
            source.setPublicId(publicId);
            source.setSystemId(systemId);
            if (logger.isTraceEnabled()) {
               logger.trace("Found beans DTD [" + systemId + "] in classpath: " + dtdFile);
            }
            return source;
         }
         catch (FileNotFoundException ex) {
            if (logger.isDebugEnabled()) {
               logger.debug("Could not resolve beans DTD [" + systemId + "]: not found in classpath", ex);
            }
         }
      }
   }

   // Fall back to the parser's default behavior.
   return null;
}
这段代码中包含了如下逻辑:
- 确保
systemId不为空,且以.dtd结尾。 - 确保
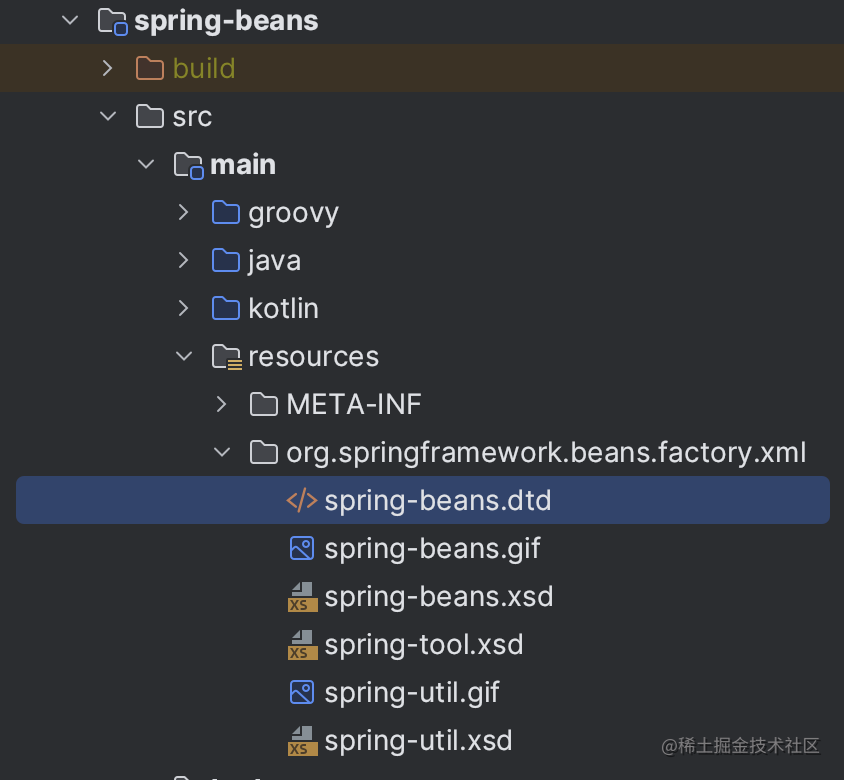
systemId字符串内容中包含spring-beans。 - 从类路径中加载
spring-beans.dtd并最终封装成 InputSource 返回。
在 Spring 的工程中,可以找到这个文件:


 1042
1042


 被折叠的 条评论
为什么被折叠?
被折叠的 条评论
为什么被折叠?
 到【灌水乐园】发言


