


一、回顾反射机制
反射的调用三步:1)获取类。2)获取方法。3)调用方法
调用方法:调用哪个对象,哪个方法,传什么参数,返回什么值。
方法(Do)类:
package test1;
public class Do {
    //定义方法
    public void doSome(){
        System.out.println("doSome()方法执行");
    }
    public String doSome(String s){
        System.out.println("doSome(String s)方法执行");
        return s;
    }
    public String doSome(String s,int i){
        System.out.println("doSome(String s,int i)方法执行");
        return s+i;
    }
}
测试类:
public class test1 {
    public static void main(String[] args) throws ClassNotFoundException, NoSuchMethodException, InstantiationException, IllegalAccessException, InvocationTargetException {
        //先获取类
       Class clazz=Class.forName("test1.Do");
       //再获取方法
       Method m= clazz.getDeclaredMethod("doSome", String.class, int.class);
       //调用方法
        //四要素:调用哪个对象,哪个方法,传什么参数,返回什么值
        //创建对象
       Object obj= clazz.newInstance();
       Object value= m.invoke(obj,"张三",23);
       System.out.println(value);
    }
    }
SpringDI核心实现
一个小练习:为手写Spring框架打前提
有这么一个类,类名叫:test1.Student,这个类符合javabean构造,还知道这个类中有一个属性叫age,且age类型为int类型,使用反射机制调用set方法,给Student对象的age属性赋值。
一个完整的javabean的Student类:
package test1;
public class Student {
    private String name;
    private int age;
    public Student(){

    }
    public Student(String name, int age) {
        this.name = name;
        this.age = age;
    }
    public String getName() {
        return name;
    }
    public void setName(String name) {
        this.name = name;
    }
    public int getAge() {
        return age;
    }
    public void setAge(int age) {
        this.age = age;
    }
    @Override
    public String toString() {
        return "Student{" +
                "name='" + name + '\'' +
                ", age=" + age +
                '}';
    }
}
测试类:
public class test1 {
    public static void main(String[] args) throws ClassNotFoundException, NoSuchMethodException, InstantiationException, IllegalAccessException, InvocationTargetException {
        //有这么一个类,类名叫:test1.Student
        //这个类符合javabean构造
        //还知道这个类中有一个属性叫age,且age类型为int类型
        //使用反射机制调用set方法,给Student对象的age属性赋值
        String className="test1.Student";//类名
        String propertyName="age";//属性
        //获取类
        Class clazz=Class.forName(className);
        //获取方法名
        String name="set"+propertyName.toUpperCase().charAt(0)+propertyName.substring(1);
        //获取方法
       Method m=clazz.getDeclaredMethod(name,int.class);
       //创建对象
       Object obj=clazz.newInstance();
       //调用方法
        m.invoke(obj,23);//无返回值类型
        System.out.println(obj);

    }
    }
org:框架的开发人员
com:框架的使用者
二、Spring IoC注解式开发
1.注解


2.反射注解
先创建一个注解,并定义其属性:
package com.hei;
import javax.lang.model.element.Element;
import java.lang.annotation.ElementType;
import java.lang.annotation.Retention;
import java.lang.annotation.RetentionPolicy;
import java.lang.annotation.Target;
//注解
@Target(ElementType.TYPE)//用于描述类、接口的注解
@Retention(RetentionPolicy.RUNTIME)//利用保留在class文件中,也可以用反射机制
public @interface Component {
    //注解属性
    //String属性类型
    //value属性名
    String value();
}
创建一个类,将注解附上:
package com.hei;
//value可以省略
@Component(value = "userbean")
public class User {

}
主函数利用反射机制:
现获取注解所在的类,再判断这个类上是否有注解,若存在,则获取注解。
public class test {
    public static void main(String[] args) throws ClassNotFoundException {
        //利用反射机制获取注解属性
        //现获取注解所在类
        Class clazz=Class.forName("com.hei.User");
        //判断类上有没有这个注解
       if(clazz.isAnnotationPresent(Component.class)){
           //获取注解
           Component com= (Component) clazz.getAnnotation(Component.class);
           System.out.println(com.value());
       }
    }
}


3.组件扫描原理
是扫描包下的类是否带了注解
类加载器
Java类加载器(Class Loader)是Java虚拟机(JVM)的一部分,负责将类的字节码加载到内存中,并将其转换为可执行的Java对象。根据类的全限定名(包括包路径和类名),定位并读取类文件的字节码。
public class ClassLoaderExample {
    public static void main(String[] args) throws ClassNotFoundException {
        // 使用系统类加载器加载并实例化一个类
        ClassLoader classLoader = ClassLoader.getSystemClassLoader();
        Class<?> clazz = classLoader.loadClass("com.example.MyClass");
        MyClass myObject = (MyClass) clazz.newInstance();

        // 调用加载的类的方法
        myObject.sayHello();
    }
}
class MyClass {
    public void sayHello() {
        System.out.println("Hello, World!");
    }
}
输出了:Hello,world.
题目
给一个包,将包下带有注解的类,扫描出来。
先创建一个注解,并定义其属性:
package com.hei.Annotion;
import java.lang.annotation.ElementType;
import java.lang.annotation.Retention;
import java.lang.annotation.RetentionPolicy;
import java.lang.annotation.Target;
//注解
@Target(ElementType.TYPE)//用于描述类、接口的注解
@Retention(RetentionPolicy.RUNTIME)//利用保留在class文件中,也可以用反射机制
public @interface Component {
    //注解属性
    //String属性类型
    //value属性名
    String value();
}
创建带有注解的类和不带有注解的类:
package com.hei.bean;
import com.hei.Annotion.Component;
@Component("userbean")
public class User {

}

package com.hei.bean;
public class Vip {
}

package com.hei.bean;
import com.hei.Annotion.Component;
@Component("oderbean")
public class Order {
}
测试类:
package com.hei.client;
import com.hei.Annotion.Component;
import java.io.File;
import java.io.IOException;
import java.net.URL;
import java.util.HashMap;
import java.util.Map;

public class test {
    public static void main(String[] args) throws IOException, ClassNotFoundException, InstantiationException, IllegalAccessException {
        Map<String,Object> hm=new HashMap<>();
        //只知道包名,要扫描包下的带有注释的类
        String Package="com.hei.bean";//包名
        //要把这个包名替换成路径
        String Pacpath=Package.replaceAll("\\.","/");
        //System.out.println(Pacpath);
        //运用类加载器,获取路径
       URL url= ClassLoader.getSystemClassLoader().getResources(Pacpath).nextElement();
       //获取绝对路径
        String path=url.getPath();
        //获取绝对路径下的文件
        File file=new File(path);
        File[] files=file.listFiles();//获取路径下所有内容
        for(File f:files){
            String name=f.getName();
            String s = name.split("\\.")[0];
            //System.out.println(s);
            String ClassName=Package+"."+s;//获取文件所在位置包名加类名
            //利用反射机制,获取包名
            Class clazz=Class.forName(ClassName);
            if(clazz.isAnnotationPresent(Component.class)){
               Component com= (Component) clazz.getAnnotation(Component.class);
               String id= com.value();
               Object obj= clazz.newInstance();
                hm.put(id,obj);
            }
        }
        System.out.println(hm);
    }
}


4.声明Bean的注解

后面三个注解都是基于第一个注解。
5.Spring注解使用

第一步:加入依赖在引入spring-context依赖中就已包含。
配置文件(spring.xml):
<beans xmlns="http://www.springframework.org/schema/beans"
       xmlns:xsi="http://www.w3.org/2001/XMLSchema-instance"
       xmlns:context="http://www.springframework.org/schema/context"
       xsi:schemaLocation="http://www.springframework.org/schema/beans http://www.springframework.org/schema/beans/spring-beans.xsd
                           http://www.springframework.org/schema/context http://www.springframework.org/schema/context/spring-context.xsd">
<!--    给spring框架指定要扫描哪些包的类-->
    <context:component-scan base-package="com.hei.bean"/>
</beans>
扫描的类:
package com.hei.bean;
import org.springframework.stereotype.Component;
@Component("userbean")
public class User {
}

package com.hei.bean;
import org.springframework.stereotype.Service;
@Service("vipbean")
public class Vip {
}

package com.hei.bean;
import org.springframework.stereotype.Controller;
@Controller//将value全部省略,bean名为类名变小写
public class Order {
}
测试类:
package com.hei;
import com.hei.bean.*;
import org.springframework.context.ApplicationContext;
import org.springframework.context.support.ClassPathXmlApplicationContext;
public class Test {
    @org.junit.Test
    public void test(){
        ApplicationContext applicationContext=new ClassPathXmlApplicationContext("spring.xml");
        User u= applicationContext.getBean("userbean",User.class);
        System.out.println(u);
        Vip v= applicationContext.getBean("vipbean",Vip.class);
        System.out.println(v);
        Order o=applicationContext.getBean("order",Order.class);
        System.out.println(o);
    }
    }


若有多个包:

6.选择性实例化Bean

第一种实现方法:
先定义带有注解的类:
package com.hei.bean;
import org.springframework.stereotype.Component;
import org.springframework.stereotype.Controller;
import org.springframework.stereotype.Repository;
import org.springframework.stereotype.Service;

@Controller
public class A {
    public A(){
        System.out.println("A的无参构造执行");
    }
}
@Component
class B{
    public B(){
        System.out.println("B的无参构造执行");
    }
}
@Service
class C{
    public C(){
        System.out.println("C的无参构造执行");
    }
}
@Repository
class D{
    public D(){
        System.out.println("D的无参构造执行");
    }
}
spring.xml配置文件中,use-deafult-filters=false使全部注解失效,通过context:include-filter type使想要的注解生效。
<beans xmlns="http://www.springframework.org/schema/beans"
       xmlns:xsi="http://www.w3.org/2001/XMLSchema-instance"
       xmlns:context="http://www.springframework.org/schema/context"
       xsi:schemaLocation="http://www.springframework.org/schema/beans http://www.springframework.org/schema/beans/spring-beans.xsd
                           http://www.springframework.org/schema/context http://www.springframework.org/schema/context/spring-context.xsd">
<!--    给spring框架指定要扫描哪些包的类-->
    <context:component-scan base-package="com.hei.bean" use-default-filters="false">
       <context:include-filter type="annotation" expression="org.springframework.stereotype.Service"/>
    </context:component-scan>

</beans>
测试类:
public class Test {
    @org.junit.Test
    public void test(){
        ApplicationContext applicationContext=new ClassPathXmlApplicationContext("spring.xml");
    }
    }
第二种方法:
通过context:exclude-filter type=" "使的注解失效。
 <context:component-scan base-package="com.hei.bean" >
      <context:exclude-filter type="annotation" expression="org.springframework.stereotype.Controller"/>
    </context:component-scan>
7.负责注入的注解
 1) @value注解
当属性类型为简单类型时,可以使用@Value注解进行注入,@Value可以用在定义属性上,也可用在set方法上,也可以用在构造方法的形参上。
Student类:
package com.hei.bean;
import org.springframework.beans.factory.annotation.Value;
import org.springframework.stereotype.Component;
@Component
public class Student {
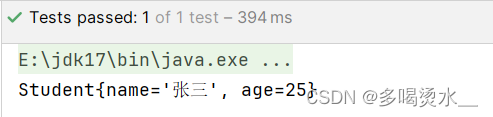
@Value("张三")
private String name;
@Value("25")
private int age;
@Override
public String toString() {
return "Student{" +
"name='" + name + '\'' +
", age=" + age +
'}';
}
}
spring.xml:
<context:component-scan base-package="com.hei.bean"></context:component-scan>测试类:
public class Test {
    @org.junit.Test
    public void test(){
        ApplicationContext applicationContext=new ClassPathXmlApplicationContext("spring.xml");
        Student s=applicationContext.getBean("student",Student.class);
        System.out.println(s);
    }
    }
2)@Autowired

@Autowired注解使用的时候,不需要指定任何属性,直接使用即可。
@Autowired可以用在定义属性上,也可用在set方法上,也可以用在构造方法的形参上。
@Autowiredhe@Qualifier联合使用,可根据名字自动装配。
接口:
package com.hei.bean;
public interface Order {
     void insert();
}
连接接口的类:
import com.hei.bean.Order;
import org.springframework.stereotype.Repository;

@Repository("orderDao")
public class OrderDao implements Order {
    @Override
    public void insert() {
        System.out.println("数据库正在保存信息");
    }
}
调用方法的类:
package com.hei.bean.Service;
import com.hei.bean.Dao.OrderDao;
import org.springframework.beans.factory.annotation.Autowired;
import org.springframework.stereotype.Service;

@Service("orderService")
public class OrderService {
    @Autowired
    private OrderDao orderDao;
    public void save(){
        orderDao.insert();
    }
}
spring.xml:
<context:component-scan base-package="com.hei.bean"></context:component-scan>测试类:
public class Test {
    @org.junit.Test
    public void test() {
        ApplicationContext applicationContext = new ClassPathXmlApplicationContext("spring.xml");
        OrderService o= applicationContext.getBean("orderService", OrderService.class);
        o.save();
    }
    }

3)@Resource

引入resource依赖:
 <dependency>
            <groupId>jakarta.annotation</groupId>
            <artifactId>jakarta.annotation-api</artifactId>
            <version>2.1.1</version>
        </dependency>
接口:
package com.hei.bean;
public interface Order {
     void insert();
}
连接接口的类:
package com.hei.bean.Dao;
import com.hei.bean.Order;
import org.springframework.stereotype.Repository;

@Repository("orderDao")
public class OrderDao implements Order {
    @Override
    public void insert() {
        System.out.println("数据库正在保存信息");
    }
}
调用方法的类:
package com.hei.bean.Service;
import com.hei.bean.Dao.OrderDao;
import jakarta.annotation.Resource;
import org.springframework.stereotype.Service;

@Service("orderService")
public class OrderService {
    @Resource(name = "orderDao")
    private OrderDao orderDao;
    public void save(){
        orderDao.insert();
    }
}
spring.xml:
<context:component-scan base-package="com.hei.bean"></context:component-scan>
测试类:
public class Test {
    @org.junit.Test
    public void test() {
        ApplicationContext applicationContext = new ClassPathXmlApplicationContext("spring.xml");
        OrderService o= applicationContext.getBean("orderService", OrderService.class);
        o.save();

    }
    }
8.全注解式开发
全注解式开发:不再使用配置文件,而是编写一个类替代配置文件。
其他的接口、类和上面的例子一样。
SpringConfig类:
package com.hei.bean;

import org.springframework.context.annotation.ComponentScan;
import org.springframework.context.annotation.Configuration;
//编写一个类代替Spring框架的配置文件
@Configuration
@ComponentScan({"com.hei.bean.Dao","com.hei.bean.Service"})
public class SpringConfig {
}
测试类:
public class Test {
    @org.junit.Test
    public void T(){
        AnnotationConfigApplicationContext a=new AnnotationConfigApplicationContext(SpringConfig.class);
        OrderService o= a.getBean("orderService",OrderService.class);
        o.save();
    }
}


 250
250

 被折叠的 条评论
为什么被折叠?
被折叠的 条评论
为什么被折叠?
 到【灌水乐园】发言


