


小实验
shh远程管理
ssh是一种安全通道协议,只能用来实现字符界面的远程登录。远程复制,远程文本传输。
ssh对通信双方的数据进行了加密。
用户名和密码登录
密钥对认证方式(可以实现免密登录)
ssh 22 网络层 传输层
数据传输的过程中是加密的
数据传输的过程中是压缩的
ssh分为服务端和客户端
服务端:Openssh
客户端:xshell moba
sshd 应用名称
22
ssh_config 针对客户端的配置文件
sshd_config 服务端的配置
都是配置文件,作用不同。
监听地址,对外提供的服务的地址
远程复制:把目标主机的文件复制到本机。
ssh -p 10022 root@192.169.60.30
scp root@192.168.60.30:/opt/xy102.txt /opt/
scp -r
scp -rP
scp -P
免密登录操作:
1、创建一个密钥文件
[root@test2 ~]# ssh-keygen -t ecdsa
Generating public/private ecdsa key pair.
Enter file in which to save the key (/root/.ssh/id_ecdsa):
Enter passphrase (empty for no passphrase):
Enter same passphrase again:
Your identification has been saved in /root/.ssh/id_ecdsa.
Your public key has been saved in /root/.ssh/id_ecdsa.pub.
The key fingerprint is:
SHA256:cfHfRXdOJFaFCh3qnArOT9oGSni0MbsVt4hyOZkSj9E root@test2
The key's randomart image is:
+---[ECDSA 256]---+
|          ....o+X|
|          .+...=o|
|   .    . o...  o|
|  o E . .= ... ..|
|   B X.+S.+   . .|
|  = &o+...       |
|   * =o.o        |
|    o  =.        |
|      ..o        |
+----[SHA256]-----+
2、进入.ssh目录下
[root@test2 ~]# cd /root/.ssh/
3、将公钥文件传给test3
[root@test2 .ssh]# ssh-copy-id -i id_ecdsa.pub -p 10022 root@192.168.60.30
/usr/bin/ssh-copy-id: INFO: Source of key(s) to be installed: "id_ecdsa.pub"
/usr/bin/ssh-copy-id: INFO: attempting to log in with the new key(s), to filter out any that are already installed
/usr/bin/ssh-copy-id: INFO: 1 key(s) remain to be installed -- if you are prompted now it is to install the new keys
4、刷新和生成密钥环境
[root@test2 .ssh]# ssh-agent bash
[root@test2 .ssh]# ssh-add
Identity added: /root/.ssh/id_ecdsa (/root/.ssh/id_ecdsa)
5、无需密码直接进入test3
[root@test2 .ssh]# ssh root@192.168.60.30
ssh: connect to host 192.168.60.30 port 22: Connection refused
xshell的免密登录操作:
1、新建一个xshell
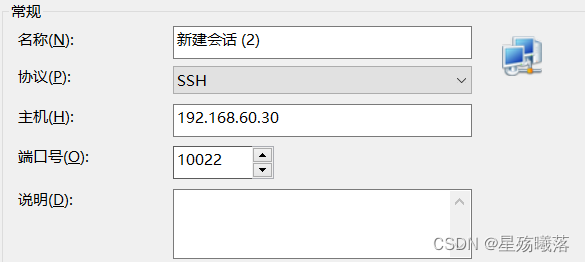
2、记住登录的用户

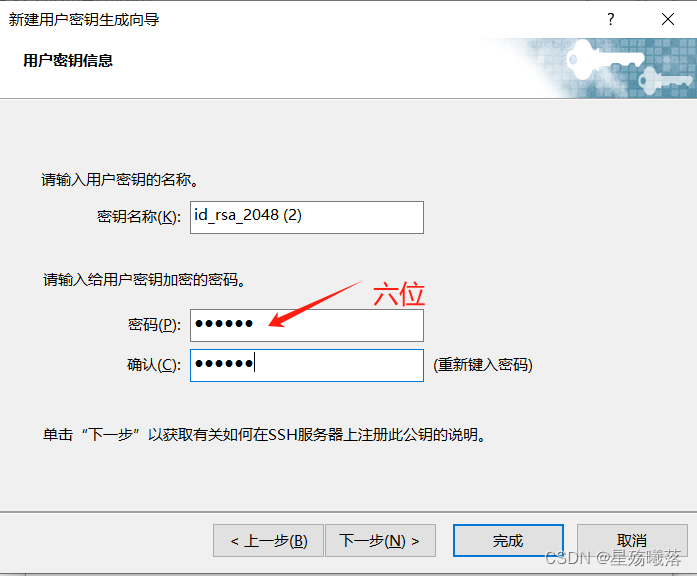
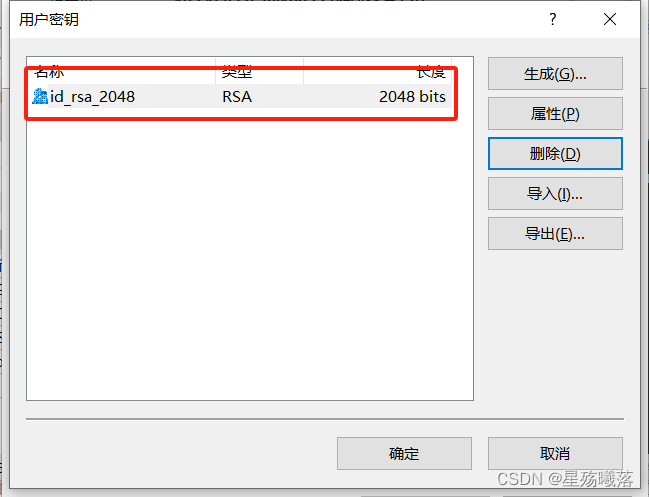
3、生成密钥

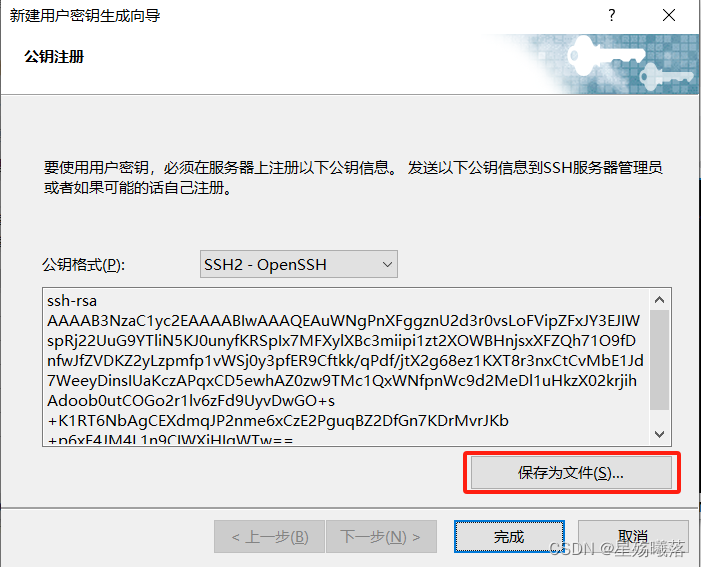
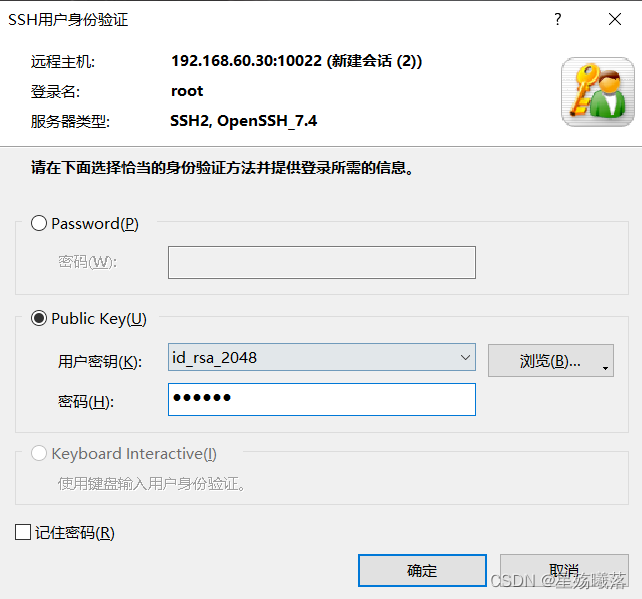
4、将密钥复制到.ssh目录下,并赋权
[root@test3 ~]# cd .ssh/
[root@test3 .ssh]# ls
id_ecdsa  id_ecdsa.pub  known_hosts
[root@test3 .ssh]# rz -E
rz waiting to receive.
[root@test3 .ssh]# ls
id_ecdsa  id_ecdsa.pub  id_rsa_2048.pub  known_hosts
[root@test3 .ssh]# cat id_rsa_2048.pub >> authorized_keys
[root@test3 .ssh]# ls
authorized_keys  id_ecdsa.pub     known_hosts
id_ecdsa         id_rsa_2048.pub
[root@test3 .ssh]# chmod 600 authorized_keys
sftp:远程文件传输协议
Openssh:包含3个功能
远程连接
远程复制
文件传输
sftp是加密的文件传输协议,传输效率比FTP低,但是更安全
sftp -P
ssh密钥认证
密钥对认证(免密登录)
密钥:密钥是一种参数,把明文转换成密文。转换成的密文是一种算法声场的参数。
密钥的形式分为两种,对称密钥,非对称密钥
ssh 非对称密钥
ssh的加密方式:
RSA
ECDSA
DSA
加密的算法可以指定。
id_ecdsa 私钥文件
id_ecdsa.pub 公钥文件
免密登录的过程:
ssh-keygen -t ecdas #执行加密的算法
ssh-copy-id -i id ecdsa.pua (-p 10022)root@192.168.60.10
把公钥文件发送到对方主机
ssh-agent bash
把密钥对进行缓存,可以自动提供身份验证,实现免密登录
ssh-add
管理缓存
NFS共享存储服务
network file system 在计算机网络中共享文件系统的协议
计算机之间可以通过网络共享目录和文件
rpcbind 远程共享调用
nfs 共享服务
配置nfs时,要先启动调用rpcbing,再开启nfs
rpcbind端口号111
nfs 2049(查询不到)
/optgongxiang 192.168.233.0/24(rw,sync,no root_squash)
/opt/gongxian8 声明本机,的共享目录
192.168.233.0/24 声明网段,谁可以访问本机的共享目录。(声明指定的主机可以访问共享目录 作业)
(rw,sync,no root_squash)权限,共享目录的使用者的权限。
rw 读写 ro 只读
sync 同步写入到硬盘当中(共享用户的操作。)
no_root_squash 如果客户机以root用户访问共享目录,就给你和本机的root用户一样的权限。
root_squash 客户机root用户登录访问共享目录,就会把你变成匿名用户。
all_squash 所有访问用户都映射为匿名用户或用户组 async 将数据先保存在内存缓冲区中,必要时才写入磁盘。 subtree_check(默认) 若输出目录是一个子目录,则nfs服务器将检查其父目录的权限。 no_subtree_check 即使输出目录是一个子目录,nfs服务器也不检查其父目录的权限,这样可以提高效率。
主机:
vim/etc/exports
/opt/gongxiang 192.168.60.0/24(rw,sync,no_root_squash)
systemctl restart rpcbind
systemctl restart nfs
showmount -e
查看本机共享出去的目录
客户机:
安装rpching和nfs
systemctl restart rpcbind
systemctl restart nfs
showmount -e 192.168.60.30
挂载:
临时
mount192.168.60.30:/optgongxiang /opt/test1
vim /etc/fstab
192.168.60.30:/opt/gongxiang /opt/test1 nfs defaults,netdev 0 0
nfs共享操作:
1、在主机安装软件包
[root@test2 opt]# yum -y install nfs-utils rpcbind
2、在opt目录下创建一个gongxiang目录,并赋权777
[root@test2 opt]# mkdir gongxiang
[root@test2 opt]# chmod 777 gongxiang/
[root@test2 opt]# ls
gongxiang
3、在etc目录下新建一个exports文件
[root@test2 opt]# vim /etc/exports
/opt/gongxiang 192.168.60.0/24(rw,sync,no_root_squash)
4、重启配置文件
[root@test2 opt]# systemctl restart rpcbind
[root@test2 opt]# systemctl restart nfs
5、查看主机可以共享的目录和可以共享的网段
[root@test2 opt]# showmount -e
Export list for test2:
/opt/gongxiang 192.168.60.0/24
6、在客户机安装软件包
[root@test3 opt]# yum -y install nfs-utils rpcbind
7、在客户机重启配置文件
[root@test3 opt]# systemctl restart rpcbind
[root@test3 opt]# systemctl restart nfs
8、在客户机查看主机的共享目录
[root@test3 ssh]# showmount -e 192.168.60.30
Export list for 192.168.60.30:
/opt/gongxiang 192.168.60.0/24
9、挂载
[root@test2 opt]# mount 192.168.60.30:/opt/gongxiang /opt/test1
[root@test2 test1]# df -hT
文件系统                     类型      容量  已用  可用 已用% 挂载点
/dev/mapper/centos-root      xfs        38G  5.5G   32G   15% /
devtmpfs                     devtmpfs  1.9G     0  1.9G    0% /dev
tmpfs                        tmpfs     1.9G     0  1.9G    0% /dev/shm
tmpfs                        tmpfs     1.9G   13M  1.9G    1% /run
tmpfs                        tmpfs     1.9G     0  1.9G    0% /sys/fs/cgroup
/dev/sr0                     iso9660   4.3G  4.3G     0  100% /mnt
/dev/sda1                    xfs      1014M  179M  836M   18% /boot
/dev/mapper/centos-home      xfs        19G   37M   19G    1% /home
tmpfs                        tmpfs     378M  8.0K  378M    1% /run/user/42
tmpfs                        tmpfs     378M   36K  378M    1% /run/user/0
/dev/sdb2                    xfs        17M  6.5M   11M   39% /data2
/dev/sdb3                    xfs       5.0G   33M  5.0G    1% /data3
192.168.60.30:/opt/gongxiang nfs4       38G  5.5G   32G   15% /opt/test1
10、在客户机中往test1中写入文件
[root@test2 opt]# ls
test1
[root@test2 opt]# cd test1/
[root@test2 test1]# touch 123123
[root@test2 test1]# ls
123123
11、在主机中查看客户机写入的文件
[root@test3 opt]# cd /opt/gongxiang/
[root@test3 gongxiang]# ls
[root@test3 gongxiang]# ls
123123
yum的进阶
yum主要的作用:
依赖关系
自动安装
自动升级
centos7 yum
centos8 dnf(yum的升级版)
dnf -y install
Ubuntu
apt
yum的包都是.rpm
Ubunt的包都是.deb
日志文件和缓存:/var/log/yum.log
网页版的形式做一个yum
网页版的形式做一个yum 操作:
1、安装apache
[root@test2 test1]# yum -y install httpd
2、进入yum.repos.d目录下新建文件
[root@test2 html]# cd /etc/yum.repos.d/
[root@test2 yum.repos.d]# vim httpd.repo
 [httpd]
 name=123
 baseurl=http://192.168.60.20/centos7
 gpgcheck=0
3、进入html目录下
[root@test2 test1]# cd /var/www/html/
[root@test2 html]# mkdir centos7
4、挂载
[root@test2 html]# mount /dev/cdrom /var/www/html/centos7/
5、清除缓存并建立元数据
[root@test2 centos7]# yum clean all && yum makecache
6、访问页面
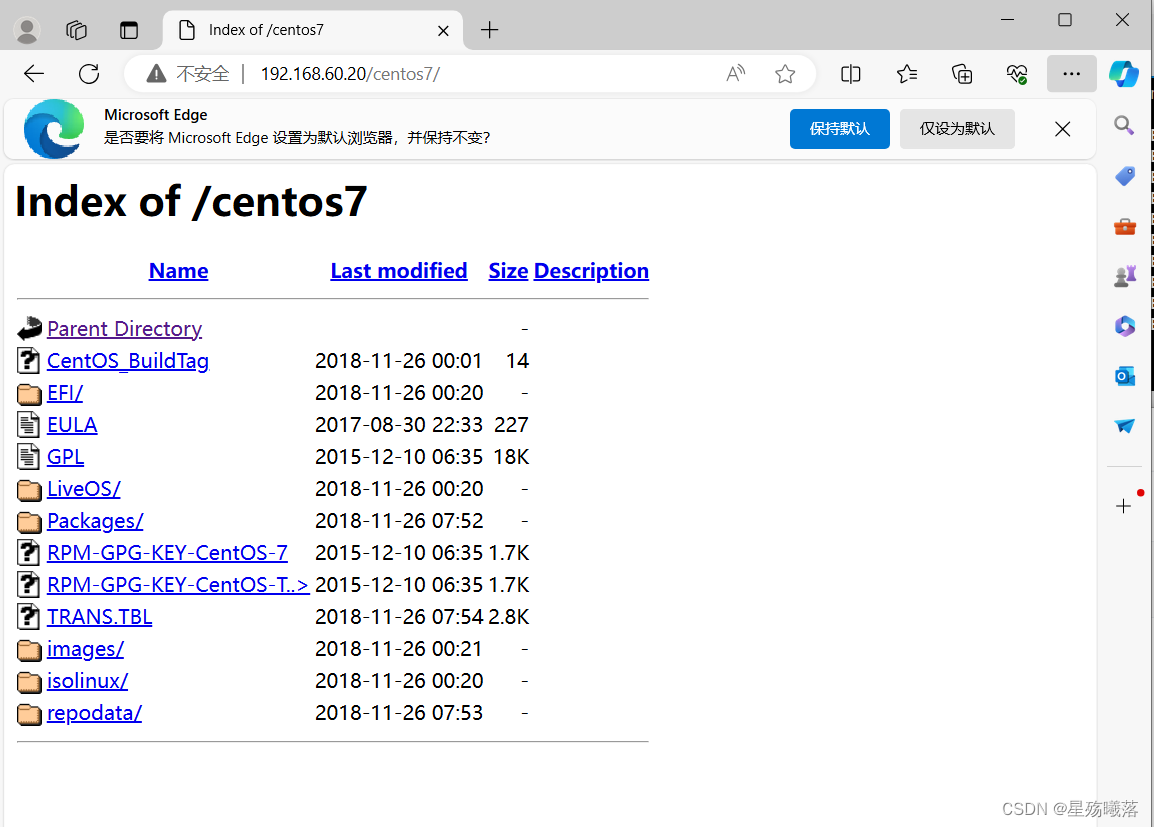
curl页面测试工具,后面跟上ip地址或者域名可以访问这个页面(测试web软件工作是否正常)
vsftpd
http
混合
vsftp的yum源操作:
1、安装vsftpd软件包
[root@test2 ~]# yum -y install vsftpd
2、关闭防火墙
[root@test2 ~]# systemctl stop firewalld.service
[root@test2 ~]# setenforce 0
3、进入ftp目录下新建应该centos7
[root@test2 ~]# cd /var/ftp/
[root@test2 ftp]# ls
pub
[root@test2 ftp]# mkdir centos7
4、挂载
[root@test2 ftp]# mount /dev/cdrom /var/ftp/centos7/
[root@test2 ftp]# df -hT
文件系统                     类型      容量  已用  可用 已用% 挂载点
/dev/mapper/centos-root      xfs        38G  4.7G   33G   13% /
devtmpfs                     devtmpfs  1.9G     0  1.9G    0% /dev
tmpfs                        tmpfs     1.9G     0  1.9G    0% /dev/shm
tmpfs                        tmpfs     1.9G   13M  1.9G    1% /run
tmpfs                        tmpfs     1.9G     0  1.9G    0% /sys/fs/cgroup
/dev/sda1                    xfs      1014M  179M  836M   18% /boot
/dev/mapper/centos-home      xfs        19G   37M   19G    1% /home
tmpfs                        tmpfs     378M  8.0K  378M    1% /run/user/42
tmpfs                        tmpfs     378M   36K  378M    1% /run/user/0
/dev/sdb2                    xfs        17M  6.5M   11M   39% /data2
/dev/sdb3                    xfs       5.0G   33M  5.0G    1% /data3
192.168.60.30:/opt/gongxiang nfs4       38G  5.5G   32G   15% /opt/test1
/dev/sr0                     iso9660   4.3G  4.3G     0  100% /var/ftp/centos7
5、打开vsftpd服务
[root@test2 yum.repos.d]# systemctl restart vsftpd
6、在yum.repos.d的目录下创建一个local.repo的文件
[root@test2 yum.repos.d]# vim local.repo
[local]
name=123
baseurl=ftp://192.168.60.20/centos7
gpgcheck=0
7、清除缓存和建立元数据
[root@test2 yum.repos.d]# yum clean all && yum makecache
已加载插件:fastestmirror, langpacks
正在清理软件源: local
Cleaning up list of fastest mirrors
Other repos take up 696 M of disk space (use --verbose for details)
已加载插件:fastestmirror, langpacks
Determining fastest mirrors
local                                     | 3.6 kB     00:00
(1/4): local/group_gz                       | 166 kB   00:00
(2/4): local/filelists_db                   | 3.2 MB   00:00
(3/4): local/primary_db                     | 3.1 MB   00:00
(4/4): local/other_db                       | 1.3 MB   00:00
元数据缓存已建立
vsftpd和httpd的混合yum源操作:
1、创建vsftpd和httpd的混合
[root@test2 yum.repos.d]# vim local.repo
[local]
name=123
baseurl=ftp://192.168.60.20/centos7
gpgcheck=0
priority=2
#指定优先级,数字越大,优先级越高
[net]
name=456
baseurl=https://mirrors.aliyun.com/epel/7Server/x86_64/
gpgcheck=0
priority=1
2、清空缓存和建立元数据
[root@test2 yum.repos.d]# yum clean all && yum makecache
已加载插件:fastestmirror, langpacks
正在清理软件源: local net
Cleaning up list of fastest mirrors
Other repos take up 696 M of disk space (use --verbose for details)
已加载插件:fastestmirror, langpacks
Determining fastest mirrors
local                                     | 3.6 kB     00:00
net                                       | 4.3 kB     00:00
(1/10): local/group_gz                      | 166 kB   00:00
(2/10): local/filelists_db                  | 3.2 MB   00:00
(3/10): local/other_db                      | 1.3 MB   00:00
(4/10): local/primary_db                    | 3.1 MB   00:00
(5/10): net/group                           | 399 kB   00:06
(6/10): net/updateinfo                      | 1.0 MB   00:01
(7/10): net/prestodelta                     | 1.5 kB   00:00
(8/10): net/primary_db                      | 8.7 MB   00:10
(9/10): net/filelists_db                    |  15 MB   00:19
(10/10): net/other_db                       | 4.1 MB   00:04
元数据缓存已建立


 8376
8376

 被折叠的 条评论
为什么被折叠?
被折叠的 条评论
为什么被折叠?
 到【灌水乐园】发言


