


1.Nginx版本分类
Nginx常用版本主要有四类:
-
Nginx开源版:http://nginx.org/
-
Nginx plus 商业版:https://www.nginx.com/
-
openresty:http://openresty.org/cn/
-
Tengine:http://tengine.taobao.org/
Nginx开源版没有额外的功能,主要就实现了三大功能:网站服务器、代理服务器、负载均衡器。
其他三种版本都对Nginx功能有所加强,封装了很多好用的功能。Nginx plus是收费的,openresty和Tengine是两个非常流行的版本,而且是完全免费开源的。
openresty主要是将 Nginx和LuaJiT进行了整合,不仅高性能,而且开发难度也不大,强烈推荐大家使用!
本文仅以Nginx开源版来演示安装和配置开机自启动。
2.Nginx安装与启动
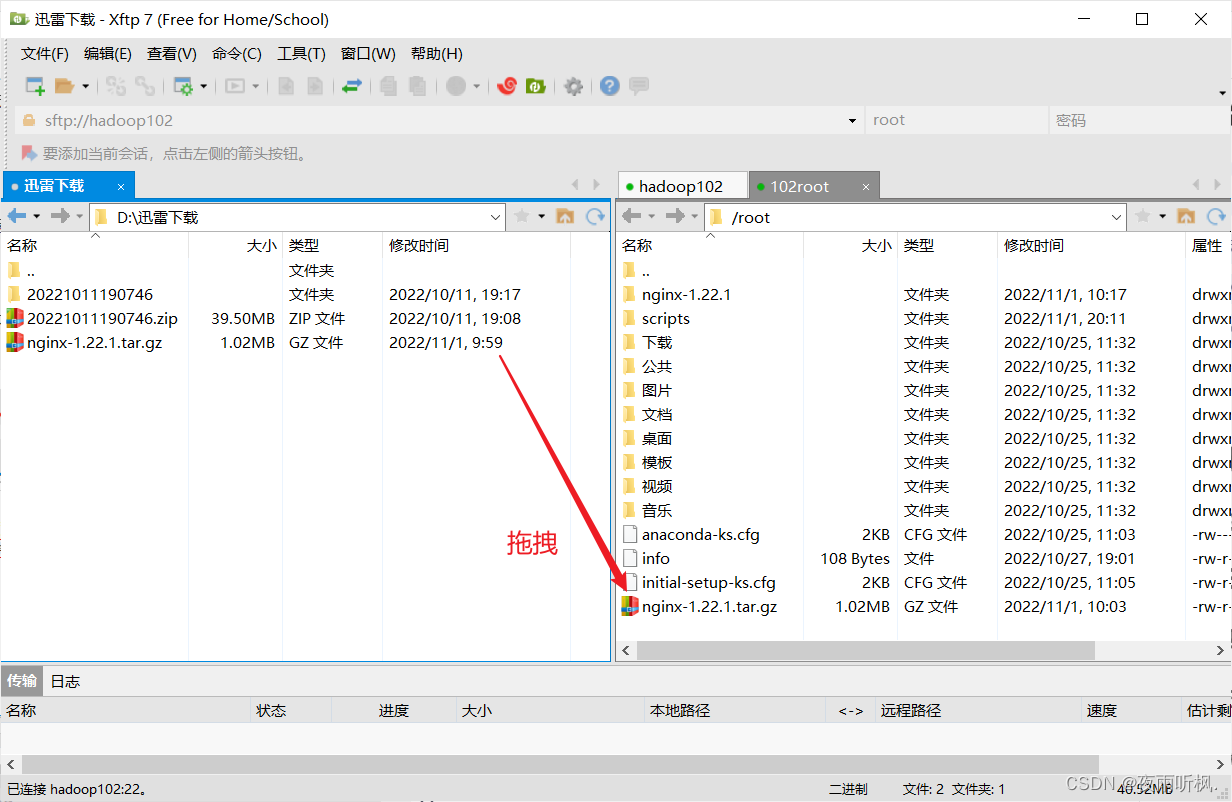
(1)使用文件传输工具Xftp将下载好的nginx压缩包导入linux
(2)解压缩并查看
[root@hadoop102 ~]# tar zxvf nginx-1.22.1.tar.gz
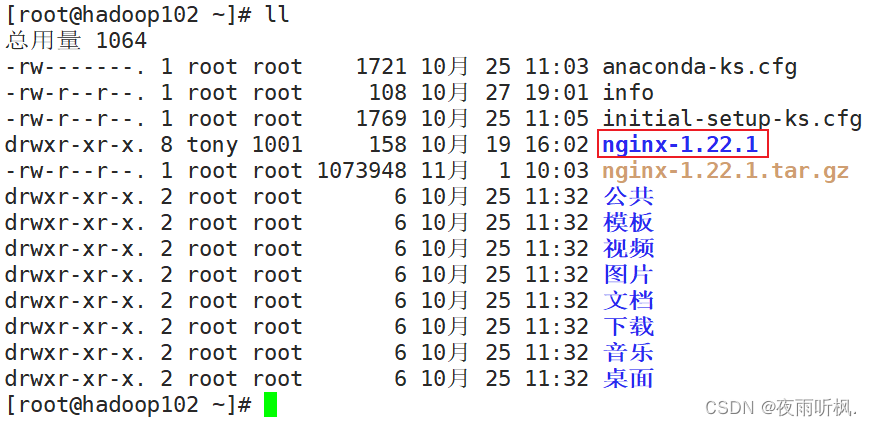
进入解压后的文件夹,ls确定解压成功
[root@hadoop102 ~]# cd nginx-1.22.1/

(3)安装依赖库
- 安装gcc
yum install -y gcc
如果没有gcc库,编译安装时会出现以下错误:
checking for OS
+ Linux 3.10.0-693.el7.x86_64 x86_64
checking for C compiler ... not found
./configure: error: C compiler cc is not found
- 安装pcre库
yum install -y pcre pcre-devel
如果没有pcre库,编译安装时会出现以下错误:
./configure: error: the HTTP rewrite module requires the PCRE library.
You can either disable the module by using --without-http_rewrite_module
option, or install the PCRE library into the system, or build the PCRE library
statically from the source with nginx by using --with-pcre=<path> option.
- 安装zlib库
yum install -y zlib zlib-devel
如果没有zlib库,编译安装时会出现以下错误:
./configure: error: the HTTP gzip module requires the zlib library.
You can either disable the module by using --without-http_gzip_module
option, or install the zlib library into the system, or build the zlib library
statically from the source with nginx by using --with-zlib=<path> option.
(4)编译安装
如果编译时报错,可能是缺少相应的依赖库,只需根据报错信息安装相应的依赖库即可。
[root@hadoop102 nginx-1.22.1]# ./configure --prefix=/usr/local/nginx
执行成功
Configuration summary
  + using system PCRE library
  + OpenSSL library is not used
  + using system zlib library

  nginx path prefix: "/usr/local/nginx"
  nginx binary file: "/usr/local/nginx/sbin/nginx"
  nginx modules path: "/usr/local/nginx/modules"
  nginx configuration prefix: "/usr/local/nginx/conf"
  nginx configuration file: "/usr/local/nginx/conf/nginx.conf"
  nginx pid file: "/usr/local/nginx/logs/nginx.pid"
  nginx error log file: "/usr/local/nginx/logs/error.log"
  nginx http access log file: "/usr/local/nginx/logs/access.log"
  nginx http client request body temporary files: "client_body_temp"
  nginx http proxy temporary files: "proxy_temp"
  nginx http fastcgi temporary files: "fastcgi_temp"
  nginx http uwsgi temporary files: "uwsgi_temp"
  nginx http scgi temporary files: "scgi_temp"
接下来执行
root@hadoop102 nginx-1.22.1]# make
[root@hadoop102 nginx-1.22.1]# make install
(5)关闭防火墙并禁止开机启动
- 关闭防火墙
systemctl stop firewalld
- 关闭防火墙开机自启动
systemctl disable firewalld
(5)启动Nginx
首先进入Nginx保存的路径/usr/local/,找到nginx
[root@hadoop102 nginx-1.22.1]# cd /usr/local/
[root@hadoop102 local]# ls
bin  etc  games  include  lib  lib64  libexec  nginx  sbin  share  src
进入nginx,里面默认有四个文件夹。
conf:存放配置信息。
html:存放静态资源(默认访问的index.html和报错跳转页面50x.html)。
logs:存放日志信息。
sbin:存放启动命令(nginx)。
在/usr/local/nginx/sbin目录下启动Nginx。
[root@hadoop102 sbin]# ./nginx
[root@hadoop102 local]# cd nginx/
[root@hadoop102 nginx]# ls
conf  html  logs  sbin
[root@hadoop102 nginx]# cd sbin/
[root@hadoop102 sbin]# ls
nginx
[root@hadoop102 sbin]# ./nginx
[root@hadoop102 sbin]#
附几个Nginx常用命令(sbin目录下):
./nginx 启动命令
./nginx -s stop 快速关闭
./nginx -s quit 延迟关闭,在退出前完成已经接受的连接请求
./nginx -s reload 重新加载配置
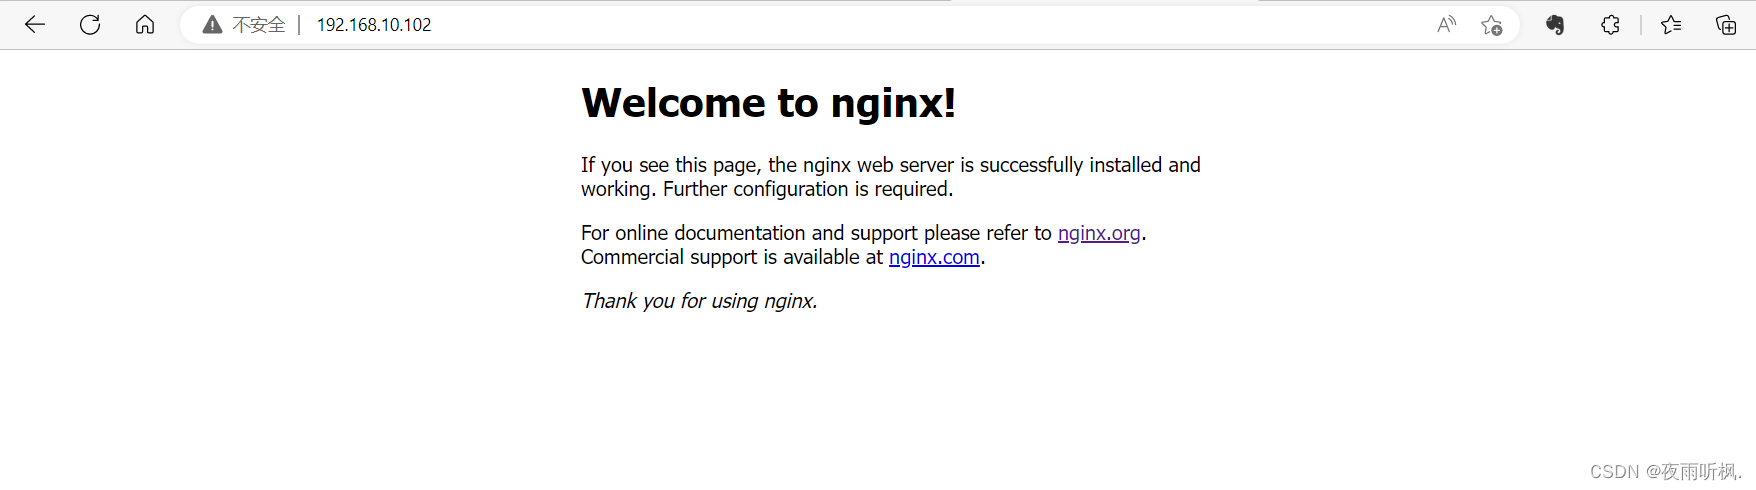
(6)从浏览器访问Nginx
直接输入当前linux系统的ip地址(使用对应的主机映射或虚拟域名也可以),回车,访问到了html目录下默认的index.html,说明启动成功。
3.将Nginx安装成系统服务
(1)创建脚本
vim /usr/lib/systemd/system/nginx.service
(2)脚本内容
注意:
①脚本里的/usr/local/nginx是我解压保存的路径,如果不是在这个路径下保存的,需要手动更改。
②远程登录工具(如XShell)粘贴的时候进入编辑模式粘贴,否则只有遇到字母i的时候才会开始粘贴,最后值粘贴了一部分(萌新常犯的错误)。
[Unit]
Description=nginx - web server
After=network.target remote-fs.target nss-lookup.target
[Service]
Type=forking
PIDFile=/usr/local/nginx/logs/nginx.pid
ExecStartPre=/usr/local/nginx/sbin/nginx -t -c /usr/local/nginx/conf/nginx.conf
ExecStart=/usr/local/nginx/sbin/nginx -c /usr/local/nginx/conf/nginx.conf
ExecReload=/usr/local/nginx/sbin/nginx -s reload
ExecStop=/usr/local/nginx/sbin/nginx -s stop
ExecQuit=/usr/local/nginx/sbin/nginx -s quit
PrivateTmp=true
[Install]
WantedBy=multi-user.target
(3)重新加载系统服务
[root@hadoop102 sbin]# systemctl daemon-reload
(4)在重新启动nginx服务之前先查看之前执行的nginx服务是否还存在,如果还存在,就停止,以防我们的脚本和原来的nginx启动冲突了。
[root@hadoop102 sbin]# ps -ef | grep nginx

关闭nginx
[root@hadoop102 sbin]# ./nginx -s stop
再次查看,nginx服务已经被关闭了。

(5)用systemctl启动nginx
因为nginx已经被配置成系统服务,所以后续的操作可以直接使用systemctl命令来实现。
[root@hadoop102 sbin]# systemctl start nginx
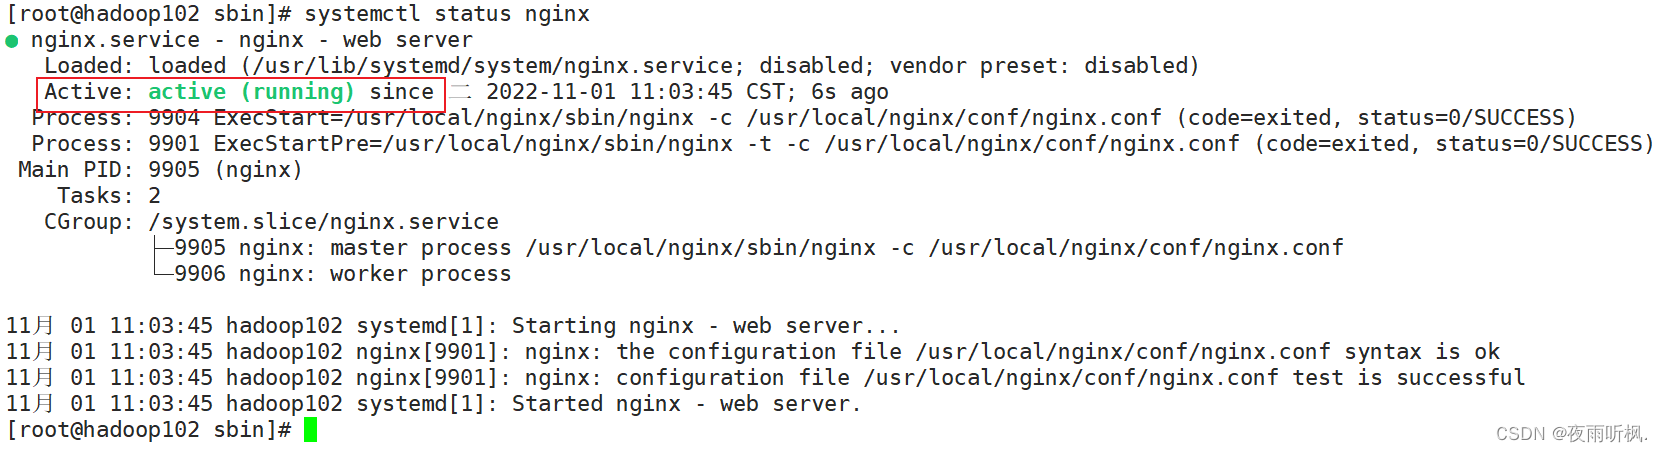
(6)查看是否启动成功
状态为active,说明通过systemctl命令成功启动nginx。
[root@hadoop102 sbin]# systemctl status nginx
4.将Nginx设置为开机自启动
- 使用系统命令systemctl enable nginx开启Nginx的开机自启动。
[root@hadoop102 sbin]# systemctl enable nginx
- 重启系统验证nginx开机自启动设置成功
[root@hadoop102 ~]# reboot
- 重启后直接从浏览器访问,进入index.html,开机自启动设置成功。


 被折叠的 条评论
为什么被折叠?
被折叠的 条评论
为什么被折叠?
 到【灌水乐园】发言


