


目录
前言
新手小白一个,摸索了几天,分享一下学习内容。以下内容具有不确定性,仅供参考。
源码:https://github.com/fundamentalvision/Deformable-DETR
1. 环境
1.1 运行环境
系统:Ubuntu 18.04
工具:Pytorch(1.8.0) CUDA(11.1) 显卡(NVIDIA GeForce RTX 3060)
驱动版本(530.41.03)
1.2 环境部署
关于双系统安装Ubuntu和Ubuntu上安装Anaconda,网上相关的教程有大把,而且都很详细,我就不在进行赘述。
1). 首先在Anaconda上为Demable-DETR搭建虚拟环境
conda create -n Deformable-DETR python=3.8 pip
运行提示输入y并回车,等待创建成功
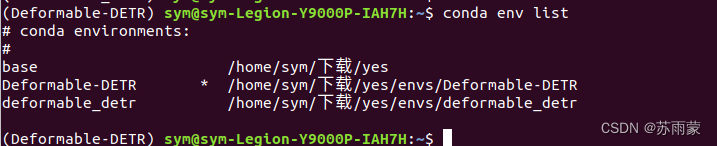
2).进入虚拟环境:
conda activate Deformable-DETR
![]()
因为我以前已经安装过环境,为了方便演示,我又新建了Deformable-DETR这个新环境。如果没有安装过其他虚拟环境,默认的是base。我们可以通过下面命令查看当前有哪些环境。
conda env list
3). 下载源码查看安装所需要的库
进入前面给的论文链接进行查看
因为这是又新安装的环境,不需要和比赛一样对版本有特定要求,所以直接去Pytorch官网查询安装命令。https://pytorch.org/
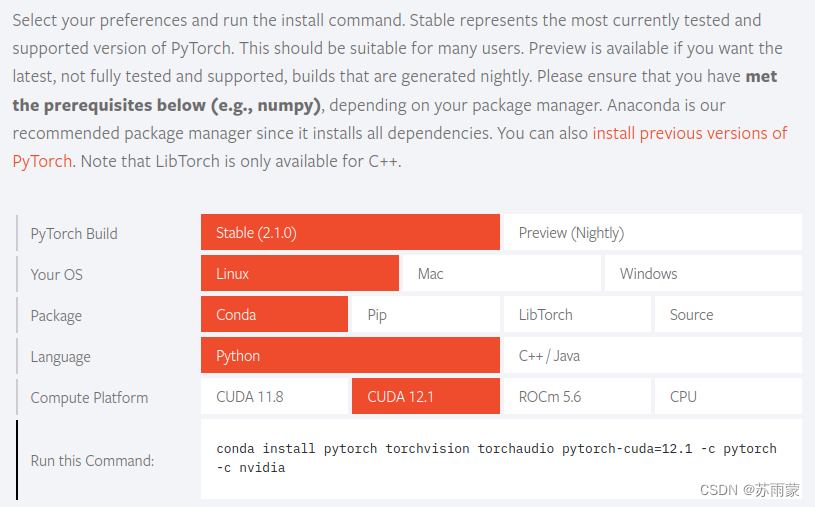
我的命令是:
conda install pytorch torchvision torchaudio pytorch-cuda=12.1 -c pytorch -c nvidia
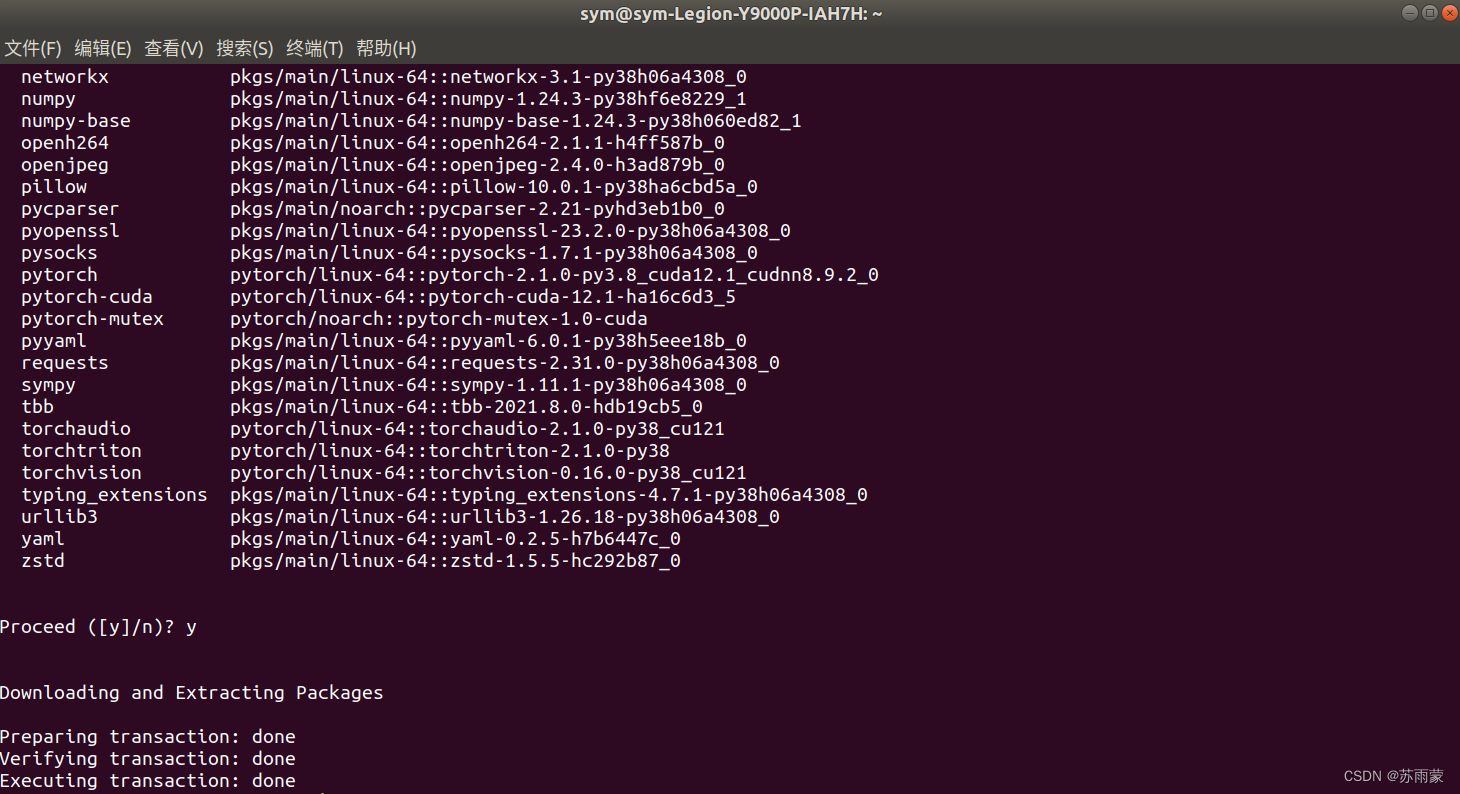
等待安装,大概需要几分钟。
打开python检查是否安装成功:
import torch
print(torch.__version__)
print(torch.version.cuda)
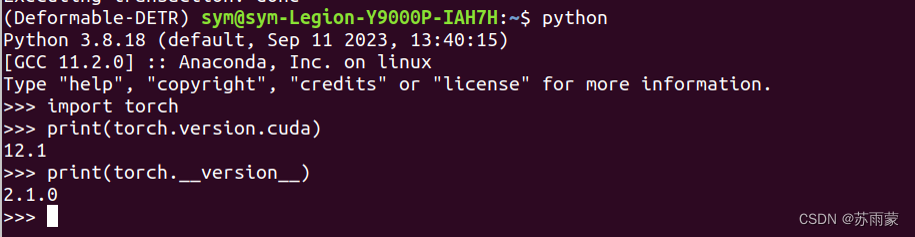
显示出版本则安装成功。
如果安装其他版本只需要对其后面进行版本的书写就可以,但是要先查询Pytorch的版本支持的 CUDA版本,这里不再进行演示。比赛要求的Pytorch为1.8,网上查询对应的CUDA为11.1和10.2,不过我用11.1进行安装,会失败,具体什么情况我也不是很清楚。
4).安装显卡驱动
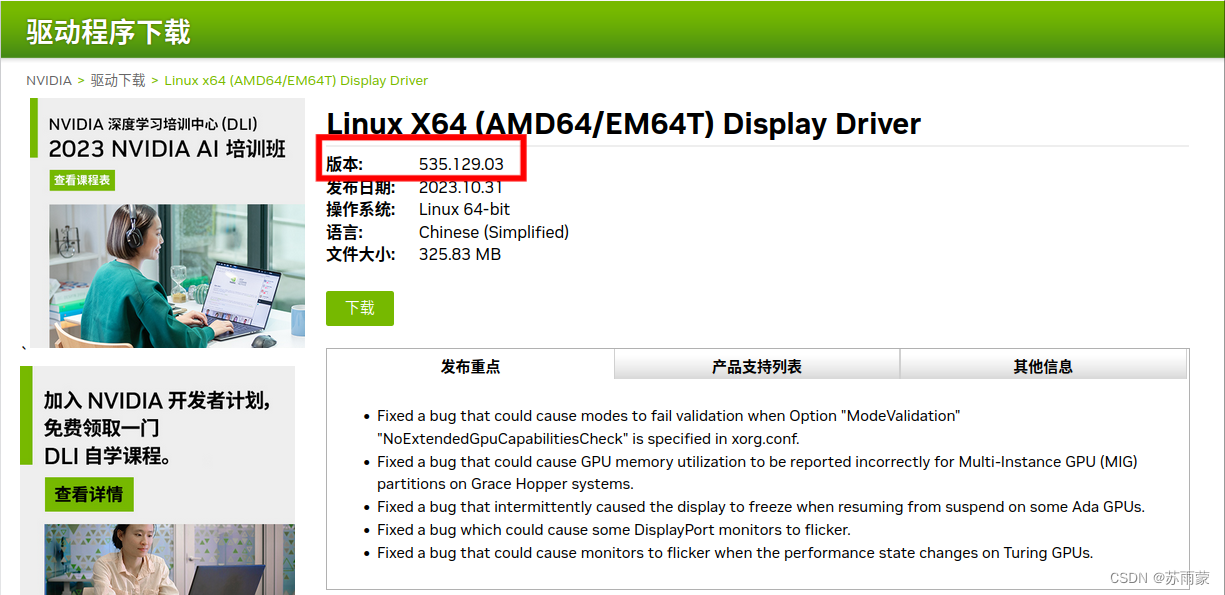
这个驱动安装就比较费事,我从网上搜了好多文章,大体有两种安装方式。第一种,有手动官网下载进行安装,显示安装成功,但查询不到驱动版本,等于安装失败。其中涉及到一些命令行的操作,不推荐新手使用这种方法。第二种就是使用系统自带渠道安装,先去英伟达官网进行查询驱动版本。https://www.nvidia.cn/Download/index.aspx?lang=cn

不要下载,这时打开Ubuntu自带的软件和更新,进行驱动的应用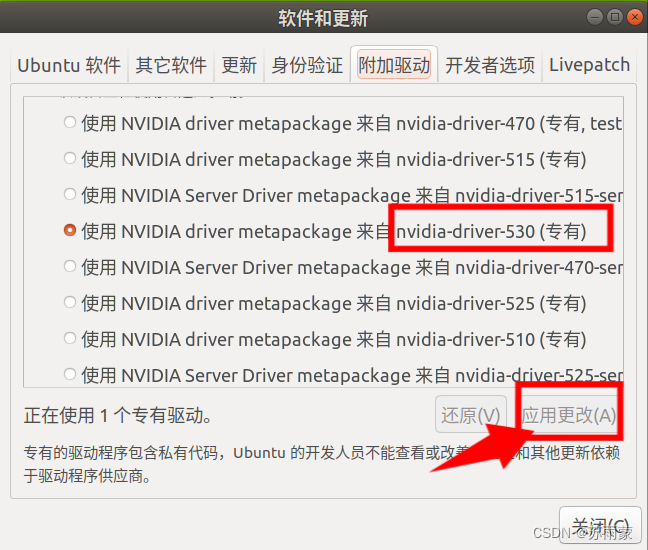
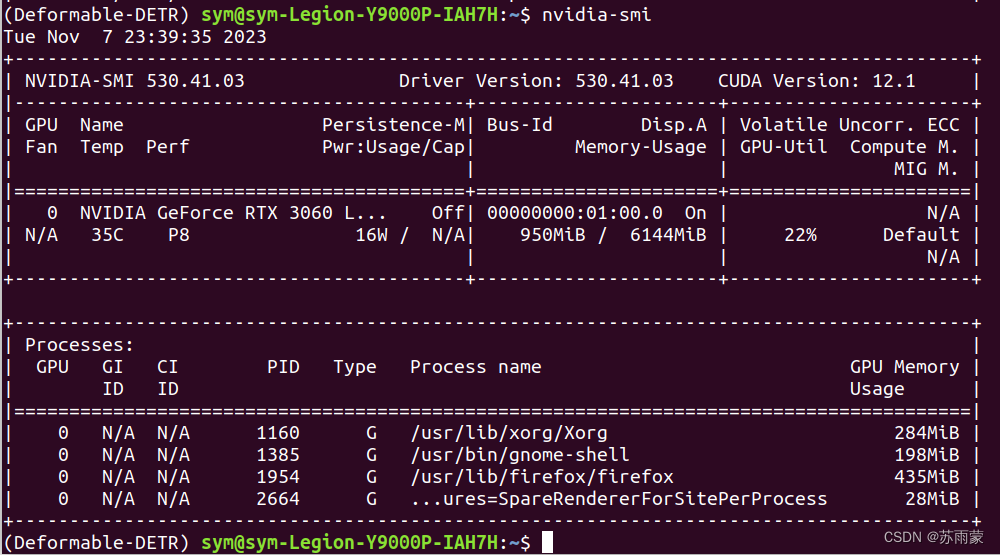
安装成功使用以下命令进行查看:
nvidia-smi
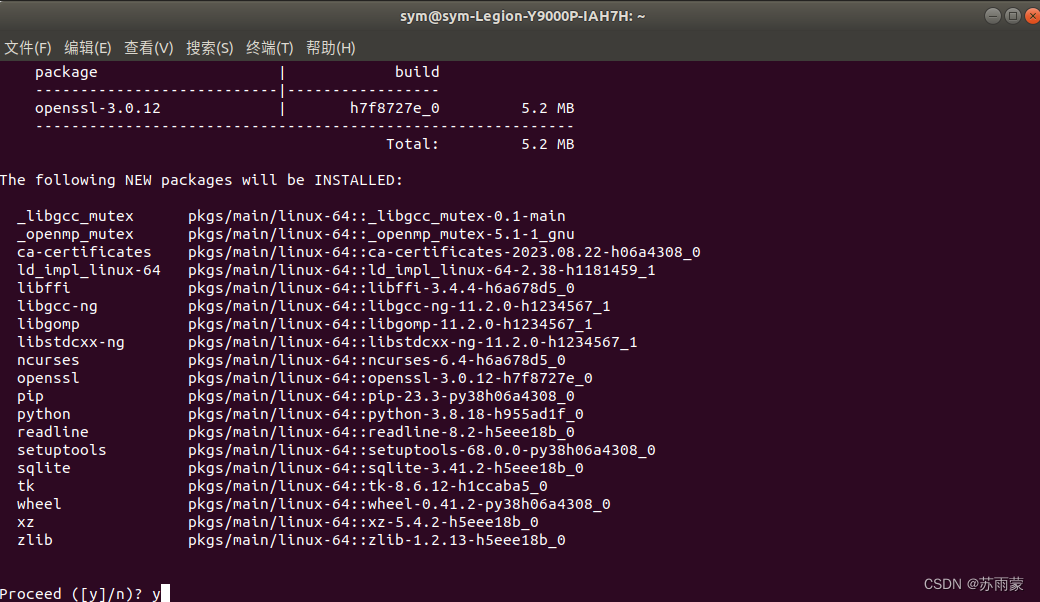
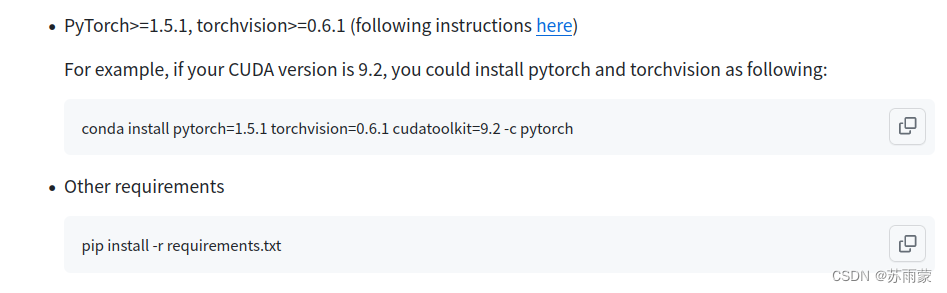
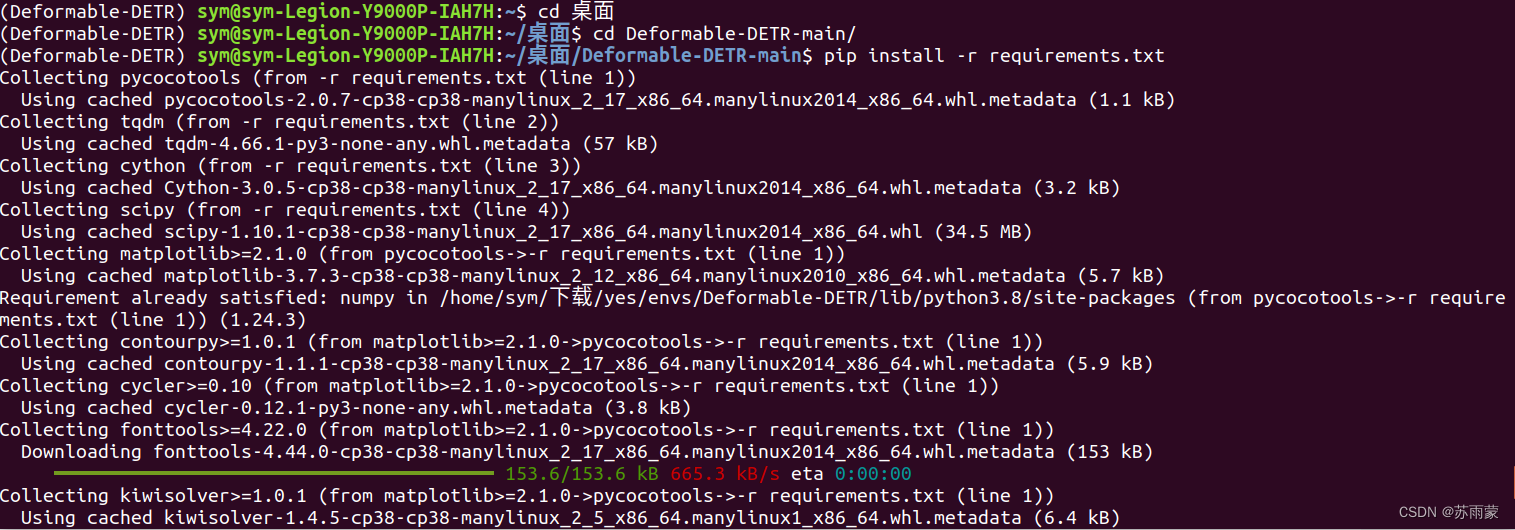
5). 其他需求

进入工程的主目录使用命令:
pip install -r requirements.txt
2.csv转换coco数据集
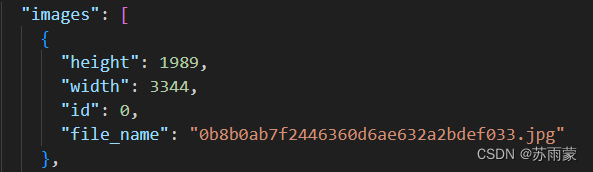
因为比赛的训练集已经提供了标注的信息.csv文件,我们只需进行转换为coco数据类型,其中coco中最主要的.json文件,我们只需要其中的 "images","annotations","categories"这三个字段,其格式如下:
"images"
height为图像高度;width为图像宽度;id为图像id;file_name为图像文件名。
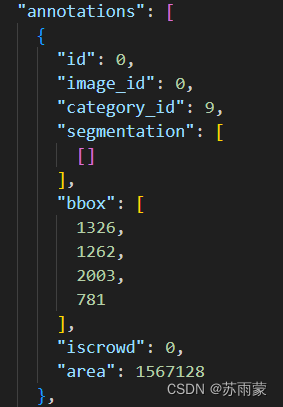
"annotations"
id为标注框的id,一张图片可以有多个标注框。
image_id为"images"中图片的id。
category_id为标签的类别,这里的数字对应"categories"中的相应类别id。
segmentation为检测目标的轮廓分割级标签。因为我这里的数据都是矩形标注框,所以设置为空。
"bbox" [x,y,width,height]为标注框的信息,x,y为标注框左上角坐标。
iscrowd为目标是否被遮盖,默认为0。
"categories"
id为对应以上annotations部分的category_id。
name为类别标签名称。

下面是我的csv转coco数据格式的代码,网上参考进行修改,非原创
import os
import json
import numpy as np
import pandas as pd
import os
import cv2
import shutil
from IPython import embed
from sklearn.model_selection import train_test_split
np.random.seed(41)

#0为背景
classname_to_id = {'E2': 1, 'J20': 2, 'B2': 3, 'F14': 4, 'Tornado': 5, 'F4': 6, 'B52': 7, 'JAS39': 8, 'Mirage2000': 9}
class Csv2CoCo:

    def __init__(self,image_dir,total_annos):
        self.images = []
        self.annotations = []
        self.categories = []
        self.img_id = 0
        self.ann_id = 0
        self.image_dir = image_dir
        self.total_annos = total_annos

    def save_coco_json(self, instance, save_path):
        json.dump(instance, open(save_path, 'w'), ensure_ascii=False, indent=2)  # indent=2 更加美观显示

    # 由txt文件构建COCO
    def to_coco(self, keys):
        self._init_categories()
        for key in keys:
            self.images.append(self._image(key))
            shapes = self.total_annos[key]
            for shape in shapes:
                bboxi = []
                # for cor in shape[:-1]:
                for cor in shape[1:]:
                    bboxi.append(int(cor))
                label = shape[0]
                annotation = self._annotation(bboxi, label)
                self.annotations.append(annotation)
                self.ann_id += 1
            self.img_id += 1
        instance = {}
        instance['images'] = self.images
        instance['annotations'] = self.annotations
        instance['categories'] = self.categories
        return instance

    # 构建类别
    def _init_categories(self):
        for k, v in classname_to_id.items():
            category = {}
            category['id'] = v
            category['name'] = k
            self.categories.append(category)

    # 构建COCO的image字段
    def _image(self , filename):
        image = {}
        img = cv2.imread(self.image_dir + filename + '.jpg')
        image['height'] = img.shape[0]
        image['width'] = img.shape[1]
        image['id'] = self.img_id
        image['file_name'] = filename + '.jpg'
        return image

    # 构建COCO的annotation字段
    def _annotation(self, shape,label):
        points = shape[0 : ]
        annotation = {}
        annotation['id'] = self.ann_id
        annotation['image_id'] = self.img_id
        annotation['category_id'] = int(classname_to_id[label])
        annotation['segmentation'] = [[]]
        annotation['bbox'] = self._get_box(points)
        annotation['iscrowd'] = 0
        annotation['area'] = self._get_area(points)
        return annotation

    # COCO的格式: [x1,y1,w,h] 对应COCO的bbox格式
    def _get_box(self, points):
        min_x = points[0]
        min_y = points[1]
        max_x = points[2]
        max_y = points[3]
        return [min_x, max_y, max_x - min_x, max_y - min_y]
    # 计算面积
    def _get_area(self, points):
        min_x = points[0]
        min_y = points[1]
        max_x = points[2]
        max_y = points[3]
        return (max_x - min_x+1) * (max_y - min_y+1)


if __name__ == '__main__':
    csv_file = "./combined_file.csv"
    image_dir = "./train/"
    saved_coco_path = "./"
    # 整合csv格式标注文件
    total_csv_annotations = {}
    annotations = pd.read_csv(csv_file).values
    for annotation in annotations:
        filename = annotation[0]
        height = annotation[1]
        width = annotation[2]
        category_id = annotation[3]
        # key = annotation[0].split(os.sep)[-1]
        # value = np.array([annotation[1:]])
        # value1 = np.array([annotation[1: 4]])
        # print(value1)
        value = np.array([annotation[3:]])
        print(value)
        # print(value)
        if filename in total_csv_annotations.keys():
            total_csv_annotations[filename] = np.concatenate((total_csv_annotations[filename],value),axis=0)
        else:
            total_csv_annotations[filename] = value
    # 按照键值划分数据
    total_keys = list(total_csv_annotations.keys())
    train_keys, val_keys = train_test_split(total_keys, test_size=0.2)
    # print(train_keys)
    print("train_n:", len(train_keys), 'val_n:', len(val_keys))
    # 创建必须的文件夹
    if not os.path.exists('%scoco/annotations/'%saved_coco_path):
        os.makedirs('%scoco/annotations/'%saved_coco_path)
    if not os.path.exists('%scoco/images/train2017/'%saved_coco_path):
        os.makedirs('%scoco/images/train2017/'%saved_coco_path)
    if not os.path.exists('%scoco/images/val2017/'%saved_coco_path):
        os.makedirs('%scoco/images/val2017/'%saved_coco_path)
    # 把训练集转化为COCO的json格式
    l2c_train = Csv2CoCo(image_dir=image_dir,total_annos=total_csv_annotations)
    train_instance = l2c_train.to_coco(train_keys)
    l2c_train.save_coco_json(train_instance, '%scoco/annotations/instances_train2017.json'%saved_coco_path)
    for file in train_keys:
        shutil.copy(image_dir+file + '.jpg',"%scoco/images/train2017/"%saved_coco_path)
    for file in val_keys:
        shutil.copy(image_dir+file + '.jpg',"%scoco/images/val2017/"%saved_coco_path)
    # 把验证集转化为COCO的json格式
    l2c_val = Csv2CoCo(image_dir=image_dir,total_annos=total_csv_annotations)
    val_instance = l2c_val.to_coco(val_keys)
    l2c_val.save_coco_json(val_instance, '%scoco/annotations/instances_val2017.json'%saved_coco_path)
其中我的cvs文件中的数据为格式如下:

执行完上面的代码,就可以生成所需要的coco数据格式了,格式如下:
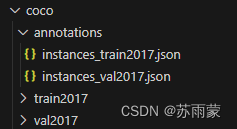
这些文件名对应的是标准coco2017数据格式进行生成的,可根据实际需求进行修改。
3.进行训练
3.1训练自己数据集
这下面参数修改的步骤都是根据下面这篇文章进行修改的。
目标检测算法——deformable-detr源码调试_deformable detr的detect.py_lzh~的博客-CSDN博客
训练我自己的数据集,使用模型进行预测效果非常次,应该是我的数据集影响因素表较多,训练集数据比较少,猜测是这些原因。纯小白,没基础参加比赛,跑出来结果就已经可以了。
放几张用自己训练模型预测的图片,其中有的图片识别标签不对,还有背景干扰过多识别的标签很多,尝试改过num_queries进行训练,效果依旧不好。
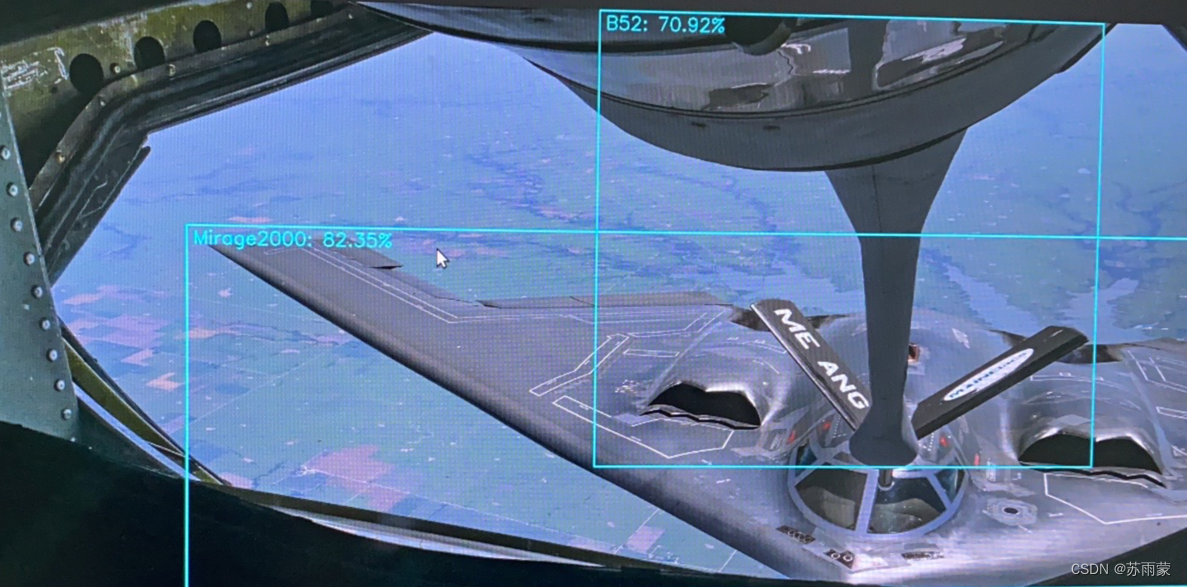
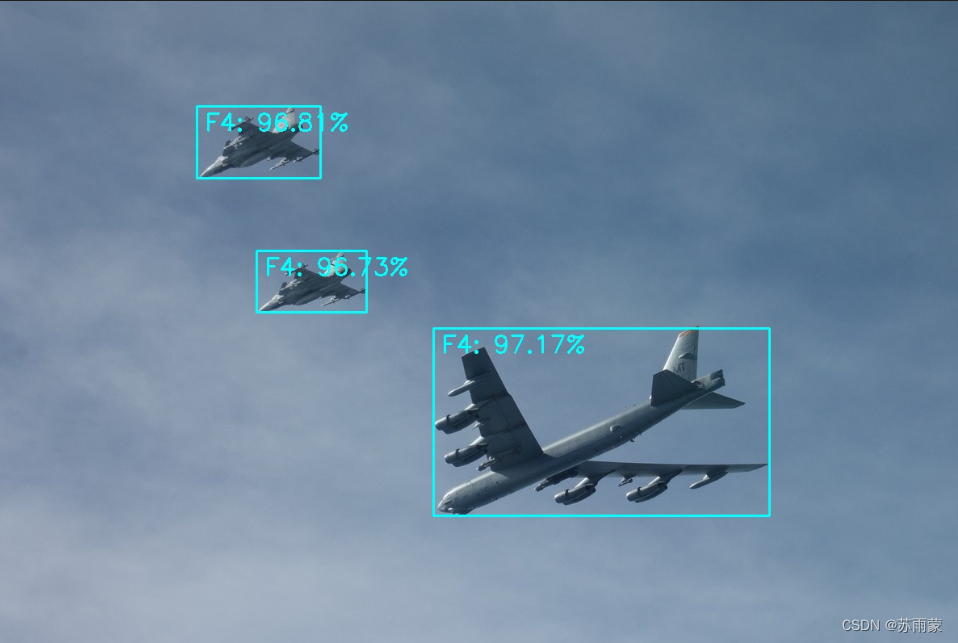
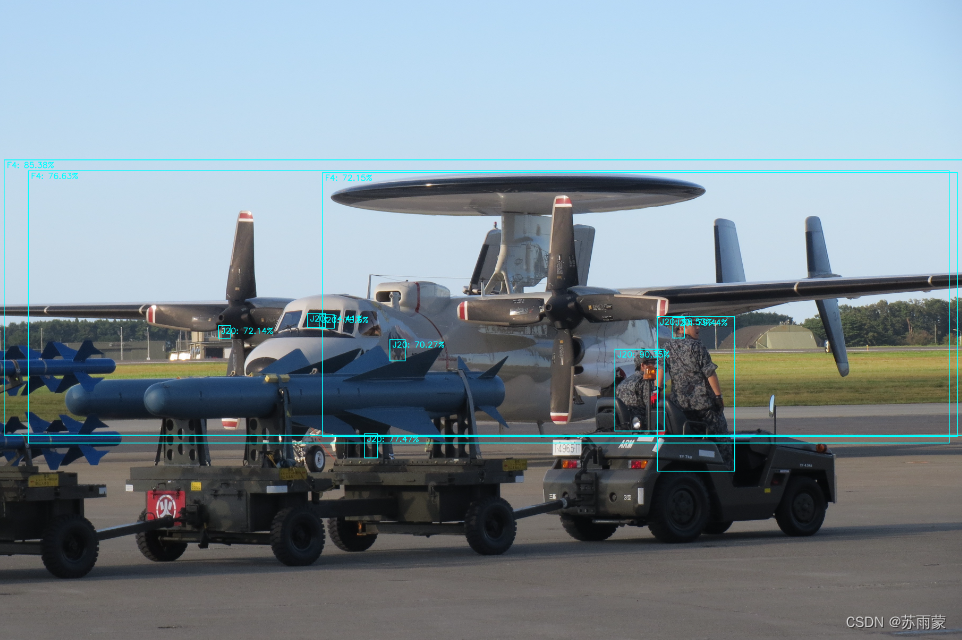
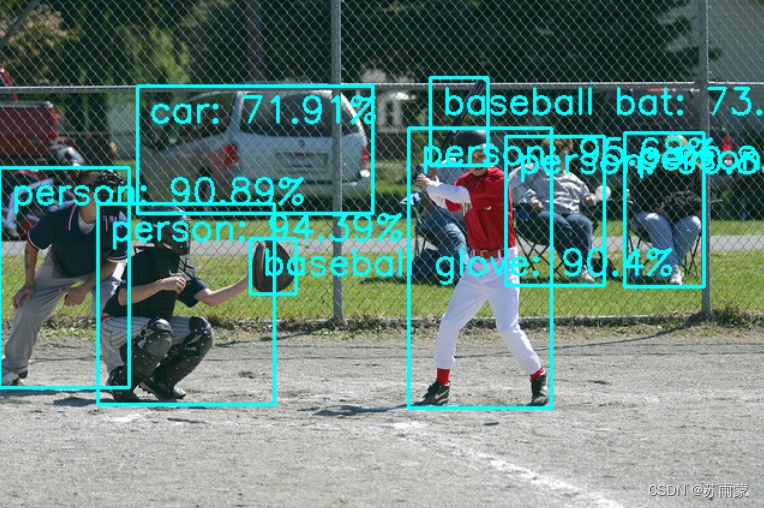
3.2使用官方的权重文件对提供的coco数据进行预测
训练自己的数据集效果非常不好,所以我又去尝试使用官方提供的权重文件,对其提供验证集进行预测,权重文件下载。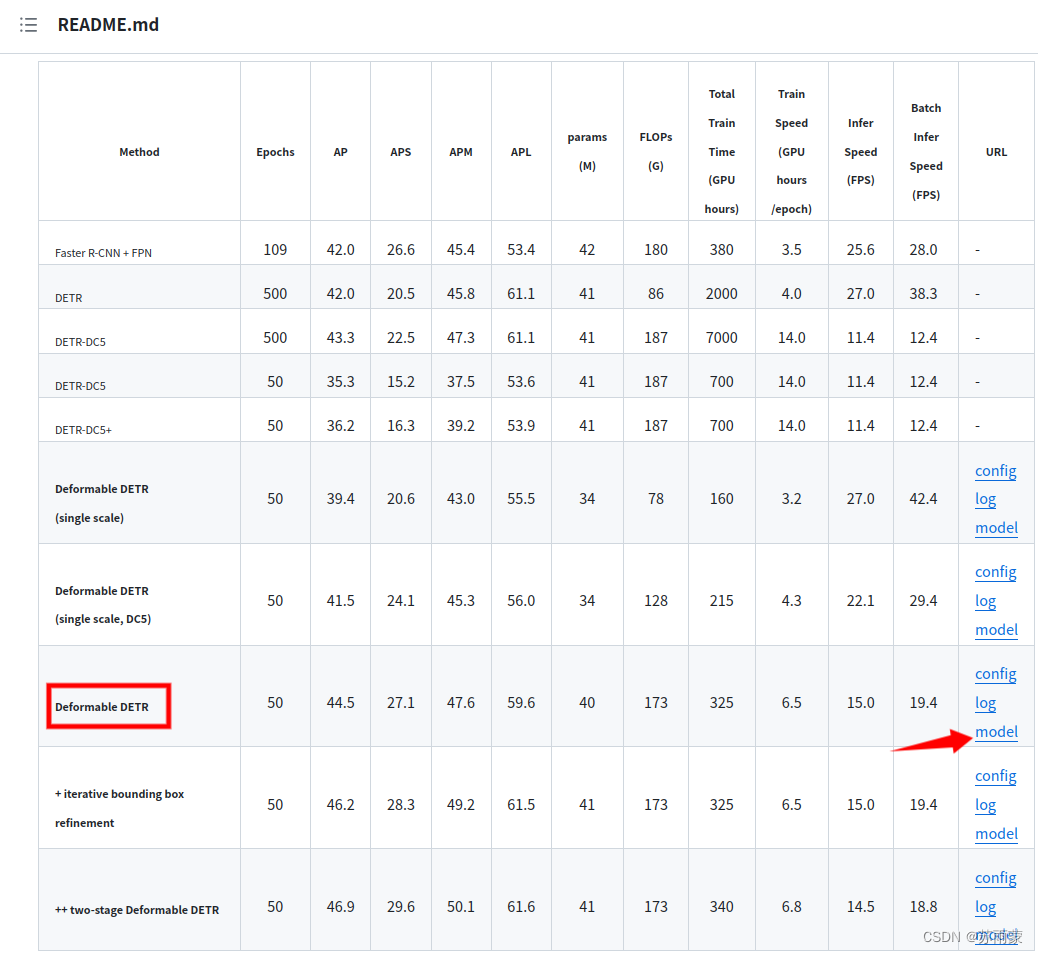
下载完直接使用这个权重文件进行预测,预测代码为:
import cv2
from PIL import Image
import numpy as np
import os
import time

import torch
from torch import nn
import torchvision.transforms as T
from main import get_args_parser as get_main_args_parser
from models import build_model

torch.set_grad_enabled(False)

device = torch.device("cuda:0" if torch.cuda.is_available() else "cpu")
print("[INFO] 当前使用{}做推断".format(device))

# 图像数据处理
transform = T.Compose([
    T.Resize(800),
    T.ToTensor(),
    T.Normalize([0.485, 0.456, 0.406], [0.229, 0.224, 0.225])
])

# plot box by opencv
def plot_result(pil_img, prob, boxes, save_name=None, imshow=False, imwrite=False):
    opencvImage = cv2.cvtColor(np.array(pil_img), cv2.COLOR_RGB2BGR)
    LABEL =['N/A', 'person', 'bicycle', 'car', 'motorcycle', 'airplane', 'bus',
            'train', 'truck', 'boat', 'traffic light', 'fire hydrant', 'N/A',
            'stop sign', 'parking meter', 'bench', 'bird', 'cat', 'dog', 'horse',
            'sheep', 'cow', 'elephant', 'bear', 'zebra', 'giraffe', 'N/A', 'backpack',
            'umbrella', 'N/A', 'N/A', 'handbag', 'tie', 'suitcase', 'frisbee', 'skis',
            'snowboard', 'sports ball', 'kite', 'baseball bat', 'baseball glove',
            'skateboard', 'surfboard', 'tennis racket', 'bottle', 'N/A', 'wine glass',
            'cup', 'fork', 'knife', 'spoon', 'bowl', 'banana', 'apple', 'sandwich',
            'orange', 'broccoli', 'carrot', 'hot dog', 'pizza', 'donut', 'cake',
            'chair', 'couch', 'potted plant', 'bed', 'N/A', 'dining table', 'N/A',
            'N/A', 'toilet', 'N/A', 'tv', 'laptop', 'mouse', 'remote', 'keyboard',
            'cell phone', 'microwave', 'oven', 'toaster', 'sink', 'refrigerator', 'N/A',
            'book', 'clock', 'vase', 'scissors', 'teddy bear', 'hair drier', 'toothbrush']
    for p, (xmin, ymin, xmax, ymax) in zip(prob, boxes):
        cl = p.argmax()
        label_text = '{}: {}%'.format(LABEL[cl], round(p[cl] * 100, 2))

        cv2.rectangle(opencvImage, (int(xmin), int(ymin)), (int(xmax), int(ymax)), (255, 255, 0), 2)
        cv2.putText(opencvImage, label_text, (int(xmin) + 10, int(ymin) + 30), cv2.FONT_HERSHEY_SIMPLEX, 1,
                    (255, 255, 0), 2)

    if imshow:
        cv2.imshow('detect', opencvImage)
        cv2.waitKey(0)

    if imwrite:
        if not os.path.exists("./result/pred"):
            os.makedirs('./result/pred')
        cv2.imwrite('./result/pred/{}'.format(save_name), opencvImage)

# 将xywh转xyxy
def box_cxcywh_to_xyxy(x):
    x_c, y_c, w, h = x.unbind(1)
    b = [(x_c - 0.5 * w), (y_c - 0.5 * h),
         (x_c + 0.5 * w), (y_c + 0.5 * h)]
    return torch.stack(b, dim=1)

def rescale_bboxes(out_bbox, size):
    img_w, img_h = size
    b = box_cxcywh_to_xyxy(out_bbox)
    b = b.cpu().numpy()
    b = b * np.array([img_w, img_h, img_w, img_h], dtype=np.float32)
    return b

def load_model(model_path , args):
    model, _, _ = build_model(args)
    model.cuda()
    model.eval()
    state_dict = torch.load(model_path) # <-----------修改加载模型的路径
    model.load_state_dict(state_dict["model"])
    model.to(device)
    print("load model sucess")
    return model

# 图像的推断
def detect(im, model, transform, prob_threshold=0.7):
    # mean-std normalize the input image (batch-size: 1)
    img = transform(im).unsqueeze(0)


    # propagate through the model
    img = img.to(device)
    start = time.time()
    outputs = model(img)

    # keep only predictions with 0.7+ confidence
    print(outputs['pred_logits'].softmax(-1)[0, :, :-1])
    probas = outputs['pred_logits'].softmax(-1)[0, :, :-1]
    keep = probas.max(-1).values > prob_threshold

    probas = probas.cpu().detach().numpy()
    keep = keep.cpu().detach().numpy()

    # convert boxes from [0; 1] to image scales
    bboxes_scaled = rescale_bboxes(outputs['pred_boxes'][0, keep], im.size)
    end = time.time()
    return probas[keep], bboxes_scaled, end - start


if __name__ == "__main__":

    main_args = get_main_args_parser().parse_args()
    # 加载模型
    dfdetr = load_model('./r50_deformable_detr-checkpoint.pth',main_args) # <--修改为自己加载模型的路径

    files = os.listdir("./val2017") # <--修改为待预测图片所在文件夹路径

    cn = 0
    waste=0
    for file in files:
        img_path = os.path.join("./val2017", file) # <--修改为待预测图片所在文件夹路径
        im = Image.open(img_path)

        scores, boxes, waste_time = detect(im, dfdetr, transform)
        plot_result(im, scores, boxes, save_name=file, imshow=False, imwrite=True)
        print("{} [INFO] {} time: {} done!!!".format(cn,file, waste_time))

        cn+=1
        waste+=waste_time
        waste_avg = waste/cn
        print(waste_avg)
查看预测结果

4.总结
使用defoemable-detr训练自己的模型,我的数据集是对飞机类别进行目标检测分类,虽然跑的通,但是效果很不好。因为是初学者具体什么原因我也不太清楚,自己摸索了几天还是比较棘手的,只会用,里面的原理,代码部分基本看不懂。观察训练日志文件,损失值是在下降,但是train_class_error错误率还是很高,个人感觉数据集过少的原因。


 1032
1032


 被折叠的 条评论
为什么被折叠?
被折叠的 条评论
为什么被折叠?
 到【灌水乐园】发言


