


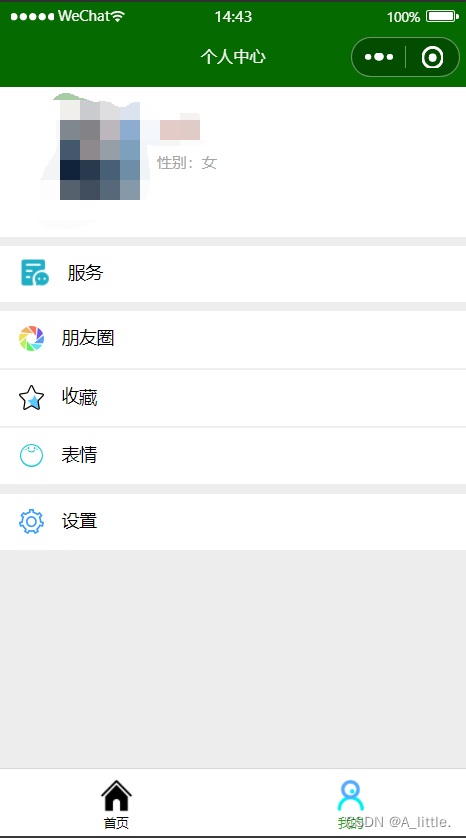
我的(页面)
wxml代码
<!--index.wxml-->


<page>

  <view class="container alittle">

    <view class="media meddia-x">

      <view class="float-left img">

        <block wx:if="{{canIUseOpenData}}">

          <view class="userinfo-avatar" bindtap="bindViewTap">

            <open-data type="userAvatarUrl"></open-data>

          </view>

          <open-data type="userNickName"></open-data>

        </block>

        <block wx:elif="{{!hasUserInfo}}">

          <button wx:if="{{canIUseGetUserProfile}}" bindtap="getUserProfile"> 获取头像昵称 </button>

        </block>

        <block wx:else>

          <image bindtap="bindViewTap" class="userinfo-avatar" src="{{userInfo.avatarUrl}}" mode="cover"></image>

          <text class="userinfo-nickname">{{userInfo.nickName}}</text>

          <view class="media-body" style="font-size: 12px; color: #a6a6a6;">性别:{{userInfo.gender==1?"男":"女"}}</view>

        </block>

      </view>

    </view>


  </view>

</page>

<view class="skspace"></view>

<view class="body">

  <view style="line-height: 40px;">

    <image src="/imges/服务.png" class="allImges" style="vertical-align: middle; height: 25px; width: 25px;"></image>

    <view class="div"> 服务</view>

  </view>

</view>

<view class="skspace"></view>

<view class="body">

  <view style="line-height: 40px;">

    <image src="/imges/朋友圈.png" class="allImges" style="vertical-align: middle;"></image>

    <view class="div"> 朋友圈</view>

  </view>

</view>


<view class="body">

  <view style="line-height: 40px;">

    <image src="/imges/收藏.png" class="allImges" style="vertical-align: middle;"></image>

    <view class="div"> 收藏</view>

  </view>

</view>


<view class="body">

  <view style="line-height: 40px;">

    <image src="/imges/微笑.png" class="allImges" style="vertical-align: middle;"></image>

    <view class="div"> 表情</view>

  </view>

</view>


<view class="skspace"></view>


<view class="body">

  <view style="line-height: 40px;">

    <image src="/imges/设置.png" class="allImges" style="vertical-align: middle;"></image>

    <view class="div"> 设置</view>

  </view>

</view>
js代码
// index.js

// 获取应用实例

const app = getApp()


Page({

  data: {

  },


// doApply(nid){

//   console.log('点击报名', nid)

//   // 判断是否登录

//   var userInfo = app.globalData.userInfo;

//   if (!userInfo){

//     wx.switchTab({

//       url: '/pages/mypage/mypage',

//     })

//     return

//   }

// },


  // 事件处理函数

  // bindViewTap() {

  //   wx.navigateTo({

  //     url: '../logs/logs'

  //   })

  // },

  onLoad() {

    if (wx.getUserProfile) {

      this.setData({

        canIUseGetUserProfile: true

      })

    }

  },

  getUserProfile(e) {

    // 推荐使用wx.getUserProfile获取用户信息,开发者每次通过该接口获取用户个人信息均需用户确认,开发者妥善保管用户快速填写的头像昵称,避免重复弹窗

    wx.getUserProfile({

      desc: '展示用户信息', // 声明获取用户个人信息后的用途,后续会展示在弹窗中,请谨慎填写

      success: (res) => {

        console.log(res)

        this.setData({

          userInfo: res.userInfo,

          hasUserInfo: true

        })

      }

    })

  },

  getUserInfo(e) {

    // 不推荐使用getUserInfo获取用户信息,预计自2021年4月13日起,getUserInfo将不再弹出弹窗,并直接返回匿名的用户个人信息

    console.log(e)

    this.setData({

      userInfo: e.detail.userInfo,

      hasUserInfo: true

    })

  }

})
wxss
/**index.wxss**/

page{
  background-color: #EDEDED;
}
.alittle{
  padding-top: 20px;
  color: #FFF;
  background-image: linear-gradient(180deg, #FFF, #fFF);
  height: 50px;
}
.userinfo-avatar {
  /* overflow: hidden; */
  width: 135rpx;
  height: 135rpx;
  margin: 0 20px;
  border-radius: 20%;
  float: left;
}

.img{
  padding-right: 190px;
}

.media-body{
  position: fixed;
  padding-top: 10px;
  padding-left: 98px;
  color: #000;
}

.skspace{
  height: 6px;
  background-color: #ededed;
  clear: both;
  border: solid #ddd 0px;
  border-left: none;
  border-right: none;
}
.body{
  background: #FFF;
  height: 45px;
  /* text-align: center; */
  /* padding: 18px 0px 0px 10px; */
  padding-left: 15px;
  border: solid 0.5px;
  border-color: #eeeeee;
}

.allImges{
  height: 20px;
  width: 20px;
}

.div{
  padding-left: 10px;
  display: inline;
  font-size: 14px;
}

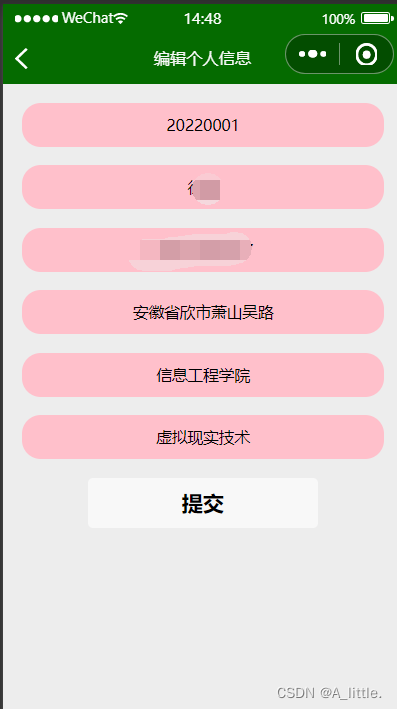
编辑完整代码
wxml
<!-- update.wxml -->
<view class="body">
  <view wx:for="{{stuData}}" wx:key="index">
    <form bindsubmit="formSubmit" >

      <view style="font-size: 12.5px;  border-radius: 10px;">
        <view class='updateInput'>
          <input type="text" value="{{item.student_code}}" name='student_code' />
        </view>
        <view class='updateInput'>
          <input type="text" value="{{item.name}}" name='name' />
        </view>
        <view class='updateInput'>
          <input type="text" value="{{item.phone}}" name='phone' />
        </view>
        <view class='updateInput'>
          <input type="text" value="{{item.address}}" name='address' />
        </view>
        <view class='updateInput'>
          <input type="text" value="{{item.faculty}}" name='faculty' />
        </view>
        <view class='updateInput'>
          <input type="text" value="{{item.major}}" name='major' />
        </view>
        <view style="color: red; text-align: center;">{{msg}}</view>
      </view>
      <button form-type="submit">提交</button>
    </form>
  </view>

</view>
js
// pages/update/update.js
Page({

  /**
   * 页面的初始数据
   */
  data: {
    stuData: [],
    msg: ''
  },
  onLoad: function (options) {
    const id = options.id; // 获取跳转时传递过来的id参数
    console.log('接收到的学生ID是:', id);

    wx.request({
      url: 'http://192.168.46.16:8004/manage/update/',
      method: 'GET',
      data: {
        id: id
      },
      success: res => {
        console.log(res.data); // 输出从后端获取的数据
        this.setData({
          stuData: res.data
        })
      },
      fail: function (error) {
        console.error(error);
      }
    });
  },
  formSubmit: function (e) {
    console.log(e.detail.value)
    const student_code = e.detail.value.student_code
    const name = e.detail.value.name
    const phone = e.detail.value.phone
    const address = e.detail.value.address
    const faculty = e.detail.value.faculty
    const major = e.detail.value.major

    const dataToSend = {
      student_code: student_code,
      name: name,
      phone: phone,
      address: address,
      faculty: faculty,
      major: major
    };
    // 发送请求至后端
    wx.request({
      url: 'http://192.168.46.16:8004/manage/oneUpdate/', // 后端接口地址
      method: 'POST', // 请求方法为POST
      header: {
        'content-type': 'application/json', // 请求头设置为JSON格式
        'Cache-Control': 'no-cache', // 禁止缓存
      },
      data: dataToSend, // 发送的数据
      success: (res) => {
        // 请求成功的处理逻辑
        console.log('成功:', res.data);
        this.setData({
          msg : res.data
        })
        // 在这里可以对后端返回的数据进行处理
      },
      fail: function (err) {
        // 请求失败的处理逻辑
        console.error('Failed to send data:', err);
      }
    });
  },

  /**
   * 生命周期函数--监听页面初次渲染完成
   */
  onReady() {

  },

  /**
   * 生命周期函数--监听页面显示
   */
  onShow() {

  },

  /**
   * 生命周期函数--监听页面隐藏
   */
  onHide() {

  },

  /**
   * 生命周期函数--监听页面卸载
   */
  onUnload() {

  },

  /**
   * 页面相关事件处理函数--监听用户下拉动作
   */
  onPullDownRefresh() {

  },

  /**
   * 页面上拉触底事件的处理函数
   */
  onReachBottom() {

  },

  /**
   * 用户点击右上角分享
   */
  onShareAppMessage() {

  }
})
wxss
/* pages/update/update.wxss */
page{
  background-color: #EDEDED;
}
.updateInput{
  background-color: pink;
  margin: 15px;
  height: 35px;
  place-items: center stretch;
  text-align: center;
  display: grid;
  border-radius: 15px;
}
列表完整代码
wxml
<view class="body">
  <view style="display: flex; align-items: center;">
    <input style="font-size: 12px; border: 1px solid rgb(112, 122, 122); border-radius: 10px; width: 210px; margin-left: 1px; text-align: center;" placeholder="搜索的学号/姓名" bindinput="inputChange" />
    <image src="/imges/搜索.png" style="width: 45px; height: 45px;" bindtap="clickSelect" />
  </view>


  <navigator style="width: 50%; height: 40px; background-color: rgb(36, 196, 44); align-items: center; display: grid; justify-items: center;border-radius: 30px;" url="/pages/create/create">新增个人信息</navigator>
  <view wx:for="{{stuData}}" wx:key="index" style="width: 100%;">
    <view class="body_1">
      <view style="flex: 1; margin-left: 15px;">{{item.student_code}} {{item.name}} {{item.phone}}</view>
      <text url="/pages/update/update" class="update_delete" data-id="{{item.student_code}}" style="background-color: pink" bindtap="handleEditClick">编辑</text>
      <text url="" class="update_delete" style="background-color: lightcoral;" bindtap="handleDeleteClick" data-id="{{item.student_code}}">删除</text>
    </view>
  </view>
</view>
js
Page({
  /**
   * 页面的初始数据
   */
  data: {
    stuData: [],
  },

  fetchData: function () {
    const that = this;
    wx.request({
      url: 'http://192.168.46.16:8004/manage/index/', // 替换成你的Django服务器地址和端口
      method: 'GET',
      success: function (res) {
        console.log(res.data); // 输出从后端获取的数据
        that.setData({
          stuData: res.data
        });
        wx.stopPullDownRefresh(); // 在这里停止下拉刷新动画
      },
      fail: function (error) {
        console.error(error);
      }
    });
  },

  handleEditClick: function (event) {
    const id = event.currentTarget.dataset.id; // 获取当前点击编辑按钮的对应ID
    console.log('当前编辑的学生ID是:', id);
    // 进行其他操作,如跳转页面,并将ID传递给下一个页面
    wx.navigateTo({
      url: '/pages/update/update?id=' + id, // 将id作为参数拼接到目标页面的URL中
    });
  },

  handleDeleteClick: function (event) {
    const id = event.currentTarget.dataset.id;
    console.log('当前删除的学生id是:' + id)
    wx.request({
      url: `http://192.168.46.16:8004/manage/delete/${id}`,
      method: 'DELETE',
      success: res => {
        console.log('删除成功', res.data);
        this.setData({
          stuData: res.data
        })
        // 这里可以根据需要处理删除成功后的操作
      },
      fail: error => {
        console.error('删除失败', error);
      }
    })
  },

  inputChange: function (event) {
    this.setData({
      searchText: event.detail.value // 将输入值保存到页面的数据中
    });
  },

  clickSelect: function () {
    const searchText = this.data.searchText; // 获取存储的输入值
    console.log(searchText);

    // 使用 wx.request() 向后端发送 GET 请求
    wx.request({
      url: 'http://192.168.46.16:8004/manage/index/', // 替换为你的后端 URL 和参数
      method: 'GET', // 使用 GET 请求
      data:{searchText:searchText},
      success: (res) => {
        // 处理后端成功响应的数据
        console.log(res.data);
        this.setData({
          stuData: res.data
        });
      },
      fail: function (error) {
        // 处理请求失败
        console.error(error);
      }
    });
  },

  /**
   * 生命周期函数--监听页面加载
   */
  // onLoad() {
  //   fetchData.call(this); // 页面加载时获取数据

  // },
  onLoad: function () {
    this.fetchData();
    // setInterval(() => {
    //   this.fetchData();
    // }, 5000);
  },


  /**
   * 生命周期函数--监听页面初次渲染完成
   */
  onReady() {

  },

  /**
   * 生命周期函数--监听页面显示
   */
  onShow() {

  },

  /**
   * 生命周期函数--监听页面隐藏
   */
  onHide() {

  },

  /**
   * 生命周期函数--监听页面卸载
   */
  onUnload() {

  },

  /**
   * 页面相关事件处理函数--监听用户下拉动作
   */
  onPullDownRefresh: function () {
    var that = this;
    that.setData({
      currentTab: 0
    });
    this.fetchData();
  },


  /**
   * 页面上拉触底事件的处理函数
   */
  onReachBottom() {

  },

  /**
   * 用户点击右上角分享
   */
  onShareAppMessage() {

  }
})
wxss
/* pages/stu/stu.wxss */
page {
  background-color: #EDEDED;
}

.body {
  margin-top: 10px;
  margin-left: 10px;
  margin-right: 10px;
  border-radius: 10px;
  height: 50px;
  display: flex;
  flex-direction: column;
  align-items: center;
}

.body_1{
  font-size: 12.5px;
  background-color:white;
  border-radius: 10px;
  margin-bottom: 8px;
  display: flex;
  align-items: center;
  height: 38px;
}

.update_delete {
  margin-left: 12px;
  border-radius: 10px;
  height: 28px;
  place-items: center;
  display: grid;
  width: 32px;
}


 2688
2688


 被折叠的 条评论
为什么被折叠?
被折叠的 条评论
为什么被折叠?
 到【灌水乐园】发言


