


1.讲解
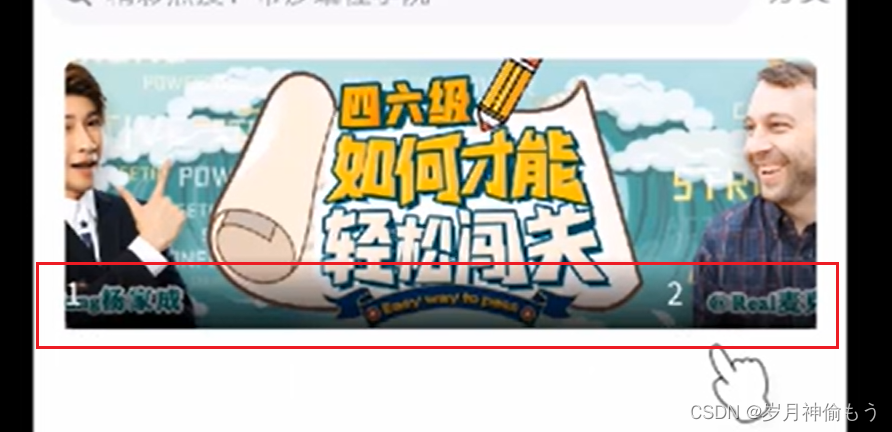
效果图:


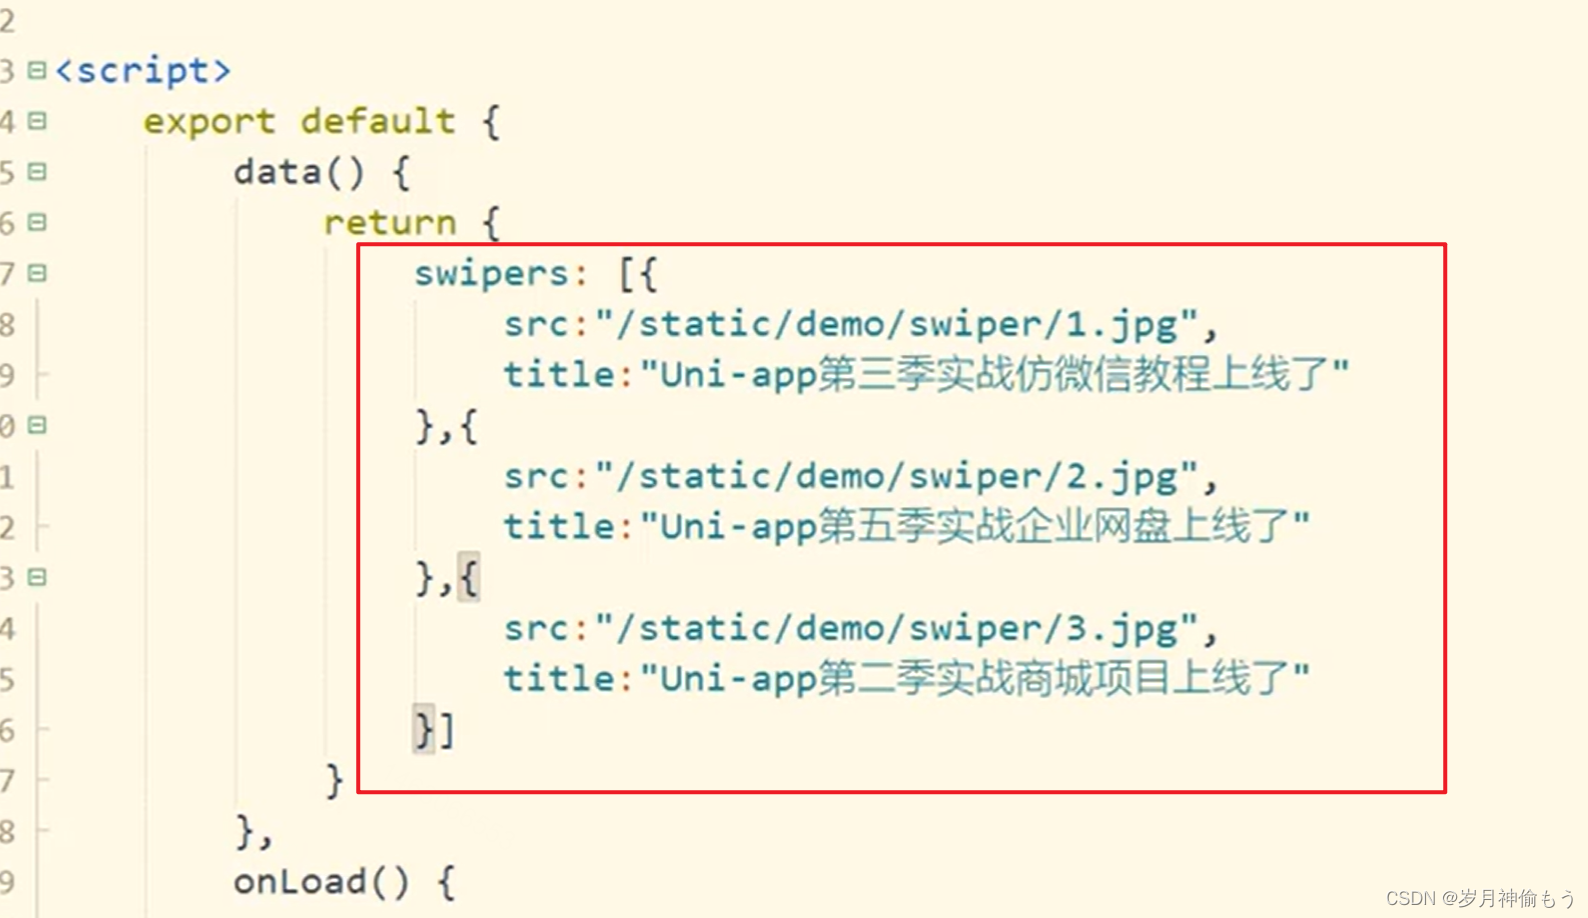
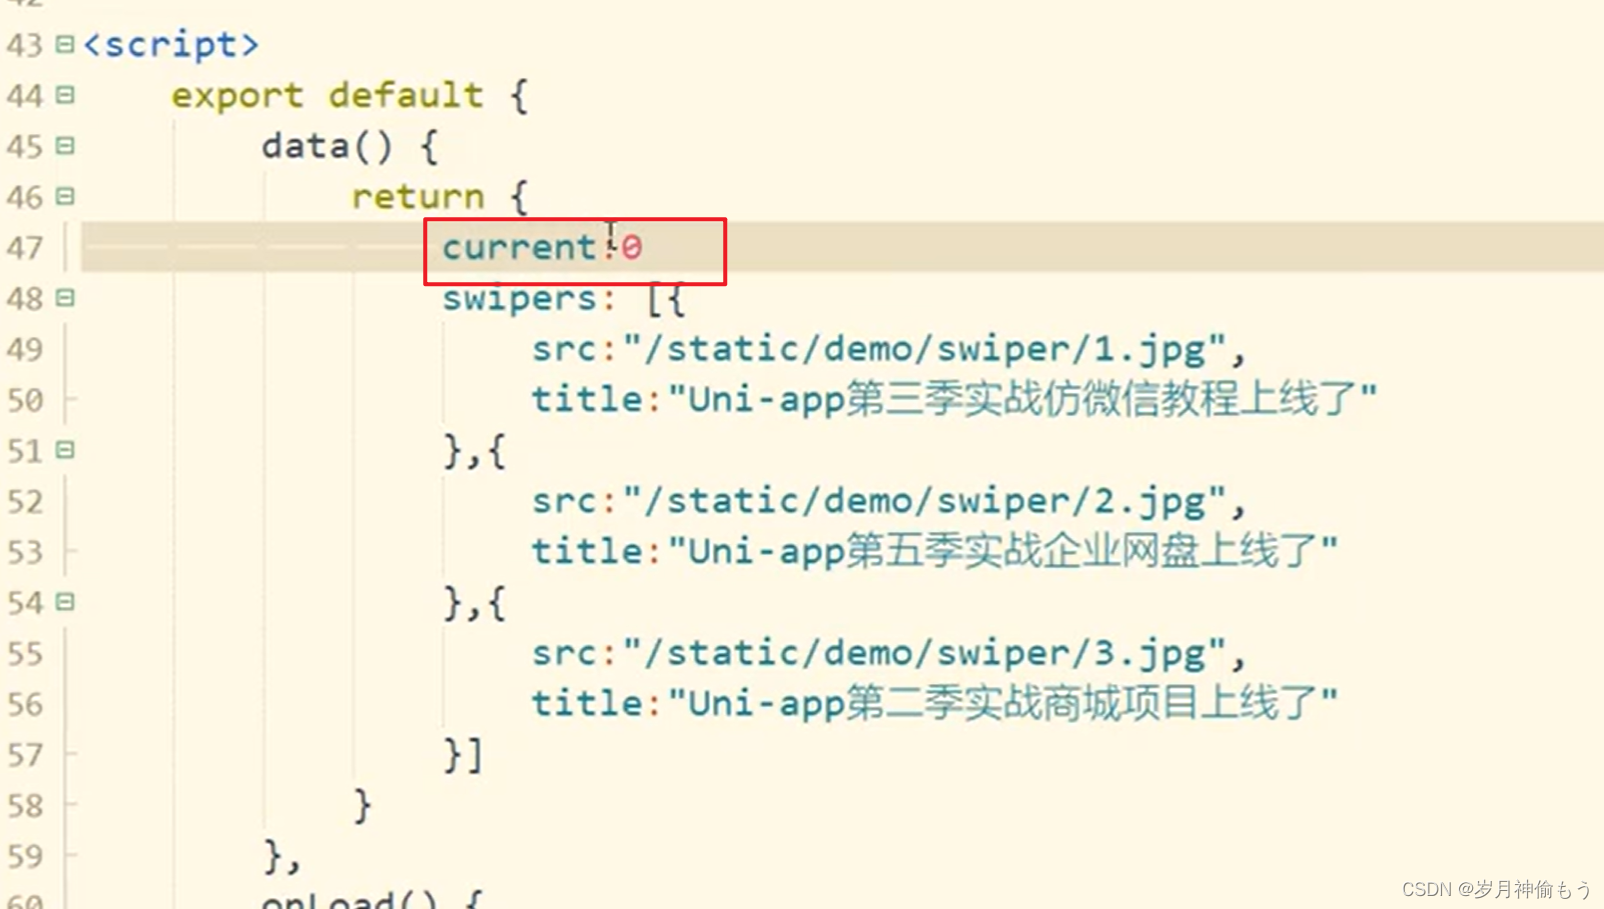
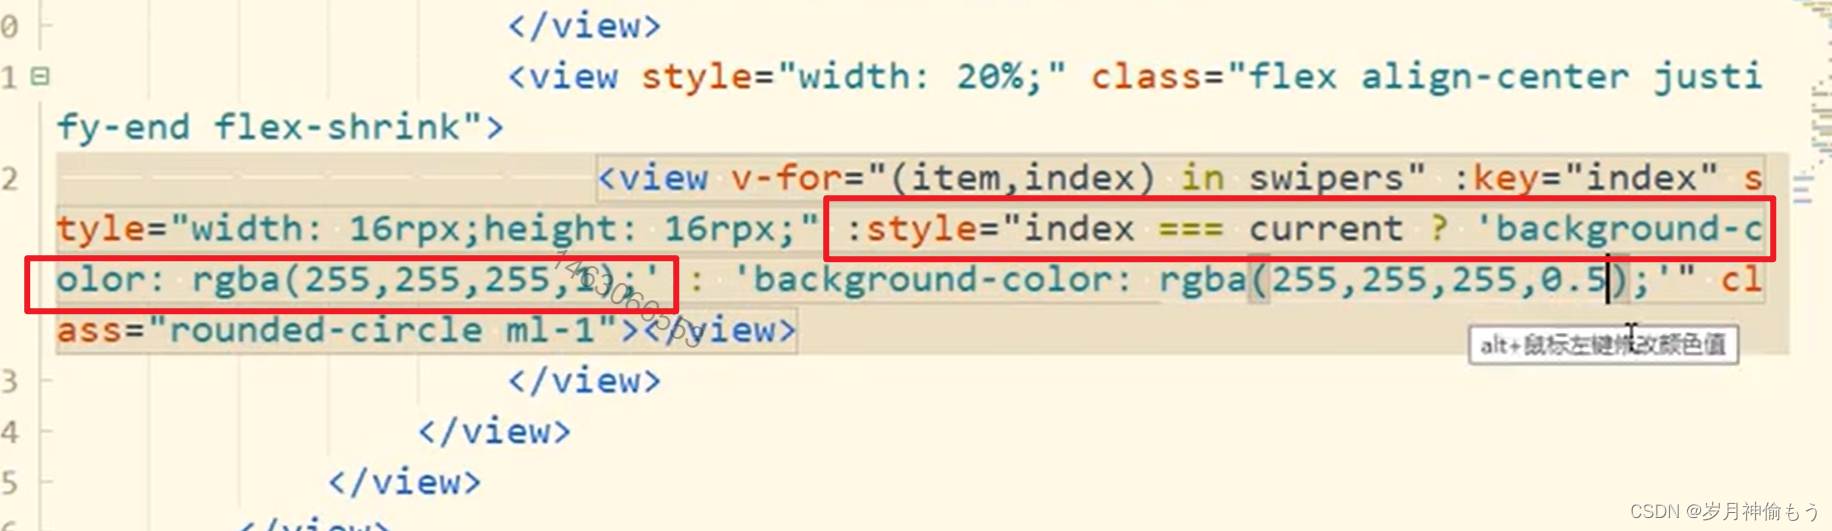
绑定数据:
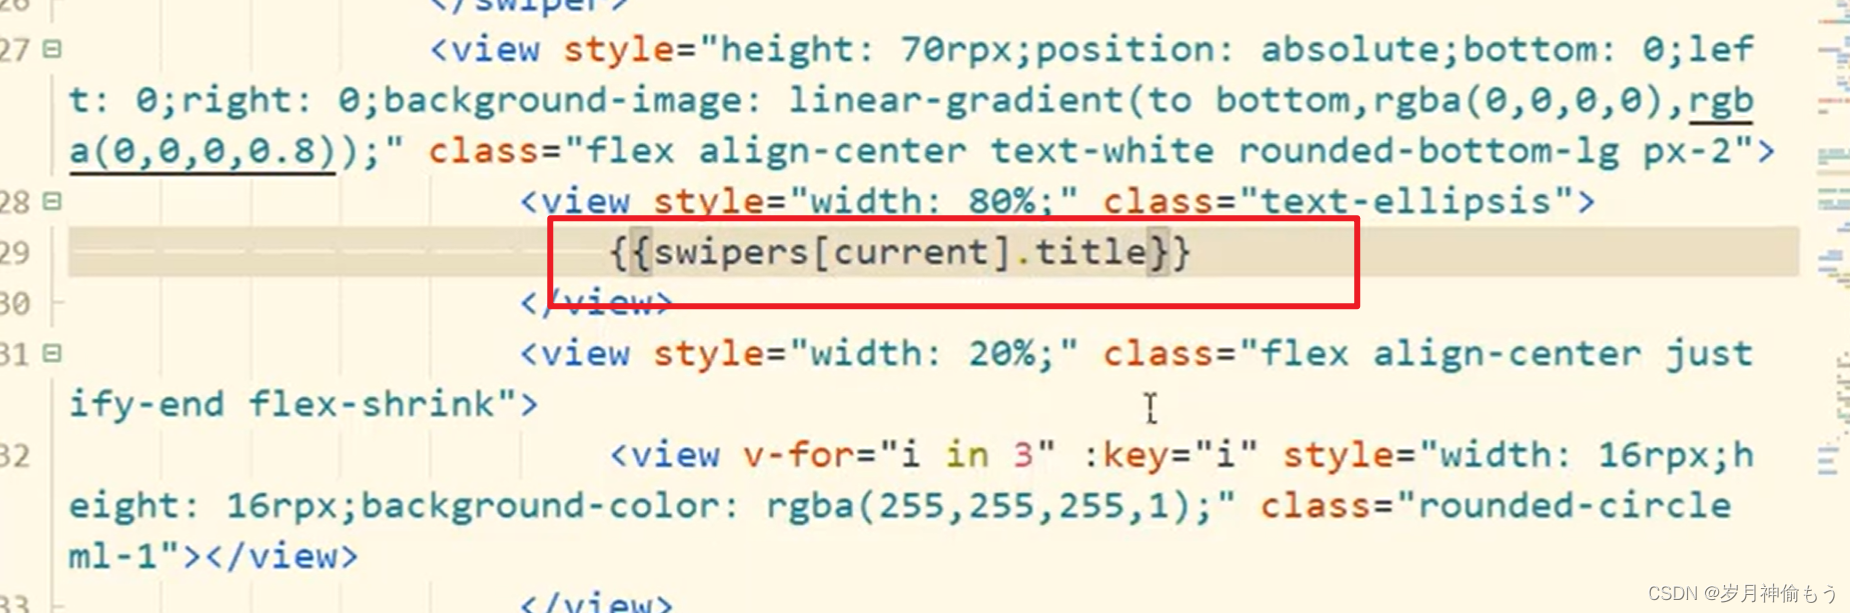
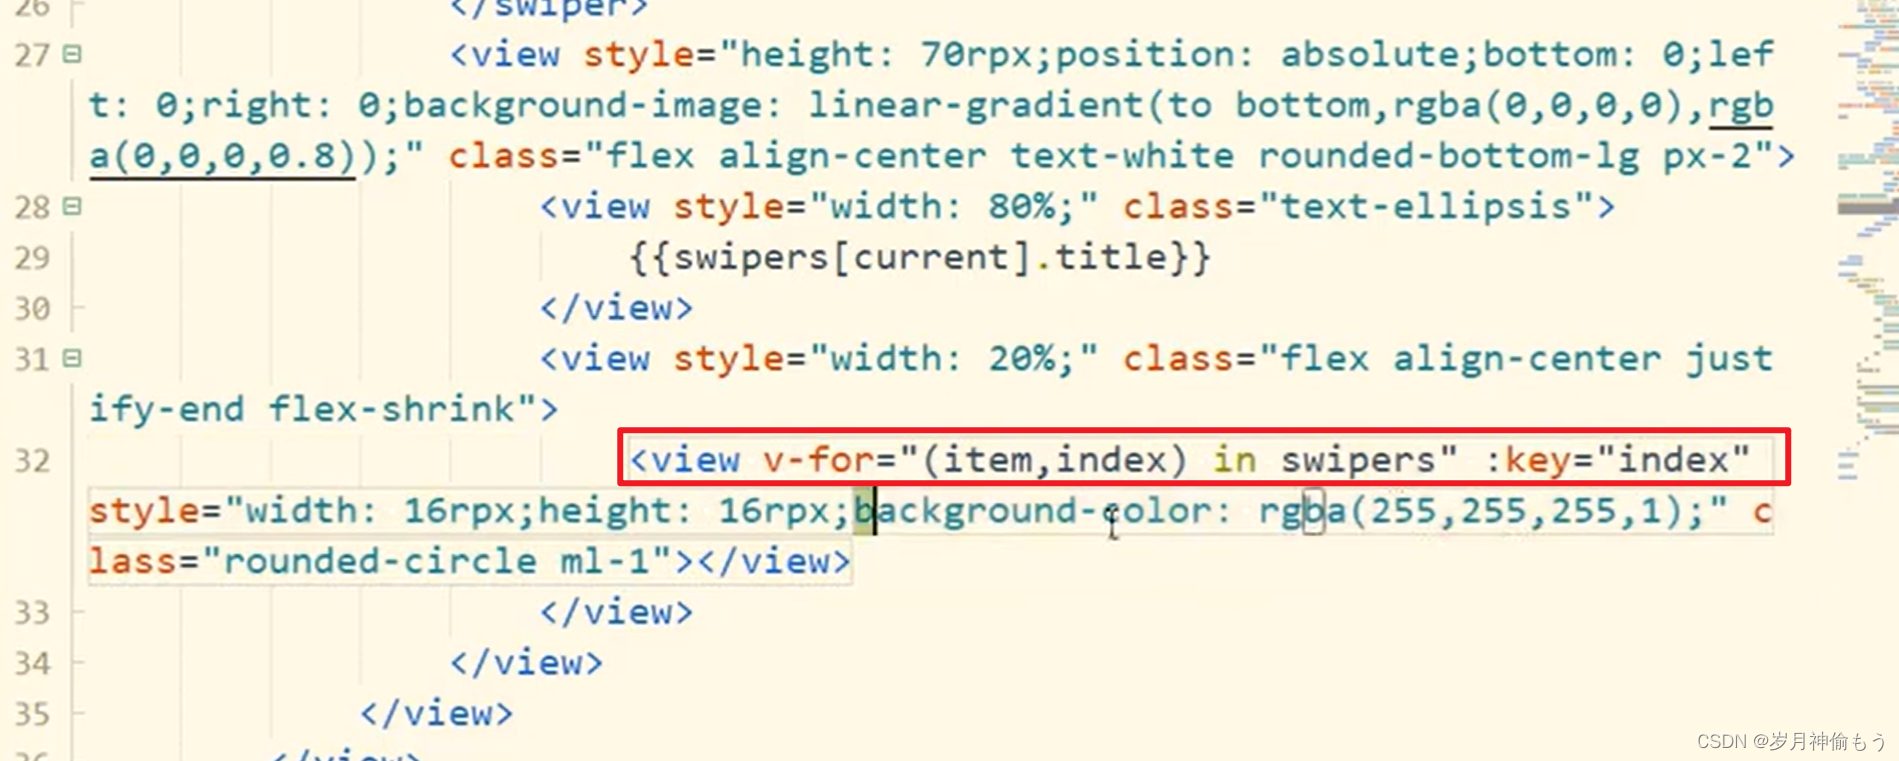
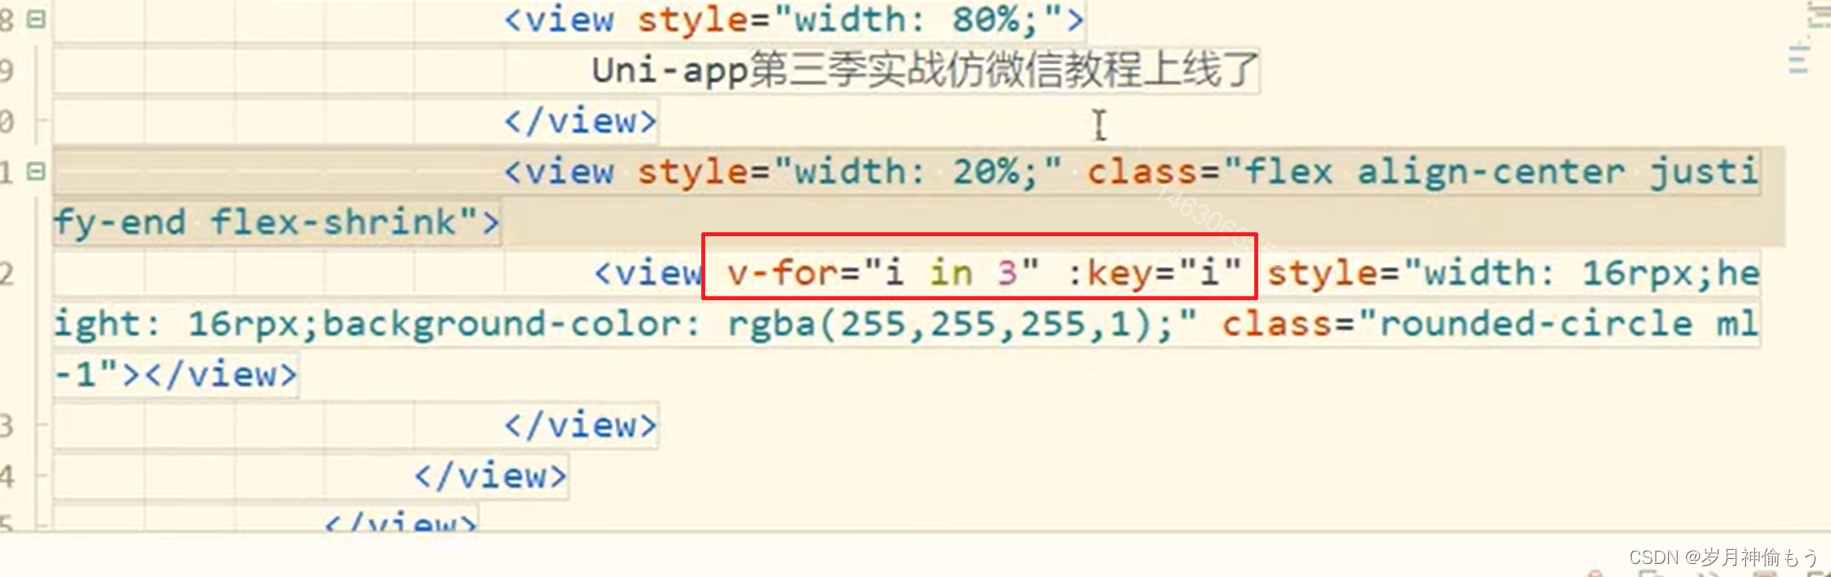
白色圆点选中的颜色是白色, 选不中的是空的颜色:
以上就完成了自定义轮播图
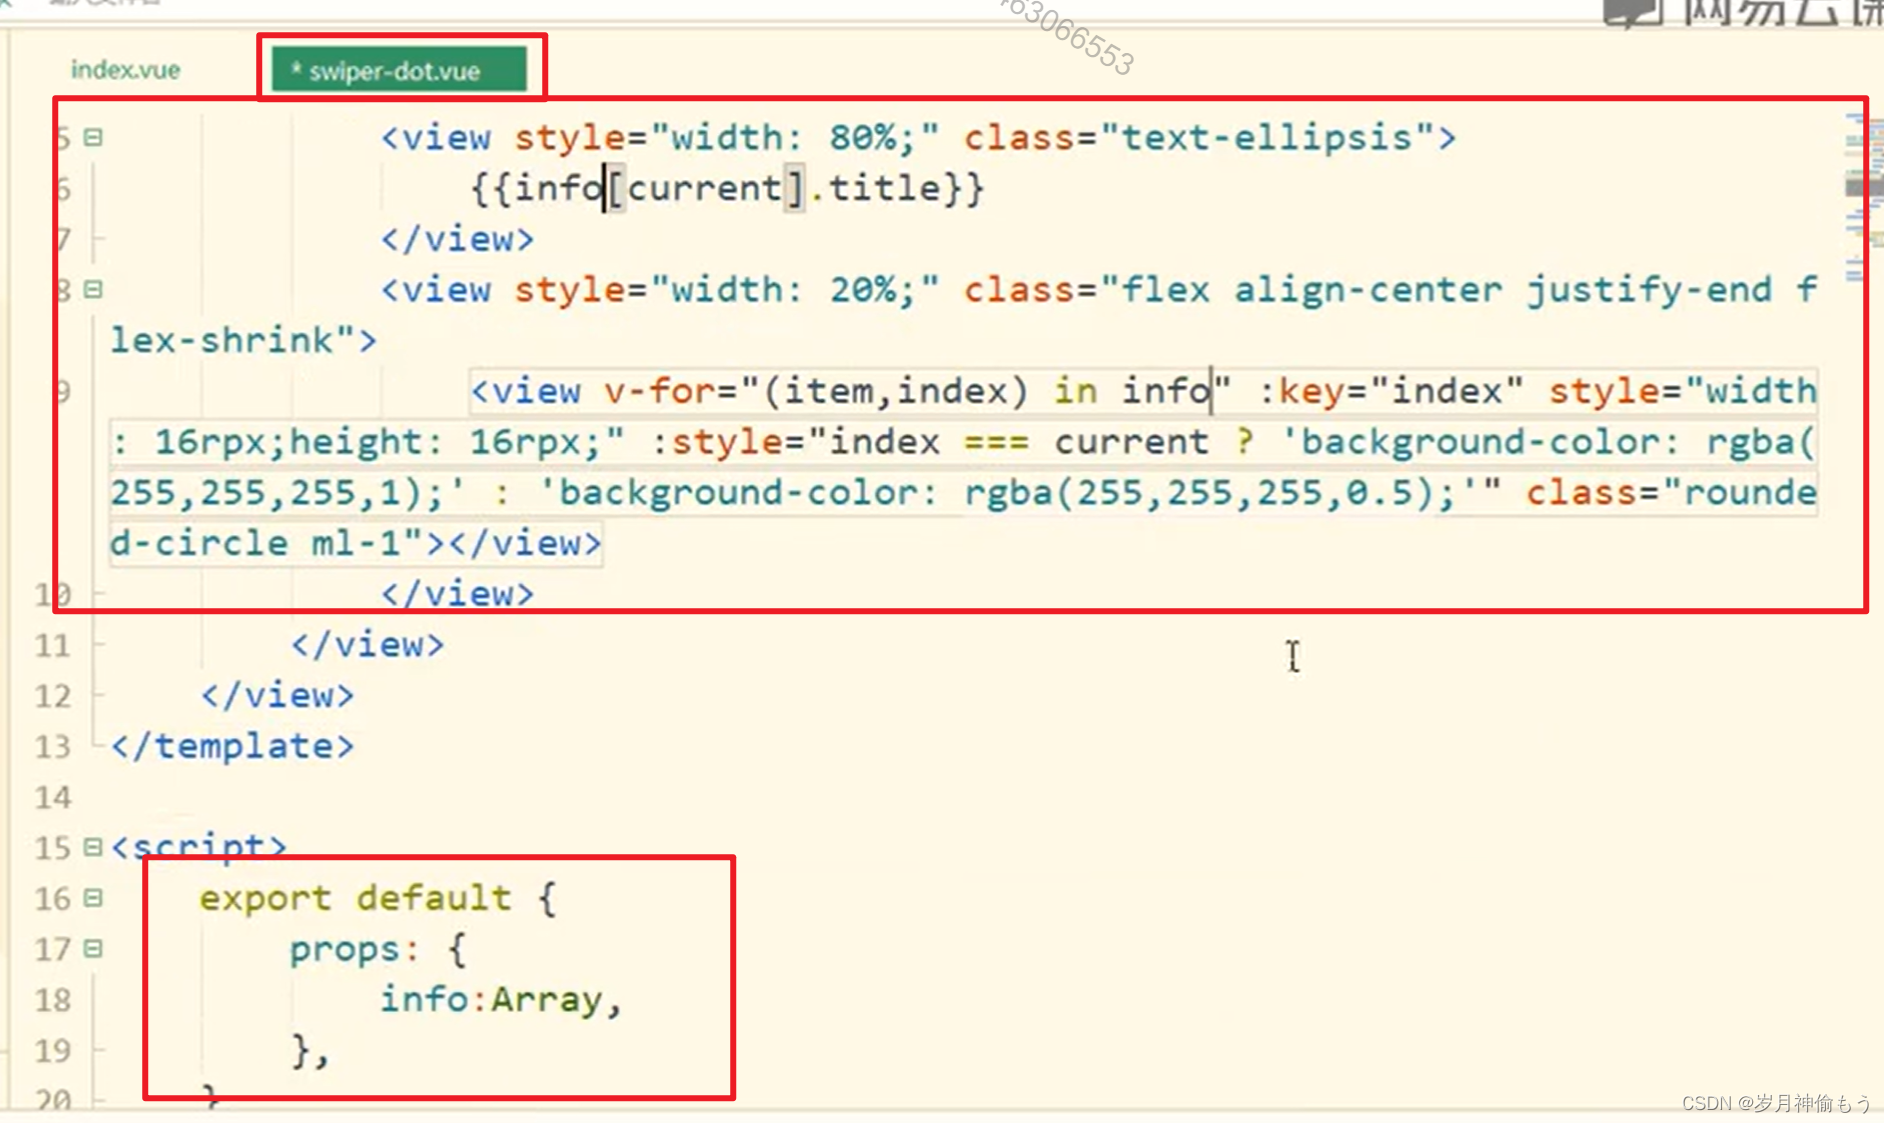
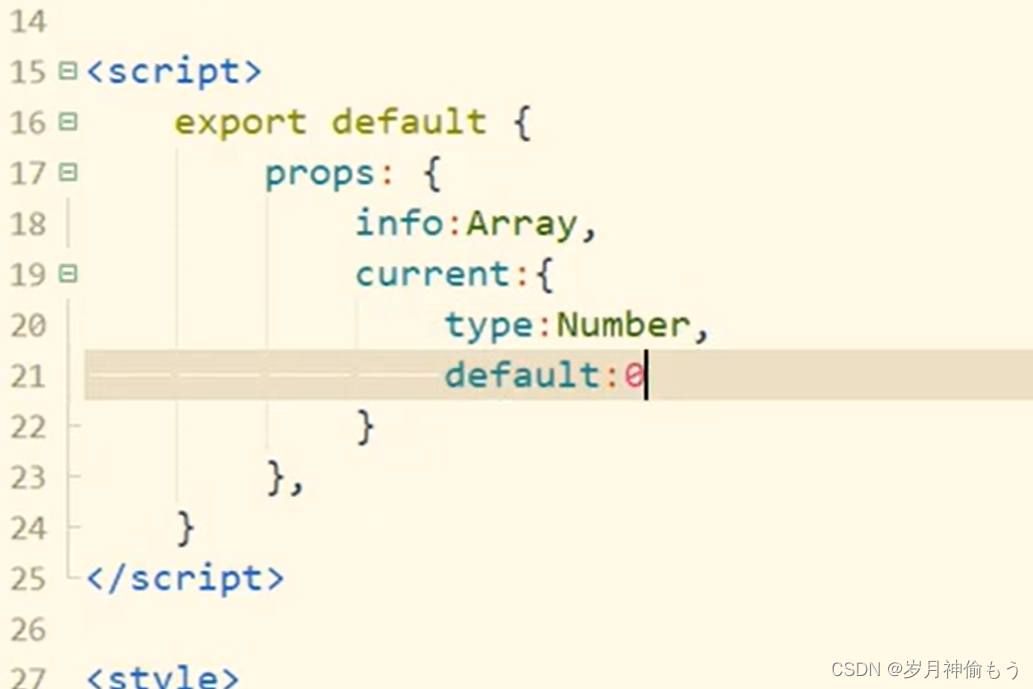
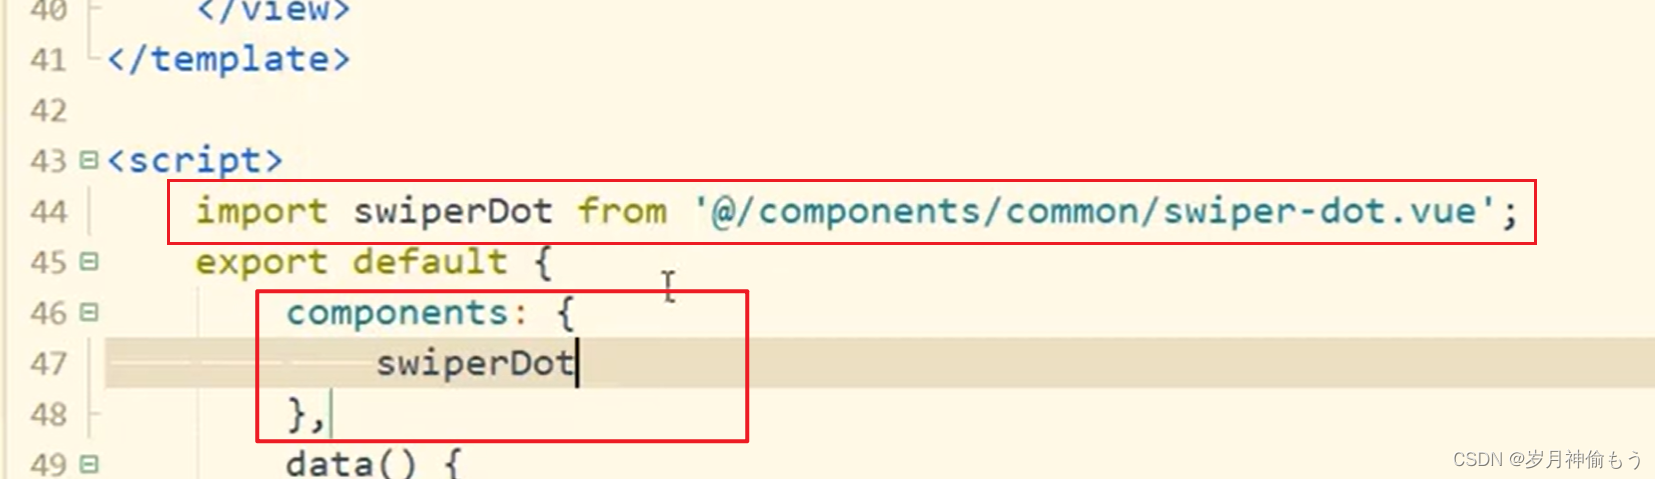
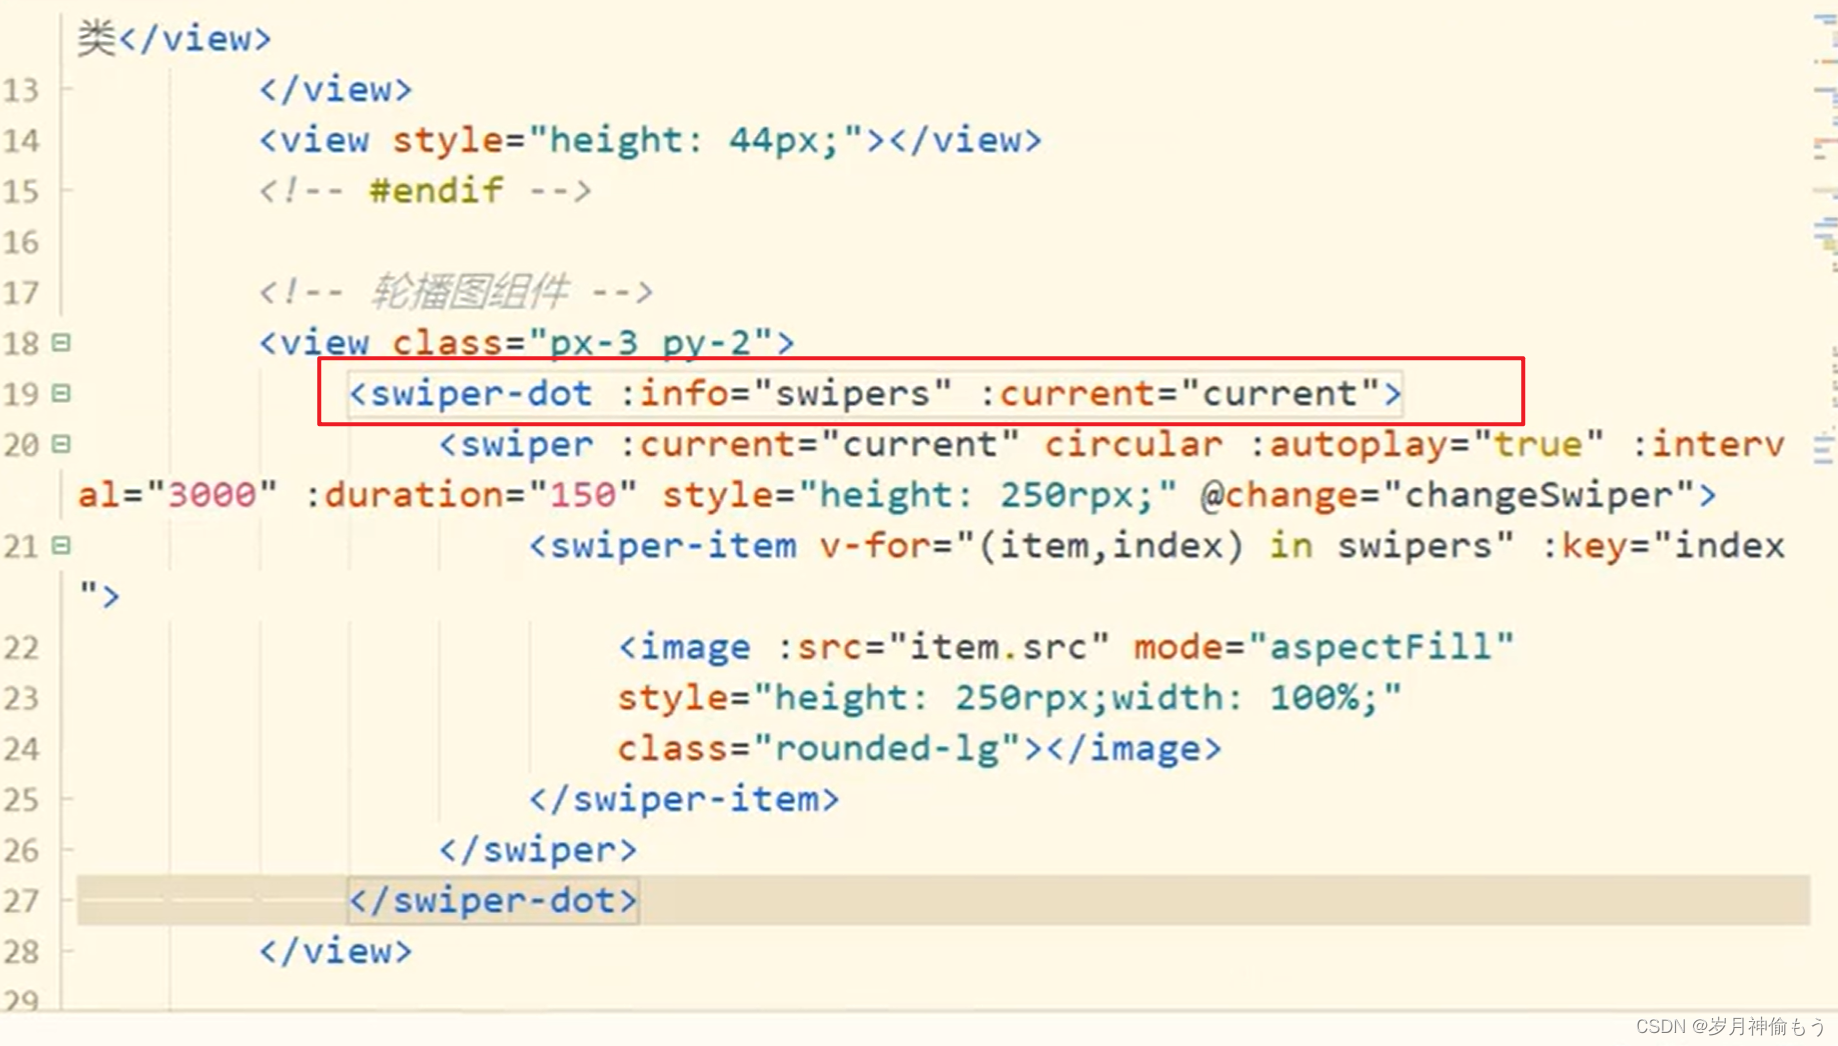
2.封装
以下是对轮播图进行封装:
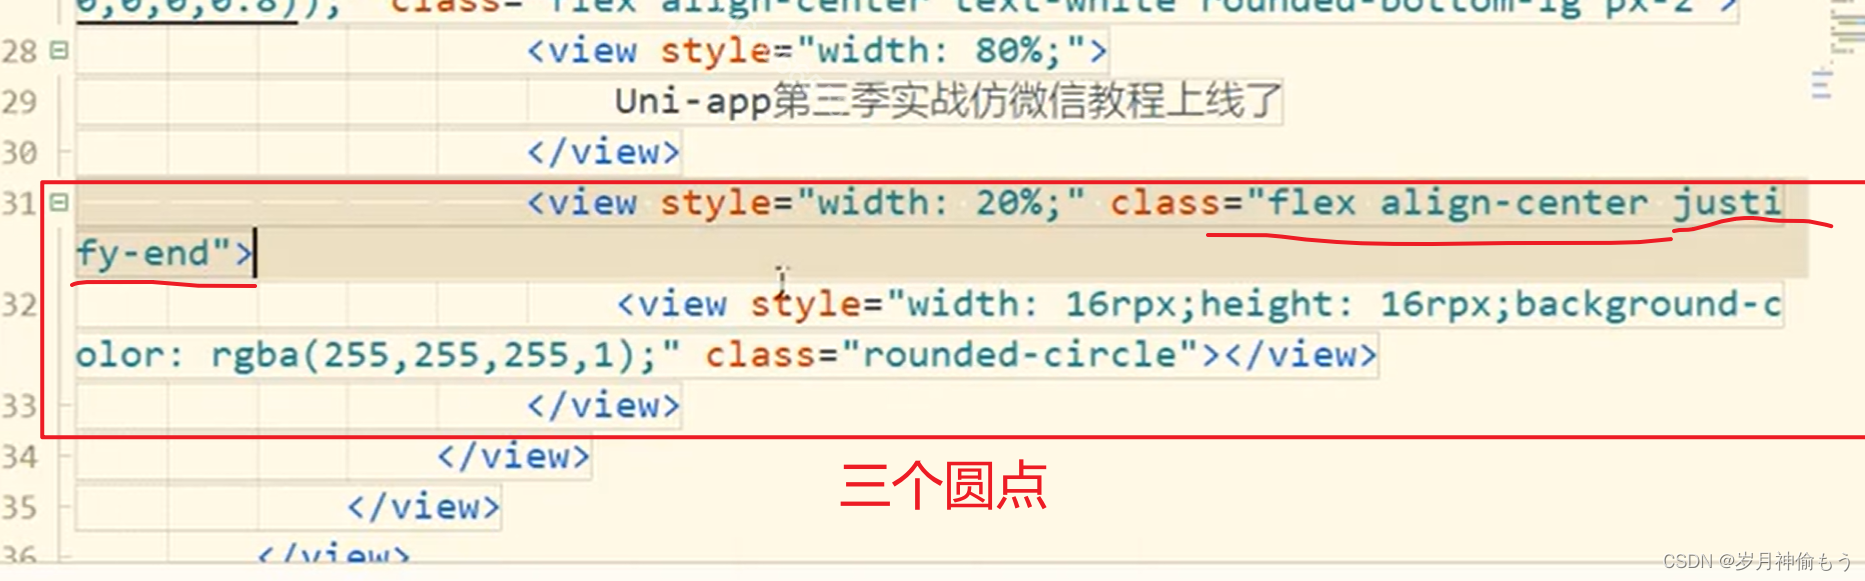
将标题和小圆点部分封装为一个组件:

3.完整代码
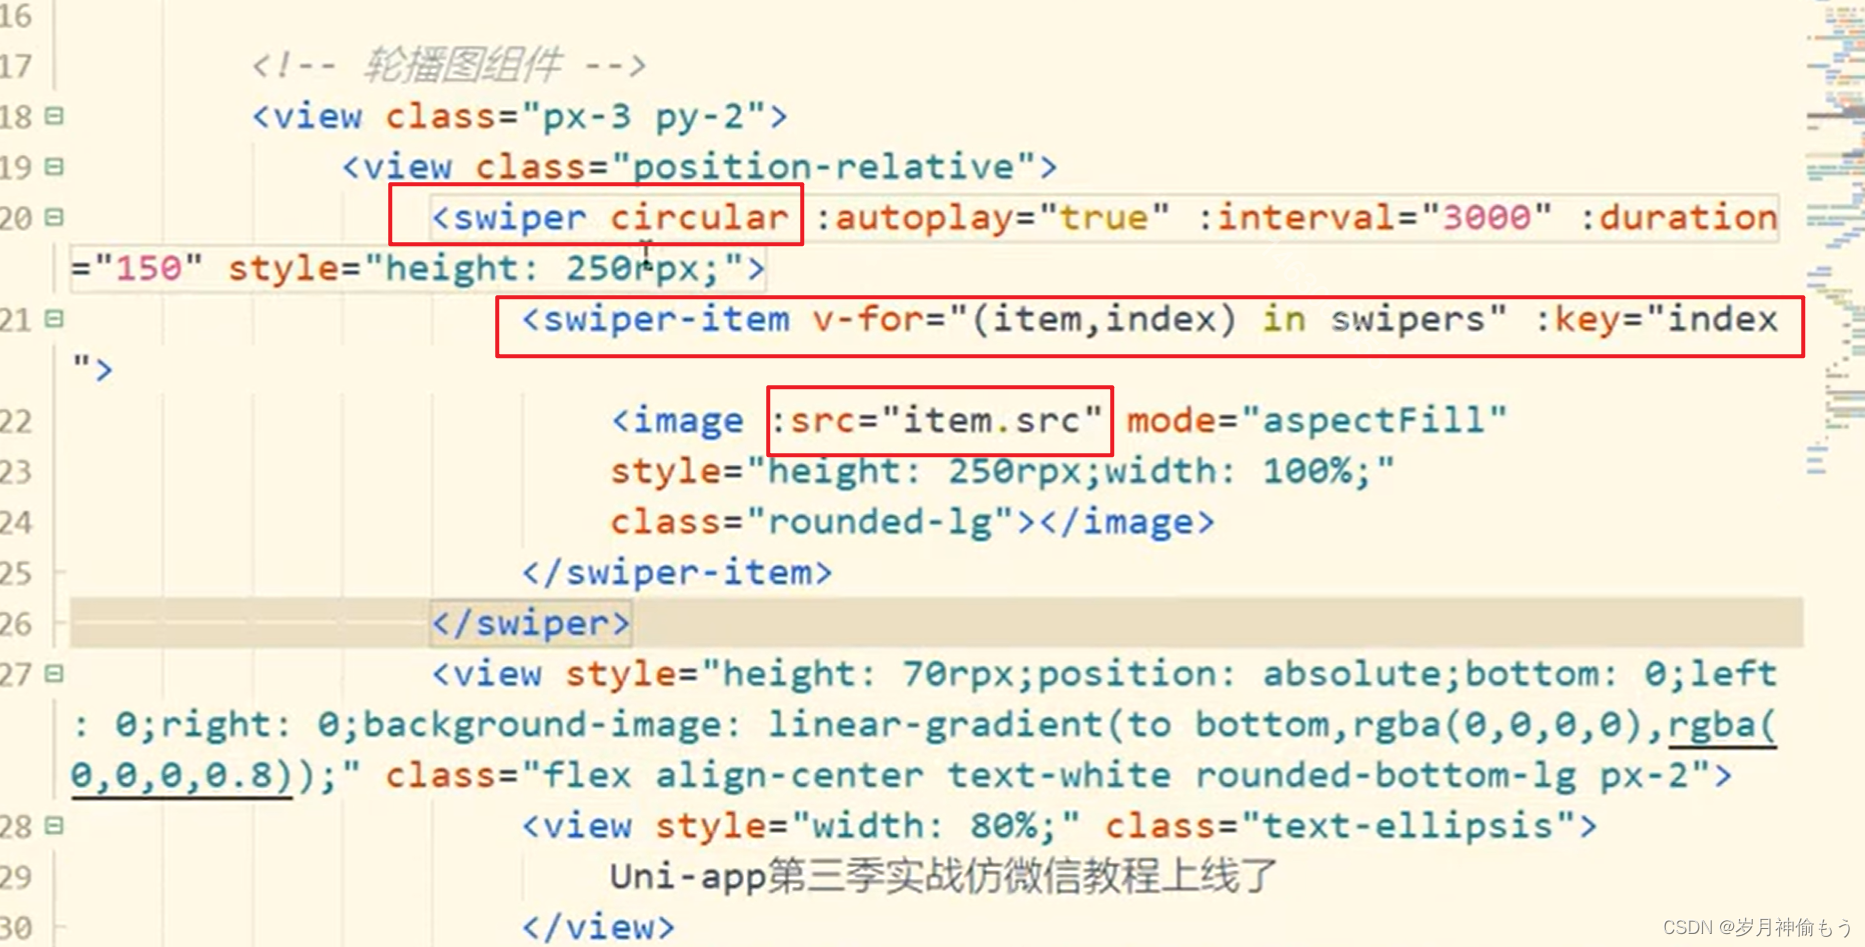
<!-- 轮播图的区域 开始-->
<!-- indicator-dots 小圆点 autoplay自动轮播 interval 轮播的间隔 duration每张轮播图轮播耗时 circular斜街滚动 -->
<view class="my-swiper">
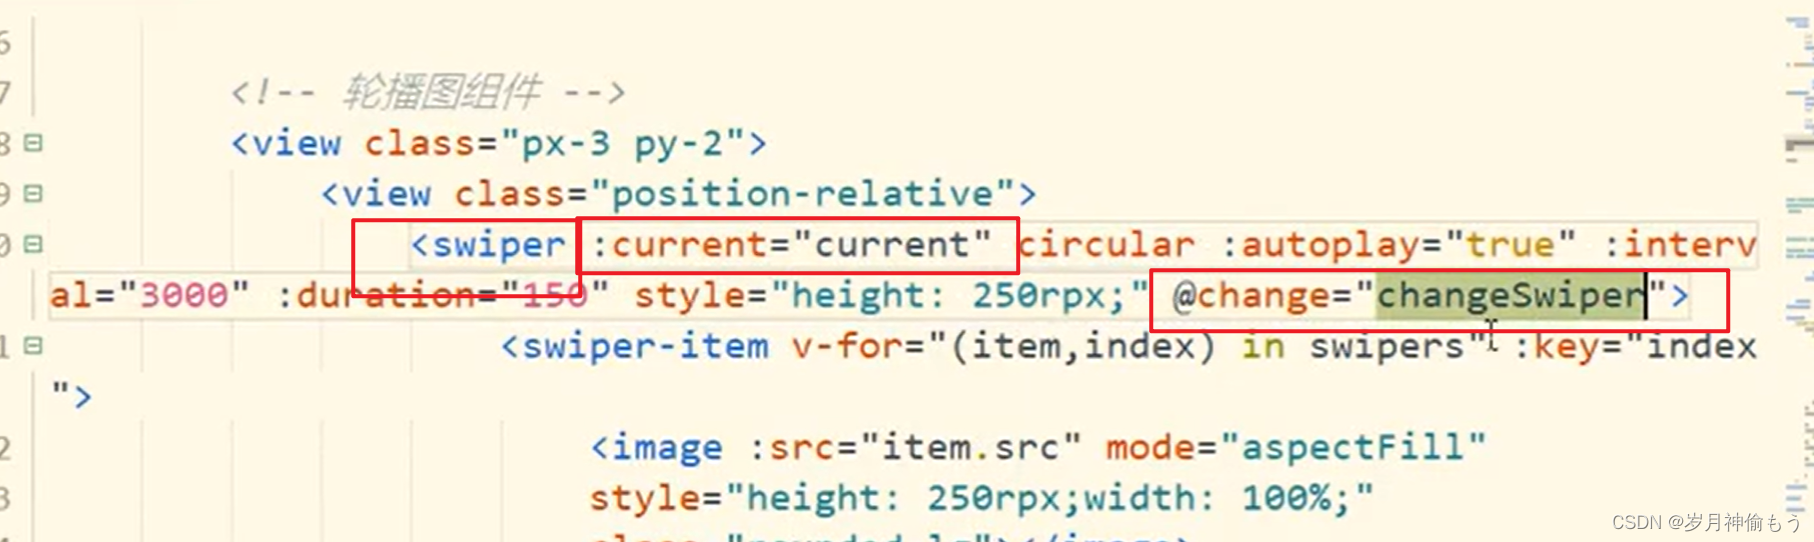
<swiper :current="current" :autoplay="true" :interval="3000" :duration="1000" :circular="true"
indicator-color="#ACACAC" indicator-active-color="#FFFFFF" @change='changeSwiper'>
<swiper-item v-for="(item, index) in banner" :key="index">
<!-- 动态绑定图片的 src 属性 -->
<!-- <navigator :href="item.click_link" v-if="item.click_type == '2'"> -->
<image :src="item.img_url" mode="" @click="handleNav(item.id)"></image>
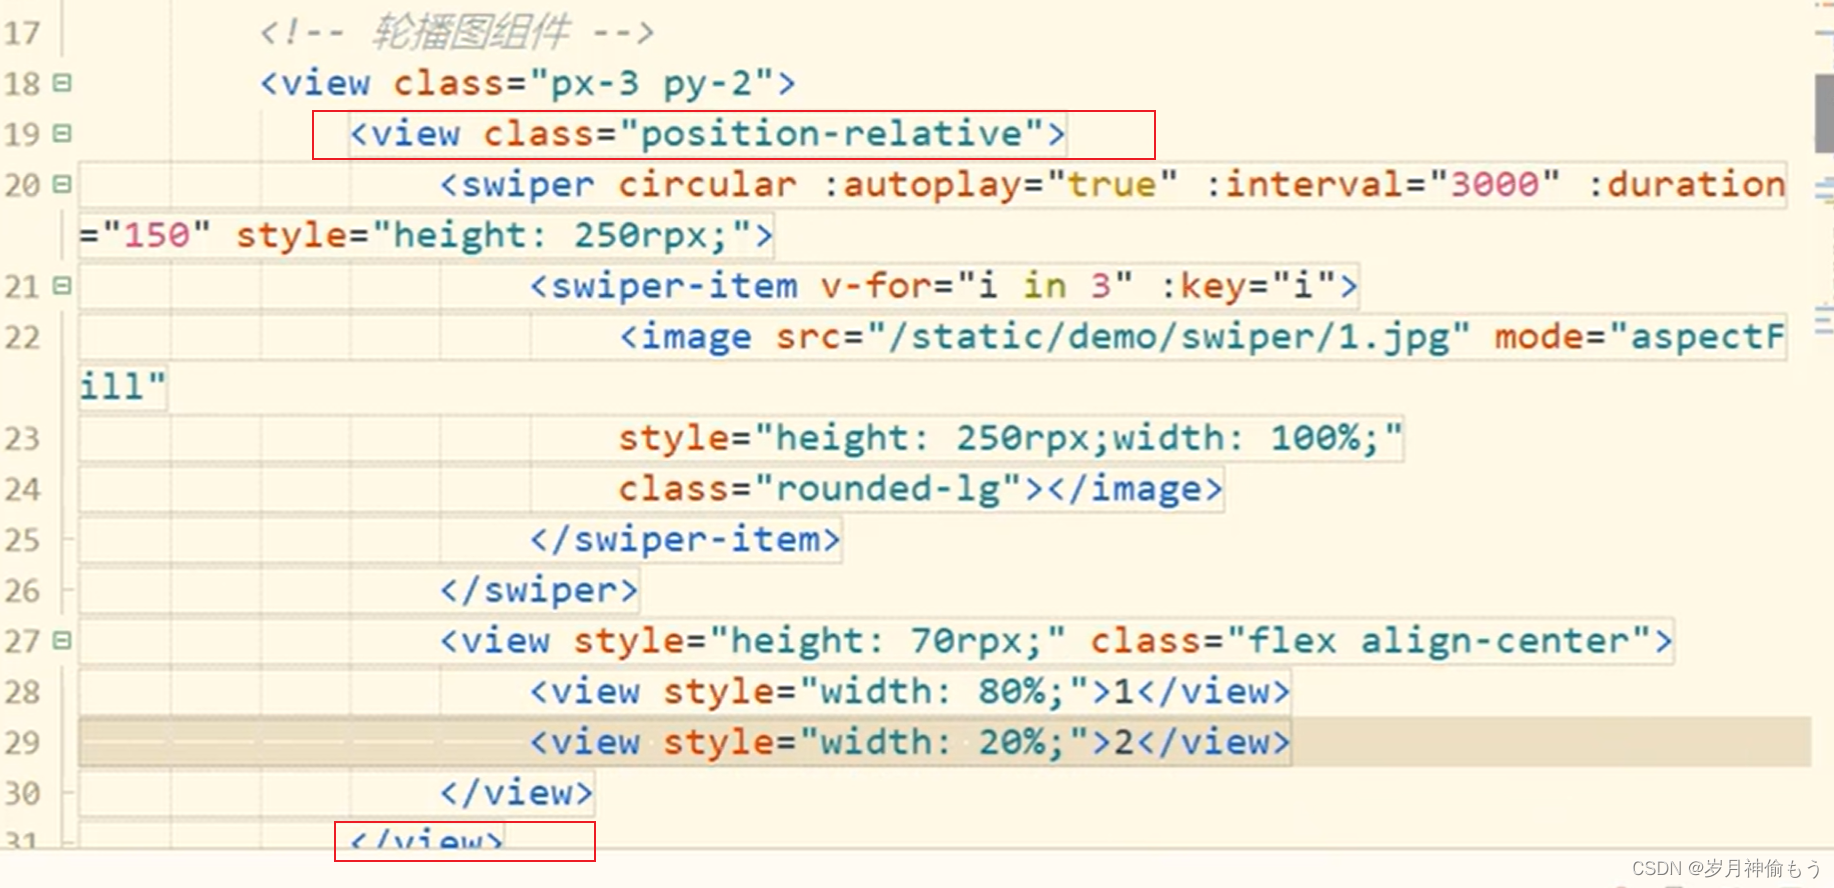
<!-- </navigator> -->
</swiper-item>
</swiper>
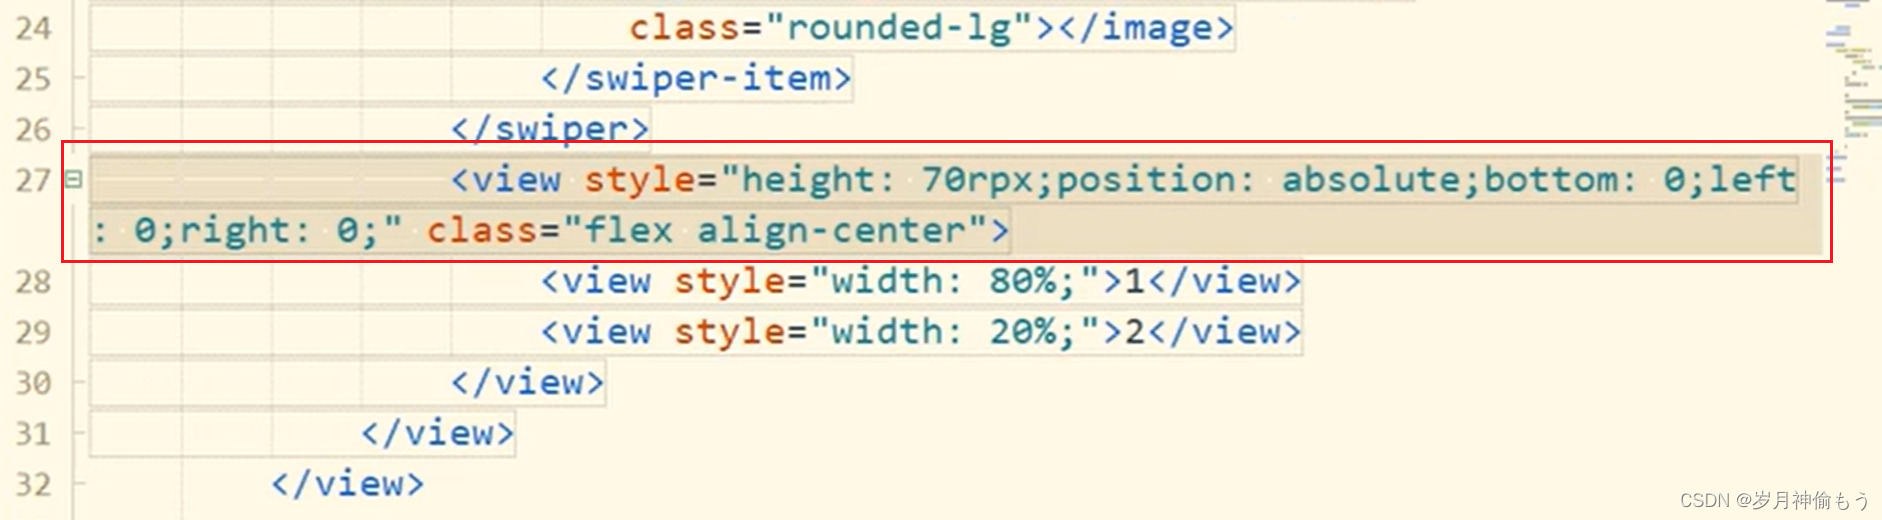
<view class="swiper-shadow">
<view class="swiper-text" @click="handleNav(banner[current].id)">
{{banner[current].title||''}}
</view>
<view class="swiper-dot">
<view class="item-dot" v-for="(item,index) in banner" :key="index"
:class="index===current?'colorone':'colortow'">
</view>
</view>
</view>
</view>
<!-- 轮播图的区域 结束--><script>
import {
findArticle,
} from '../../api/home.js'
export default {
data() {
return {
cdnUrl: getApp().globalData.cdnUrl,
current: 0,
swiperList: [{
id: 1,
src: getApp().globalData.cdnUrl + 'static/img-home/topimg.png'
},
{
id: 2,
src: getApp().globalData.cdnUrl + 'static/img-home/topimg.png'
},
{
id: 3,
src: getApp().globalData.cdnUrl + 'static/img-home/topimg.png'
}
],
banner: [],
collect: [],
important_news: [],
announcement: [],
news: [],
announcementList: [],
minList: []
}
},
/**
* 生命周期函数--监听页面加载
*/
onLoad(options) {
console.log()
},
/**
* 生命周期函数--监听页面初次渲染完成
*/
onReady() {},
/**
* 生命周期函数--监听页面显示
*/
onShow() {
this.getArticle();
},
methods: {
handleNav(id) {
$T.handleNav(id)
},
async getArticle() {
const result = await findArticle()
const {
data
} = result
this.banner = data.banner
this.announcement = data.announcement
this.collect = data.collect
this.important_news = data.important_news
this.news = data.news
},
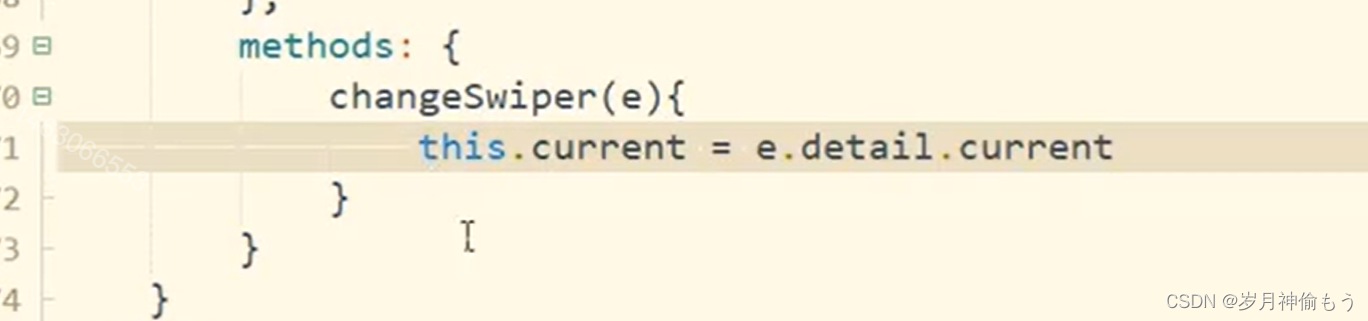
// 切换轮播图
changeSwiper(e) {
// console.log(e);
this.current = e.detail.current
}
}
}
</script>// 轮播图
.my-swiper {
position: relative;
width: 100%;
height: 512rpx;
// 轮播图片
swiper {
height: 100%;
.swiper-item,
image {
width: 100%;
height: 100%;
}
}
// 轮播阴影
.swiper-shadow {
position: absolute;
bottom: 0px;
left: 0rpx;
right: 0;
display: flex;
align-content: center;
height: 80rpx;
width: 100%;
background-color: rgba(34, 34, 34, 0.56);
.swiper-text {
width: 75%;
height: 80rpx;
line-height: 80rpx;
margin-left: 32rpx;
color: #FFFFFF;
overflow: hidden;
text-overflow: ellipsis;
display: -webkit-box;
-webkit-line-clamp: 1;
/* 限制在一个块元素显示的文本的行数 */
-webkit-box-orient: vertical;
/* 垂直排列 */
word-break: break-all;
/* 内容自动换行 */
}
// 轮播图小圆点
.swiper-dot {
width: 20%;
height: 80rpx;
margin-left: 60rpx;
.item-dot {
margin-top: 35rpx;
float: left;
margin-left: 12rpx;
width: 16rpx;
height: 16rpx;
border-radius: 50%;
}
.colorone {
background: #FFFFFF;
}
.colortow {
background: #ACACAC;
}
}
}
}


 6790
6790


 被折叠的 条评论
为什么被折叠?
被折叠的 条评论
为什么被折叠?
 到【灌水乐园】发言


