


之前没有完整的写过H5端的项目,最近写了一个点餐商家版的项目,来复盘一下,我之前没有遇到过的知识盲区吧!
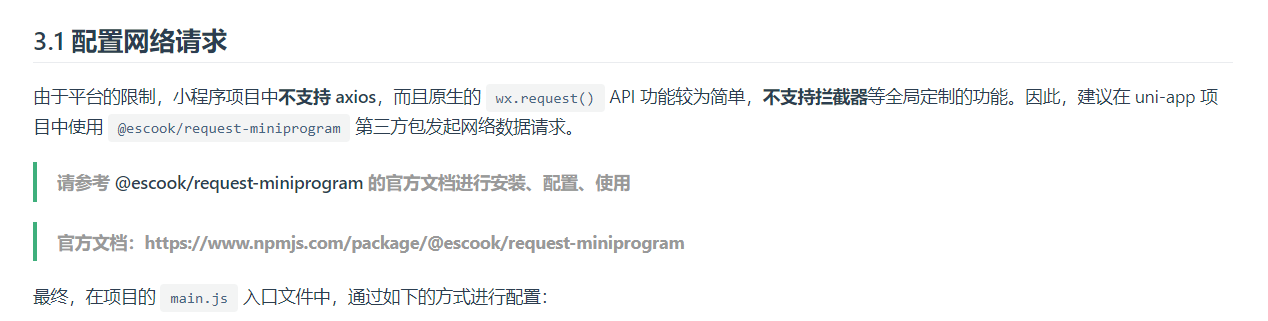
首先第一点,我这个项目是基于uni-app框架写的,创建时直接用的模板。本着之前用uni-app框架写过一个电商小程序的经验来说,我这次也用着这个电商的请求数据方式(即没有封装request.js),那么我们是怎么实现的呢?我们来回忆一下!
// #ifndef VUE3
import Vue from 'vue'
import App from './App'
// import * as config from './config/config.js'
// 引入全局uView
import uView from '@/uni_modules/uview-ui'

// 按需导入$http对象
import {
  $http
} from "@escook/request-miniprogram"
// 将$http挂载到uni顶级对象之上,方便全局使用
uni.$http = $http
//配置baseUrl
$http.baseUrl = process.env.VUE_APP_TITLE == '生产环境' ? process.env.VUE_APP_BASE_API : '/api'
// 请求拦截器
$http.beforeRequest = function(options) {
  const token = uni.getStorageSync('token')

  const pages = getCurrentPages()
  const currentPage = pages[pages.length-1]
  const currentRoute = currentPage.route
  // 如果当前页面为登录页面,则不显示loading
  if(currentRoute === 'pages/login/login'){
     wx.hideLoading()
  }else{
    wx.showLoading({
      title: '数据加载中...',
    })
  }

  options.header = {
    token: token,
  }
}
// 响应拦截器
$http.afterRequest = function(resp) {
   if(resp.message == 'token不存在' || resp.data.message == 'token不存在'){
     uni.showToast({
       title:'请先登录!',
       duration:1000,
       icon:'error'
     })
     setTimeout(()=>{
       uni.reLaunch({
         url:'/pages/login/login'
       })
     },2000)

   }
  wx.hideLoading()
}

Vue.use(uView)

Vue.config.productionTip = false

App.mpType = 'app'

const app = new Vue({
  ...App
})
app.$mount()
// #endif

// #ifdef VUE3
import {
  createSSRApp
} from 'vue'
import App from './App.vue'
export function createApp() {
  const app = createSSRApp(App)
  return {
    app
  }
}
// #endif
可以看到,主要分为以下几步:
按需导入$http对象
import { $http } from "@escook/request-miniprogram"将$http挂载到uni顶级对象之上,方便全局使用
uni.$http = $http配置baseUrl(因为我们配置了代理,在生产环境是不支持代理的,所以我们在这是需要进行判断的)
$http.baseUrl = process.env.VUE_APP_TITLE == '生产环境' ? process.env.VUE_APP_BASE_API : '/api'请求拦截器
我们在这个请求拦截器里,添加了【 wx.showLoading({ title: '数据加载中...' })】,在响应拦截器里添加了【wx.hideLoading()】,是为了在我们进行数据请求的时候,用户有更好的使用体验,知道自己请求了,但是因为网络的原因,会有个等待的过程。
但是我们在登录的时候,也属于一个请求。可能用户名或者密码输入错了,有个错误提示,但是同时也有这个【数据加载中……】的提示,这样用户体验可能就不太好,所以我使用了下面的方法,把login页面的请求排除在外了。
  const pages = getCurrentPages()
  const currentPage = pages[pages.length-1]
  const currentRoute = currentPage.route
  // 如果当前页面为登录页面,则不显示loading
  if(currentRoute === 'pages/login/login'){
     wx.hideLoading()
  }else{
    wx.showLoading({
      title: '数据加载中...',
    })
  }
响应拦截器
我们刚刚说到了配置代理,那么怎么配置代理呢?
有两种方式:
修改manifest.json文件(找到mainfest.json => 源码视图,添加H5配置项)

"h5" : {
    "devServer" : {
        "disableHostCheck" : true,
        "proxy" : {
            "/api" : {
                "target" : "http://www.dzm.com",
                "changeOrigin" : true,
                "secure" : false,
                "ws": false,
                "pathRewrite" : {
                    "^/api" : ""
                }
            }
        }
    }
}
添加vue.config.js文件
uni-app会识别vue.config.js文件,但是mainfest.json的优先级要高于vue.config.js文件,所以看需求选择一个配置即可。
像vue开发一样,手动创建一个vue.config.js文件,然后添加上代理,vue.config.js只能创建在项目的根目录,不然会无法识别到。
module.exports = {
    devServer: {
        disableHostCheck: true,
        proxy: {
            '/api': {
                target: 'http://www.dzm.com',
                changeOrigin: true,
                secure: false,
                ws: false,
                pathRewrite: {
                    '^/api': ''
                }
            }
        }
    }
}
今天遇到一个问题,我觉得挺神奇的,不是有多难,而是我没有写过,作此笔记,方便自己查看!
在 iOS 和安卓系统上,TabBar 的高度是不同的,并且不同的设备上也可能不同。为了实现 TabBar 的自适应高度,可以使用以下代码:
.tab-bar {
  height: calc(env(safe-area-inset-bottom) + 50px);
}
在上述代码中,我们使用了 calc() 函数和 env() 函数来计算 TabBar 的高度。env() 函数用于获取当前设备的安全区域大小,safe-area-inset-bottom 表示底部的安全区域大小,而 50px 则表示 TabBar 的默认高度。通过这样的计算,可以实现 TabBar 的自适应高度。
在实际开发中,你还可以使用 JavaScript 来动态计算 TabBar 的高度,例如:
<template>
  <div class="container">
    <div class="main-content">
      <!-- 页面主要内容区域 -->
    </div>

    <div class="tab-bar">
      <!-- TabBar 区域 -->
      <div class="tab-bar-item">Item 1</div>
      <div class="tab-bar-item">Item 2</div>
      <div class="tab-bar-item">Item 3</div>
    </div>
  </div>
</template>

<script>
export default {
  mounted() {
    // 获取当前设备的底部安全区域大小
    const safeAreaInsetBottom = window.safeAreaInsets.bottom || 0;
    // 计算 TabBar 的高度
    const tabBarHeight = safeAreaInsetBottom + 50;

    // 将计算出来的高度应用到 TabBar 元素上
    document.querySelector('.tab-bar').style.height = tabBarHeight + 'px';
  }
};
</script>

<style>
.container {
  display: flex;
  flex-direction: column;
  height: 100vh;
}

.main-content {
  flex: 1;
}

.tab-bar {
  display: flex;
  height: calc(env(safe-area-inset-bottom) + 50px);
  background-color: #f5f5f5;
  border-top: 1px solid #e0e0e0;
}

.tab-bar-item {
  flex: 1;
  display: flex;
  justify-content: center;
  align-items: center;
  font-size: 16px;
}
</style>
在上述代码中,我们使用了一个 container 容器元素,其中包括了一个 main-content 元素用于显示页面主要内容,以及一个自适应高度的 tab-bar 元素用于显示 TabBar。
在 CSS 样式中,我们使用了 flex 布局来实现 TabBar 的布局,使用了 calc() 函数和 env() 函数来计算 TabBar 的高度。
在 JavaScript 中,我们在页面加载完成后获取当前设备的底部安全区域大小,并计算出 TabBar 的高度,最后将计算得到的高度应用到 tab-bar 元素上。
需要注意的是,在实际开发中,如果你在多个页面中都需要使用自适应高度的 TabBar,你可以将计算高度的 JavaScript 代码抽取出来,放到一个单独的公共模块中,然后在各个页面中引用。这样可以避免代码重复,并提高代码的可维护性。
使用ECharts在Uni-App中创建图表的基本步骤:
安装ECharts插件,可使用插件市场中的插件或者运行命令npm install echarts --save进行安装。
在需要使用图表的页面中导入ECharts插件:
import * as echarts from 'echarts';创建一个空的canvas元素,用于渲染图表:
<template>
  <view>
    <view ref="chartRef" class="chart" style="width: 100%;height: 400rpx;"></view>
  </view>
</template>
在页面的onReady生命周期中初始化图表:
import * as echarts from 'echarts';

export default {
   onReady() {
     this.initChart();
   },
   methods: {
      initChart() {
         this.$nextTick(() => {
          const chartDom = this.$refs.chartRef;
          const chart = echarts.init(chartDom);
      //构建图表的配置项,例如:
      const option = {
         title: {
         text: 'ECharts Demo'
         },
         tooltip: {},
         legend: {
            data:['销量']
         },
         xAxis: {
            data: ["衬衫","羊毛衫","雪纺衫","裤子","高跟鞋","袜子"]
         },
         yAxis: {},
         series: [{
            name: '销量',
            type: 'bar',
            data: [5, 20, 36, 10, 10, 20]
         }]
       };
      chart.setOption(option);
      this.chart = chart;
    });
  }
}

}
在图表的其他方法中,例如onLoad、onUnload等方法中,对图表进行操作:
onUnload() {
  // 销毁图表实例
  if (this.chart) {
    this.chart.dispose();
  }
}
对于checkBox复选框,我在uniapp中可能是我不太熟悉吧,我踩了很多坑,我来总结一下我在uniapp框架的用法和uview的用法:
uniapp框架的用法
先看结构:
//每一个商品前的单选框
<view class="dataInfo">
   <view class="dataList" v-for="(item,index) in searchData" :key="index">
      <checkbox-group @change="checkClick(item)">
         <checkbox :checked="item.checked" />
      </checkbox-group>
   </view>
</view>
//全选按钮
<view class="checked">
   <checkbox-group @tap="checkAll">
       <checkbox :checked="allChecked" />
   </checkbox-group>
   <text>全选</text>
</view>
JS:
// 单个商品的选择
checkClick(item) {
   item.checked = !item.checked
   if (!item.checked) {
      this.allChecked = false
   } else {
      // 判断每一个商品是否是被选择的状态
      const goods = this.list.every(item => {
      return item.checked === true
   })
   if (goods) {
      this.allChecked = true
   } else {
      this.allChecked = false
     }
   }
},
//全选、全不选
checkAll() {
   this.allChecked = !this.allChecked
   if (this.allChecked) {
       this.list.map(item => {item.checked = true})
   } else {
       this.list.map(item => {item.checked = false})
  }
}
uview的用法:
<template>
  <view class="container">
    <view class="title">
      营业时间段设置
    </view>
    <view class="workDay">
      <view class="">
        <u-checkbox-group v-model="checkboxValue1" placement="column" @change="checkboxChange">
          <u-checkbox :customStyle="{marginBottom: '16rpx'}" v-for="(item, index) in workDay" :key="index"
            :label="item.title" :name="item.clickIndex">
          </u-checkbox>
        </u-checkbox-group>
      </view>
    </view>
    <view class="allDay" style="margin-top: 50rpx;display: flex;">
      <view class="uni-title" style="margin-bottom: 50rpx;margin-right: 20rpx;">是否全天:</view>
      <view>
        <radio-group @change="radioChange" style="display: flex; ">
          <label class="radio" v-for="(item, index) in items" :key="item.value"
            style="display: flex;margin-right: 40rpx;">
            <view>
              <radio color="rgb(255,106,0)" style=" transform:scale(0.7);" :value="item.value"
                :checked="index ==current" />
            </view>
            <view>{{item.name}}</view>
          </label>
        </radio-group>
      </view>
    </view>
    <view class="timePicker" v-show="!openList">
      <!-- 1 -->
      <view style="display: flex; margin-bottom: 40rpx;" class="time">
        <view class="timeTitle">
          时间段一:
        </view>
        <view class="start_time" @click="openTime(1)">
          {{titleTime}}
          <selectTime ref="timeslotStar" @confirm="confirmTime"></selectTime>
        </view>
        <span>~</span>
        <view class="end_time" @click="openTime(2)">
          {{titleTime2}}
          <selectTime ref="timeslotEnd" @confirm="confirmTime2"></selectTime>
        </view>
      </view>
      <!-- 2 -->
      <view style="display: flex; margin-bottom: 40rpx;" class="time">
        <view class="timeTitle">
          时间段二:
        </view>
        <view class="start_time" @click="openTime(3)">
          {{titleTime3}}
          <selectTime ref="timeslotStar2" @confirm="confirmTime3"></selectTime>
        </view>
        <span>~</span>
        <view class="end_time" @click="openTime(4)">
          {{titleTime4}}
          <selectTime ref="timeslotEnd2" @confirm="confirmTime4"></selectTime>
        </view>
      </view>
      <!-- 3 -->
      <view style="display: flex; margin-bottom: 40rpx;" class="time">
        <view class="timeTitle">
          时间段三:
        </view>
        <view class="start_time" @click="openTime(5)">
          {{titleTime5}}
          <selectTime ref="timeslotStar3" @confirm="confirmTime5"></selectTime>
        </view>
        <span>~</span>
        <view class="end_time" @click="openTime(6)">
          {{titleTime6}}
          <selectTime ref="timeslotEnd3" @confirm="confirmTime6"></selectTime>
        </view>
      </view>
    </view>
    <view style="display: flex;">
      <view class="save" @click="save">
        保存
      </view>
      <view class="save" @click="cancel">
        取消
      </view>
    </view>

  </view>
</template>

<script>
  import selectTime from "../../components/selectTime/qh-data-time.vue";
  export default {
    components: {
      selectTime: selectTime
    },
    onLoad() {
      this.getInfo()
    },
    data() {
      return {
        checkboxValue1: [],
        workDay: [{
            clickIndex: 1,
            title: '周一'
          },
          {
            clickIndex: 2,
            title: '周二'
          },
          {
            clickIndex: 3,
            title: '周三'
          },
          {
            clickIndex: 4,
            title: '周四'
          },
          {
            clickIndex: 5,
            title: '周五'
          },
          {
            clickIndex: 6,
            title: '周六'
          },
          {
            clickIndex: 7,
            title: '周日'
          },
        ],
        checked: [], //工作日的checked值默认为false
        openList: false, //营业时间是否全天,默认为false
        titleTime: '', //营业时间段一开始
        titleTime2: '', //营业时间段一结束
        titleTime3: '', //营业时间段二开始
        titleTime4: '', //营业时间段二结束
        titleTime5: '', //营业时间段三开始
        titleTime6: '', //营业时间段三结束
        items: [{//radio
            value: '1',
            name: '是'
          },
          {
            value: '0',
            name: '否'
          }
        ],
        current: 1, //radio的默认值
        requestData: {
          work_week: '',
          is_all_day: 0,
          open_start_time1: 0,
          open_start_time2: 0,
          open_start_time3: 0,
          open_end_time1: 0,
          open_end_time2: 0,
          open_end_time3: 0
        },
        checkboxLength: 0
      }
    },
    methods: {
      // 时间选择器确定事件
      confirmTime(e) {
        this.titleTime = e.dataTime.year + ':' + e.dataTime.month + ':' + e.dataTime.day
        this.requestData.open_start_time1 = this.titleTime
      },
      confirmTime2(e) {
        this.titleTime2 = e.dataTime.year + ':' + e.dataTime.month + ':' + e.dataTime.day
        this.requestData.open_end_time1 = this.titleTime2
      },
      confirmTime3(e) {
        this.titleTime3 = e.dataTime.year + ':' + e.dataTime.month + ':' + e.dataTime.day
        this.requestData.open_start_time2 = this.titleTime3
      },
      confirmTime4(e) {
        this.titleTime4 = e.dataTime.year + ':' + e.dataTime.month + ':' + e.dataTime.day
        this.requestData.open_end_time2 = this.titleTime4
      },
      confirmTime5(e) {
        this.titleTime5 = e.dataTime.year + ':' + e.dataTime.month + ':' + e.dataTime.day
        this.requestData.open_start_time3 = this.titleTime5
      },
      confirmTime6(e) {
        this.titleTime6 = e.dataTime.year + ':' + e.dataTime.month + ':' + e.dataTime.day
        this.requestData.open_end_time3 = this.titleTime6
      },
      // 时间选择器open事件
      openTime(index) {
        const refs = [
          'timeslotStar',
          'timeslotEnd',
          'timeslotStar2',
          'timeslotEnd2',
          'timeslotStar3',
          'timeslotEnd3'
        ];
        this.$refs[`${refs[index - 1]}`].open();
      },
      // 营业时间段radio事件
      radioChange: function(evt) {
        this.current = parseInt(evt.detail.value)
        this.requestData.is_all_day = parseInt(evt.detail.value)
        for (let i = 0; i < this.items.length; i++) {
          if (this.items[i].value === evt.detail.value) {
            this.current = i;
            if (this.items[i].value === '1') {
              this.openList = true
            } else {
              this.openList = false
            }
            break;
          }
        }
      },
      // checkbox事件
      change(e) {
        this.checkboxLength = e.detail.value.length
      },
      // 点击商品地,把id放入一个数组里
      checkedIndex(clickIndex) {
        if (this.checkboxLength != 0) {
          let index = this.requestData.work_week.indexOf(clickIndex)
          if (index == -1) {
            this.requestData.work_week += clickIndex + ','
          } else {
            // 用空字符串替换掉要删除的子字符串
            this.requestData.work_week = this.requestData.work_week.replace(clickIndex + ',', '')
          }
        } else {
          this.requestData.work_week = ''
        }
      },
      // 保存营业时间
      async save() {
        const res = await uni.$http.get('/shopapi/shop/shopOpenTimeSet', {
          ...this.requestData
        })
        if (res.data.code == 0) {
          uni.showToast({
            title:res.data.message,
            icon: 'none'
          })
        }
      },
      async getInfo(){
        const res = await uni.$http.get('/shopapi/shop/shopInfo')
        // onLoad中页面checkbox显示
        this.checkboxValue1 = res.data.data.shop_info.work_week.split(',').map((item) => {
          return parseInt(item)
        })
        this.requestData.work_week = this.checkboxValue1.join(',')
        // onLoad中页面时间的显示
        this.titleTime = res.data.data.shop_info.open_start_time1
        this.titleTime2 = res.data.data.shop_info.open_end_time1
        this.titleTime3 = res.data.data.shop_info.open_start_time2
        this.titleTime4 = res.data.data.shop_info.open_end_time2
        this.titleTime5 = res.data.data.shop_info.open_start_time3
        this.titleTime6 = res.data.data.shop_info.open_end_time3
        // 载入时不选择时间段也会有参数
        this.requestData.open_start_time1 = this.titleTime
        this.requestData.open_end_time1 = this.titleTime2
        this.requestData.open_start_time2 = this.titleTime3
        this.requestData.open_end_time2 = this.titleTime4
        this.requestData.open_start_time3 = this.titleTime5
        this.requestData.open_end_time3 = this.titleTime6

        // onLoad中页面radio显示
        this.current = res.data.data.shop_info.is_all_day == 1 ? 0 : 1
        this.requestData.is_all_day = res.data.data.shop_info.is_all_day
        if (this.current == 0) {
          this.openList = true
        } else {
          this.openList = false
        }
      },
      cancel(){
        uni.navigateBack({
            delta: 1
        });
      },
      checkboxChange(e) {
        this.requestData.work_week = e.join(',')
      }
    }
  }
</script>
对于后端返回的html结构渲染以及样式修改:
<template>
  <view>
    <view v-if="table">
      <view class="time" v-if="datetime">
        当前日期:{{datetime}}
      </view>
      <view class="table" v-html="table"></view>
    </view>
    <view class="none"  v-else>
     <image mode="heightFix" src="../../static/other/common-empty.png"></image>
    </view>
  </view>
</template>

<script>
  export default {
    data() {
      return {
        datetime:'',
        table:''
      };
    },
    onLoad(){
      this.getTable()
    },
    methods: {
      async getTable(){
        const res = await uni.$http.get('/shopapi/shop/getShopOrderGoods')
        this.datetime = res.data.data.datetime
        this.table = res.data.data.html
      }
    }
  }
</script>

<style lang="scss">
  .time{
    font-size: 28rpx;
    font-weight: bold;
    margin-bottom: 10rpx;
    padding: 20rpx;

  }
  /deep/ #table{
    width: 95%;
    margin: 0 auto;
    border-collapse: collapse;
  }
  /deep/ #table td,th {
    padding: 16rpx;
    border: 2rpx solid #000;
    font-size: 28rpx;
  }
  .none{
    position: absolute;
    top: 40%;
    left: 50%;
    transform: translate(-50%,-50%);
  }
</style>


 1239
1239

 被折叠的 条评论
为什么被折叠?
被折叠的 条评论
为什么被折叠?
 到【灌水乐园】发言


