


前言
开始时用vue实现了一个圆弧滑动条,因为uniapp自己封装了canvas方法,移植到uniapp时并不能适用。于是进行了修改。
实现
<canvas style="height: 300px; width: 300px;" ref="myCanvas" canvas-id="myCanvas" @touchstart="canvasDown" @touchmove="canvasMove" @touchend="canvasUp"></canvas>
<script>
import {
	hideTabBar
} from "@/common/util.js"
import slideableImg from "@/static/settings/slideable.png"
export default {
	data() {
		return {
			pageUrl: {
				info: 'device/loadDevice', // 设备信息
				edit: 'appDevice/singleSetting' // 保存设备信息
			},
			// 画布
			canvas: '',
			// 画笔
			ctx: '',
			// 是否可以拖动
			canvasMoveUse: false,
			// 可滑动提醒图片
			slideableImg,
			// 显示的电量百分比
			showCharge: 50,
			// 设备信息
			deviceInfo: {},
			// 设备id
			deviceId: '',
			// 用户id
			userId: ''
		}
	},

	created() {
		hideTabBar()
	},
	computed: {
		// 显示百分比
		showChargePercent(){
			return this.showCharge + '%'
		}
	},
	onLoad() {
		this.deviceId = uni.getStorageSync('deviceId')
		this.userId = uni.getStorageSync('consumer').id
		this.$nextTick(() => {
			this.initCanvas()
		})
	},
	onShow() {
		uni.setNavigationBarTitle({
			title: this.$t('function.deviceDischarge')
		});
		// 获取设备信息
		// this.getDischargeInfo()
	},
	// 监听返回事件
	onBackPress() {
	},
	methods: {
		// 初始化
		async initCanvas() {
			await this.getDischargeInfo()
			let realAngel = (0.01 * (Math.PI * 5 / 3) * this.showCharge) + ((Math.PI * 2) / 3)
			let x = this.getInitX(150, 150, 100, this.showCharge)
			let y = this.getInitY(150, 150, 100, this.showCharge)
			this.ctx = uni.createCanvasContext("myCanvas")
			this.drawDefaultRing()
			// this.drawRingByTouch(Math.PI * 9 / 6)
			this.drawRingByTouch(realAngel)
			this.drawPoint(x, y)
			this.drawText(this.showChargePercent)
			this.ctx.draw()
		},

		// 画默认的圆弧
		drawDefaultRing() {
			this.ctx.beginPath()
			this.ctx.setLineWidth(20)
			this.ctx.setStrokeStyle('#fff')
			this.ctx.arc(
				150, 150,
				100,
				0, Math.PI * 2 / 6,
				false
			);
			this.ctx.stroke();
			this.ctx.beginPath()
			this.ctx.arc(
				150, 150,
				100,
				Math.PI * 4 / 6, Math.PI * 14 / 6,
				false
			);
			this.ctx.stroke();
		},

		// 画圆点
		drawPoint(x, y) {
			this.ctx.beginPath()
			this.ctx.setFillStyle('#009f8a')
			this.ctx.arc(
				x, y,
				9,
				0, Math.PI * 2
			)
			this.ctx.fill();

			this.ctx.beginPath()
			this.ctx.setFillStyle('#ffffff')
			this.ctx.arc(
				x, y,
				4,
				0, Math.PI * 2
			)
			this.ctx.fill();
		},

		// 画圆弧
		drawRingByTouch(angle) {
			this.ctx.beginPath()
			this.ctx.setLineWidth(8)
			var gr = this.ctx.createLinearGradient(80, 150, 220, 150);
			//添加颜色端点
			gr.addColorStop(0, 'rgba(12, 194, 194, 1)');
			gr.addColorStop(.24, 'rgba(46, 163, 255, 1)');
			gr.addColorStop(.58, 'rgba(74, 115, 247, 1)');
			gr.addColorStop(.78, 'rgba(74, 115, 247, 1)');
			gr.addColorStop(1, 'rgba(139, 71, 222, 1)');
			//应用fillStyle生成渐变
			this.ctx.setStrokeStyle(gr);
			this.ctx.arc(
				150, 150,
				100,
				(Math.PI * 4 / 6), angle,
				false
			);
			this.ctx.stroke();
		},

		// 写文字
		drawText(text) {
			// 文字下方底色
			this.ctx.beginPath()
			this.ctx.setFillStyle('#ffffff')
			this.ctx.arc(
				150, 150,
				70,
				0, Math.PI * 2
			)
			this.ctx.fill();

			this.ctx.beginPath()
			// text = '75%';
			//字体颜色
			this.ctx.font = '30px arial';
			this.ctx.fillStyle = '#000000';
			// 位置
			this.ctx.textAlign = 'center';
			this.ctx.textBaseline = 'middle';
			//描边宽度
			this.ctx.lineWidth = 3;
			//填充文字
			this.ctx.fillText(text, 150, 150);
		},

		canvasDown(e) {
			this.canvasMoveUse = true;
		},
		canvasMove(e) {
			if (this.canvasMoveUse) {
				let canvasX = e.touches[0].x
				let canvasY = e.touches[0].y

				// console.log(canvasX + ',' + canvasY);
				let angle = Math.atan((canvasY - 150) / (canvasX - 150))

				let x = this.getX(150, 150, 100, canvasX, canvasY)
				let y = this.getY(150, 150, 100, canvasX, canvasY)

				let realAngle = this.getRealAngle(canvasX, canvasY, angle)
				// 半圆的滑动范围判断
				if (realAngle <= (Math.PI * 14 / 6) && realAngle >= (Math.PI * 9 / 6)) {
					let percent = ((realAngle - (2 * Math.PI / 3)) / (Math.PI * 5 / 3)).toFixed(2)
					let showPercent = (percent * 100).toFixed(0)
					this.showCharge = showPercent
					// console.log(realAngle);
					this.$nextTick(() => {
						this.ctx.clearRect(0, 0, 300, 300)
						this.drawDefaultRing()
						this.drawRingByTouch(realAngle)
						this.drawPoint(x, y)
						this.drawText(this.showChargePercent)
						this.ctx.draw()
					})
				}
			}
		},

		/**
		 * 获取角度
		 * @param canvasX 鼠标x坐标
		 * @param canvasY 鼠标y坐标
		 * @param angle 根据反正切函数算出的角度
		 */
		getRealAngle(canvasX, canvasY, angle) {
			let realAngle = 0
			if (canvasX < 150 && canvasY > 150) {
				realAngle = (Math.PI / 2) - Math.abs(angle) + Math.PI / 2
			}
			if (canvasX < 150 && canvasY < 150) {
				realAngle = Math.abs(angle) + (Math.PI / 2) + Math.PI / 2
			}
			if (canvasX > 150 && canvasY < 150) {
				realAngle = (Math.PI / 2) - Math.abs(angle) + Math.PI + Math.PI / 2
			}
			if (canvasX > 150 && canvasY > 150) {
				realAngle = Math.abs(angle) + Math.PI * (3 / 2) + Math.PI / 2
			}
			return realAngle
		},

		/**
		 * 获取在圆上x轴坐标
		 * @param ox 原点x坐标
		 * @param oy 原点y坐标
		 * @param r 圆的半径
		 * @param x 鼠标x轴坐标
		 * @param y 鼠标y轴坐标
		 */
		getX(ox, oy, r, x, y) {
			// 角度
			let angle = Math.atan((oy - y) / (x - ox))
			// x轴长度
			let realX = Math.abs(r * Math.cos(angle))
			if (x < ox) {
				return (-realX) + ox
			} else {
				return realX + ox
			}
		},

		/**
		 * 根据初始值获取初始的x
		 * @param ox 原点x坐标
		 * @param oy 原点y坐标
		 * @param r 半径
		 * @param angle
		 */
		getInitX(ox, oy, r, angle) {
			let tempAngle = (angle * (Math.PI * 5 / 3 * 0.01) + Math.PI / 6)
			if (tempAngle <= Math.PI) {
				return (-Math.abs(r * Math.sin(tempAngle))) + ox
			} else if (tempAngle > Math.PI) {
				return Math.abs(r * Math.sin(tempAngle)) + ox
			}
		},

		/**
		 * 根据初始值获取初始y
		 * @param ox 原点x坐标
		 * @param oy 原点y坐标
		 * @param {Object} r 半径
		 * @param {Object} angle 角度
		 */
		getInitY(ox, oy, r, angle) {
			let tempAngle = (angle * (Math.PI * 5 / 3) * 0.01 + Math.PI / 6)
			if ((tempAngle <= Math.PI / 2) || (tempAngle >= Math.PI * 3 / 2)) {
				return oy + Math.abs(r * Math.cos(tempAngle))
			} else if ((tempAngle > Math.PI / 2) && (tempAngle < Math.PI * 3 / 2)) {
				return oy - Math.abs(r * Math.cos(tempAngle))
			}
		},

		/**
		 * 获取在圆上y轴坐标
		 * @param ox 原点x坐标
		 * @param oy 原点y坐标
		 * @param r 圆的半径
		 * @param x 鼠标x轴坐标
		 * @param y 鼠标y轴坐标
		 */
		getY(ox, oy, r, x, y) {
			// 角度
			let angle = Math.atan((oy - y) / (x - ox))
			// y轴长度
			let realY = Math.abs(r * Math.sin(angle))
			if (y < oy) {
				return (-realY + oy)
			} else {
				return realY + oy
			}
		},

		canvasUp(e) {
			this.canvasMoveUse = false
		},
		canvasLeave(e) {
			this.canvasMoveUse = false
		},

		/**
		 * 获取设备放电信息
		 */
		getDischargeInfo() {
			let params = {
				id: this.deviceId
			}
			return this.$http('GET', this.pageUrl.info, params)
				.then(res => {
					if (res.success) {
						if(this.showCharge){
							this.deviceInfo = res.result // 保存设备信息
							this.showCharge = Number(res.result.battery_low_discharge)
						}
					} else {
						this.$showToast(res.message)
					}
				})
				.catch(err => {
					this.$showToast(err.message)
				})
		},

		// 保存
		save() {
			let params = {
				id: this.deviceId,
				battery_low_discharge: Number(this.showCharge) ,
				user_id: this.userId
			}
			this.$http('POST', this.pageUrl.edit, params)
			.then(res => {
				if(res.success){
					this.$showToast(res.message)
				}else{
					this.$showToast(res.message)
				}
			})
			.catch(err => {
				this.$showToast(err.message)
			})
		}
	}
}
</script>
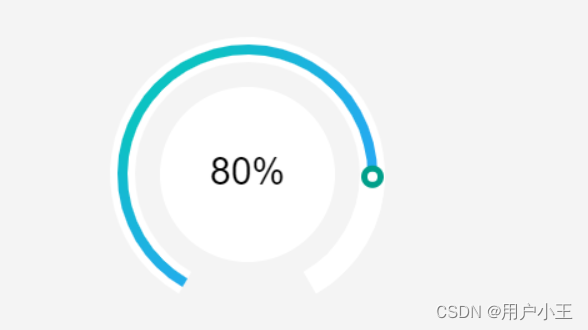
效果:


 1017
1017


 被折叠的 条评论
为什么被折叠?
被折叠的 条评论
为什么被折叠?
 到【灌水乐园】发言


