


目录
第一步,选择自定义

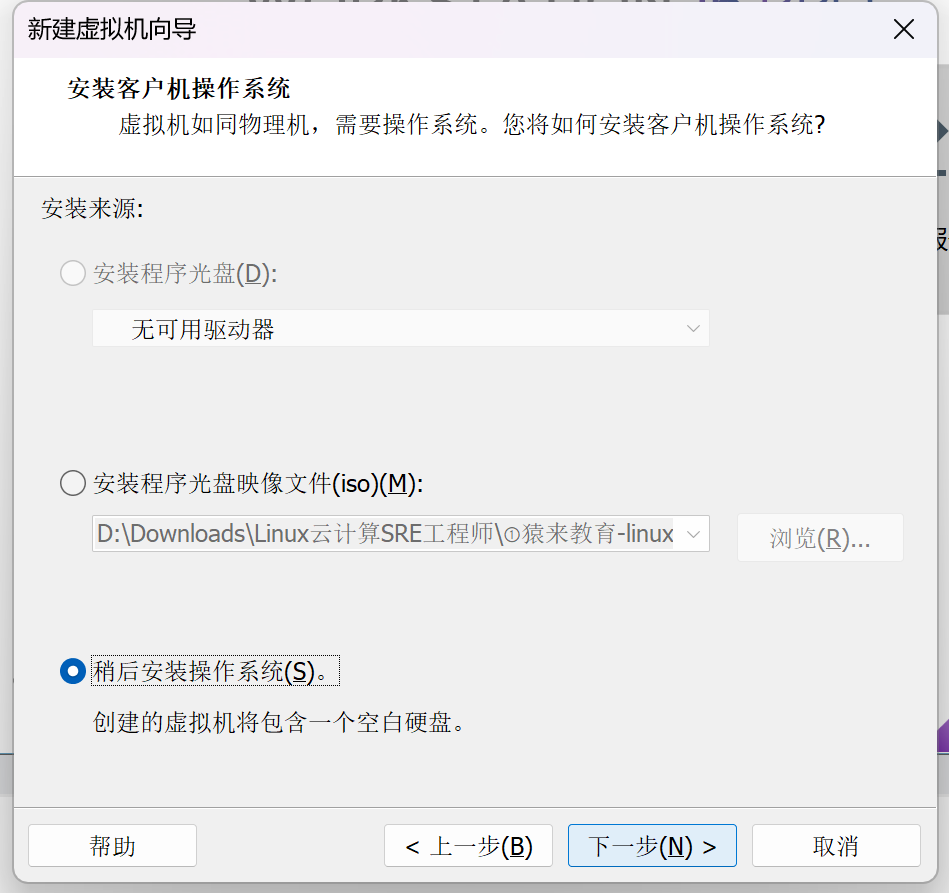
第二步,稍后安装系统
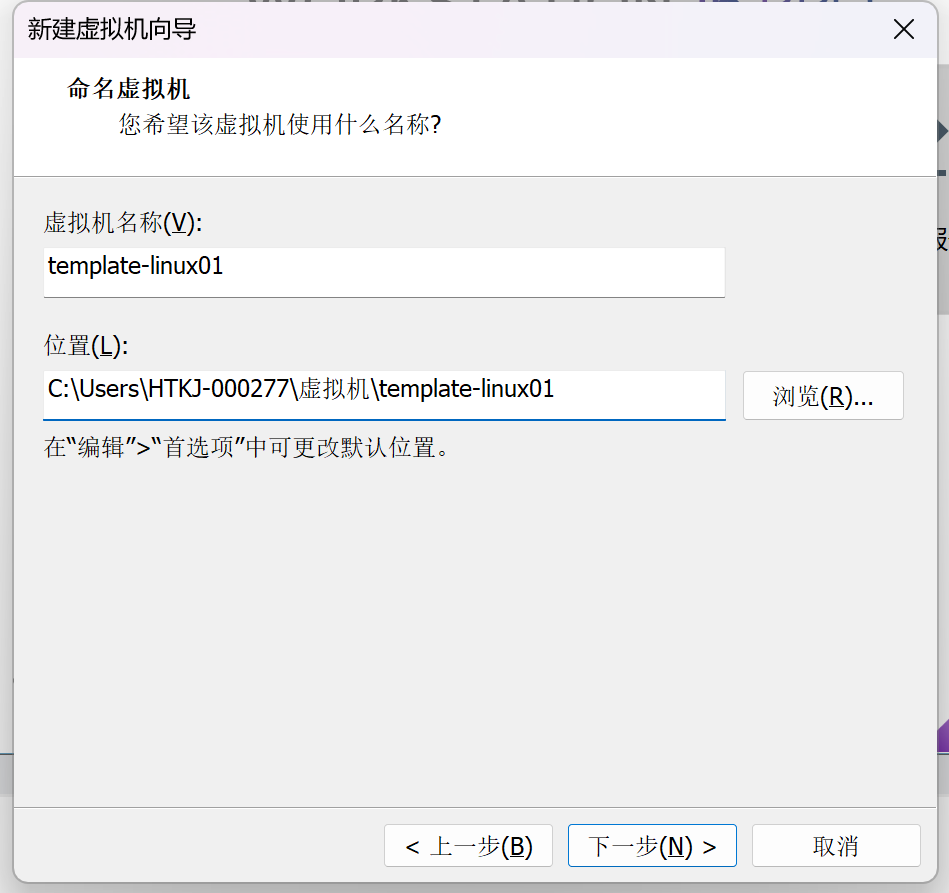
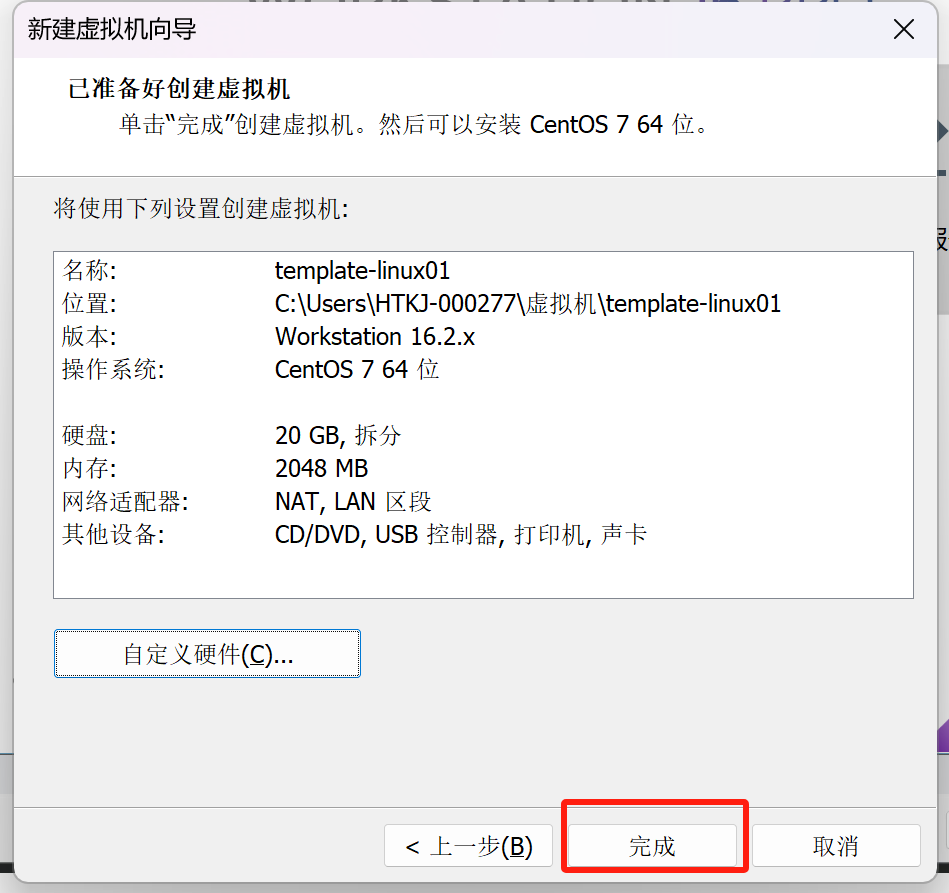
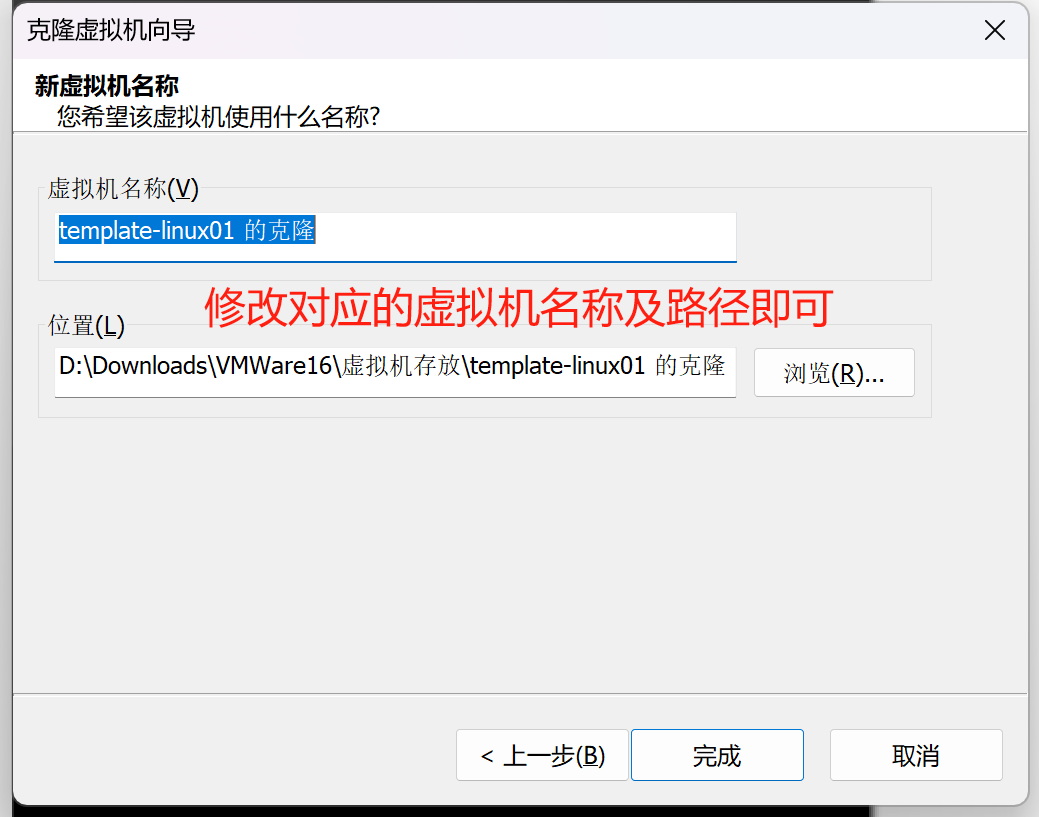
第三步,选择文件位置,更改虚拟机名
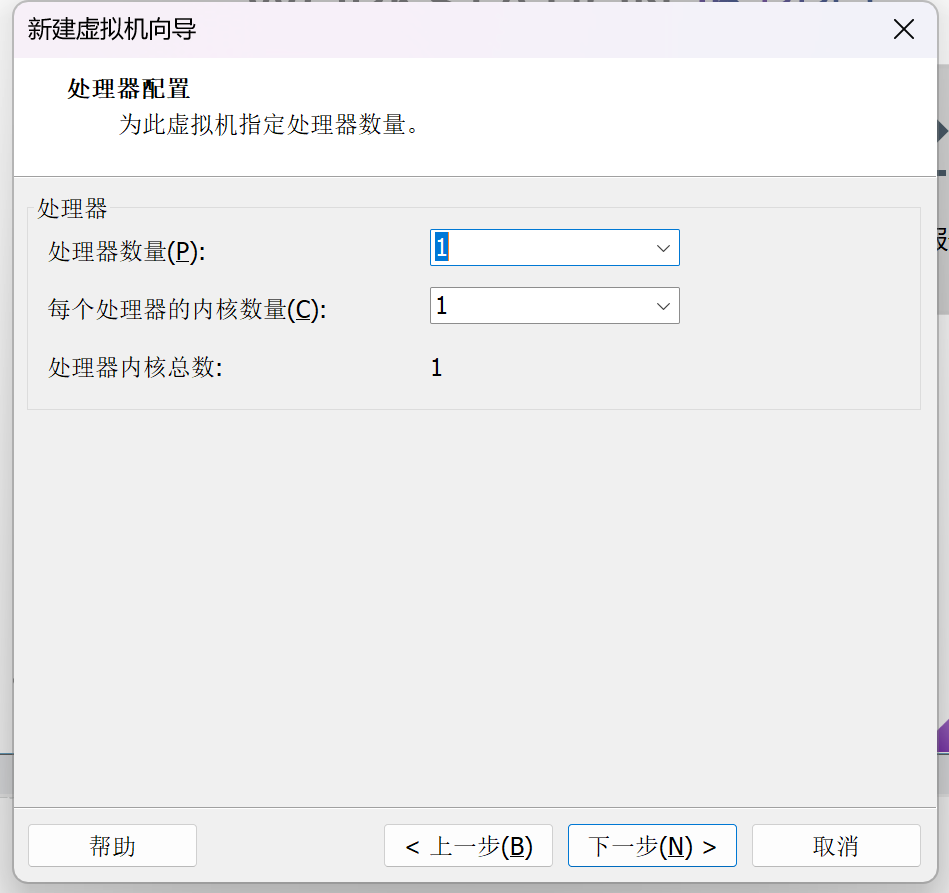
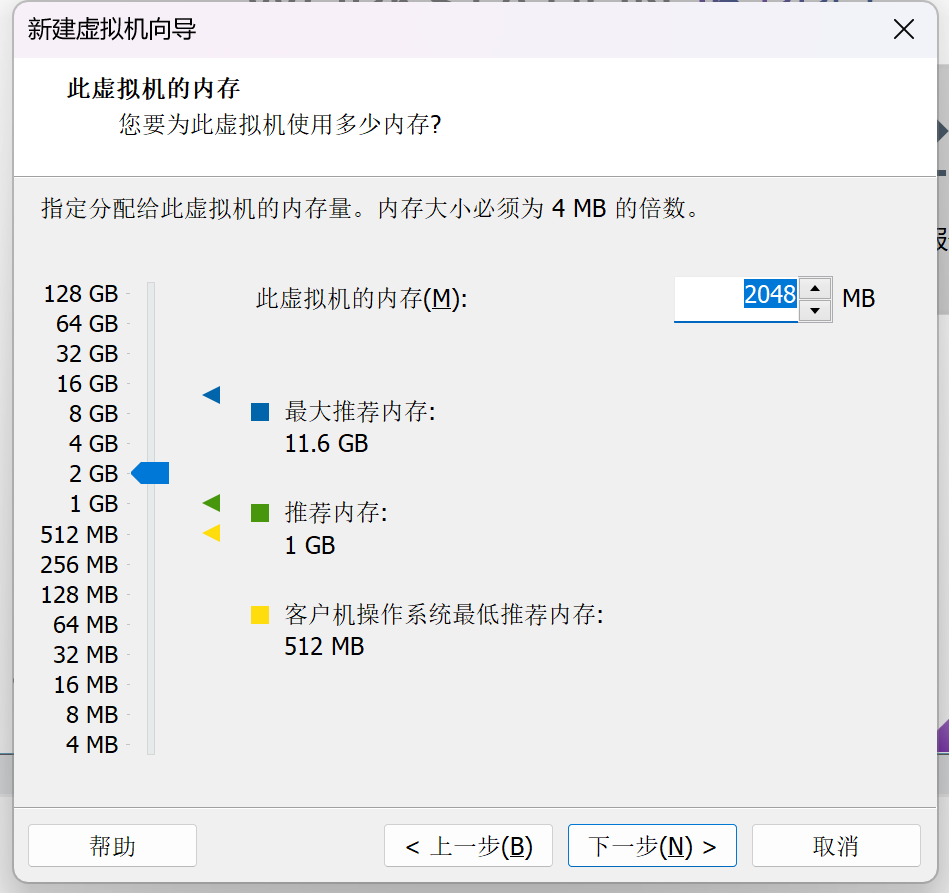
第四步,选择1个处理器1个内核,选择2g运行内存


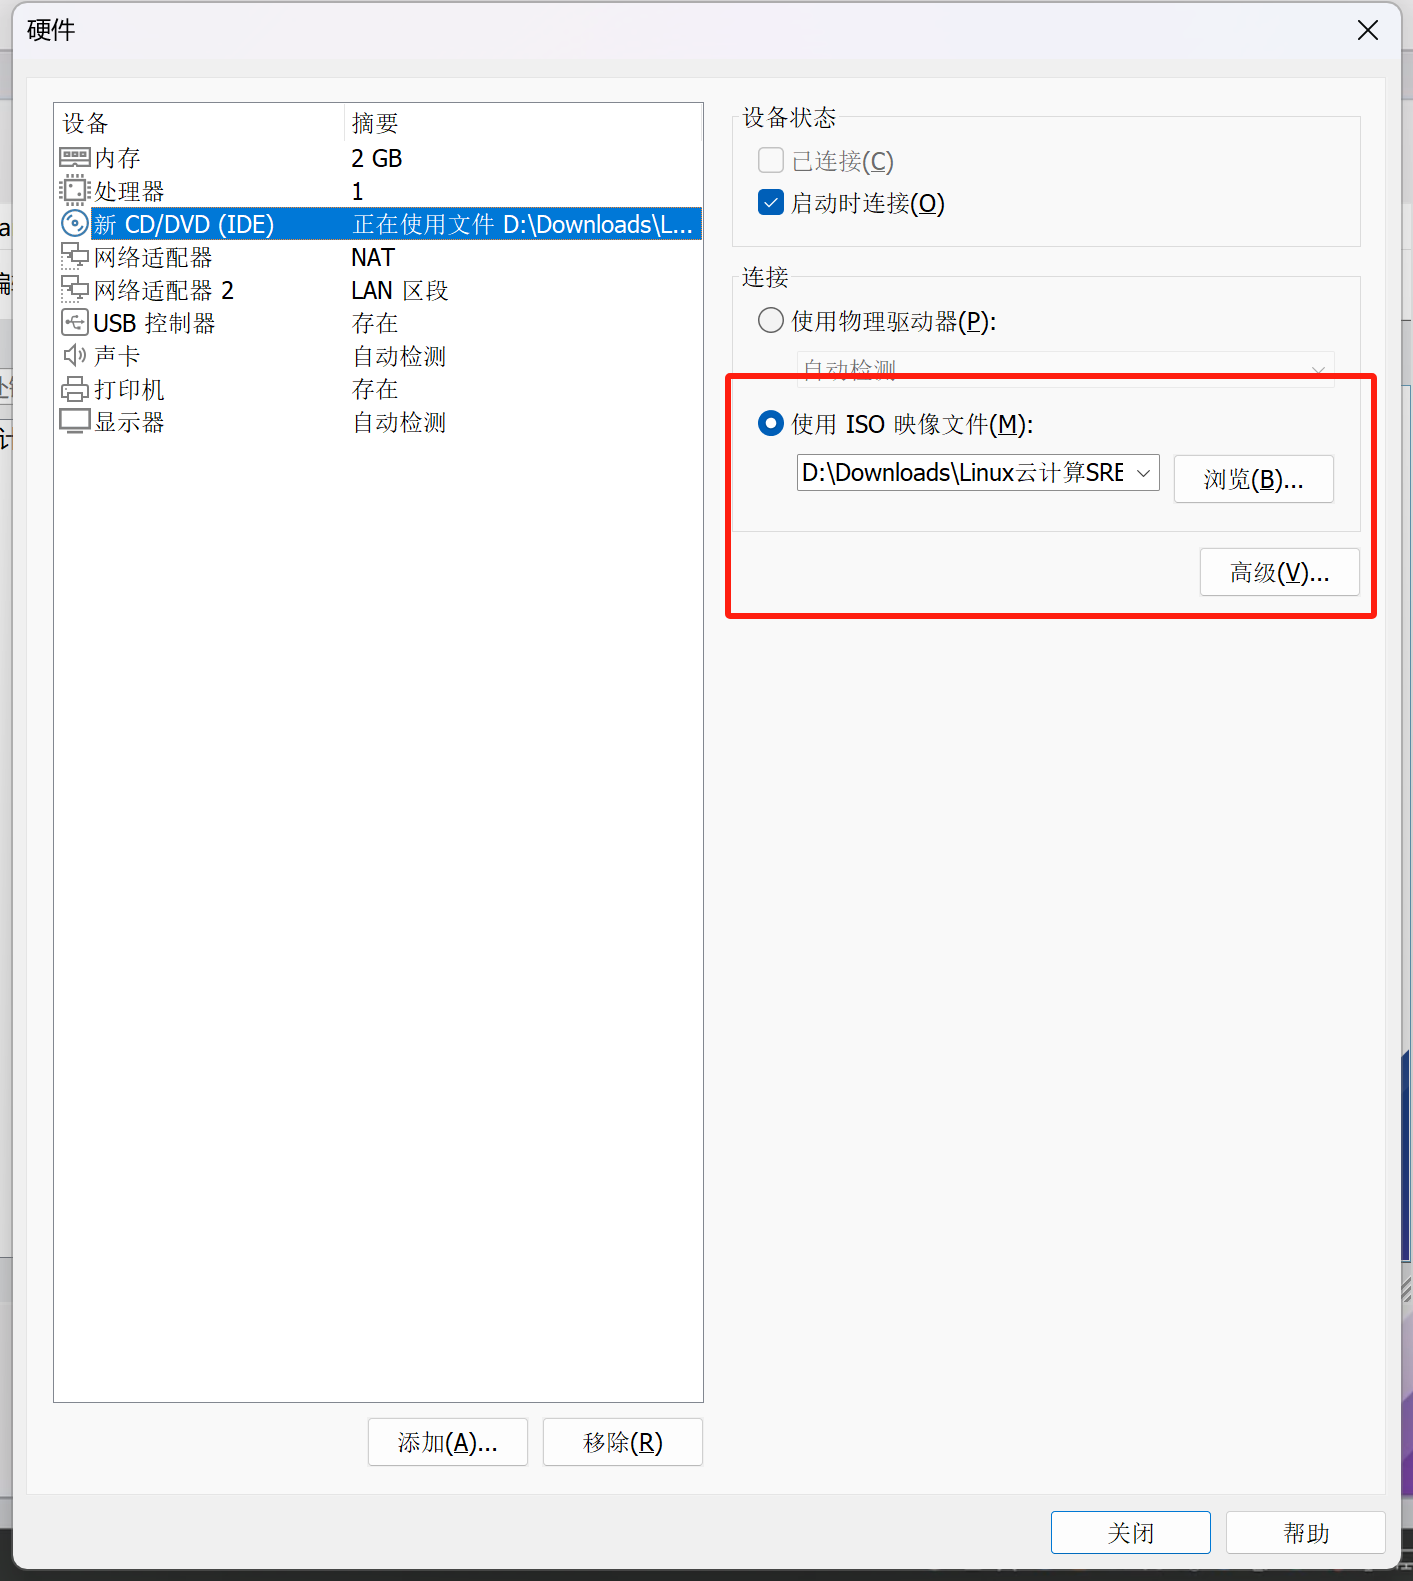
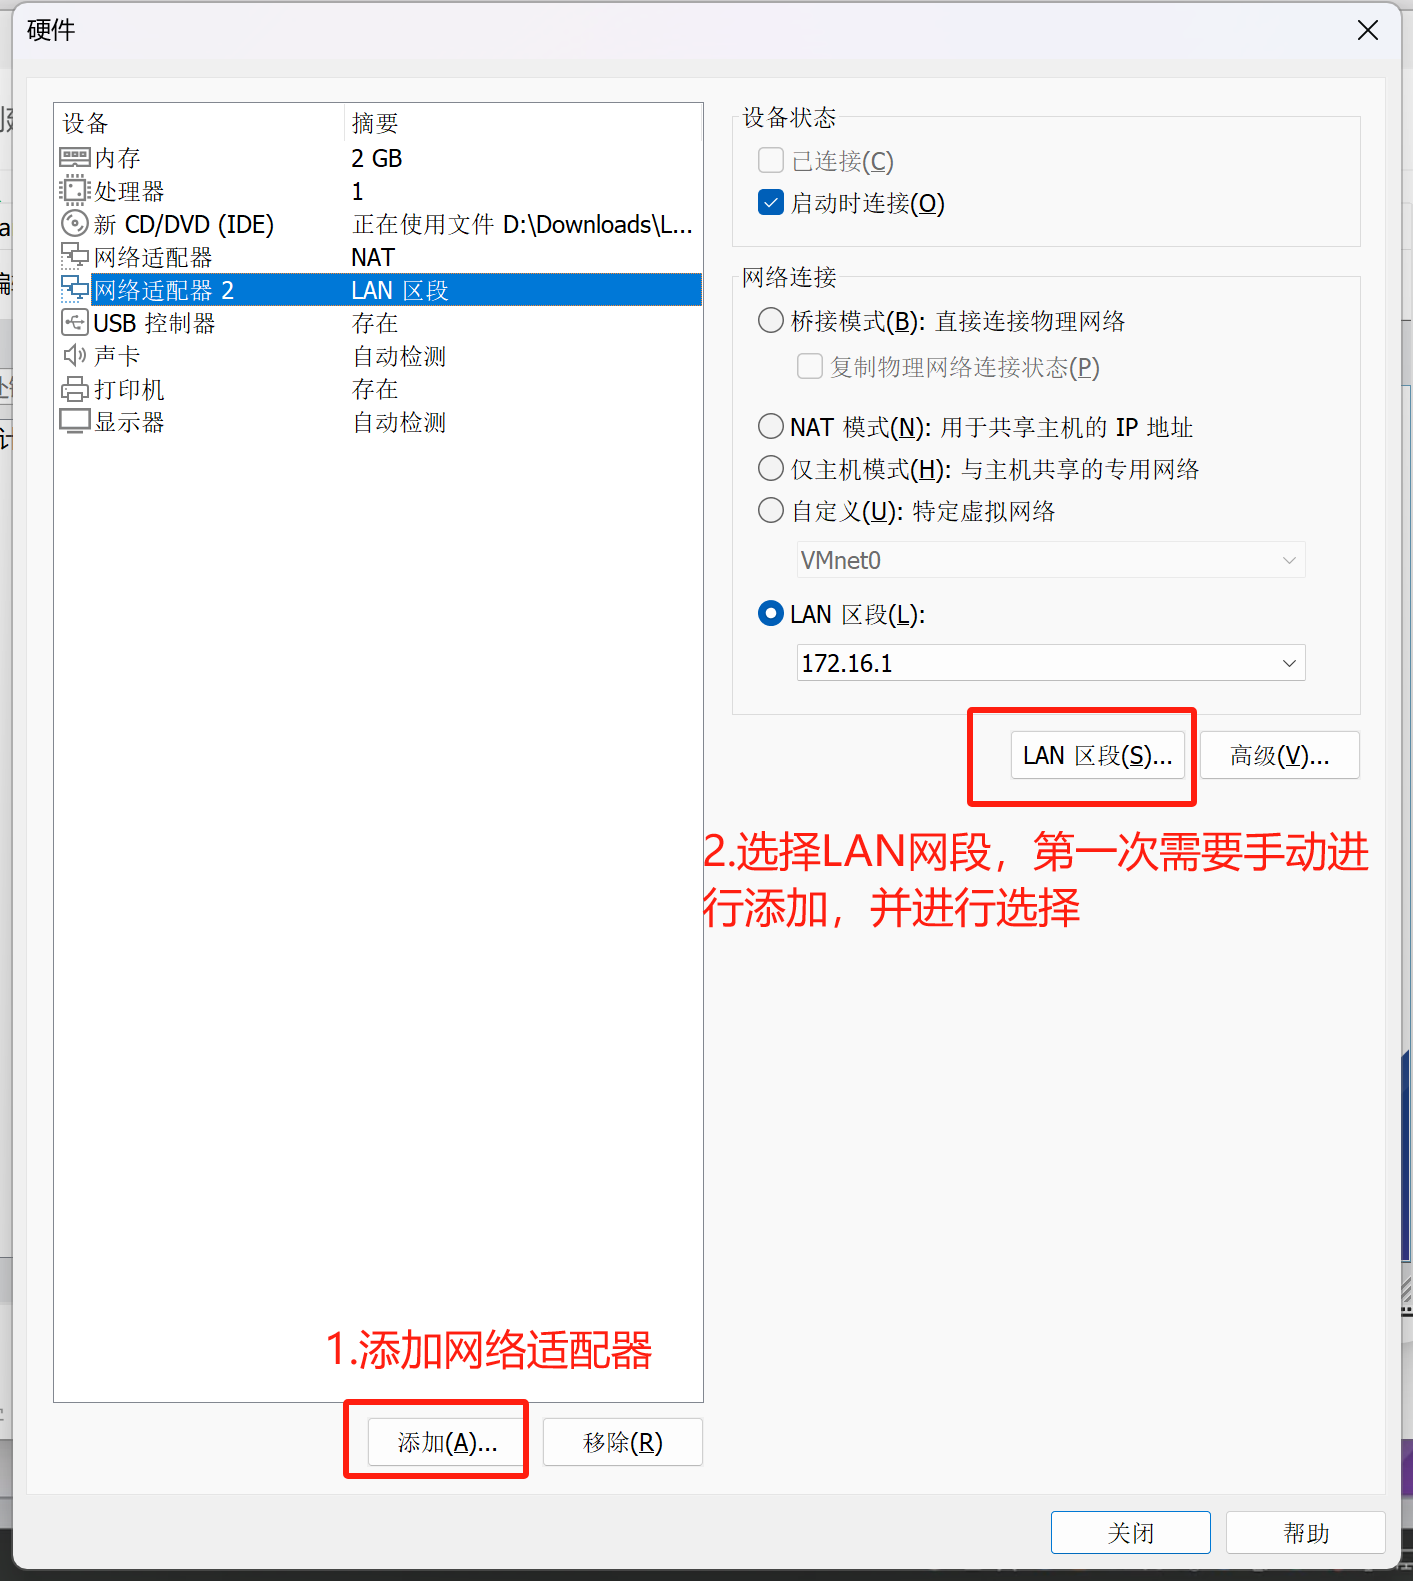
第五步,选择iso文件,增加网络适配器
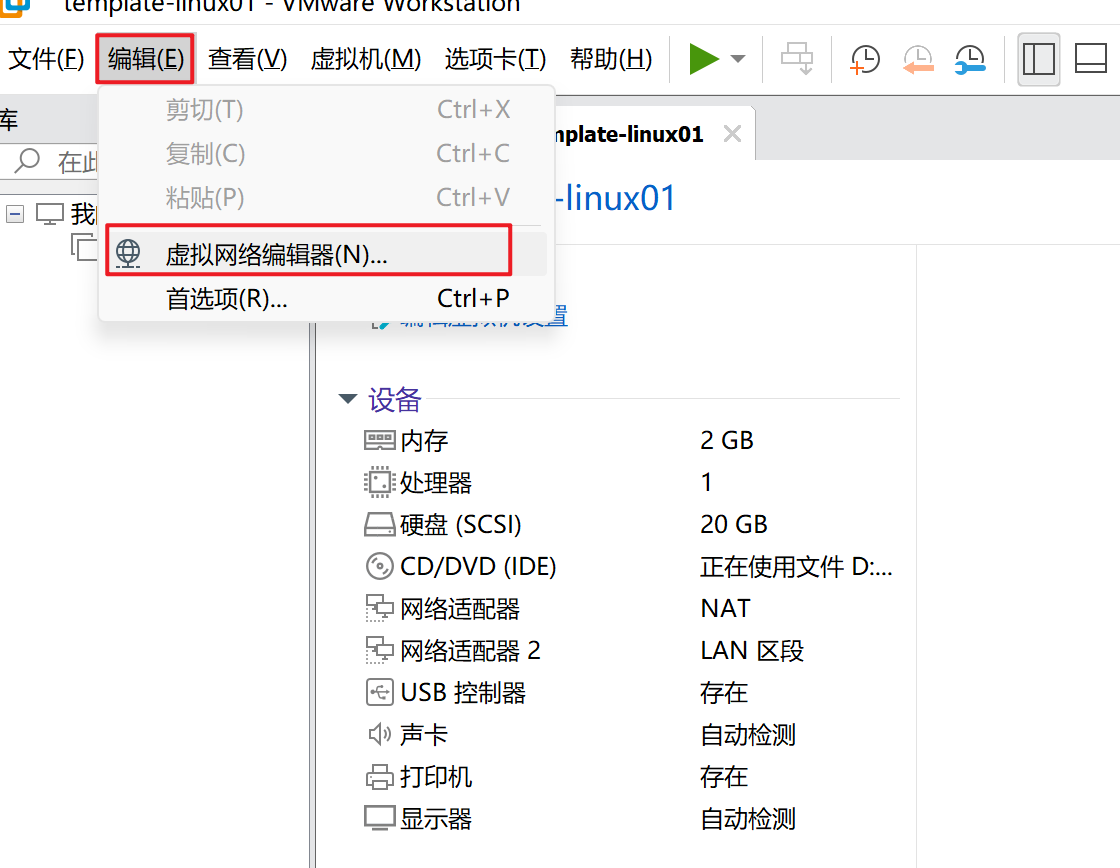
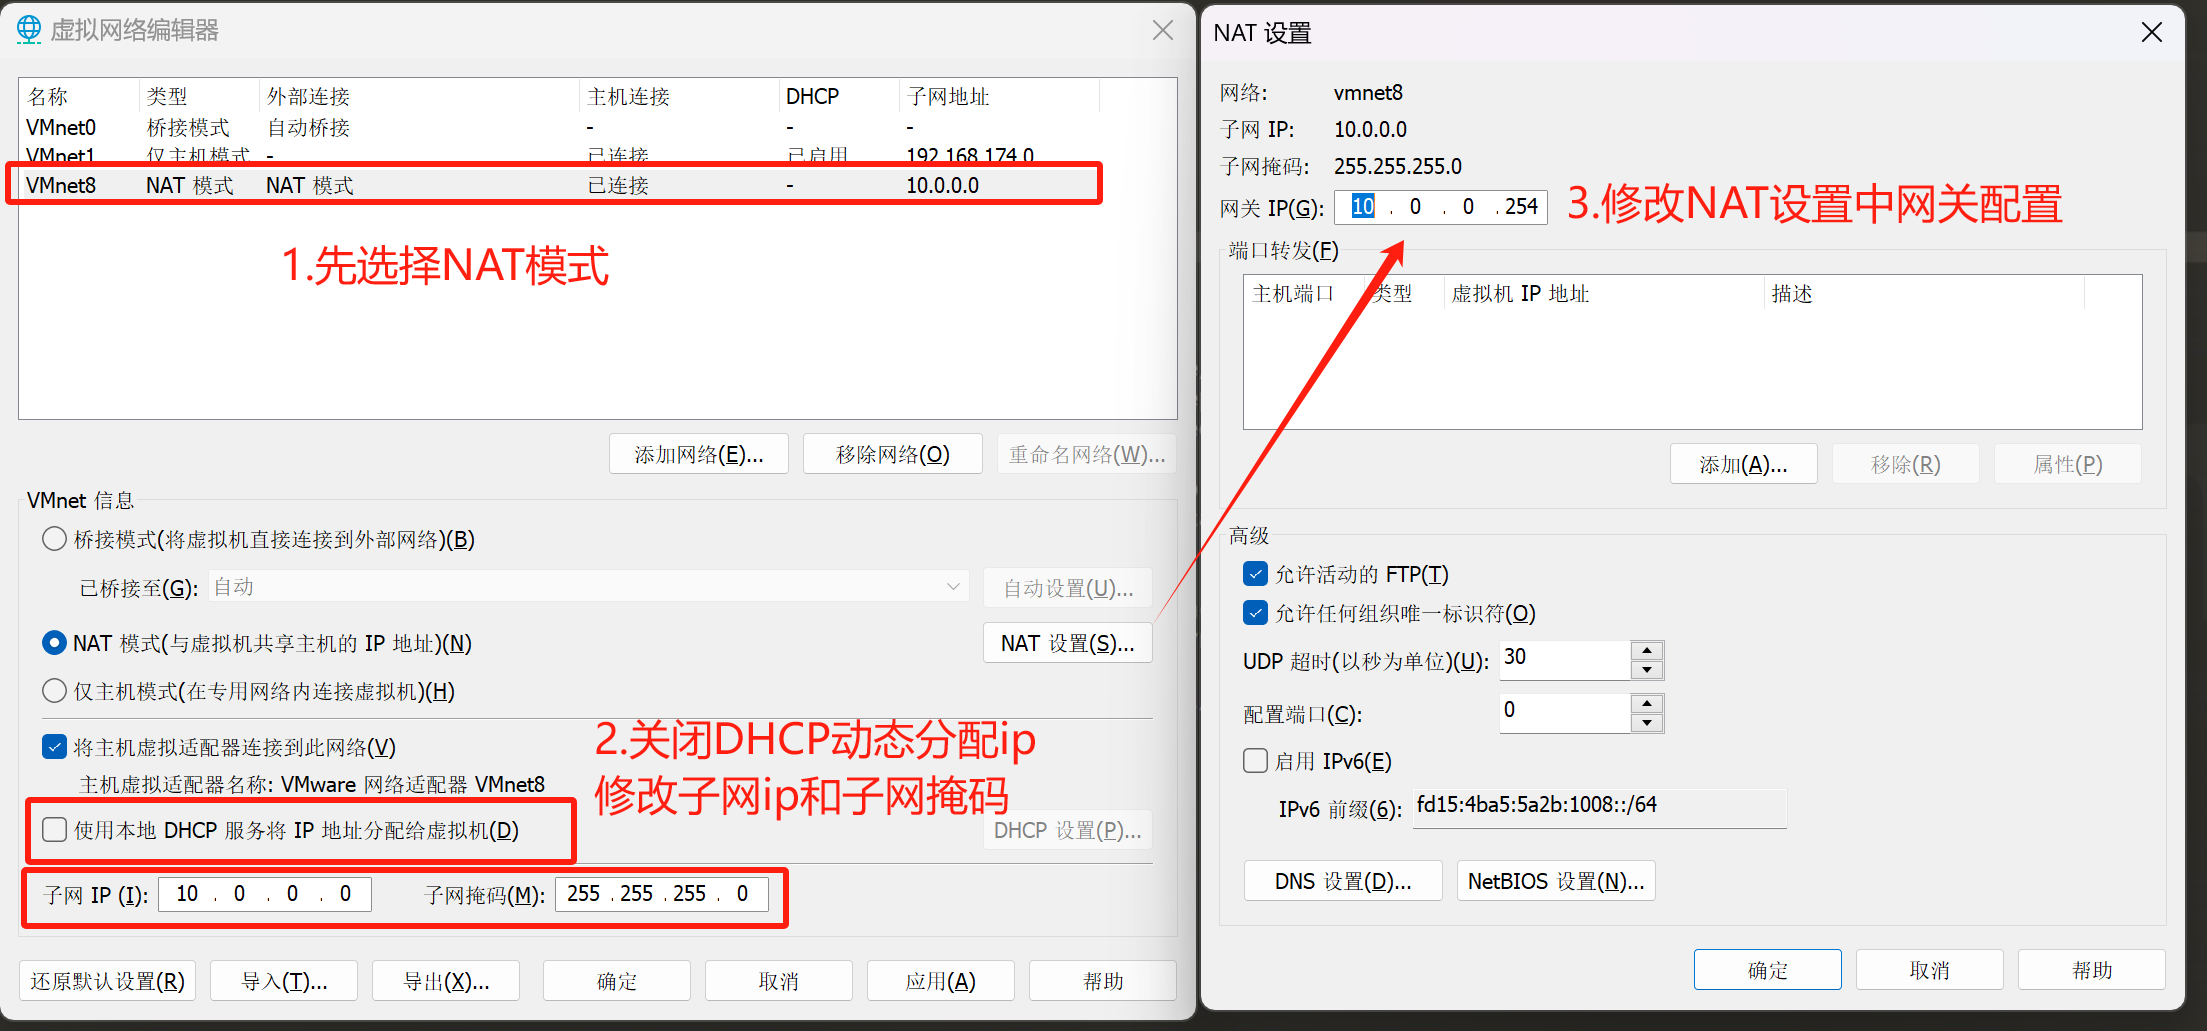
第六步,修改NAT模式网卡配置
第七步,修改网卡的名字
网卡设置完了之后,还得修改linux的安装启动参数,修改网卡的名字
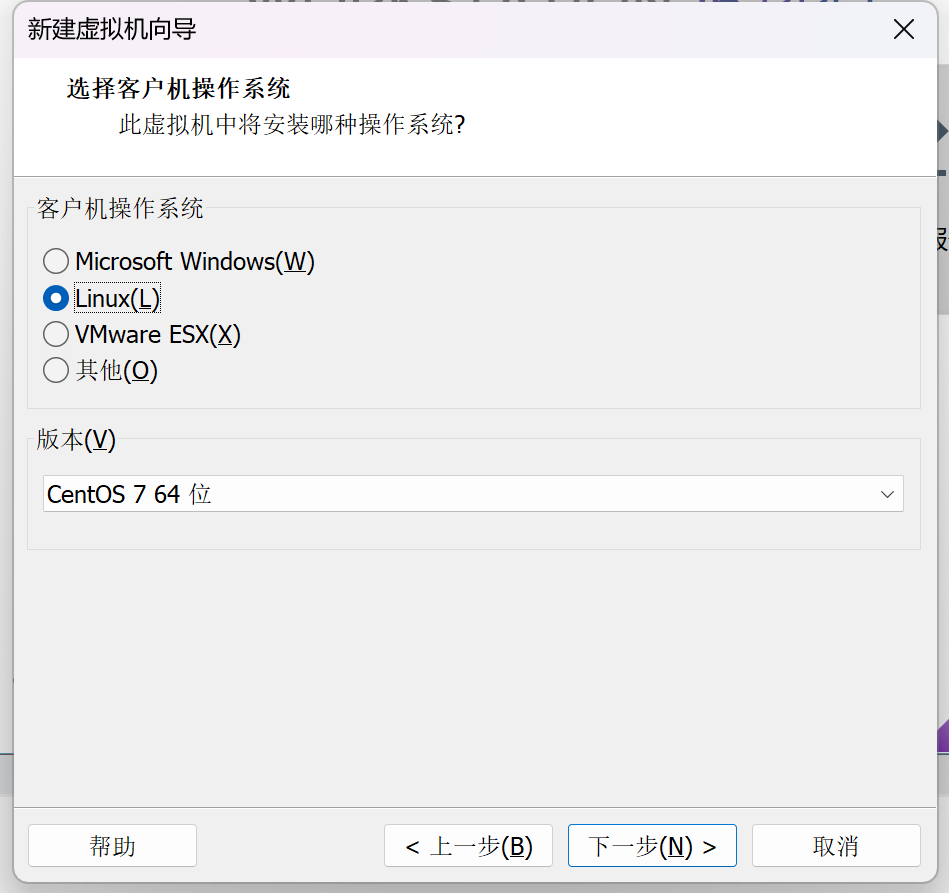
centos7默认是 ens33
按照如下操作,修改为eth0
1.在开机选择画面,输入上下左右
2.按下tab键,再点两下空格,输入如下指令,修改启动参数
net.ifnames=0 biosdevname=0

3.输入回车,启动
4.请注意,必须是英文,以后再也别用中文了,因为你要看日志
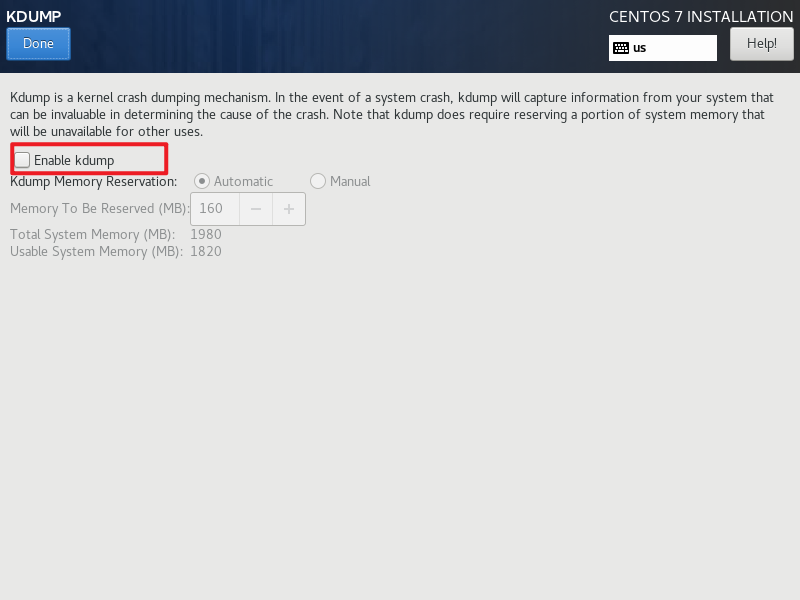
5.只需要修改亚洲上海时区,自动分区,其他全部默认

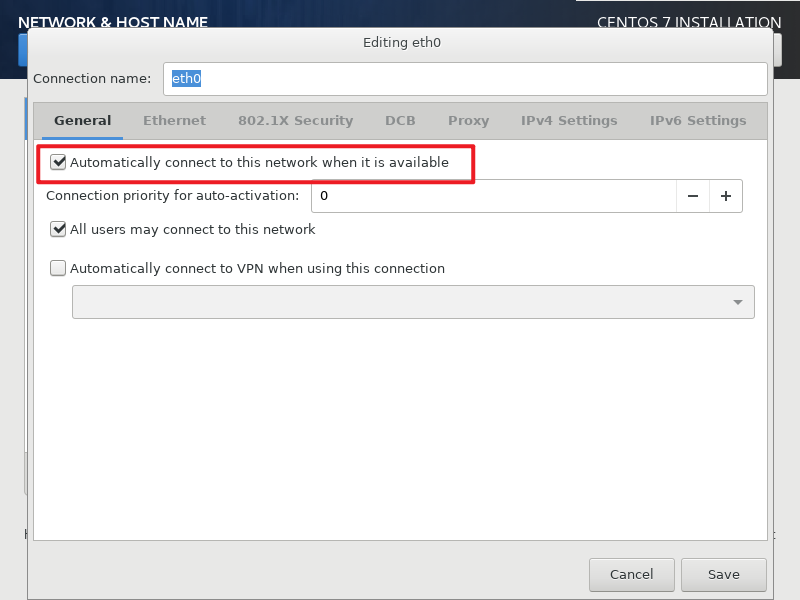
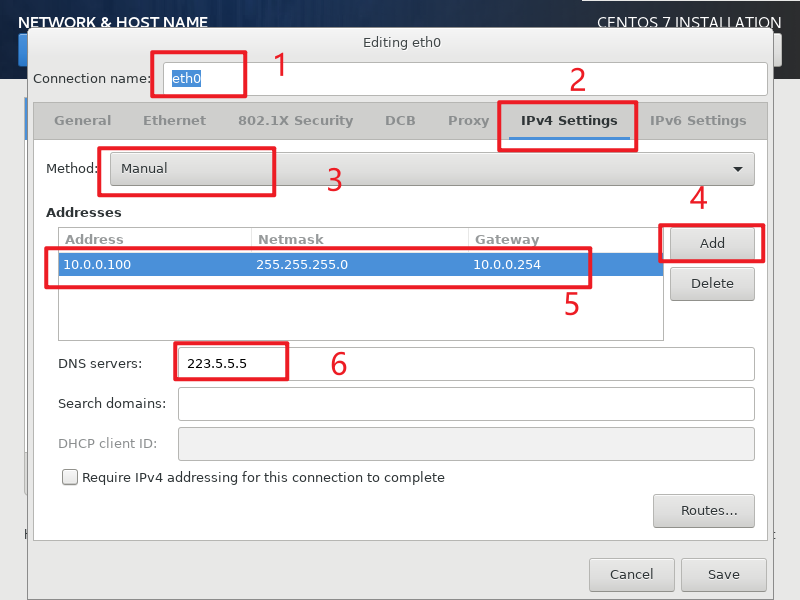
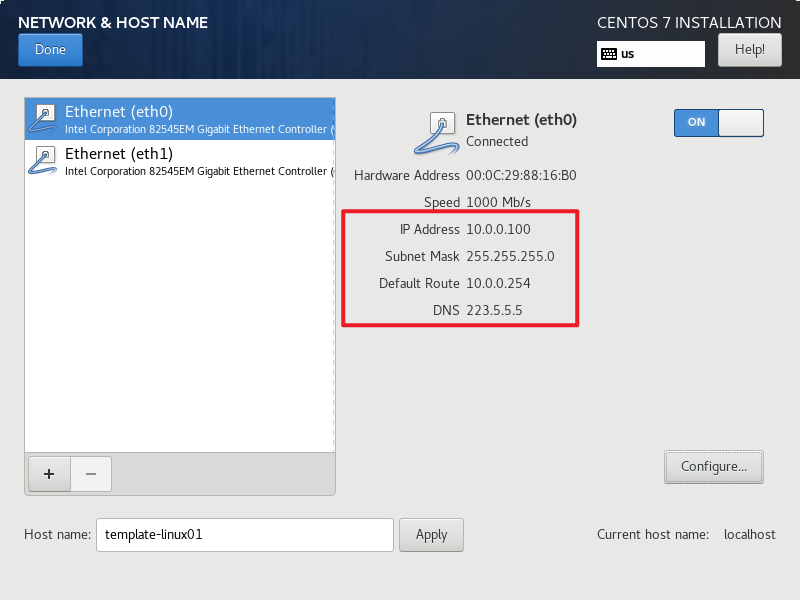
6.网络设置、修改静态ip地址、设置主机名
模板机,主机名 template-linux01
ip,10.0.0.100
网关,10.0.0.254
修改完之后直接点击done进行继续装机,eth1进去后再调整
设置root密码为1

第八步,简化网卡配置文件,做前最好进行备份
[root@template-linux01 ~]# cp /etc/sysconfig/network-scripts/ifcfg-eth0 /etc/sysconfig/network-scripts/ifcfg-eth0.bak

1.删除网卡配置文件中关于ipv4、ipv6的行

#I参数是不区分大小写
[root@template-linux01 ~]# sed -i '/ipv[46]/Id' /etc/sysconfig/network-scripts/ifcfg-eth0

2.再删除如下四行
proxy_method
browser_only
defroute
uuid

[root@template-linux01 ~]# sed -r -i   '/(proxy_method|browser_only|uuid|defroute)/Id' /etc/sysconfig/network-scripts/ifcfg-eth0

3.上述俩语句,你也可以一行搞定
确保最终的配置如下,和我一样即可

[root@template-linux01 ~]# cat /etc/sysconfig/network-scripts/ifcfg-eth0
TYPE=Ethernet
BOOTPROTO=none
NAME=eth0
DEVICE=eth0
ONBOOT=yes
IPADDR=10.0.0.100
PREFIX=24
GATEWAY=10.0.0.254
DNS1=223.5.5.5


4.如果你不这么做,你后续克隆虚拟机,会导致无法上网,必须要删除网卡配置文件的uuid
而且如果你对sed理解不够,你可以直接复制于超老师的这个网卡信息(你能对自己这么低的要求吗?不能!)
修改第二块网卡
eth1 ,仅仅模拟局域网,我们这9台机器
内网的网段设置(vmware,创建的LAN局域网,纯纯的局域网,只能和这个网段的ip地址通信,没有网关,无法从这个网关大门出去,和外接地址通信 )
[root@template-linux01 ~]# cp /etc/sysconfig/network-scripts/ifcfg-eth0 /etc/sysconfig/network-scripts/ifcfg-eth1
[root@template-linux01 ~]# sed -r -e 's#eth0#eth1#g' -e 's#10.0.0.100#172.16.1.100#g' -e 's#10.0.0.254#172.16.1.254#g' /etc/sysconfig/network-scripts/ifcfg-eth0 >/etc/sysconfig/network-scripts/ifcfg-eth1
[root@template-linux01 ~]# cat /etc/sysconfig/network-scripts/ifcfg-eth1
TYPE=Ethernet
BOOTPROTO=none
NAME=eth1
DEVICE=eth1
ONBOOT=yes
IPADDR=172.16.1.100
PREFIX=24
GATEWAY=172.16.1.254
DNS1=223.5.5.5

重启网络
[root@template-linux01 ~]# systemctl restart network
[root@template-linux01 ~]# ip a | grep -E 'eth0|eth1'
2: eth0: <BROADCAST,MULTICAST,UP,LOWER_UP> mtu 1500 qdisc pfifo_fast state UP group default qlen 1000
    inet 10.0.0.100/24 brd 10.0.0.255 scope global noprefixroute eth0
3: eth1: <BROADCAST,MULTICAST,UP,LOWER_UP> mtu 1500 qdisc pfifo_fast state UP group default qlen 1000
    inet 172.16.1.100/24 brd 172.16.1.255 scope global noprefixroute eth1
第九步,系统初始化
[root@template-linux01 ~]# systemctl stop firewalld NetworkManager

[root@template-linux01 ~]# systemctl disable firewalld NetworkManager
Removed symlink /etc/systemd/system/multi-user.target.wants/NetworkManager.service.
Removed symlink /etc/systemd/system/multi-user.target.wants/firewalld.service.
Removed symlink /etc/systemd/system/dbus-org.freedesktop.nm-dispatcher.service.
Removed symlink /etc/systemd/system/network-online.target.wants/NetworkManager-wait-online.service.
Removed symlink /etc/systemd/system/dbus-org.fedoraproject.FirewallD1.service.

[root@template-linux01 ~]# sed -i '/^SELINUX=/c SELINUX=disabled' /etc/selinux/config

[root@template-linux01 ~]# grep '^SELINUX=' /etc/selinux/config
SELINUX=disabled

[root@template-linux01 ~]# setenforce 0

[root@template-linux01 ~]# getenforce
Permissive

[root@template-linux01 ~]# iptables -F

[root@template-linux01 ~]# iptables -X

[root@template-linux01 ~]# iptables -Z

[root@template-linux01 ~]# iptables -L
Chain INPUT (policy ACCEPT)
target     prot opt source               destination

Chain FORWARD (policy ACCEPT)
target     prot opt source               destination

Chain OUTPUT (policy ACCEPT)
target     prot opt source               destination

[root@template-linux01 ~]# systemctl is-enabled firewalld NetworkManager
disabled
disabled
第十步,加速ssh连接
修改以下两个参数
[root@template-linux01 ~]# grep -Ei '^(.*gssapiauth|.*usedns)' /etc/ssh/sshd_config
GSSAPIAuthentication yes
#UseDNS yes
[root@template-linux01 ~]# sed -i -e 's#^GSSAPIAuthentication yes#GSSAPIAuthentication no#' -e 's/^#UseDNS yes/UseDNS no/' /etc/ssh/sshd_config
[root@template-linux01 ~]# grep -Ei '^(.*gssapiauth|.*usedns)' /etc/ssh/sshd_config
GSSAPIAuthentication no
UseDNS no
[root@template-linux01 ~]# systemctl restart sshd.service
第十一步,添加配色
user设置
cat >> ~/.bashrc << EOF
PS1='[\[\e[35;1m\]\u@\[\e[33;1m\]\h\[\e[34;1m\] \W\[\e[0m\]]\$ '
EOF
root设置
cat >> ~/.bashrc << EOF
PS1='[\[\e[35;1m\]\u@\[\e[33;1m\]\h\[\e[34;1m\] \W\[\e[0m\]]\# '
EOF
第十二步,添加网络yum源
[root@template-linux01 ~]# cd /etc/yum.repos.d/
[root@template-linux01 yum.repos.d]# mkdir bak
[root@template-linux01 yum.repos.d]# mv *.repo bak/
[root@template-linux01 yum.repos.d]# ls
bak
[root@template-linux01 yum.repos.d]# vi CentOS-Base-7.repo
或
[root@template-linux01 yum.repos.d]# curl https://mirrors.aliyun.com/repo/Centos-7.repo > /etc/yum.repos.d/CentOS-Base-7.repo
或
#利用-o参数
[root@template-linux01 yum.repos.d]# curl -o /etc/yum.repos.d/epel.repo  http://mirrors.aliyun.com/repo/epel-7.repo
[root@template-linux01 yum.repos.d]# yum clean all
[root@template-linux01 yum.repos.d]# yum makecache
# CentOS-Base.repo
#
# The mirror system uses the connecting IP address of the client and the
# update status of each mirror to pick mirrors that are updated to and
# geographically close to the client. You should use this for CentOS updates
# unless you are manually picking other mirrors.
#
# If the mirrorlist= does not work for you, as a fall back you can try the
# remarked out baseurl= line instead.
#
#
[base]
name=CentOS-$releasever - Base - mirrors.aliyun.com
failovermethod=priority
baseurl=http://mirrors.aliyun.com/centos/$releasever/os/$basearch/
http://mirrors.aliyuncs.com/centos/$releasever/os/$basearch/
http://mirrors.cloud.aliyuncs.com/centos/$releasever/os/$basearch/
gpgcheck=1
gpgkey=http://mirrors.aliyun.com/centos/RPM-GPG-KEY-CentOS-7
#released updates
[updates]
name=CentOS-$releasever - Updates - mirrors.aliyun.com
failovermethod=priority
baseurl=http://mirrors.aliyun.com/centos/$releasever/updates/$basearch/
http://mirrors.aliyuncs.com/centos/$releasever/updates/$basearch/
http://mirrors.cloud.aliyuncs.com/centos/$releasever/updates/$basearch/
gpgcheck=1
gpgkey=http://mirrors.aliyun.com/centos/RPM-GPG-KEY-CentOS-7
#additional packages that may be useful
[extras]
name=CentOS-$releasever - Extras - mirrors.aliyun.com
failovermethod=priority
baseurl=http://mirrors.aliyun.com/centos/$releasever/extras/$basearch/
http://mirrors.aliyuncs.com/centos/$releasever/extras/$basearch/
http://mirrors.cloud.aliyuncs.com/centos/$releasever/extras/$basearch/
gpgcheck=1
gpgkey=http://mirrors.aliyun.com/centos/RPM-GPG-KEY-CentOS-7
#additional packages that extend functionality of existing packages
[centosplus]
name=CentOS-$releasever - Plus - mirrors.aliyun.com
failovermethod=priority
baseurl=http://mirrors.aliyun.com/centos/$releasever/centosplus/$basearch/
http://mirrors.aliyuncs.com/centos/$releasever/centosplus/$basearch/
http://mirrors.cloud.aliyuncs.com/centos/$releasever/centosplus/$basearch/
gpgcheck=1
enabled=0
gpgkey=http://mirrors.aliyun.com/centos/RPM-GPG-KEY-CentOS-7
#contrib - packages by Centos Users
[contrib]
name=CentOS-$releasever - Contrib - mirrors.aliyun.com
failovermethod=priority
baseurl=http://mirrors.aliyun.com/centos/$releasever/contrib/$basearch/
http://mirrors.aliyuncs.com/centos/$releasever/contrib/$basearch/
http://mirrors.cloud.aliyuncs.com/centos/$releasever/contrib/$basearch/
gpgcheck=1
enabled=0
gpgkey=http://mirrors.aliyun.com/centos/RPM-GPG-KEY-CentOS-7第十三步,安装基础软件
[root@template-linux01 ~]# yum install -y tree wget bash-completion bash-completion-extras lrzsz net-tools sysstat iotop iftop htop unzip telnet ntpdate lsof第十四步,关闭邮箱警告
[root@template-linux01 ~]# echo 'unset mailcheck' >> /etc/profile
[root@template-linux01 ~]# source /etc/profile
第十五步,配置host解析文件
[root@template-linux01 ~]# mv /etc/hosts /etc/hosts.bak
[root@template-linux01 ~]# cat > /etc/hosts <<EOF
# 外网地址   内网地址     主机名
10.0.0.61  172.16.1.61  master-61
10.0.0.5   172.16.1.5   slb-5
10.0.0.6   172.16.1.6   slb-6
10.0.0.7   172.16.1.7   web-7
10.0.0.8   172.16.1.8   web-8
10.0.0.9   172.16.1.9   web-9
10.0.0.31  172.16.1.31  nfs-31
10.0.0.41  172.16.1.41  rsync-41
10.0.0.51  172.16.1.51  db-51
EOF
第十六步,时间同步
[root@template-linux01 ~]# crontab -l
* */1 * * * /usr/sbin/ntpdate time1.aliyun.com > /dev/null 2>&1
第十七步,关闭swap分区
[root@template-linux01 ~]# swapoff -a
[root@template-linux01 ~]# free -m
              total        used        free      shared  buff/cache   available
Mem:           1980         202        1040           9         737        1619
Swap:             0           0           0
[root@template-linux01 ~]# cat /etc/fstab

#
# /etc/fstab
# Created by anaconda on Fri Aug 30 18:25:46 2024
#
# Accessible filesystems, by reference, are maintained under '/dev/disk'
# See man pages fstab(5), findfs(8), mount(8) and/or blkid(8) for more info
#
/dev/mapper/centos-root /                       xfs     defaults        0 0
UUID=c00d26dc-6b16-44a7-bdd2-5d76e2e8de40 /boot                   xfs     defaults        0 0
/dev/mapper/centos-swap swap                    swap    defaults        0 0

#删除挂载的swap分区,否则机器会启动不了
[root@template-linux01 ~]# vim /etc/fstab
[root@template-linux01 ~]# cat /etc/fstab

#
# /etc/fstab
# Created by anaconda on Fri Aug 30 18:25:46 2024
#
# Accessible filesystems, by reference, are maintained under '/dev/disk'
# See man pages fstab(5), findfs(8), mount(8) and/or blkid(8) for more info
#
/dev/mapper/centos-root /                       xfs     defaults        0 0
UUID=c00d26dc-6b16-44a7-bdd2-5d76e2e8de40 /boot                   xfs     defaults        0 0
第十八步,添加修改网卡配置脚本
[root@template-linux01 ~]# cat > change_network.sh <<EOF
#!/bin/sh
file1=/etc/sysconfig/network-scripts/ifcfg-eth0
file2=/etc/sysconfig/network-scripts/ifcfg-eth1
read -p "请输入你的主机位:" my_ip
read -p "请输入你的主机名:" host_name
echo "正在修改eth0网卡配置文件"
[ -f $file1 ] && sed -ri -e "s/(^IPADDR.*)\.(.*)\.(.*)\.(.*)/\1\.\2\.\3\.$my_ip/g" $file1 || echo "$file1 don't exist!"
echo "正在修改eth1网卡配置文件"
[ -f $file2 ] && sed -ri -e "s/(^IPADDR.*)\.(.*)\.(.*)\.(.*)/\1\.\2\.\3\.$my_ip/g" $file2 || echo "$file2 don't exist!"
if [ $? -eq 0 ];then
  echo "网卡配置完成"
  echo "网卡eth0配置如下:"
  /usr/bin/cat $file1
  echo "网卡eth1配置如下:"
  cat $file2
else
  echo "网卡配置失败"
  exit
fi
echo "正在设置主机名"
hostnamectl set-hostname ${host_name}
echo "你的主机名设置完成,主机名为"
hostname
EOF
第十九步,创建链接克隆
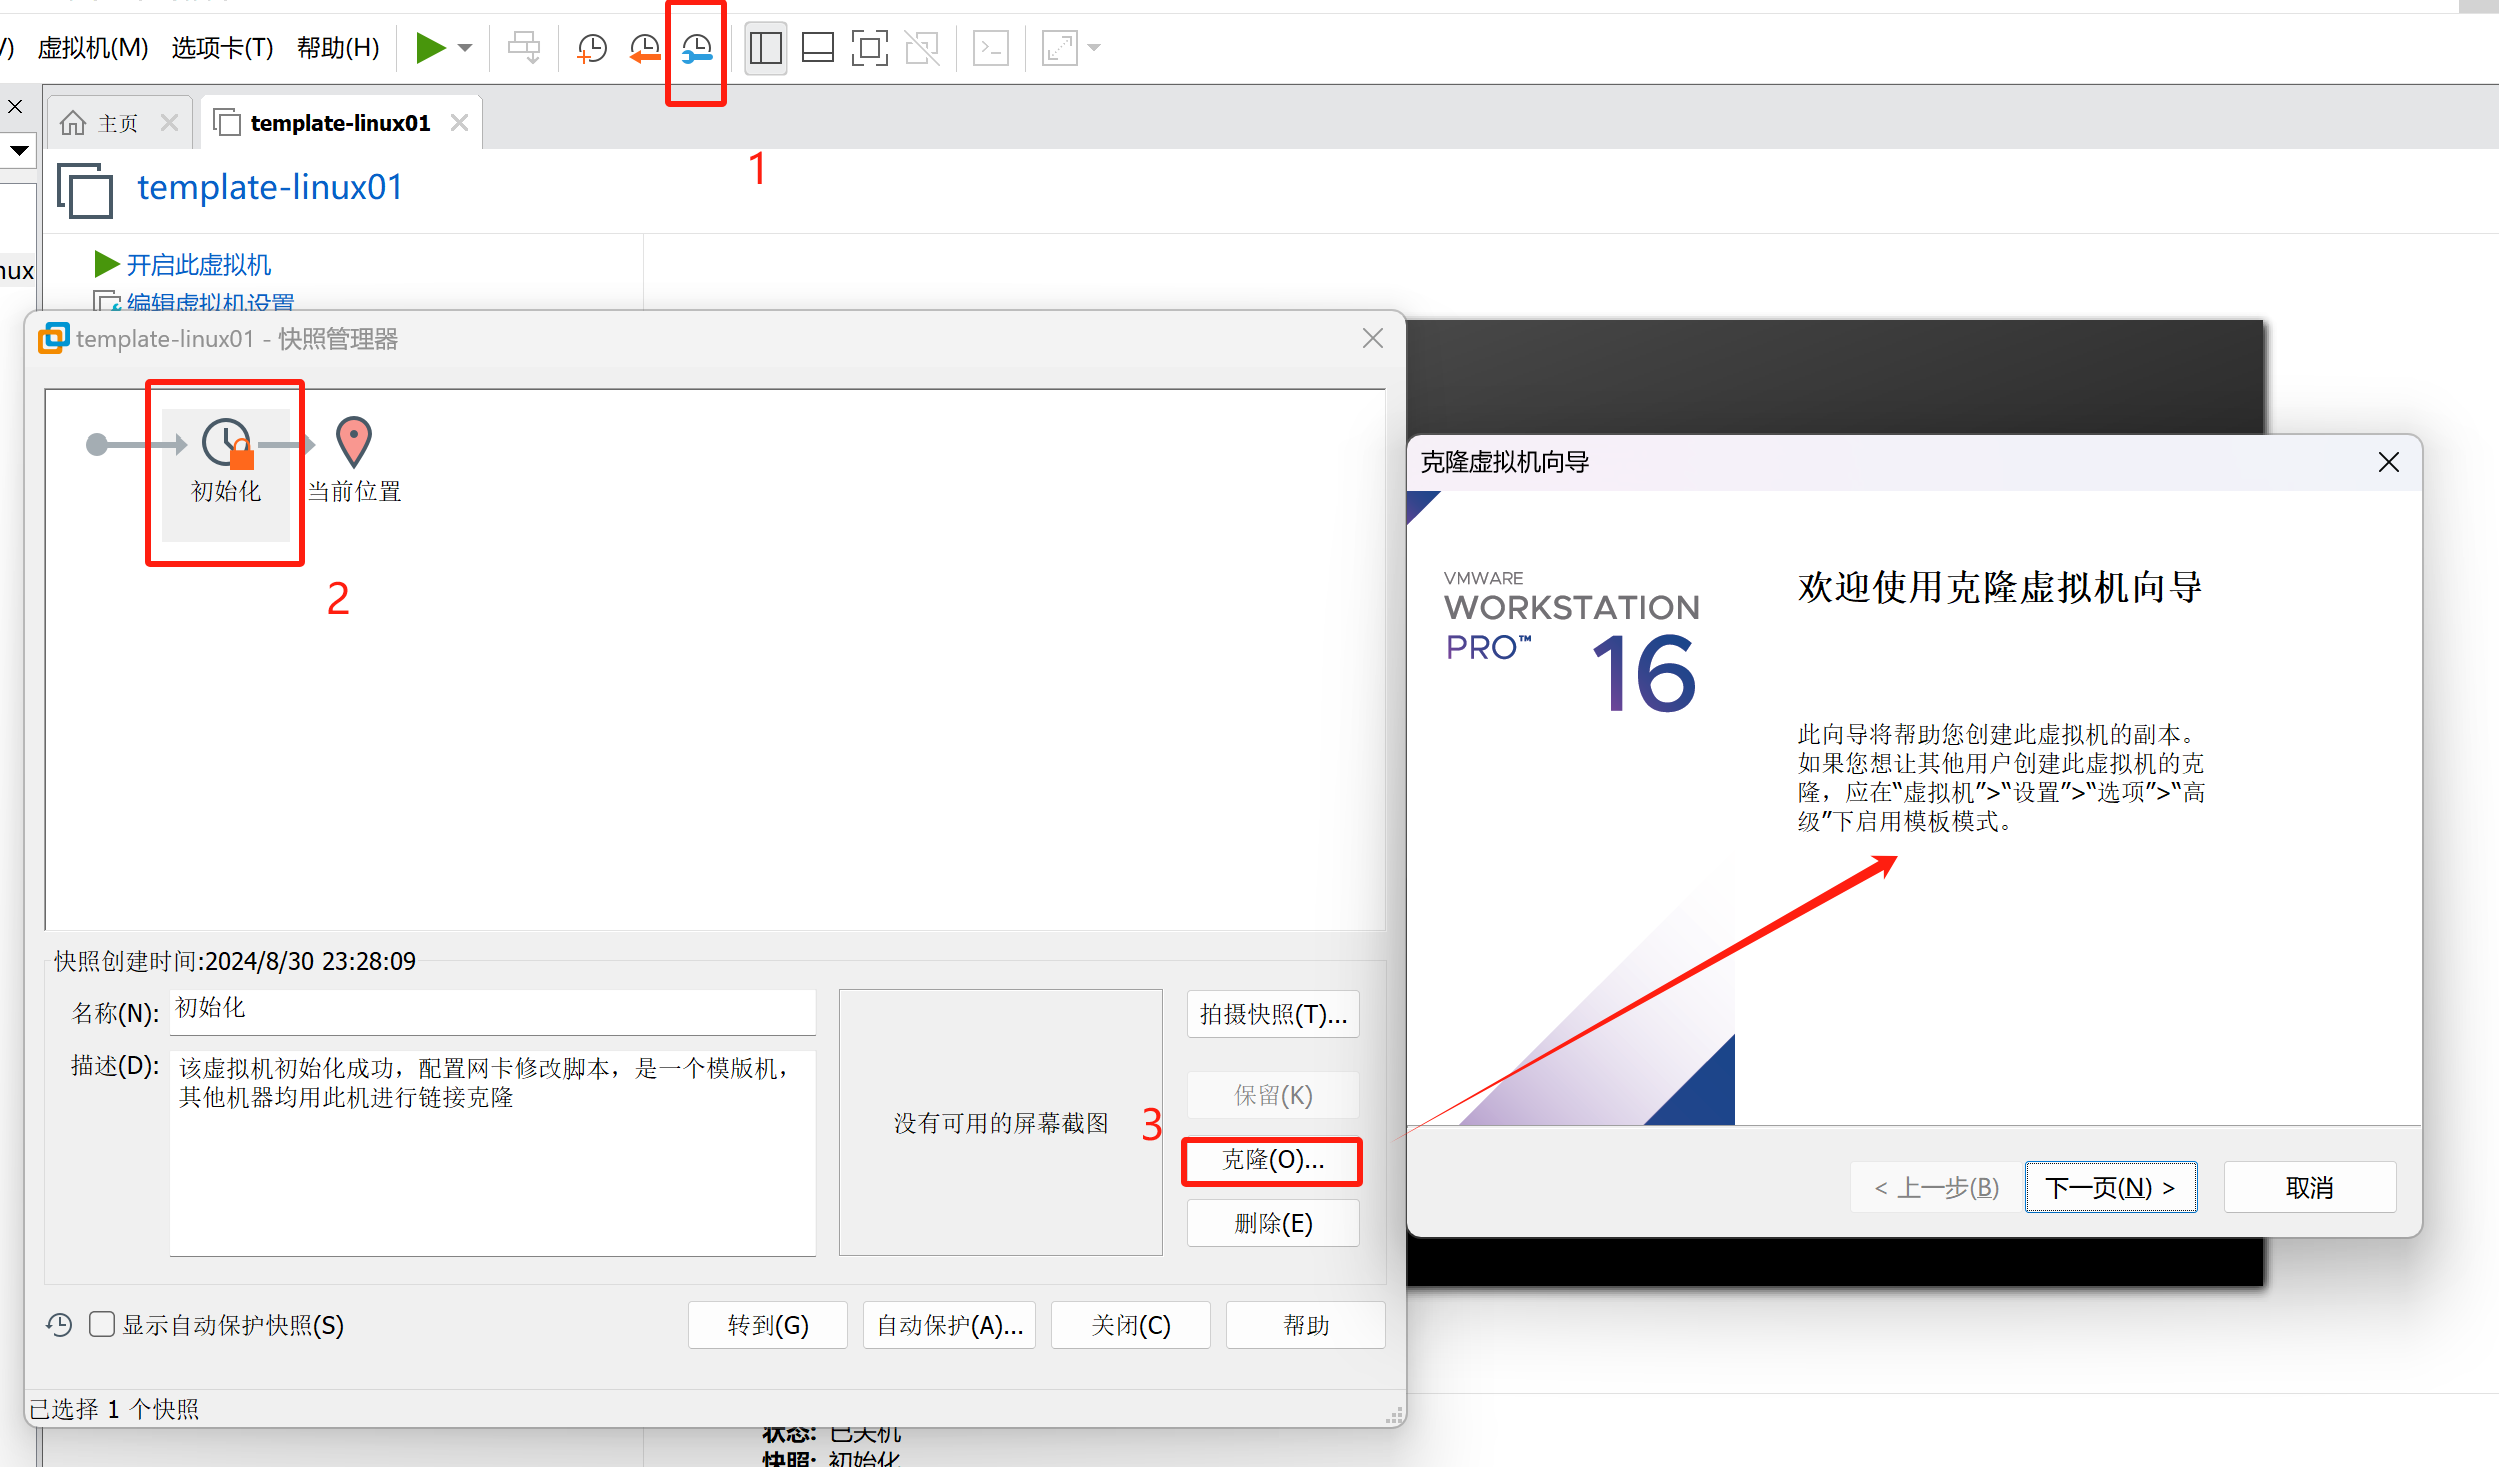
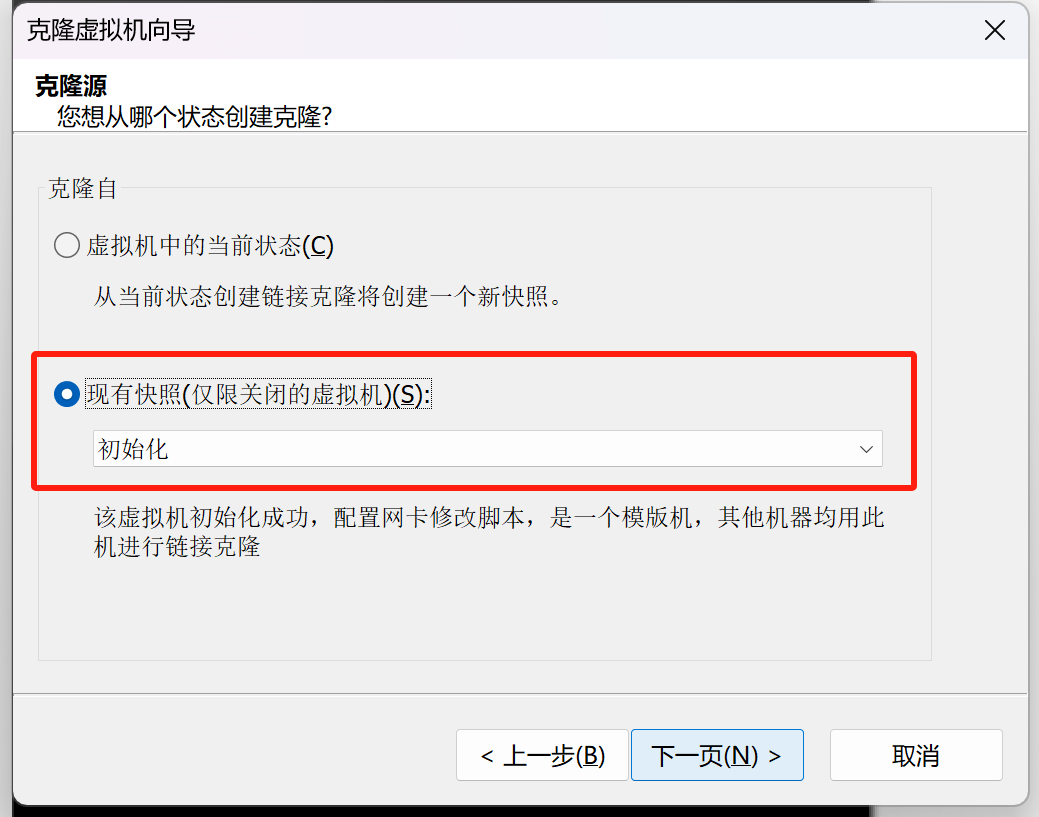
开机执行脚本替换网卡配置即可


 6万+
6万+

 被折叠的 条评论
为什么被折叠?
被折叠的 条评论
为什么被折叠?
 到【灌水乐园】发言


