


目录
1.创建线程的两种方式
a.继承Thread类,重写run方法
b.实现Runnable接口,重写run方法
1.继承Thread类
public class Thread01 {
    public static void main(String[] args) {
        //创建cat对象,可以当作线程使用
        Cat cat=new Cat();
        cat.start();
    }
}
//当一个类继承了Thread类,该类就可以当作线程使用
//重写run方法,写自己的逻辑代码
//run Thread类实现了Runable接口的run方法

/**
 *  @Override
 *     public void run() {
 *         if (target != null) {
 *             target.run();
 *         }
 *     }
 */
class Cat extends Thread{

    int times=0;
    @Override
    public void run() {
        while (true) {
            System.out.println("I am a cat "+(++times));
            //休眠一秒
            try {
                Thread.sleep(100);
            } catch (InterruptedException e) {
                e.printStackTrace();
            }
            if(times==80){
                break;
            }
        }

    }
}
上面的代码我们有三个步骤,第一重写了run方法,第二在run方法里面我们使用了Thread.sleep方法做延迟,第三在我们调用这个线程的时候,我们底层使用的是start0()方法。start0()才是创建线程决定性的语句。
我们在这段代码实现了这么一个线程,实现每0.1秒在控制台输出一句话的效果,这里要说明一下,当main线程启动一个线程的时候,主线程不会阻塞,会继续执行。并且我们的子线程和主线程是交替进行的。
为了更直观一点我们用Jconsole监控线程情况,并画出程序示意图
在IDE终端打上Jconsole命令

我们可以打开下面界面:

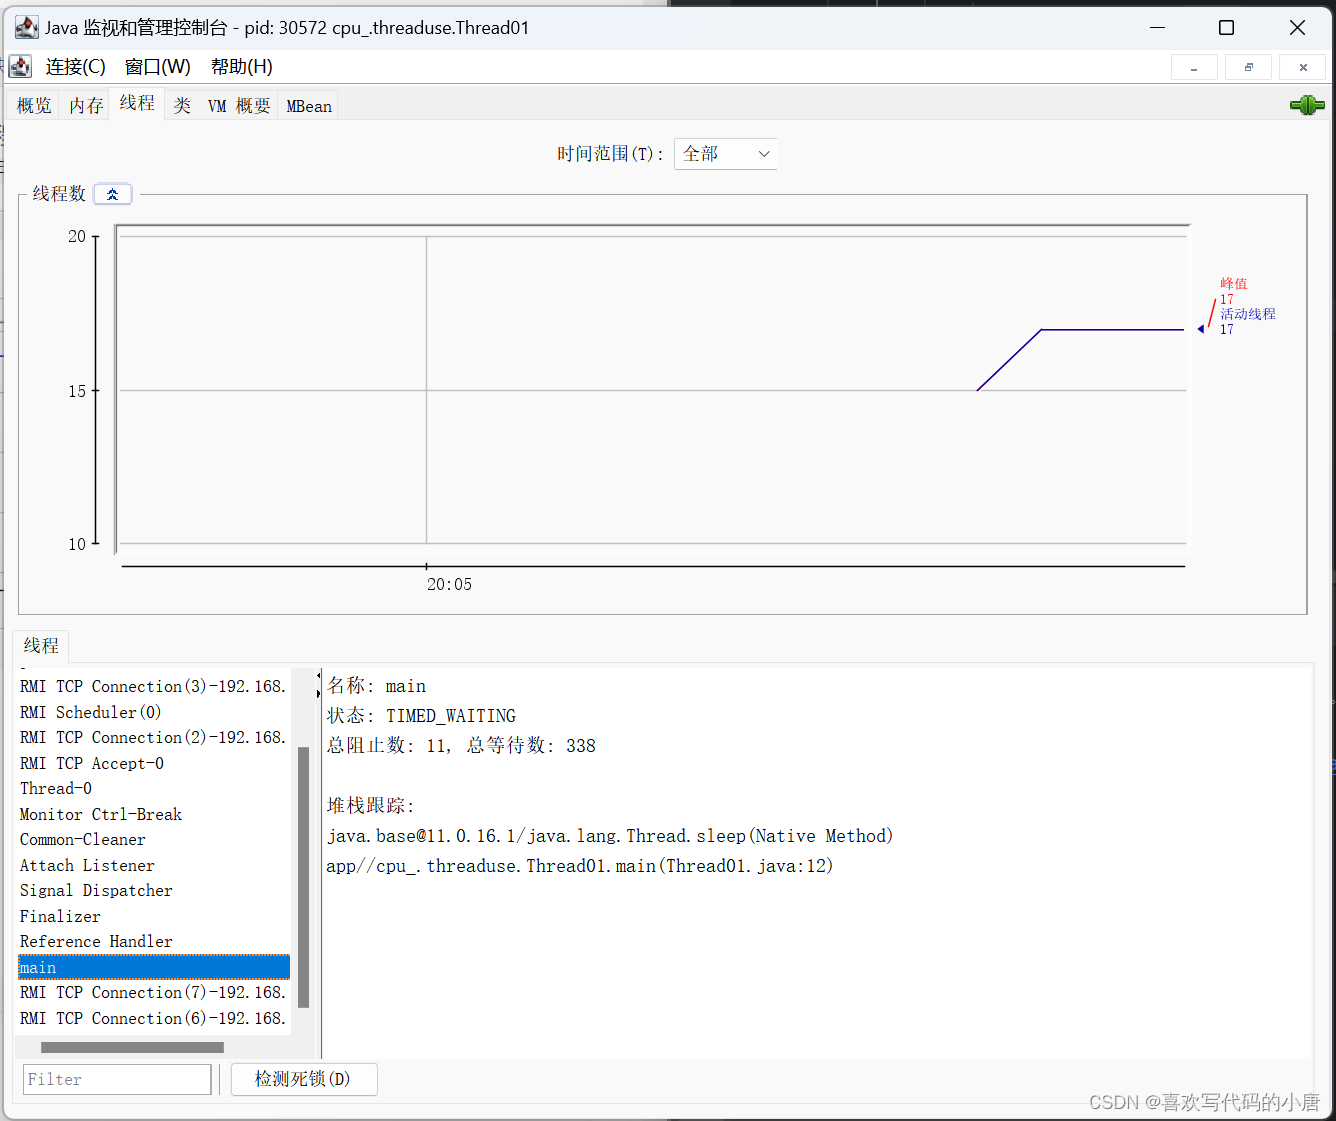

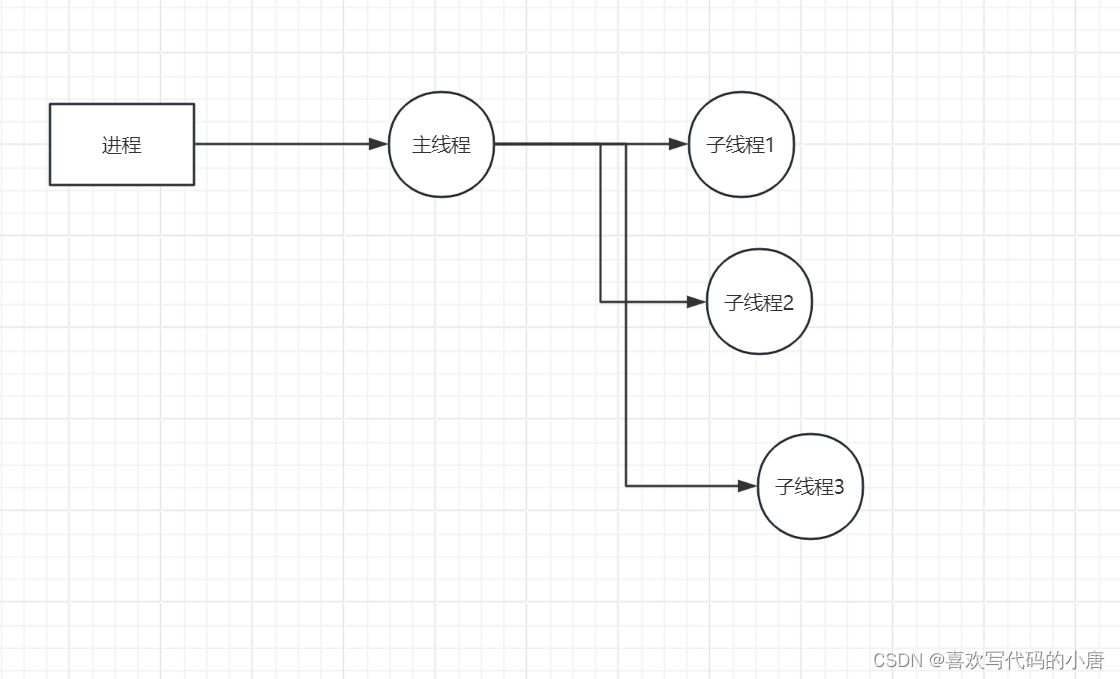
以上是线程在运行中监控的图像,我们会发现在线程结束以后图的我们就会断开连接,以及我们的main和thread线程是同时存在的。并且我们发现对于main这个主线程来说,他先结束并不会意味着子线程也结束,对于计算机来说,他会先建立一个进程,然后在进程里面加入线程如下:
run方法和start方法解析:
如果我们直接去调用run方法也就是main线程去调用run方法,而不是建立一个子线程去调用run方法,也就是说,如果直接调用,那么run方法就是在main线程里面串行实现的,而且我们打印出线程名字时就是main而不是Thread,如下:

所以真正实现线程的是start方法而不是run方法
2.实现Runnable接口
java是单继承的,在某种情况下,一个类可能已经继承了某个父类,这时在用继承Thread类方法来创建线程显然不可能,所以我们使用实现Runnable接口来创建线程.这里底层用了设计模式的静态代理模式。实现代码如下:
public class Thread02 {
    public static void main(String[] args) {
        Dog dog=new Dog();
        //这里不能调用start
        Thread thread=new Thread(dog);
        thread.start();
    }
}
class Dog implements Runnable{

    int  count=0;
    @Override
    public void run() {
        while(true){
            System.out.println("dog "+(++count)+Thread.currentThread().getName());
            try {
                Thread.sleep(1000);
            } catch (InterruptedException e) {
                throw new RuntimeException(e);
            }

        }
    }
}
接下来我们用代码模拟一下静态代理模式
class Animal{}
class Tiger extends Animal implements Runnable{

    @Override
    public void run() {
        System.out.println("t t t t t t ");
    }
}
class ThreadProxy implements Runnable{//用代码实现代理,模拟了极简的thread类

    private Runnable target=null;//类型是Runnable
    @Override
    public void run() {
        if (target != null) {
            target.run();
        }
    }
    public ThreadProxy(Runnable target) {
        this.target = target;
    }

    public void start(){
        start0();//这个方法是实现多线程的方法
    }
    public void start0(){
        run();
    }
}
一般我们用代理去执行代码或线程的话,一般是实现InvocationHandler接口。但对于静态代理类来说,我们其实倾向于模拟,也就是对于这个来说,我们实现了两个类,一个是代理类,一个是被代理类。他们都实现了同一个接口,我们在实现被代理类的时候,我们不直接调用,而是转到代理类里面,去实现,当然我们最后调用的还是被代理类的方法,但是我们可以用代理类对方法进行处理。当然我们用的最多还是动态代理类。这里对于静态代理类的介绍我更倾向于他用代码模拟了动态代理类的底层逻辑。
然后我们来看继承Thread类和实现Runnable接口这两种方法来建立一个线程区别在于:Thread类,他是继承的,但是对于java来说单继承性质限制thread类的使用场景。而对于直接实现Runnable接口来开发线程,因为接口的实现是多维的所以,我们对于Runnable接口的使用场景反而更加多元化,更加灵活而且方便。
2.多线程执行
我们这里也是介绍的叫多个子线程案例,看我下面的代码:
public class Thread03 {
    public static void main(String[] args) {
        T1 t1 = new T1();
        T2 t2 = new T2();
        Thread thread = new Thread(t1);
        Thread thread1 = new Thread(t2);
        thread.start();//第一个线程
        thread1.start();//第二个线程

    }
}
class T1 implements Runnable{

    int count=0;
    @Override
    public void run() {
        //每隔一秒输出helloword
        while(true){
            System.out.println("hello word +"+(++count));
            try {
                Thread.sleep(1000);
            } catch (InterruptedException e) {
                throw new RuntimeException(e);
            }
            if (count == 10) {
                break;
            }
        }
    }
}
class T2 implements Runnable{

    int count=0;
    @Override
    public void run() {
        //每隔一秒输出helloword
        while(true){
            System.out.println("hi +"+(++count));
            try {
                Thread.sleep(1000);
            } catch (InterruptedException e) {
                throw new RuntimeException(e);
            }
            if (count == 5) {
                break;
            }
        }
    }
}
我们用T1,T2两个类去分别实现两个线程的创建,子线程的创建我们用的是实现Runnable接口来创建,然后我们在main主线程里面启动两个子线程。然后我们两个子线程同时执行。这里需要重申一下,主线程的结束并不影响,子线程的执行。换句话来说,主线程和子线程 ,子线程和子线程在开始和结束问题上并没有依赖关系。但是这里考虑的环境是在,极少线程的情况,如果是高并发的情况,子线程之间会有冲突或者相互影响。这个点我们后面会交代,就不在这过多赘述。


 6581
6581


 被折叠的 条评论
为什么被折叠?
被折叠的 条评论
为什么被折叠?
 到【灌水乐园】发言


