


一、安装 Apache2
更新软件包列表
在安装任何软件之前,建议先更新系统的软件包列表,以确保获取最新的软件版本和安全补丁。
root@ubuntu-test:~# apt update
Hit:1 https://mirrors.aliyun.com/ubuntu jammy InRelease
Get:2 https://mirrors.aliyun.com/ubuntu jammy-security InRelease [129 kB]
Get:3 https://mirrors.aliyun.com/ubuntu jammy-updates InRelease [128 kB]
Get:4 https://mirrors.aliyun.com/ubuntu jammy-backports InRelease [127 kB]
Fetched 384 kB in 11s (35.8 kB/s)
Reading package lists... Done
Building dependency tree... Done
Reading state information... Done
142 packages can be upgraded. Run 'apt list --upgradable' to see them.
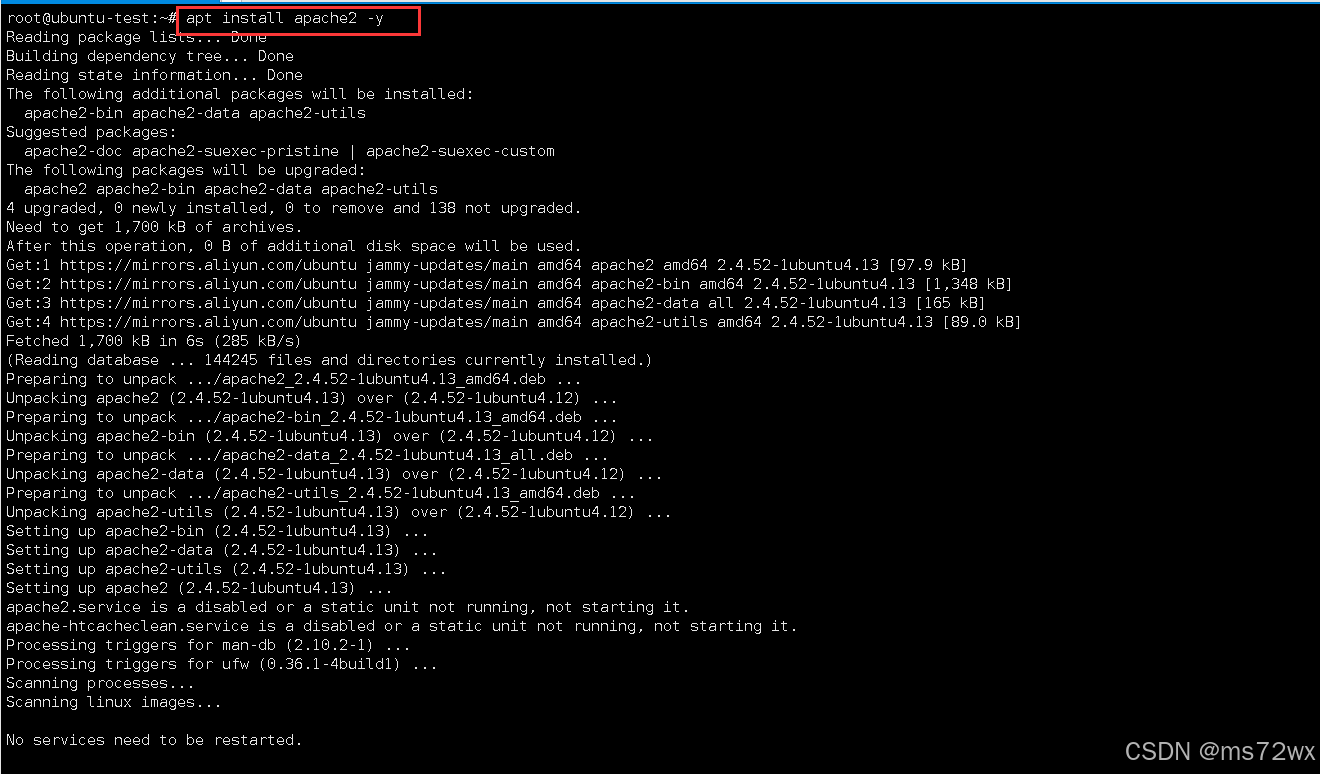
安装 Apache2
使用 apt 包管理器安装 Apache2:
apt install apache2 -y
启动服务
安装完成后,我们使用以下命令,启动 Apache2 服务。
systemctl start apache2
systemctl enable  apache2
验证安装
参考以下命令,可以检查 Apache2 服务状态:
systemctl status apache2
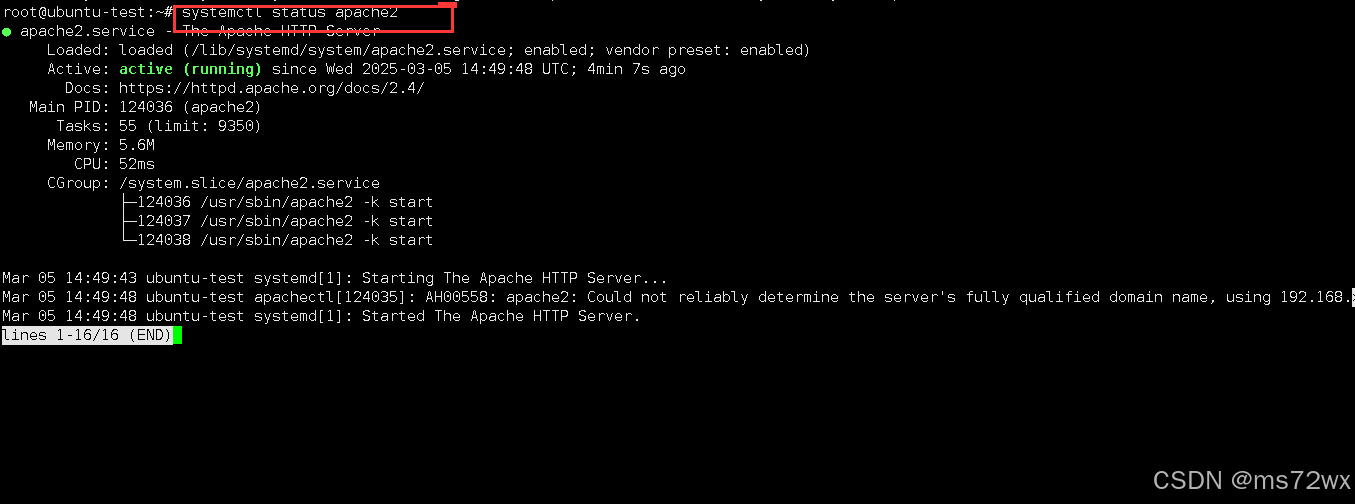
如果看到 “active (running)” 字样,说明 Apache2 已成功启动。
二、访问默认页面
打开浏览器,访问服务器的 IP 地址或域名(例如:http://your_server_ip),如果看到 Apache2 的默认页面,说明安装成功。

三、基本配置
配置文件结构
Apache2 的主要配置文件位于 /etc/apache2/ 目录下:
apache2.conf: 主配置文件,包含全局配置。ports.conf: 定义 Apache2 监听的端口。sites-available/: 存放可用网站的配置文件。sites-enabled/: 存放已启用网站的符号链接。mods-available/: 存放可用模块的配置文件。mods-enabled/: 存放已启用模块的符号链接。
root@ubuntu-test:~# ls /etc/apache2/
apache2.conf  conf-available  conf-enabled  envvars  magic  mods-available  mods-enabled  ports.conf  sites-available  sites-enabled
- 创建虚拟主机
- 生成测试网站文件
mkdir -p /var/www/example.com/public_html
echo hello--test--web > /var/www/example.com/public_html/index.html
虚拟主机允许你在同一台服务器上运行多个网站。以下是一个简单的虚拟主机配置示例:
-
在
/etc/apache2/sites-available/目录下创建一个新的配置文件,例如example.com.conf:vim /etc/apache2/sites-available/example.com.conf -
在文件中添加以下内容:
<VirtualHost *:80> ServerAdmin webmaster@example.com ServerName example.com ServerAlias www.example.com DocumentRoot /var/www/example.com/public_html ErrorLog ${APACHE_LOG_DIR}/error.log CustomLog ${APACHE_LOG_DIR}/access.log combined </VirtualHost> -
启用虚拟主机:
a2ensite example.com.conf -
重新加载 Apache2 配置:
systemctl reload apache2
 ```

目录权限
确保网站根目录 (/var/www/example.com/public_html) 的权限设置正确,以便 Apache2 用户可以读取文件:
  chown -R www-data:www-data /var/www/example.com/public_html
  chmod -R 755 /var/www/example.com/public_html
访问测试
- 在本地windows的hosts文件中添加以下内容:
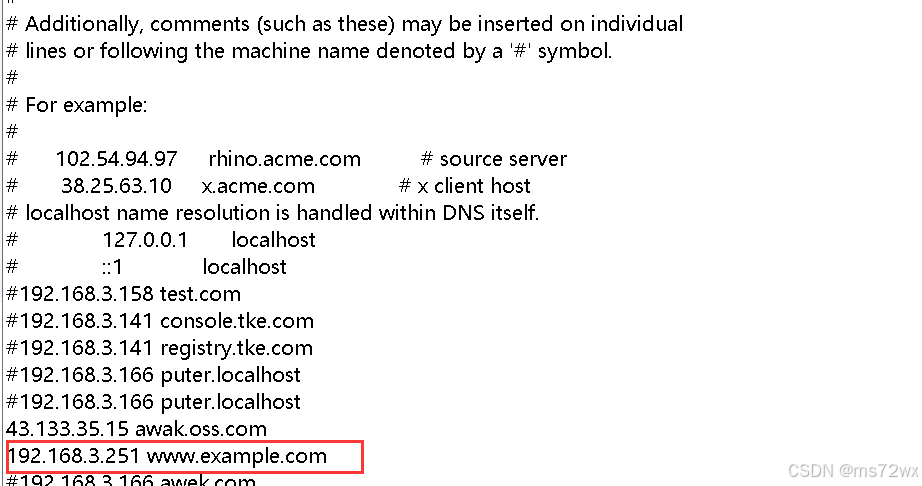
- 打开浏览器:www.example.com进行访问,看到以下内容则成功配置。

四、故障排除
-
检查 Apache2 错误日志:
/var/log/apache2/error.log文件中记录了 Apache2 运行过程中出现的错误信息,是排查问题的重要依据。 -
检查配置文件语法:
使用以下命令检查 Apache2 配置文件的语法是否正确:
apachectl configtest -
查看端口占用情况:
如果 Apache2 无法启动,可能是端口被其他程序占用。可以使用以下命令查看端口占用情况:
netstat -tulpn | grep :80
五、总结
通过以上步骤,我们已经成功在 Ubuntu 系统上安装和配置了 Apache2,并掌握了一些基本的运维技巧。Apache2 功能强大,配置灵活,可以满足各种 Web 服务的需求。


 266
266

 被折叠的 条评论
为什么被折叠?
被折叠的 条评论
为什么被折叠?
 到【灌水乐园】发言


