


一.欢迎页面UI实现
分析页面布局:从上到下的列式布局:包括图片、文本。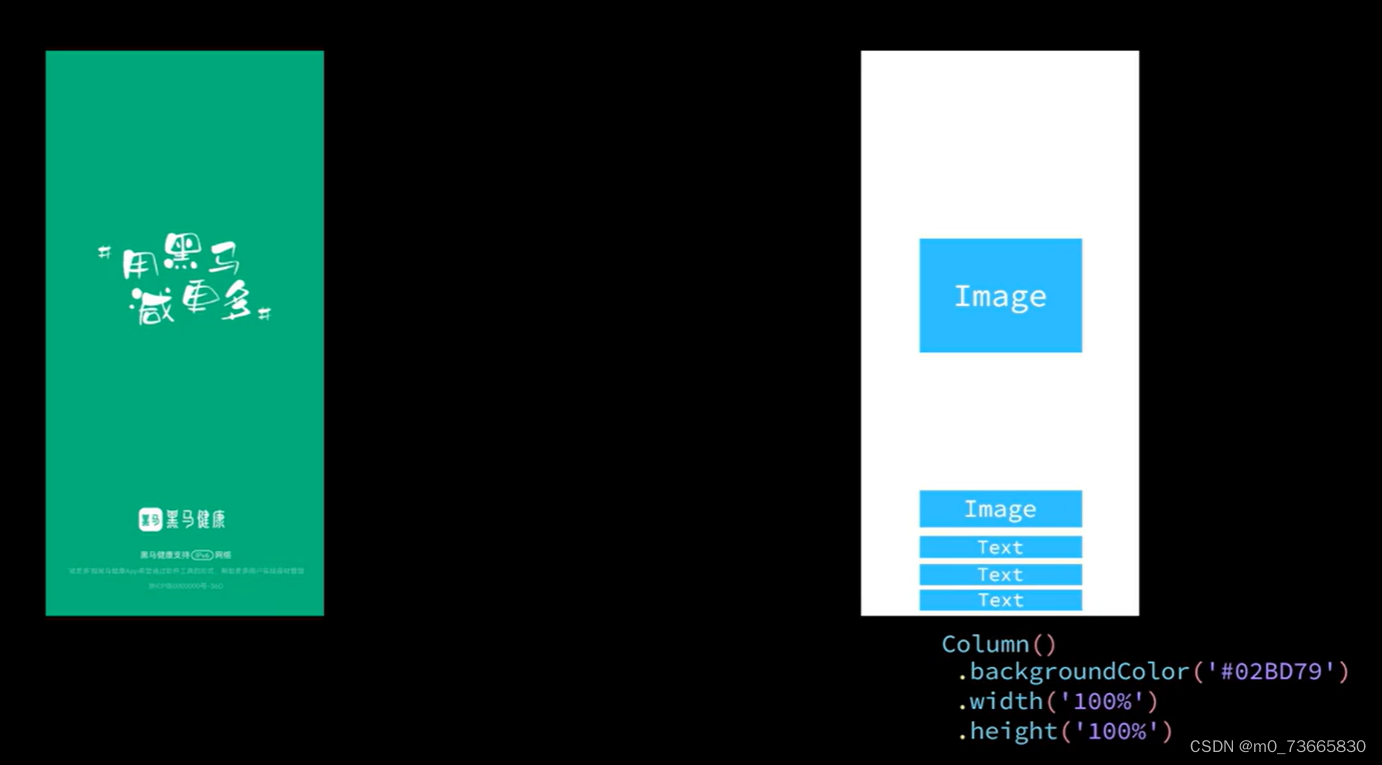
首先创建一个新的项目包:HeimaHealthy
传入资料包后,开始编写欢迎页面:在page下新建一个WelcomPage.ets文件。
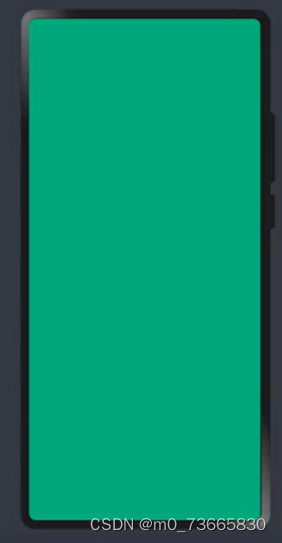
1.调整背景色
@Entry
@Component
struct WelcomePage {
build() {
    Column() {
    }
    .width('100%')
    .height('100%')
    .backgroundColor($r('app.color.welcome_page_background'))
  }
}
previewer后:
2.按照分析的布局编写代码
布局大致分三部分:(1)中央Slogan (2)logo (3)文字描述
注意:opacity()可调整文本的透明度(数字越小透明度越高);利用bordedr()给文本套一个带有圆弧的边框,为了让边框内部文本与边框距离不那么紧凑需要用到padding()调整内边距。
@Entry
@Component
struct WelcomePage {
build() {
    Column({ space: 10 }) {
      // 1.中央Slogan
        Image($r('app.media.home_slogan')).width(260)
      // 2.logo
      Image($r('app.media.home_logo')).width(150)
      // 3.文字描述
      Row() {
        Text('黑马健康支持')..fontSize(12).opacity(0.8).fontColor(Color.White)
        Text('IPv6')
          .fontSize(10)
          .opacity(0.8)
          .fontColor(Color.White)
          .border({ style: BorderStyle.Solid, width: 1, color: Color.White, radius: 15 })
          .padding({ left: 5, right: 5 })
        Text('网络').fontSize(12).opacity(0.8).fontColor(Color.White)
      }

      Text(`'减更多'指黑马健康App希望通过软件工具的形式,帮助更多用户实现身材管理`)
        .fontSize(10).opacity(0.6).fontColor(Color.White)
      Text('浙ICP备0000000号-36D')
        .fontSize(10).opacity(0.4).fontColor(Color.White)
    }
    .width('100%')
    .height('100%')
    .backgroundColor($r('app.color.welcome_page_background'))
  }
}
previewer后:

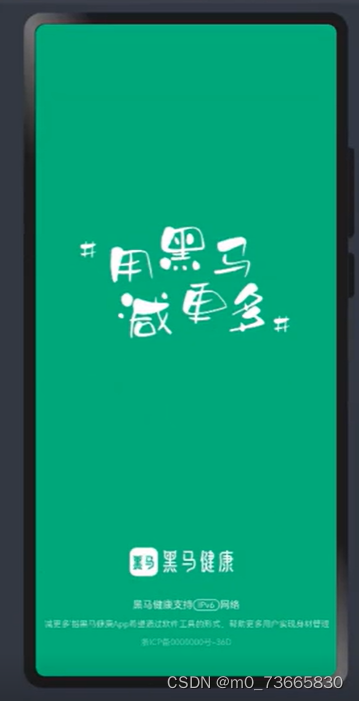
存在问题:我们希望第一部分在上,后两个部分在下并且在下面的部分不要贴底。
解决方法:将第一部分放在一个Row()容器里,设置旗权重为1;给最后一个文本添加一个外边距与底部留出空隙。
@Entry
@Component
struct WelcomePage {
build() {
    Column({ space: 10 }) {
      // 1.中央Slogan
      Row() {
        Image($r('app.media.home_slogan')).width(260)
      }
      .layoutWeight(1)
      // 2.logo
      Image($r('app.media.home_logo')).width(150)
      // 3.文字描述
      Row() {
        Text('黑马健康支持').fontSize(12).opacity(0.8).fontColor(Color.White)
        Text('IPv6')
         .fontSize(10)
          .opacity(0.8)
          .fontColor(Color.White)
          .border({ style: BorderStyle.Solid, width: 1, color: Color.White, radius: 15 })
          .padding({ left: 5, right: 5 })
        Text('网络').fontSize(12).opacity(0.8).fontColor(Color.White)
      }

      Text(`'减更多'指黑马健康App希望通过软件工具的形式,帮助更多用户实现身材管理`)
        .fontSize(10).opacity(0.6).fontColor(Color.White)
      Text('浙ICP备0000000号-36D')
        .fontSize(10).opacity(0.4).fontColor(Color.White)
        .margin({ bottom: 35 })
    }
    .width('100%')
    .height('100%')
    .backgroundColor($r('app.color.welcome_page_background'))
  }
}
previewer后:
3.抽取通用的公共样式(简化代码)
@Extend(Text) function opacityWhiteText(opacity: number, fontSize: number = 10) {
  .fontSize(fontSize)
  .opacity(opacity)
  .fontColor(Color.White)
}
@Entry
@Component
struct WelcomePage {
build() {
    Column({ space: 10 }) {
      // 1.中央Slogan
      Row() {
        Image($r('app.media.home_slogan')).width(260)
      }
      .layoutWeight(1)
      // 2.logo
      Image($r('app.media.home_logo')).width(150)
      // 3.文字描述
      Row() {
        Text('黑马健康支持').opacityWhiteText(0.8, 12)
        Text('IPv6')
          .opacityWhiteText(0.8)
          .border({ style: BorderStyle.Solid, width: 1, color: Color.White, radius: 15 })
          .padding({ left: 5, right: 5 })
        Text('网络').opacityWhiteText(0.8, 12)
      }

      Text(`'减更多'指黑马健康App希望通过软件工具的形式,帮助更多用户实现身材管理`)
        .opacityWhiteText(0.6)
      Text('浙ICP备0000000号-36D')
        .opacityWhiteText(0.4)
        .margin({ bottom: 35 })
    }
    .width('100%')
    .height('100%')
    .backgroundColor($r('app.color.welcome_page_background'))
  }
}
二. 欢迎页面的业务逻辑开发
1.需求分析
需要判断用户是否同意用户使用协议(同意的状态需要持久化保存,下一次打开不需要再次询问)
判断逻辑图:

涉及自定义弹窗的知识:
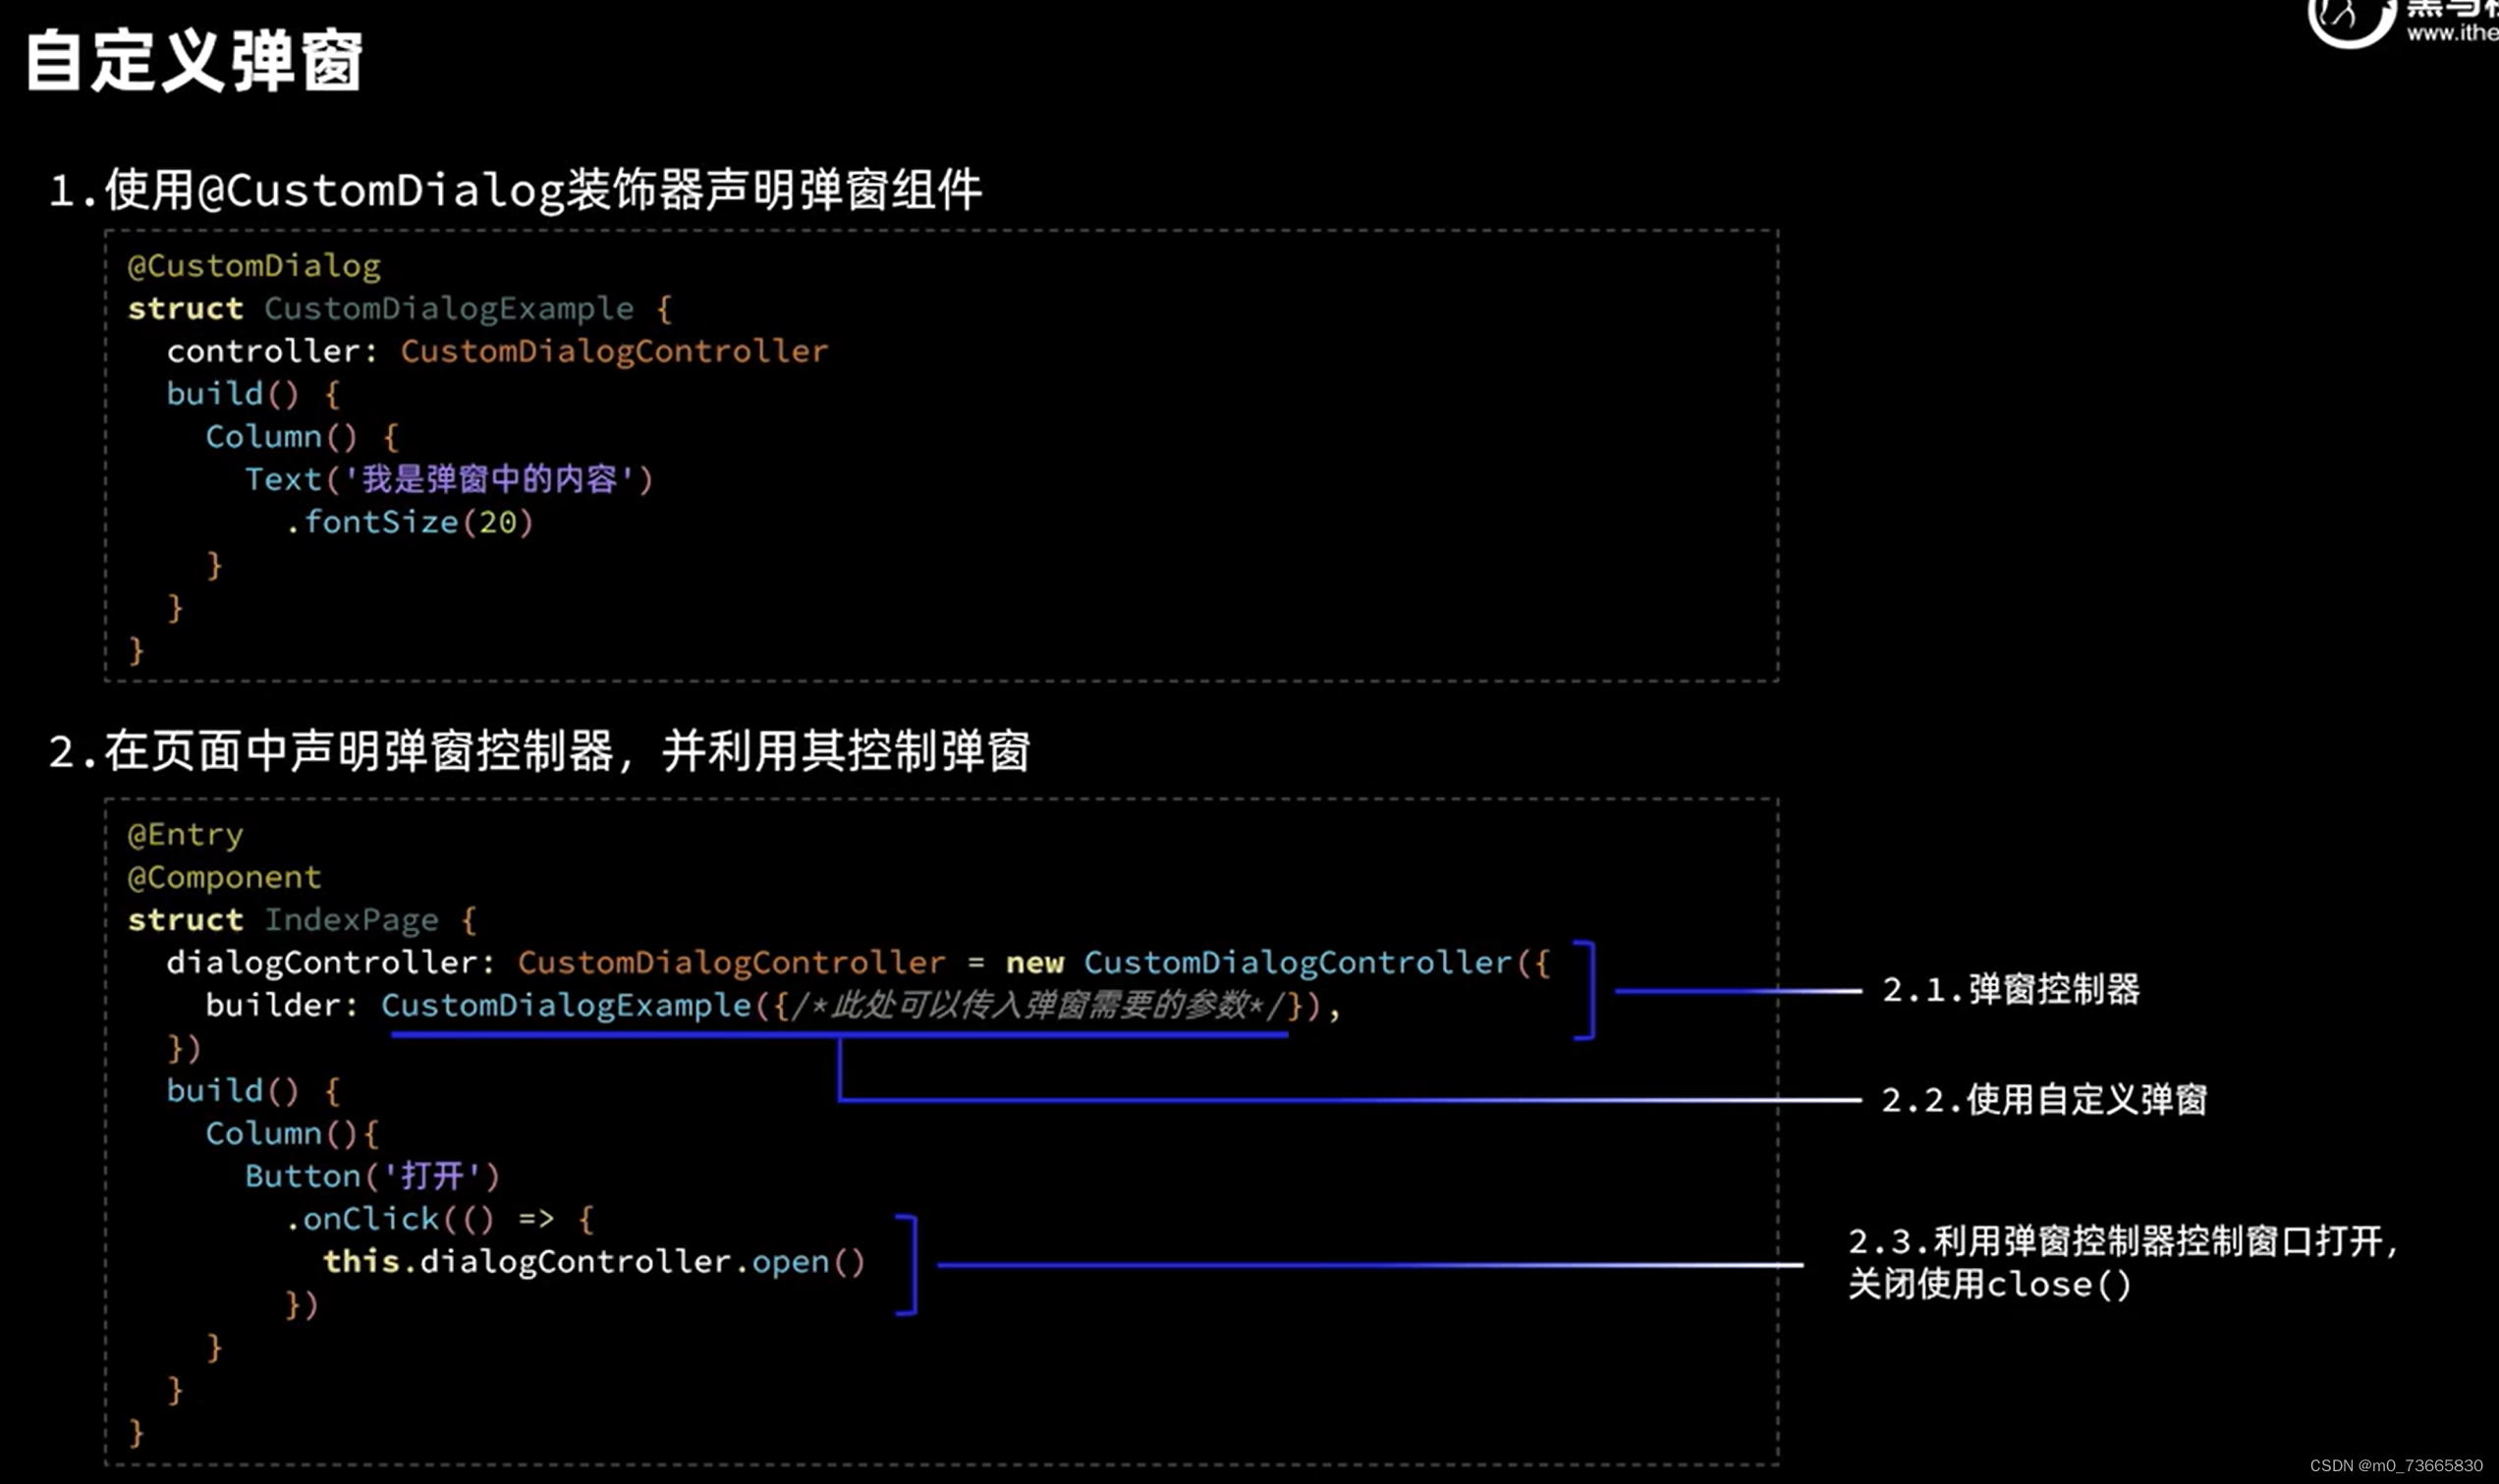
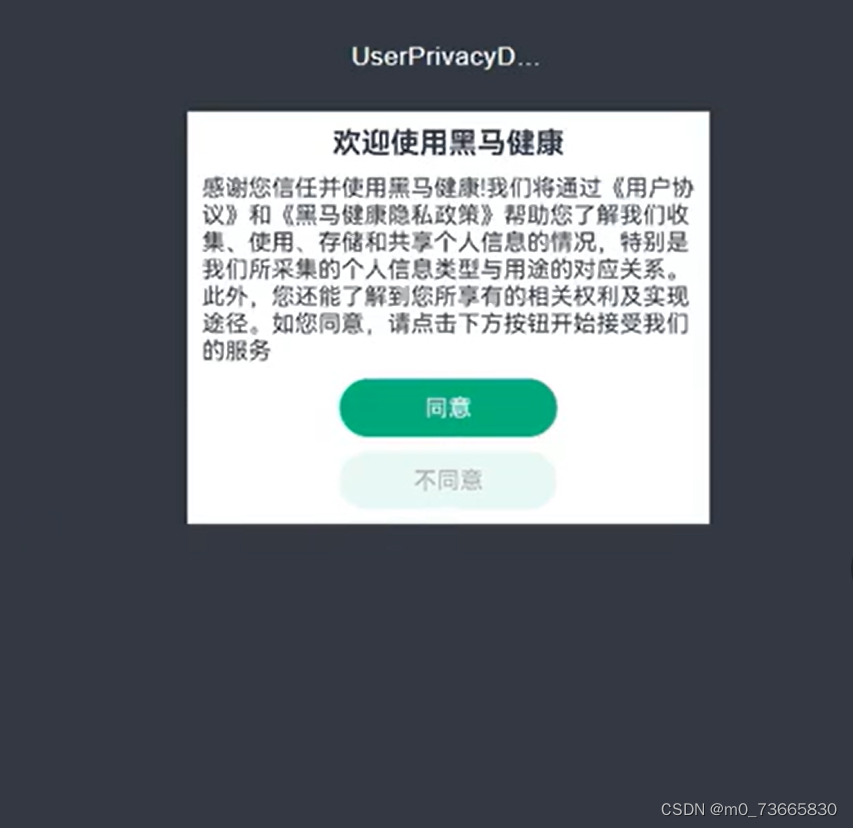
2.编写弹窗大体框架
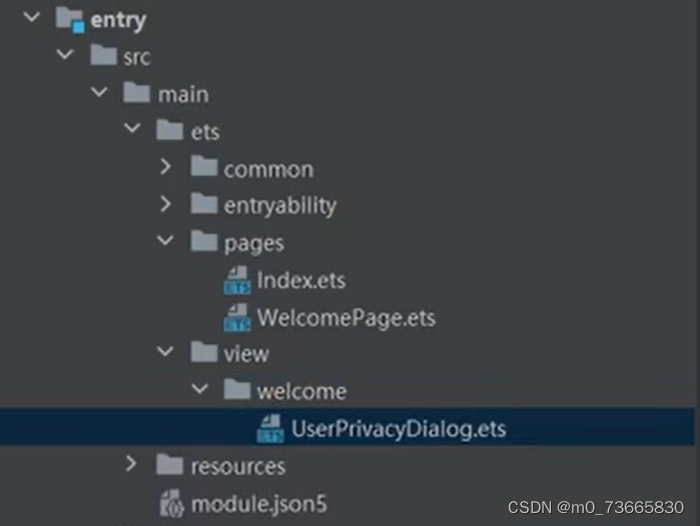
弹窗布局大致分为三部分:(1)标题(2)内容(3)按钮
@CustomDialog
export default struct UserPrivacyDialog {
  controller: CustomDialogController
  confirm: () => void
  cancel: () => void

  build() {
    Column({space: CommonConstants.SPACE_10}){
      // 1.标题
      Text($r('app.string.user_privacy_title'))
        .fontSize(20)
        .fontWeight(CommonConstants.FONT_WEIGHT_700)
      // 2.内容
      Text($r('app.string.user_privacy_content'))
      // 3.按钮
      Button($r('app.string.agree_label'))
        .width(150)
        .backgroundColor($r('app.color.primary_color'))
      Button($r('app.string.refuse_label'))
        .width(150)
        .backgroundColor($r('app.color.lightest_primary_color'))
        .fontColor($r('app.color.light_gray'))

    }
    .width('100%')
    .padding(10)
  }
}
3.加入弹窗按钮的点击事件
/*UserPrivacyDialog*/
import { CommonConstants } from '../../common/constants/CommonConstants'

@CustomDialog
export default struct UserPrivacyDialog {
  controller: CustomDialogController
  confirm: () => void
  cancel: () => void

  build() {
    Column({space: CommonConstants.SPACE_10}){
      // 1.标题
      Text($r('app.string.user_privacy_title'))
        .fontSize(20)
        .fontWeight(CommonConstants.FONT_WEIGHT_700)
      // 2.内容
      Text($r('app.string.user_privacy_content'))
      // 3.按钮
      Button($r('app.string.agree_label'))
        .width(150)
        .backgroundColor($r('app.color.primary_color'))
        .onClick(() => {
          this.confirm()
          this.controller.close()
        })
      Button($r('app.string.refuse_label'))
        .width(150)
        .backgroundColor($r('app.color.lightest_primary_color'))
        .fontColor($r('app.color.light_gray'))
        .onClick(() => {
          this.cancel()
          this.controller.close()
        })

    }
    .width('100%')
    .padding(10)
  }
}
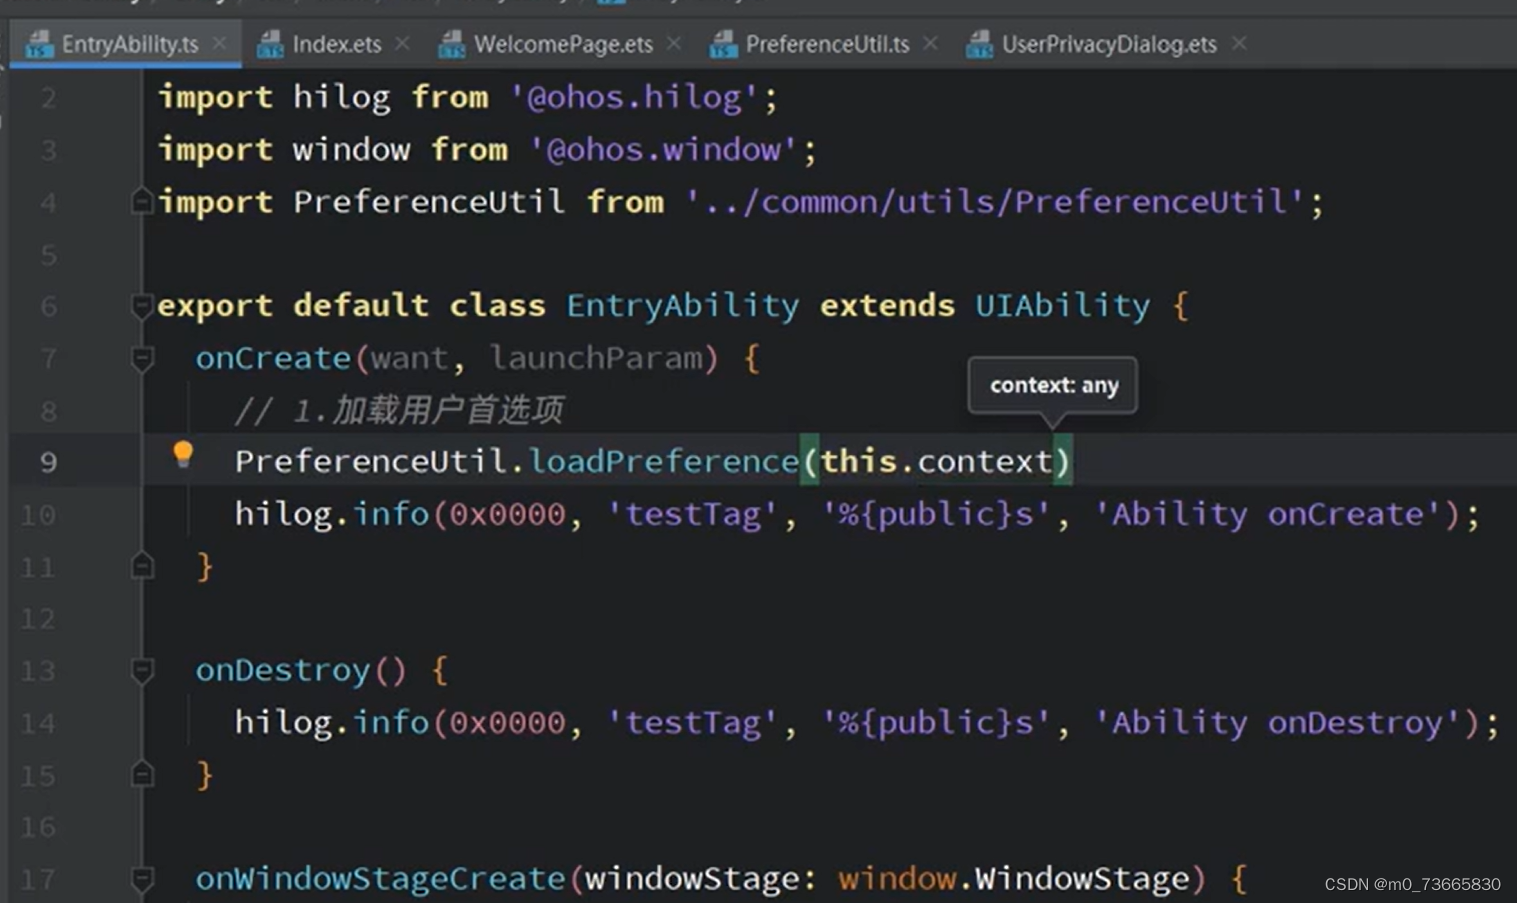
4.欢迎页面的逻辑判断
对app来说,打开后首先加载用户选项,判断用户是否同意使用协议,若同意则跳转到首页,否则打开询问弹窗。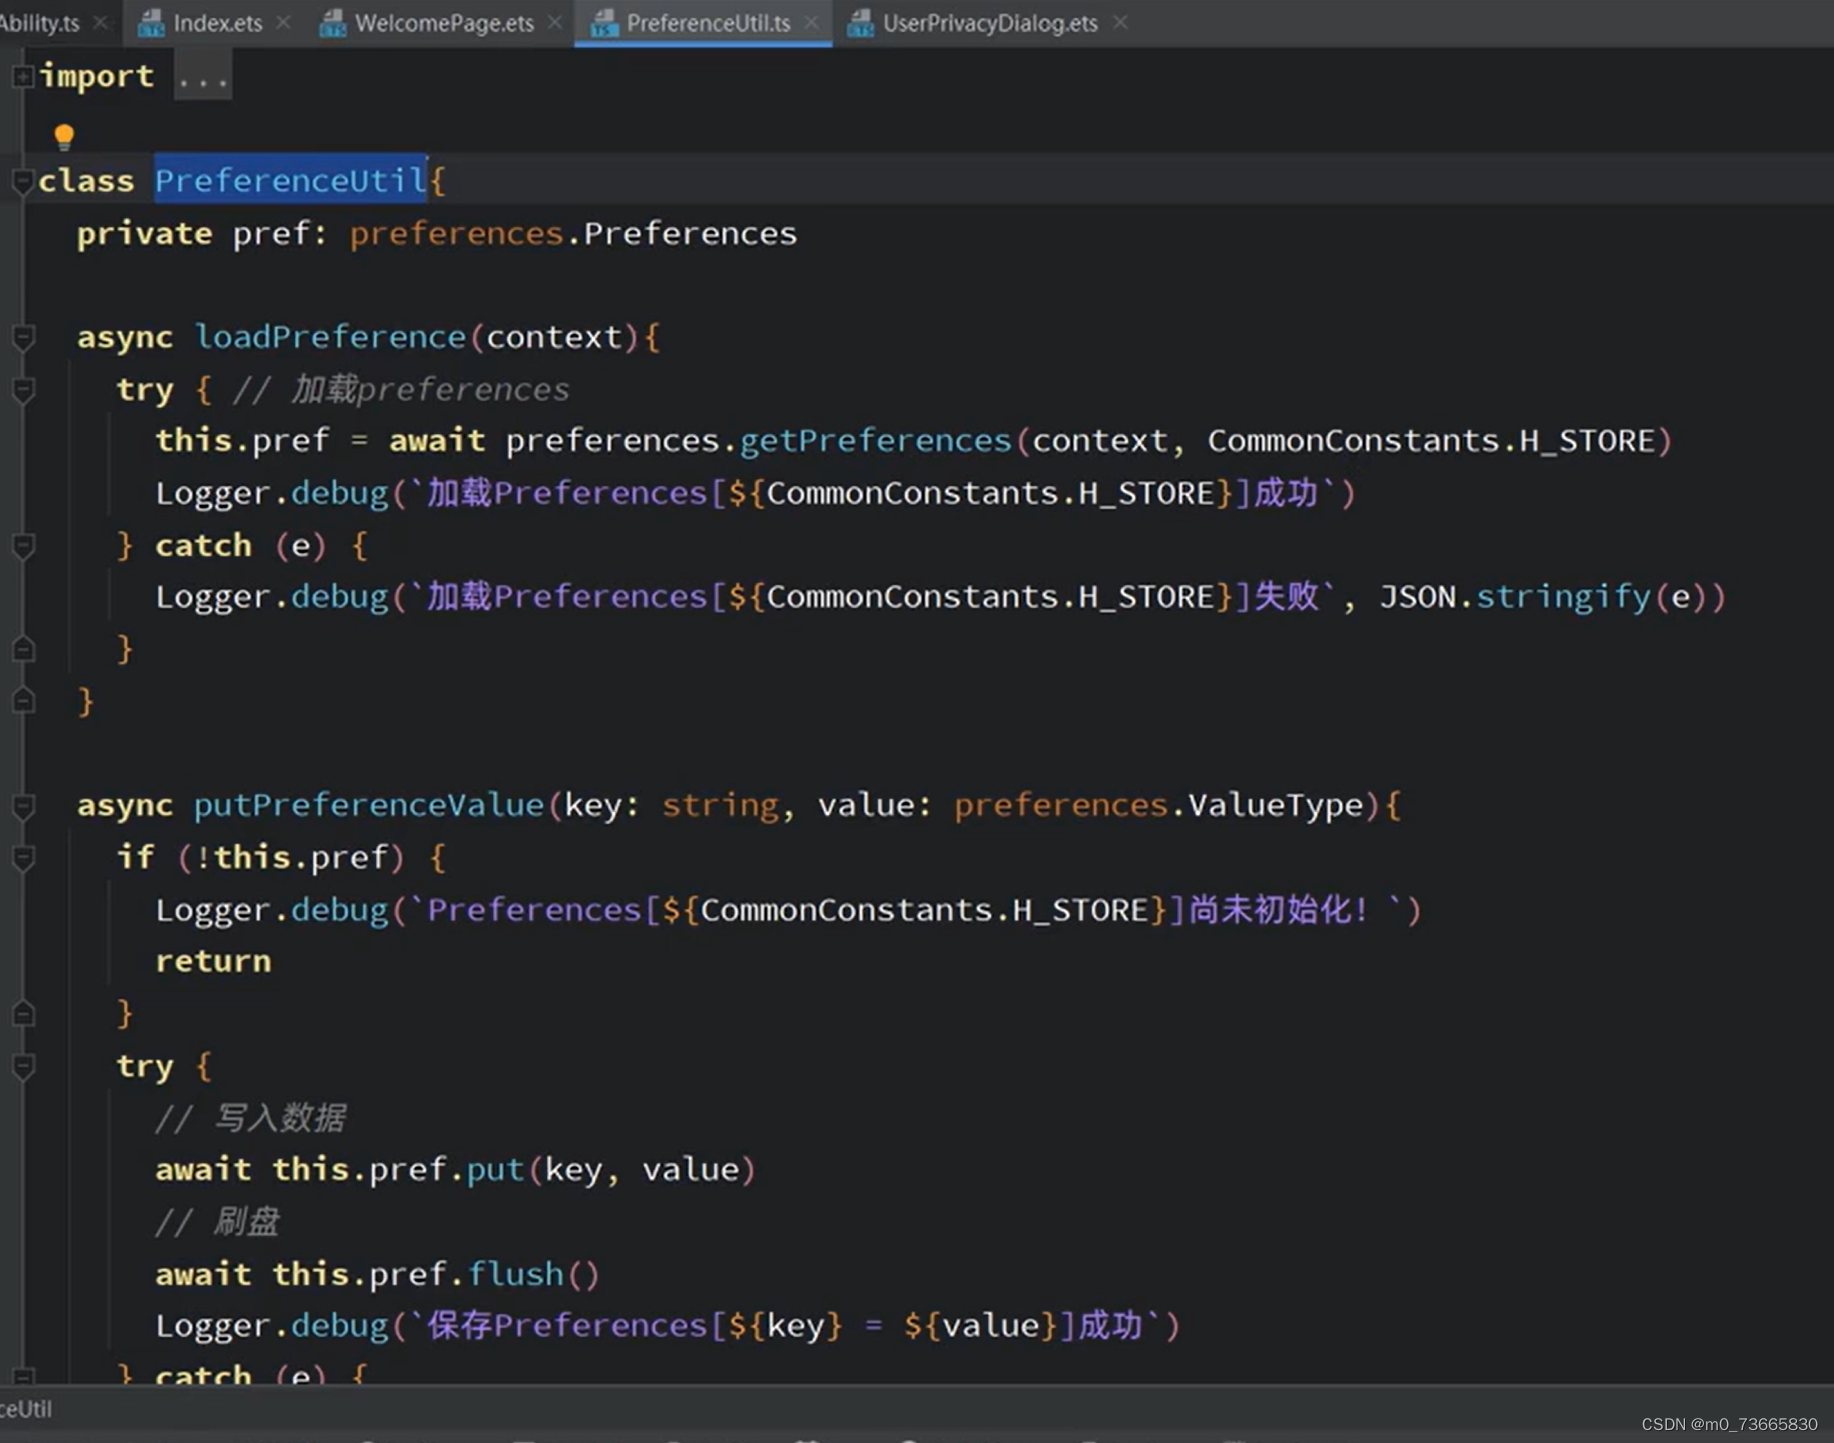
注意:jumpToIndex()中不用pushUrl是因为它会把当前页面压入栈中,但我们的欢迎页面只是在应用启动时出现,之后的使用中不会再出现,所以没有必要使用它,在这里使用replaceUrl就替换掉当前页面足够了;利用定时任务setTimeout(单位为毫秒)使其1秒之后再跳转。
/*WelcomePage*/
const PREF_KEY = 'userPrivacyKey'
@Entry
@Component
struct WelcomePage {
  context = getContext(this) as common.UIAbilityContext
  controller: CustomDialogController = new CustomDialogController({
    builder: UserPrivacyDialog({
      confirm: () => this.onConfirm(),
      cancel: () => this.exitApp()
    })
  })

  async aboutToAppear(){
    // 1.加载首选项
    let isAgree = await PreferenceUtil.getPreferenceValue(PREF_KEY, false)
    // 2.判断是否同意
    if(isAgree){
      // 2.1.同意,跳转首页
      this.jumpToIndex()
    }else{
      // 2.2.不同意,弹窗
      this.controller.open()
    }
  }

  jumpToIndex(){
    //定时任务setTimeout
    setTimeout(() => {
      router.replaceUrl({
        url: 'pages/Index'
      })
    }, 1000)//单位为毫秒,代表1秒之后再跳转
  }

  onConfirm(){
    // 1.保存首选项
    PreferenceUtil.putPreferenceValue(PREF_KEY, true)
    // 2.跳转到首页
    this.jumpToIndex()
  }

  exitApp(){
    // 退出APP
    this.context.terminateSelf()
  }
}
用模拟器进行测试:

测试结果:首次进入时,进入欢迎页面直接出现弹窗,若点击同意则进入首页(且下次进入不再弹窗询问直接进入首页),否则退出应用。


 258
258

 被折叠的 条评论
为什么被折叠?
被折叠的 条评论
为什么被折叠?
 到【灌水乐园】发言


