


🌈🌈🌈今天学习JavaEE初阶部分的多线程,这部分内容无论是在工作中还是在学习中,都是非常重要的内容,现在我们就来介绍一下线程和多线程。
🛩️🛩️🛩️希望我的文章能对你有所帮助,有不足的地方还请各位看官多多指教,大家一起学习交流!
✈️✈️✈️动动你们发财的小手,点点关注点点赞!在此谢过啦!哈哈哈!😛😛😛


目录
2.2.4 方法4——匿名内部类创建 Runnable 子类对象
2.2.5 方法5——lambda 表达式创建 Runnable 子类对象
3.4.2 使用Thread.currentThread().isInterrupted()
一、认识线程
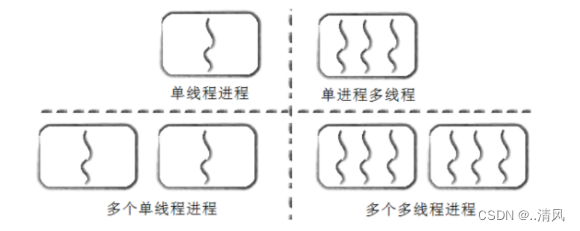
1.1 线程是什么
我们设想如下场景:一家公司要去银行办理业务,既要进行财务转账,又要进行福利发放,还得进行缴社保。如果只有张三一个会计就会忙不过来,耗费的时间特别长。为了让业务更快的办理好,张三又找来两位同事李四、王五一起来帮助他,三个人分别负责一个事情,分别申请一个号码进行排队,自此就有了三个执行流共同完成任务,但本质上他们都是为了办理一家公司的业务。此时,我们就把这种情况称为多线程,将一个大任务分解成不同小任务,交给不同执行流就分别排队执行。其中李四、王五都是张三叫来的,所以张三一般被称为主线程(Main Thread)。
1.2 为什么要有线程
- 单核 CPU 的发展遇到了瓶颈. 要想提高算力, 就需要多核 CPU,而并发编程能更充分利用多核 CPU资源。
- 有些任务场景需要 "等待 IO", 为了让等待 IO 的时间能够去做一些其他的工作, 也需要用到并发编程。
其次, 虽然多进程也能实现并发编程, 但是线程比进程更轻量。
- 创建线程比创建进程更快。
- 销毁线程比销毁进程更快。
- 调度线程比调度进程更快。
1.3 进程和线程的区别
- 进程是包含线程的,每个进程至少有一个线程存在,即主线程。
- 进程和进程之间不共享内存空间,同一个进程的线程之间共享同一个内存空间。
比如,每个客户来银行办理各自的业务,但他们之间的票据肯定是不想让别人知道的,否则钱不就被其他人取走了么。而上面我们的公司业务中,张三、李四、王五虽然是不同的执行流,但因为办理的都是一家公司的业务,所以票据是共享着的。这个就是多线程和多进程的最大区别。
- 进程是系统分配资源的最小单位,线程是系统调度的最小单位。
1.4 Java 的线程和操作系统线程的关系
二、第一个多线程程序
2.1 感受多线程程序和普通程序的区别
- 每个线程都是一个独立的执行流
- 多个线程之间是 "并发" 执行的
import java.util.Random;
public class ThreadDemo {
private static class MyThread extends Thread {
@Override
public void run() {
Random random = new Random();
while (true) {
// 打印线程名称
System.out.println(Thread.currentThread().getName());
try {
// 随机停止运行 0-9 秒
Thread.sleep(random.nextInt(10));
} catch (InterruptedException e) {
e.printStackTrace();
}
}
}
}
public static void main(String[] args) {
MyThread t1 = new MyThread();
MyThread t2 = new MyThread();
MyThread t3 = new MyThread();
t1.start();
t2.start();
t3.start();
Random random = new Random();
while (true) {
// 打印线程名称
System.out.println(Thread.currentThread().getName());
try {
Thread.sleep(random.nextInt(10));
} catch (InterruptedException e) {
// 随机停止运行 0-9 秒
e.printStackTrace();
}
}
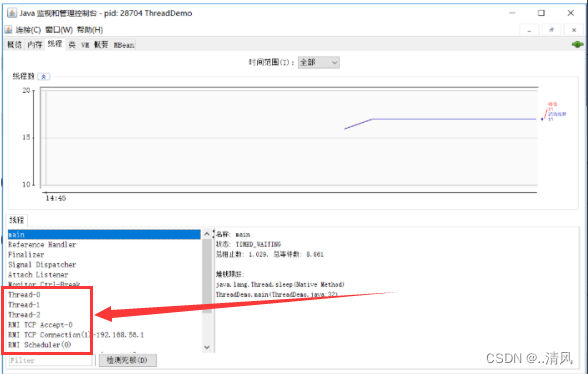
}
}使用 jconsole 命令观察线程
2.2 创建线程
2.2.1 方法1——继承Thread类
继承 Thread 来创建一个线程类 →创建 MyThread 类的实例调用 →start 方法启动线程
class MyThread extends Thread{
@Override
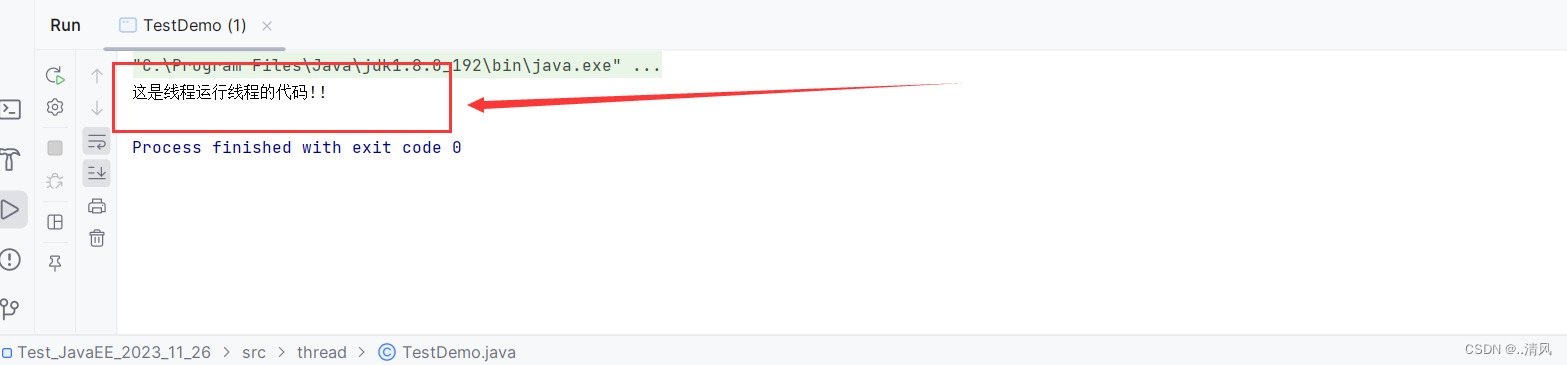
public void run() {
System.out.println("这是线程运行线程的代码!!");
}
}
public class TestDemo {
public static void main(String[] args) {
MyThread myThread = new MyThread();
myThread.start();
}
}
2.2.2 方法2——实现Runnable接口
实现 Runnable 接口→创建 Thread 类实例, 调用 Thread 的构造方法时将 Mythread2 对象作为 target 参数→调用 start 方法
class MyThread2 implements Runnable{
    @Override
    public void run() {
        System.out.println("这是线程执行的代码!!");
    }
}
public class Demo7 {
    public static void main(String[] args) {
        Thread t = new Thread(new MyThread2());
        t.start();
    }
}
对比上面两种方法:
- 继承 Thread 类, 直接使用 this 就表示当前线程对象的引用
- 实现 Runnable 接口, this 表示的是 MyThread2 的引用. 需要使用 Thread.currentThread()
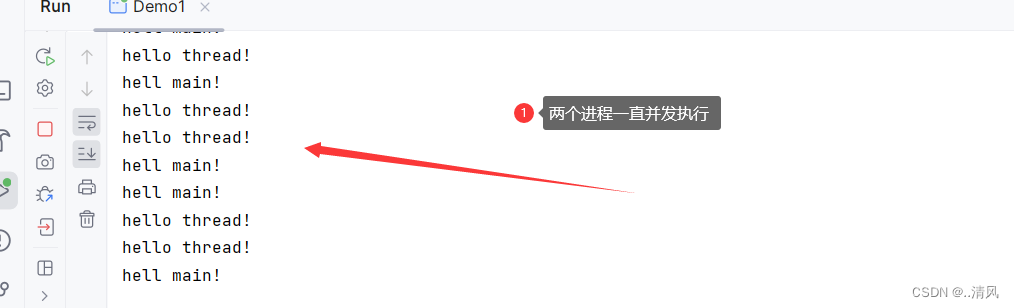
2.2.3 方法3——匿名内部类创建Threa子类对象
public class Demo1 {
    public static void main(String[] args) {
        Thread t = new Thread(){//创建一个子类继承thread类,没有名字
            @Override
            public void run() {
                while (true){
                    System.out.println("hello thread!");
                    try {
                        Thread.sleep(1000);
                    } catch (InterruptedException e) {
                        throw new RuntimeException(e);
                    }
                }
            }
        };
        t.start();//调用系统API
        while (true){
            System.out.println("hell main!");
            try {
                Thread.sleep(1000);
            }catch (InterruptedException e){
                e.printStackTrace();
            }
        }
    }
}
2.2.4 方法4——匿名内部类创建 Runnable 子类对象
public class Demo2 {
    public static void main(String[] args) {
        Thread t = new Thread(new Runnable() {
            @Override
            public void run() {
                while (true){
                    System.out.println("hello thread!");
                    try {
                        Thread.sleep(1000);
                    }catch (InterruptedException e){
                        e.printStackTrace();
                    }
                }
            }
        });
        t.start();
        while (true){
            System.out.println("hello main!");
            try {
                Thread.sleep(1000);
            }catch (InterruptedException e){
                e.printStackTrace();
            }
        }
    }
}
运行结果和上面相同。
2.2.5 方法5——lambda 表达式创建 Runnable 子类对象
public class Demo3 {
    public static void main(String[] args) throws InterruptedException {
        Thread t = new Thread(()->{
            while (true){
                System.out.println("hello thread!");
                try {
                    Thread.sleep(1000);
                } catch (InterruptedException e) {
                    throw new RuntimeException(e);
                }
            }
        });
        t.start();
        while (true){
            System.out.println("hello main");
            Thread.sleep(1000);
        }
    }
}
运行结果同样和上述相同。
三、Thread类及其常见方法
3.1 Thread类的常见构造方法
| 方法 | 说明 |
|
Thread()
|
创建线程对象
|
|
Thread(Runnable target)
|
使用
Runnable
对象创建线程对象
|
|
Thread(String name)
|
创建线程对象,并命名
|
|
Thread(Runnable target, String name)
|
使用
Runnable
对象创建线程对象,并命名
|
|
【了解】
Thread(ThreadGroup group,
Runnable target)
|
线程可以被用来分组管理,分好的组即为线程组,这个目前我们了解即可
|
Thread t1 = new Thread();
Thread t2 = new Thread(new MyRunnable());
Thread t3 = new Thread("这是我的名字");
Thread t4 = new Thread(new MyRunnable(), "这是我的名字");
3.2 Thread的常见属性
| 属性 | 获取方法 |
|
ID
|
getId()
|
|
名称
| getName() |
|
状态
| getState() |
|
优先级
| getPriority() |
|
是否后台线程
| isDaemon() |
|
是否存活
| isAlive() |
|
是否被中断
| isInterrupted() |
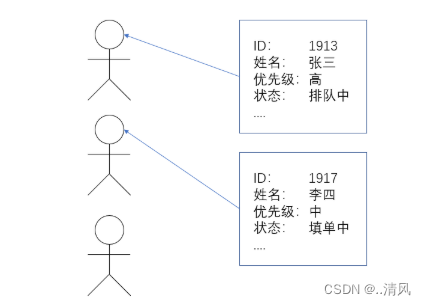
- ID 是线程的唯一标识,不同线程不会重复
- 名称是各种调试工具用到
- 状态表示线程当前所处的一个情况,下面我们会进一步说明
- 优先级高的线程理论上来说更容易被调度到
- 关于后台线程,需要记住一点:JVM会在一个进程的所有非后台线程结束后,才会结束运行。
- 是否存活,一般都是Thread对象先创建好,手动调用start,内核才真正创建出线程。消亡的时候,可能是Thread对象先结束生命周期,也可能是Threa对象还在,内核中的线程把run执行完了,就结束了。
- 线程的中断问题,下面我们进一步说明
public class ThreadDemo {
    public static void main(String[] args) {
        Thread thread = new Thread(() -> {
            for (int i = 0; i < 10; i++) {
                try {
                    System.out.println(Thread.currentThread().getName() + ": 我还
活着");
                    Thread.sleep(1 * 1000);
               } catch (InterruptedException e) {
                    e.printStackTrace();
               }
           }
            System.out.println(Thread.currentThread().getName() + ": 我即将死去");
       });
        System.out.println(Thread.currentThread().getName()
                           + ": ID: " + thread.getId());
        System.out.println(Thread.currentThread().getName()
                           + ": 名称: " + thread.getName());
        System.out.println(Thread.currentThread().getName()
                           + ": 状态: " + thread.getState());
        System.out.println(Thread.currentThread().getName()
                           + ": 优先级: " + thread.getPriority());
        System.out.println(Thread.currentThread().getName()
                           + ": 后台线程: " + thread.isDaemon());
        System.out.println(Thread.currentThread().getName()
                           + ": 活着: " + thread.isAlive());
        System.out.println(Thread.currentThread().getName()
                           + ": 被中断: " + thread.isInterrupted());
        thread.start();
        while (thread.isAlive()) {}
        System.out.println(Thread.currentThread().getName()
                           + ": 状态: " + thread.getState());
   }
}
3.3 启动一个线程
- 覆写 run 方法是提供给线程要做的事情的指令清单
- 线程对象可以认为是把李四、王五叫过来了
- 而调用 start() 方法,就是喊一声:”行动起来!“,线程才真正独立去执行了。

调用 start 方法, 才真的在操作系统的底层创建出一个线程。
3.4 终止一个线程
- 通过共享的标记来进行沟通
- 调用 interrupt() 方法来通知
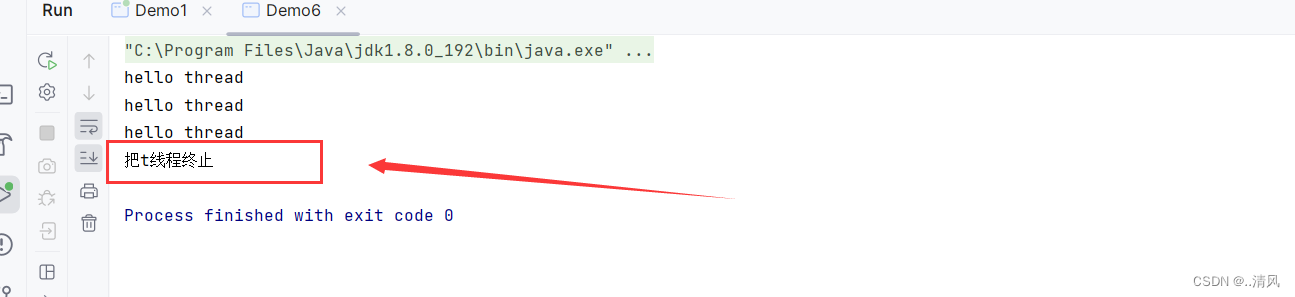
3.4.1 使用自定义的变量作为标志位
public class Demo6 {
    public static boolean isQuit = false;
    public static void main(String[] args) throws InterruptedException {
        Thread t = new Thread(()->{
            while (!isQuit){
                System.out.println("hello thread");
                try {
                    Thread.sleep(1000);
                } catch (InterruptedException e) {
                    throw new RuntimeException(e);
                }
            }
        });
        t.start();
        //主线程执行其他逻辑,让t线程结束
        Thread.sleep(3000);

        isQuit = true;
        System.out.println("把t线程终止");
    }
}
3.4.2 使用Thread.currentThread().isInterrupted()
//线程终止,使用Thread自带的标志位
public class Demo8 {
    public static void main(String[] args) throws InterruptedException {
        Thread t = new Thread(()->{
            //Thread.currentThread()→获取当前线程的对象
            //isInterrupted()->Thread对象内部提供的标志位,true:线程要结束
            while (!Thread.currentThread().isInterrupted()){
                System.out.println("hello thread!!");
                try {
                    Thread.sleep(1000);
                } catch (InterruptedException e) {
                    //e.printStackTrace();
                    break;
                }
            }
        });
        t.start();
        Thread.sleep(3000);

        t.interrupt();//把上面的标志位设置成true,sleep被唤醒,清除标志位,会一直执行下去
//此时给我们留了更大的操作空间,此时选择break跳出即可

    }
}
thread 收到通知的方式有两种:
否则,只是内部的一个中断标志被设置,thread 可以通过 Thread.interrupted() 判断当前线程的中断标志被设置,清除中断标志 。Thread.currentThread().isInterrupted() 判断指定线程的中断标志被设置,不清除中断标志。这种方式通知收到的更及时,即使线程正在 sleep 也可以马上收到。
🌈🌈🌈好啦,今天的分享就到这里!
🛩️🛩️🛩️希望各位看官读完文章后,能够有所提升。
🎉🎉🎉创作不易,还希望各位大佬支持一下!
✈️✈️✈️点赞,你的认可是我创作的动力!
⭐⭐⭐收藏,你的青睐是我努力的方向!
✏️✏️✏️评论:你的意见是我进步的财富!


 6398
6398

 被折叠的 条评论
为什么被折叠?
被折叠的 条评论
为什么被折叠?
 到【灌水乐园】发言


