


 本文介绍了CIFAR-100数据集的结构,包括图片数量、分类信息和数据组织方式,并提供了加载数据的Python代码示例。此外,还讨论了如何将数据转换为dataloader,包括基本和增强版本,用于训练模型时的批量处理和数据增强技术。
大家可以在https://download.csdn.net/download/m0_74057422/88016213下载到对应的数据集
或者在CIFAR10、CIFAR100数据集的官网链接:CIFAR-10 and CIFAR-100 datasets
数据集简介:
CIFAR-100是计算机视觉中最基本的数据集,每个数据集都包含60k张图片,并且都是50k张训练,10k张测试。这数据集的压缩包解压后分别得到和‘cifar-100-python’这个文件夹
文件夹中应该包含meta,test,train三个文件
这篇文章已经把CIFAR-100的组成部分讲清楚了
数据集使用:
path为你“cifar-100-python”的路径
from matplotlib import pyplot as plt
import os
import pickle


def load_data(path):#输入你“cifar-100-python”的路径

    with open(os.path.join(path,'train'), 'rb') as f:
        data_train = pickle.load(f, encoding='latin1')#训练集,不同分类的数据,不同类别序号,
    with open(os.path.join(path,'test'), 'rb') as f:
        data_test = pickle.load(f, encoding='latin1')#测试集,不同分类的数据,不同类别序号,
    with open(os.path.join(path,'meta'), 'rb') as f:
        data_meta = pickle.load(f, encoding='latin1')#100分类与20分类的标签
    return data_train, data_test, data_meta
选择你数据的路径
data_train, data_test, data_meta = load_data('cifar-100-python')返回的是字典类型,看看有什么吧
print(data_train.keys())
print(data_test.keys())
print(data_meta.keys())
dict_keys(['filenames', 'batch_label', 'fine_labels', 'coarse_labels', 'data'])
dict_keys(['filenames', 'batch_label', 'fine_labels', 'coarse_labels', 'data'])
dict_keys(['fine_label_names', 'coarse_label_names'])了解每一种类背后的数据
训练集data_train,测试集data_test
1,"filenames"包括各个图片的名字
print(len(data_train["filenames"]))
print(data_train["filenames"][0:3])
50000
['bos_taurus_s_000507.png', 'stegosaurus_s_000125.png', 'mcintosh_s_000643.png']2.batch_label区分训练测试集
3.fine_labels是100分类后的标签
print(len(data_train["fine_labels"]))
print(data_train["fine_labels"][0:10])
50000
[19, 29, 0, 11, 1, 86, 90, 28, 23, 31]4.coarse_labels是20分类后的标签
print(len(data_train["coarse_labels"]))
print(data_train["coarse_labels"][0:10])
50000
[11, 15, 4, 14, 1, 5, 18, 3, 10, 11]5.data就是图片数据了(但还要经过预处理)
print(data_train["data"].shape)
print(np.max(data_train["data"]))
print(np.min(data_train["data"]))
(50000, 3072)
255
0类别标签data_meta
1.fine_label_names 100分类标题名字
print(len(data_meta["fine_label_names"]))
print(data_meta["fine_label_names"][0:5])
100
['apple', 'aquarium_fish', 'baby', 'bear', 'beaver']2.coarse_label_names 20分类标题名字
print(len(data_meta["coarse_label_names"]))
print(data_meta["coarse_label_names"][0:5])
20
['aquatic_mammals', 'fish', 'flowers', 'food_containers', 'fruit_and_vegetables']dataloader转化
其实最重要的还是如何转化为dataloader在代码中使用
数据量相对于比较小,可以一步直接导入
把data类 reshape成可以训练的长宽((N,C,H,W))
PATH = 'cifar-100-python'#你“cifar-100-python”的路径
data_train, data_test, data_meta = load_data(PATH)
data_train['data'] = data_train['data'].reshape((data_train['data'].shape[0], 3, 32, 32)).transpose((0,2,3,1))
data_test['data'] = data_test['data'].reshape((data_test['data'].shape[0], 3, 32, 32)).transpose((0,2,3,1))
1.先给一个最简单的dataloader实现基础功能(batch_size, shuffle ,onehot)
shuffle 是否打乱
onehot 是否变成独热向量(分类常用)
def dataloader(data, labels, batch_size = 128, shuffle = True,onehot = True):

    order = np.arange(data.shape[0], dtype = 'int32')
    if shuffle: np.random.shuffle(order)
    labels = np.array(labels)
    __eye = np.eye(np.max(labels) + 1)
    gen = range(data.shape[0] // batch_size)
    for i in gen:
        x = data[order[i * batch_size: i * batch_size + batch_size]]
        l = labels[order[i * batch_size: i * batch_size + batch_size]]

        # extract the onehot encoding
        if onehot:
            l = __eye[l]

        yield x , l
展示使用dataloader方法:
使用100分类的数据集data_train['data']
使用100分类的标签data_train['fine_labels']
for data, labels in dataloader(data_train['data'], data_train['fine_labels'], batch_size = 128, shuffle = True):
print(data.shape)
print(labels[0:2])
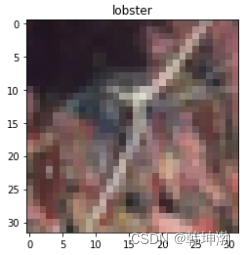
plt.imshow(data[0].transpose(1,2,0))
plt.title(''.join([('%s, '%(data_meta['fine_label_names'][index]) if p > 0 else '')
for index, p in enumerate(labels[0])])[:-2] )
break(128, 3, 32, 32)
[[0. 0. 0. 0. 0. 0. 0. 0. 0. 0. 0. 0. 0. 0. 0. 0. 0. 0. 0. 0. 0. 0. 0. 0.
0. 0. 0. 0. 0. 0. 0. 0. 0. 0. 0. 0. 0. 0. 0. 0. 0. 0. 0. 0. 0. 1. 0. 0.
0. 0. 0. 0. 0. 0. 0. 0. 0. 0. 0. 0. 0. 0. 0. 0. 0. 0. 0. 0. 0. 0. 0. 0.
0. 0. 0. 0. 0. 0. 0. 0. 0. 0. 0. 0. 0. 0. 0. 0. 0. 0. 0. 0. 0. 0. 0. 0.
0. 0. 0. 0.]
[0. 0. 0. 0. 0. 0. 0. 0. 0. 0. 0. 0. 0. 0. 0. 0. 0. 0. 0. 0. 0. 0. 0. 0.
0. 0. 0. 0. 0. 0. 0. 0. 0. 0. 0. 0. 0. 0. 0. 0. 0. 0. 0. 0. 0. 0. 0. 0.
0. 0. 0. 0. 1. 0. 0. 0. 0. 0. 0. 0. 0. 0. 0. 0. 0. 0. 0. 0. 0. 0. 0. 0.
0. 0. 0. 0. 0. 0. 0. 0. 0. 0. 0. 0. 0. 0. 0. 0. 0. 0. 0. 0. 0. 0. 0. 0.
0. 0. 0. 0.]]32像素图就是这么“清晰”
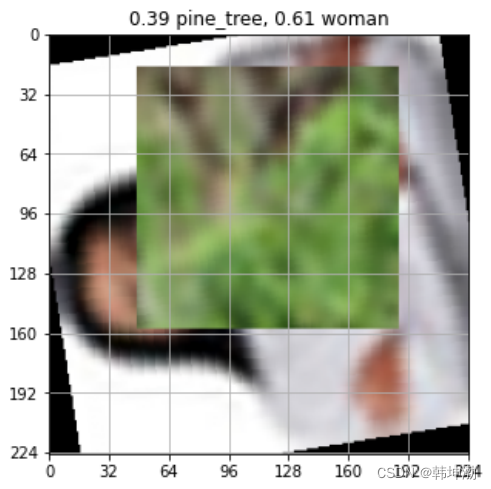
2.在来一个升级版的(拥有放缩,翻转,剪切,混合等功能)
from matplotlib import pyplot as plt
import numpy as np
import torch
from tqdm import tqdm
from PIL import Image

def augmentate(pics, labels = None, resize = (224, 224), augmentation = False,
                cut = False, mix = False, grid = 0, rotate = 15):
    '''Simple data augmentator'''
    pics2 = []
    n = pics.shape[0]
    if resize is None:
        resize = pics[0].shape

    if augmentation:
        angles = (np.random.random(n) - .5) * (rotate * 2.)
        flips = np.random.randint(0, 2, n)
        for i in range(n):
            pic = Image.fromarray(pics[i])
            if flips[i]: pic = pic.transpose(Image.FLIP_LEFT_RIGHT)
            pic = pic.resize(resize, Image.ANTIALIAS)
            pic = pic.rotate(angles[i])
            pic = np.array(pic)
            pics2.append(pic)

        if cut and not mix:
            # cutout
            if not grid: grid = 1
            cutx = np.random.randint(cut, resize[0], n) // grid * grid
            cuty = np.random.randint(cut, resize[1], n) // grid * grid
            for i in range(n):
                pics2[i][cutx[i]-cut : cutx[i],
                         cuty[i]-cut : cuty[i], : ] = 0
            labels *= (1. - cut * cut / pics2[0].size * 3.)

        elif mix and not cut:
            # mixup
            couple = np.arange(n)
            np.random.shuffle(couple)
            propotion = np.random.random(n)

            # warning: do not modify in-place
            pics3 = [propotion[i] * pics2[couple[i]] + (1 - propotion[i]) * pics2[i]
                        for i in range(n)]

            # pointer
            pics2 = pics3

            labels = labels + (labels[couple] - labels) * propotion.reshape((n,1))

        elif cut and mix:
            # cutmix
            couple = np.arange(n)
            np.random.shuffle(couple)
            if not grid:
                propotion = np.random.random(n)
                rw = (resize[0] * np.sqrt(propotion)).astype('uint8')
                rh = ((resize[1] / resize[0]) * rw).astype('uint8')
                grid = 1
            else:
                propotion = np.full(n, cut * cut / pics2[0].size * 3.)
                rw = np.full(n, cut, dtype='uint8')
                rh = np.full(n, cut, dtype='uint8')

            rx = np.random.randint(65535, size = n) % ((resize[0] - rw) // grid) * grid
            ry = np.random.randint(65535, size = n) % ((resize[1] - rh) // grid) * grid

            # warning: do not modify in-place
            pics3 = np.array(pics2)
            for i in range(n):
                pics3[i][rx[i] : rx[i]+rw[i], ry[i] : ry[i]+rh[i]] = \
                    pics2[couple[i]][rx[i] : rx[i]+rw[i], ry[i] : ry[i]+rh[i]]

            # pointer
            pics2 = pics3

            labels = labels + (labels[couple] - labels) * propotion.reshape((n,1))

    else:
        # no augmentation but resizing
        for i in range(pics.shape[0]):
            pic = Image.fromarray(pics[i])
            pic = pic.resize(resize, Image.ANTIALIAS)
            pic = np.array(pic)
            pics2.append(pic)

    return np.array(pics2), labels


def dataloader(data, labels, batch_size = 128, shuffle = True, verbose = True,
                resize = (224,224), augmentation = True, onehot = False,
                cut = False, mix = False, grid = 0, rotate = 15):
    order = np.arange(data.shape[0], dtype = 'int32')
    if shuffle: np.random.shuffle(order)
    labels = np.array(labels)
    __eye = np.eye(np.max(labels) + 1)
    gen = range(data.shape[0] // batch_size)
    if verbose: gen = tqdm(gen)
    for i in gen:
        x = data[order[i * batch_size: i * batch_size + batch_size]]
        l = labels[order[i * batch_size: i * batch_size + batch_size]]

        # extract the onehot encoding
        l = __eye[l]

        # transpose the dimensions to Image.fromarray
        x = x.transpose((0,2,3,1))

        # augmentate the data
        x , l = augmentate(x, l, resize = resize, augmentation = augmentation,
                            cut = cut, mix = mix, grid = grid, rotate = rotate)

        # transpose the dimensions to match (N,C,H,W)
        x = x.transpose((0,3,1,2))
        x = torch.tensor(x, dtype = float) / 255.

        # retrieve the non-onehot encoding if asked
        if not onehot:
            l = labels[order[i * batch_size: i * batch_size + batch_size]]
        yield x , l
展示使用dataloader方法:
resize = (224, 224)
cut = 128
grid = 32
plt.figure(figsize=(5,5))
for x, labels in dataloader(data_train['data'], data_train['fine_labels'], verbose = False,
                            resize = (224, 224), cut = cut, mix = 1, grid = 0, onehot = True):
    plt.imshow(x[0].transpose(2,0))
    plt.title(''.join([('%.2f %s, '%(p, data_meta['fine_label_names'][index]) if p > 0 else '')
                            for index, p in enumerate(labels[0])])[:-2] )
    ax = plt.gca()
    ax.set_xticks(np.arange(-1, resize[0], grid))
    ax.set_yticks(np.arange(-1, resize[1], grid))
    ax.set_xticklabels(np.arange(0, resize[0]+1, grid))
    ax.set_yticklabels(np.arange(0, resize[1]+1, grid))
    plt.grid()
    break
展示效果:
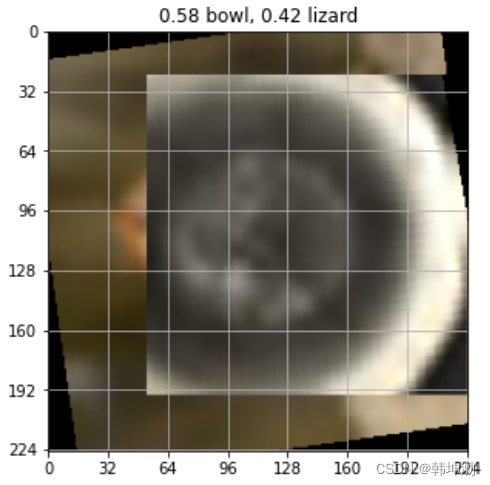
了解数据结构之后可以根据自己训练需求,调整自己的dataloader


 4406
4406

 被折叠的 条评论
为什么被折叠?
被折叠的 条评论
为什么被折叠?
 到【灌水乐园】发言


