


一、前言
个人博客无疑是很多开发者、技术爱好者记录技术经验、分享生活和展示个人作品的一个重要平台。作为一名开发者,搭建一个属于自己的博客网站不仅是一个展示自我的窗口,还能帮助自己总结学习成果,提升技术水平。
在这篇博客中,我将带你一起走过基于 Hexo 框架搭建个人博客的全过程,同时介绍如何使用 Butterfly 主题来美化博客,使其更加符合个人风格。
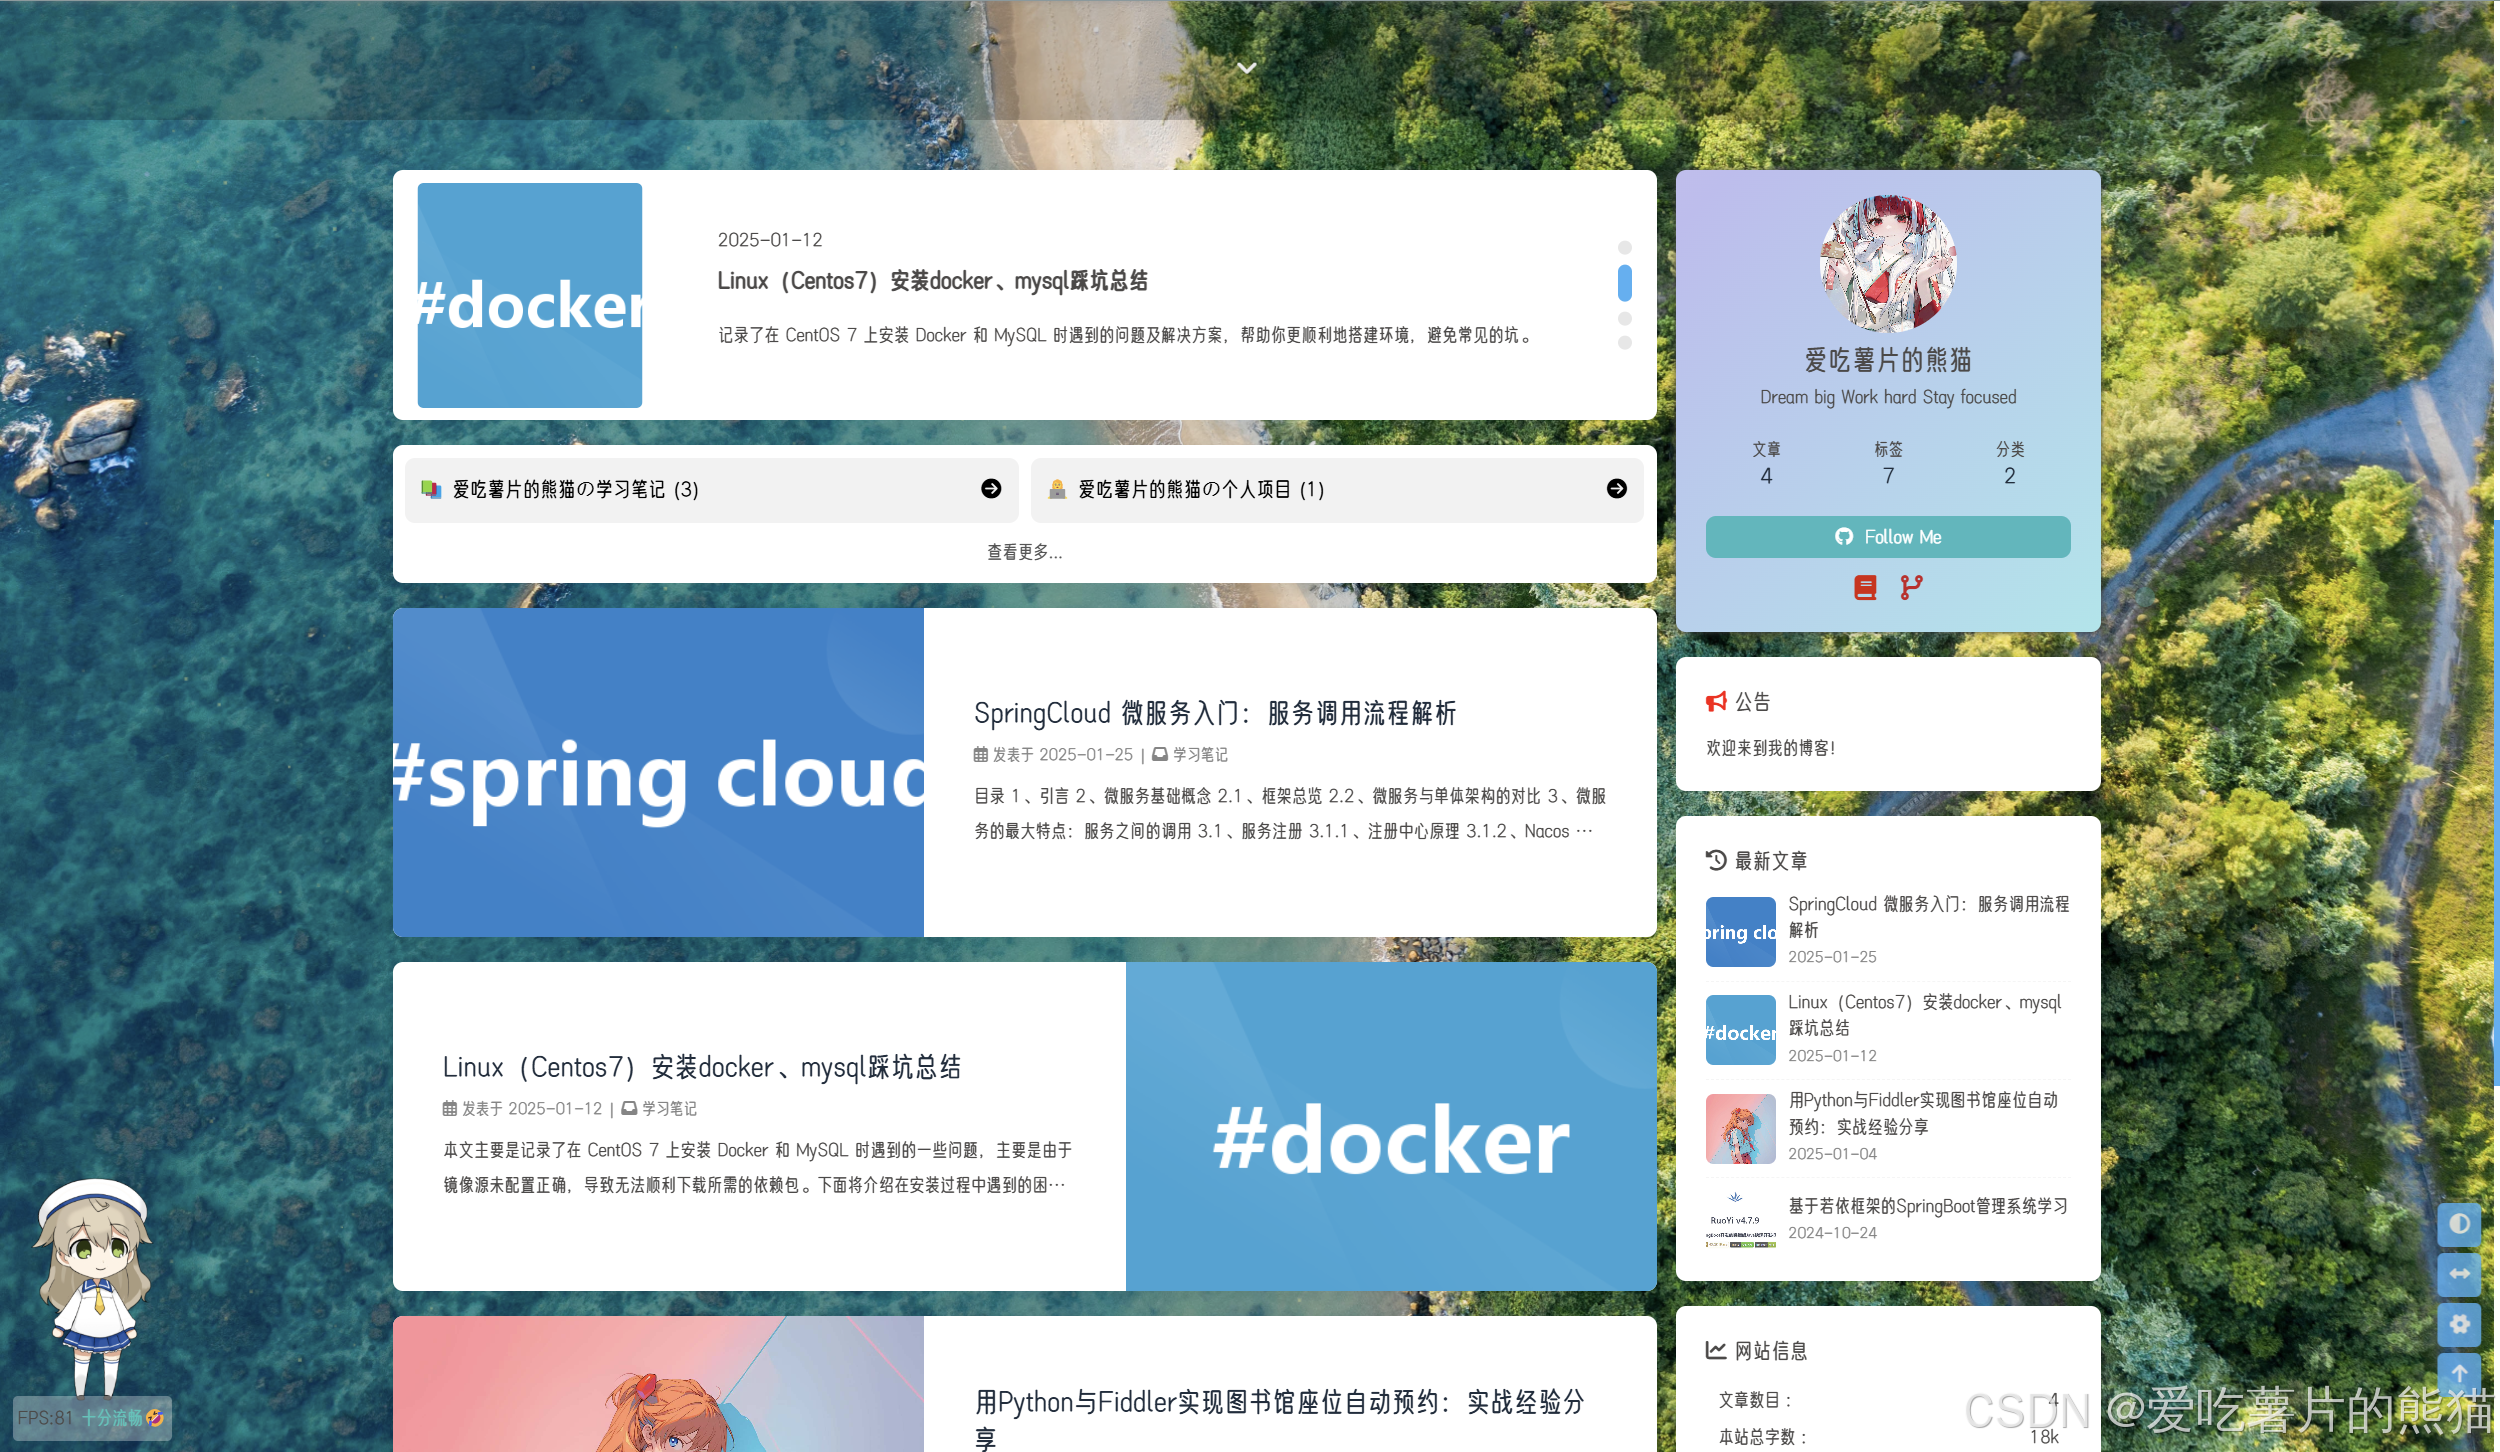
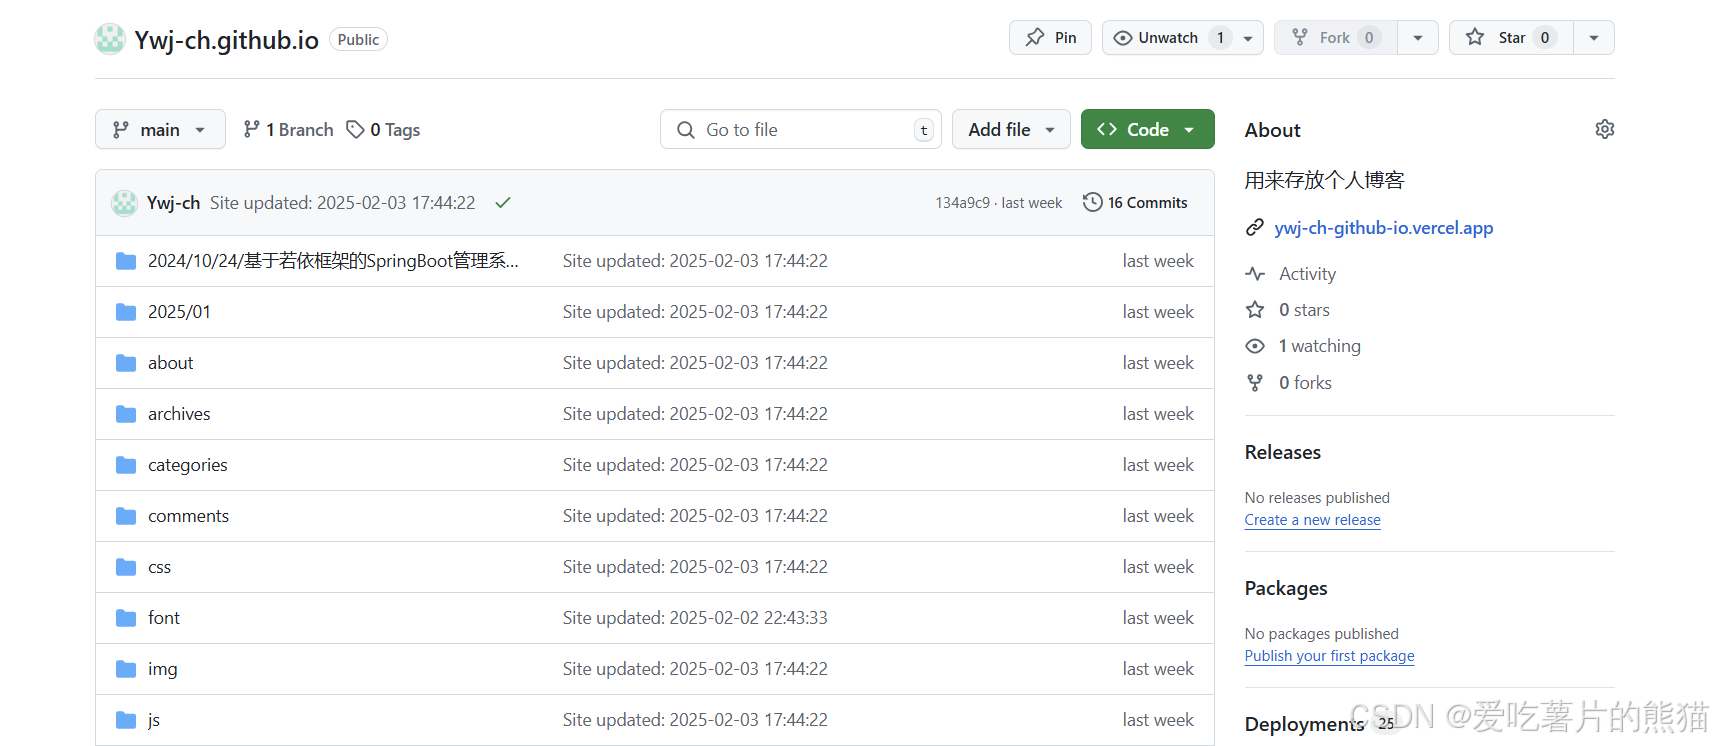
下面展示一下我的个人博客网站:
二、Hexo框架简介
2.1、什么是Hexo?
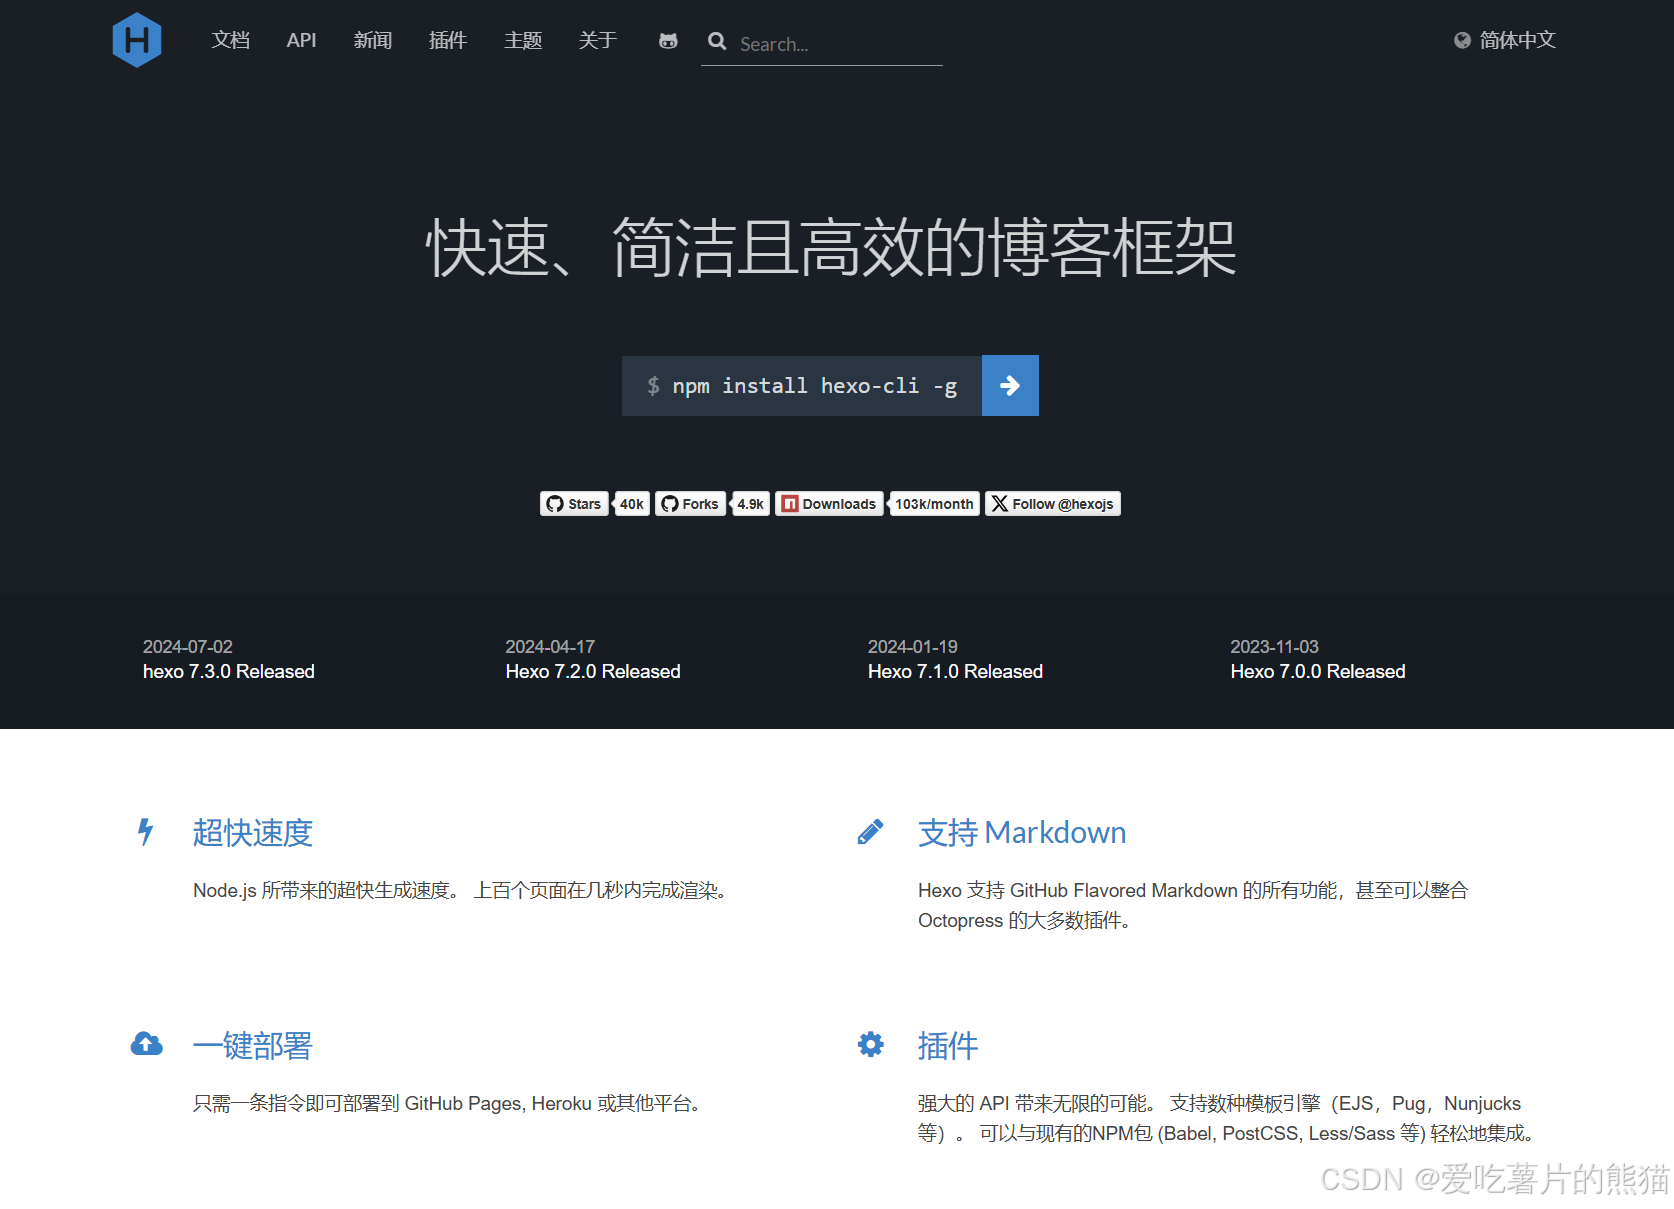
Hexo 是一个快速、简洁且高效的博客框架。 Hexo 使用 Markdown(或其他标记语言)解析文章,在几秒内,即可利用靓丽的主题生成静态网页。
2.2、安装
在安装Hexo之前需要先安装好Git和Node.js:
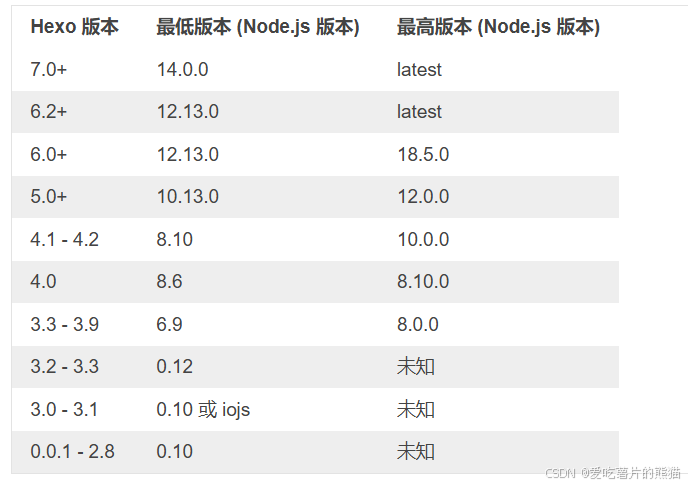
Git和Node.js的安装过程这里就不过多赘述了,下面进行hexo的安装:
hexo的安装也非常简单,在终端运行以下代码:
$ npm install -g hexo-cli安装 Hexo 完成后,请执行下列命令,Hexo 将会在指定文件夹中新建所需要的文件。
$ hexo init MyBlog
$ cd MyBlog
$ npm install
2.3、结构解析
初始化后,你的项目文件夹将如下所示:
.
├── _config.yml
├── package.json
├── scaffolds
├── source
|   ├── _drafts
|   └── _posts
└── themes
_config.yml:
网站的配置文件。 你可以在此配置大部分的参数。
package.json:
scaffolds:
模板文件夹。 当你新建文章时,Hexo 会根据 scaffold 来创建文件。
source:
资源文件夹。 是存放用户资源的地方。 除
_posts文件夹之外,开头命名为_(下划线)的文件 / 文件夹和隐藏的文件将会被忽略。 Markdown 和 HTML 文件会被解析并放到public文件夹,而其他文件会被拷贝过去。
themes:
主题文件夹, Hexo 会根据主题来生成静态页面。
到这里你的博客基础框架就搭好了,使用命令hexo start即可启动!
hexo clean
hexo g
hexo s
以上三条命令是 Hexo 中常用的命令,它们的作用分别是:
hexo clean:
- 清理 Hexo 生成的缓存和已生成的静态文件。通常在你修改了配置或主题后运行此命令,确保生成的文件是最新的。
- 它会删除
public目录中的所有文件和_posts目录中的缓存文件。
hexo g(hexo generate的简写):
- 生成 Hexo 博客的静态文件。运行这个命令后,Hexo 会根据你的 Markdown 文件生成对应的 HTML 文件,这些文件会被保存在
public目录下。你可以通过浏览器访问这个目录下的文件,查看你的博客页面。
hexo s(hexo server的简写):
- 启动 Hexo 内置的本地开发服务器。运行此命令后,Hexo 会启动一个本地 Web 服务器,默认地址是
http://localhost:4000。你可以在浏览器中打开这个地址,实时查看博客效果。- 这个命令非常适合在本地调试和查看博客效果,修改内容后,刷新浏览器即可看到变化。
一般我们本地测试修改界面样式后使用如下命令即可刷新界面:
hexo cl; hexo s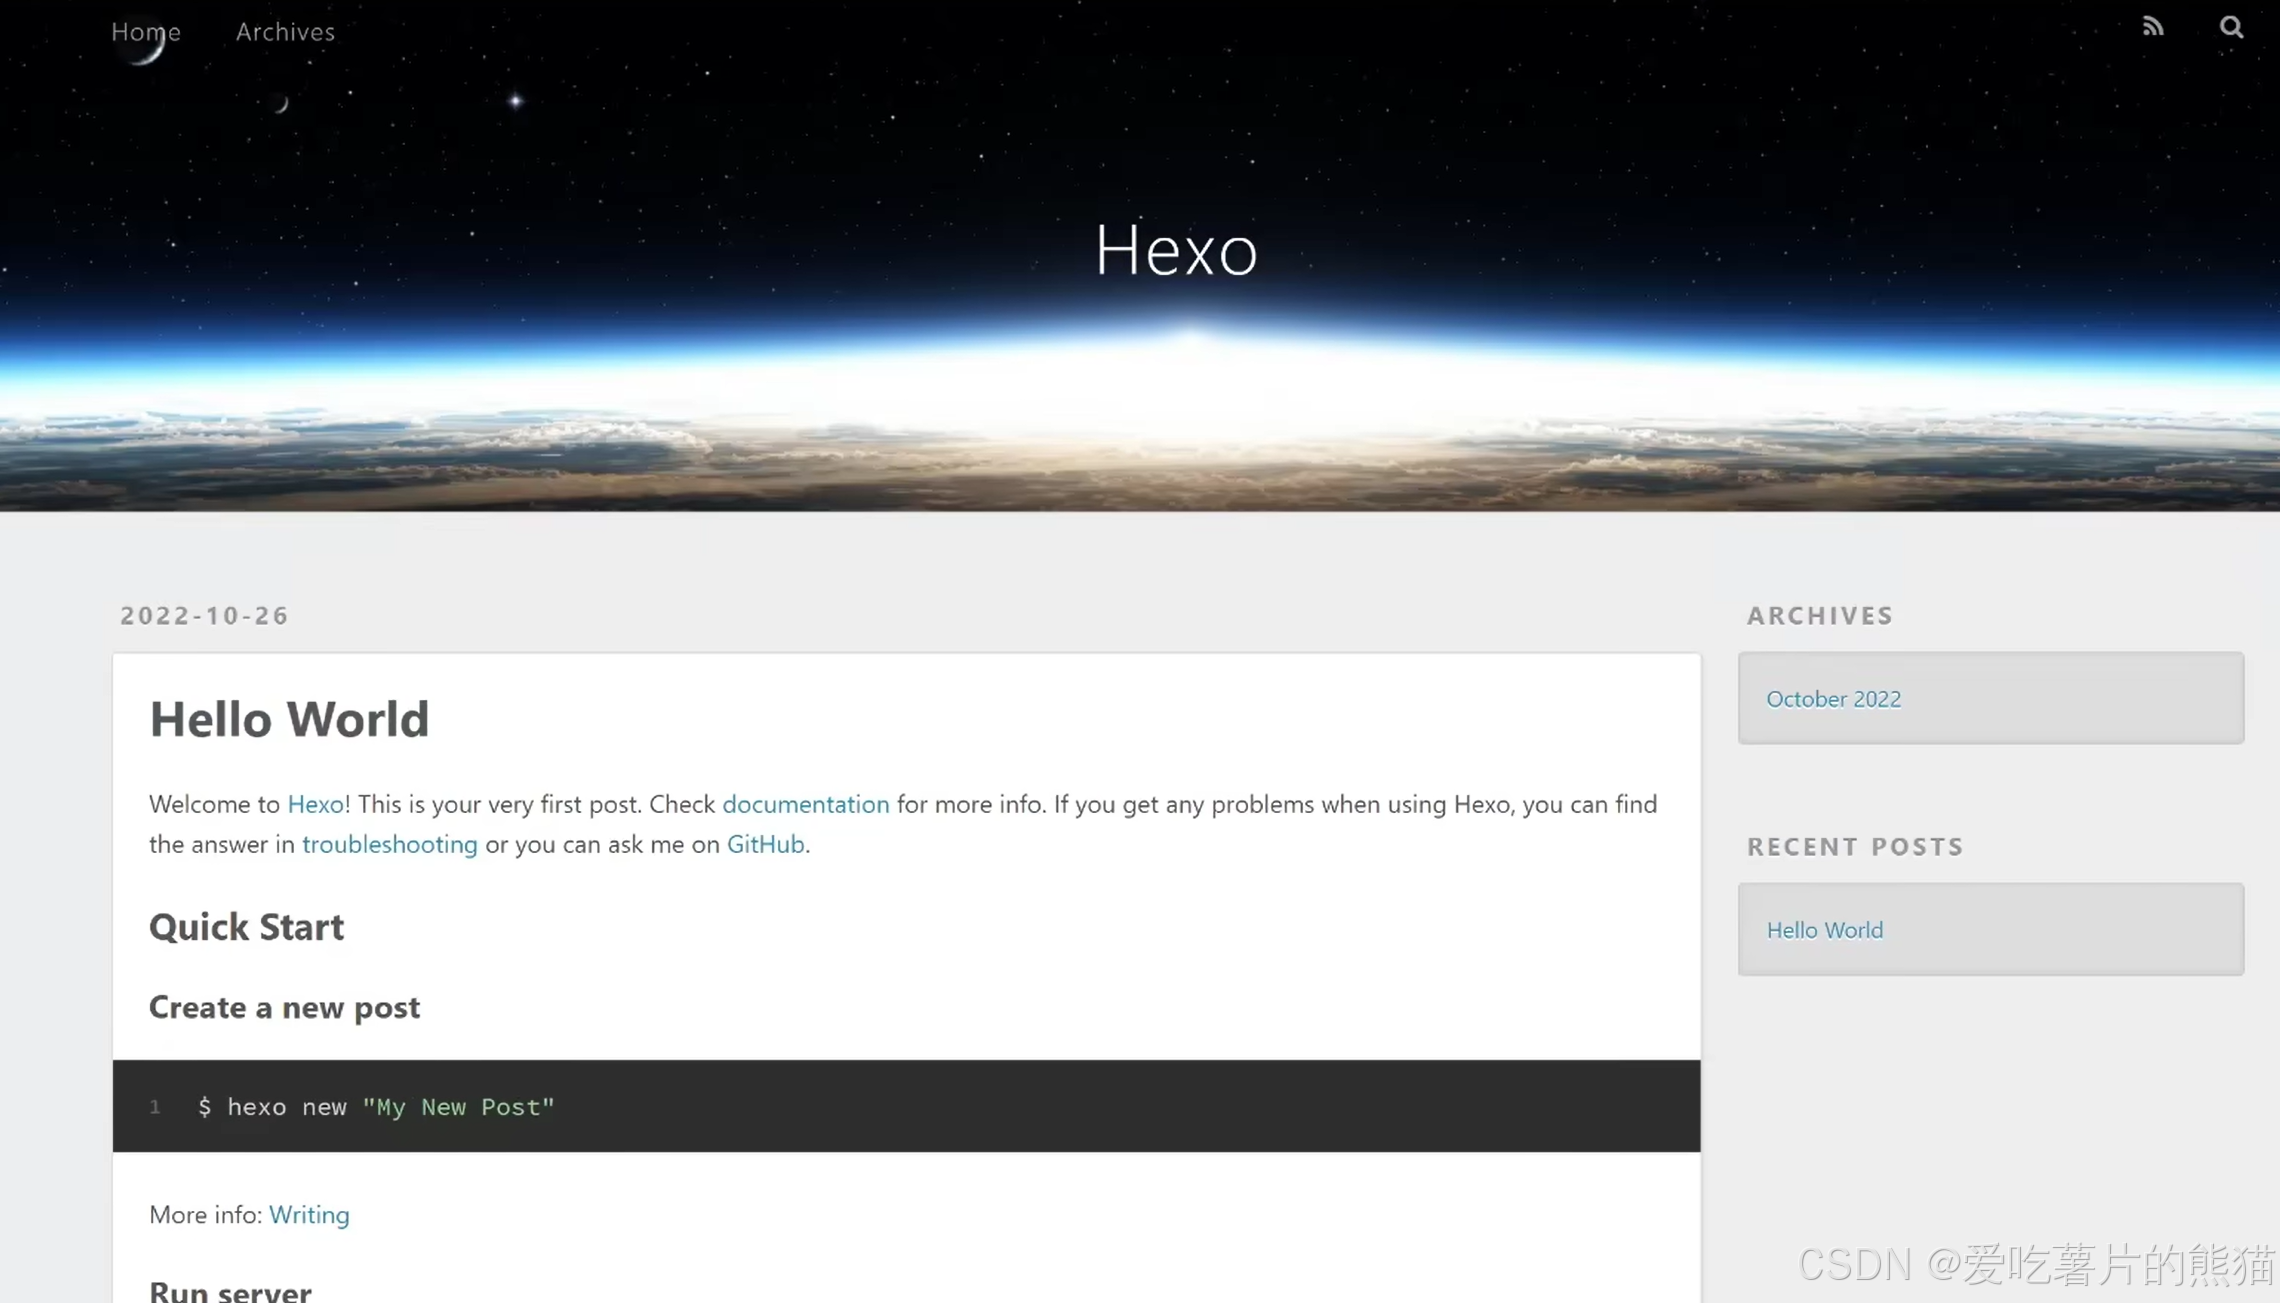
2.4、如何写文章?
在
\scaffolds\post.md文件中,可以修改文章的默认模板,比如:
---
title: {{ title }}
date: {{ date }}
categories: {{ categories }}
tags: {{ tags }}
description: {{ description }}
top_img: {{ top_img }}
cover: {{ cover }}
---
然后在终端运行如下命令即可创建文章:
hexo new "文章标题" --template post
注意hexo默认文章格式只支持Markdown,你会用markdown语法最好,不会也没有关系,网上有很多转换成markdown格式的在线编辑器。
三、基于GitHub Pages部署
搭好了个人博客,虽然在本地可以运行,但如果想让其他人也能访问,就得部署到线上。需要购买服务器吗?不不不,Hexo 自带的插件可以直接将博客部署到 GitHub Pages,完全不需要额外的服务器!
3.1、什么是GitHub Pages?
GitHub Pages 是 GitHub 提供的一项静态网站托管服务,允许用户直接通过 GitHub 仓库托管和发布个人或项目的静态网页。它非常适合用于展示个人博客、项目文档、个人作品集等内容。GitHub Pages 是免费的,并且提供了一个简单的发布流程,尤其适合开发者和技术人员使用。
GitHub Pages 的特点:
- 免费托管:GitHub Pages 是免费的,只要你有一个 GitHub 账户,就可以使用这项服务。
- 支持自定义域名:你可以将自己的域名绑定到 GitHub Pages 托管的网站。
- 支持 HTTPS:GitHub Pages 会自动为你的网站提供 HTTPS 加密连接,确保网站的安全性。
- 与 GitHub 仓库集成:网站内容直接从 GitHub 仓库的文件生成和托管。你可以利用 GitHub 的版本控制功能来管理网站的更新和历史记录。
- 快速部署:通过简单的 Git 操作,你可以将博客或网站的内容直接从本地推送到 GitHub 上发布到网上。
3.2、如何部署到GitHub Pages
创建一个 GitHub 仓库:首先,登录 GitHub,创建一个新的仓库。如果是个人网站,仓库名必须为
your_username.github.io(your_username替换为你的 GitHub 用户名)。
然后在你的hexo中运行如下命令:
npm install hexo-deployer-git --save
修改配置文件
_config.yml:
deploy:
  type: git
  repo: git@github.com:USERNAME/USERNAME.github.io.git
  branch: main
然后执行以下命令:
#前面两个都介绍过,hexo d 是deployment的缩写,意为部署
hexo clean && hexo g && hexo d
等待部署完成,打开你的博客地址(USERNAME.github.io),就可以看到你的博客了。
四、Butterfly主题美化
通过之前的步骤,我们已经完成了博客的基本搭建。但是,Hexo 默认的界面比较简单,接下来,让我们一起美化一下博客,提升它的视觉效果!
打开Hexo官网,可以看到这里有许多好看的主题,大家可以根据自己的喜好选择。

下面我以Butterfly主题来演示:
4.1、安装 Butterfly 主题
在你的终端运行如下命令:
git clone -b master https://github.com/jerryc127/hexo-theme-butterfly.git themes/butterfly
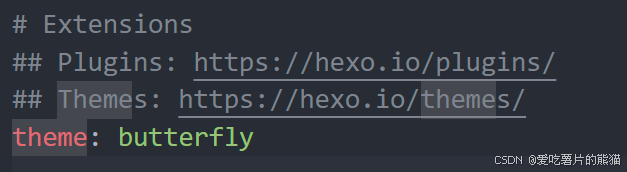
npm install hexo-renderer-pug hexo-renderer-stylus --save修改配置文件
_config.yml中的theme项为 butterfly:
建议:
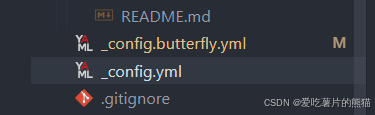
- 为了減少升级主题带来的不便,我们可以把主题文件夹中的
_config.yml重命名为_config.butterfly.yml,复制到 Hexo 根目录下与_config.yml同级。- Hexo会自动合并主题中的
_config.yml和_config.butterfly.yml,如果存在同名配置,会使用_config.butterfly.yml的配置,其优先度较高。所以像和博客网址相关联的固定资料可以设置在_config.yml中,比如博客的标题、作者信息和邮箱等等资料,而和主题样式相关的配置放在_config.butterfly.yml中,那么在将来你想换一个主题是很方便的。
4.2、安装插件
1、搜索插件
npm install hexo-generator-search --save
效果是给你的网站增加一个搜索栏:
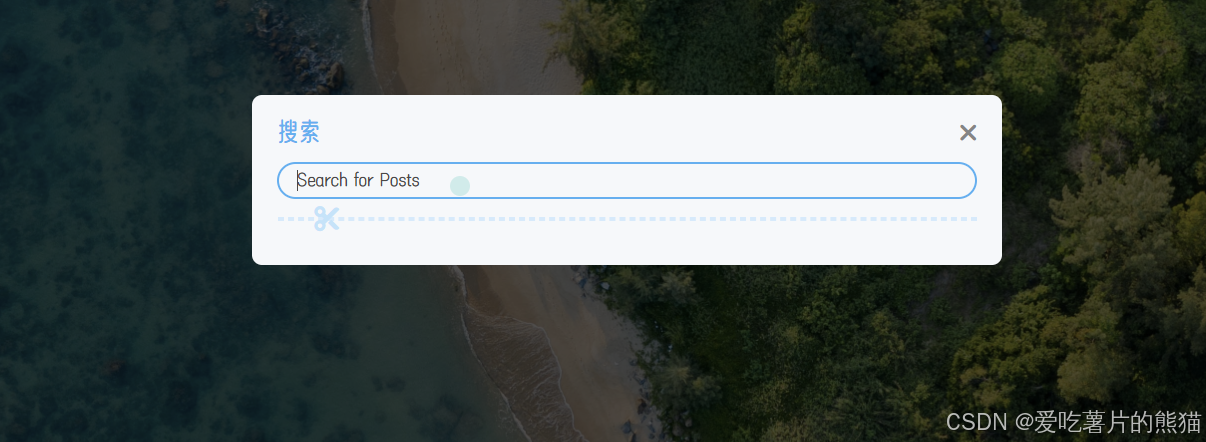
更改配置文件
_config.butterfly.yml:
use: local_search

...

    # Local search
    local_search:
    enable: true
    labels:
        input_placeholder: Search for Posts
        hits_empty: "We didn't find any results for the search: ${query}"
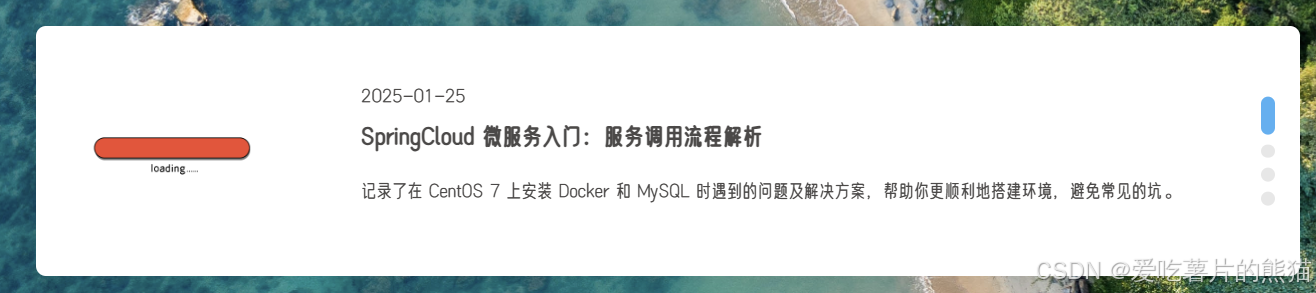
2.、图片懒加载插件
npm install hexo-lazyload-image --save效果是当图片资源加载时用设置的动态加载图片覆盖图片异常显示:
在
_config.yml中添加以下配置(注意是系统设置文件不是主题设置文件):
lazyload:
  enable: true
  loadingImg: /img/loading.gif

3、字数统计插件
npm install hexo-wordcount --save or yarn add hexo-wordcount在
_config.butterfly.yml中修改以下配置:
wordcount:
  enable: true
  post_wordcount: true
  min2read: true
  total_wordcount: true
4.3、个性化设置
1、修改顶部菜单
修改主题配置文件
_config.butterfly.yml:
menu:
  首页: / || fas fa-home
  归档: /archives/ || fas fa-archive
  标签: /tags/ || fas fa-tags
  分类: /categories/ || fas fa-folder-open
  列表||fa fa-list || hide:
    音乐: /music/ || fas fa-music
    照片: /picture/ || fas fa-images
    电影: /movies/ || fas fa-video
  留言板: /comments/ || fas fa-envelope-open
  友链: /link/ || fas fa-link
  关于: /about/ || fas fa-heart
必须是
/xxx/,后面||分开,然后写图标名,如果不想显示图标,图标名可不写
注意这里只是创建了导航菜单的·标签,我们还要新建对应的标签页:
hexo new page tags
......
然后加上对应的type:
---
title: tags
date: 2025-02-01 14:40:05
type: "tags"
---
其他的标签也是一样,最终效果如图:

2. 修改个人信息
修改配置文件
_config.yml:
title: 标题
subtitle: 副标题
description: 个性签名
keywords:
author: 作者
language: zh-CN
timezone: Asia/Shanghai
3. 修改侧边栏
调整侧边栏位置:
aside:
  enable: true
  hide: false
  button: true
  mobile: true # display on mobile
  position: right # left or right
增加个人链接:
打开配置文件
_config.butterfly.yml:
# 侧边栏的个人链接
# Social media links
# Formal:
#   icon: link || the description || color
social:
  fas fa-book: https://blog.csdn.net/m0_74123949 || CSDN || '#d81e06'
  fas fa-code-branch: https://gitee.com/Ywj-ee || Gitee || '#C71D23'
在
aside里的card_author更改个人信息:
  card_author:
    enable: true
    description:
    button:
      enable: true
      icon: fab fa-github
      text: Follow Me
      link: https://github.com/Ywj-ch
  card_announcement:
    enable: true
    content: 欢迎来到我的博客!
提一下fa-github是框架自带的图标库,
Butterfly支持font-awesome v6图标,当然你也可以根据自身需求进行定制。

4. 图片设置
图片放在在
/themes/butterfly/source/img文件夹下面就行
打开配置文件
_config.butterfly.yml
网站图标
favicon: /img/favicon.png头像
avatar:
  img: /img/butterfly-icon.png
  effect: false
背景
背景建议是将封面图index_img:不设置,直接设置background: /img/背景图2.jpg,然后将顶部图像设置为透明default_top_img: rgba(0, 0, 0, 0),这样的效果可以让你的背景图保持简洁(”一图流“)
文章封面图
打开
source/_posts/xxx.md文章:
---
title: XXXXX        # 标题
tags: XXXXX         # 标签
categories: XXXXX   # 分类
description: XXXXX  # 描述
top_img: XXXXX      # 顶部背景图
cover: XXXXX        # 文章封面
---
5、代码块样式
打开配置文件
_config.butterfly.yml:
highlight_theme: mac  #  darker / pale night / light / ocean / mac / mac light / false 代码主题
highlight_copy: true # 复制按钮
highlight_lang: false # 是否显示代码语言
highlight_shrink: false # true: 代码块默认不展开 / false: 代码块默认展开 | none: 展开并隐藏折叠按钮
highlight_height_limit: false # unit: px
code_word_wrap: true #代码自动换行,关闭滚动条
同时将站点配置文件
_config.yml的highlight设置为false:
highlight:
  enable: false
  line_number: false
  auto_detect: false
6、副标题循环打字效果
打开配置文件
_config.butterfly.yml:
# The subtitle on homepage
subtitle:
  enable: true
  effect: true
  loop: true
  source: false
  # 如果有英文逗号' , ',请使用转义字元 ,
  # 如果有英文双引号' " ',请使用转义字元 "
  sub:
    - Dare to dream Live to shine! 🌟💫
    - Time flows gently Cherish each moment! ⏳🍃
效果如下:

4.4、鼠标样式魔改
新建文件
[BlogRoot]\source\js\cursor.js(默认是没有的),在里面写上如下代码:
var CURSOR;

Math.lerp = (a, b, n) => (1 - n) * a + n * b;

const getStyle = (el, attr) => {
    try {
        return window.getComputedStyle
            ? window.getComputedStyle(el)[attr]
            : el.currentStyle[attr];
    } catch (e) {}
    return "";
};

class Cursor {
    constructor() {
        this.pos = {curr: null, prev: null};
        this.pt = [];
        this.create();
        this.init();
        this.render();
    }

    move(left, top) {
        this.cursor.style["left"] = `${left}px`;
        this.cursor.style["top"] = `${top}px`;
    }

    create() {
        if (!this.cursor) {
            this.cursor = document.createElement("div");
            this.cursor.id = "cursor";
            this.cursor.classList.add("hidden");
            document.body.append(this.cursor);
        }

        var el = document.getElementsByTagName('*');
        for (let i = 0; i < el.length; i++)
            if (getStyle(el[i], "cursor") == "pointer")
                this.pt.push(el[i].outerHTML);

        document.body.appendChild((this.scr = document.createElement("style")));
        // 这里改变鼠标指针的颜色 由svg生成
        this.scr.innerHTML = `* {cursor: url("data:image/svg+xml,<svg xmlns='http://www.w3.org/2000/svg' viewBox='0 0 8 8' width='8px' height='8px'><circle cx='4' cy='4' r='4' opacity='.5'/></svg>") 4 4, auto}`;
    }

    refresh() {
        this.scr.remove();
        this.cursor.classList.remove("hover");
        this.cursor.classList.remove("active");
        this.pos = {curr: null, prev: null};
        this.pt = [];

        this.create();
        this.init();
        this.render();
    }

    init() {
        document.onmouseover  = e => this.pt.includes(e.target.outerHTML) && this.cursor.classList.add("hover");
        document.onmouseout   = e => this.pt.includes(e.target.outerHTML) && this.cursor.classList.remove("hover");
        document.onmousemove  = e => {(this.pos.curr == null) && this.move(e.clientX - 8, e.clientY - 8); this.pos.curr = {x: e.clientX - 8, y: e.clientY - 8}; this.cursor.classList.remove("hidden");};
        document.onmouseenter = e => this.cursor.classList.remove("hidden");
        document.onmouseleave = e => this.cursor.classList.add("hidden");
        document.onmousedown  = e => this.cursor.classList.add("active");
        document.onmouseup    = e => this.cursor.classList.remove("active");
    }

    render() {
        if (this.pos.prev) {
            this.pos.prev.x = Math.lerp(this.pos.prev.x, this.pos.curr.x, 0.15);
            this.pos.prev.y = Math.lerp(this.pos.prev.y, this.pos.curr.y, 0.15);
            this.move(this.pos.prev.x, this.pos.prev.y);
        } else {
            this.pos.prev = this.pos.curr;
        }
        requestAnimationFrame(() => this.render());
    }
}

(() => {
    CURSOR = new Cursor();
    // 需要重新获取列表时,使用 CURSOR.refresh()
})();
其中比较重要的参数就是鼠标的尺寸和颜色,已经在上面的代码中标出,可以自行调节。
在
[BlogRoot]\source\css\custom.css添加如下代码:
/* 鼠标样式 */
#cursor {
  position: fixed;
  width: 16px;
  height: 16px;
  /* 这里改变跟随的底色 */
  background: var(--theme-color);
  border-radius: 8px;
  opacity: 0.25;
  z-index: 10086;
  pointer-events: none;
  transition: 0.2s ease-in-out;
  transition-property: background, opacity, transform;
}

#cursor.hidden {
  opacity: 0;
}

#cursor.hover {
  opacity: 0.1;
  transform: scale(2.5);
  -webkit-transform: scale(2.5);
  -moz-transform: scale(2.5);
  -ms-transform: scale(2.5);
  -o-transform: scale(2.5);
}

#cursor.active {
  opacity: 0.5;
  transform: scale(0.5);
  -webkit-transform: scale(0.5);
  -moz-transform: scale(0.5);
  -ms-transform: scale(0.5);
  -o-transform: scale(0.5);
}
这里比较重要的参数就是鼠标跟随的圆形颜色,可以根据自己的喜好进行更改:
#cursor {
  /* 这里改变跟随的底色 */
  background: rgb(57, 197, 187);
}
最后在主题配置文件
_config.butterfly.yml文件的inject配置项引入刚刚创建的css文件和js文件:
inject:
  head:
    - <link rel="stylesheet" href="/css/custom.css">
  bottom:
    - <script defer src="/js/cursor.js"></script>
重启项目就能看到效果了
hexo cl; hexo s4.5、Live2D看板娘
在Hexo根目录
[BlogRoot]下打开终端,输入以下指令安装必要插件:
npm install --save hexo-helper-live2d打开站点配置文件
[BlogRoot]\config.yml
搜索live2d,按照如下注释内容指示进行操作。
如果没有搜到live2d的配置项,就直接把以下内容复制到最底部。
# Live2D
## https://github.com/EYHN/hexo-helper-live2d
live2d:
  enable: true #开关插件版看板娘
  scriptFrom: local # 默认
  pluginRootPath: live2dw/ # 插件在站点上的根目录(相对路径)
  pluginJsPath: lib/ # 脚本文件相对与插件根目录路径
  pluginModelPath: assets/ # 模型文件相对与插件根目录路径
  # scriptFrom: jsdelivr # jsdelivr CDN
  # scriptFrom: unpkg # unpkg CDN
  # scriptFrom: https://npm.elemecdn.com/live2d-widget@3.x/lib/L2Dwidget.min.js # 你的自定义 url
  tagMode: false # 标签模式, 是否仅替换 live2d tag标签而非插入到所有页面中
  debug: false # 调试, 是否在控制台输出日志
  model:
    use: live2d-widget-model-wanko # npm-module package name
    # use: wanko # 博客根目录/live2d_models/ 下的目录名
    # use: ./wives/wanko # 相对于博客根目录的路径
    # use: https://npm.elemecdn.com/live2d-widget-model-wanko@1.0.5/assets/wanko.model.json # 你的自定义 url
  display:
    position: right #控制看板娘位置
    width: 150 #控制看板娘大小
    height: 300 #控制看板娘大小
  mobile:
    show: false # 手机中是否展示
然后重启项目即可浏览效果了
4.6、文章置顶滚动栏
安装插件,在博客根目录
[BlogRoot]下打开终端,运行以下指令:
npm install hexo-butterfly-swiper --save在站点配置文件
_config.yml或者主题配置文件_config.butterfly.yml中添加:
# hexo-butterfly-swiper
# see https://akilar.top/posts/8e1264d1/
swiper:
  enable: true # 开关
  priority: 5 #过滤器优先权
  enable_page: all # 应用页面
  timemode: date #date/updated
  layout: # 挂载容器类型
    type: id
    name: recent-posts
    index: 0
  default_descr: 再怎么看我也不知道怎么描述它的啦!
  swiper_css: https://npm.elemecdn.com/hexo-butterfly-swiper/lib/swiper.min.css #swiper css依赖
  swiper_js: https://npm.elemecdn.com/hexo-butterfly-swiper/lib/swiper.min.js #swiper js依赖
  custom_css: https://npm.elemecdn.com/hexo-butterfly-swiper/lib/swiperstyle.css # 适配主题样式补丁
  custom_js: https://npm.elemecdn.com/hexo-butterfly-swiper/lib/swiper_init.js # swiper初始化方法
到这里,相信你已经成功搭建了一个外观简洁且漂亮的博客。在这个过程中,我们不仅完成了博客的基础搭建,还通过美化主题让博客的视觉效果更加吸引人。不过,真正让博客与众不同的,不仅仅是它的外观,而是博客的内容。你可以根据自己的兴趣和需求,持续添加有价值的内容,分享你的技术经验、生活感悟或创作成果。
无论是记录学习过程中的点滴,还是分享工作中的见解,内容才是吸引读者和展示个人特色的关键。希望你能通过这个平台,不断积累和沉淀,让你的博客成为一个有深度、有温度的地方。
最后,博客的搭建只是开始,真正的挑战是如何持续更新内容,并与读者建立连接。祝你在博客的创作之路上越走越远!”


 1万+
1万+

 被折叠的 条评论
为什么被折叠?
被折叠的 条评论
为什么被折叠?
 到【灌水乐园】发言


