


本期将为大家讲解Hexo Butterfly主题的使用。
0. 前期回顾
最新Hexo+GitHubPages搭建个人博客【二】-使用Vercel加速和自定义域名
最新Hexo+GitHubPages搭建个人博客【三】-使用GitHub自带的自定义域名]
最新Hexo+GitHubPages搭建个人博客【四】-Hexo基础使用
最新Hexo+GitHubPages搭建个人博客【五】-主题Icarus使用
1. 主题介绍
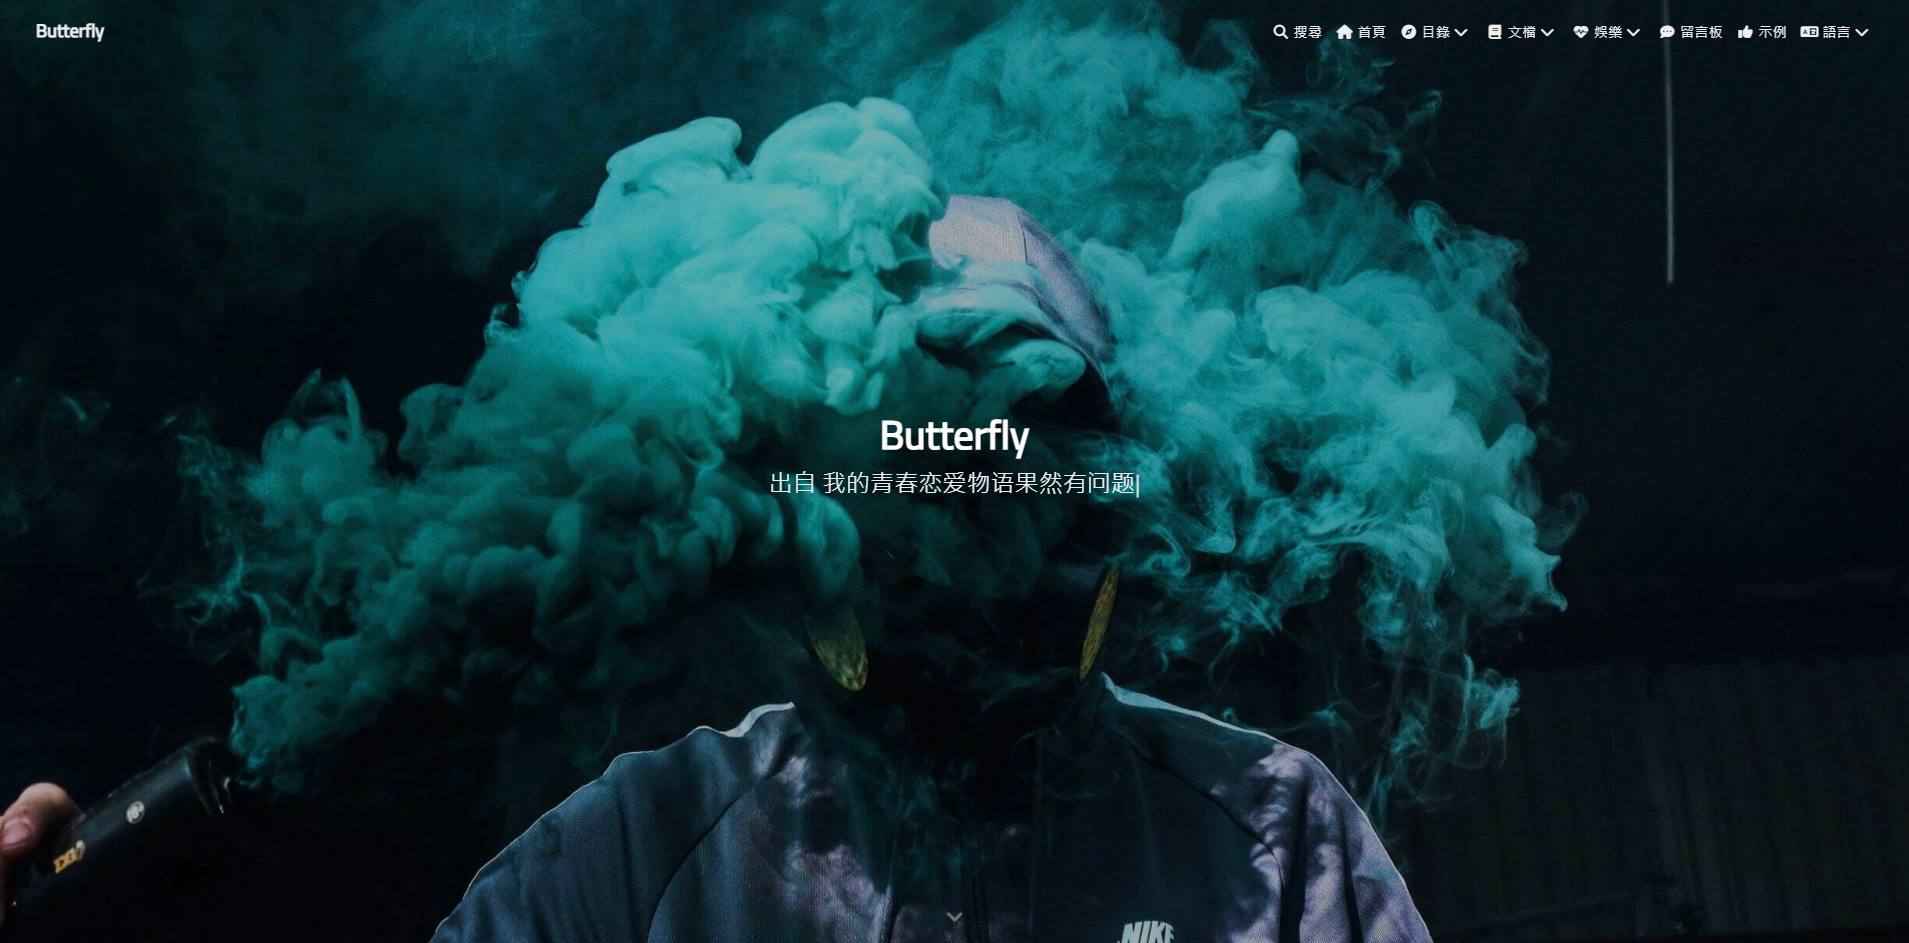
hexo-theme-butterfly是基于 Molunerfinn 的 hexo-theme-melody 的基础上进行开发的,当前版本是v4.13.0。
主题官网:https://github.com/jerryc127/hexo-theme-butterfly
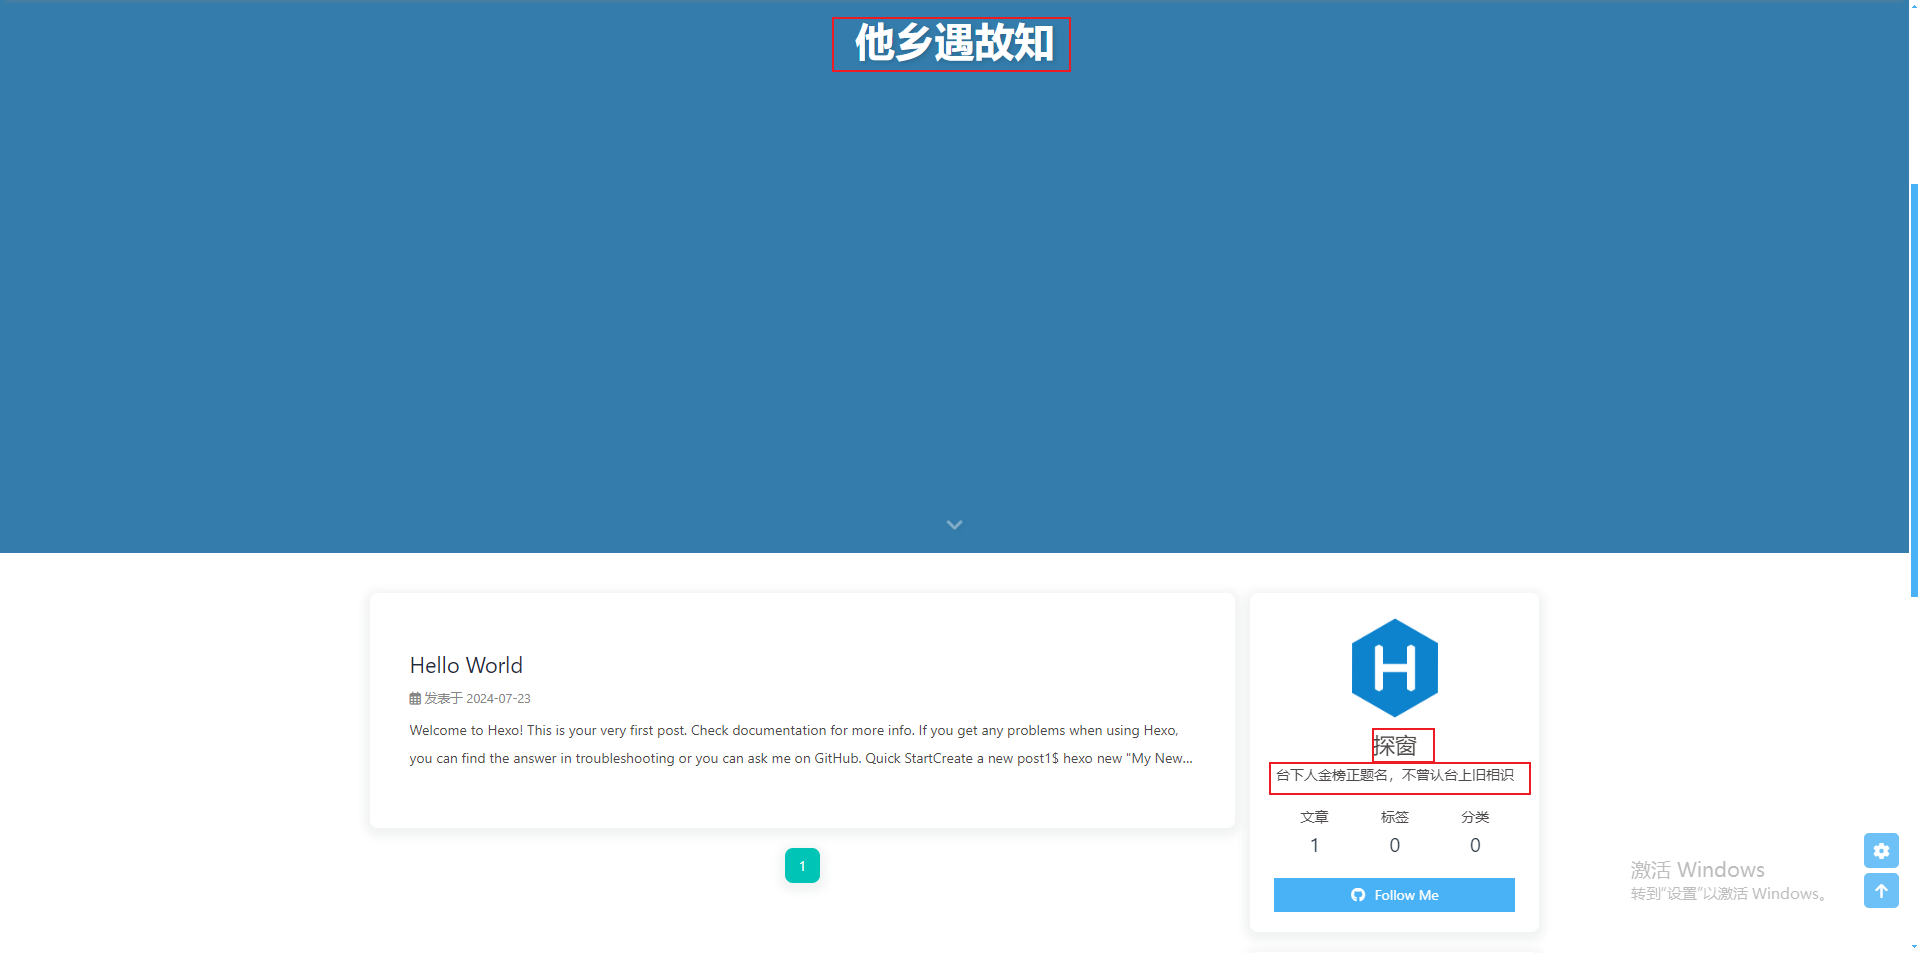
官网效果图:
2. 主题安装
2.1 下载主题
建议你使用clone最新版本的方式,之后的更新可以通过 git pull 来快速更新, 而不用再次下载压缩包替换。
切换到博客的主题根目录下打开Git Bash并执行以下命令:
git clone https://github.com/jerryc127/hexo-theme-butterfly.git themes/butterfly
下载完成后,会在项目themes目录下生成butterfly文件夹。

如果没有修改代码的需求可以直接通过npm来安装。
npm i hexo-theme-butterfly
仅支持Hexo 5.0.0及以上版本
2.2 渲染器下载
需要安装安装pug 和 stylus 渲染器,否则启动之后访问页面会报错。
错误内容: extends includes/layout.pug block content include ./includes/mixins/post-ui.pug #recent-posts.recent-posts +postUI include includes/pagination.pug
npm install hexo-renderer-pug hexo-renderer-stylus --save
2.3 切换主题
与所有 Hexo 主题启用的模式一样。当 克隆/下载 完成后,打开 站点配置文件, 找到 theme 字段,并将其值更改为 butterfly。
theme: butterfly
到此,Butterfly主题安装完成。
2.4 验证主题
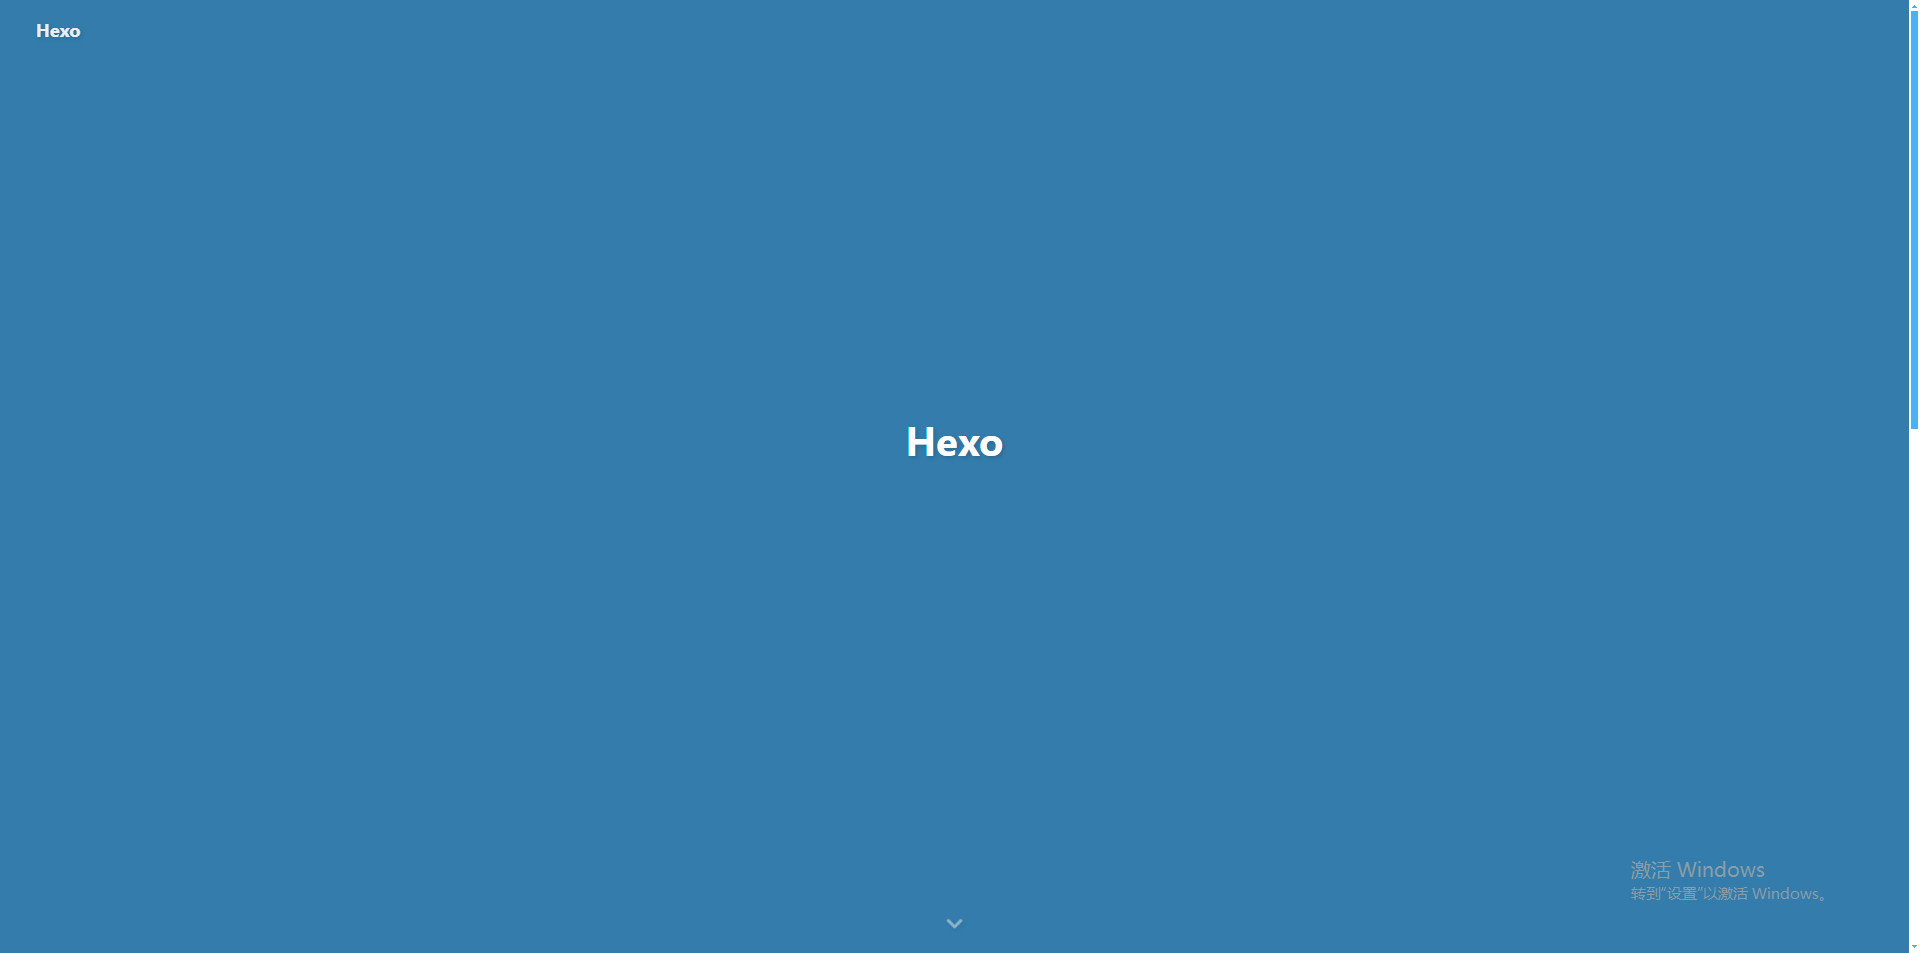
启动服务并访问http://localhost:4000查看效果.
hexo clean && hexo s
3. 主题配置
主题配置文件是themes/butterfly/_config.yml。
3.1 配置说明
以下是themes/butterfly/_config.yml文件的翻译版本,可以复制进去替换原文件
# Navigation bar settings (导航栏设置)
# 见 https://butterfly.js.org/posts/4aa8abbe/##导航栏设置-Navigation-bar-settings
# --------------------------------------

nav:
  logo: # 图片
  display_title: true
  fixed: false # 固定导航栏

# Menu 目录
menu:
  # Home: / || fas fa-home
  # Archives: /archives/ || fas fa-archive
  # Tags: /tags/ || fas fa-tags
  # Categories: /categories/ || fas fa-folder-open
  # List||fas fa-list:
  #   Music: /music/ || fas fa-music
  #   Movie: /movies/ || fas fa-video
  # Link: /link/ || fas fa-link
  # About: /about/ || fas fa-heart

# Code Blocks (代码块相关)
# --------------------------------------

highlight_theme: light # darker / pale night / light / ocean / false
highlight_height_limit: false # 单位:像素
code_word_wrap: false
# 高亮工具栏
highlight_theme_macStyle: false # 使用 Mac 风格
highlight_copy: true # 复制按钮
highlight_lang: true # 显示代码语言
highlight_shrink: false # true: 收缩代码块 / false: 展开代码块 | none: 展开代码块并隐藏按钮
highlight_fullpage: true # true: 添加切换全屏的按钮

# Social Settings (社交图标设置)
# 正式:
#   icon: 链接 || 描述 || 颜色
social:
  # fab fa-github: https://github.com/xxxxx || Github || '#24292e'
  # fas fa-envelope: mailto:xxxxxx@gmail.com || Email || '#4a7dbe'

# Image (图片设置)
# --------------------------------------

# Favicon(网站图标)
favicon: /img/favicon.png

# Avatar (头像)
avatar:
  img: https://i.loli.net/2021/02/24/5O1day2nriDzjSu.png
  effect: false

# 禁用所有横幅图片
disable_top_img: false

# 首页的横幅图片
index_img:

# 如果页面没有设置横幅,则显示顶部图片
default_top_img:

# 归档页面的横幅图片
archive_img:

# 如果标签页面没有设置横幅,则显示顶部图片
# 注意:标签页面,不是标签页面(子标签页面的顶部图片)
tag_img:

# 标签页面的横幅图片
# 格式:
#  - 标签名: xxxxx

tag_per_img:

# 如果分类页面没有设置横幅,则显示顶部图片
# 注意:分类页面,不是分类页面(子分类页面的顶部图片)
category_img:

# 分类页面的横幅图片
# 格式:
#  - 分类名: xxxxx

category_per_img:

# 封面
cover:
  # 是否显示文章封面
  index_enable: true
  aside_enable: true
  archives_enable: true
  # 首页封面显示的位置
  # left/right/both
  position: both
  # 当没有设置封面时,显示默认封面
  default_cover:
    # - https://i.loli.net/2020/05/01/gkihqEjXxJ5UZ1C.jpg

# 替换无法显示的图片
error_img:
  flink: /img/friend_404.gif
  post_page: /img/404.jpg

# 一个简单的 404 页面
error_404:
  enable: false
  subtitle: '页面未找到'
  background: https://i.loli.net/2020/05/19/aKOcLiyPl2JQdFD.png

# post_meta 页面元数据
post_meta:
  page: # 首页
    date_type: created # created 或 updated 或 both 主页文章日期显示创建日或者更新日或都显示
    date_format: date # date 或 relative 显示日期还是相对日期
    categories: true # true 或 false 主页是否显示分类
    tags: false # true 或 false 主页是否显示标签
    label: true # true 或 false 显示描述性文字
  post:
    position: left # left 或 center 文章页标题位置
    date_type: both # created 或 updated 或 both 文章页日期显示创建日或者更新日或都显示
    date_format: date # date 或 relative 显示日期还是相对日期
    categories: true # true 或 false 文章页是否显示分类
    tags: true # true 或 false 文章页是否显示标签
    label: true # true 或 false 显示描述性文字

# 在首页显示文章介绍
# 1: description
# 2: both (如果描述存在,则显示描述,否则显示自动摘要)
# 3: auto_excerpt (默认)
# false: 不显示文章介绍
index_post_content:
  method: 3
  length: 500 # 如果你设置方法为 2 或 3,需要配置长度

# 锚点
anchor:
  # 当你滚动时,URL 将根据标题 id 更新
  auto_update: false
  # 点击标题滚动并更新锚点
  click_to_scroll: false

# 图片描述文字
photofigcaption: false

# 复制设置
# copyright: 在复制内容后面添加版权信息
copy:
  enable: true
  copyright:
    enable: false
    limit_count: 50

# 文章
# --------------------------------------

# toc (目录)
toc:
  post: true
  page: false
  number: true
  expand: false
  style_simple: false # 针对文章
  scroll_percent: true

# 文章版权
post_copyright:
  enable: true
  decode: false
  author_href:
  license: CC BY-NC-SA 4.0
  license_url: https://creativecommons.org/licenses/by-nc-sa/4.0/

# 赞助/打赏
reward:
  enable: false
  text:
  QR_code:
    # - img: /img/wechat.jpg
    #   link:
    #   text: wechat
    # - img: /img/alipay.jpg
    #   link:
    #   text: alipay

# 文章编辑
# 在线轻松浏览和编辑博客源代码
post_edit:
  enable: false
  # url: https://github.com/user-name/repo-name/edit/branch-name/subdirectory-name/
  # 例如: https://github.com/jerryc127/butterfly.js.org/edit/main/source/
  url:

# 相关文章
related_post:
  enable: true
  limit: 6 # 显示的文章数量
  date_type: created # 或者 created 或 updated 文章日期显示创建日或者更新日

# 文章分页
# value: 1 || 2 || false
# 1: 下一篇文章将链接到旧文章
# 2: 下一篇文章将链接到新文章
# false: 禁用分页
post_pagination: 1

# 显示文章的过时提醒
noticeOutdate:
  enable: false
  style: flat # 风格: simple/flat
  limit_day: 500 # 何时显示
  position: top # 位置: top/bottom
  message_prev: 已经有
  message_next: 天未更新,文章内容可能已过时。

# 页脚设置
# --------------------------------------

footer:
  owner:
    enable: true
    since: 2020
  custom_text:
  copyright: true # 主题和框架的版权

# 侧边栏
# --------------------------------------

aside:
  enable: true
  hide: false
  button: true
  mobile: true # 在移动设备上显示
  position: right # left or right
  display:
    archive: true
    tag: true
    category: true
  card_author:
    enable: true
    description:
    button:
      enable: true
      icon: fab fa-github
      text: 关注我
      link: https://github.com/xxxxxx
  card_announcement:
    enable: true
    content: 这是我的博客
  card_recent_post:
    enable: true
    limit: 5 # 如果设置为 0 将显示全部
    sort: date # date 或 updated
    sort_order: # 除非你知道它如何工作,否则不要修改设置
  card_categories:
    enable: true
    limit: 8 # 如果设置为 0 将显示全部
    expand: none # none/true/false
    sort_order: # 除非你知道它如何工作,否则不要修改设置
  card_tags:
    enable: true
    limit: 40 # 如果设置为 0 将显示全部
    color: false
    orderby: random # 标签顺序,random/name/length
    order: 1 # 排序方式。1,升序;-1,降序
    sort_order: # 除非你知道它如何工作,否则不要修改设置
  card_archives:
    enable: true
    type: monthly # yearly 或 monthly
    format: MMMM YYYY # 例如:YYYY年MM月
    order: -1 # 排序方式。1,升序;-1,降序
    limit: 8 # 如果设置为 0 将显示全部
    sort_order: # 除非你知道它如何工作,否则不要修改设置
  card_webinfo:
    enable: true
    post_count: true
    last_push_date: true
    sort_order: # 除非你知道它如何工作,否则不要修改设置
  card_post_series:
    enable: true
    series_title: false # 标题显示系列名称
    orderBy: 'date' # 按标题或日期排序
    order: -1 # 排序方式。1,升序;-1,降序

# 网站访问人数统计
busuanzi:
  site_uv: true
  site_pv: true
  page_pv: true

# 网页运行时间(发布日期与现在的时间差)
# 格式:Month/Day/Year Time or Year/Month/Day Time
runtimeshow:
  enable: false
  publish_date:

# 侧边栏小部件 - 最新评论
newest_comments:
  enable: false
  sort_order:
  limit: 6
  storage: 10 # 单位:分钟,数据保存到 localStorage
  avatar: true

# 右下角按钮
# --------------------------------------

# 简繁转换
translate:
  enable: false
  # 按钮的文本
  default: 繁
  # 网站的语言 (1 - 繁体中文 / 2 - 简体中文)
  defaultEncoding: 2
  # 时间延迟
  translateDelay: 0
  # 简体字状态下按钮的文本
  msgToTraditionalChinese: '繁'
  # 繁体字状态下按钮的文本
  msgToSimplifiedChinese: '简'

# 阅读模式
readmode: true

# 暗色模式
darkmode:
  enable: true
  # 切换暗色/浅色模式的按钮
  button: true
  # 自动切换暗色/浅色模式 (自动切换 dark mode 和 light mode)
  # autoChangeMode: 1  跟随系统设置,如果系统不支持暗色模式,则在下午 6 点到早上 6 点之间切换暗色模式
  # autoChangeMode: 2  在下午 6 点到早上 6 点之间切换暗色模式
  # autoChangeMode: false
  autoChangeMode: false
  # 设置浅色模式的时间。取值范围是 0 到 24。如果没有设置,默认值是 6 和 18
  start:
  end:

# 在返回顶部按钮中显示滚动百分比
rightside_scroll_percent: false

# 除非你知道它们如何工作,否则不要修改以下设置
# 选择:readmode,translate,darkmode,hideAside,toc,chat,comment
# 不要重复
rightside_item_order:
  enable: false
  hide: # readmode,translate,darkmode,hideAside
  show: # toc,chat,comment

# Math (數學)
# --------------------------------------

# 关于每页的设置
# 如果你设置为 true,它将在每一页都加载 mathjax/katex 脚本 (true 表示每一页都加载 js)
# 如果你设置为 false,它将根据你的设置加载 mathjax/katex 脚本 (需要在页面的 Markdown Front-matter 中添加 mathjax: true)
# (false 按需加载,必须在使用的 Markdown Front-matter 中添加 mathjax: true)

# MathJax
mathjax:
  enable: false
  per_page: false

# KaTeX
katex:
  enable: false
  per_page: false
  hide_scrollbar: true

# 搜索
# 见 https://butterfly.js.org/posts/ceeb73f/#搜索系统
# --------------------------------------

# Algolia 搜索
algolia_search:
  enable: false
  hits:
    per_page: 6

# 本地搜索
local_search:
  enable: false
  # 页面加载时预加载搜索数据
  preload: false
  # 每篇文章显示前 n 个结果,设置为 -1 显示所有结果
  top_n_per_article: 1
  # 将 HTML 字符串转换为可读的格式
  unescape: false
  CDN:

# Docsearch
docsearch:
  enable: false
  appId:
  apiKey:
  indexName:
  option:

# 分享系统
# --------------------------------------

# Share.js
# https://github.com/overtrue/share.js
sharejs:
  enable: true
  sites: facebook,twitter,wechat,weibo,qq

# AddToAny
# https://www.addtoany.com/
addtoany:
  enable: false
  item: facebook,twitter,wechat,sina_weibo,facebook_messenger,email,copy_link

# 评论系统
# --------------------------------------

comments:
  # 最多可以选择两个评论系统,第一个将作为默认显示
  # 选择:Disqus/Disqusjs/Livere/Gitalk/Valine/Waline/Utterances/Facebook Comments/Twikoo/Giscus/Remark42/Artalk
  use:
  text: true # 在按钮旁边显示评论名称
  # lazyload: 当评论元素进入浏览器视口时,评论系统将被加载。
  # 如果你设置为 true,则评论计数将无效
  lazyload: false
  count: false # 在文章顶部图片中显示评论计数
  card_post_count: false # 在首页显示评论计数

# Disqus
# https://disqus.com/
disqus:
  shortname:
  apikey: # 用于最新评论小部件

# DisqusJS 评论系统,可以在网络审查地区加载 Disqus 评论列表,兼容原版
# https://github.com/SukkaW/DisqusJS
disqusjs:
  shortname:
  apikey:
  option:

# Livere (来必力)
# https://www.livere.com/
livere:
  uid:

# Gitalk
# https://github.com/gitalk/gitalk
gitalk:
  client_id:
  client_secret:
  repo:
  owner:
  admin:
  option:

# Valine
# https://valine.js.org
valine:
  appId: # Leancloud 应用 App ID
  appKey: # Leancloud 应用 App 密钥
  avatar: monsterid # Gravatar 风格 https://valine.js.org/#/avatar
  serverURLs: # 此配置适用于国内自定义域名用户,海外版本将自动检测(无需手动填写)
  bg: # Valine 背景
  visitor: false
  option:

# Waline - 一个简单的带有后端支持的评论系统,Valine 的一个分支
# https://waline.js.org/
waline:
  serverURL: # Waline 服务器地址 URL
  bg: # Waline 背景
  pageview: false
  option:

# Utterances
# https://utteranc.es/
utterances:
  repo:
  # 问题映射:pathname/url/title/og:title
  issue_term: pathname
  # 主题:github-light/github-dark/github-dark-orange/icy-dark/dark-blue/photon-dark
  light_theme: github-light
  dark_theme: photon-dark

# Facebook Comments Plugin
# https://developers.facebook.com/docs/plugins/comments/
facebook_comments:
  app_id:
  user_id: # 可选
  pageSize: 10 # 显示的评论数量
  order_by: social # social/time/reverse_time
  lang: zh_TW # 语言 en_US/zh_CN/zh_TW 等

# Twikoo
# https://github.com/imaegoo/twikoo
twikoo:
  envId:
  region:
  visitor: false
  option:

# Giscus
# https://giscus.app/
giscus:
  repo:
  repo_id:
  category_id:
  theme:
    light: light
    dark: dark
  option:

# Remark42
# https://remark42.com/docs/configuration/frontend/
remark42:
  host: # 你的主机 URL
  siteId: # 你的站点 ID
  option:

# Artalk
# https://artalk.js.org/guide/frontend/config.html
artalk:
  server:
  site:
  visitor: false
  option:

# 聊天服务
# --------------------------------------

# 聊天按钮 [推荐]
# 它将在网站右下角创建一个按钮,并隐藏原始按钮
chat_btn: false

# 当滚动至上部时显示原始聊天按钮,滚动下来时隐藏按钮
chat_hide_show: false

# Chatra
# https://chatra.io/
chatra:
  enable: false
  id:

# Tidio
# https://www.tidio.com/
tidio:
  enable: false
  public_key:

# Daovoice
# http://dashboard.daovoice.io/app
daovoice:
  enable: false
  app_id:

# Crisp
# https://crisp.chat/en/
crisp:
  enable: false
  website_id:

# Messenger
# https://developers.facebook.com/docs/messenger-platform/discovery/facebook-chat-plugin/
messenger:
  enable: false
  pageID:
  lang: zh_TW # 语言 en_US/zh_CN/zh_TW 等

# 分析
# --------------------------------------

# Baidu Analytics
# https://tongji.baidu.com/web/welcome/login
baidu_analytics:

# Google Analytics
# https://analytics.google.com/analytics/web/
google_analytics:

# Cloudflare Analytics
# https://www.cloudflare.com/zh-tw/web-analytics/
cloudflare_analytics:

# Microsoft Clarity
# https://clarity.microsoft.com/
microsoft_clarity:

# 广告
# --------------------------------------

# Google Adsense (谷歌广告)
google_adsense:
  enable: false
  auto_ads: true
  js: https://pagead2.googlesyndication.com/pagead/js/adsbygoogle.js
  client:
  enable_page_level_ads: true
# 手动插入广告
# ad:
#   index:
#   aside:
#   post:

# 站长验证
# --------------------------------------

site_verification:
  # - name: google-site-verification
  #   content: xxxxxx
  # - name: baidu-site-verification
  #   content: xxxxxxx

# 美化/效果
# --------------------------------------

# 自定义主题颜色
# 注意:颜色值必须用双引号引起来,如 "#000",否则可能会导致错误!

# theme_color:
#   enable: true
#   main: "#49B1F5"
#   paginator: "#00c4b6"
#   button_hover: "#FF7242"
#   text_selection: "#00c4b6"
#   link_color: "#99a9bf"
#   meta_color: "#858585"
#   hr_color: "#A4D8FA"
#   code_foreground: "#F47466"
#   code_background: "rgba(27, 31, 35, .05)"
#   toc_color: "#00c4b6"
#   blockquote_padding_color: "#49b1f5"
#   blockquote_background_color: "#49b1f5"
#   scrollbar_color: "#49b1f5"
#   meta_theme_color_light: "ffffff"
#   meta_theme_color_dark: "#0d0d0d"

# 首页的 top_img 设置
# 默认:top img - 全屏,site info - 中间(默认 top_img 全屏,site_info 在中间)
# 网站信息的位置,例如:300px/300em/300rem/10%(首页标题距离顶部的距离)
index_site_info_top:
# 首页 top_img 的高度,例如:300px/300em/300rem
index_top_img_height:

# 分类和标签页面的用户界面设置 (category 和 tag 页的 UI 设置)
# index - 与首页 UI 相同(index 值代表 UI 将与首页的 UI 一样)
# default - 与归档 UI 相同,默认跟 archives 页面 UI 一样
category_ui: # 留空或 index
tag_ui: # 留空或 index

# 拉伸行宽,使每一行宽度相等(文字两端对齐,对最后一行无效)
text_align_justify: false

# 设置网站背景
# 可以设置为颜色或图片(可设置图片 或者 颜色)
# 图片格式:url(http://xxxxxx.com/xxx.jpg)
background:

# 页脚背景
footer_bg: false

# 为 header 或 footer 添加黑色半透明遮罩
mask:
  header: true
  footer: true

# 右下角按钮距离底部的位置,默认单位为像素
rightside_bottom:

# 开启网页进入效果
enter_transitions: true

# 打字效果
# https://github.com/disjukr/activate-power-mode
activate_power_mode:
  enable: false
  colorful: true # 开启粒子动画(发光特效)
  shake: true # 开启 shake(抖动特效)
  mobile: false

# 背景特效
# --------------------------------------

# canvas_ribbon (静止彩带背景)
# 见: https://github.com/hustcc/ribbon.js
canvas_ribbon:
  enable: false
  size: 150
  alpha: 0.6
  zIndex: -1
  click_to_change: false
  mobile: false

# Fluttering Ribbon (动态彩带)
canvas_fluttering_ribbon:
  enable: false
  mobile: false

# canvas_nest
# https://github.com/hustcc/canvas-nest.js
canvas_nest:
  enable: false
  color: '0,0,255' # 线条的颜色,默认: '0,0,0';RGB 值:(R,G,B)。(注意:用 ',' 分隔)
  opacity: 0.7 # 线条的透明度 (0~1),默认: 0.5
  zIndex: -1 # 背景的 z-index 属性,默认: -1
  count: 99 # 线条的数量,默认: 99
  mobile: false

# 鼠标点击效果:烟花特效
fireworks:
  enable: false
  zIndex: 9999 # -1 或 9999
  mobile: false

# 鼠标点击效果:爱心
click_heart:
  enable: false
  mobile: false

# 鼠标点击效果:文字
clickShowText:
  enable: false
  text:
    # - 我
    # - 爱
    # - 你
  fontSize: 15px
  random: false
  mobile: false

# 网站默认的显示模式
# light (默认) / dark
display_mode: light

# 美化页面显示
beautify:
  enable: false
  field: post # site/post
  title-prefix-icon: # '\\f0c1'
  title-prefix-icon-color: # '#F47466'

# 全局字体设置
# 除非你知道它们如何工作,否则不要修改以下设置
font:
  global-font-size:
  code-font-size:
  font-family:
  code-font-family:

# 网站标题和副标题的字体设置
# 左上角网站名字 主页居中网站名字
blog_title_font:
  font_link:
  font-family:

# 水平分隔线图标设置
hr_icon:
  enable: true
  icon: # 字体图标的 Unicode 值,例如 '\\3423'
  icon-top:

# 首页副标题
subtitle:
  enable: false
  # 打字效果
  effect: true
  # 定制 typed.js
  # https://github.com/mattboldt/typed.js/#customization
  typed_option:
  # source 调用第三方服务
  # source: false 关闭调用
  # source: 1  调用一言网的一句话(简体) https://hitokoto.cn/
  # source: 2  调用一句网(简体) https://yijuzhan.com/
  # source: 3  调用今日诗词(简体) https://www.jinrishici.com/
  # subtitle 会先显示 source , 再显示 sub 的内容
  source: false
  # 如果关闭打字效果,subtitle 只会显示 sub 的第一行文字
  sub:

# 加载动画
preloader:
  enable: false
  # source
  # 1. fullpage-loading
  # 2. pace (progress bar)
  source:
  # pace 主题 (见 https://codebyzach.github.io/pace/)
  pace_css_url:

# 字数统计
# 见 https://butterfly.js.org/posts/ceeb73f/#字数统计
wordcount:
  enable: false
  post_wordcount: true
  min2read: true
  total_wordcount: true

# 图片大图查看模式
# --------------------------------------
# 只能选择一个,或者两个都不选

# medium-zoom
# https://github.com/francoischalifour/medium-zoom
medium_zoom: false

# fancybox
# https://fancyapps.com/fancybox/
fancybox: true

# 标签插件设置
# --------------------------------------

# series (系列文章)
series:
  enable: true
  orderBy: 'title' # 按标题或日期排序
  order: 1 # 排序方式。1, 升序;-1, 降序
  number: true

# abcjs (乐谱渲染)
# 见 https://github.com/paulrosen/abcjs
abcjs:
  enable: false
  per_page: true

# Mermaid
# 见 https://github.com/mermaid-js/mermaid
mermaid:
  enable: true
  # 以代码块形式书写 Mermaid 图表(以代码块形式书写 Mermaid)
  code_write: false
  # 内置主题: default/forest/dark/neutral
  theme:
    light: default
    dark: dark

# Note (Bootstrap Callout)
note:
  # Note 标签样式值:
  #  - simple    bs-callout 旧版警告样式。默认。
  #  - modern    bs-callout 新版 (v2-v3) 警告样式。
  #  - flat      带有背景的 flat callout 样式,类似于 Mozilla 或 StackOverflow。
  #  - disabled  禁用所有 CSS 样式的导入。
  style: flat
  icons: true
  border_radius: 3
  # 对现代和平面风格的背景进行百分比的偏移量更亮 (现代: -12 | 12; 平面: -18 | 6)。
  # 偏移量也应用于标签变量。此选项可以与禁用的 note 标签一起使用。
  light_bg_offset: 0

# 其他
# --------------------------------------

# Pjax
# 它可能包含错误并且不稳定,请在发现错误时提供反馈。
# https://github.com/MoOx/pjax
pjax:
  enable: false
  exclude:
    # - xxxx
    # - xxxx

# 注入 CSS 和脚本 (aplayer/meting)
aplayerInject:
  enable: false
  per_page: true

# Snackbar (Toast 通知弹窗)
# https://github.com/polonel/SnackBar
# position 弹窗位置
# 可选 top-left / top-center / top-right / bottom-left / bottom-center / bottom-right
snackbar:
  enable: false
  position: bottom-left
  bg_light: '#49b1f5' # 浅色模式下 Toast 通知的背景颜色
  bg_dark: '#1f1f1f' # 深色模式下 Toast 通知的背景颜色

# https://instant.page/
# prefetch (预加载)
instantpage: false

# https://github.com/vinta/pangu.js
# 在中英文之间添加空格
pangu:
  enable: false
  field: site # site/post

# 懒加载 (图片懒加载)
# https://github.com/verlok/vanilla-lazyload
lazyload:
  enable: false
  field: site # site/post
  placeholder:
  blur: false

# PWA
# 见 https://github.com/JLHwung/hexo-offline
# ---------------
# pwa:
#   enable: false
#   manifest: /pwa/manifest.json
#   apple_touch_icon: /pwa/apple-touch-icon.png
#   favicon_32_32: /pwa/32.png
#   favicon_16_16: /pwa/16.png
#   mask_icon: /pwa/safari-pinned-tab.svg

# Open graph 元标签
# https://developers.facebook.com/docs/sharing/webmasters/
Open_Graph_meta:
  enable: true
  option:
    # twitter_card:
    # twitter_image:
    # twitter_id:
    # twitter_site:
    # google_plus:
    # fb_admins:
    # fb_app_id:

# 添加厂商前缀以确保兼容性
css_prefix: true

# 注入
# 在头部 ('<head>' 标签之前) 和底部 ('<body>' 标签之前) 插入代码
# 在头部 <head> 之前 和 底部 <body> 之前插入代码
inject:
  head:
    # - <link rel="stylesheet" href="/xxx.css">
  bottom:
    # - <script src="xxxx"></script>

# CDN
# 除非你知道它们如何工作,否则不要修改以下设置
# 非必要请不要修改

CDN:
  # 主题内部 js 的 CDN 配置
  # 选项: local/jsdelivr/unpkg/cdnjs/custom
  # Dev 版本只能选择 (dev 版的主体只能设置为 local)
  internal_provider: local

  # 第三方 js 的 CDN 配置
  # 选项: local/jsdelivr/unpkg/cdnjs/custom
  # 当设置为 local 时,你需要安装 hexo-butterfly-extjs
  third_party_provider: jsdelivr

  # 在 URL 中添加版本号,true 或 false
  version: true

  # 自定义格式
  # 例如: https://cdn.staticfile.org/${cdnjs_name}/${version}/${min_cdnjs_file}
  custom_format:

  option:
    # abcjs_basic_js:
    # activate_power_mode:
    # algolia_js:
    # algolia_search:
    # aplayer_css:
    # aplayer_js:
    # artalk_css:
    # artalk_js:
    # blueimp_md5:
    # busuanzi:
    # canvas_fluttering_ribbon:
    # canvas_nest:
    # canvas_ribbon:
    # click_heart:
    # clickShowText:
    # disqusjs:
    # disqusjs_css:
    # docsearch_css:
    # docsearch_js:
    # egjs_infinitegrid:
    # fancybox:
    # fancybox_css:
    # fireworks:
    # fontawesome:
    # gitalk:
    # gitalk_css:
    # giscus:
    # instantpage:
    # instantsearch:
    # katex:
    # katex_copytex:
    # lazyload:
    # local_search:
    # main:
    # main_css:
    # mathjax:
    # medium_zoom:
    # mermaid:
    # meting_js:
    # pangu:
    # prismjs_autoloader:
    # prismjs_js:
    # prismjs_lineNumber_js:
    # pjax:
    # sharejs:
    # sharejs_css:
    # snackbar:
    # snackbar_css:
    # translate:
    # twikoo:
    # typed:
    # utils:
    # valine:
    # waline_css:
    # waline_js:
3.2 更改语言
首先我们要将英语改为中文;butterfly主题自带4种语言。
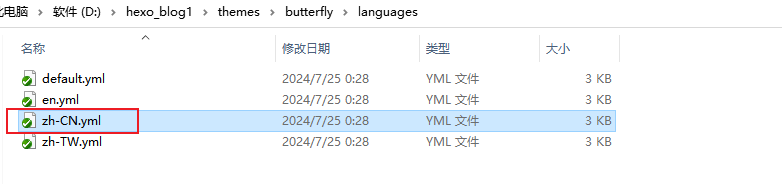
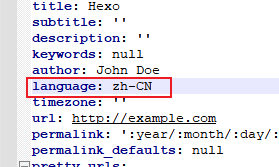
编辑**站点配置文件**,修改语言设置。
language: zh-CN
3.3 设置站点信息
效果图:
打开**站点配置文件(_config.yml)修改网站各种资料,例如标题、副标题和语言**等个人资料。
# Site
title: '他乡遇故知' #标题
subtitle: '一步一句是相思' #副标题
description: '台下人金榜正题名,不曾认台上旧相识' #个性签名
keywords: null
author: 探窗 #作者
language: zh-CN #语言
timezone: '' #时区
3.4 设置导航菜单
效果图:
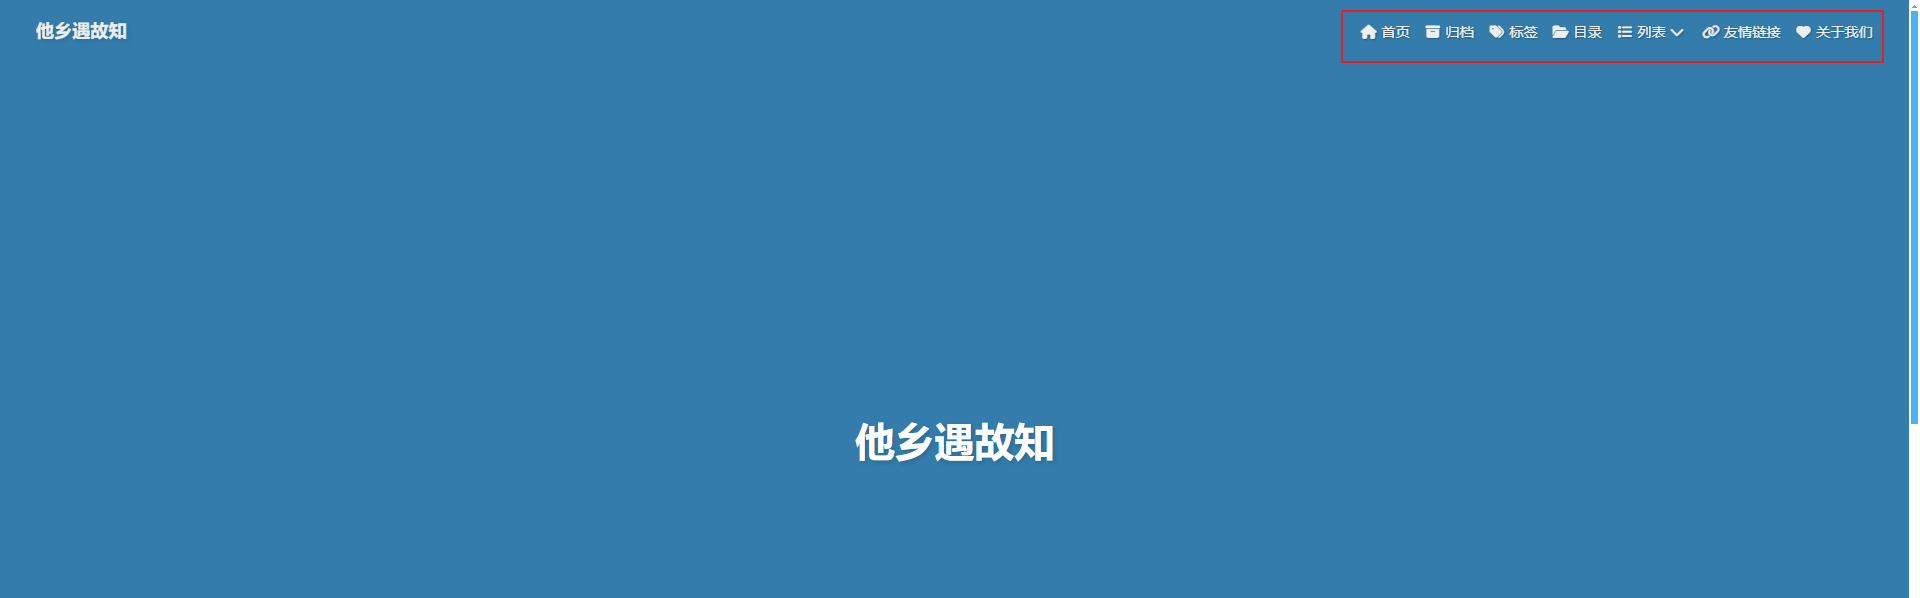
编辑 themes/butterfly/_config.yml,修改以下内容:
# Menu 目錄
menu:
  首页: / || fas fa-home
  归档: /archives/ || fas fa-archive
  标签: /tags/ || fas fa-tags
  目录: /categories/ || fas fa-folder-open
  列表||fas fa-list:
    音乐: /music/ || fas fa-music
    电影: /movies/ || fas fa-video
  友情链接: /link/ || fas fa-link
  关于我们: /about/ || fas fa-heart
3.5 代码块显示设置
效果图相当漂亮:
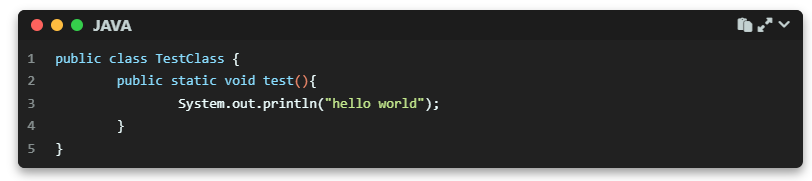
编辑 themes/butterfly/_config.yml,修改以下内容:
# Code Blocks (代码块相关)
# --------------------------------------
highlight_theme: darker # darker / pale night / light / ocean / false
highlight_height_limit: false # 单位:像素
code_word_wrap: true
# 高亮工具栏
highlight_theme_macStyle: true # 使用 Mac 风格
highlight_copy: true # 复制按钮
highlight_lang: true # 显示代码语言
highlight_shrink: false # true: 收缩代码块 / false: 展开代码块 | none: 展开代码块并隐藏按钮
highlight_fullpage: true # true: 添加切换全屏的按钮
同时,将**站点配置文件**(_config.yml)中的highlight相关的配置注释掉。
#highlight:
#  line_number: false
#  auto_detect: false
#  tab_replace: ''
#  wrap: false
#  hljs: false
3.6 设置导航栏图片
效果图如下:

编辑 themes/butterfly/_config.yml,修改以下内容:
# Navigation bar settings (导航栏设置)
# 见 https://butterfly.js.org/posts/4aa8abbe/##导航栏设置-Navigation-bar-settings
# --------------------------------------

nav:
  logo: /images/butterfly.png
本地图片在站点根目录的
source文件夹里。
3.7 修改首页副标题
效果图:

编辑 themes/butterfly/_config.yml:
# 首页副标题
subtitle:
  # 是否开启:true:开启,false:不开启
  enable: true
  # 打字效果
  effect: true
  # 定制 typed.js
  # https://github.com/mattboldt/typed.js/#customization
  typed_option:
  # source 调用第三方服务
  # source: false 关闭调用
  # source: 1  调用一言网的一句话(简体) https://hitokoto.cn/
  # source: 2  调用一句网(简体) https://yijuzhan.com/
  # source: 3  调用今日诗词(简体) https://www.jinrishici.com/
  # subtitle 会先显示 source , 再显示 sub 的内容
  source: false
  # 如果关闭打字效果,subtitle 只会显示 sub 的第一行文字
  sub:
    - 你在抱怨什么呢
    - 为明天到来的事,说人生像是没有意义
    - 没有选择会是唯一的路
    - 这不是你自己的问题,人终归要好好去生活
3.8 图片设置
图片链接地址可以是:
- 完整的互联网 URI,如:http://example.com/avatar.png
- 站点内的地址,主题或站点的source目录下。注意:是站点根目录的
source文件夹里。
修改主题配置文件_config.butterfly.yml:
-
网站图标
# Favicon(网站图标) favicon: /img/favicon.png -
头像
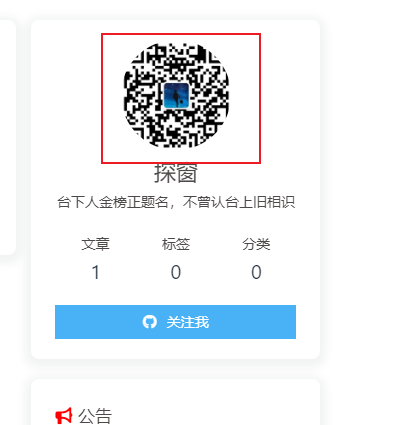
# Avatar (头像) avatar: img: /images/next_icon.png #https://i.loli.net/2021/02/24/5O1day2nriDzjSu.png effect: false #是否一直转圈 false:不开启,true开启 -
主页横幅图片
# 首页的横幅图片 index_img: -
文章详情页顶部图片
当没有在
front-matter设置top_img和cover的情况下会显示该图# 如果页面没有设置横幅,则显示顶部图片 default_top_img: /img/default_top_img.png -
归档页横幅图片
# 归档页面的横幅图片 archive_img: -
tag标签页横幅图片# 如果标签页面没有设置横幅,则显示顶部图片 # 注意:标签页面,不是标签页面(子标签页面的顶部图片) tag_img: # 具体标签页面的横幅图片 # 格式: # - 标签名: xxxxx tag_per_img: -
category目录页横幅图片# 如果分类页面没有设置横幅,则显示顶部图片 # 注意:分类页面,不是分类页面(子分类页面的顶部图片) category_img: # 具体分类页面的横幅图片,可以为不同的category设置不同的横幅图片 # 格式: # - 分类名: xxxxx category_per_img: -
文章统一封面
# 封面
cover:
  # 是否显示文章封面
  index_enable: true
  aside_enable: true
  archives_enable: true
  # 首页封面显示的位置
  position: both  # left/right/both
  # 当没有设置封面时,显示默认封面
  default_cover:
    # 当配置多张图片时,会随机选择一张作为 cover. 此时写法为
    - https://i.loli.net/2020/05/01/gkihqEjXxJ5UZ1C.jpg
    - https://i.loli.net/2020/05/01/gkihqEjXxJ5UZ1C.jpg
    - https://i.loli.net/2020/05/01/gkihqEjXxJ5UZ1C.jpg
    - https://i.loli.net/2020/05/01/gkihqEjXxJ5UZ1C.jpg
    - https://i.loli.net/2020/05/01/gkihqEjXxJ5UZ1C.jpg
如果需要为每一篇文章设置不同的封面,可以在文章的
md文件中添加配置。--- title: Hello World # 标题 tags: [hello] # 标签 categories: # 分类 description: hello word~ # 描述 top_img: /img/hello-1.png # 顶部背景图 cover: /img/hello-1.png # 文章封面 --- -
错误页面
配置了该属性后会替换无法展示的图片
# 替换无法显示的图片
error_img:
  flink: /img/friend_404.gif
  post_page: /img/404.jpg
3.9 图片懒加载
-
新增
hexo-lazyload-image模块npm install hexo-lazyload-image --save -
编辑**
站点配置文件**(_config.yml)增加配置:lazyload: enable: true loadingImg: /img/loading.gif在图片没加载出来的时候,出现一个动图转动的图片样式。
3.10 图片大图查看
编辑 themes/butterfly/_config.yml,修改以下内容:
# 图片大图查看模式
# --------------------------------------
# 只能选择一个,或者两个都不选

# medium-zoom
# https://github.com/francoischalifour/medium-zoom
medium_zoom: false

# fancybox
# https://fancyapps.com/fancybox/
fancybox: true
注意:这两个选项只能二选一或者不选
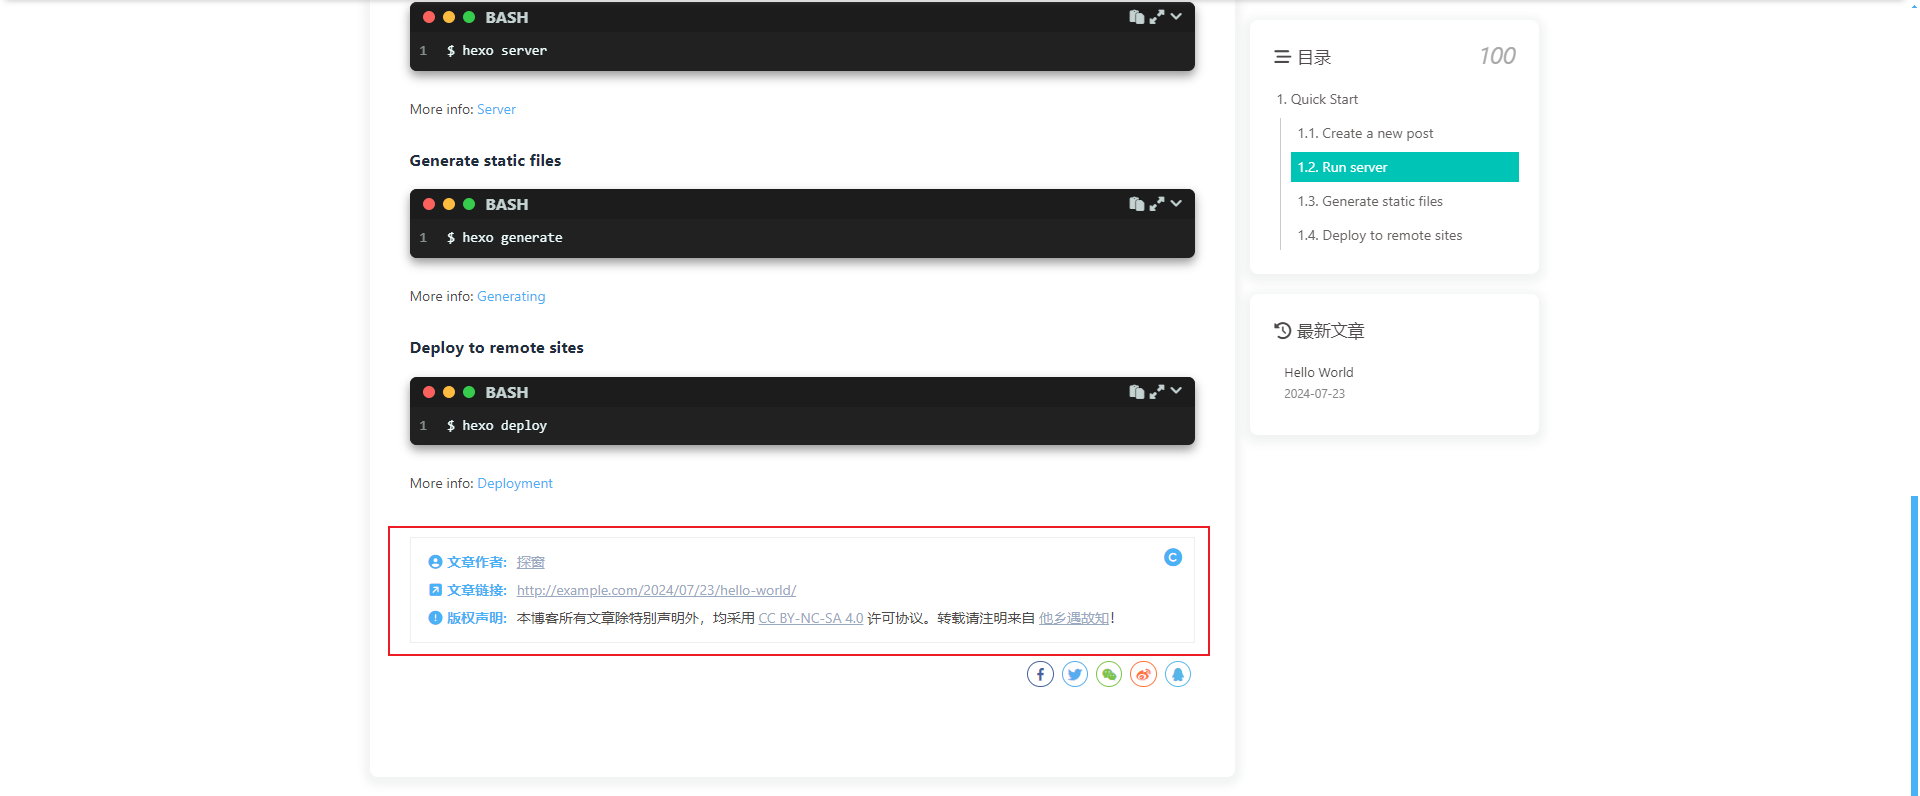
3.11 版权样式
编辑 themes/butterfly/_config.yml,修改以下内容:
- 复制的内容后面加上版权信息
# 复制设置
# copyright: 在复制内容后面添加版权信息
copy:
  enable: true # 是否开启网站复制权限
  copyright: # 复制的内容后面加上版权信息
    enable: false # 是否开启复制版权信息添加
    limit_count: 50 # 字数限制,当复制文字大于这个字数限制时
-
文章版权信息
# 文章版权
post_copyright:
  enable: true
  decode: true
  author_href:
  license: CC BY-NC-SA 4.0
  license_url: https://creativecommons.org/licenses/by-nc-sa/4.0/
效果图:
3.12 相关文章
效果图:
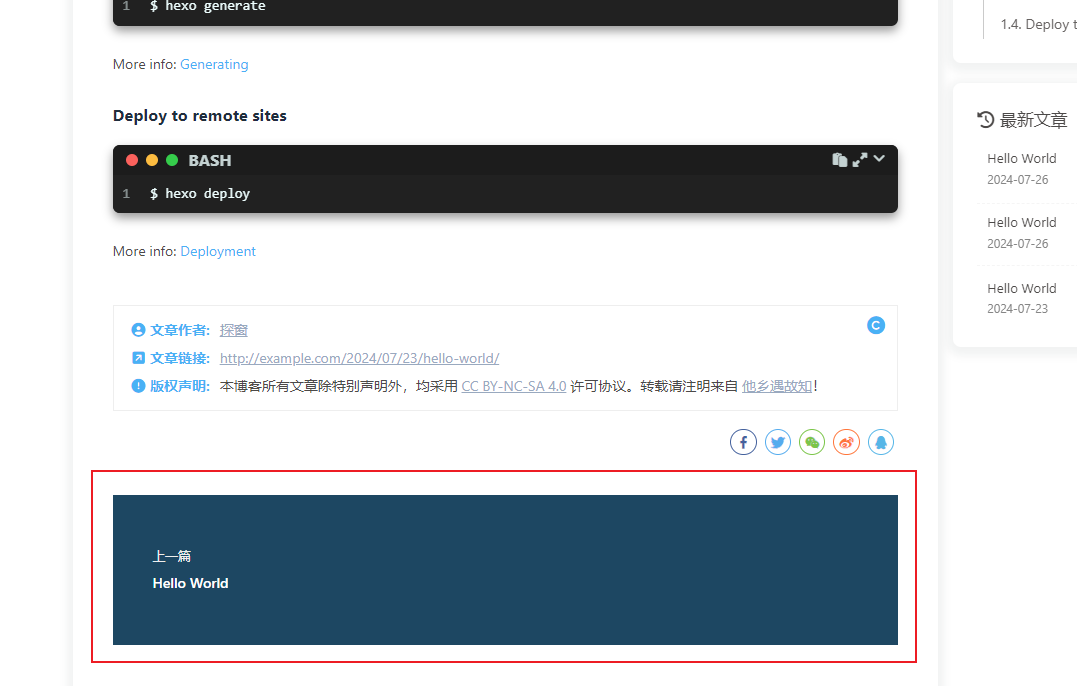
在文章最下面出现相关文章推荐。
编辑 themes/butterfly/_config.yml:
# 相关文章
related_post:
  enable: true
  limit: 6 # 显示的文章数量
  date_type: created # 或者 created 或 updated 文章日期显示创建日或者更新日
3.13 打赏
效果图:

给文章结尾设置打赏按钮,可以放上收款二维码。
编辑 themes/butterfly/_config.yml:
# 赞助/打赏
reward:
  enable: true
  text:
  QR_code:
    - img: /img/wechat.png
      link:
      text: wechat
    - img: /img/alipay.png
      link:
      text: alipay
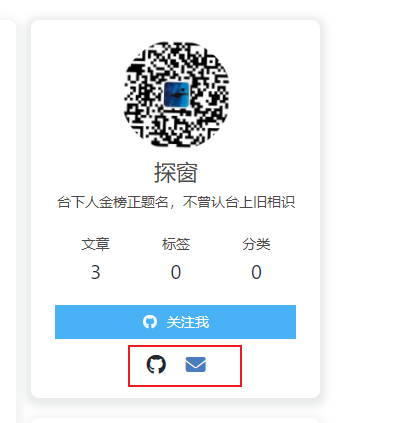
3.14 侧边栏样式
编辑 themes/butterfly/_config.yml:
-
调整侧边栏出现位置
aside: enable: true hide: false button: true mobile: true # 在移动设备上显示 position: right # left or right -
个人信息
# Social Settings (社交图标设置)
# 正式:
#   icon: 链接 || 描述 || 颜色
social:
  fab fa-github: https://github.com/xxxxx || Github || '#24292e'
  fas fa-envelope: mailto:xxxxxx@gmail.com || Email || '#4a7dbe'
效果图:
3.15 公告栏设置
效果图:
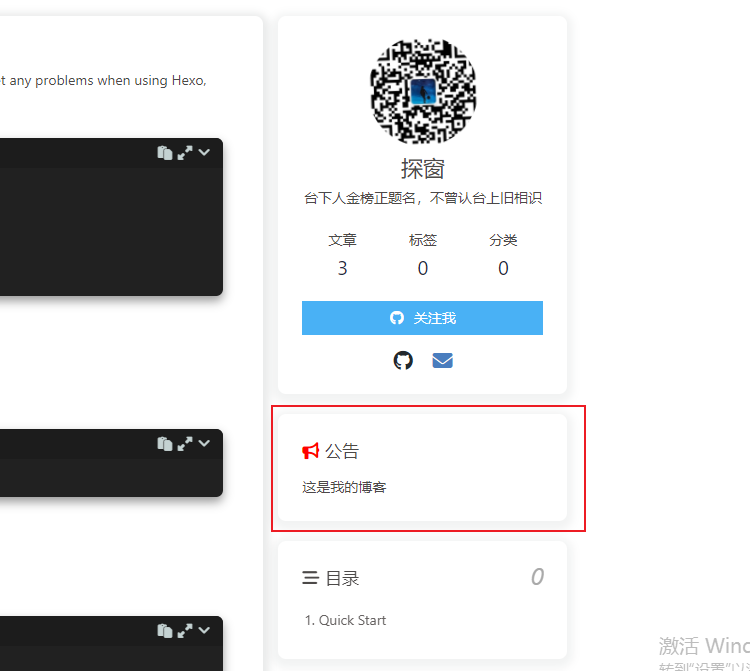
编辑 themes/butterfly/_config.yml:
card_announcement:
  enable: true
  content: 这是我的博客  #修改公告栏信息
3.16 Toc目录
效果图:
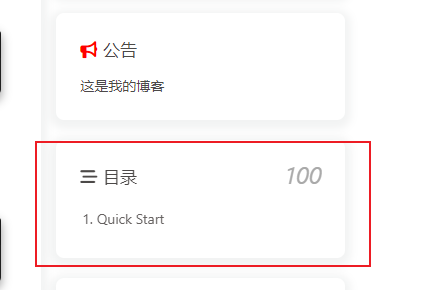
编辑 themes/butterfly/_config.yml:
# toc (目录)
toc:
  post: true
  page: false
  number: true
  expand: false
  style_simple: false # 针对文章
  scroll_percent: true
3.17 字数统计
效果图:

-
安装统计组件
npm install hexo-wordcount --save or yarn add hexo-wordcount -
编辑
themes/butterfly/_config.yml:# 字数统计 # 见 https://butterfly.js.org/posts/ceeb73f/#字数统计 wordcount: enable: true post_wordcount: true min2read: true total_wordcount: true
3.18 文章分享功能
share.js、addtoany二选一开启。
编辑 themes/butterfly/_config.yml:
# 分享系统
# --------------------------------------

# Share.js
# https://github.com/overtrue/share.js
sharejs:
  enable: true
  sites: facebook,twitter,wechat,weibo,qq

# AddToAny
# https://www.addtoany.com/
addtoany:
  enable: false
  item: facebook,twitter,wechat,sina_weibo,facebook_messenger,email,copy_link
效果图:
Share.js
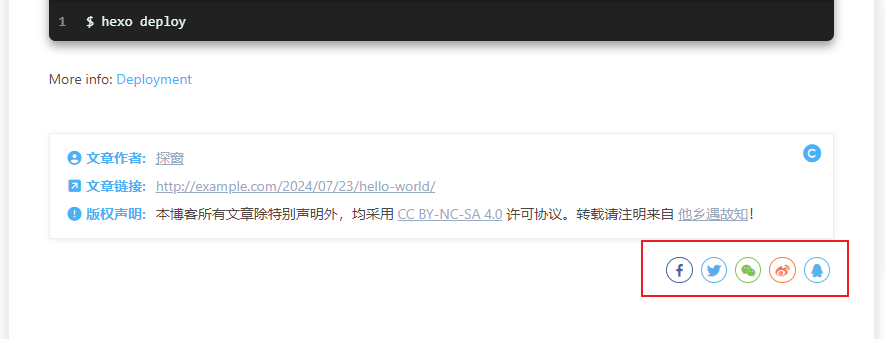
AddToAny

3.19 背景特效/美化
编辑 themes/butterfly/_config.yml:
1. 鼠标点击效果
有烟火特效、爱心特效、文字特效,选择其中一个将enable设置为true就可以。
# 鼠标点击效果:烟花特效
fireworks:
  enable: false
  zIndex: 9999 # -1 或 9999
  mobile: false

# 鼠标点击效果:爱心
click_heart:
  enable: false
  mobile: false

# 鼠标点击效果:文字
clickShowText:
  enable: false
  text:
    # - 我
    # - 爱
    # - 你
  fontSize: 15px
  random: false
  mobile: false
2. 打字效果
# 打字效果
# https://github.com/disjukr/activate-power-mode
activate_power_mode:
  enable: false
  colorful: true # 开启粒子动画(发光特效)
  shake: true # 开启 shake(抖动特效)
  mobile: false
3. 背景特效
# canvas_ribbon (静止彩带背景)
# 见: https://github.com/hustcc/ribbon.js
canvas_ribbon:
  enable: false
  size: 150
  alpha: 0.6
  zIndex: -1
  click_to_change: false
  mobile: false

# Fluttering Ribbon (动态彩带)
canvas_fluttering_ribbon:
  enable: false
  mobile: false

# canvas_nest
# https://github.com/hustcc/canvas-nest.js
canvas_nest:
  enable: false
  color: '0,0,255' # 线条的颜色,默认: '0,0,0';RGB 值:(R,G,B)。(注意:用 ',' 分隔)
  opacity: 0.7 # 线条的透明度 (0~1),默认: 0.5
  zIndex: -1 # 背景的 z-index 属性,默认: -1
  count: 99 # 线条的数量,默认: 99
  mobile: false
4. 自定义背景主题色
# 美化/效果
# --------------------------------------

# 自定义主题颜色
# 注意:颜色值必须用双引号引起来,如 "#000",否则可能会导致错误!

# theme_color:
#   enable: true
#   main: "#49B1F5"
#   paginator: "#00c4b6"
#   button_hover: "#FF7242"
#   text_selection: "#00c4b6"
#   link_color: "#99a9bf"
#   meta_color: "#858585"
#   hr_color: "#A4D8FA"
#   code_foreground: "#F47466"
#   code_background: "rgba(27, 31, 35, .05)"
#   toc_color: "#00c4b6"
#   blockquote_padding_color: "#49b1f5"
#   blockquote_background_color: "#49b1f5"
#   scrollbar_color: "#49b1f5"
#   meta_theme_color_light: "ffffff"
#   meta_theme_color_dark: "#0d0d0d"
5. 渐变背景
默认显示白色,可设置图片或者颜色
# 设置网站背景
# 可以设置为颜色或图片(可设置图片 或者 颜色)
# 图片格式:url(http://xxxxxx.com/xxx.jpg)
background:
增加背景渐变色步骤:
-
在
themes/butterfly/source/css/目录下创建css文件background.css:#web_bg { background: -webkit-linear-gradient( 0deg, rgba(247, 149, 51, 0.1) 0, rgba(243, 112, 85, 0.1) 15%, rgba(239, 78, 123, 0.1) 30%, rgba(161, 102, 171, 0.1) 44%, rgba(80, 115, 184, 0.1) 58%, rgba(16, 152, 173, 0.1) 72%, rgba(7, 179, 155, 0.1) 86%, rgba(109, 186, 130, 0.1) 100% ); background: -moz-linear-gradient( 0deg, rgba(247, 149, 51, 0.1) 0, rgba(243, 112, 85, 0.1) 15%, rgba(239, 78, 123, 0.1) 30%, rgba(161, 102, 171, 0.1) 44%, rgba(80, 115, 184, 0.1) 58%, rgba(16, 152, 173, 0.1) 72%, rgba(7, 179, 155, 0.1) 86%, rgba(109, 186, 130, 0.1) 100% ); background: -o-linear-gradient( 0deg, rgba(247, 149, 51, 0.1) 0, rgba(243, 112, 85, 0.1) 15%, rgba(239, 78, 123, 0.1) 30%, rgba(161, 102, 171, 0.1) 44%, rgba(80, 115, 184, 0.1) 58%, rgba(16, 152, 173, 0.1) 72%, rgba(7, 179, 155, 0.1) 86%, rgba(109, 186, 130, 0.1) 100% ); background: -ms-linear-gradient( 0deg, rgba(247, 149, 51, 0.1) 0, rgba(243, 112, 85, 0.1) 15%, rgba(239, 78, 123, 0.1) 30%, rgba(161, 102, 171, 0.1) 44%, rgba(80, 115, 184, 0.1) 58%, rgba(16, 152, 173, 0.1) 72%, rgba(7, 179, 155, 0.1) 86%, rgba(109, 186, 130, 0.1) 100% ); background: linear-gradient( 90deg, rgba(247, 149, 51, 0.1) 0, rgba(243, 112, 85, 0.1) 15%, rgba(239, 78, 123, 0.1) 30%, rgba(161, 102, 171, 0.1) 44%, rgba(80, 115, 184, 0.1) 58%, rgba(16, 152, 173, 0.1) 72%, rgba(7, 179, 155, 0.1) 86%, rgba(109, 186, 130, 0.1) 100% ); } -
在
themes/butterfly/_config.yml中添加样式文件引入# 注入 # 在头部 ('<head>' 标签之前) 和底部 ('<body>' 标签之前) 插入代码 # 在头部 <head> 之前 和 底部 <body> 之前插入代码 inject: head: - <link rel="stylesheet" href="/css/background.css"> bottom: # - <script src="xxxx"></script> -
如果背景色不生效,在
_config.butterfly.yml设置:# 设置网站背景 # 可以设置为颜色或图片(可设置图片 或者 颜色) # 图片格式:url(http://xxxxxx.com/xxx.jpg) background: '#efefef'
6. footer 背景
footer 的背景,当设置 false 时,将与主题色一致。
# 页脚背景
footer_bg: true
4. 其他
另外,对以下内容感兴趣的同学请移步对应教程:


 1万+
1万+

 被折叠的 条评论
为什么被折叠?
被折叠的 条评论
为什么被折叠?
 到【灌水乐园】发言


