一、下载Ubuntu镜像文件
这里我选择国内清华源下载ubuntu镜像文件
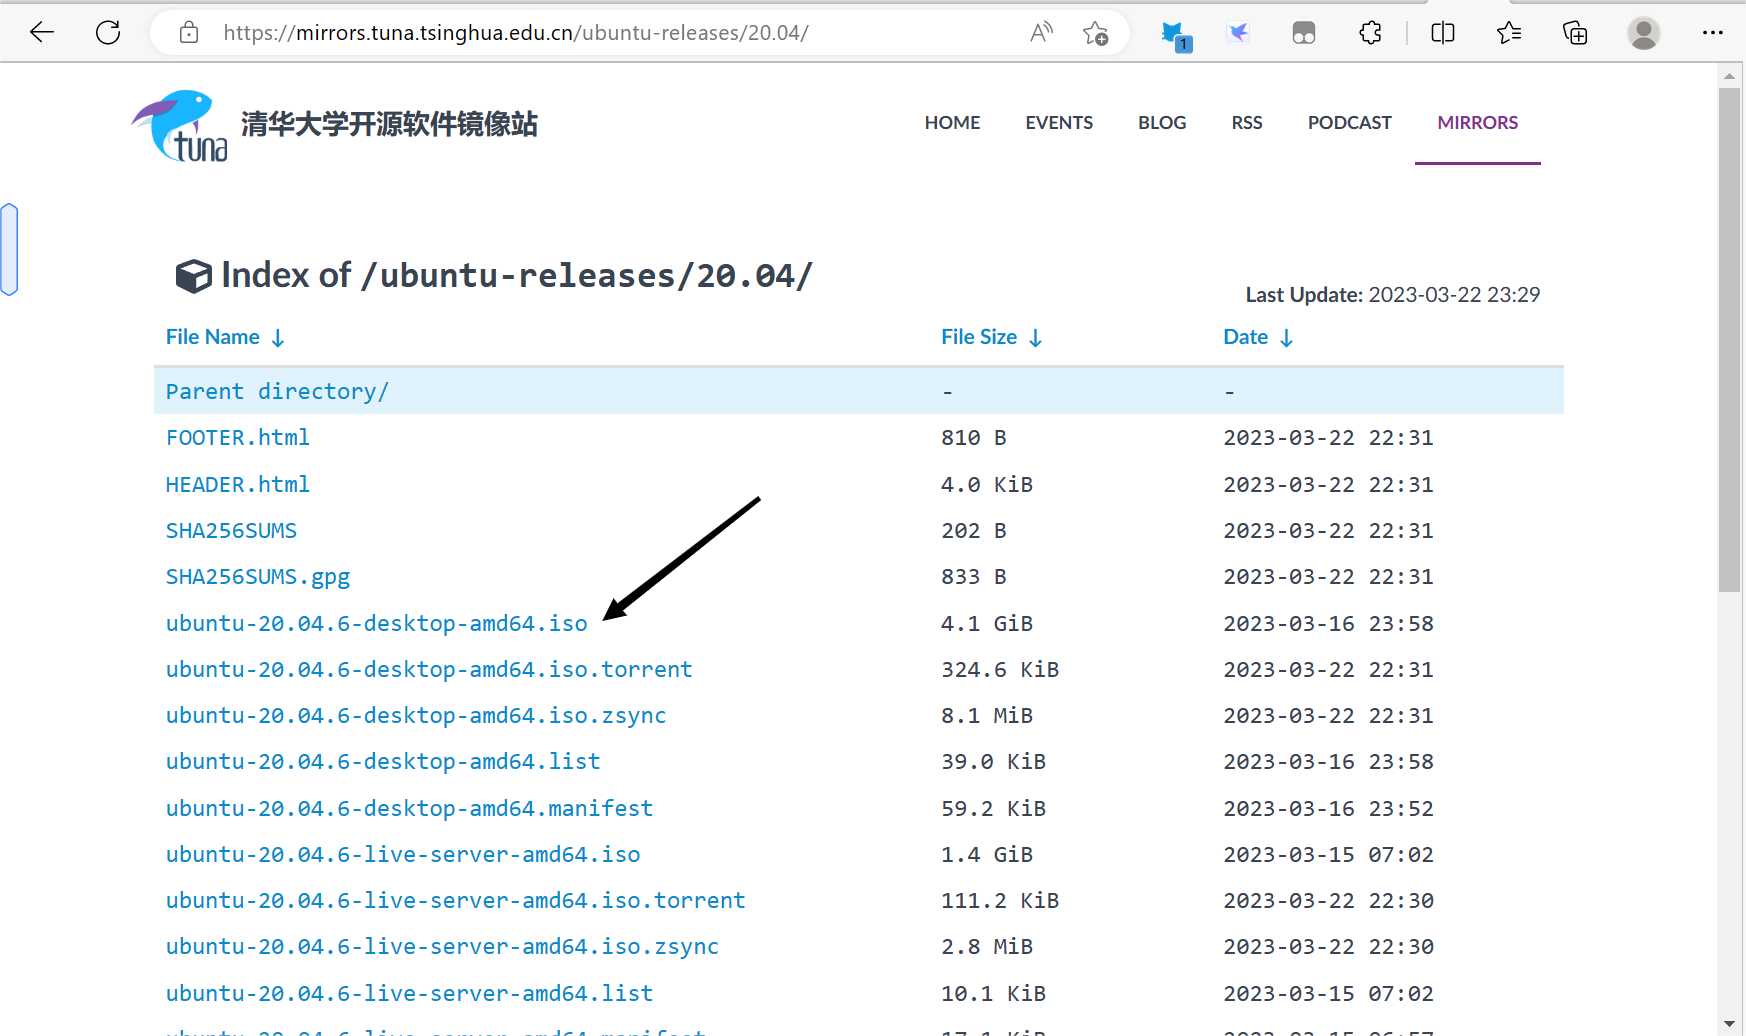
步骤一:清华源下载地址:Index of /ubuntu-releases/20.04/ | 清华大学开源软件镜像站 | Tsinghua Open Source Mirror
步骤二:点击ubuntu-20.04.6-desktop-amd64.iso进行下载
![](https://img-blog.csdnimg.cn/img_convert/f9c5b7fc89518120826af9992020edfb.png)
2.下载好后,记住下载文件的保存路径,后面在vritualbox上会用到
二、进行虚拟机的配置
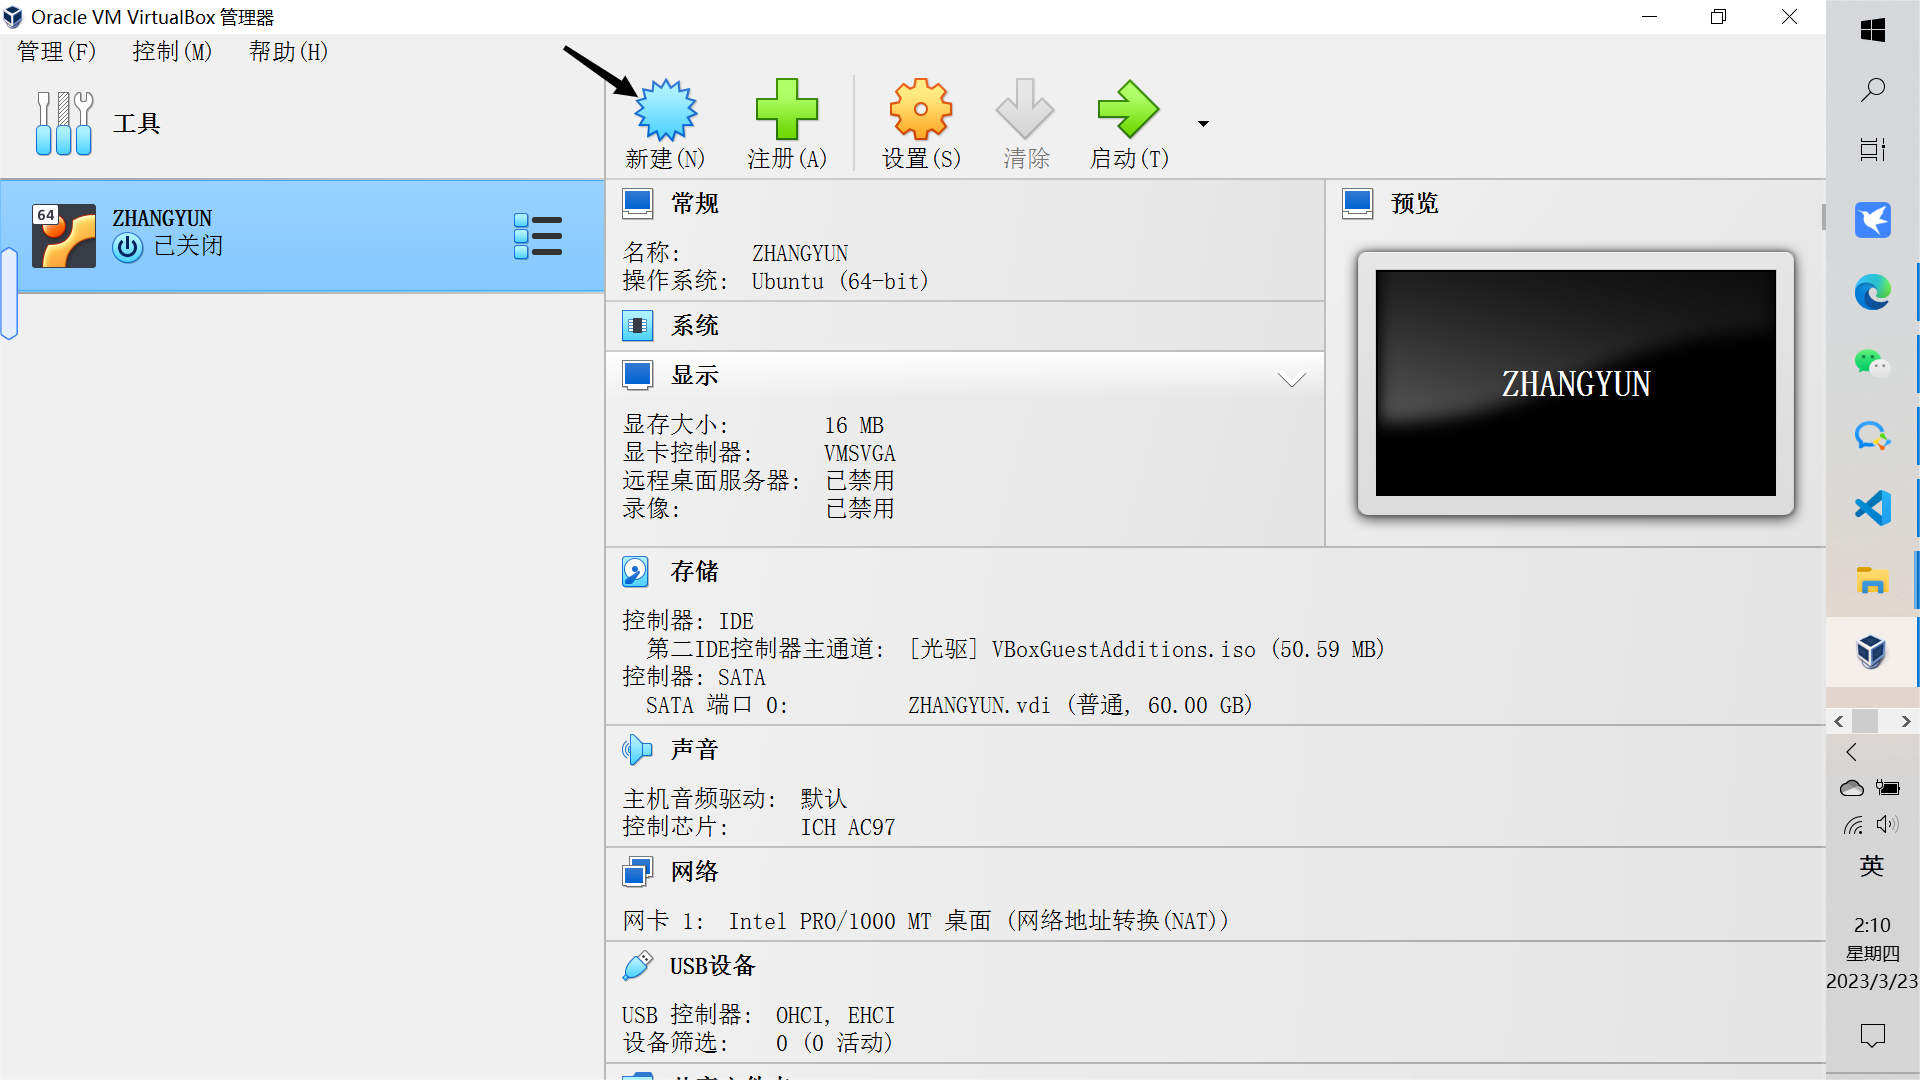
步骤一:双击virtualbox打开软件,刚打开的界面跟我不太一样(因为我这里是已经安装好的),找到新建(N),点击它
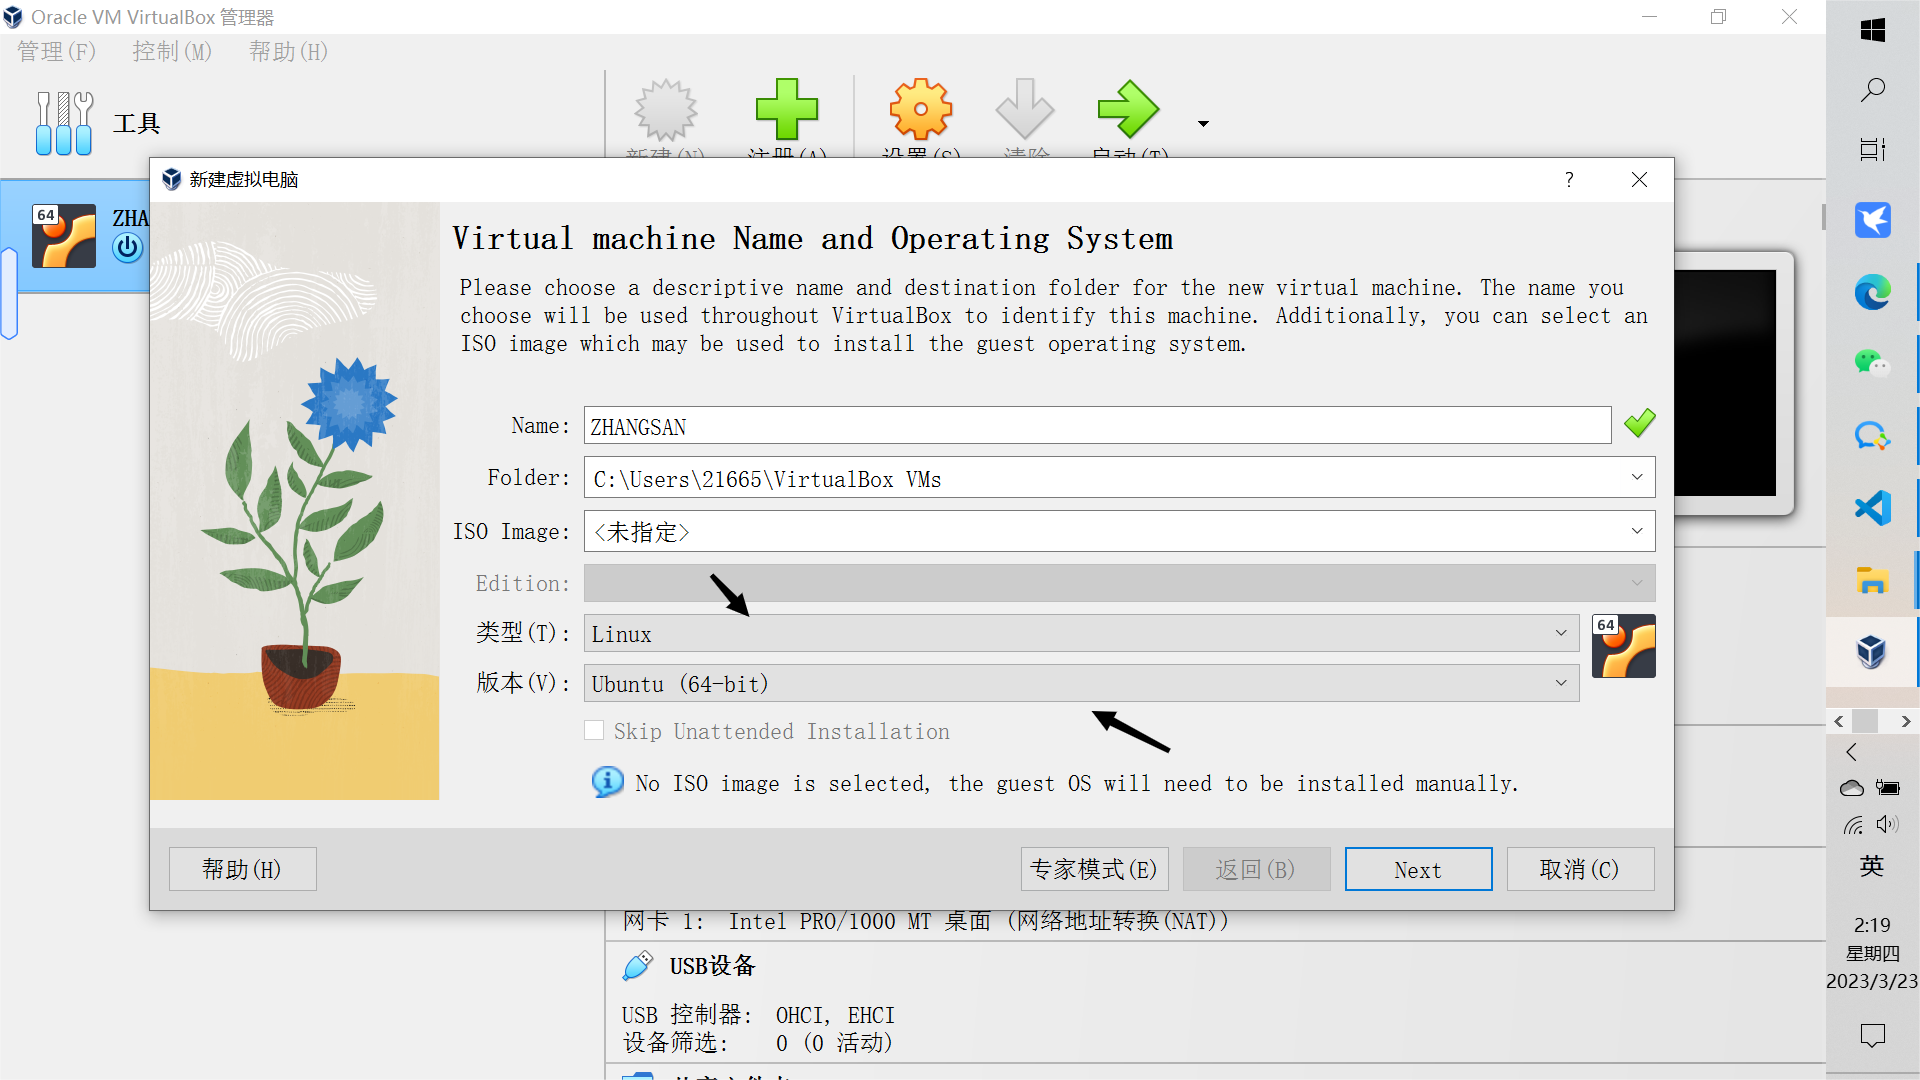
![](https://img-blog.csdnimg.cn/img_convert/874424d5696ef5229edf8667814a8404.png)
步骤二:然后就会出现这个界面
![](https://img-blog.csdnimg.cn/img_convert/f072a95d2ba67eb610bf5a117eabbff2.png)
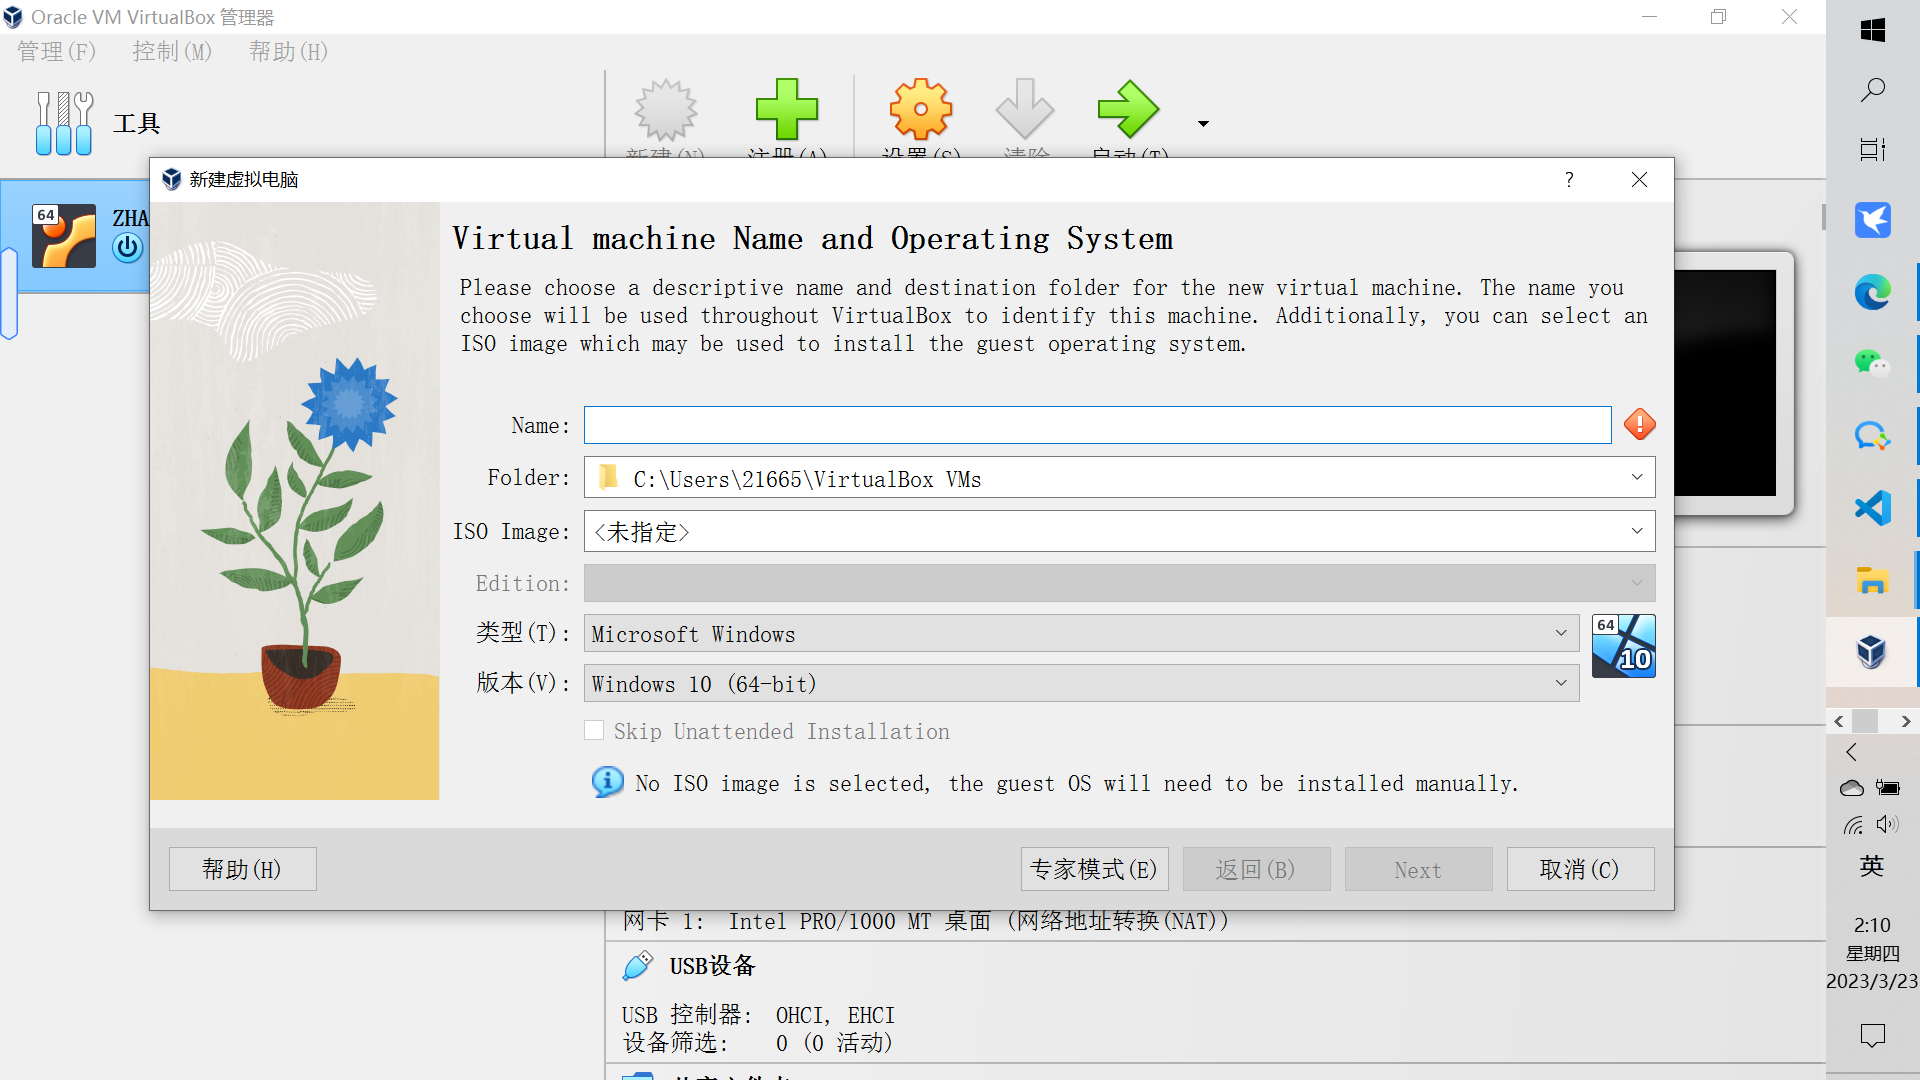
步骤三:Name的话你可以随便取个名字(最好是英文)
![](https://img-blog.csdnimg.cn/img_convert/6aafeac395cba7bc3d86202f4c1a6195.png)
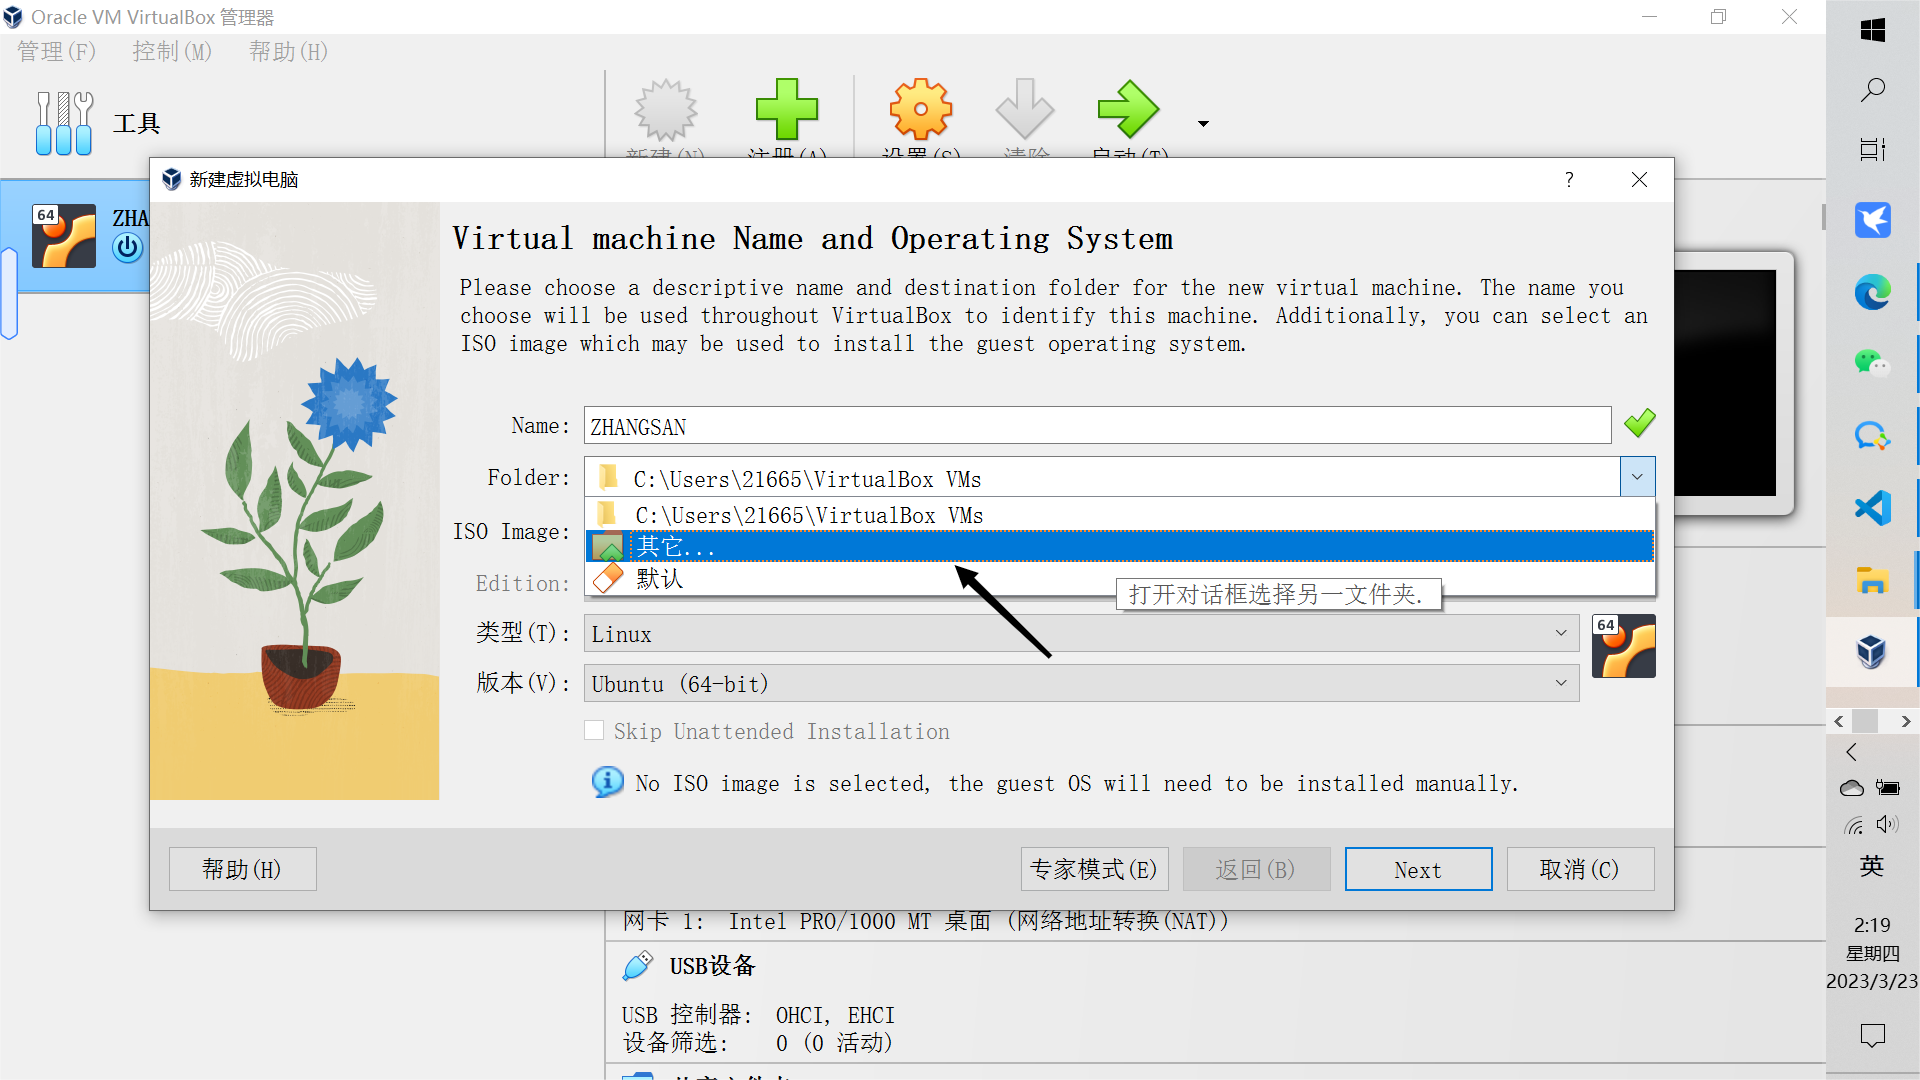
步骤四:(Folder)文件保存位置选择其它,然后在其他盘上建立一个文件夹
![](https://img-blog.csdnimg.cn/img_convert/9153e903045abe3f2f03dea81669908c.png)
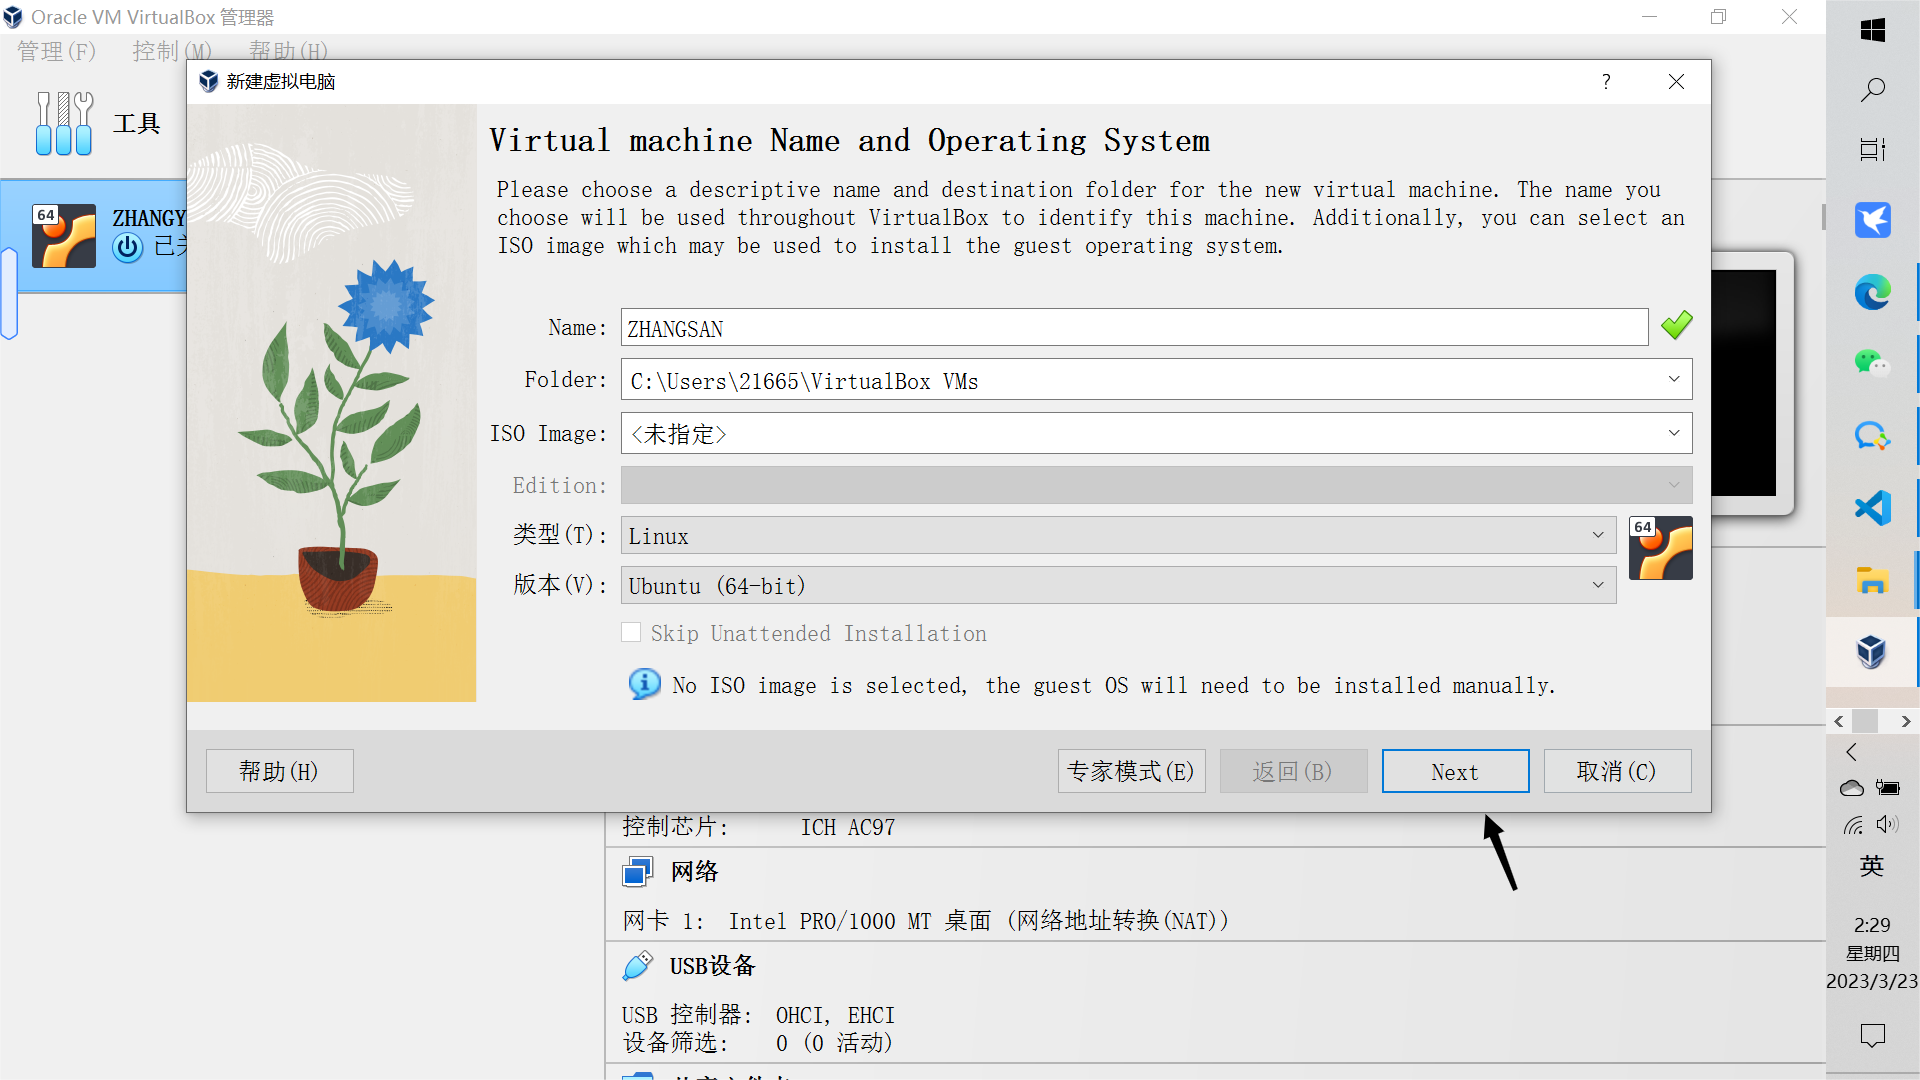
步骤五:将类型选择为Linux,将版本选择为Ubuntu(64-bit),然后点击Next
![](https://img-blog.csdnimg.cn/img_convert/03863a47a797a6ef46c6fcef5250f207.png)
![](https://img-blog.csdnimg.cn/img_convert/af886298e432db2bff77728dc26a1a70.png)
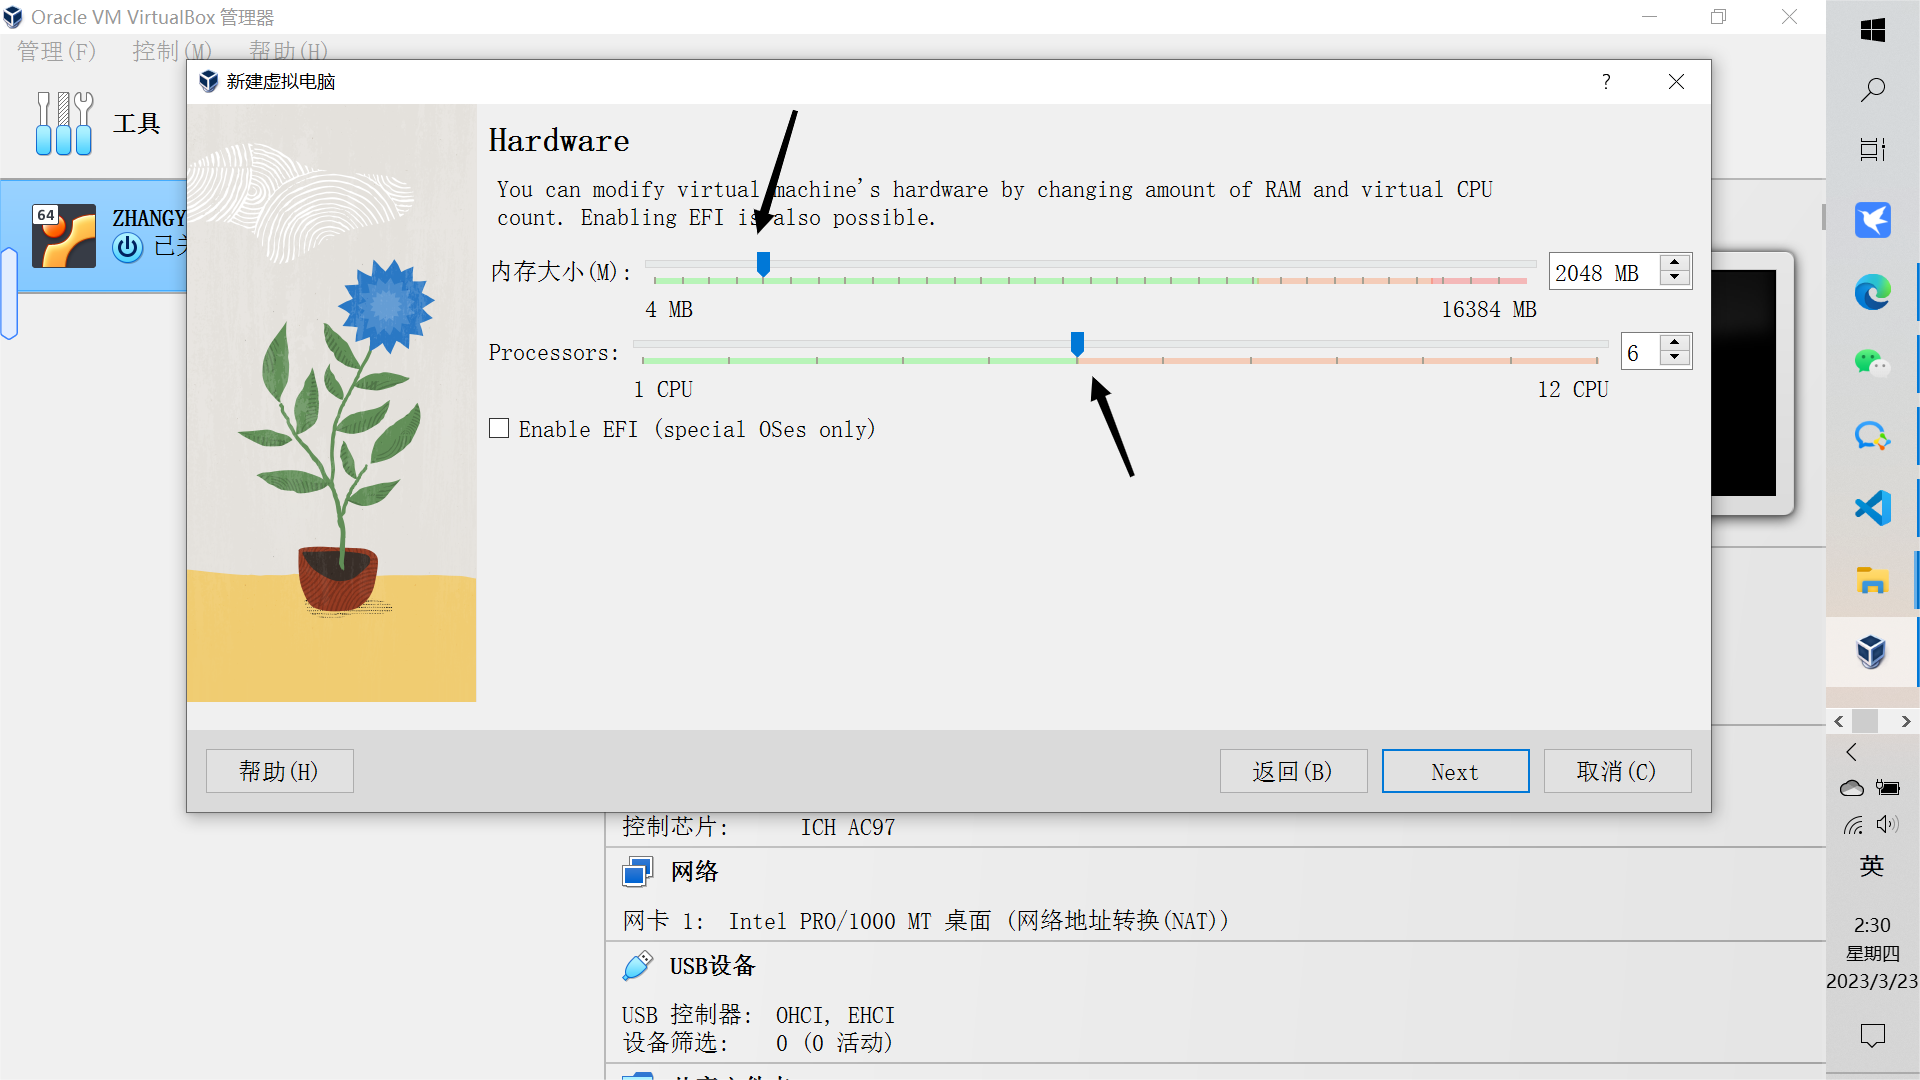
步骤五:内存大小建议选择4096MB或者8192MB,你也可以设置大点,CPU建议选择6颗
![](https://img-blog.csdnimg.cn/img_convert/3359f9f7bb0dff1f057931aec2babc35.png)
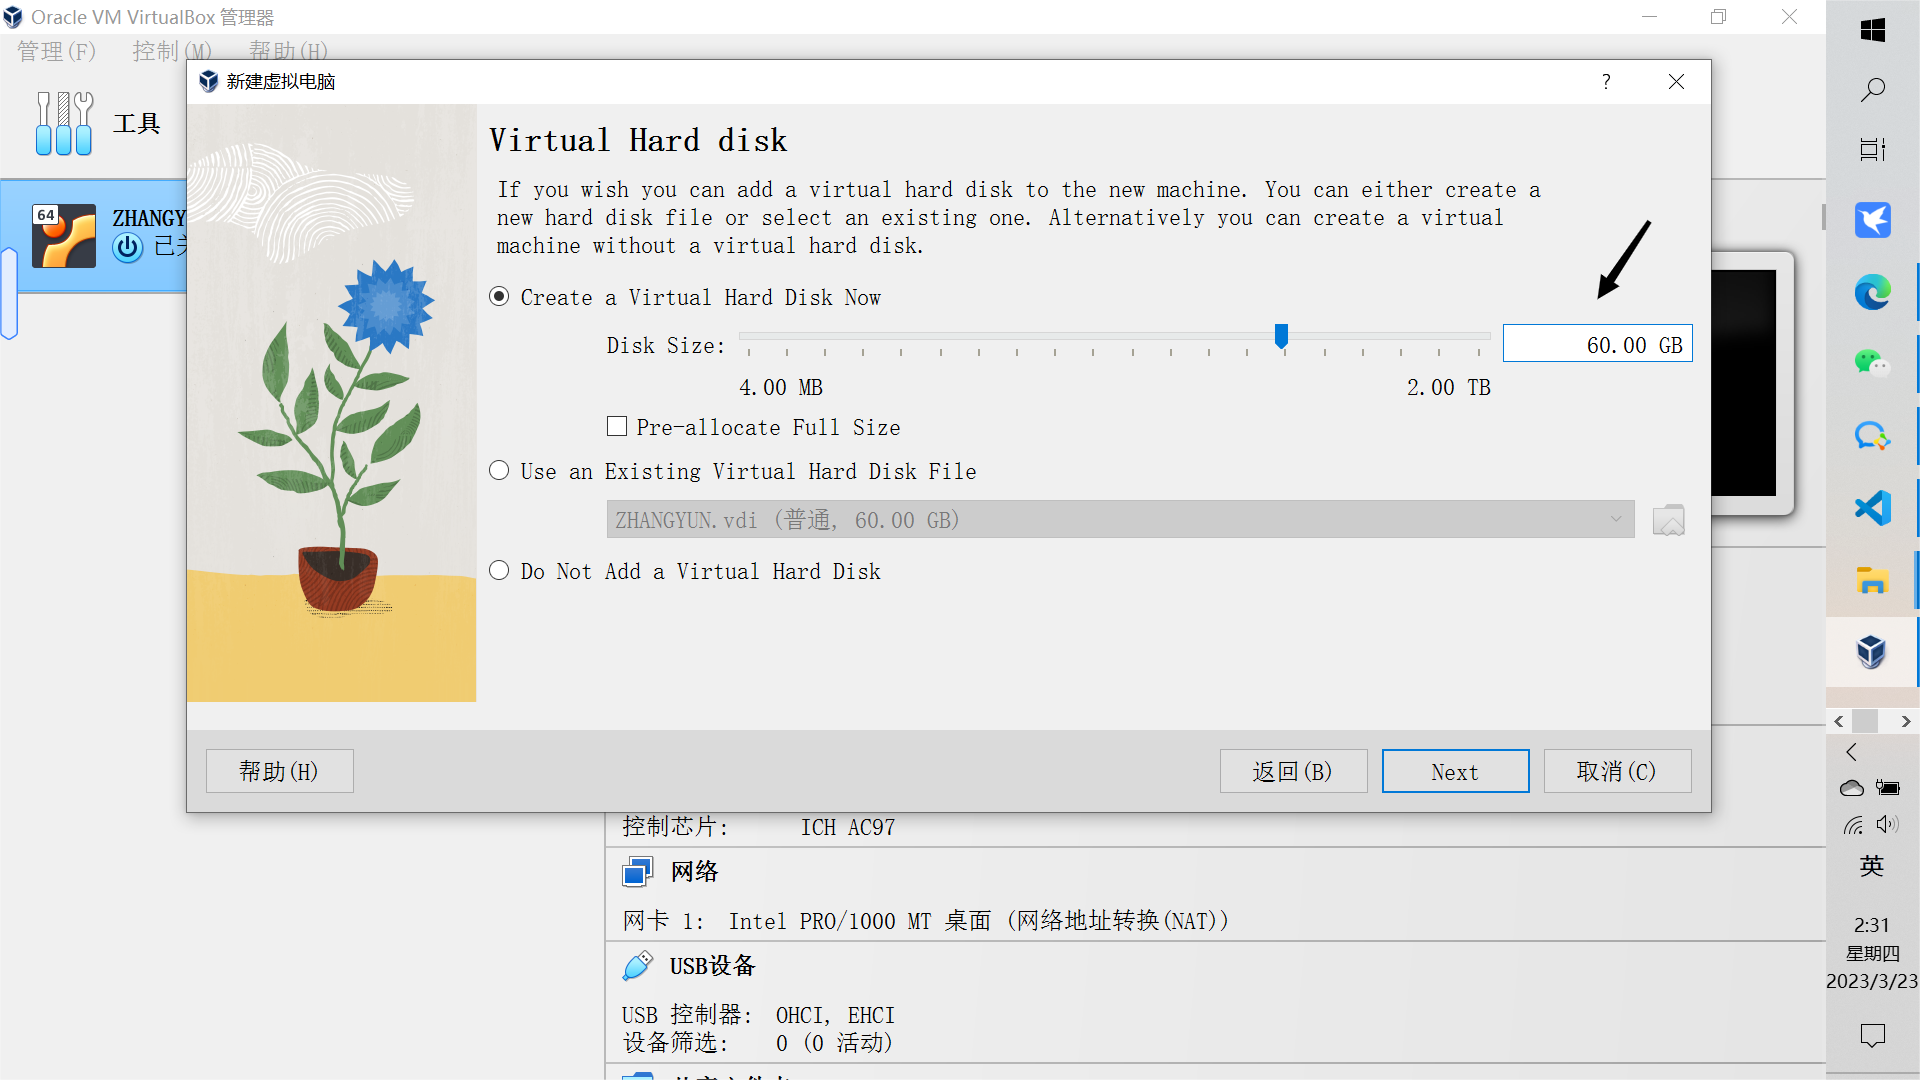
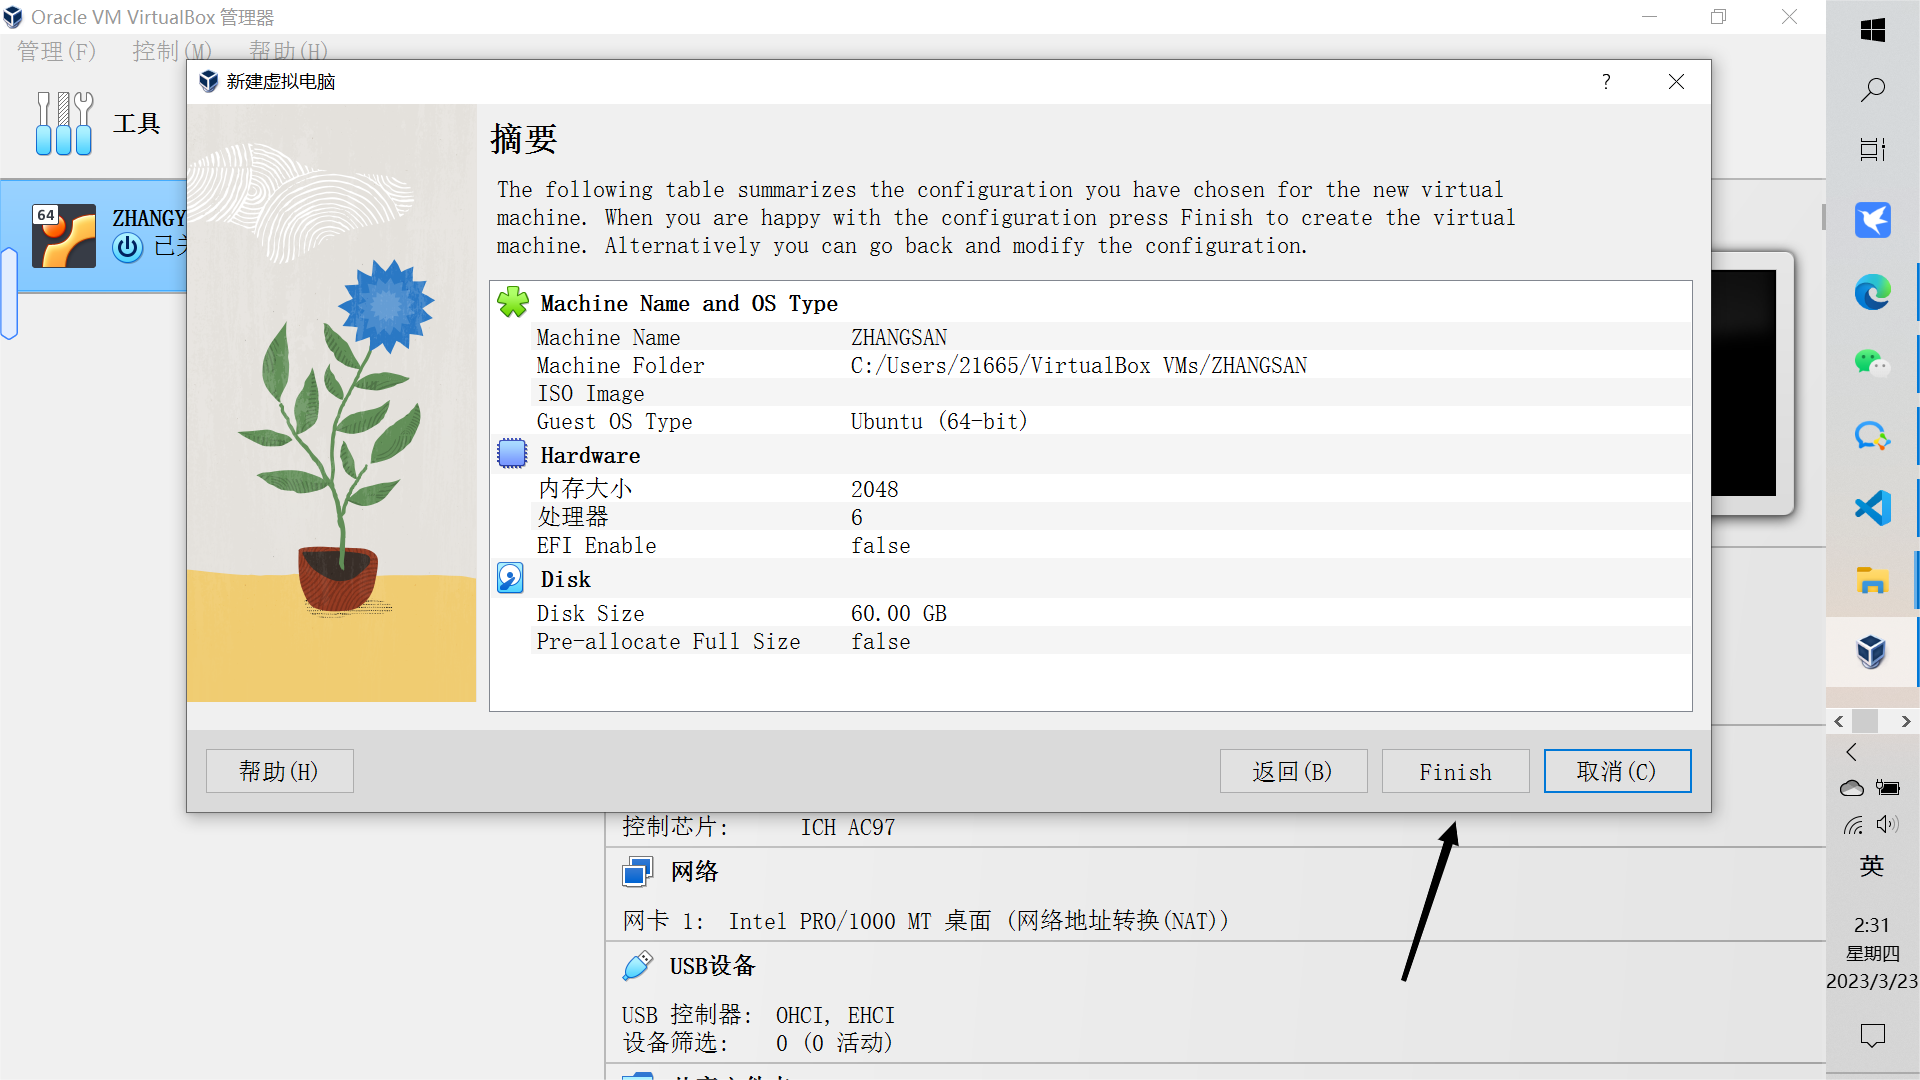
步骤六:硬盘内存设置成60.00GB,设置好后再点击Finish
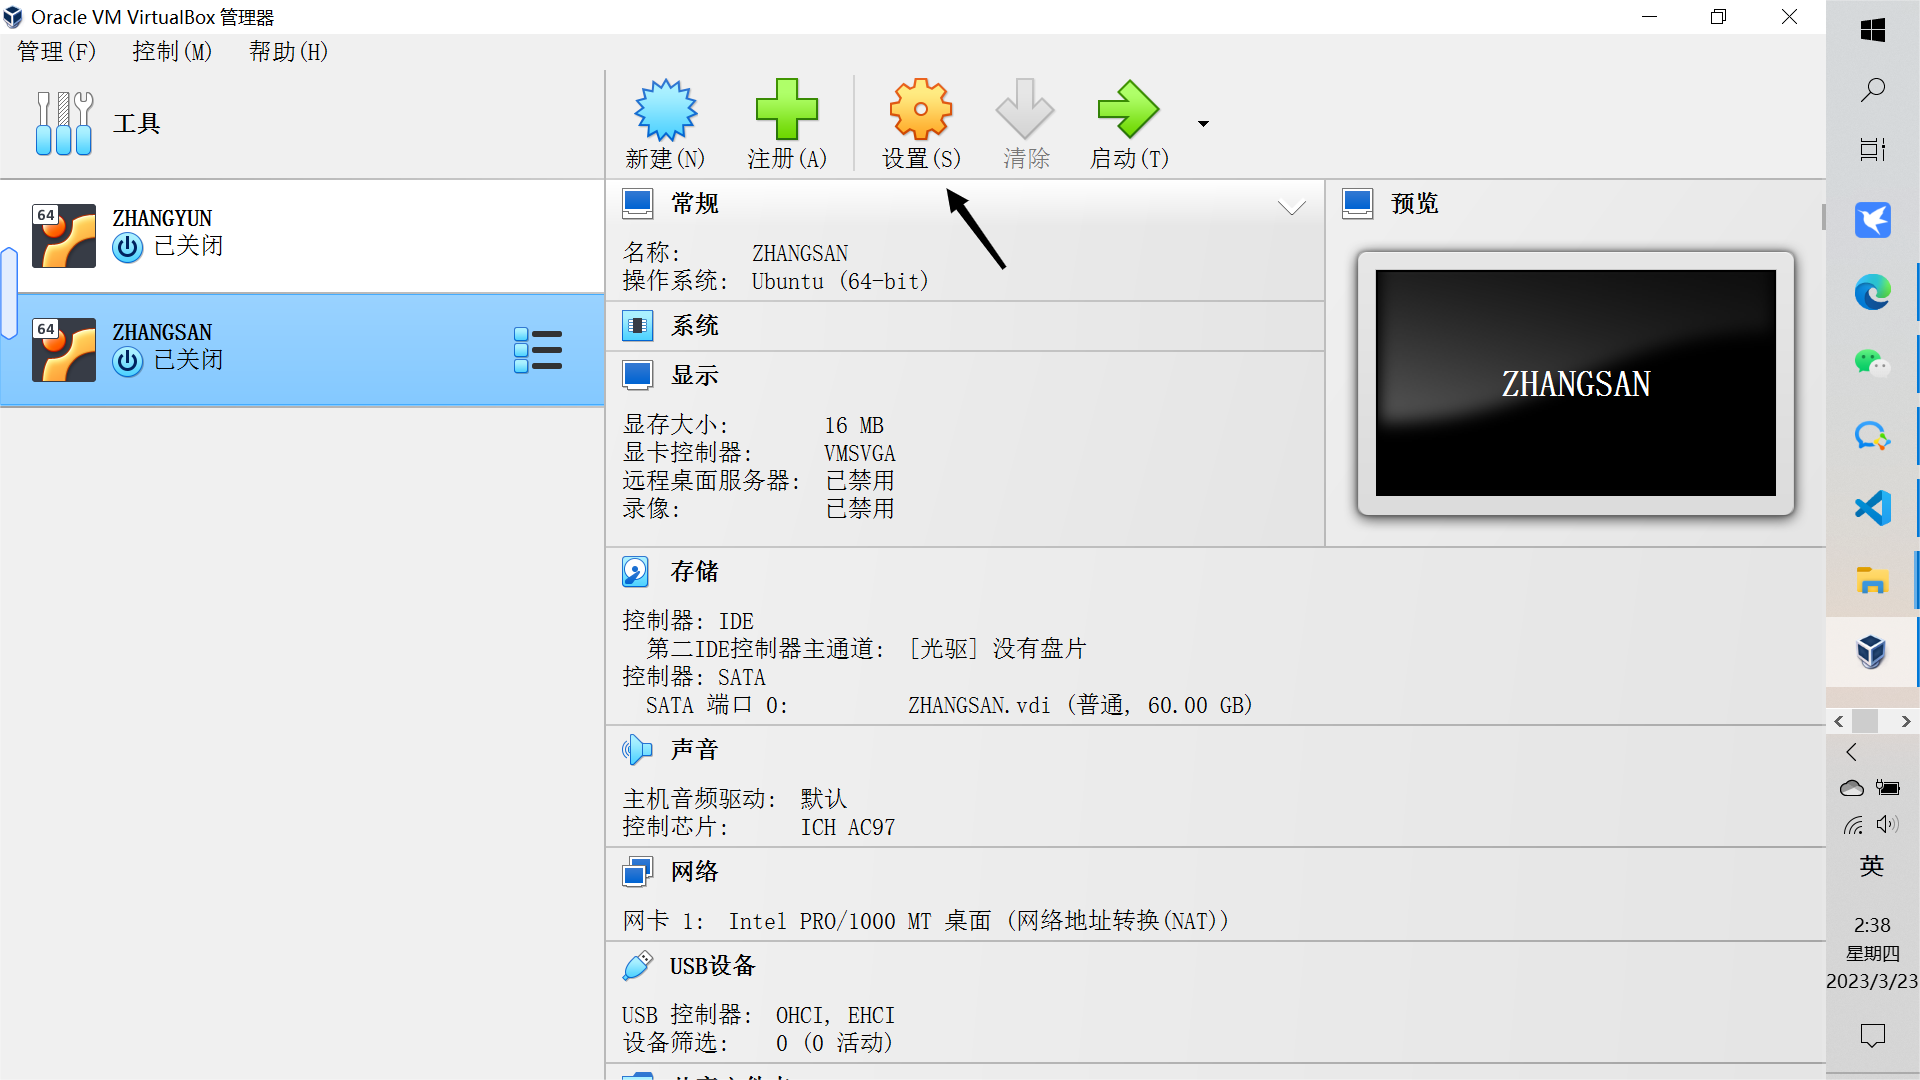
![](https://img-blog.csdnimg.cn/img_convert/166f761e643569c454992ac1ac49592e.png)
![](https://img-blog.csdnimg.cn/img_convert/94fe7c25392feccc2af34f5148f0c49d.png)
步骤七:(1)、点击设置(s)
![](https://img-blog.csdnimg.cn/img_convert/effc8f427b456bfec48ec28ad1ff9423.png)
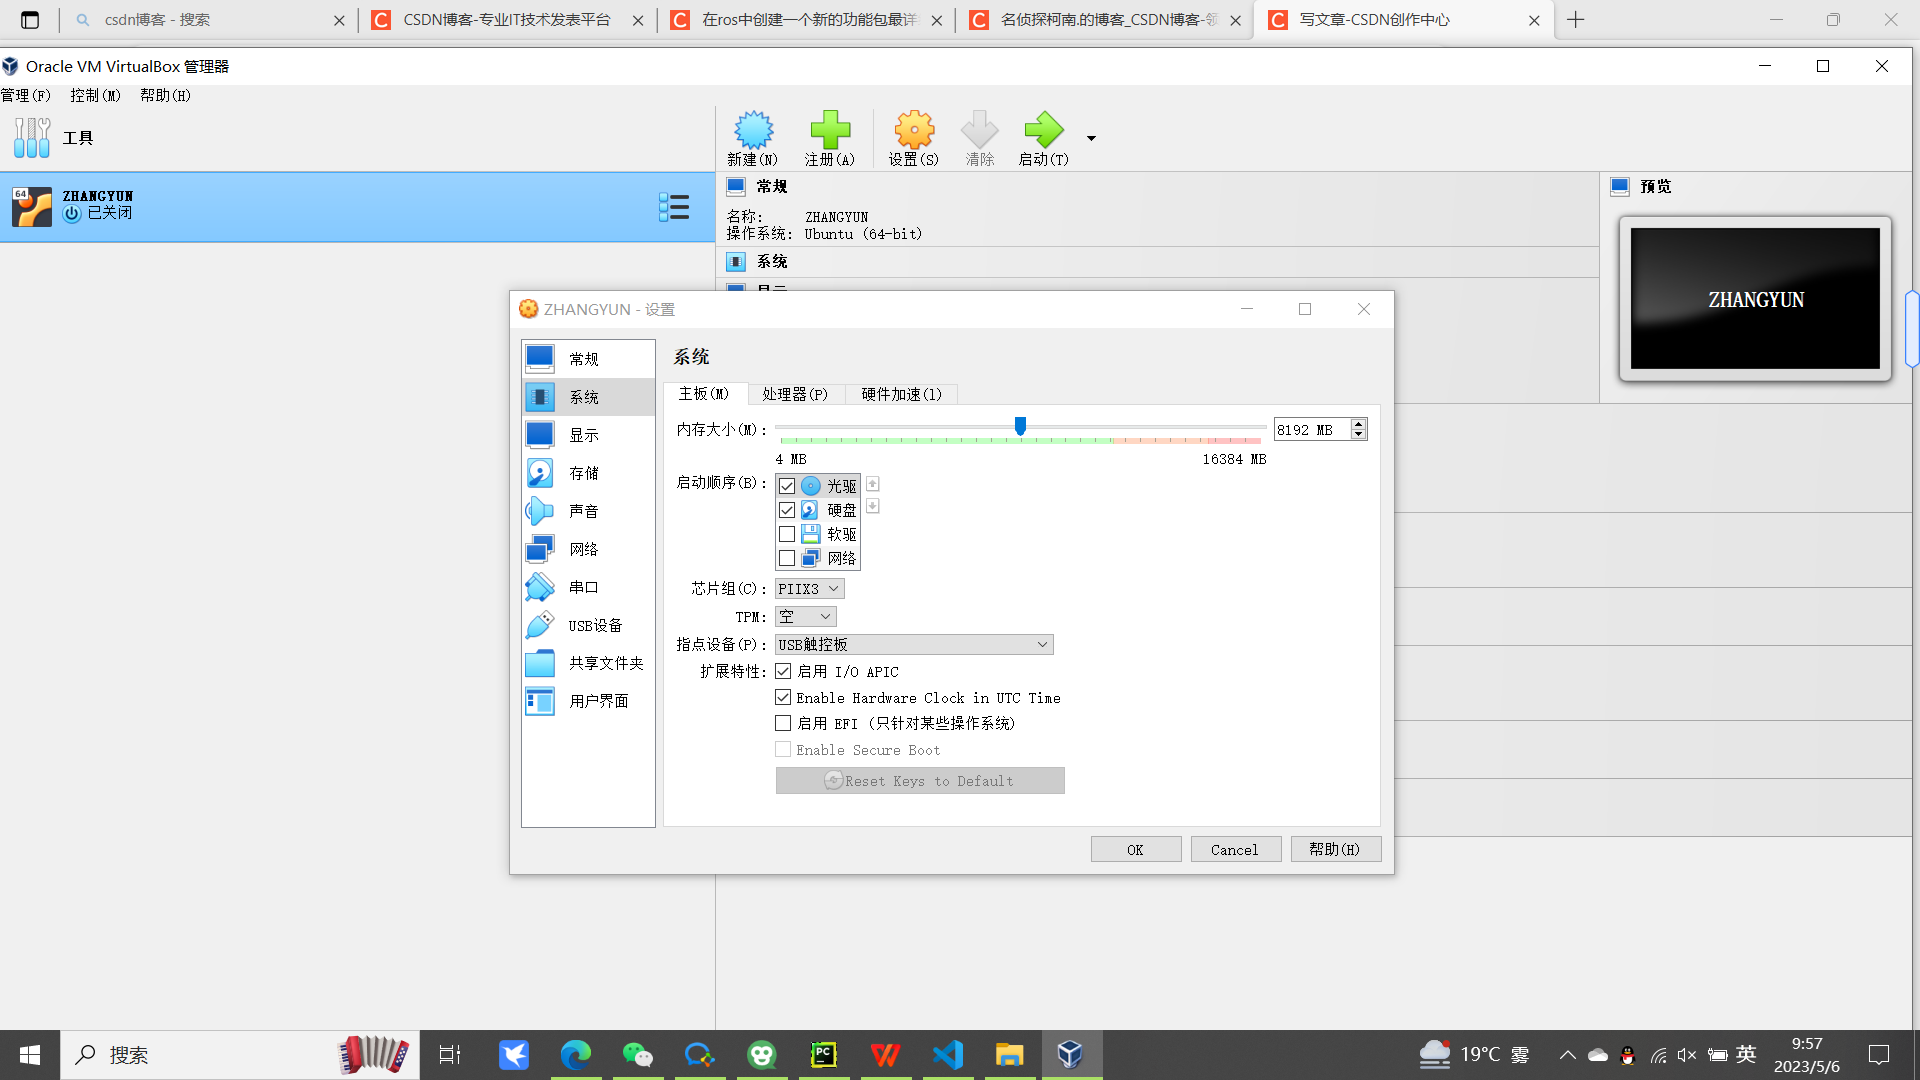
(2)、点击系统,将软驱的勾去掉,然后点击箭头将光驱的顺序放在第一位
![](https://img-blog.csdnimg.cn/img_convert/9411a62eb06d071ea445c34120fbed02.png)
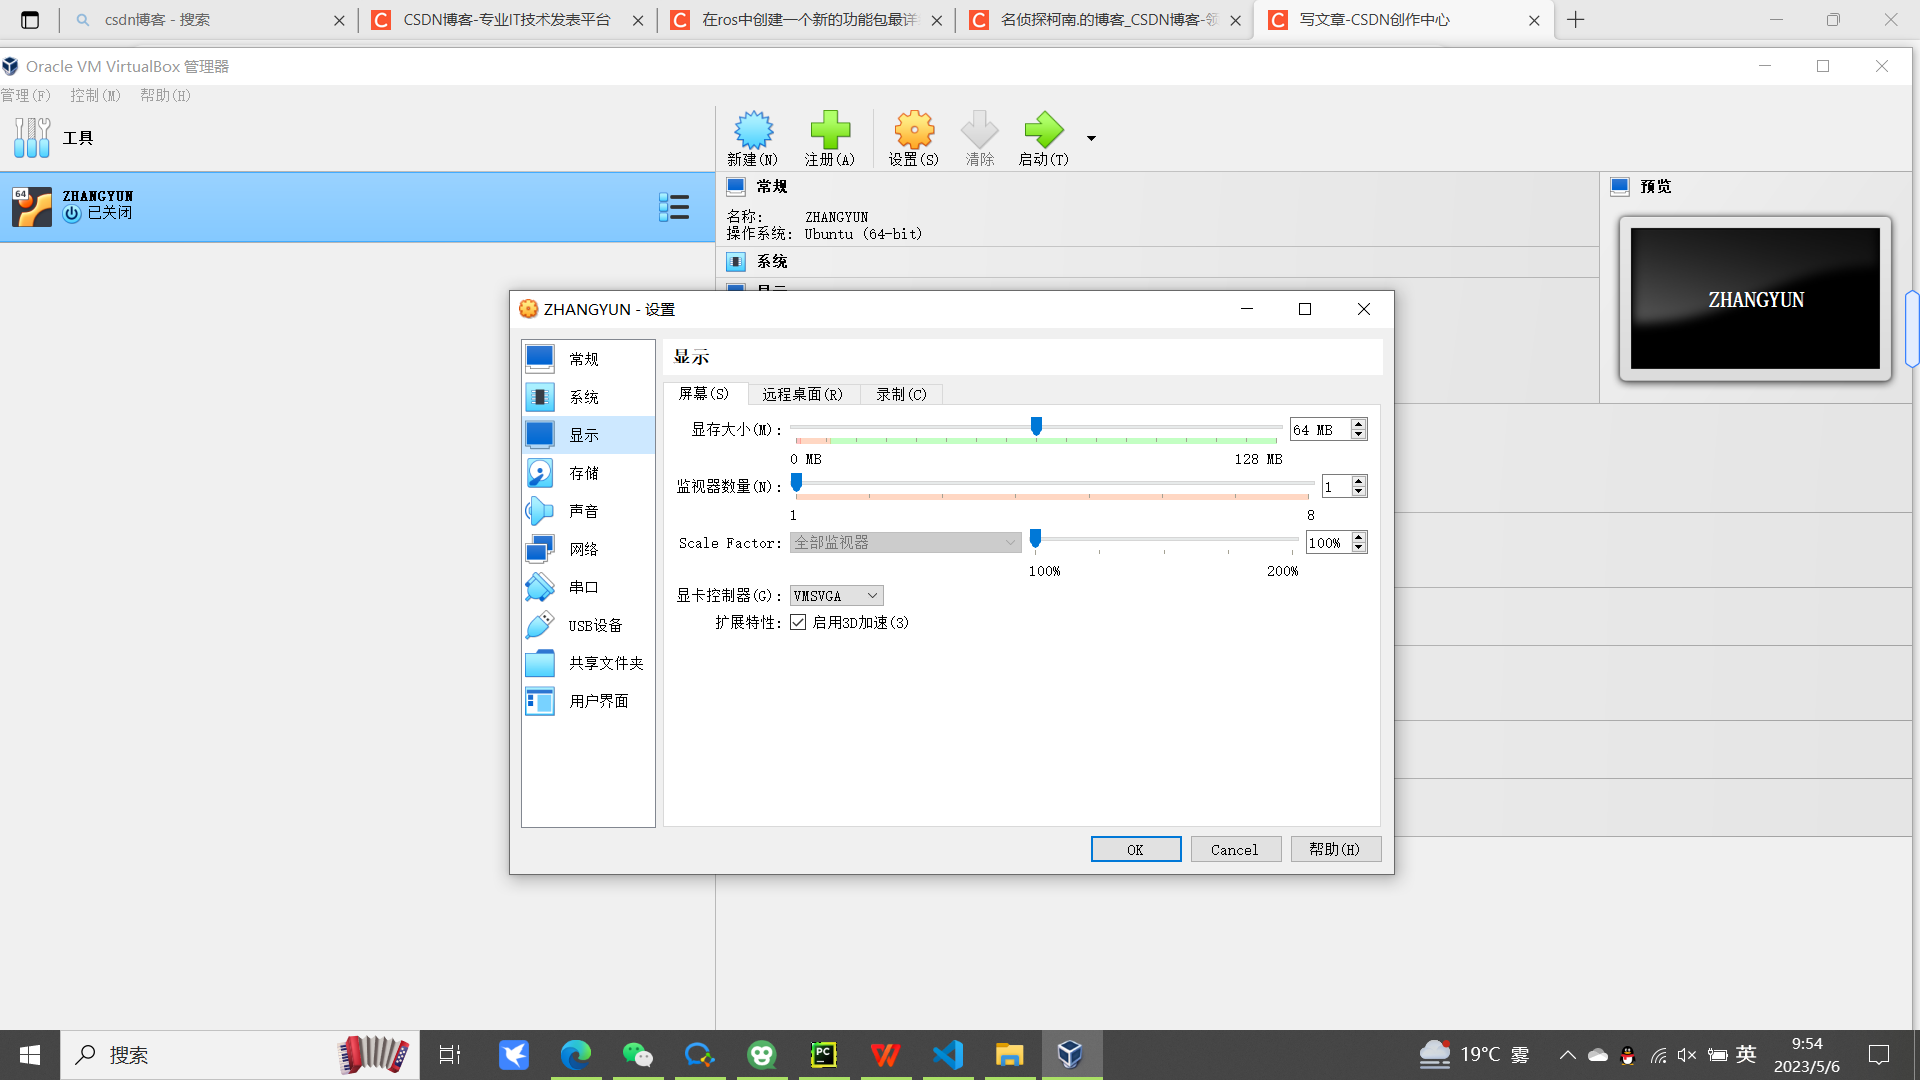
(3) 点击显示,再点击屏幕,显存大小改为64MB,再把3D硬件加速打开,把框里打上勾
![](https://img-blog.csdnimg.cn/img_convert/b0eee99b741f2b18b2b20fc6e3adefba.png)
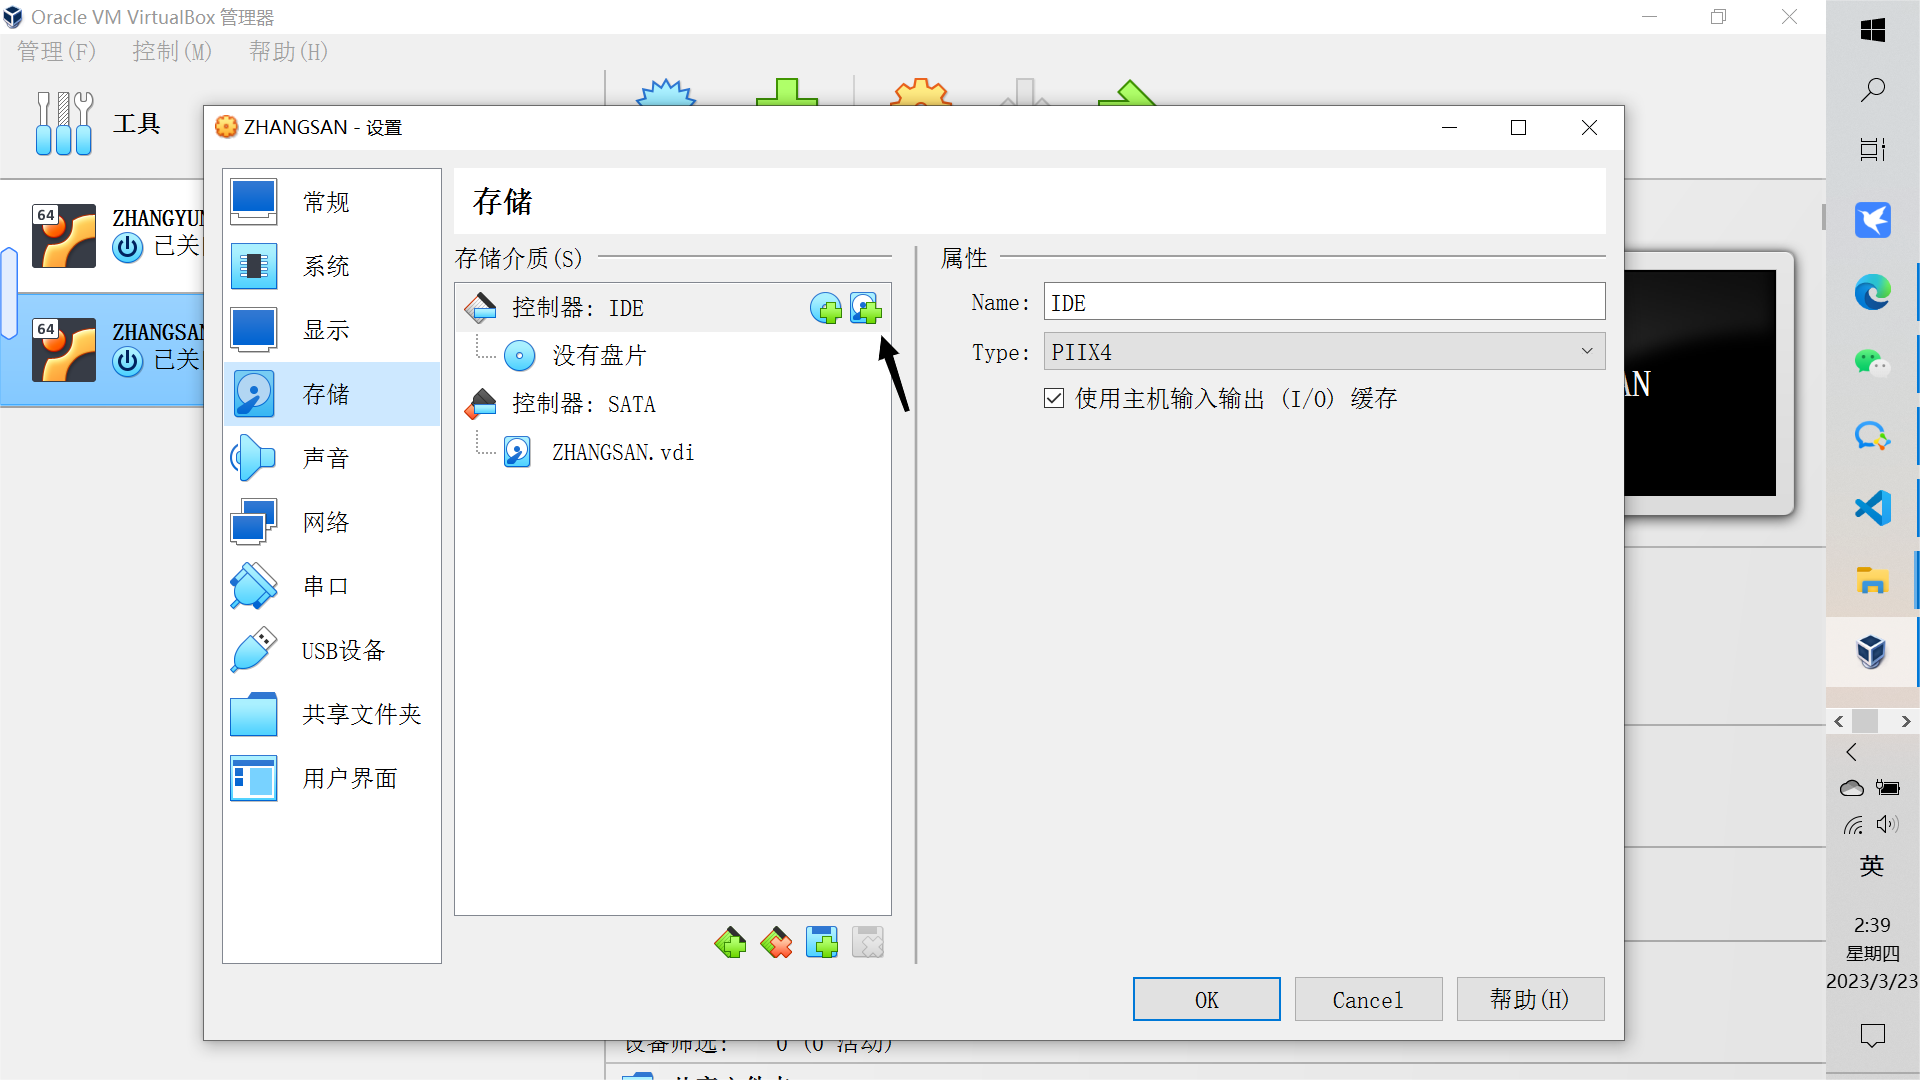
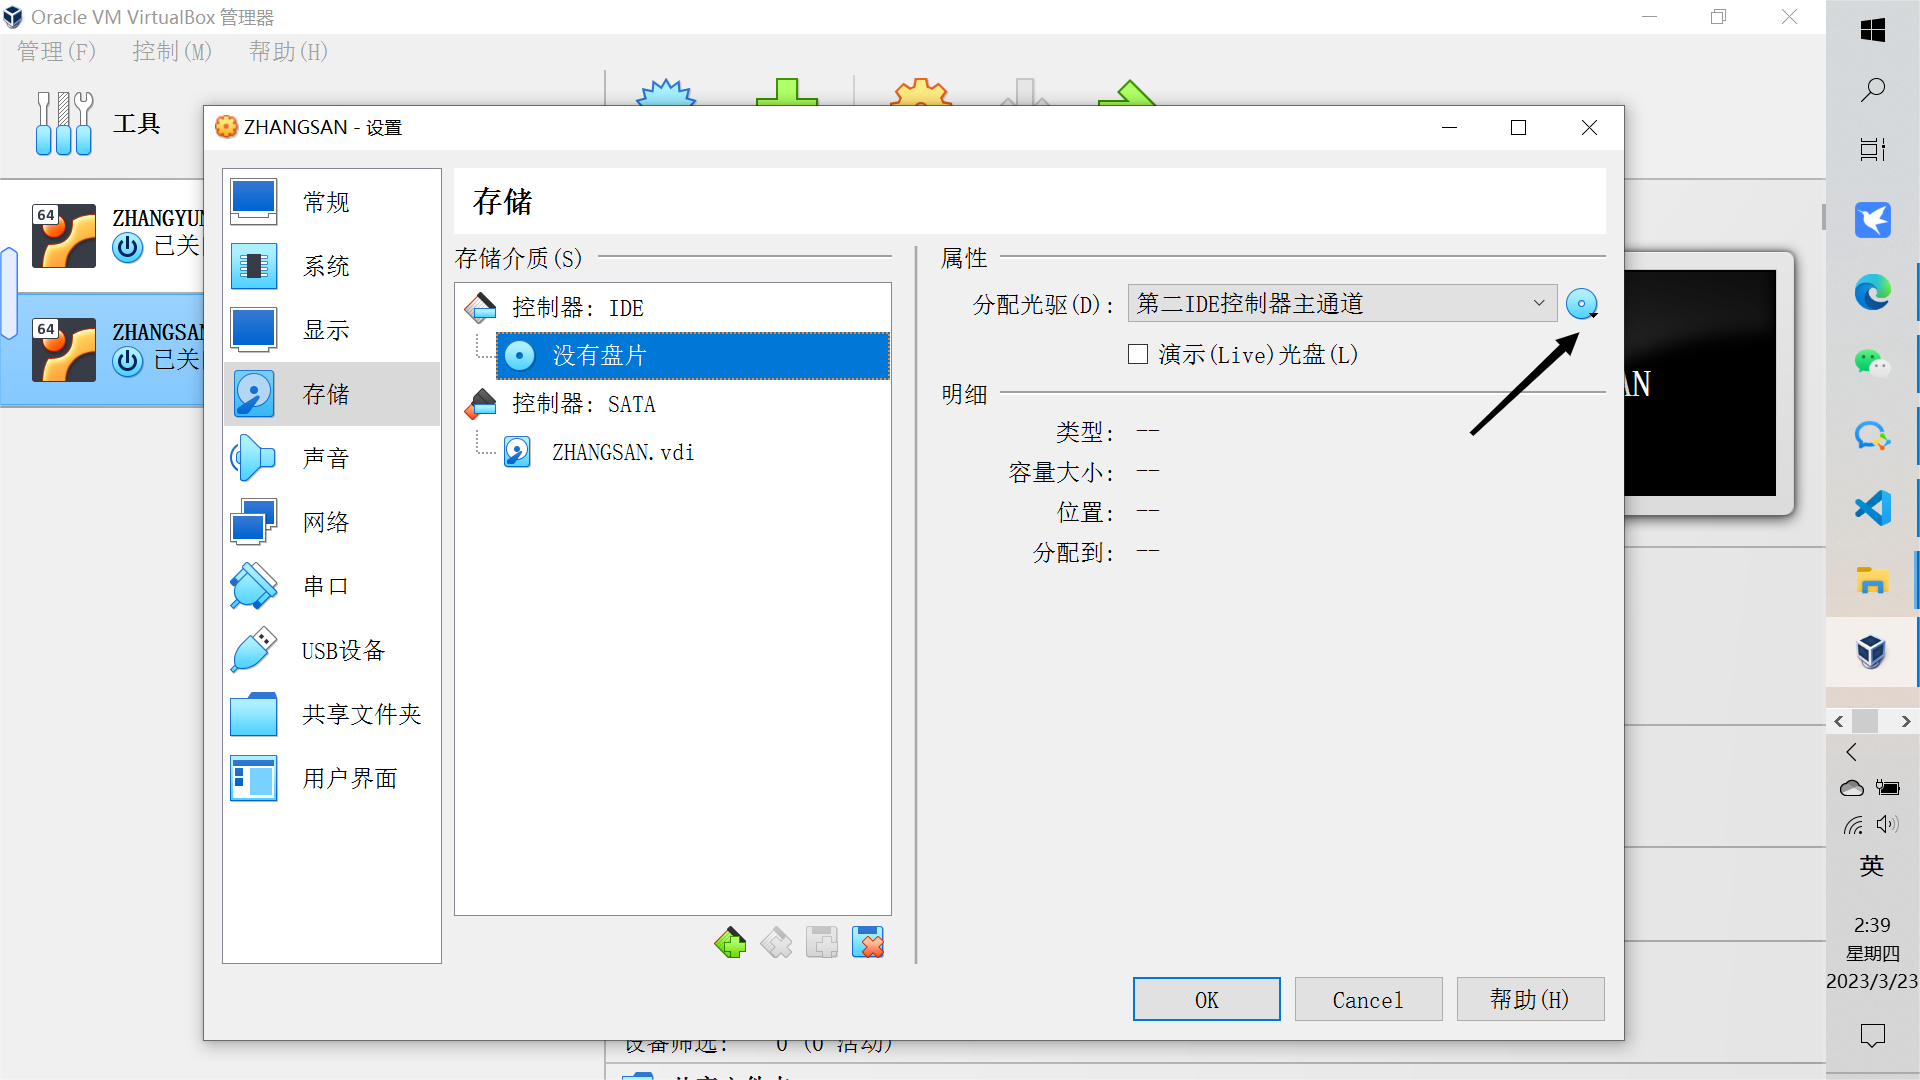
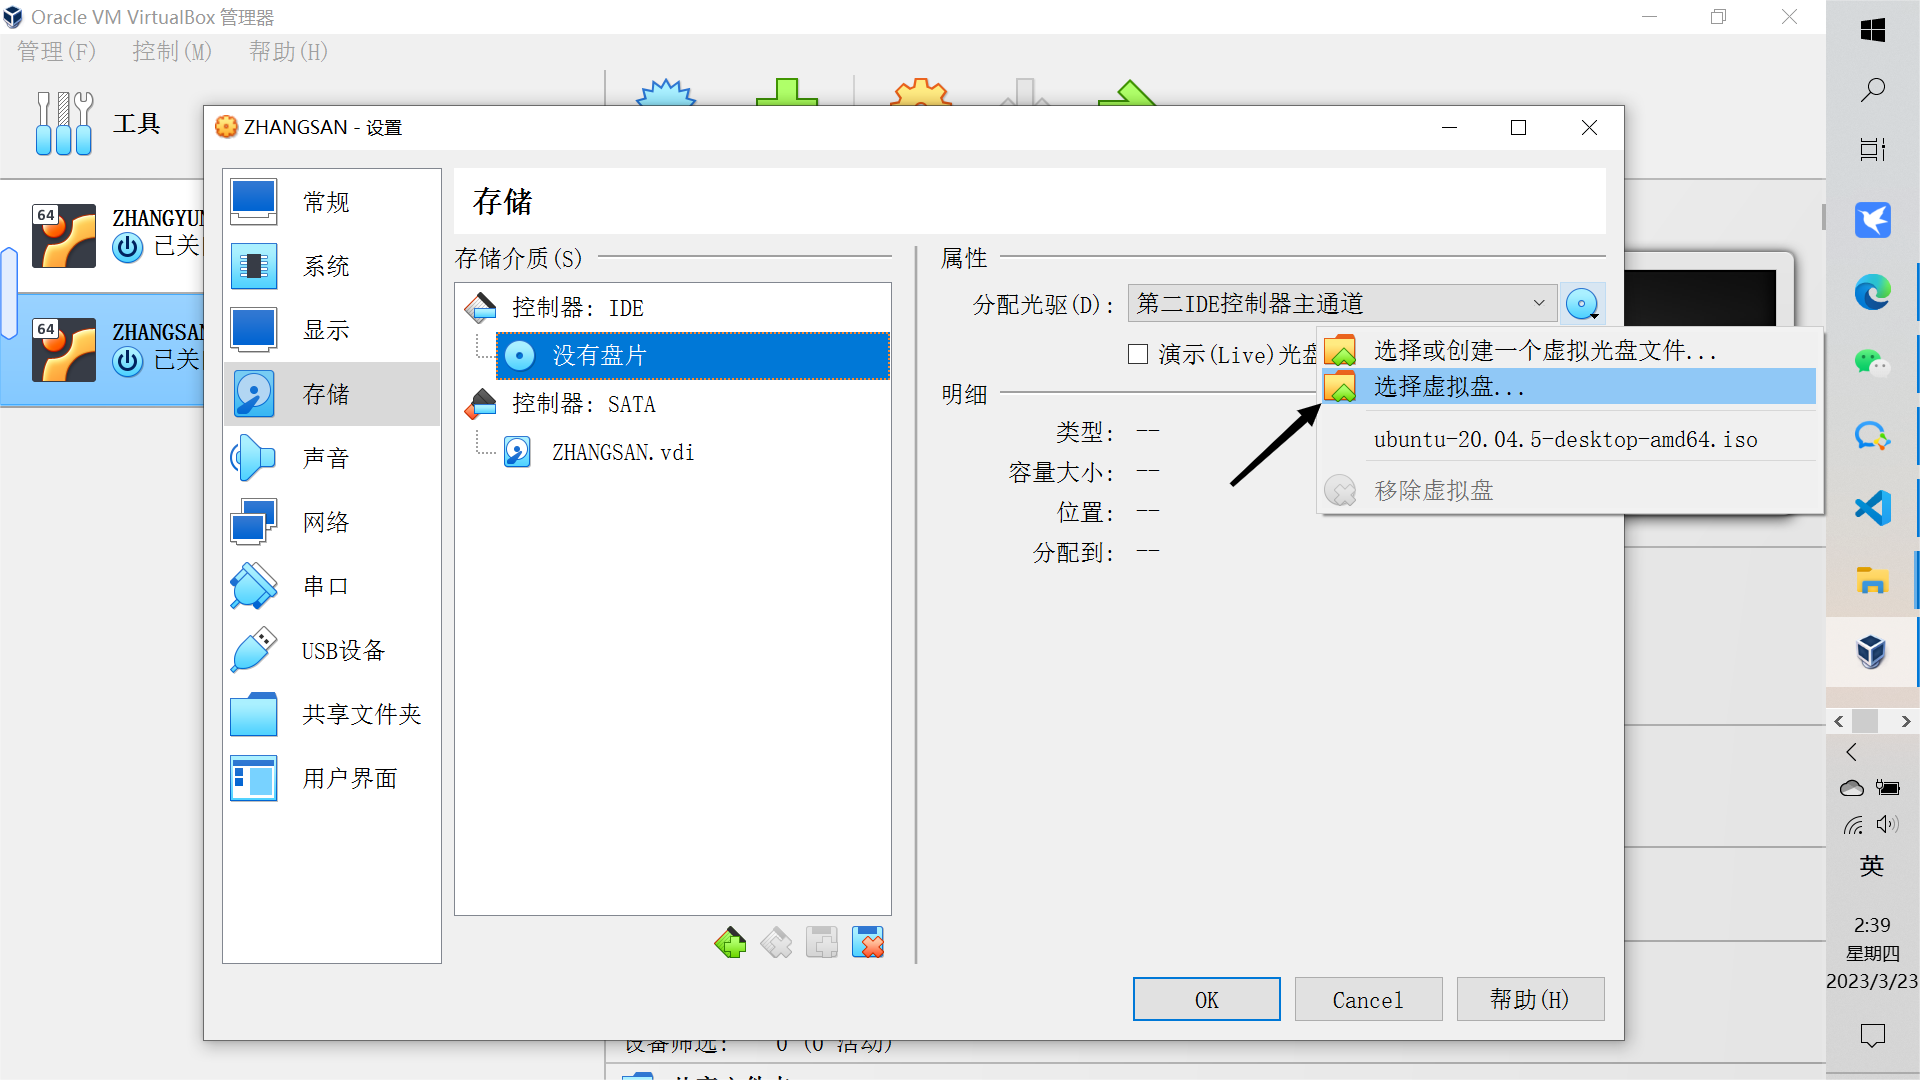
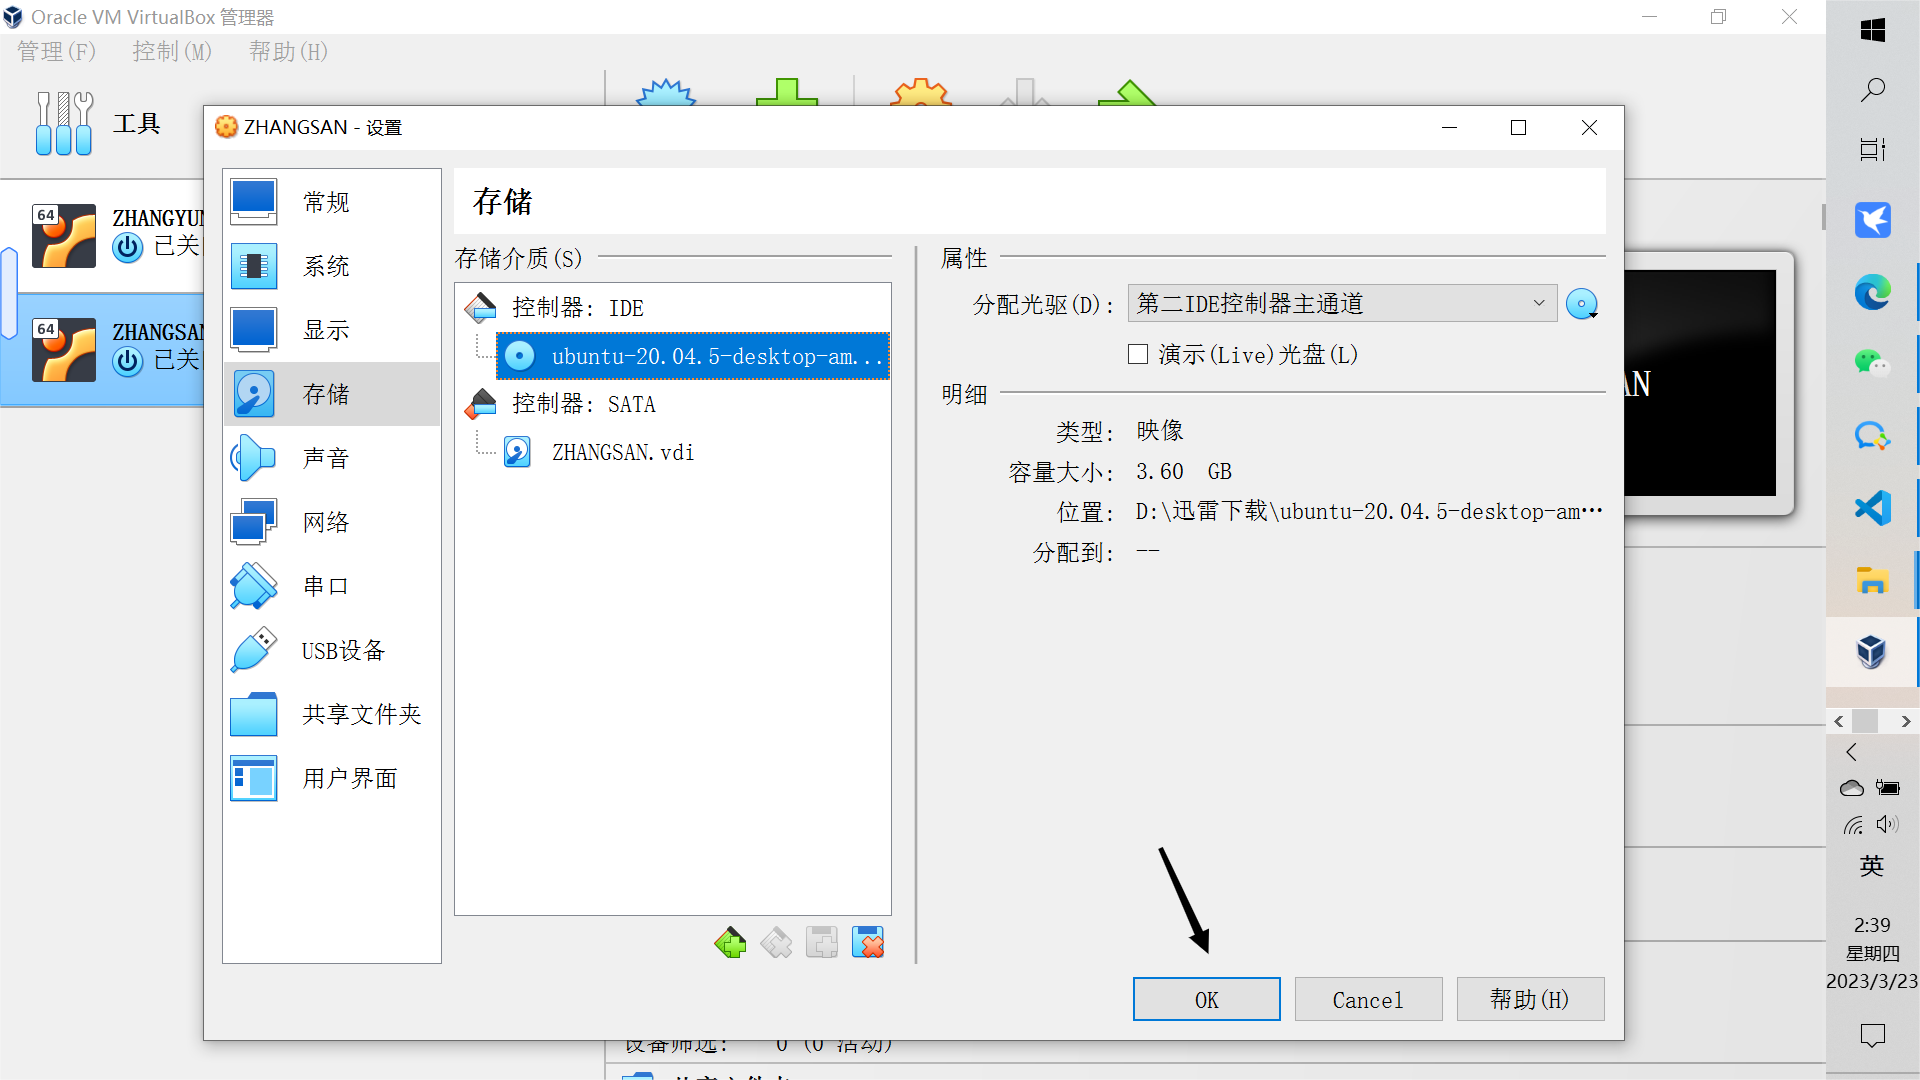
(4)、点击存储,再点击没有盘片,最后添加盘片
![](https://img-blog.csdnimg.cn/img_convert/26071556b9f2d43c354f182dd29ff9ea.png)
![](https://img-blog.csdnimg.cn/img_convert/dd2f2a1b56342eeff10328be187fd5cb.png)
(5)、选择虚拟盘,这里你就需要找到你之前自己下载ubuntu镜像文件的位置,然后点击选择就好了,最后点击OK,到这里你就已经调好虚拟机系统的配置了,后面你点击启动就可以进入ubuntu系统了
![](https://img-blog.csdnimg.cn/img_convert/ac57fd150acbc7e0510b85f7d05b55dc.png)
![](https://img-blog.csdnimg.cn/img_convert/ae682e192147a14707ecbe47181f96ef.png)
(6)安装增强功能
首先你得进入vritualbox下载官网,找到增强功能扩展包进行下载
![](https://img-blog.csdnimg.cn/img_convert/055e9b05827600abe98097899b700329.png)
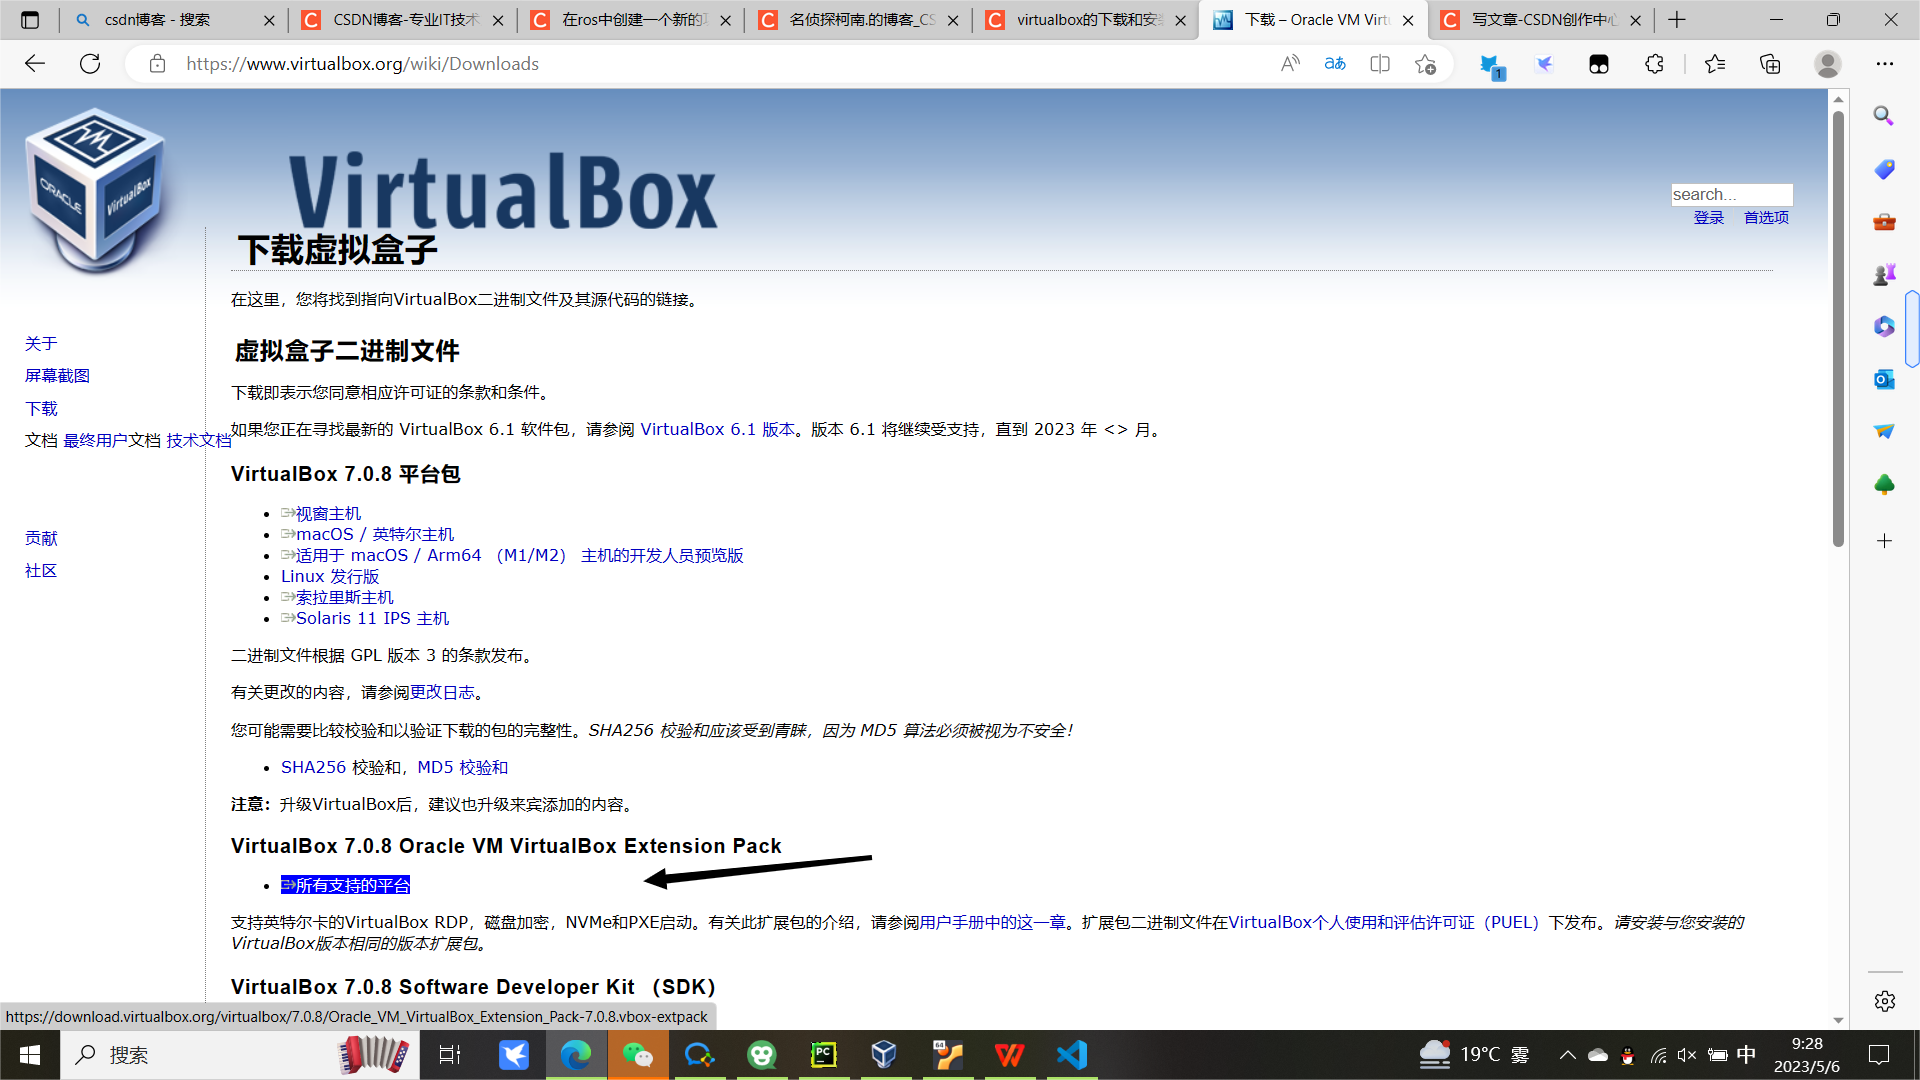
点击这个扩展包,下载号后注意扩展文件保存位置,记住位置
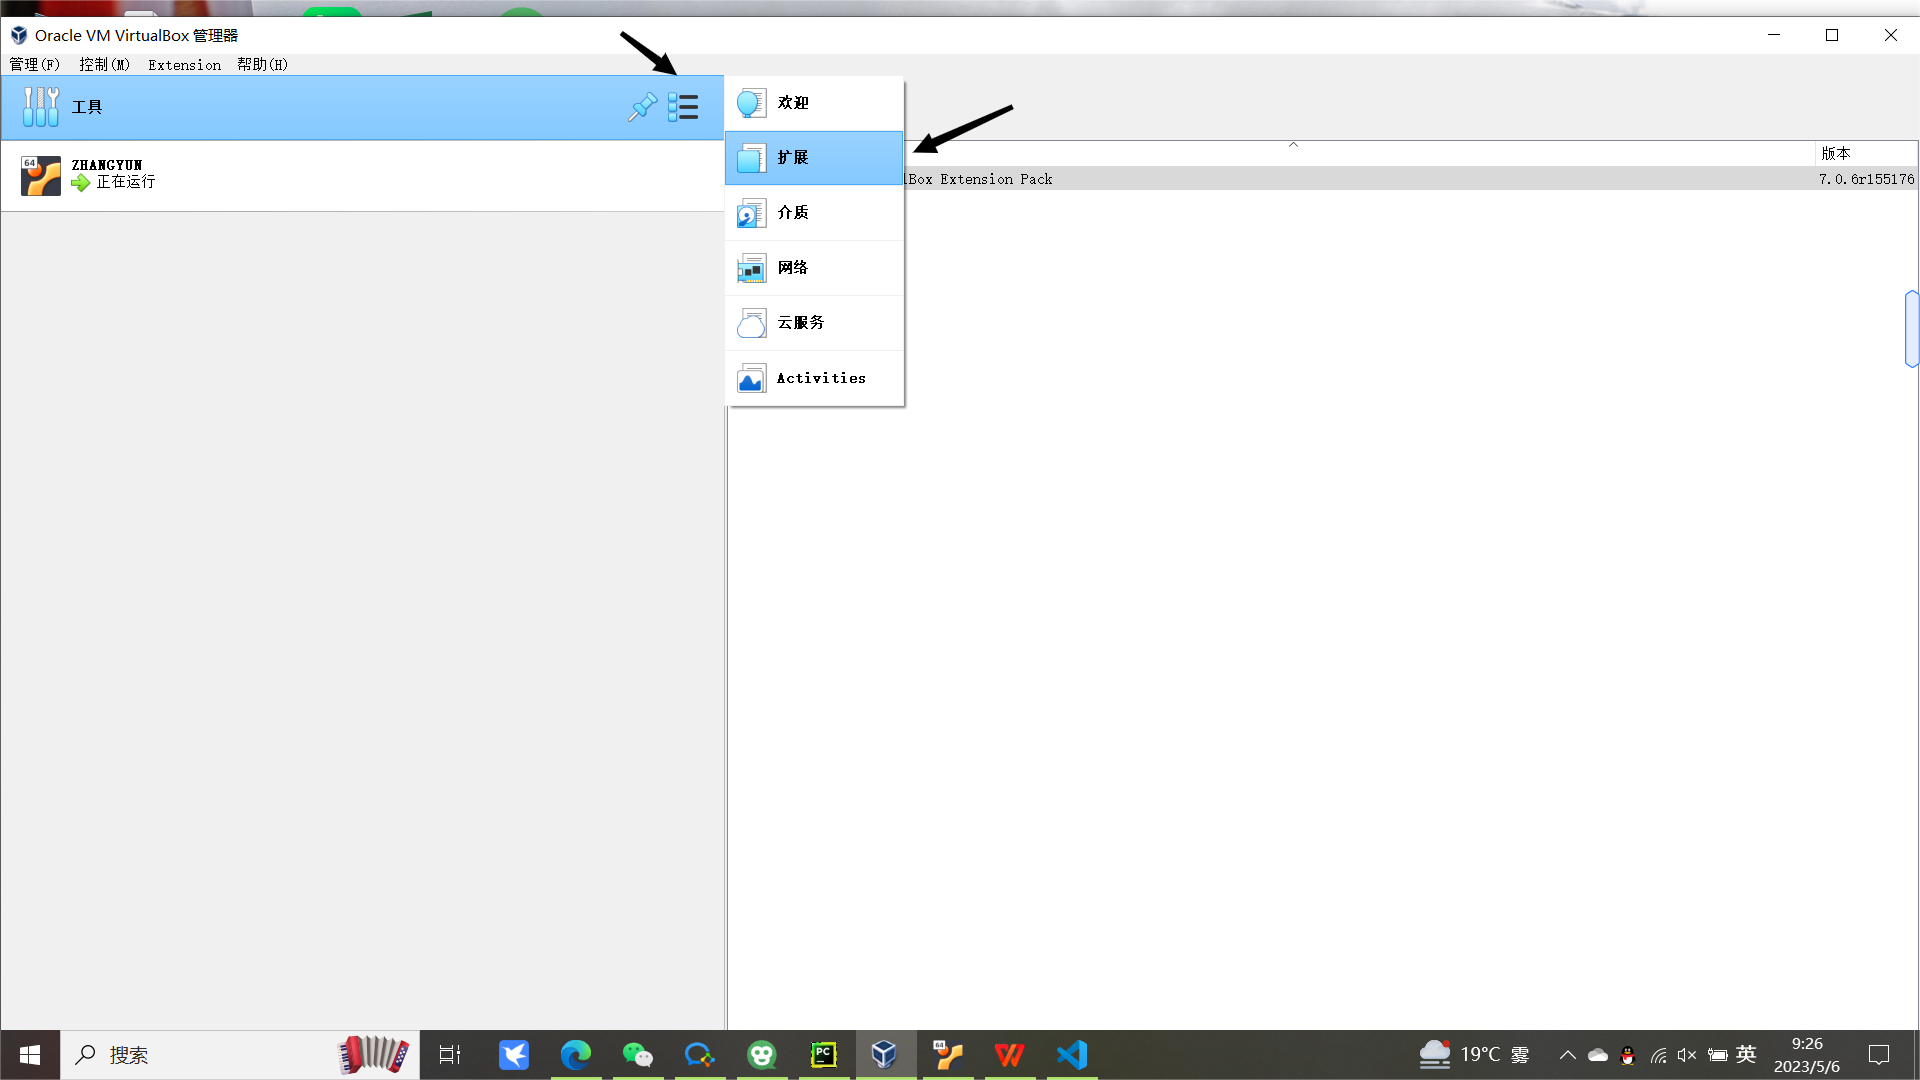
![](https://img-blog.csdnimg.cn/img_convert/1f2f5481451f9f389c0bad218c0b1d6a.png)
然后打开虚拟机点击工具,在点击扩展
![](https://img-blog.csdnimg.cn/img_convert/9f227a28d233b3710ef8de33573a7192.png)
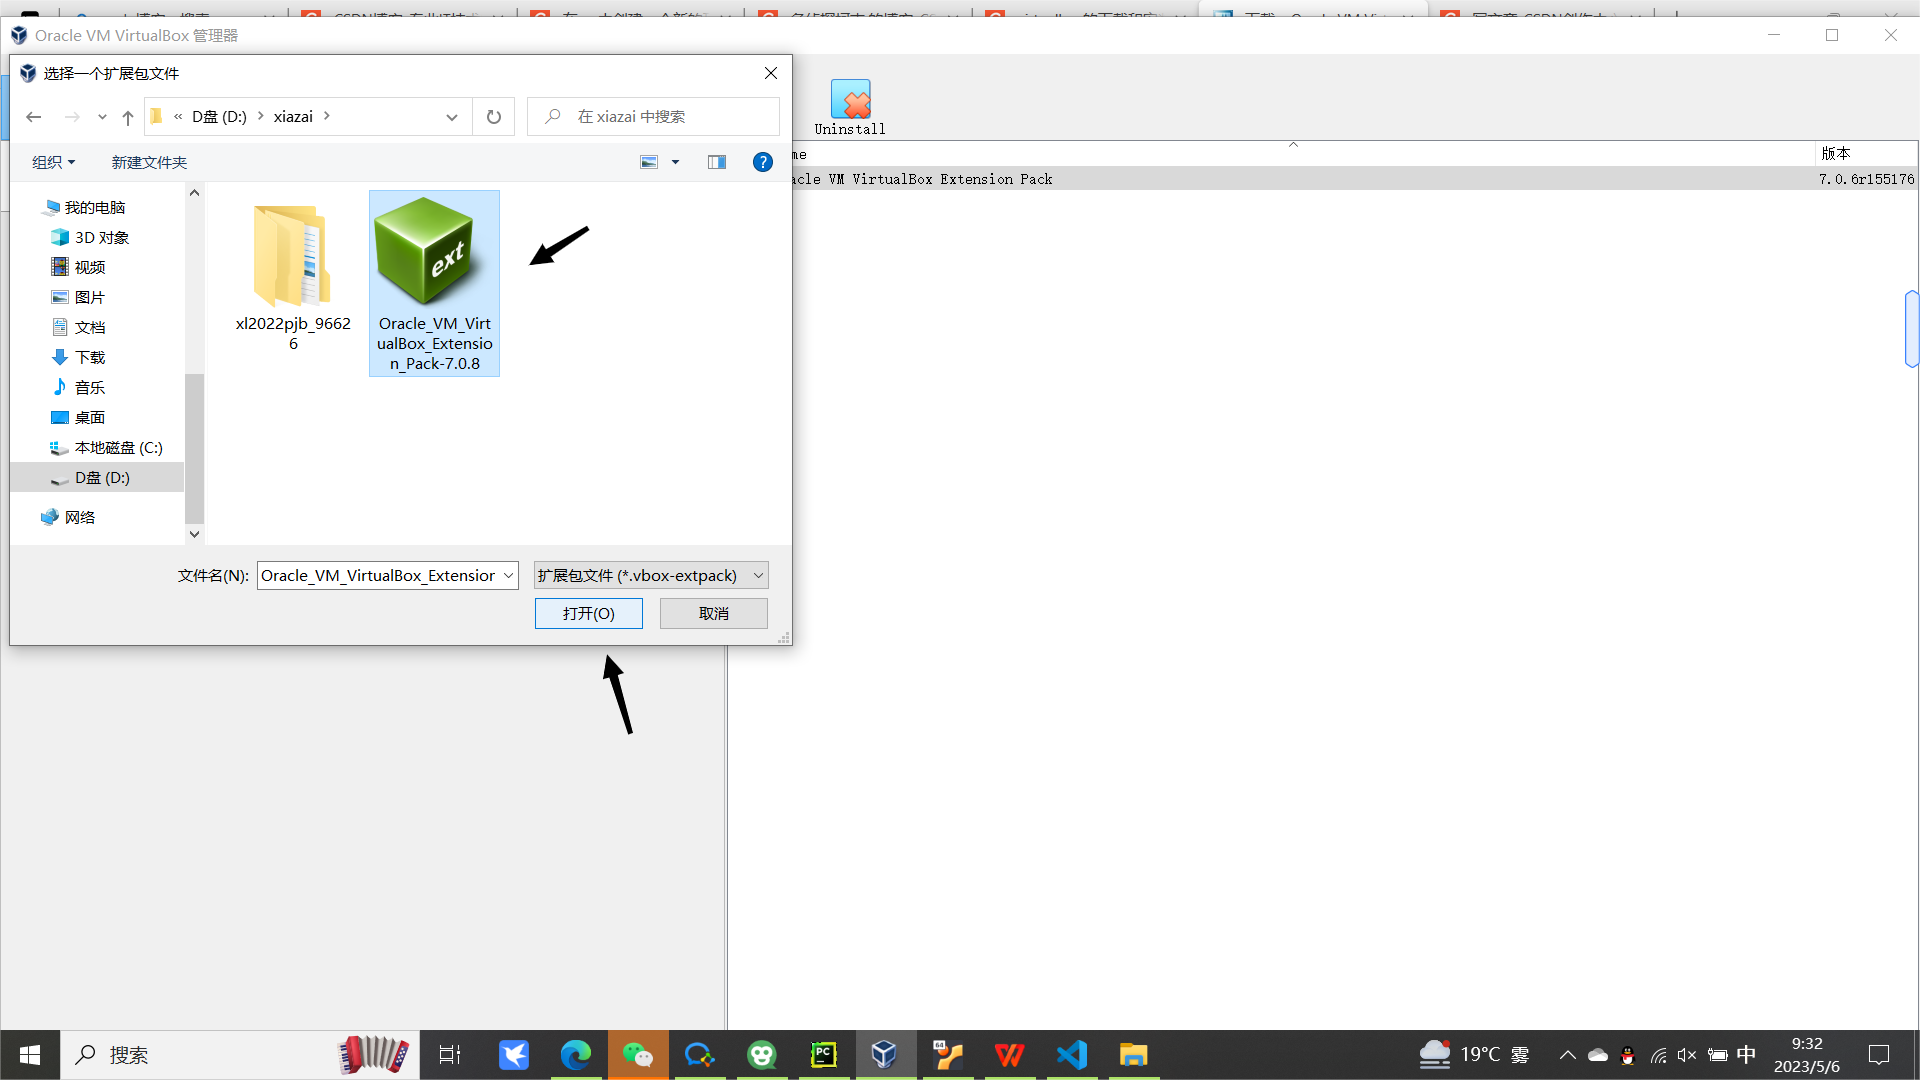
找到刚刚扩展文件保存的位置,点击扩展文件,点击打开
![](https://img-blog.csdnimg.cn/img_convert/1dc5fb09ca6b7dba492820375aa6d308.png)
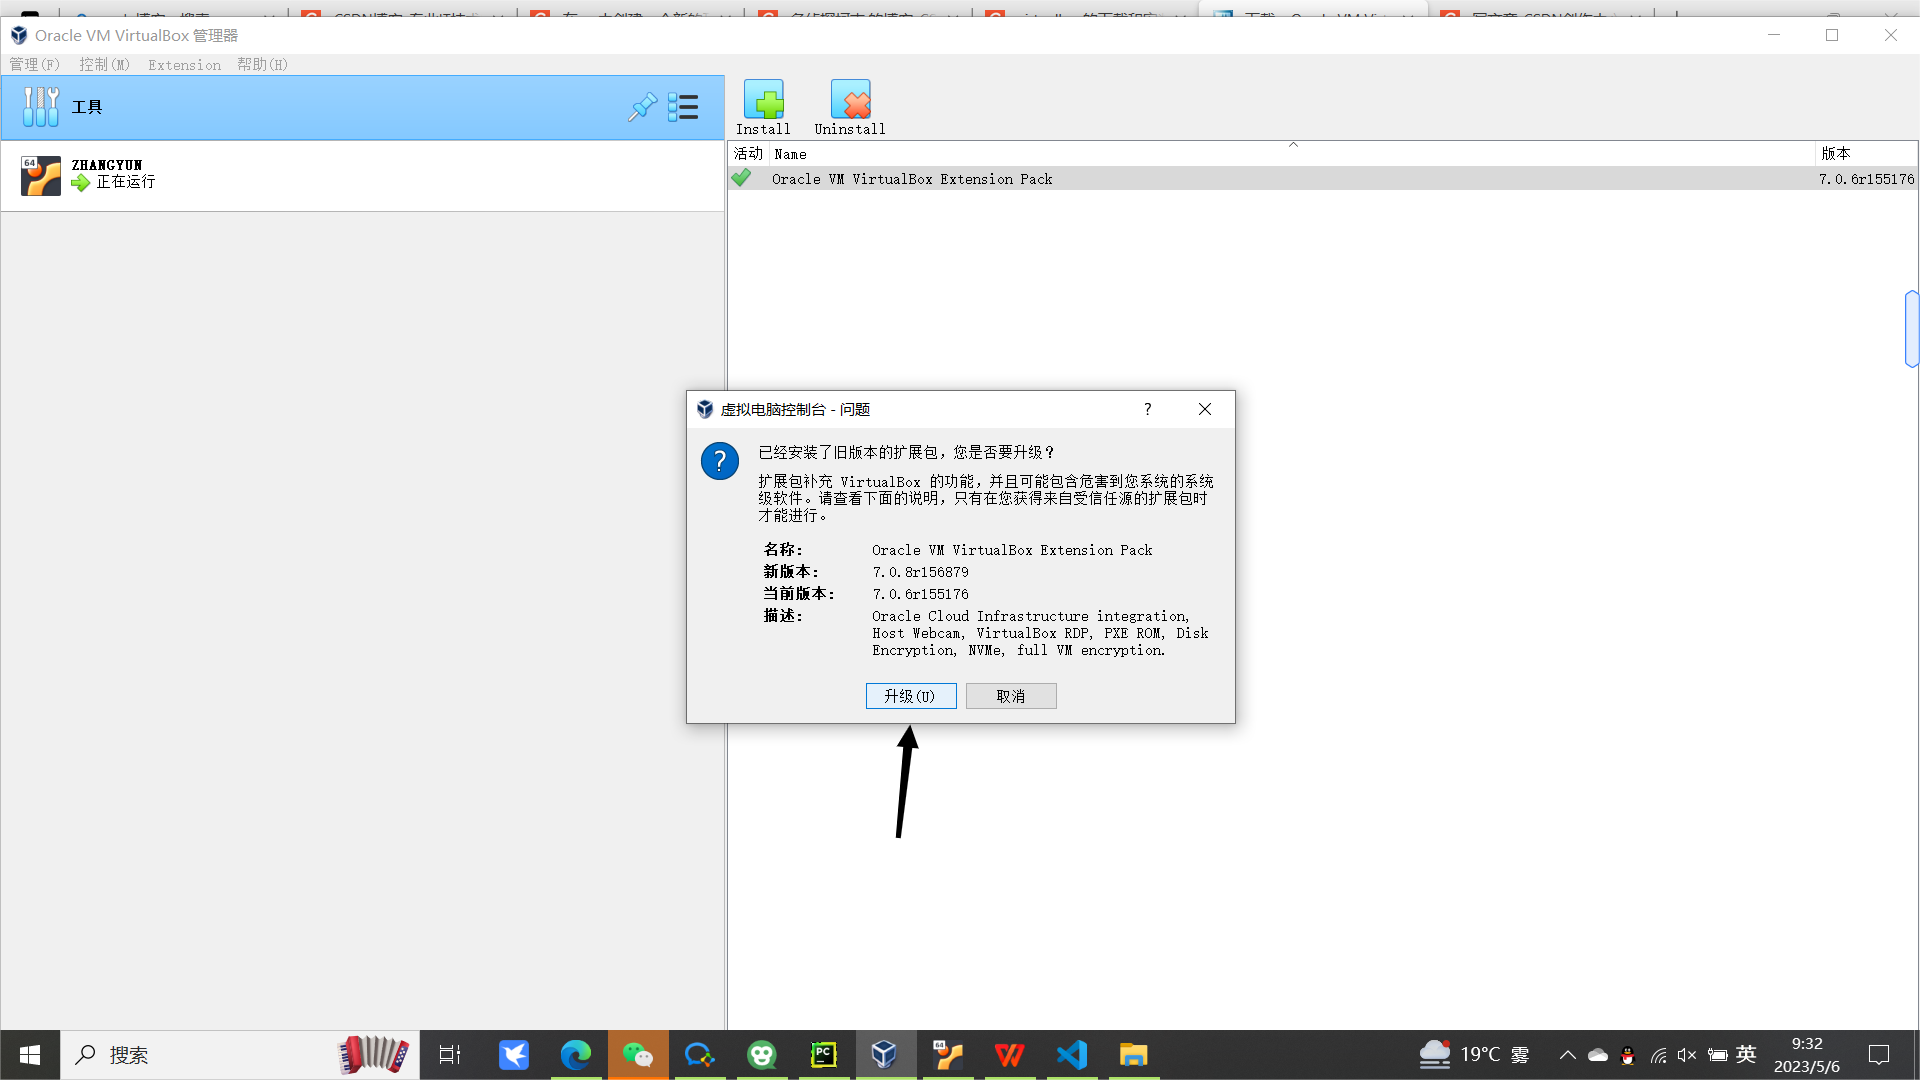
这里因为我之前已经下载过了,所以我这里显示升级,刚下载的时候显示的是安装,点击安装就好了
![](https://img-blog.csdnimg.cn/img_convert/75050747359eacaaa8e43b5549246d5d.png)
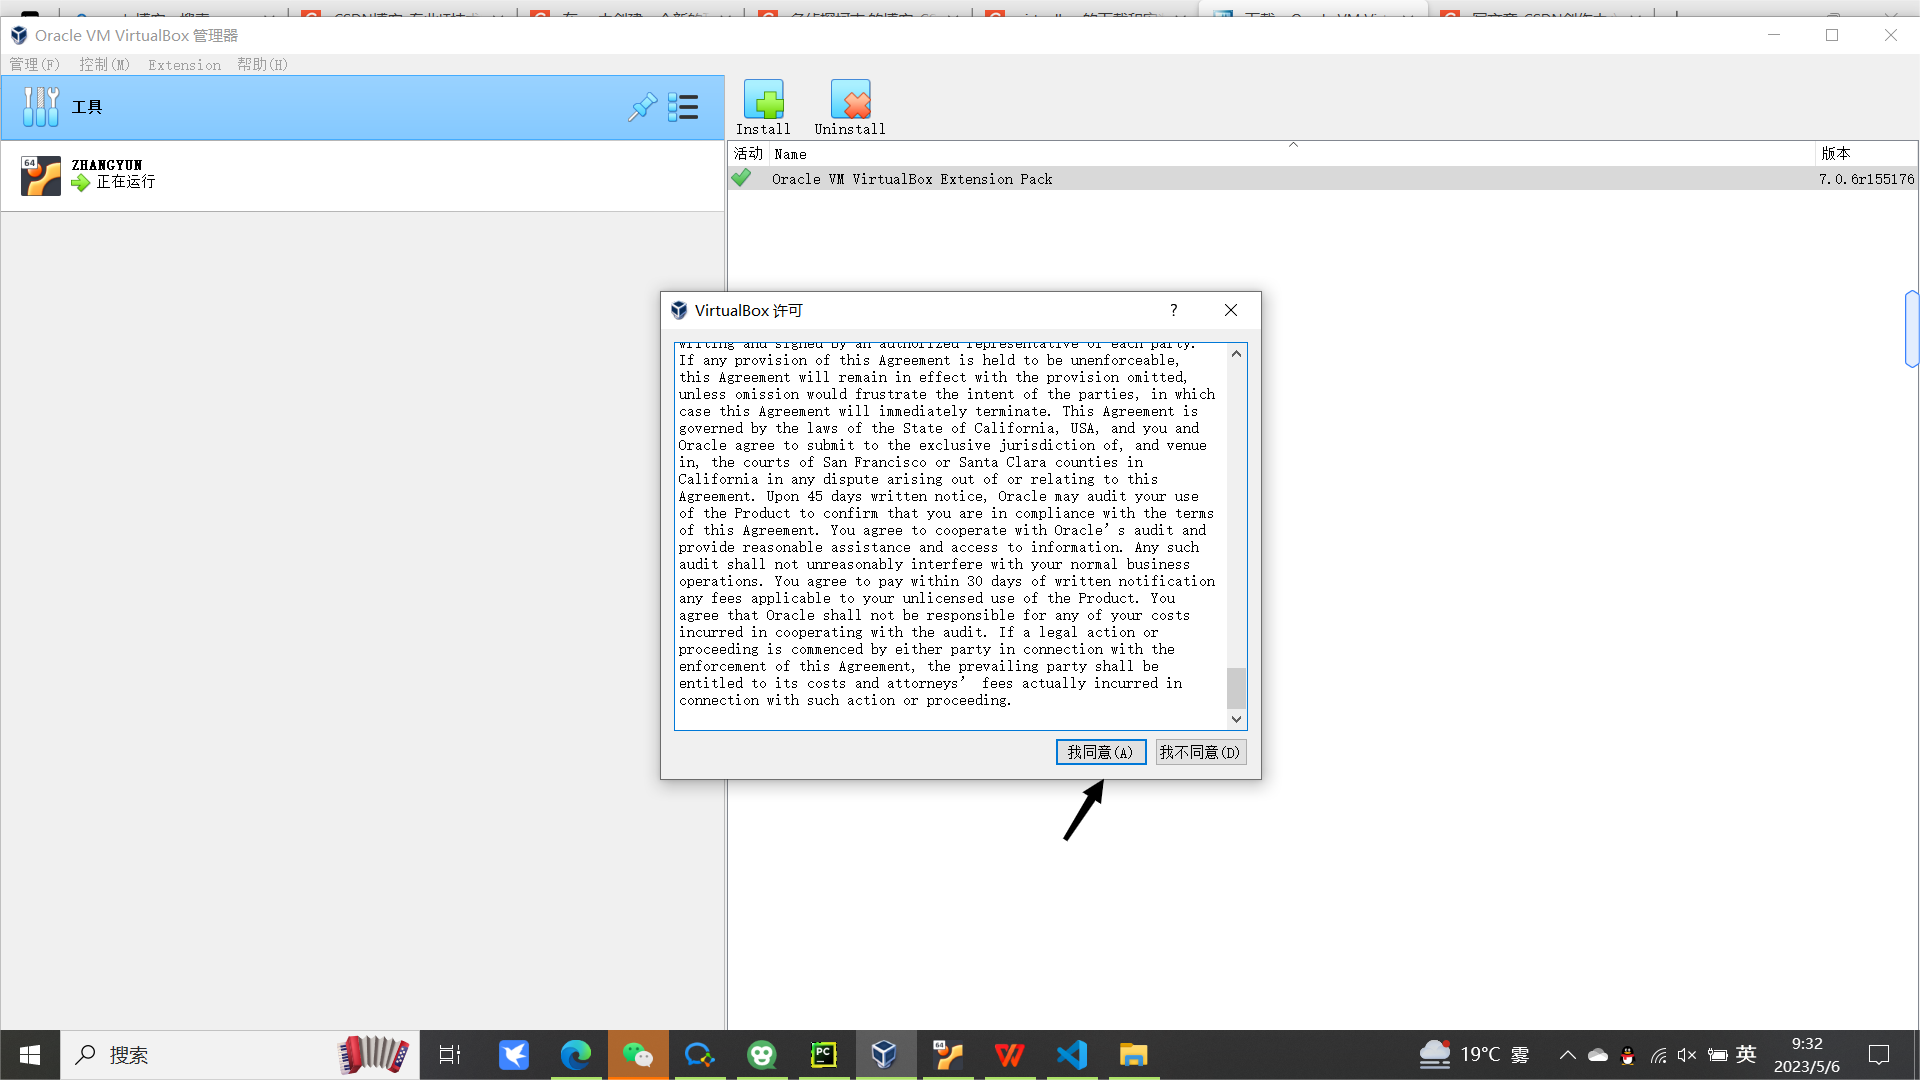
然后下拉进度条,再点击我同意就好了,然后打开启动虚拟机,到了虚拟机界面会显示运行扩展的提示,这个时候你点击run,在终端运行一下,当终端提示回车的时候,点击回车。到这里增强功能就安装好了,看了一下时间发现已经快三点了,写这些文章用来记录自己的学习进度,还可以给有需要的人一点帮助。