链表的基础知识
引言
用python来写链表,个人认为是通过python自己的代码来模拟c++或c语言来编写的链表。创建链表的方式虽然在语言上有所不同,但是本质上还是一样的。每个链节点可以说是分为数据域与指针域,指针域中一般存储的是指向下一个节点的指针。
1. 链节点类
  class ListNode:
    def __init__(self, val=0, next=None):
        self.val = val
        self.next = next
2.链表类
class LinkedList:
    def __init__(self):
        self.head = None
3.根据 data 初始化一个新链表
def create(self, data):
    self.head = ListNode(0)
    cur = self.head
    for i in range(len(data)):
        node = ListNode(data[i])
        cur.next = node
        cur = cur.next
这个新链表的创建我给我很大的启发,因为链表中第一个链节点的数据为0,那么在后面进行遍历的时候,我们就可以很容易将下标与后面的链节点的数据一一对应起来。
4.求线性链表的长度
求线性链表长度:使用指针变量cur 顺着链表 指针进行移动,并使用计数器count 记录元素个数。
def length(self):
    count = 0
    cur = self.head
    while cur:
        count += 1
        cur = cur.next
    return count
我们在这里可以很好的看到count与每一个元素一一对应的关系
5.插入元素
链表中插入元素操作分为三种:
- 链表头部插入元素:在链表第1个链节点之前插入值为val的链节点。
def insertFront(self, val):
    node = ListNode(val)
    node.next = self.head
    self.head = node
- 链表尾部插入元素:在链表最后1个链节点之后插入值为val的链节点。
def insertRear(self, val):
    node = ListNode(val)
    cur = self.head
    while cur.next:
        cur = cur.next
    cur.next = node
- 链表中间插入元素:在链表第n个链节点之前插入值为val的链节点。
def insertInside(self, index, val):
    count = 0
    cur = self.head
    while cur and count < index - 1:
        count += 1
        cur = cur.next

    if not cur:
        return 'Error'

    node = ListNode(val)
    node.next = cur.next
    cur.next = node
在中间插入元素,主要是要注意可能插入的节点在最后一个节点后,那这个时候我们就需要返回错误。
6.删除元素
链表的删除元素操作与链表的查找元素操作一样,同样分为三种情况:
- 链表头部删除元素:删除链表的第 1个链节点。
def removeFront(self):
    if self.head:
        self.head = self.head.next
- 链表尾部删除元素:删除链表末尾最后 1个链节点。
def removeRear(self):
    if not self.head or not self.head.next:
        return 'Error'

    cur = self.head
    while cur.next.next:
        cur = cur.next
    cur.next = None
- 链表中间删除元素:删除链表第n个链节点。
def removeInside(self, index):
    count = 0
    cur = self.head

    while cur.next and count < index - 1:
        count += 1
        cur = cur.next

    if not cur:
        return 'Error'

    del_node = cur.next
    cur.next = del_node.next
中间插入和中间删除元素的判定有所不同。
中间插入元素是
while cur and count < index - 1:
中间删除元素是
while cur.next and count < index - 1:
因为第一个是在第n个元素前插入,第二个是删除第n个元素.这个地方的小细节需要注意。
小拓展
if not self.head:
            self.head=ListNode(data)
        else:
            cur=self.head
            while cur.next:
                cur=cur.next
            cur.next=ListNode(data)
这个是不采用第一个元素数据域为0的链表的创建方式。可行,但在后面写代码中没有注释的话,可能会导致部分混乱。
链表的排序
之前在c++中已经了解过冒泡排序和选择排序,这次主要学习的是插入排序和归并排序。
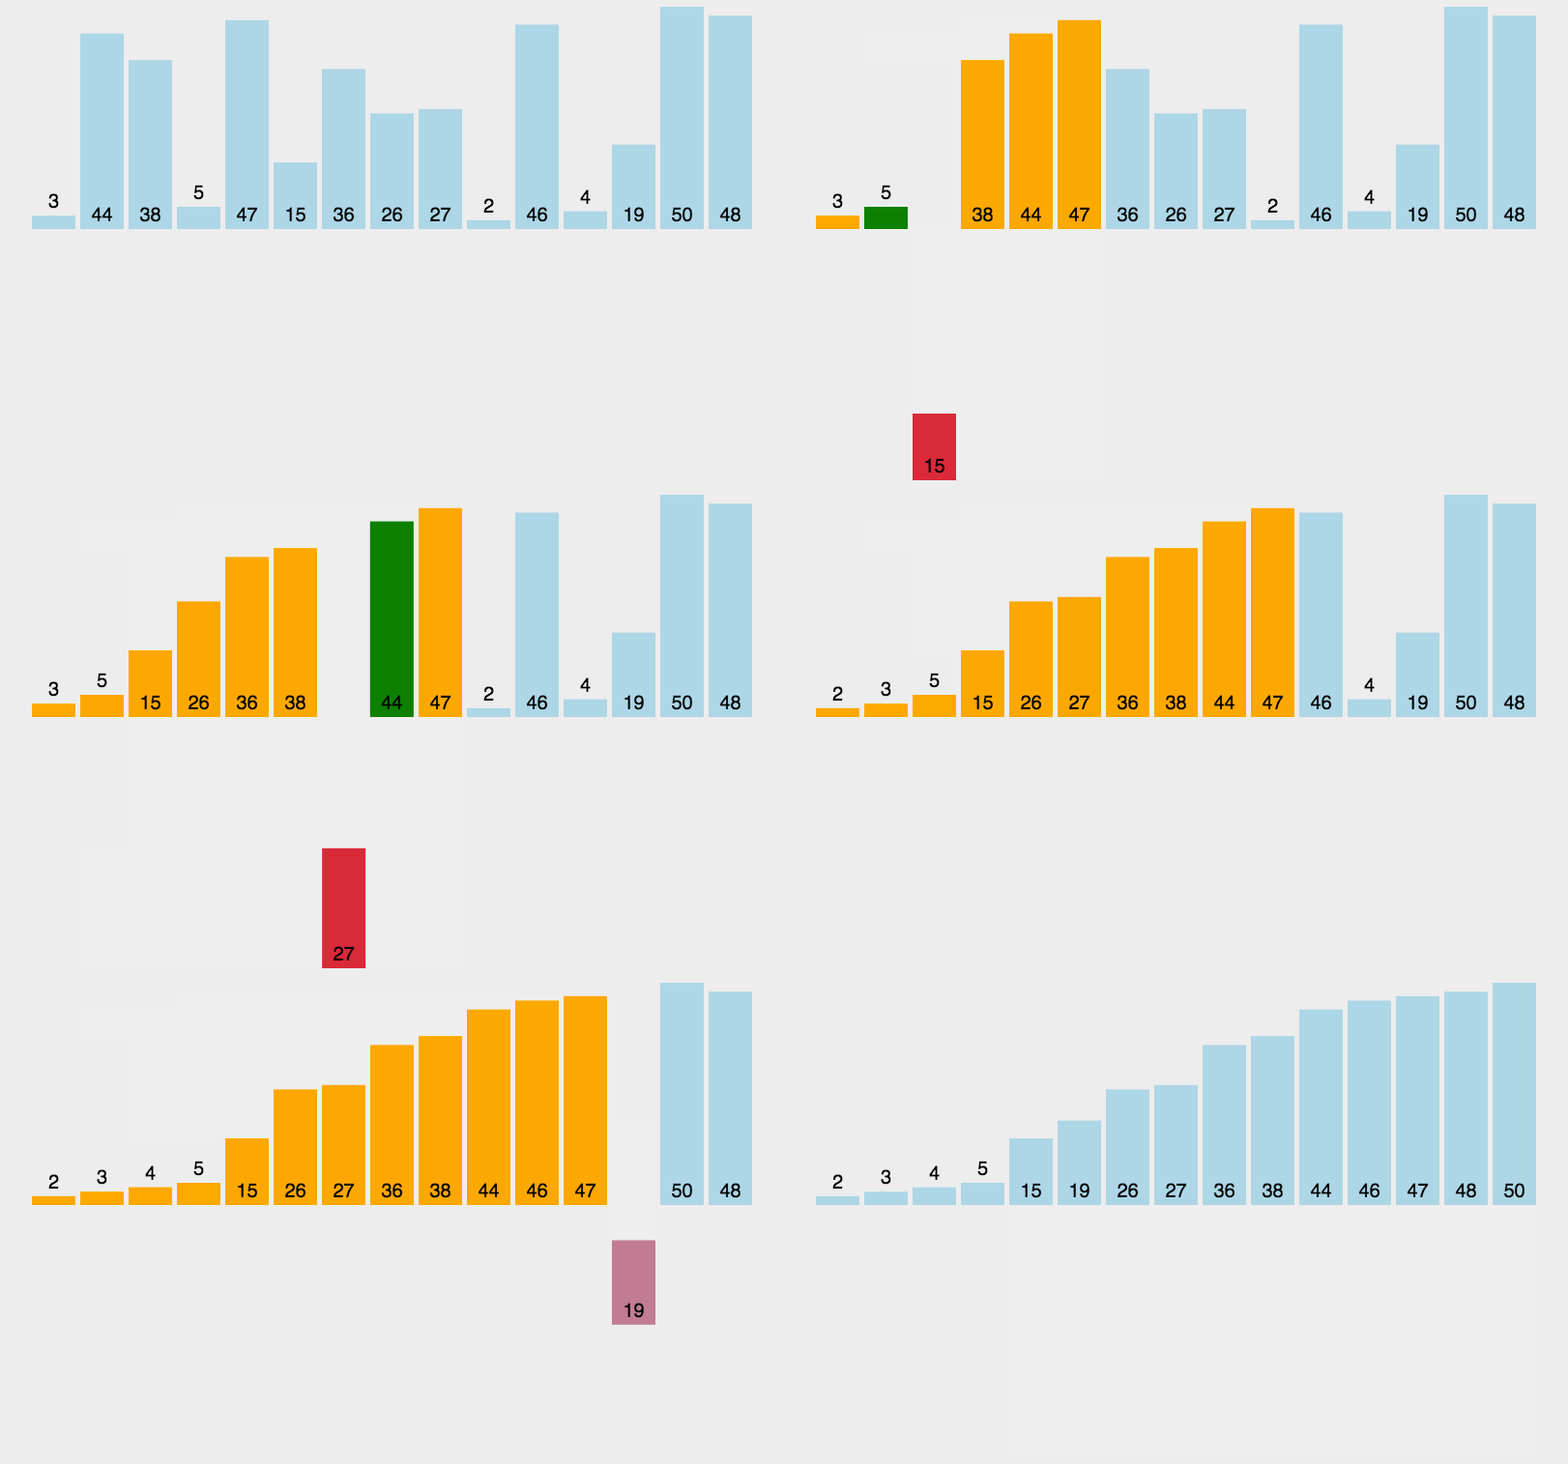
插入排序

这里我找了个好理解的动图来展示插入排序的过程
class Solution:
    def insertionSort(self, head: ListNode):
        if not head or not head.next:
            return head

        dummy_head = ListNode(-1)
        dummy_head.next = head
        sorted_list = head#确定第一个已排序的节点
        cur = head.next #确定为未排序的的第一个节点

        while cur:
            #如果cur更大,说明他应该排在sorted_list的后面
            if sorted_list.val <= cur.val:
                # 将 cur 插入到 sorted_list 之后
                sorted_list = sorted_list.next
            else:
                prev = dummy_head#这里是已排序节点的第一个节点
                while prev.next.val <= cur.val:#从prev开始遍历来进行比较,找到cur应该插入的位置
                    prev = prev.next
                # 将 cur 到链表中间
                sorted_list.next = cur.next
                cur.next = prev.next
                prev.next = cur
            cur = sorted_list.next

        return dummy_head.next

    def sortList(self, head: Optional[ListNode]) -> Optional[ListNode]:
        return self.insertionSort(head)
时间复杂度:
。O(n2)
空间复杂度:
。O(1)
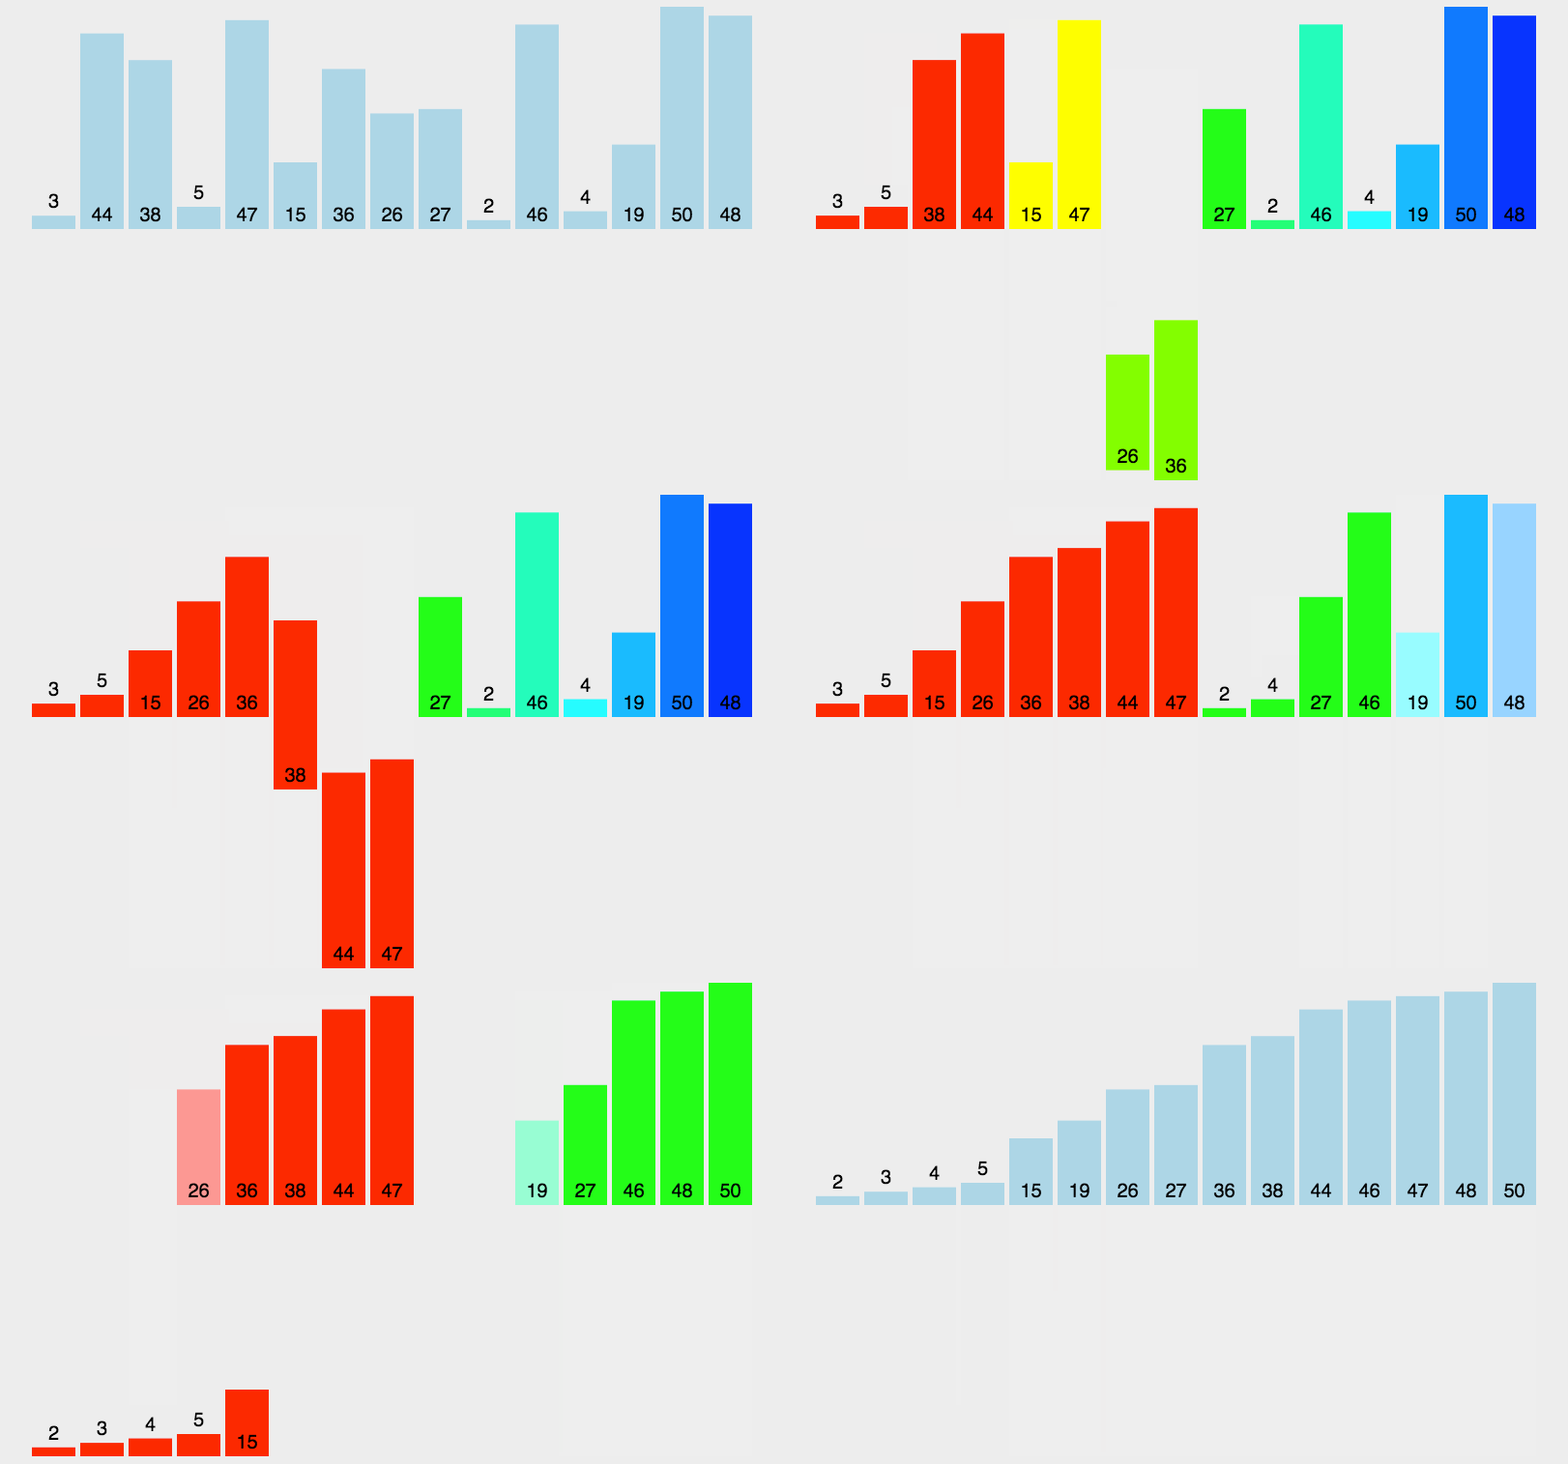
归并排序

同样是非常直观的动图,很直接明了。
class Solution:
    def merge(self, left, right):
        # 归并环节
        dummy_head = ListNode(-1)
        cur = dummy_head
        while left and right:
            if left.val <= right.val:
                cur.next = left
                left = left.next
            else:
                cur.next = right
                right = right.next
            cur = cur.next

        if left:
            cur.next = left
        elif right:
            cur.next = right

        return dummy_head.next

    def mergeSort(self, head: ListNode):
        # 分割环节
        if not head or not head.next:
            return head

        # 快慢指针找到中心链节点
        slow, fast = head, head.next
        while fast and fast.next:
            slow = slow.next
            fast = fast.next.next

        # 断开左右链节点
        left_head, right_head = head, slow.next
        slow.next = None

        # 归并操作
        #这里采用的是递归的操作,到最后left_head和right_head都只有一个元素
        return self.merge(self.mergeSort(left_head), self.mergeSort(right_head))

    def sortList(self, head: Optional[ListNode]) -> Optional[ListNode]:
        return self.mergeSort(head)
时间复杂度
- O(n*log2n)。
空间复杂度 - O(n)
双指针
起点不一致的快慢指针
slow = head
fast = head

while n:
    fast = fast.next
    n -= 1
while fast:
    fast = fast.next
    slow = slow.next
步长不一致的快慢指针
fast = head
slow = head

while fast and fast.next:
    slow = slow.next
    fast = fast.next.next
分离双指针
left_1 = list1
left_2 = list2

while left_1 and left_2:
   if 一定条件 1:
       left_1 = left_1.next
       left_2 = left_2.next
   elif 一定条件 2:
       left_1 = left_1.next
   elif 一定条件 3:
       left_2 = left_2.next


 2191
2191


 被折叠的 条评论
为什么被折叠?


