


前言
很多时候很多东西重复的写,是不是枯燥乏味,这时候自己封装成插件往npm仓库一放,每次要用直接下载,方便~
开始编写插件
这里编写的是一个日期格式化插件
- 创建一个空文件夹
- 初始化项目
npm init
根据命令行提示,设置package.json信息
- name: 包名,后续在npm中搜索全靠它,跟项目名字没有关系
- version:版本号,每发布一次npm包就要增加一个版本,每个版本不能重复。
- description:描述
- main: 本包向外暴露的文件,很重要,一定要和你打包出来的文件名一模一样
- private: true/false 是否为私有。一般为false否则只有自己能使用
- keywords: npm检索的关键字
- author: 作者
- 创建 index.js 文件,用于安装依赖时,使用的文件
我的项目结构
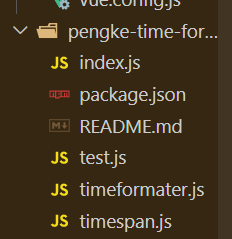
index依赖入口,test.js自己用于测试的,timeformater是我写的日期格式化插件,timespan是我写的计算日期间隔插件
index.js
// 入口文件
const timeformater=require('./timeformater')
const timespan=require('./timespan')
module.exports={
    timeformater,//时间格式化
    timespan,//时间间隔
}
日期格式化timeformater.js
// 定义一个存放返回时间类型的数组

var timeType = [{

type: 1,

description: 'YYYY-MM-DD'

},

{

type: 2,

description: 'YYYY/MM/DD'

},

{

type: 3,

description: 'YYYY-MM-DD hh:mm:ss'

},

{

type: 4,

description: 'YYYY-MM-DD hh-mm-ss'

},

{

type: 5,

description: 'YYYY/MM/DD hh:mm:ss'

},

{

type: 6,

description: 'YYYY/MM/DD hh-mm-ss'

},

]

//定义一个类,通常首字母大写

var TimeFormater = function (input, type) {
var that = this

// 默认返回的时间类型是 YYYY-MM-DD hh-mm-ss

that.dateType = 3

timeType.forEach(function (item) {

if (item.description === type) {

that.dateType = item.type

}

})


if (typeof input === 'string') {

that.timeNumber = parseInt(input);

} else if (typeof input === 'number') {

that.timeNumber = parseInt(input);

} else {

that.timeNumber = (new Date()).getTime()

}

TimeFormater.fn.timeNumber = that.timeNumber

TimeFormater.fn.dateType = that.dateType

return TimeFormater.fn.init();

}


//覆写原型链,给继承者提供方法

TimeFormater.fn = TimeFormater.prototype = {

constructor: TimeFormater,

init: function () {

if (this.dateType === 1) {

return this.YYYY() + '-' + this.MM() + '-' + this.DD()

} else if (this.dateType === 2) {

return this.YYYY() + '/' + this.MM() + '/' + this.DD()

} else if (this.dateType === 3) {

return this.YYYY() + '-' + this.MM() + '-' + this.DD() + ' ' + this.hh() + ':' + this.mm() + ':' + this.ss()

} else if (this.dateType === 4) {

return this.YYYY() + '-' + this.MM() + '-' + this.DD() + ' ' + this.hh() + '-' + this.mm() + '-' + this.ss()

} else if (this.dateType === 5) {

return this.YYYY() + '/' + this.MM() + '/' + this.DD() + ' ' + this.hh() + ':' + this.mm() + ':' + this.ss()

} else if (this.dateType === 6) {

return this.YYYY() + '/' + this.MM() + '/' + this.DD() + ' ' + this.hh() + '-' + this.mm() + '-' + this.ss()

} else {

return this.YYYY() + '-' + this.MM() + '-' + this.DD() + ' ' + this.hh() + ':' + this.mm() + ':' + this.ss()

}

},

YYYY: function () {

var that = this

that.year = (new Date(that.timeNumber)).getFullYear()

return that.year

},

MM: function () {

var that = this

that.month = ((new Date(that.timeNumber)).getMonth() + 1) < 10 ? ('0' + ((new Date(that.timeNumber)).getMonth() + 1)) : ((new Date(that.timeNumber)).getMonth() + 1)

return that.month

},

DD: function () {

var that = this

that.day = (new Date(that.timeNumber)).getDate() < 10 ? ('0' + (new Date(that.timeNumber)).getDate()) : (new Date(that.timeNumber)).getDate()

return that.day

},

hh: function () {

var that = this

that.hours = (new Date(that.timeNumber)).getHours() < 10 ? ('0' + (new Date(that.timeNumber)).getHours()) : (new Date(that.timeNumber)).getHours()

return that.hours

},

mm: function () {

var that = this

that.minutes = (new Date(that.timeNumber)).getMinutes() < 10 ? ('0' + (new Date(that.timeNumber)).getMinutes()) : (new Date(that.timeNumber)).getMinutes()

return that.minutes

},

ss: function () {

var that = this

that.seconds = (new Date(that.timeNumber)).getSeconds() < 10 ? ('0' + (new Date(that.timeNumber)).getSeconds()) : (new Date(that.timeNumber)).getSeconds()

return that.seconds

},

}


//兼容CommonJs规范

if (typeof module !== 'undefined' && module.exports) module.exports = TimeFormater;

//兼容AMD/CMD规范

if (typeof define === 'function') define(function () {

return TimeFormater;

});


TimeFormater.fn.init.prototype = TimeFormater.fn;

module.exports = TimeFormater;
另一个文件就不展示了
这样大致就写好了一个日期格式化插件,创建一个描述文件
README.md
描述内容
发布
首先在做一下操作时需要保证安装源是国外的
npm config set registry https://registry.npmjs.org
进行npm登陆
npm login
安装提示输入用户名和密码然后就可以登陆成功了!!!
验证是否登陆成功…
npm whoami
发布命令
npm publish
这样就能发布成功了
更新
当我们发布了一个版本需要更新迭代的~
关键语句:npm version xx
version后的参数分别有:
patch:小变动,比如修复bug等,版本号变动 v1.0.0->v1.0.1
minor:增加新功能,不影响现有功能,版本号变动 v1.0.0->v1.1.0
major:破坏模块对向后的兼容性,版本号变动 v1.0.0->v2.0.0
假设是小变动就执行
npm version patch
它会返回一个版本号给我们
再执行发布命令
npm publish
这样就更新成功了
我写好的日期插件:https://www.npmjs.com/package/@pengke/pengke-time-formater✌


 239
239


 被折叠的 条评论
为什么被折叠?
被折叠的 条评论
为什么被折叠?
 到【灌水乐园】发言


