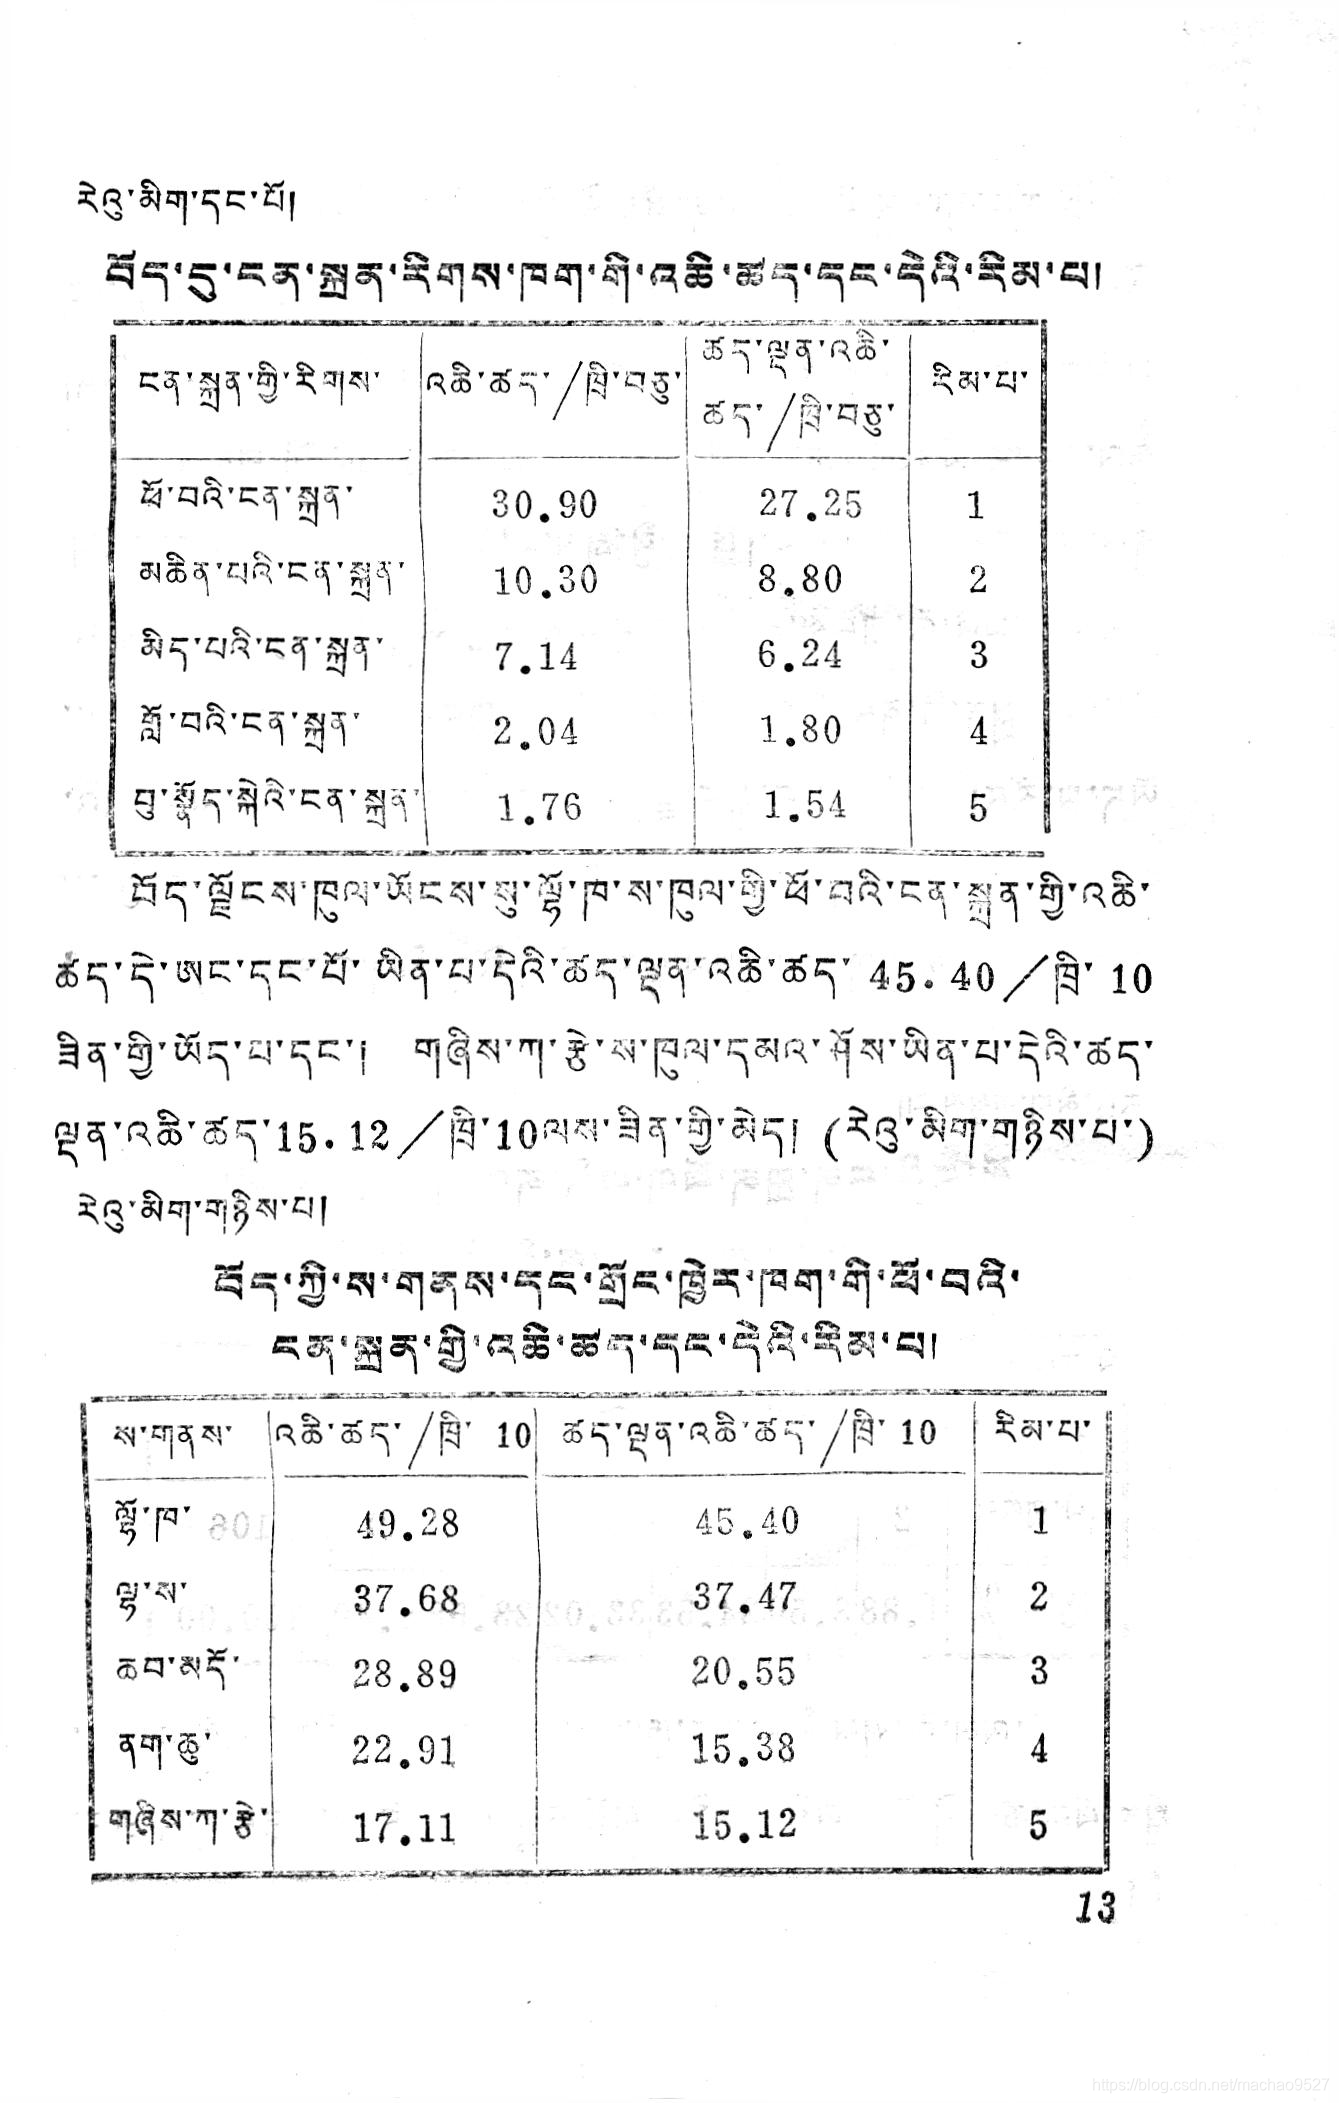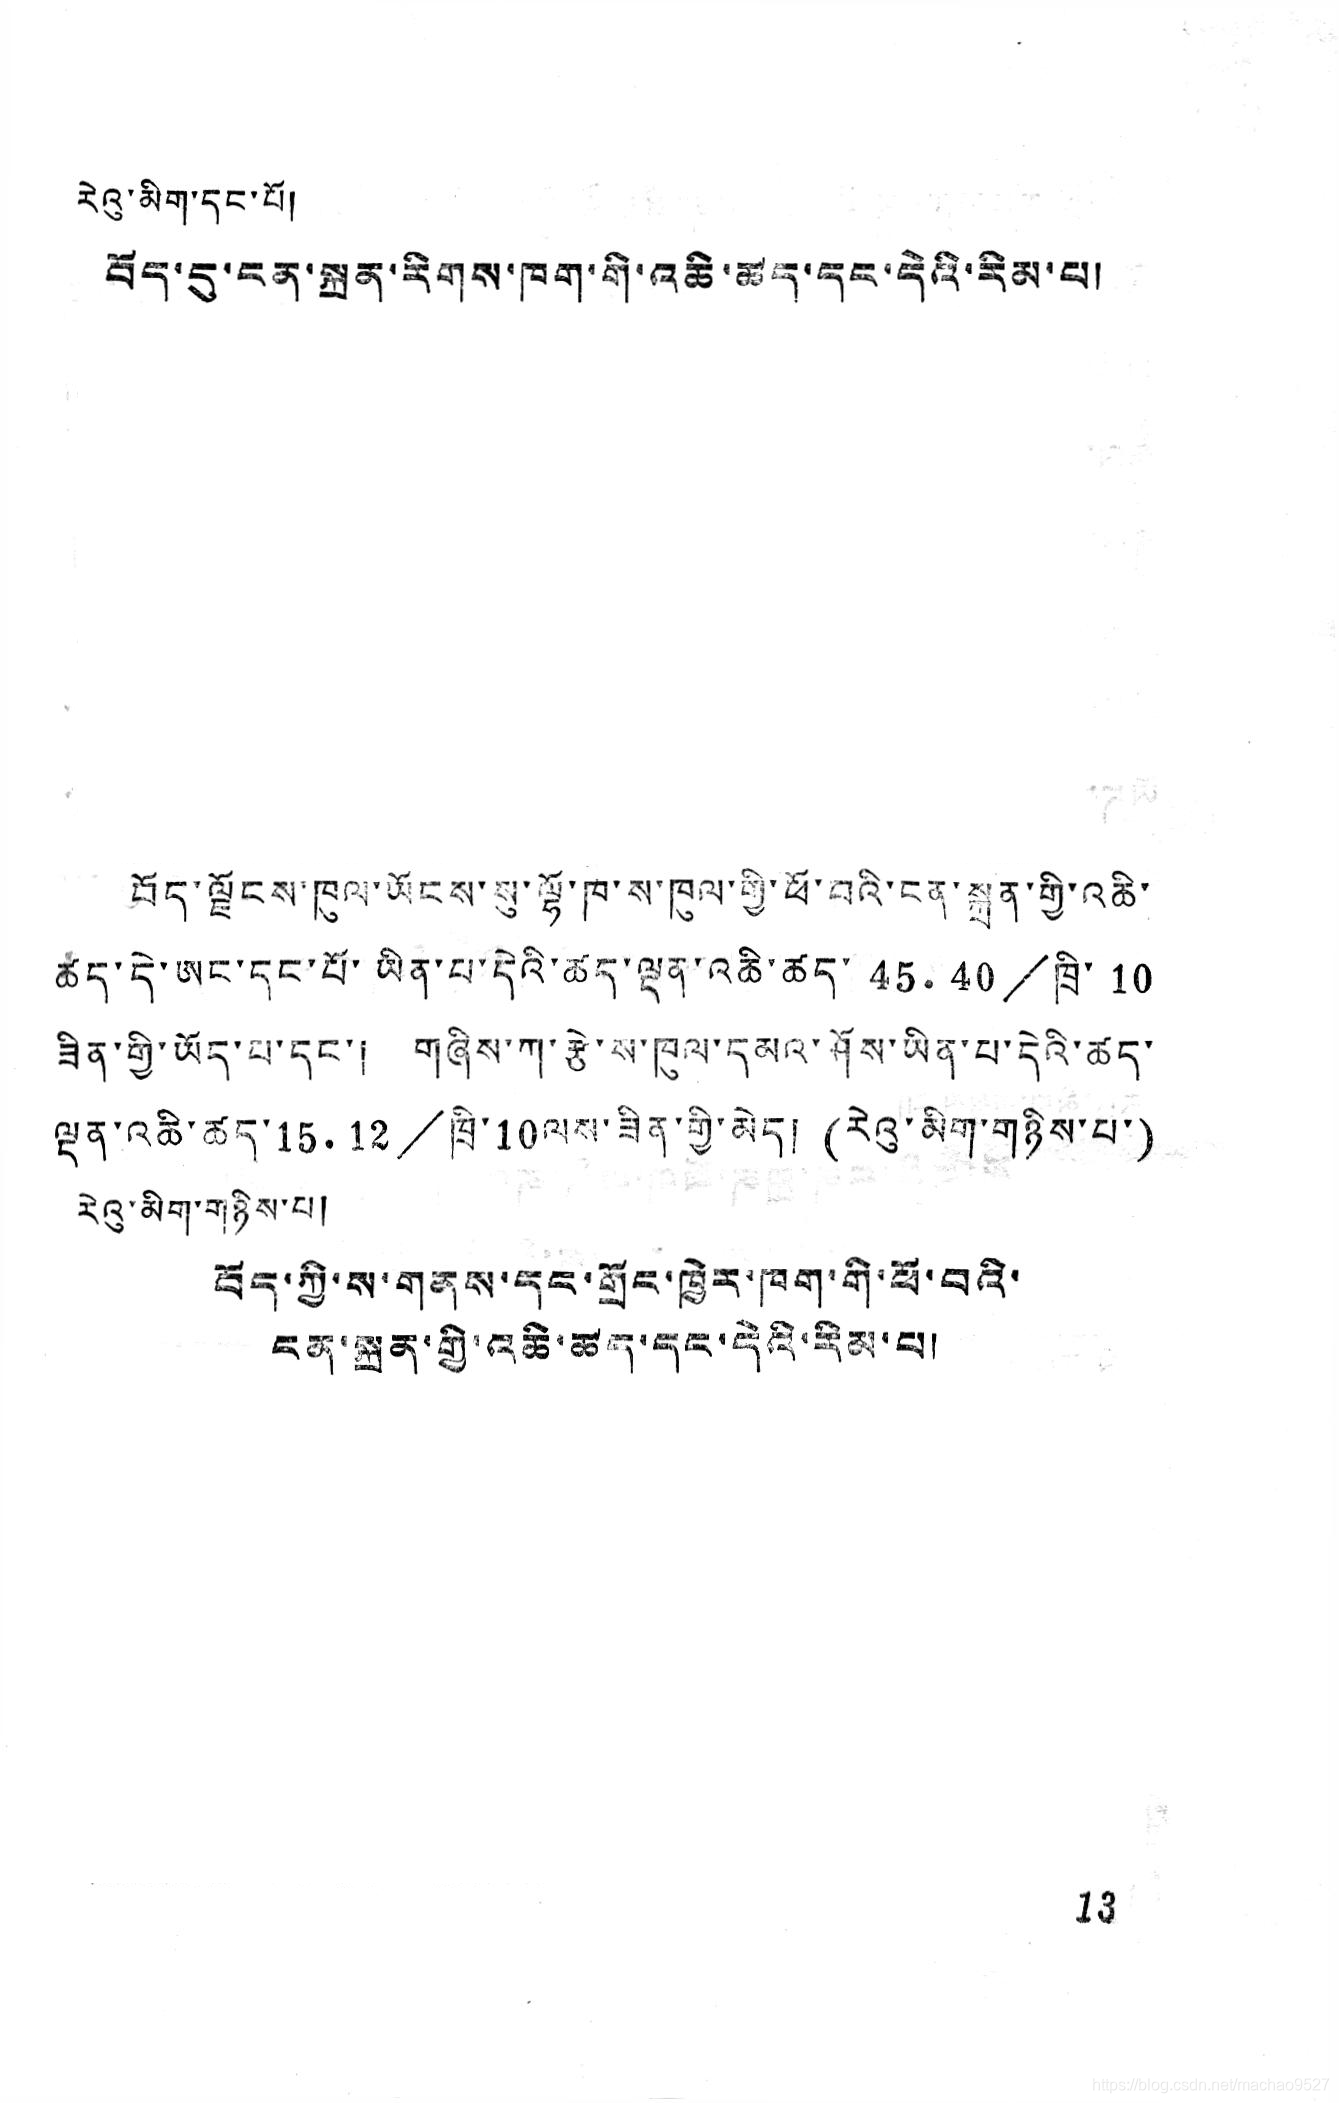

最近公司在合并藏文双层pdf的时候遇到图片中表格影响合并效果,于是用opencv进行了处理,在网上看了很多案例,但是用java写的比较少,所以分享一下;
第一次写,直接上干货:
/**
     * 删除table
     * @author mc
     * @time 2019-9-26
     */
    public void delTable(String url,String path){
        Mat srcImage = Imgcodecs.imread(url);
        ImgUtil.save(path + "/source.png",srcImage);
        // 图片二值化
        Mat thresh_image = ImgUtil.ImgBinarization(srcImage);
        ImgUtil.save(path + "/binarization.png",thresh_image);

        //获取图片上的竖线 1
        Mat vertical_line = ImgUtil.getLines(thresh_image,Math.PI/1,1);
        ImgUtil.save(path + "/vertical_line.png",vertical_line);

        //获取图片上的横线 2
        Mat horizontal_line = ImgUtil.getLines(thresh_image,Math.PI/180,2);
        ImgUtil.save(path + "/horizontal_line.png",horizontal_line);

        // 将横线和竖线合并为一张图片
        Mat mask_image = new Mat();
        Core.add(horizontal_line,vertical_line,mask_image);
        ImgUtil.save(path + "/mask_image.png",mask_image);
        /*
         * 通过 bitwise_and 定位横线、垂直线交汇的点
         */
        Mat points_image = new Mat();
        Core.bitwise_and(horizontal_line, vertical_line, points_image);
        ImgUtil.save(path + "/points_image.png",points_image);

        /**
         * 处理图片中的表格
         */
        ImgUtil.editTable(srcImage,mask_image,points_image,path);

        //将处理后的图像保存为文件,可做调试使用
        ImgUtil.save(path + "/result_image.png",srcImage);

    }
处理图片类
package com.ltkj.test;

import java.io.File;
import java.util.ArrayList;
import java.util.LinkedList;
import java.util.List;

import org.opencv.core.CvType;
import org.opencv.core.Mat;
import org.opencv.core.MatOfPoint;
import org.opencv.core.MatOfPoint2f;
import org.opencv.core.Point;
import org.opencv.core.Rect;
import org.opencv.core.Scalar;
import org.opencv.core.Size;
import org.opencv.imgcodecs.Imgcodecs;
import org.opencv.imgproc.Imgproc;

public class ImgUtil {
    /**
     * 根据角度分辨率获取直线
     * 并将图片二值化返回
     * @author mc
     * @time 2019-9-26
     */
    public static Mat getLines(Mat thresh_image,double theta,int i){
        Mat lines = new Mat();
        // 检测直线:图片,线段,角度分辨率,半径分辨率,判断直线点数的阈值,最小长度,最大间隙
        //去除table
//        Imgproc.HoughLinesP(thresh_image, lines, 1, theta, 200, 100, 1);
        //去除矩形图片
        Imgproc.HoughLinesP(thresh_image, lines, 1, theta, 200, 100, 1);
        Mat allLines = thresh_image.clone();

        Point p = new Point(0,0);
        // 设置宽和高
        Size s = new Size(allLines.width(),allLines.height());
        Rect boundRect = new Rect(p,s);
        //将白色矩形覆盖至表格,实现删除图像中表格内容
        Imgproc.rectangle(allLines, boundRect.tl(), boundRect.br(), new Scalar(0, 0, 0), -1, 4, 0);
        for (int x = 0; x < lines.rows(); x++){
            double[] vec = lines.get(x, 0);
            double x1 = vec[0], y1 = vec[1], x2 = vec[2], y2 = vec[3];
//            System.out.println(String.format("y1:%s----y2:%s", new Object[]{y1,y2}));
            // i:1 为竖线 2为横线
            if(i==1){
                //将竖线拉长两百
                y1 = y1 + (thresh_image.height()*(0.002));
                y2 = y2 - (thresh_image.height()*(0.002));
                Point start = new Point(x1, y1);
                Point end = new Point(x2, y2);
                // 图片,开始坐标,结束坐标,颜色,线条宽度,直线类型,比例
                Imgproc.line(allLines, start, end, new Scalar(255, 255, 255, 255), 5, Imgproc.LINE_4, 0);
            }
            if(i==2 && y1==y2){
                //将横线拉长两百
                x1 = x1 - (thresh_image.width()*(0.02));
                x2 = x2 + (thresh_image.width()*(0.02));
                Point start = new Point(x1, y1);
                Point end = new Point(x2, y2);
                // 图片,开始坐标,结束坐标,颜色,线条宽度,直线类型,比例
                Imgproc.line(allLines, start, end, new Scalar(255, 255, 255, 255), 5, Imgproc.LINE_4, 0);
            }
        }
        return allLines;
    }

    /**
     * 根据图片进行二值化返回
     * @author mc
     * @time 2019-9-26
     */
    public static Mat ImgBinarization(Mat srcImage){

        Mat dstImage = srcImage.clone();
        Imgproc.Canny(srcImage, dstImage, 400, 500, 5, false);
        //灰度处理
        Mat gray_image = new Mat(srcImage.height(), srcImage.width(), CvType.CV_8UC1);
        Imgproc.cvtColor(srcImage,gray_image,Imgproc.COLOR_RGB2GRAY);

        //二值化
        Mat thresh_image = new Mat(srcImage.height(), srcImage.width(), CvType.CV_8UC1);
        // C 负数,取反色,超过阈值的为黑色,其他为白色
        Imgproc.adaptiveThreshold(gray_image, thresh_image,255, Imgproc.ADAPTIVE_THRESH_MEAN_C, Imgproc.THRESH_BINARY,7,-2);
        return thresh_image;
    }
    /**
     * 将图片中的表格处理掉
     * @author mc
     * @time 2019-9-26
     * srcImage 原图
     * mask_image 横线竖线合并图
     * points_image 焦点图
     * path 保存文件夹名
     */
    public static void editTable(Mat srcImage, Mat mask_image, Mat points_image,String path){
         /*
         * 通过 findContours 找轮廓
         *
         * 第一个参数,是输入图像,图像的格式是8位单通道的图像,并且被解析为二值图像(即图中的所有非零像素之间都是相等的)。
         * 第二个参数,是一个 MatOfPoint 数组,在多数实际的操作中即是STL vectors的STL vector,这里将使用找到的轮廓的列表进行填充(即,这将是一个contours的vector,其中contours[i]表示一个特定的轮廓,这样,contours[i][j]将表示contour[i]的一个特定的端点)。
         * 第三个参数,hierarchy,这个参数可以指定,也可以不指定。如果指定的话,输出hierarchy,将会描述输出轮廓树的结构信息。0号元素表示下一个轮廓(同一层级);1号元素表示前一个轮廓(同一层级);2号元素表示第一个子轮廓(下一层级);3号元素表示父轮廓(上一层级)
         * 第四个参数,轮廓的模式,将会告诉OpenCV你想用何种方式来对轮廓进行提取,有四个可选的值:
         *      CV_RETR_EXTERNAL (0):表示只提取最外面的轮廓;
         *      CV_RETR_LIST (1):表示提取所有轮廓并将其放入列表;
         *      CV_RETR_CCOMP (2):表示提取所有轮廓并将组织成一个两层结构,其中顶层轮廓是外部轮廓,第二层轮廓是“洞”的轮廓;
         *      CV_RETR_TREE (3):表示提取所有轮廓并组织成轮廓嵌套的完整层级结构。
         * 第五个参数,见识方法,即轮廓如何呈现的方法,有三种可选的方法:
         *      CV_CHAIN_APPROX_NONE (1):将轮廓中的所有点的编码转换成点;
         *      CV_CHAIN_APPROX_SIMPLE (2):压缩水平、垂直和对角直线段,仅保留它们的端点;
         *      CV_CHAIN_APPROX_TC89_L1  (3)or CV_CHAIN_APPROX_TC89_KCOS(4):应用Teh-Chin链近似算法中的一种风格
         * 第六个参数,偏移,可选,如果是定,那么返回的轮廓中的所有点均作指定量的偏移
         */
        List<MatOfPoint> contours = new ArrayList<MatOfPoint>();
        Mat hierarchy = new Mat();
        Imgproc.findContours(mask_image,contours,hierarchy, Imgproc.RETR_EXTERNAL, Imgproc.CHAIN_APPROX_SIMPLE,new Point(0,0));


        List<MatOfPoint> contours_poly = contours;
        Rect[] boundRect = new Rect[contours.size()];

        LinkedList<Mat> tables = new LinkedList<Mat>();

        int tableNums = 0;    //图像中的表格个数
        //循环所有找到的轮廓-点
        for(int i=0 ; i< contours.size(); i++){

            MatOfPoint point = contours.get(i);
            MatOfPoint contours_poly_point = contours_poly.get(i);

            /*
             * 获取区域的面积
             * 第一个参数,InputArray contour:输入的点,一般是图像的轮廓点
             * 第二个参数,bool oriented = false:表示某一个方向上轮廓的的面积值,顺时针或者逆时针,一般选择默认false
             */
            double area = Imgproc.contourArea(contours.get(i));
            //如果小于某个值就忽略,代表是杂线不是表格
            if(area < 100){
                continue;
            }

            /*
             * approxPolyDP 函数用来逼近区域成为一个形状,true值表示产生的区域为闭合区域。比如一个带点幅度的曲线,变成折线
             *
             * MatOfPoint2f curve:像素点的数组数据。
             * MatOfPoint2f approxCurve:输出像素点转换后数组数据。
             * double epsilon:判断点到相对应的line segment 的距离的阈值。(距离大于此阈值则舍弃,小于此阈值则保留,epsilon越小,折线的形状越“接近”曲线。)
             * bool closed:曲线是否闭合的标志位。
             */
            Imgproc.approxPolyDP(new MatOfPoint2f(point.toArray()),new MatOfPoint2f(contours_poly_point.toArray()),3,true);

            //为将这片区域转化为矩形,此矩形包含输入的形状
            boundRect[i] = Imgproc.boundingRect(contours_poly.get(i));

            // 找到交汇处的的表区域对象
            Mat table_image = points_image.submat(boundRect[i]);

            List<MatOfPoint> table_contours = new ArrayList<MatOfPoint>();
            Mat joint_mat = new Mat();
            Imgproc.findContours(table_image, table_contours,joint_mat, Imgproc.RETR_CCOMP, Imgproc.CHAIN_APPROX_SIMPLE);
            //从表格的特性看,如果这片区域的点数小于4,那就代表没有一个完整的表格,忽略掉
            if (table_contours.size() < 4){
                continue;
            }

            //将表格添加到集合
            tables.addFirst(srcImage.submat(boundRect[i]).clone());

            //将矩形画在原图上
//            Imgproc.rectangle(srcImage, boundRect[i].tl(), boundRect[i].br(), new Scalar(255, 0, 25), 1, 8, 0);

            //将白色矩形覆盖至表格,实现删除图像中表格内容
            Imgproc.rectangle(srcImage, boundRect[i].tl(), boundRect[i].br(), new Scalar(255, 255, 255), -1, 4, 0);
            tableNums++;
        }
//        for(int i=0;i<boundRect.length;i++){
//            System.out.println(boundRect[i]);
//        }
        //所有的表格区域图像
        for(int i=0; i< tables.size(); i++ ){

            //拿到表格后,可以对表格再次处理,比如 OCR 识别等
            save(path + "/table-"+(i+1)+".png",tables.get(i));
        }
        System.out.println("表格数量:"+tableNums);
    }

    /**
     * 保存图片
     * @author mc
     * @time 2019-9-25
     */
    public static void save(String name,Mat mat){
        String outPath = "C:/Users/Administrator/Desktop/opencv/" + name;
        File file = new File(outPath);
        //目录是否存在
        dirIsExist(file.getParent());
        Imgcodecs.imwrite(outPath,mat);
    }
    public static void dirIsExist(String dirPath){
        File dir = new File(dirPath);
        if(!dir.exists()){
            dir.mkdirs();
        }
    }
}


 1038
1038

 被折叠的 条评论
为什么被折叠?


