


1. 简述 Keepalived 的主要功能、应用场合。
1、实现对YS的健康检查。
2、在主备中进行故障切换 --- 2个负载均衡器同时工作时 ---非抢占模式
2. 使用 Keepalived 实现双机热备时,主、备服务器的配置存在哪些区别?
1、两个节点的state都必须设置为BACKUP
2、两个节点都在vrrp_instance中添加nopreempt(不抢占)参数(优先级高的配置nopreempt参数就行)
3、一个节点的优先级必须比另一个节点的优先级高
3. 构建 LVS+Keepalived 高可用群集时,如何缩短故障中断时间?
TCP健康检查方式配置 ---修改健康检查的时间参数
real_server 192.168.191.130 80 {
weight 3 inhibit_on_failure #在服务器健康检查失效时,将其设为0
TCP_CHECK { connect_timeout 5 #连接超时时间
nb_get_retry 3#重连次数
delay_before_retry 3 #重连间隔时间
connect_port 80 #健康检查的端口
}
}
4. 基于 CentOS 7构建nginx的Keepalived 高可用群(2台主机)
| 主机名 | IP |
| centos7 | 192.168.164.130 |
| centos7.2 | 192.168.164.140 |
1、安装nginx --- 2台主机
yum install -y pcre-devel

yum install -y openssl-devel  --- 以上为安装nginx的依赖包

groupadd -r -g 995 nginx
useradd -r -u 995 -g 995 -s /sbin/nologin -M nginx  --- 创建nginx的用户以及用户组

wget http://nginx.org/download/nginx-1.18.0.tar.gz  --- 下载nginx压缩包

tar xf nginx-1.18.0.tar.gz -C /usr/local/src/  --- 将下载下来的压缩包解压

cd /usr/local/src/nginx-1.18.0/
./configure --user=nginx --group=nginx --prefix=/usr/local/nginx --with-http_ssl_module --with-http_auth_request_module --with-http_gzip_static_module --with-http_gunzip_module --with-http_stub_status_module   加载所需要的模块

make && make install --- 编译以安装

vim /usr/lib/systemd/system/nginx.service --- 编辑nginx支配文件

systemctl enable --now nginx --- 设置nginx服务开机自启和现在启动
vim /usr/lib/systemd/system/nginx.service  --- 配置文件的内容


[Unit]
Description=nginx - high performance web server
Documentation=http://nginx.org/en/docs/After=network-online.target remote-fs.targe nss-lookup.target
Wants=network-online.target

[Service]
Type=forking
PIDFile=/usr/local/nginx/logs/nginx.pid
ExecStart=/usr/local/nginx/sbin/nginx -c /usr/local/nginx/conf/nginx.conf
ExecReload=/bin/kill -s HUP $MAINPID
ExecStop=/bin/kill -s TERM $MAINPID

[Install]
WantedBy=multi-user.target
ps -ef | grep nginx
区分不同的nginx页面

echo "`hostname -I`,this is web1" > /usr/local/nginx/html/index.html


echo "`hostname -I`,this is web2" > /usr/local/nginx/html/index.html
2、安装Keepalived
yum install curl libnl3-devel net-snmp-devel libnfnetlink-devel -y ---安装keepalived依赖包
wget https://www.keepalived.org/software/keepalived-1.2.18.tar.gz --no-check-certificate ===下载keepalived的压缩包
tar -zxvf keepalived-1.2.18.tar.gz -C /usr/local/ ---将下载的压缩包解压到指定目录下
cd /usr/local/keepalived-1.2.18/
./configure --prefix=/usr/local/keepalived ---加载模块
make && make install --- 编译并安装
mkdir /etc/keepalived ---创建目录,需要将配置文件复制到此目录下
cp /usr/local/keepalived/etc/keepalived/keepalived.conf /etc/keepalived/
cp /usr/local/keepalived/etc/rc.d/init.d/keepalived /etc/init.d/
cp /usr/local/keepalived/etc/sysconfig/keepalived /etc/sysconfig/
ln -s /usr/local/sbin/keepalived /usr/sbin/ --- 创建软连接,安便使用
vim /lib/systemd/system/keepalived.service --- 编写配置文件
vim /lib/systemd/system/keepalived.service  ---配置文件


[Unit]
Decription=Keepalived
After=syslog.target network.target remote-fs.target nss-lookup.target

[Service]
Type=forking
PIDFile=/var/run/keepalived.pid
ExecStart=/usr/local/keepalived/sbin/keepalived -D
ExecReload=/bin/kill -s HUP $MAINPID
ExecStop=/bin/kill -s QUIT $MAINPID
PrivateTmp=true

[Install]
WantedBy=multi-user.target
systemctl daemon-reload
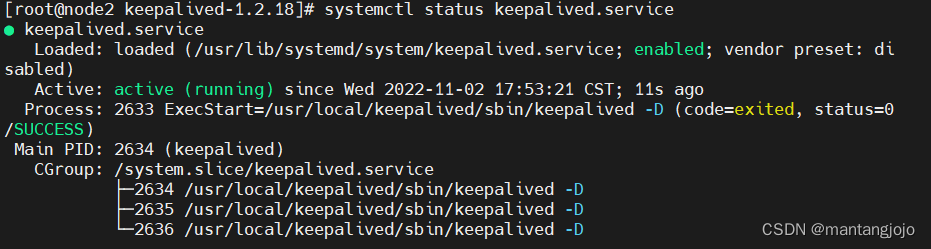
systemctl enable --now keepalived.service ---设置开机自启和现在开启此服务
systemctl status keepalived.service --- 查看状态
keepalived.conf的高可用配置
编辑keepalived高可用的shell脚本
vim /etc/keepalived/check_nginx.sh


#!/bin/bash
A=`ps -C nginx --no-header |wc -l`
if [ $A -eq 0 ];then
systemctl start nginx
sleep 3
if [ `ps -C nginx --no-header |wc -l` -eq 0 ]
then
systemctl stop keepalived
fi
fi


 410
410


 被折叠的 条评论
为什么被折叠?
被折叠的 条评论
为什么被折叠?
 到【灌水乐园】发言


