GDI+由二维矢量图形、图像和版面等三部分组成,其中的二维矢量图形的图元,包括点、线条、曲线和图形等的绘制工具就是画笔和画刷,而画笔的特征又是由画刷决定的(在以后的关于画笔的文章中介绍),因此,熟练地掌握GDI+的各种画刷特性和使用方法是绘制GDI+图形的前提条件。
GDI+提供了SolidBrush(实色刷)、HatchBrush(阴影刷)、TextureBrush(纹理刷)、LinearGradientBrush(渐变刷)和PathGradientBrush(路径刷)等五种画刷,在GDI+ for VCL中,各种画刷在原C++类类名基础上加了TGp前缀,均派生于TGpBrush,其中的TGpSolidBrush和TGpHatchBrush相当于VCL中传统的GDI的画刷TBrush。
GDI+ for VCL的TGpLinearGradientBrush采用颜色线性渐变填充图形,包括双色渐变和多色渐变,渐变的方向是沿着指定的角度或者2点之间的直线进行的。
一、双色渐变
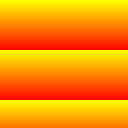
下面的代码通过两个点和起始颜色及结束颜色建立了一个双色渐变刷,渐变沿两个点(0,0) - (50,10)组成的直线进行,由于填充区域大于两个点的距离,所以填充过程是重复进行的,其效果截图见图一:
var
brush: TGpLinearGradientBrush;
begin
brush : = TGpLinearGradientBrush.Create(GpPoint( 0 , 0 ), GpPoint( 50 , 10 ), kcYellow, kcRed);
g.FillRectangle(brush, GpRect(ClientRect));
brush.Free;
end;
// C++ Builder 2007
TGpLinearGradientBrush * brush =
new TGpLinearGradientBrush(TGpPoint( 0 , 0 ), TGpPoint( 50 , 10 ), kcYellow, kcRed);
// 假定TGpGraphics对象g已经建立
g -> FillRectangle(brush, ClientRect);
delete brush;
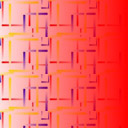
也可以通过指定的矩形、起始颜色和结束颜色以及方向,创建TGpLinearGradientBrush对象,效果截图见图二:
var
brush: TGpLinearGradientBrush;
begin
brush : = TGpLinearGradientBrush.Create(GpRect( 0 , 0 , 50 , 50 ), kcYellow, kcRed, lmBackwardDiagonal);
// 假定TGpGraphics对象g已经建立
g.FillRectangle(brush, GpRect(ClientRect));
brush.Free;
end;
// C++ Builder 2007
TGpLinearGradientBrush * brush =
new TGpLinearGradientBrush(TGpRect( 0 , 0 , 50 , 50 ), kcYellow, kcRed, lmBackwardDiagonal);
// 假定TGpGraphics对象g已经建立
g -> FillRectangle(brush, ClientRect);
delete brush;
其中的lmBackwardDiagonal是个TLinearGradientMode枚举成员,它决定了渐变的方向,定义如下:
lmHorizontal, // 指定从左到右的渐变。
lmVertical, // 指定从上到下的渐变。
lmForwardDiagonal, // 指定从左上到右下的渐变。
lmBackwardDiagonal // 指定从右上到左下的渐变。
);
还可以通过指定的矩形、起始颜色、结束颜色和角度,建立TGpLinearGradientBrush对象,将上面的代码中TLinearGradientMode构造方法的参数lmBackwardDiagonal替换为90,渐变方向是从上到下进行的,相当于TLinearGradientMode成员lmVertical,效果截图见图三。
利用上面建立的渐变刷填充的图案都是重复的,要改变这种情况,必须使渐变刷的指定矩形等于我们要绘的图形矩形,下面代码没有重复填充,而且起始色和结束色都使用kcRed,但是起始色的为半透明,所以渐变填充为半透明红色到不透明红色的效果,见图四:
 //
Delphi 2007
 var
var brush: TGpLinearGradientBrush;
 begin
begin brush :
=
TGpLinearGradientBrush.Create(GpRect(
0
,
0
,
128
,
128
), ARGB(
32
, kcRed), kcRed);
 //
假定TGpGraphics对象g已经建立
 g.FillRectangle(brush,
0
,
0
,
128
,
128
);
 brush.Free;
 end;
end;
 //
C++ Builder 2007
 TGpLinearGradientBrush
*
brush
=
 new
TGpLinearGradientBrush(TGpRect(
0
,
0
,
128
,
128
), TGpColor(
32
, kcRed), kcRed);
 //
假定TGpGraphics对象g已经建立
 g
->
FillRectangle(brush,
0
,
0
,
128
,
128
);
 delete brush;


图一 图二 图三 图四
二、多色渐变
使用TGpLinearGradientBrush的SetInterpolationColors 方法可以实现多色渐变, SetInterpolationColors方法定义如下:
procedure SetInterpolationColors(const presetColors: array of TARGB;
const blendPositions: array of Single);
其中,presetColors为沿渐变的相应位置处使用的颜色的颜色数组;blendPositions为沿渐变线的位置,这些位置是介于 0 到 1 之间的值,指定沿定位相应颜色的渐变线的距离的比率,其中,最左边的值必须为0,最右边的值必须为1,否则,会出现InvalidParameter的错误。
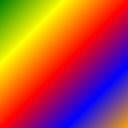
调用该方法后,将在沿渐变线的每一位置创建具有一种颜色的多色渐变。设置该属性将使该 TGpLinearGradientBrush对象的以前所有颜色、位置和过渡设置无效。当然,尺寸和方向设置还是有效的。下面的代码建立了一个45度角的5色渐变刷,填充效果见图五:
var
brush: TGpLinearGradientBrush;
begin
brush : = TGpLinearGradientBrush.Create(GpRect( 0 , 0 , 128 , 128 ), 0 , 0 , 45 );
brush.SetInterpolationColors([kcGreen, kcYellow, kcRed,
kcBlue, kcOrange], [ 0 , 0.25 , 0.5 , 0.75 , 1 ]);
// 假定TGpGraphics对象g已经建立
g.FillRectangle(brush, 0 , 0 , 128 , 128 );
brush.Free;
end;
// C++ Builder 2007
TGpColor colors[] = {kcGreen, kcYellow, kcRed, kcBlue, kcOrange};
float ps[] = { 0 , 0.25 , 0.5 , 0.75 , 1 };
TGpLinearGradientBrush * brush =
new TGpLinearGradientBrush(TGpRect( 0 , 0 , 128 , 128 ), 0 , 0 , 45 );
brush -> SetInterpolationColors(colors, ps, 5 );
// 假定TGpGraphics对象g已经建立
g -> FillRectangle(brush, 0 , 0 , 128 , 128 );
delete brush;
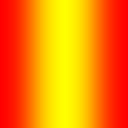
例子中的渐变线的位置是均匀分配的(0, 0.25, 0.5, 0.75, 1),改变各个位置的值,可增减任意2色之间的过渡宽度。
图五 图六 图七
三、其它设置
1、重新设置起始色和结束色。下面的C++代码演示了颜色设置:
new TGpLinearGradientBrush(TGpRect( 0 , 0 , 128 , 128 ), kcYellow, kcRed);
// 假定TGpGraphics对象g已经建立
g -> FillRectangle(brush, 0 , 0 , 128 , 128 ); // 黄色到红色的渐变
brush -> SetLinearColors(kcWhite, kcBlack); // 重新设置渐变色
g -> TranslateTransform( 128 , 0 );
g -> FillRectangle(brush, 0 , 0 , 128 , 128 ); // 白色到黑色的渐变
delete brush;
2、设置双色渐变的混合因子。TGpLinearGradientBrush的SetBlend方法可以按指定的位置设置渐变色的混合因子,该方法定义如下:
// 设置 Blend,它指定为渐变定义自定义过渡的位置和因子。对双色渐变有效
// blendFactors:用于渐变的混合因子数组,混合因子表示相应位置结束色占起始色的比率。
// blendPositions:渐变的混合位置的数组,这些位置是介于 0 到 1 之间的值,
// 最左边必须为0,最右边必须为1
procedure SetBlend(const blendFactors, blendPositions: array of Single);
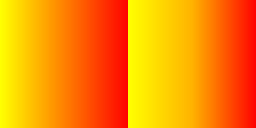
下面的代码演示混合效果,效果图见图六:
var
brush: TGpLinearGradientBrush;
begin
brush : = TGpLinearGradientBrush.Create(GpRect( 0 , 0 , 128 , 128 ), kcYellow, kcRed);
// 假定TGpGraphics对象g已经建立
g.FillRectangle(brush, 0 , 0 , 128 , 128 );
brush.SetBlend([ 0 , 0.3 , 1 ], [ 0 , 0.5 , 1 ]);
g.TranslateTransform( 128 , 0 );
g.FillRectangle(brush, 0 , 0 , 128 , 128 );
brush.Free;
end;
// C++ Builder 2007
float fs[] = { 0 , 0.3 , 1 };
float ps[] = { 0 , 0.5 , 1 };
TGpLinearGradientBrush * brush =
new TGpLinearGradientBrush(TGpRect( 0 , 0 , 128 , 128 ), kcYellow, kcRed);
// 假定TGpGraphics对象g已经建立
g -> FillRectangle(brush, 0 , 0 , 128 , 128 );
brush -> SetBlend(fs, ps, 3 );
g -> TranslateTransform( 128 , 0 );
g -> FillRectangle(brush, 0 , 0 , 128 , 128 );
delete brush;
效果图左边是正常渐变填充,右边则是设置中间位置(0.5)的混合因子0.3(正常情况应该为0.5),所以右边图的中间的黄色比例比正常渐变大。
3、设置钟型曲线渐变。
// 创建基于钟形曲线的渐变过渡过程。
// focus: 0 - 1,指定渐变中心(渐变中只由结束色构成的点)。
// scale: 0 - 1, 指定颜色从 focus 过渡的规模(程度)。
procedure SetBlendBellShape(focus: Single; scale: Single = 1.0);
 TGpLinearGradientBrush
*
brush
=
 new
TGpLinearGradientBrush(TGpRect(
0
,
0
,
128
,
128
), kcRed, kcYellow);
 brush
->
SetBlendBellShape(
0.5
,
1.0
);
 //
假定TGpGraphics对象g已经建立
 g
->
FillRectangle(brush,
0
,
0
,
128
,
128
);
上面的C++代码演示了一个钟型曲线渐变填充,渐变中心点为0.5,如果小于0.5,钟型曲线偏左,大于则偏右;渐变过渡程度为1,随着这个值的减小,结束色黄色就越淡。效果图见图七。
4、中心色向两端单个颜色线性过渡的线性渐变。
// 创建一个从中心色向两端单个颜色线性过渡的线性渐变过程。参数同钟型曲线渐变
procedure SetBlendTriangularShape(focus: Single; scale: Single = 1.0);
brush: TGpLinearGradientBrush;
begin
brush : = TGpLinearGradientBrush.Create(GpRect( 0 , 0 , 128 , 128 ), kcRed, kcYellow);
try
brush.SetBlendTriangularShape( 0.5 );
g.FillRectangle(brush, 0 , 0 , 128 , 128 );
finally
brush.Free;
end;
end;
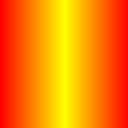
上面的Delphi代码演示了中心色向两端渐变,参数的设置原理同钟型渐变,效果图见图八。
5、伽玛修正。
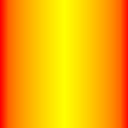
如果在上面的代码中填充图形前加入:brush.GammaCorrection := True;则启用伽玛修正,效果图见图九,可以同图八进行比较。
图八 图九
6、其它。如画刷几何变换和绕行模式对填充的影响,可参见《GDI+ for VCL基础 -- 画刷之TextureBrush》。


 3272
3272

 被折叠的 条评论
为什么被折叠?


