


Eclipse使用Hibernate实现用户添加
这里我们建一个项目名字就随便叫他hellohibernate
这里呢我们进行导包,项目名右键properties

之后找到Java Build Path

找到第三个选项Libraries,接下来右侧Add libraries后选use libraries

点进来我们发现什么都没有那么我们需要新建
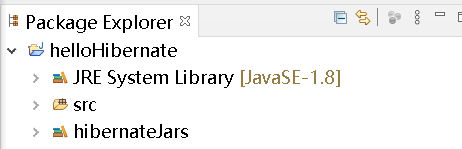
点击use Libraries点击New给他起一个名字我就叫他HibernateJars


之后点击右侧的Add External JARs找到你存放Jar包的位置这里相关的包已放在
链接: 百度网盘.
提取码: srqy

按照包里面的这个路径进行寻找hibernate-release-5.2.10.Final\lib\required的全部jar包

之后还需要连接数据库

之后还有就是日志包两个都要

最后一共是十三个包

添加配置文件
hibernate.cfg.xml(要放在src下)右键新建一个xml

代码如下
<!DOCTYPE hibernate-configuration PUBLIC
"//Hibernate/Hibernate Configuration DTD 3.0//EN"
"http://www.hibernate.org/dtd/hibernate-configuration-3.0.dtd">
<hibernate-configuration>
<session-factory>
    <property name="hibernate.connection.driver_class">com.mysql.jdbc.Driver</property>
    <property name="hibernate.connection.url">jdbc:mysql://localhost:3306/hellohibernate</property>
    <property name="hibernate.connection.username">root</property>
    <property name="hibernate.connection.password">12345</property>
    <property name="hibernate.dialect">org.hibernate.dialect.MySQLDialect</property>
    <property name="show_sql">true</property>
    <mapping resource="pojo.user.hbm.xml"></mapping>
</session-factory>
</hibernate-configuration>
接下来就是建数据库以及表
哦对了我还把id设置为了自增。

这里按照阴影显示的按键操作


下方控制台那里我们可以看到成功了


建包类如下:

下面展示一些 代码dao.manageUser。
package dao;
import java.sql.Date;
import org.hibernate.HibernateException;
import org.hibernate.Session;
import org.hibernate.SessionFactory;
import org.hibernate.Transaction;
import org.hibernate.cfg.Configuration;
import pojo.User;
public class manageUser {
	public static void main(String[] args) {
		Configuration cfg =null;
		SessionFactory sf=null;
		Session session=null;
		Transaction ts=null;
		User u=new User();
		u.setName("张三");
		u.setGender("男");
		u.setAge(21);
		u.setBirthday(Date.valueOf("2001-1-1"));
		try {
			cfg =new Configuration().configure();
			sf=cfg.buildSessionFactory();
			session=sf.openSession();
			ts=session.beginTransaction();
			session.save(u);
			ts.commit();
		} catch (HibernateException e) {
			// TODO Auto-generated catch block
			e.printStackTrace();
			if(ts !=null) {
				ts.rollback();
			}
		}finally {
			session.close();
			sf.close();
		}

	}
}
下面展示一些 代码pojo.User。
package pojo;

import java.sql.Date;

public class User {
	private int id;
	private String name;
	private String gender;
	private int age;
	Date birthday;
	public int getId() {
		return id;
	}
	public void setId(int id) {
		this.id = id;
	}
	public String getName() {
		return name;
	}
	public void setName(String name) {
		this.name = name;
	}
	public String getGender() {
		return gender;
	}
	public void setGender(String gender) {
		this.gender = gender;
	}
	public int getAge() {
		return age;
	}
	public void setAge(int age) {
		this.age = age;
	}
	public Date getBirthday() {
		return birthday;
	}
	public void setBirthday(Date birthday) {
		this.birthday = birthday;
	}
}
<?xml version="1.0"?>
<!--
  ~ Hibernate, Relational Persistence for Idiomatic Java
  ~
  ~ License: GNU Lesser General Public License (LGPL), version 2.1 or later.
  ~ See the lgpl.txt file in the root directory or <http://www.gnu.org/licenses/lgpl-2.1.html>.
  -->
<!DOCTYPE hibernate-mapping PUBLIC
	"-//Hibernate/Hibernate Mapping DTD 3.0//EN"
	"http://www.hibernate.org/dtd/hibernate-mapping-3.0.dtd">
<hibernate-mapping>

    <class name="pojo.User" table="user">
        <id name="id" column="id">
            <generator class="native"/>
        </id>
        <property name="name"/>
        <property name="gender"/>
        <property name="age"/>
        <property name="birthday"/>
    </class>

</hibernate-mapping>
接下来就是运行结果

就成功啦。再看一下数据库。


 503
503


 被折叠的 条评论
为什么被折叠?
被折叠的 条评论
为什么被折叠?
 到【灌水乐园】发言


